When you click on links to various merchants on this site and make a purchase, this can result in this site earning a commission. Affiliate programs and affiliations include, but are not limited to, the eBay Partner Network.
I am about to change my oil on the GT4RS for the first time at about 1,200 miles. Does anyone have the workshop manual torque specs for the 2 oil plugs? See Below
Since this engine is basically the same as the 992 GT3, I was very interested to read GrantG's 992 GT3 Engine Oil Change thread where the new engine holds 8.1ltrs of oil, but only drains 4.1ltrs of oil at each oil change. It is a radical change. I do not believe there has been a conclusion as to why the change, but that is the reality - only 1/2 of the oil comes out with each change. This has been confirmed in both the 992 GT3 and 992 GT3 Cup engines.
I will post pics of the parts and tools I've gathered to do the oil change.
Here is what we know about changing oil in the GT4RS that might be different from what you've experienced on other models:
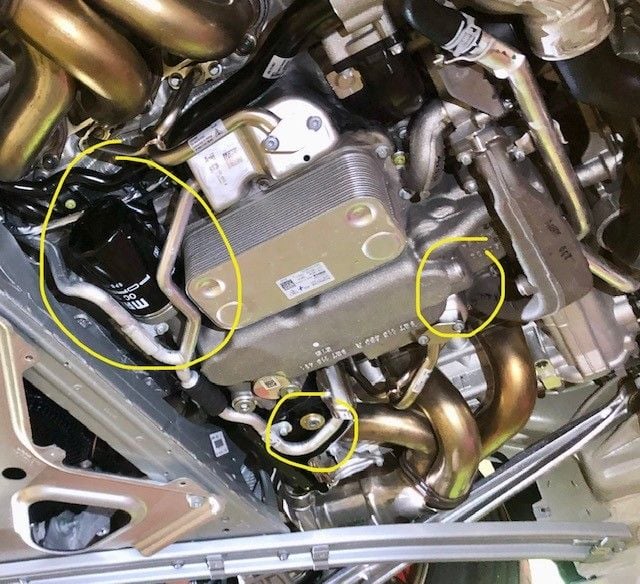
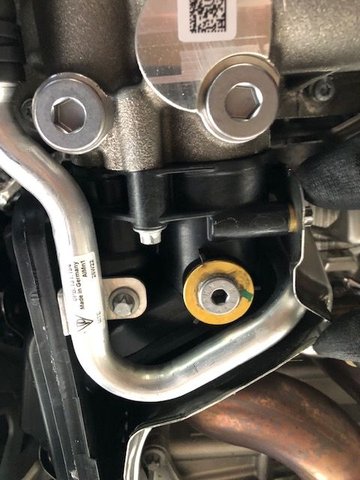
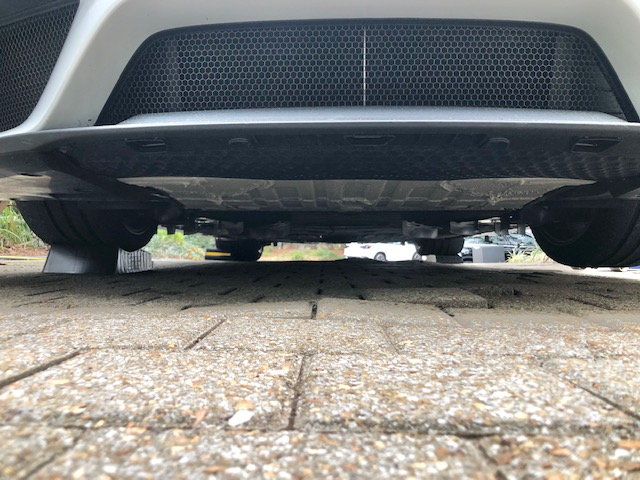
- (3) underbody panels must be removed to access the plugs and filter- the diffuser, the panel under the engine, and loosen the panel just forward of the engine.
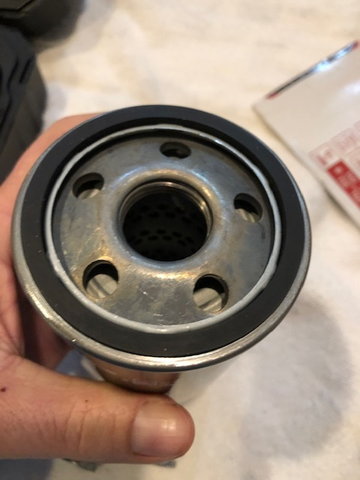
- the filter is a traditional complete replaceable metal unit - not a cartridge that inserts into the plastic housing.
- there are (2) plugs, not one.
- only about 4.3 quarts (4.1) liters is drainable / replaceable with each change
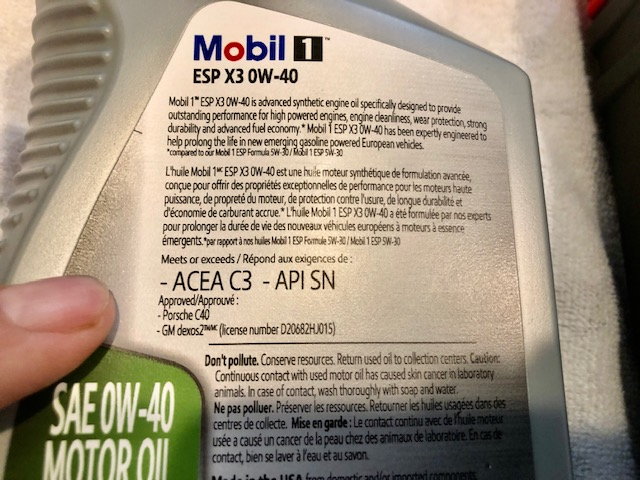
- the oil is a specific C40 spec formulation Mobile 1, ESP X3 0w-40.
Parts Needed:
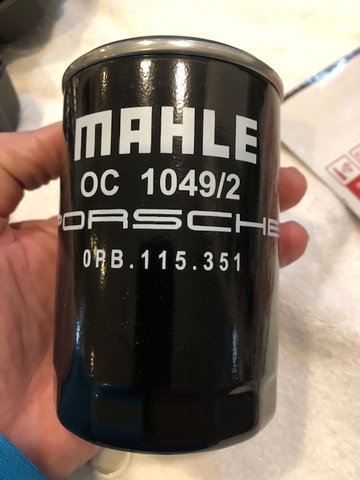
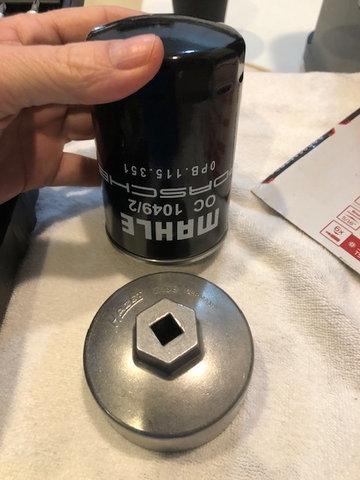
Oil Filter - Mahle part # OPB-115-351
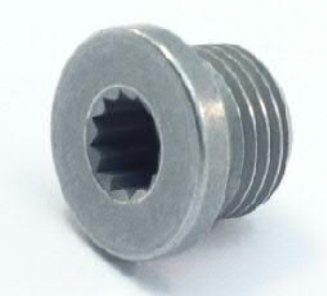
Oil Pan Sealing Plug #1 - Sealing plug PAF-911-559
Crush washer - Seal Ring PAF-013-844
Oil Tank Sealing Plug #2 - Sealing Part 9GT-115-647-B (includes an attached rubber O-ring)
Oil - Mobile 1 Esp X3 0w-40 Porsche C40 spec 4 - 5 quarts
Tools Needed:
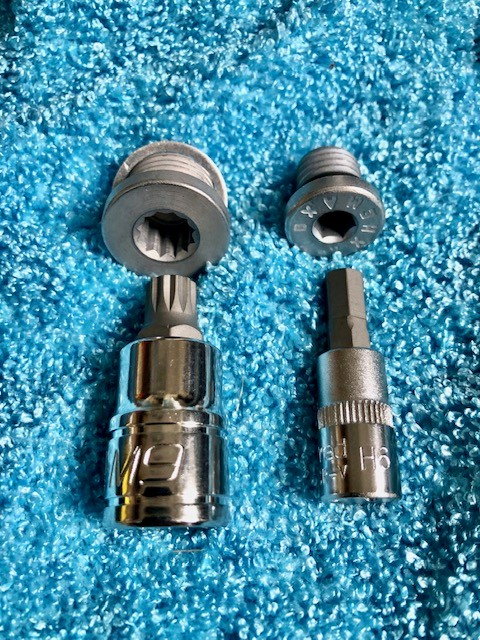
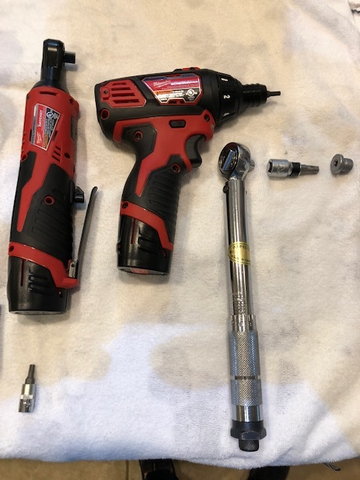
Oil Filter wrench - Hazet 2169 is the one I have. Torx T46 socket bit - for Plug #1 M9 XZN Tripple-square, stubby socket bit -for Plug #1
Hex #6 socket bit- for Plug #2 **
#10 Open end socket, or a specialized torque wrench
T25 bit & #10 socket for removing diffuser / under body panels. I used a Milwaukee power tools to make the task super easy.
Torq wrench - Specs:
Oil Pan drain plug #1: 31 NM, (22.9 ft lb.)
Oil Tank drain sealing plug #2: 20 Nm, (14.8 ft lb.)
Oil Filter - (tight, but not overtighten )
and of course, catch can for oil, and plenty rags.
** WARNING; The Oil Tank drain plug (#2) is inserted into a brass fitting which is attached to the plastic oil tank. In some cases, the brass fitting has been known to strip when hot. Porsche advises on the same GT3 4.0 engine, if it is difficult to loosen, you are to first allow the car to cool to ambient temperature, then loosen the plug, then re-tighten the plug half way to 10 Nm (7.4 ft lbs), then idle until the oil comes up to operating temperature prior to draining the oil.
My First Oil Change Challenges and Notes;
Jacking up the Car - this was interesting. I have 10" Race Ramp blocks which I put under the rear wheels to do the oil change safely. But, I found the car is so stiff that depending on the starting balance, the car would not necessary raise in the same manner using the same jackpoint. Sometimes, it would lift the entire side (as one would expect) and sometimes the side and the entire front would raise. I still do not understand the physics but just be aware when jacking the car it can teeter. Safest on a 4 point lift, or plan to do it VERY carefully as I did.
Removing the panels - (3) sections, pretty straight forward. There are 4 size fasteners; smaller black screws, larger black screws, and (4) silver bolts, and (4) nut washers. Both size screws use the T25 bits, and the (4) silver bolts and nut washers use the 10mm socket. Note; the (6) longer screws are for the rear section defuser section. The only "trick" to be aware is the naca ducts in the center panel are attached with 3 of the small screws, the inboard screw does double duty to attach the panel to the underbody, so it must be removed to get the panel down.
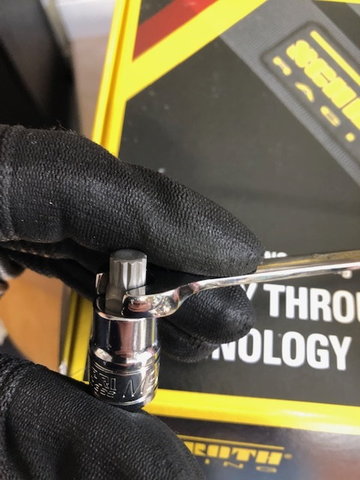
Oil drain plug - I discovered that there is not enough space to fit both the XZN Tripple-square, stubby socket bit and a standard torque wrench. So, I improvised using a 10mm open end wrench to assist as shown in the photo below.
First removal - I did followed the safe method of removing the plugs cold. I both were easy to loosen - no chance of stripping, nice! I surmise that at the factory that they might have been slighly under torqued. I re-torqued the the oil tank plug (#2) to spec. re: the oil pan plug, I did not have a specialized torque wrench, so I used my "elbow" torque with the 10mm wrench to get to 22 lbs - which is not that much. I observed that the ultra- light crush washer from the used plug was barely deformed - meaning that the 22 lbs of torque is not that much. I replaced both the plug and the washer but it was very difficult to determine which was new and which was the used one.
Oil Drain - In total, a bit over 4 quarts came out. About 2 quarts from the oil pan, about 1.6 quarts from the oil tank, and.5 quarts from the oil filter removal - ish.
I took a sample the oil and sent to Blackstone for a report, and see how it comes back.
I added 3.5 quarts as suggested. And, I'm still awaiting the computer to give me an proper oil level reading so I can top off.
Oil Pan Sealing Plug #1 - Sealing plug PAF-911-559
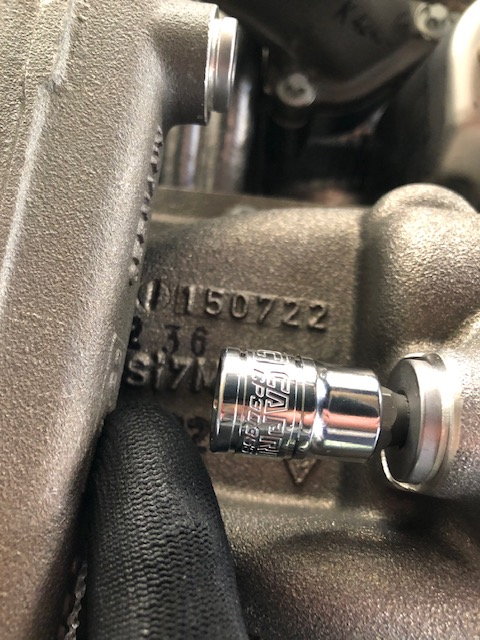
Both plugs with the M9 12 point bit for Plug #1, and the Hex #6 for Plug #2.
Oil Filter - Mahle part # OPB-115-351
T25 bit & #10 socket for removing diffuser / under body panels.
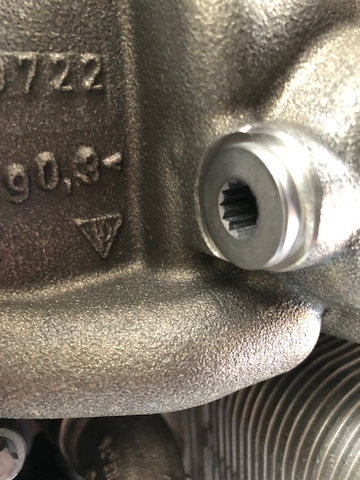
The silver plug in the brass fitting in the plastic oil tank is Plug #2.
This is the Oil Drain Plug #1
Not enough space for standard torque wrench.
This was my method using a 10mm open end wrench on the 12point socket.
Shows car on (2) 3" Megan Racing drive up ramps on front right, and rear left - results in front right wheel airborne - very interesting!
Last edited by matttheboatman; 02-07-2023 at 12:43 AM.
Reason: Updated Torque specs / Updated with correct image of plug and tools required. Warning added for removing the plug in CF tank
The first 'free' service has to be done at the 1 year mark, with +/- 3 months of variance. So from 9 - 15 months from vehicle delivery. (double check with your dealer)
The first 'free' service has to be done at the 1 year mark, with +/- 3 months of variance. So from 9 - 15 months from vehicle delivery. (double check with your dealer)
I'll check with my local AutoNation stealer who I go to for free maintenance and warranty items.
Curious why you didn't take it to the dealer since the first oil change is free?
With spirited driving, and now the realization that only 1/2 the oil gets changed each time, I'll likely change the filter and (some of) the oil 3-5 times before I ever reach 10,000 miles.
Yes, that has been confirmed, looking at the techical service manual. Confirmed with a Gold Porsche tech as well. Very unusual for sure.
Can confirm that only half the oil is drained and replaced. I did a post break-in oil change at Manthey Racing just before taking my 4 RS on the 'Ring this past October. I think Manthey is pretty much as authoritative a source as you can get, short of AP himself
Potential reasons (some mentioned by the Manthey tech) for this new regimen include, 1) reduced chance of momentary oil starvation event and associated wear, because it takes oil pressure a fraction of a sec longer to build when the engine is cranked over right after a full oil change, 2) reduced oil cost, 3) improved oil formulations make oil last longer, especially with ~4 L of freshly added oil to dilute out effects of old oil.

 01-15-2023, 02:15 PM
 )
)