
1965 Imp 911 - a baby 911 in making....


 07-28-2022, 06:04 PM
#48
Advanced
Thread Starter


The following users liked this post:
yoeddynz (08-30-2022)
08-30-2022, 07:12 AM
#50
Advanced
Thread Starter
Ooh its been a while. I have been tinkering away at this but other life things have popped up so this has not been high on my agenda. My dad, 89, went into hospital with pneumonia. Well he'll get looked after there.
Then he got covid in hospital. Bugger. Long story short he was on deaths door, pulled through with the aid of strong anti viral technology and great staff, slowly improved and is now in a home. His body is frail but his mind is strong. So I've been dealing with that.
Then Hannah and I got covid and it was not very fun. Being normally very fit out on the push bikes etc we have really noticed a huge loss in strength and lung efficiency. Getting better though.
So yeah.. this engine has been collecting dust. When I tested positive for covid I honestly thought I'd deal with it for a few days and then get heaps done on the engine while isolating. But my body had other ideas.
Anyway, I'm back onto it now. Quite a lot of photos to load up too.
Induction time. I have decided to make something from the existing inlet runners and use a central plenum chamber with a rear facing throttle body. Try to hide the TB and use a remote pod filter to draw in cool air from somewhere other than the top of the engine bay. I have a some very funky ideas for my plenum design and have a particular look I'm chasing with the setup. Looking forward to building that. But I need to sort out injection first.
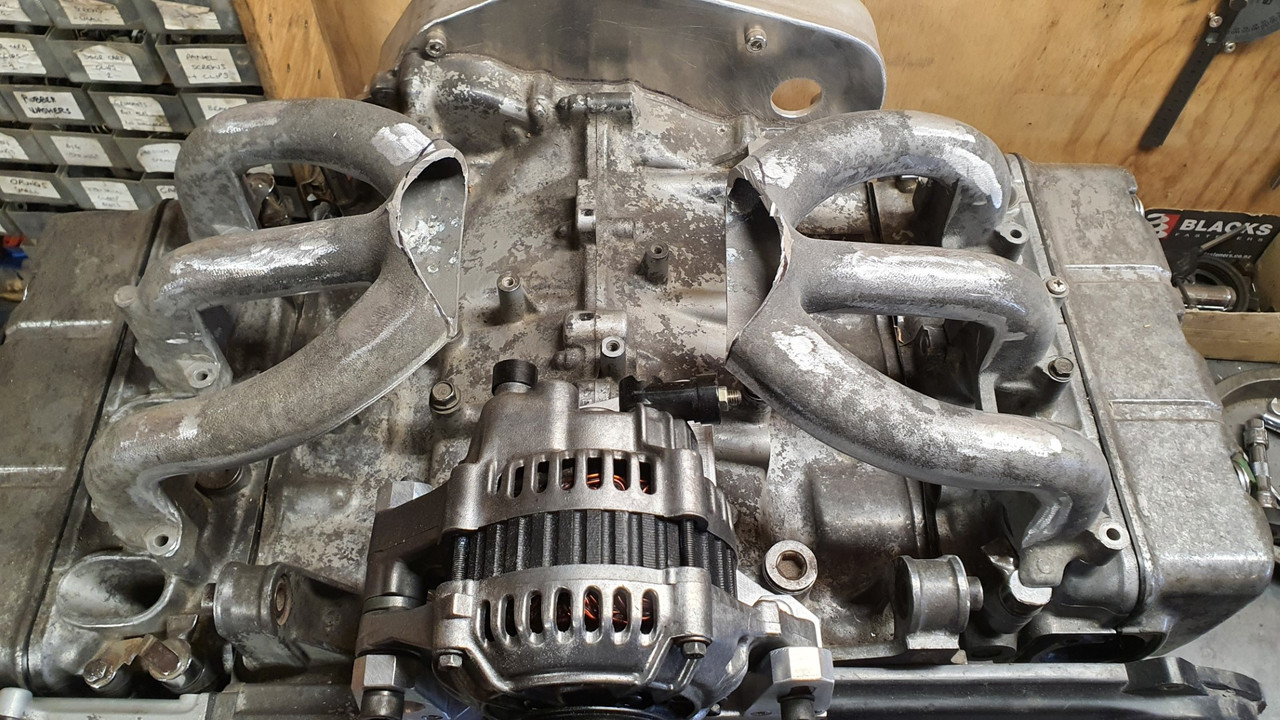
Here are the stock runners, normally fed by two carbs that sit too high and would have fouled the rear parcel shelf...
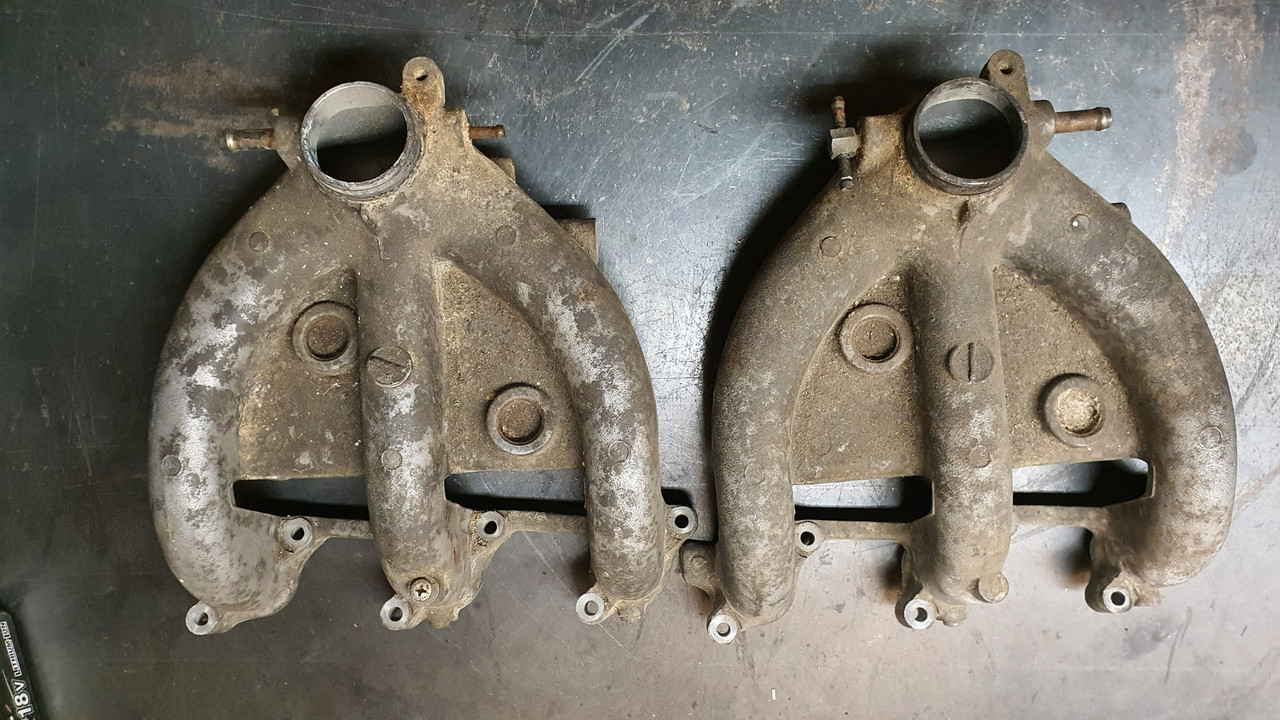
Interestingly this engine has a neat feature in that the cylinder heads are identical as are the inlet runners. They could be swapped side to side. This was going to help with my modifications when setting up the mill etc.
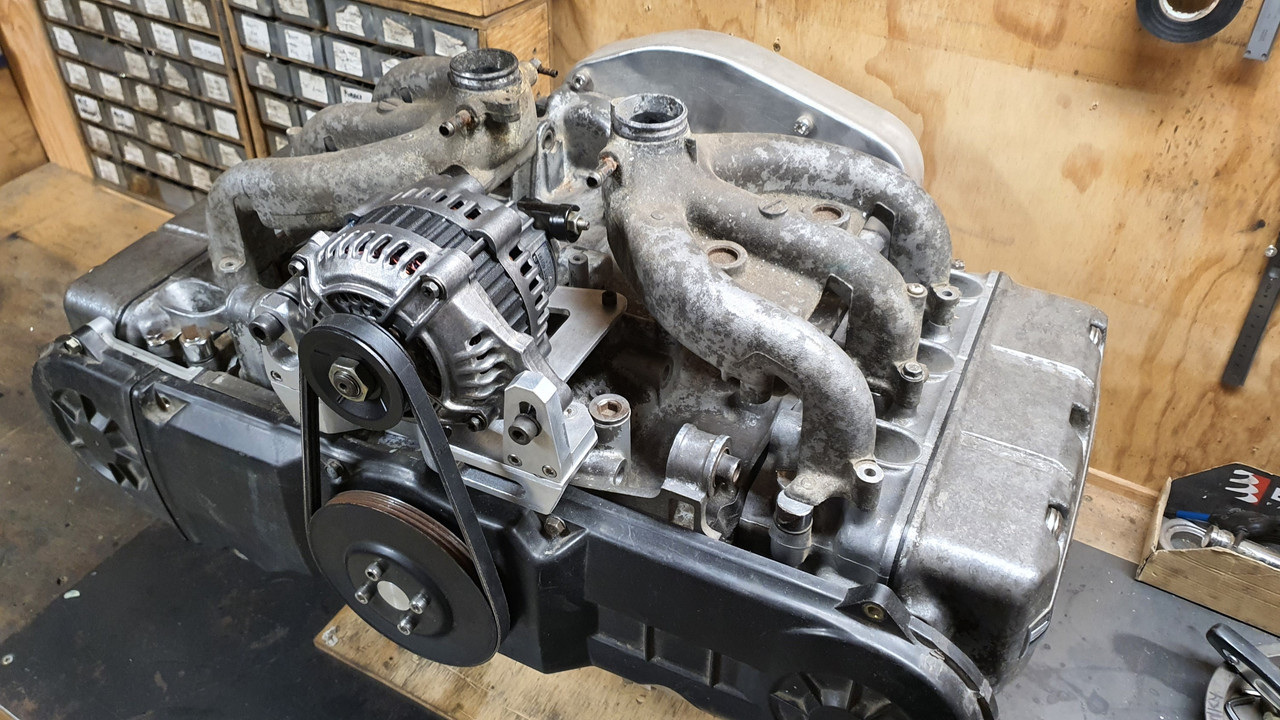
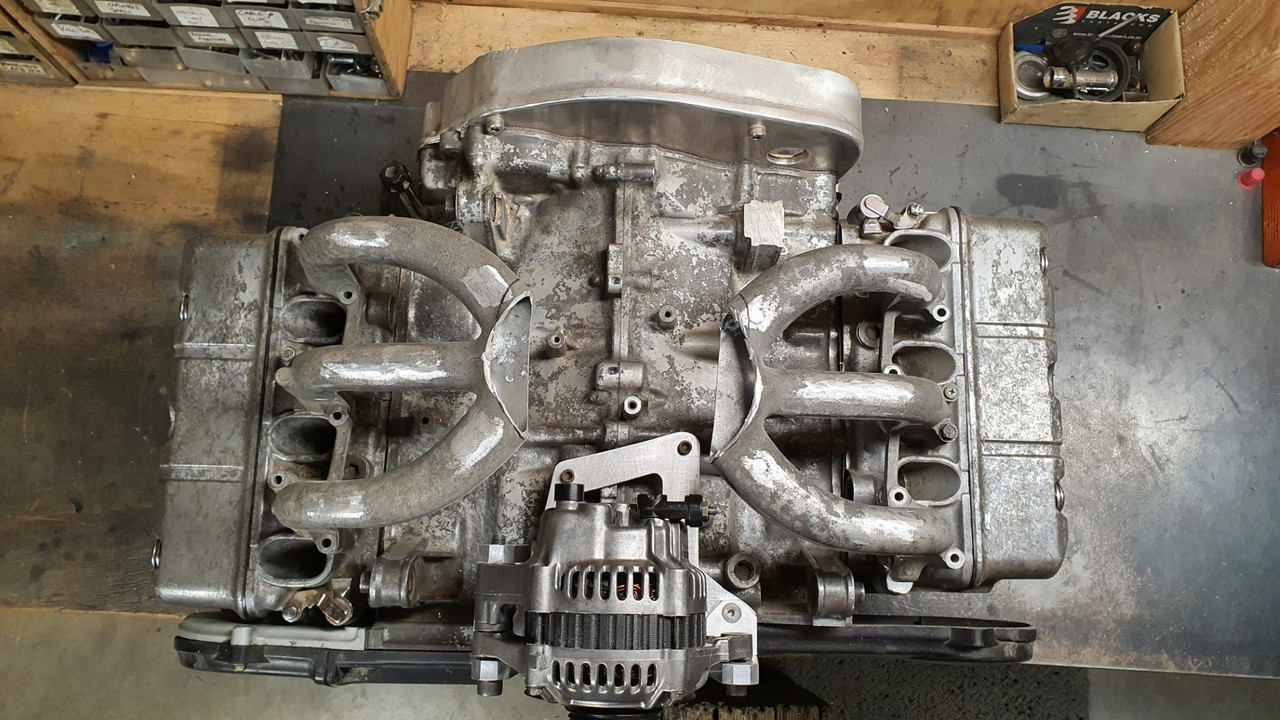
in place..
Note the total lack of injector bosses..
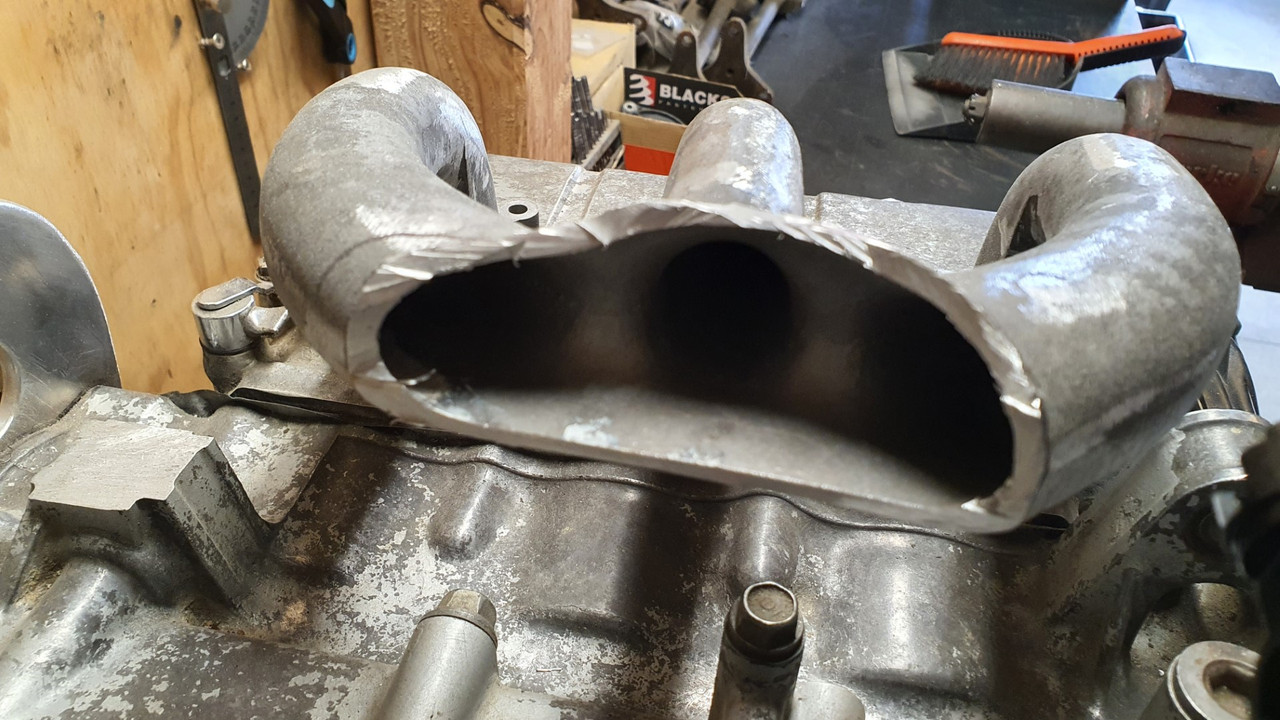
First thing was to remove the (ugly) water jacket which was not going to be needed in my setup..
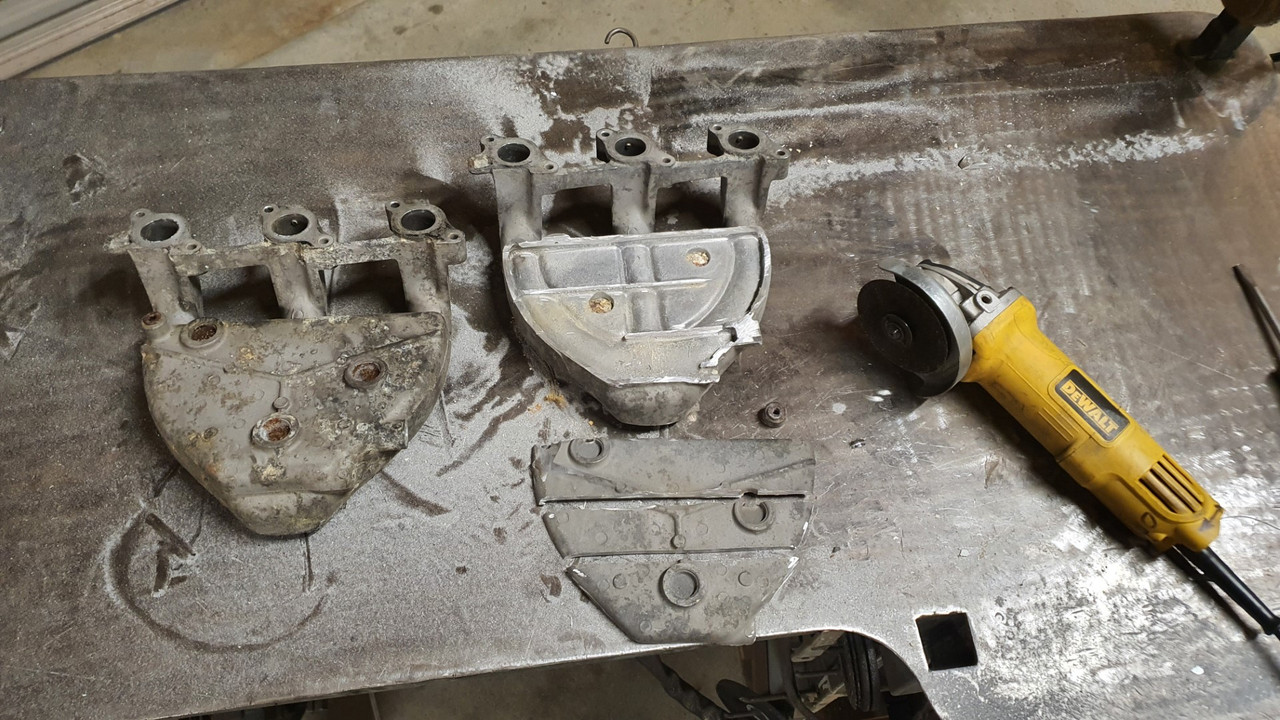
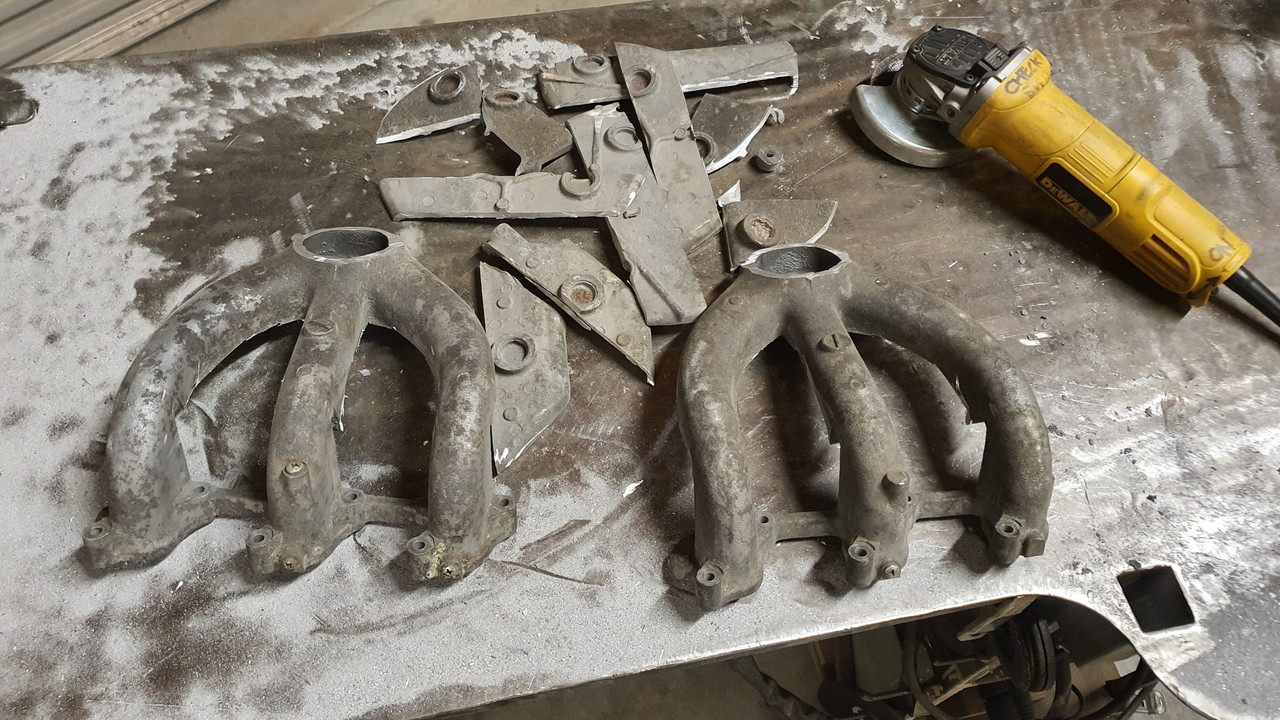
Much nicer looking and lighter too...
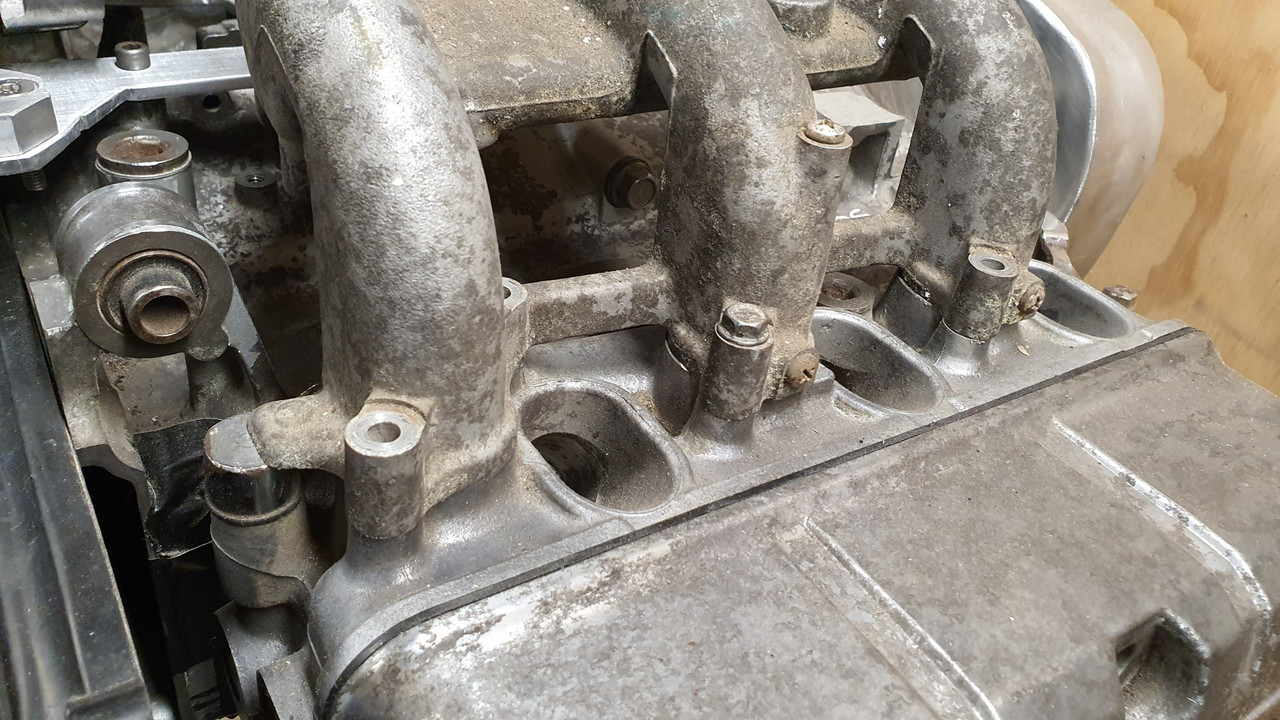
Lots of room for a suitable sized plenum..
Very nice smooth entries into the runners..
Now I needed to start looking at injector fitment. It has to be as neat and compact as possible. The spacing doesn't suit anything I could find so the rails will have to be custom. I decided against top feed injectors because they would be just too bulky. Side feed it was to be. I had a couple of ideas.
Bought another injector rail setup from a Nissan Micra K11 at the wreckers because the stock injectors have a very suitable rate (130cc) and are cheap and easy to get.

I also had a set of Mazda V6, as per fitted to my Viva, gifted to me by Steve @Transom


They were close and rather compact but it wasn't going to work without a lot of chopping and then the top caps with the wires set into the plastic would have been a pain to shorten and keep neat. Final nail for these was the injectors being just a bit high in flow rate (220cc) , running the risk of awkward tuning around idle on an engine with smaller fuel requirements.
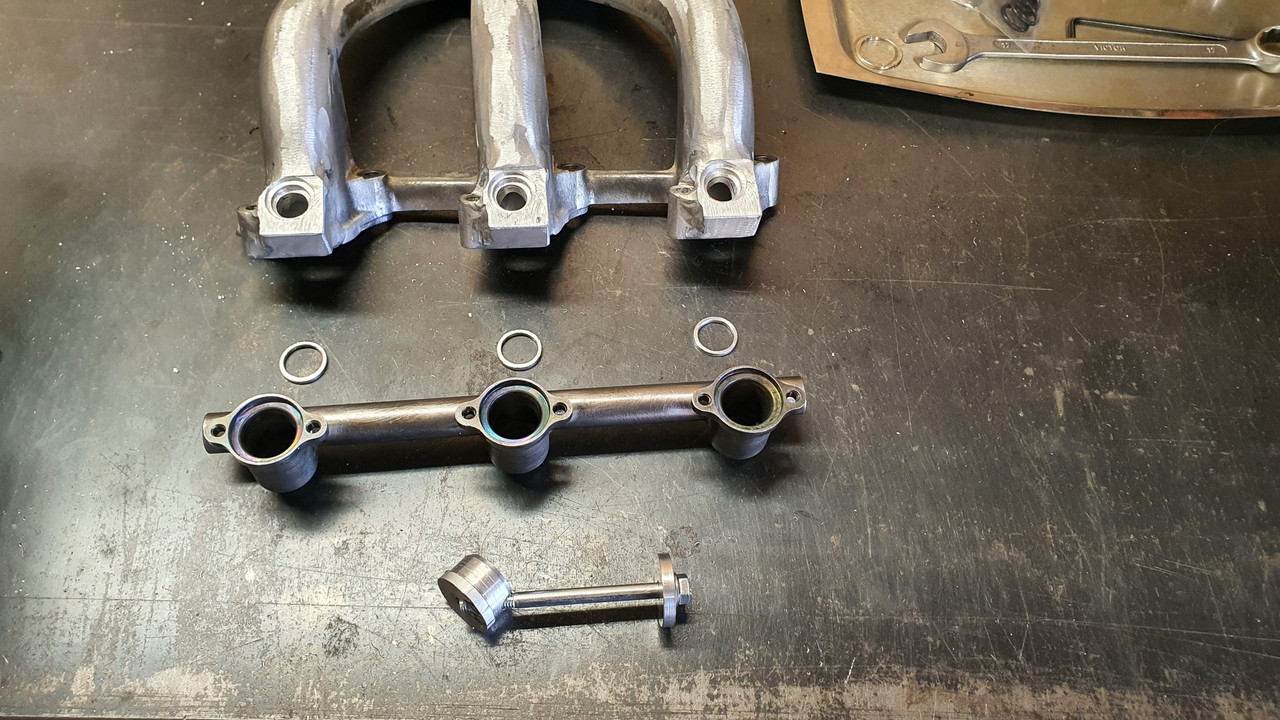
K11 injectors it was. But the spacing is way off and they had ugly brackets all over them.
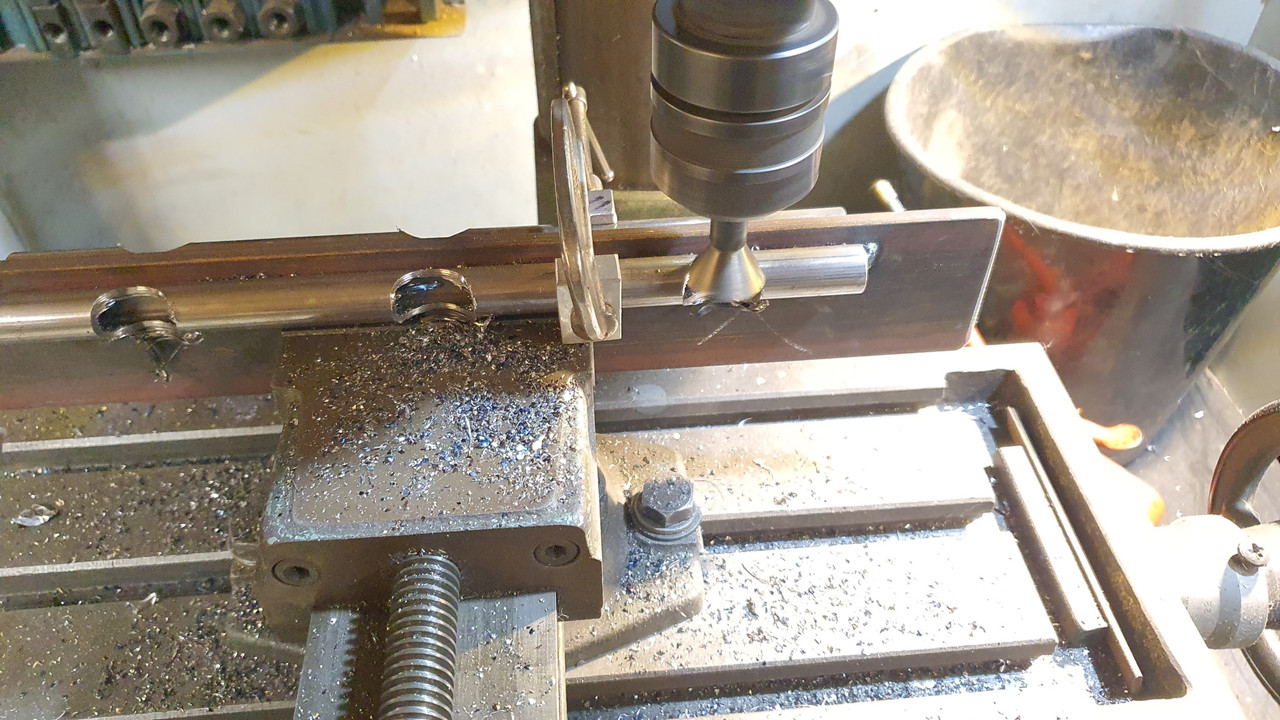
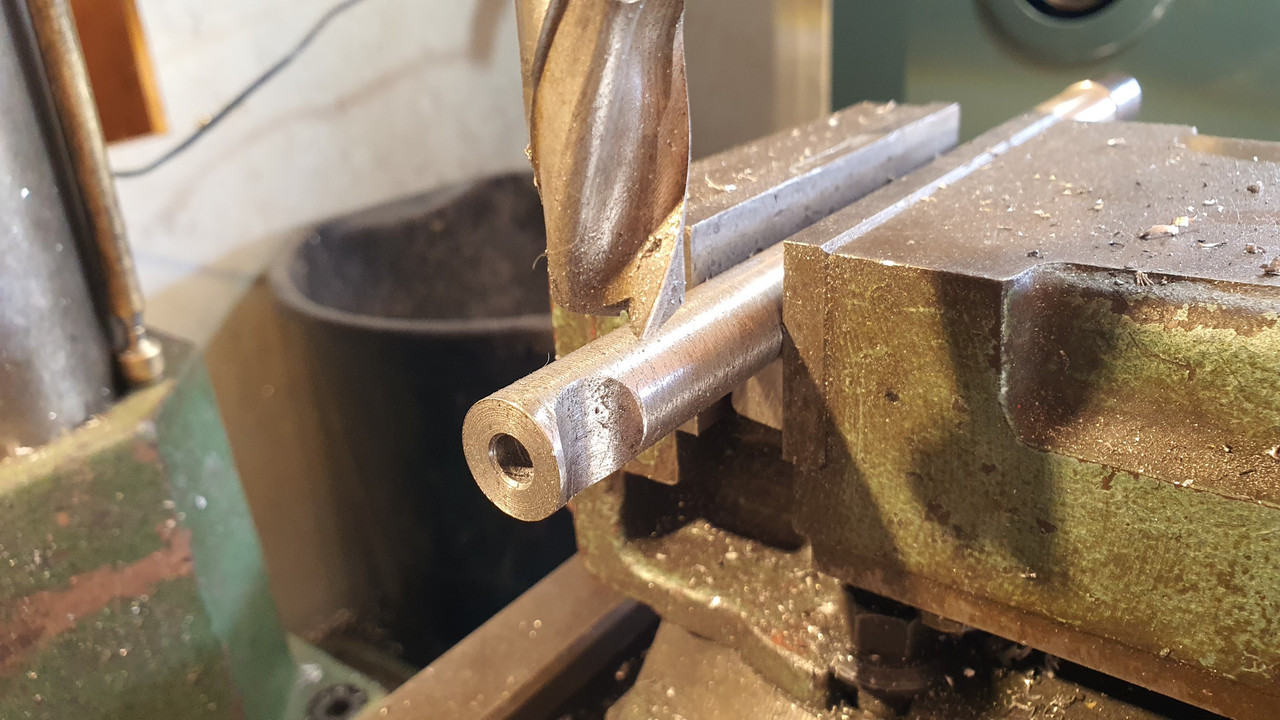
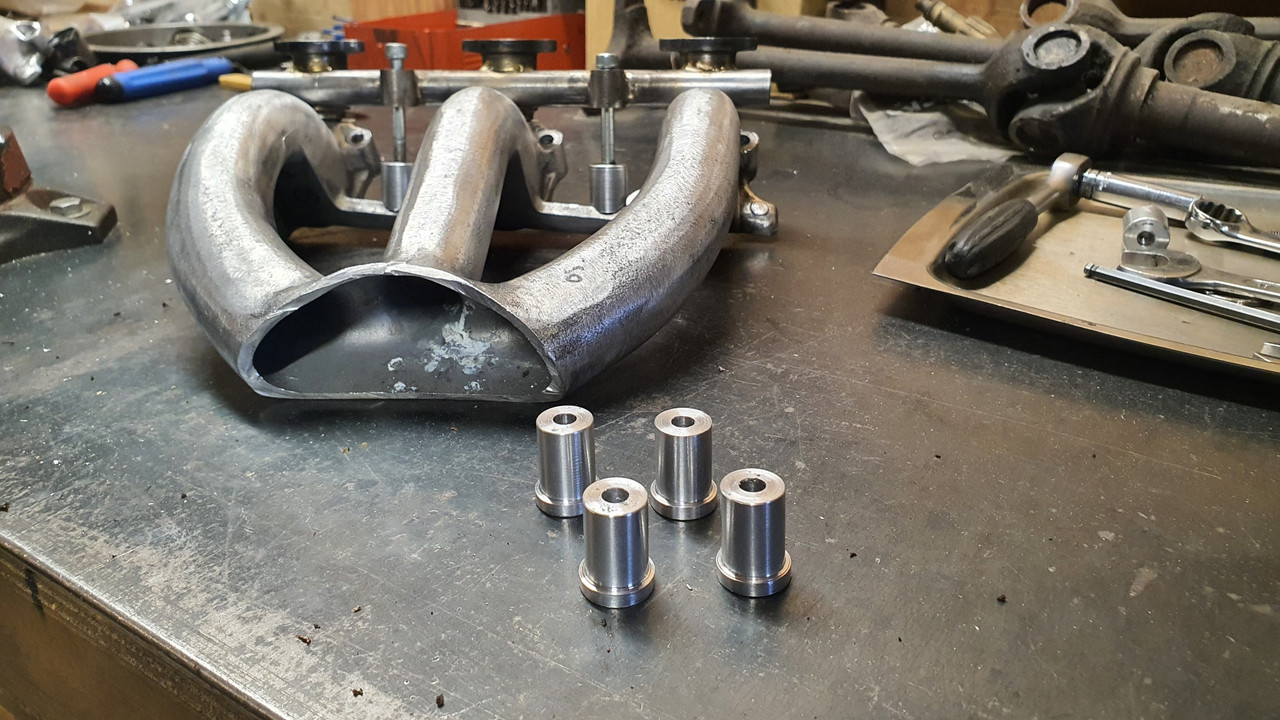
So I cut them up and ended up with just the injector housings and then played around with some 16mm tube and the mill. Bit of a test piece...
The fit was spot on..
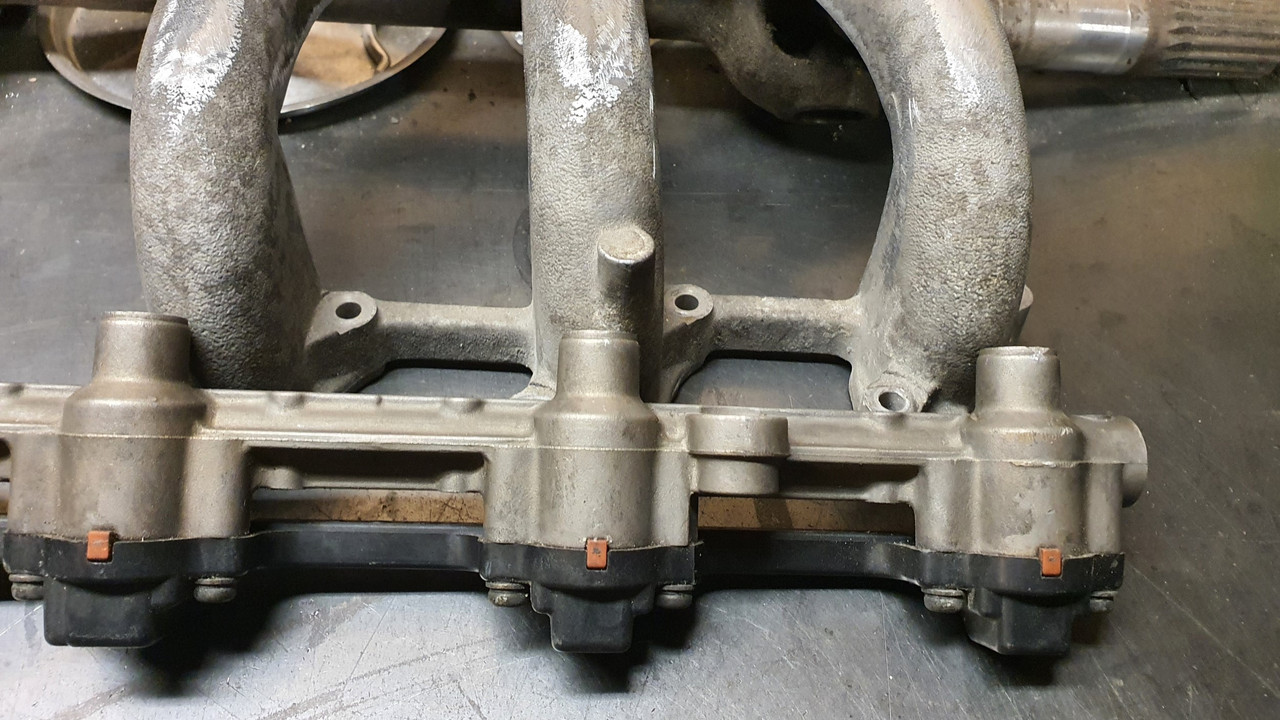
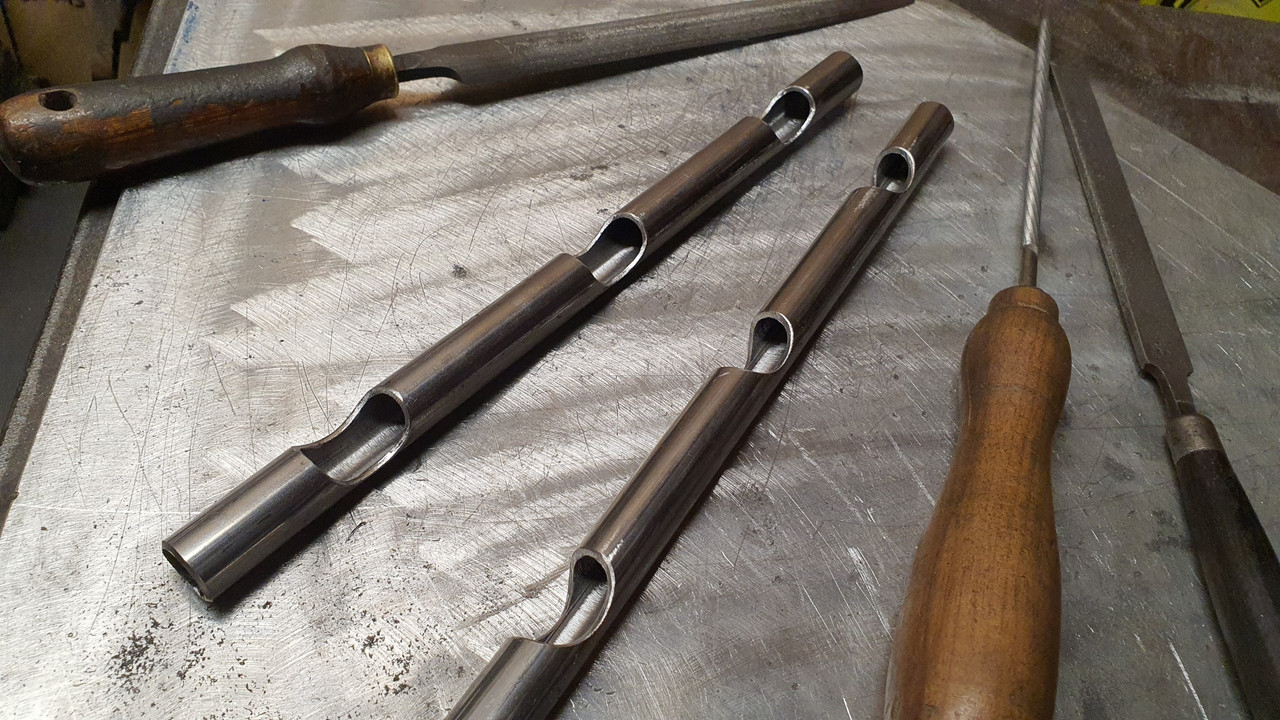
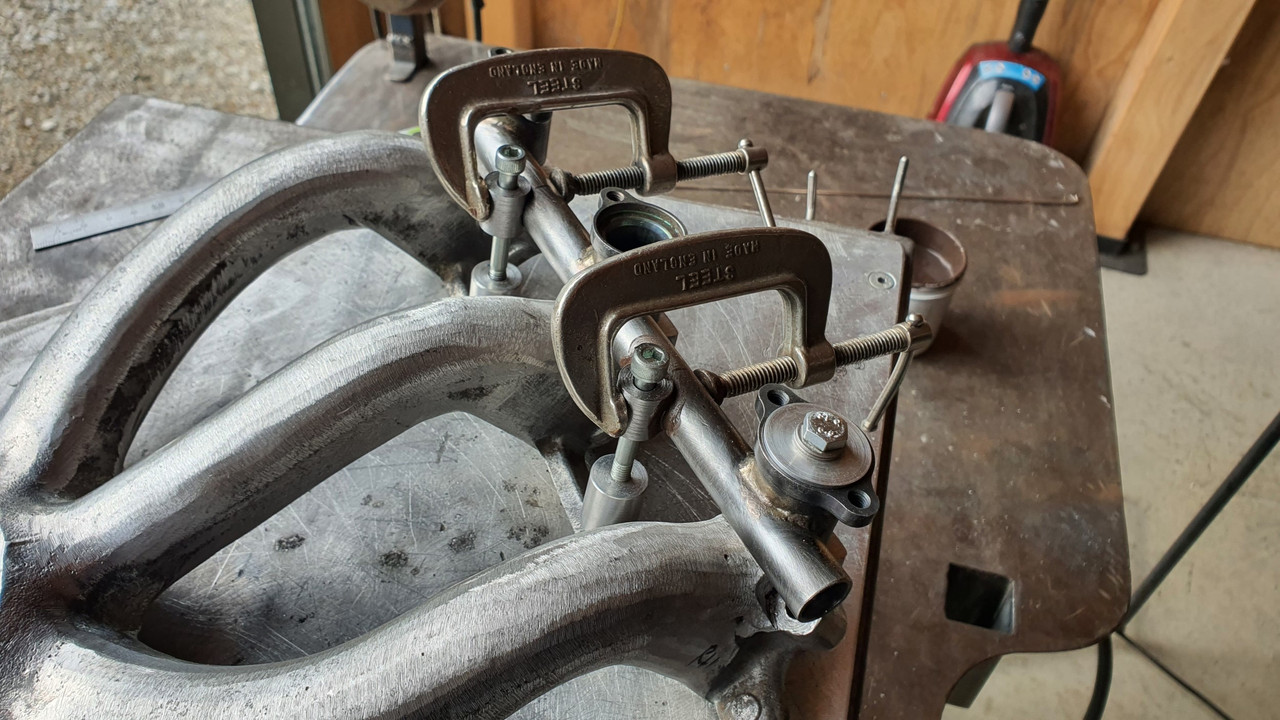
Happy with that I welded two bits of tube onto a plate of steel and carefully milled the tubes, spaced to suit the inlet spacing...
a tidy up removing sharp edges with files and they came up neat..
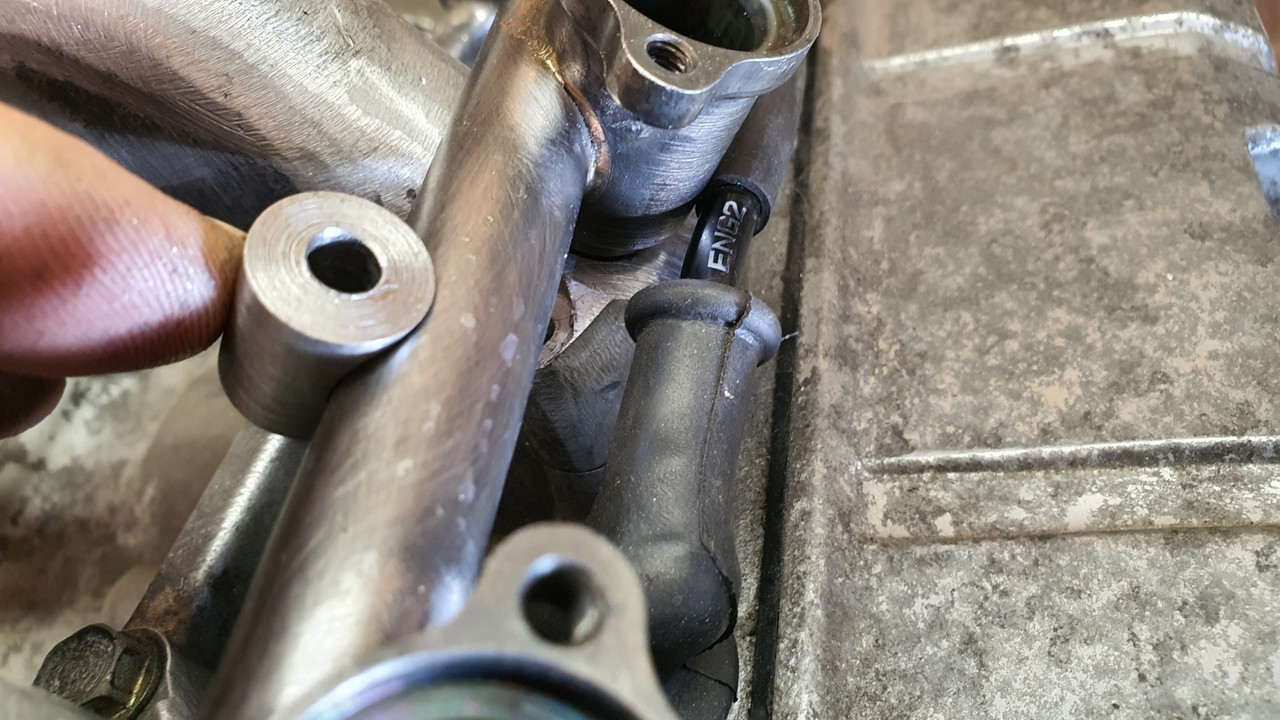
I made a little jig to hold the injector housings onto the rail with the correct spacing so I could braze them in place..
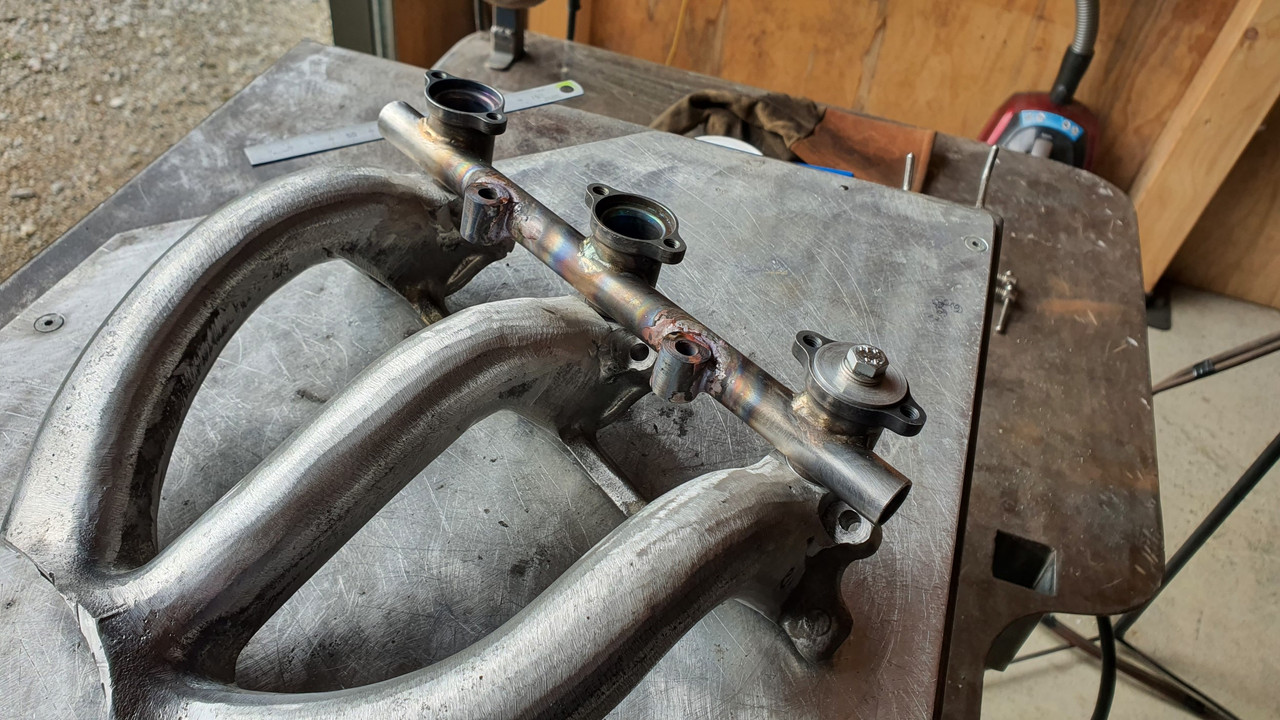
Then out with the oxy acetylene and brazed them in place with silver solder. Note my sore nose where I had smacked it with a large branch when cleaning up a fallen tree. Hurty...
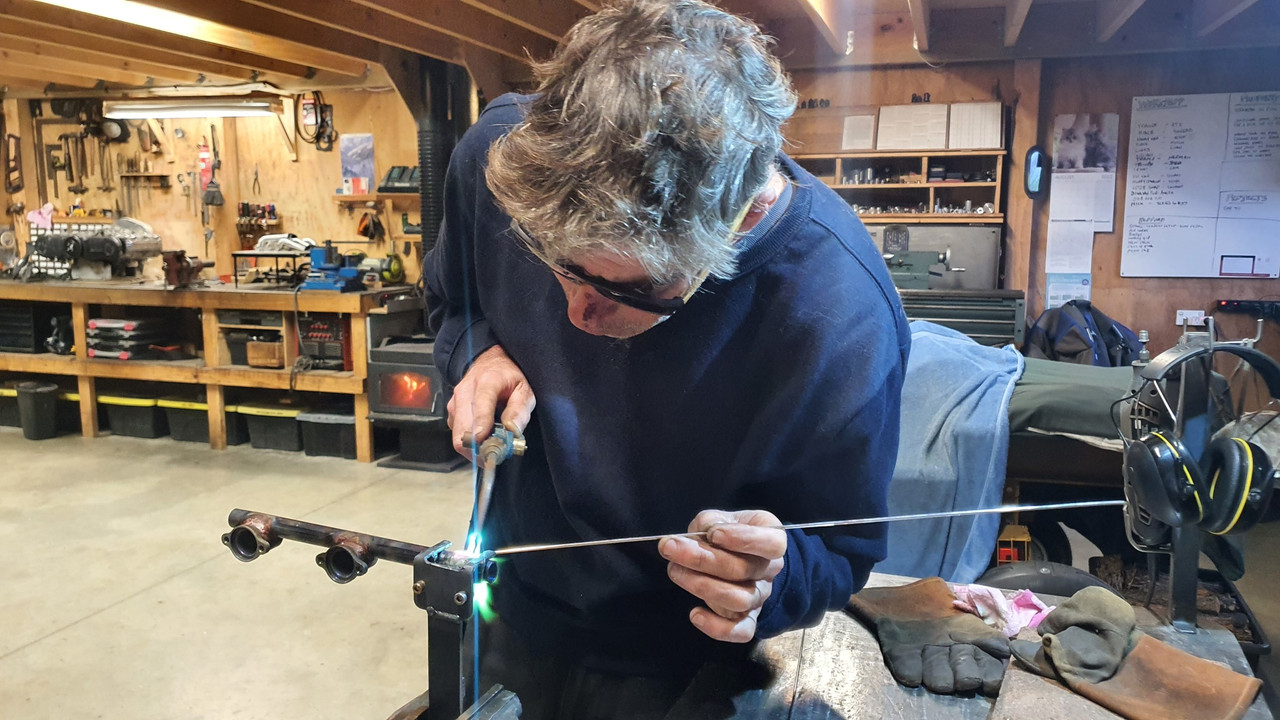
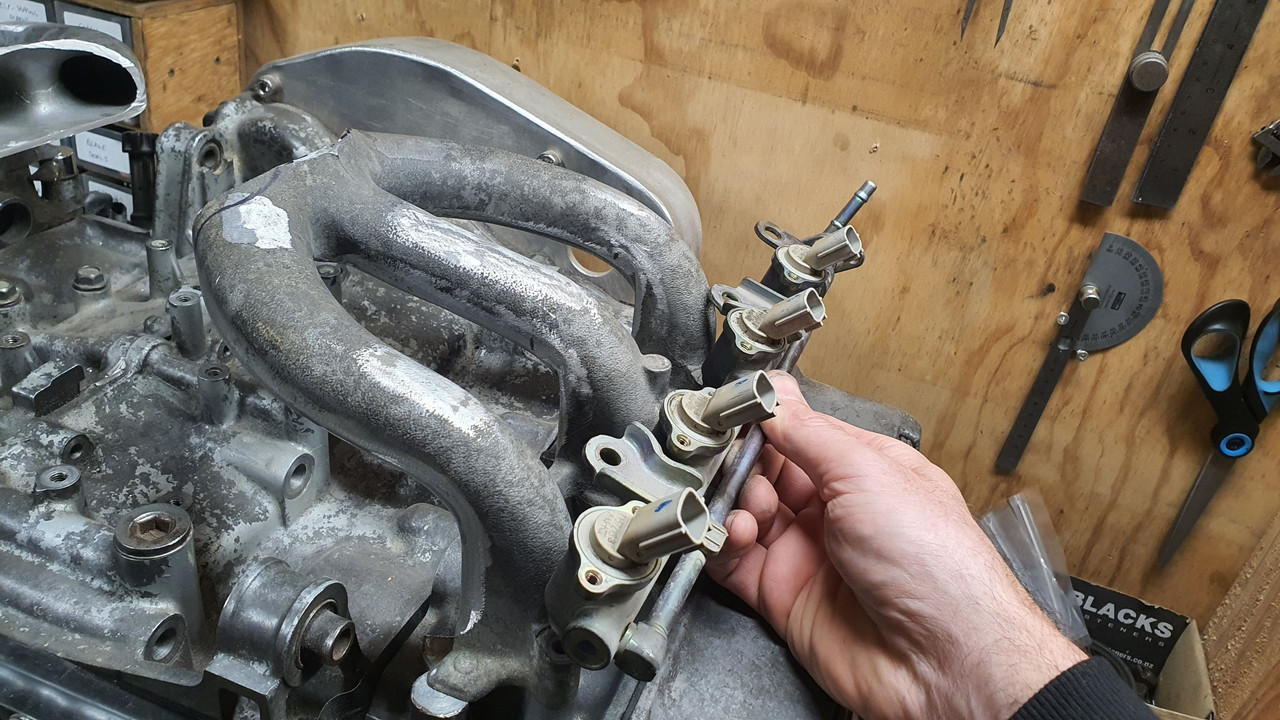
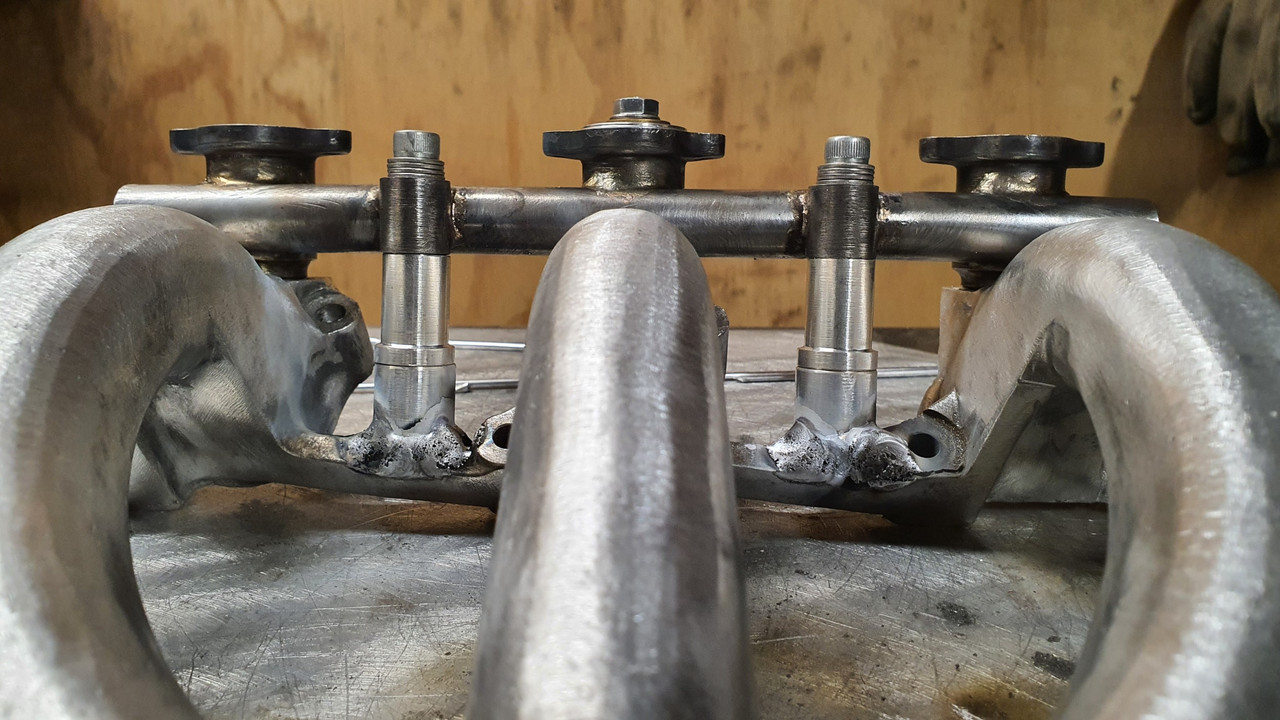
Now I have some side feed rails with the correct spacing

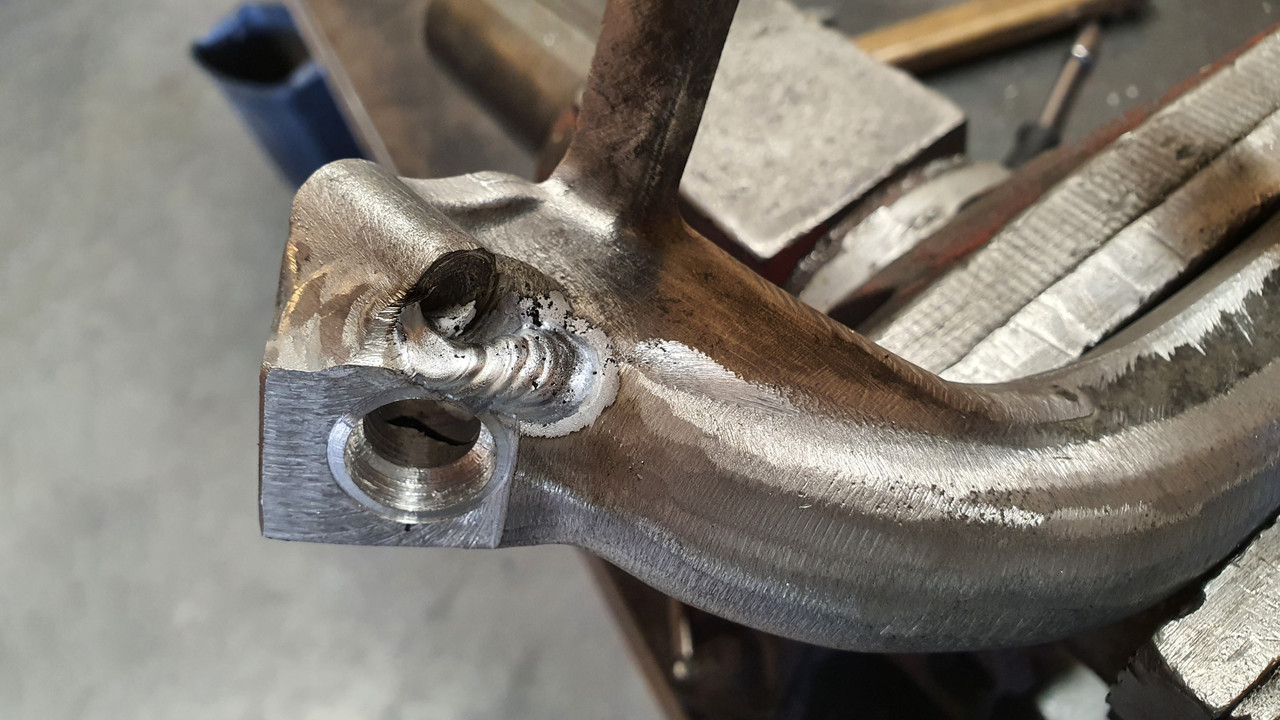
Next job was to create a place for them to fit. I needed to add some bosses to the inlet manifold and get the angle just right so the injectors would end up pointing as close to the back of the valve heads as possible. I cut up some chunks from a large bar of alloy. Then I milled them down to suit and tacked them in place...
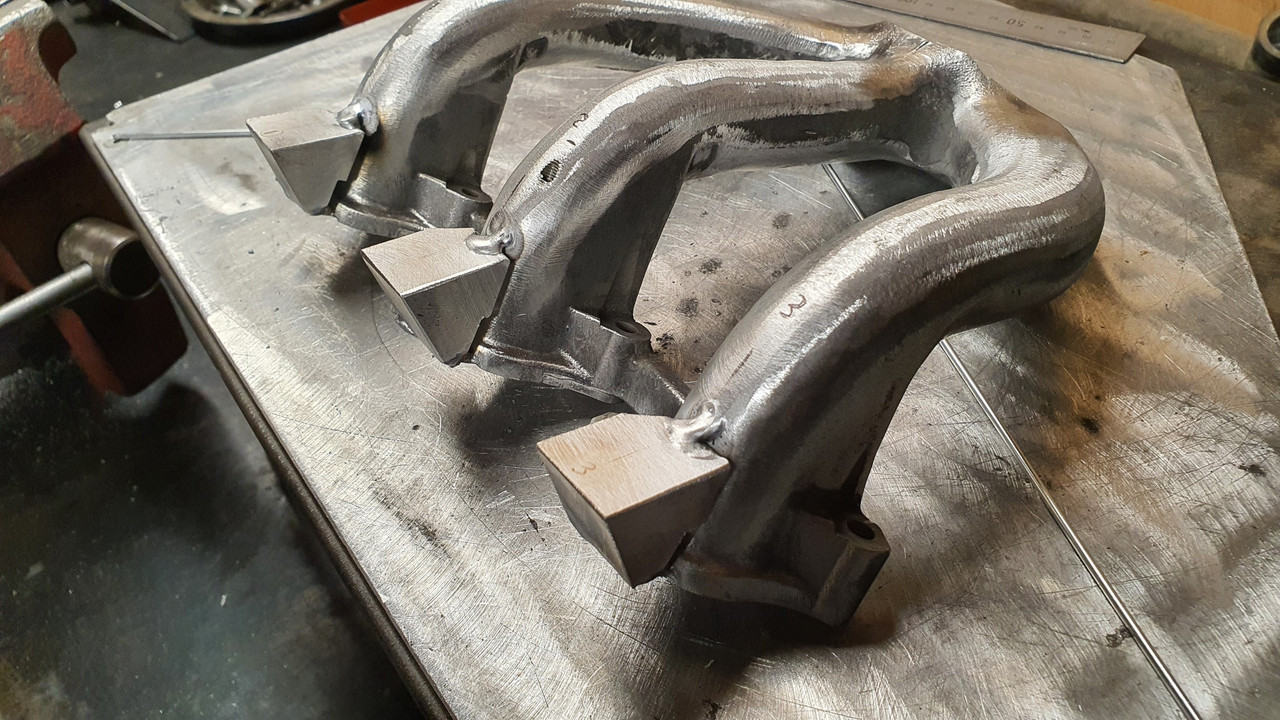
Happy they were located correctly I fully welded them in place. The inlet casting was luckily of pretty decent quality and welded nice enough..
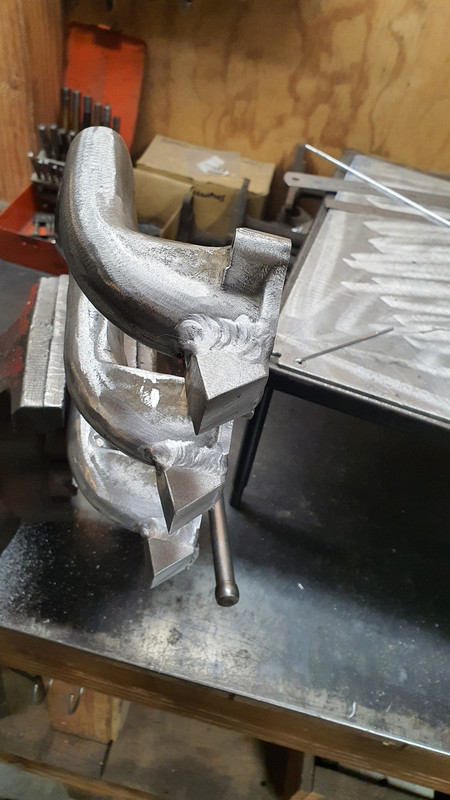
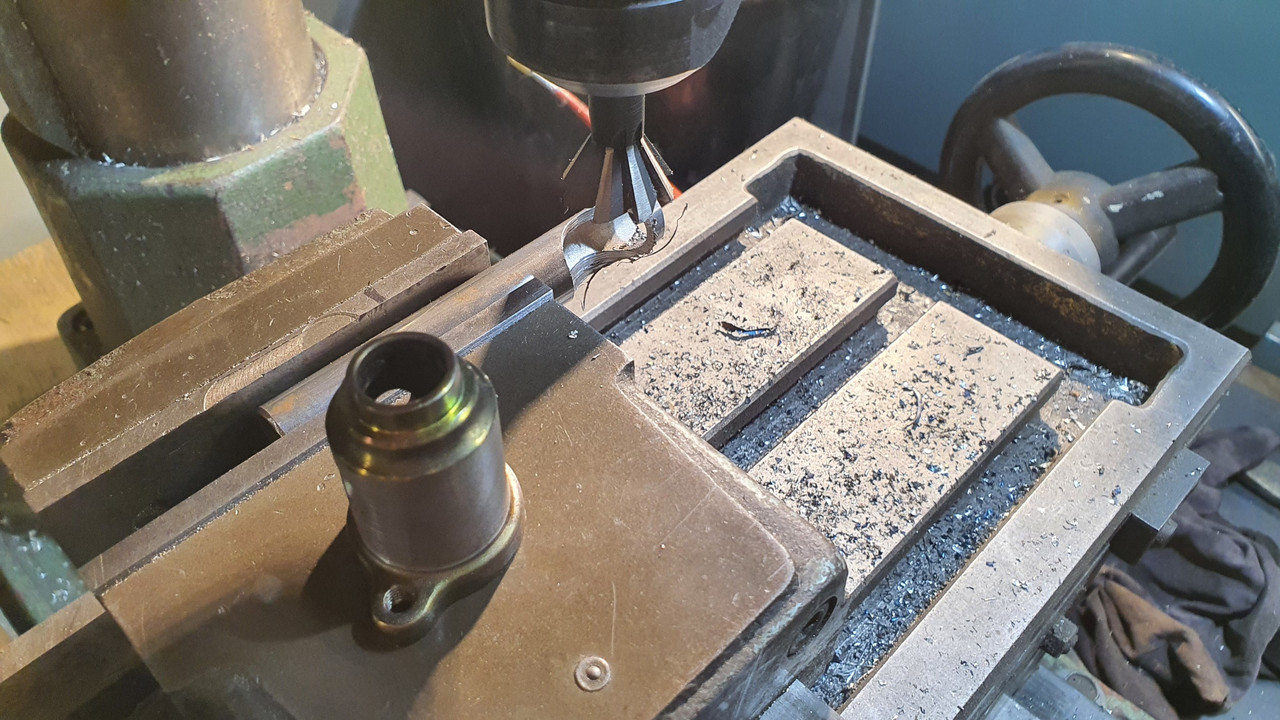
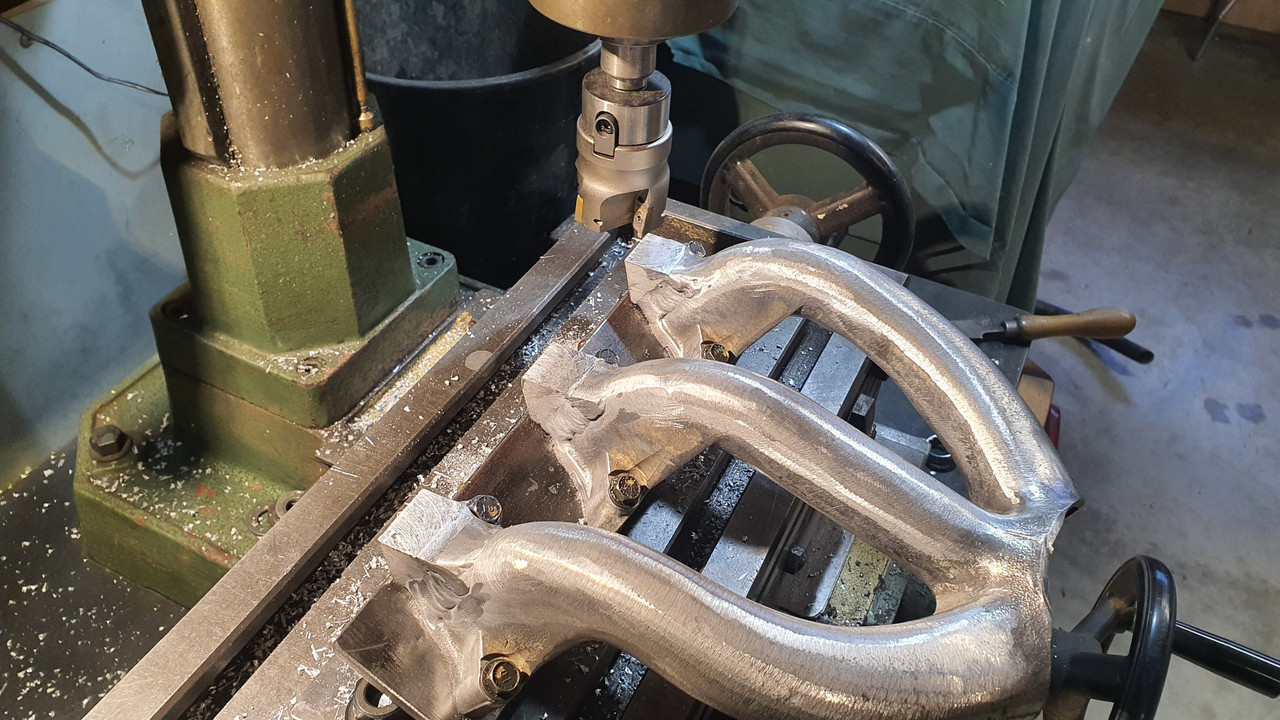
With them welded up and solid I could machine the bosses down in one hit, levelling them off at the correct angle and making sure the faces all lined up. I made a steel jig, set at the angle to suit (because my drill mill doesn't have an head adjustable for angle... oh how I'd love a larger knee mill)
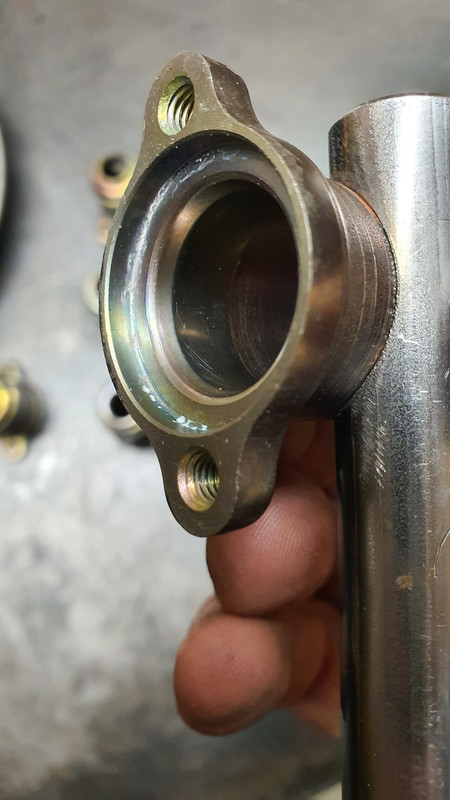
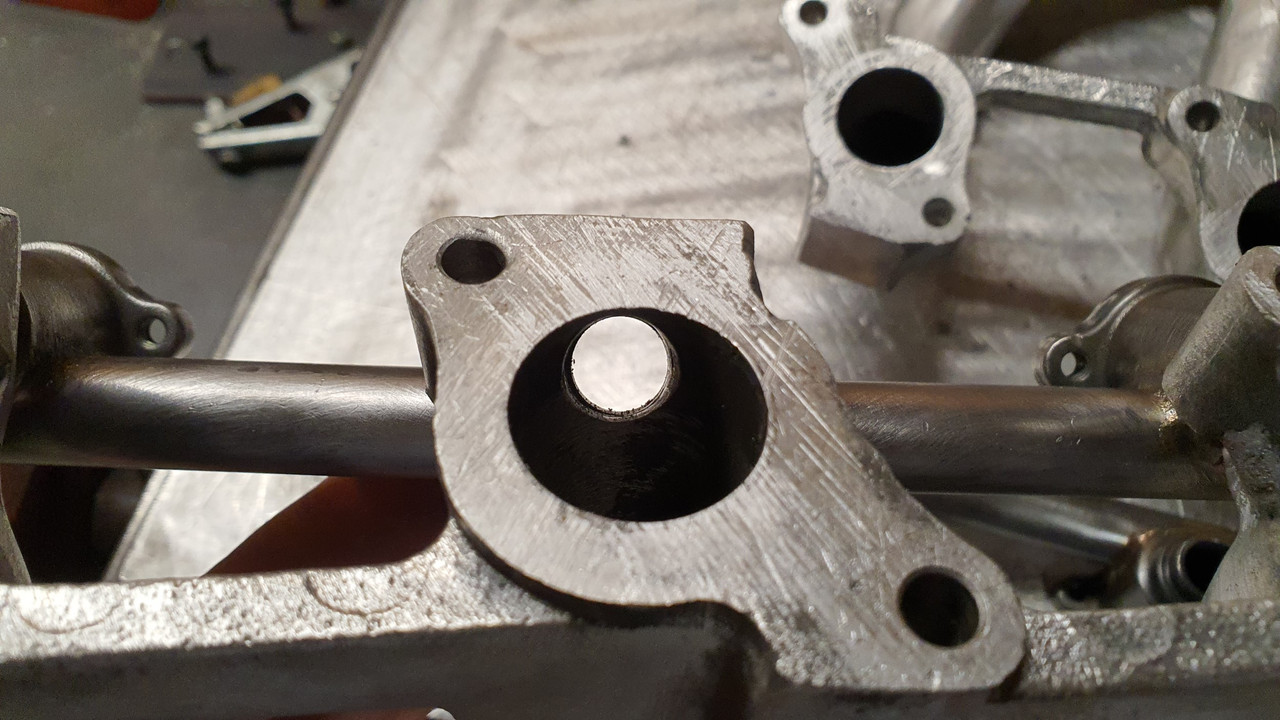
Now I was able to carefully mark and drill out the injector holes, then spot face the O-ring seats..
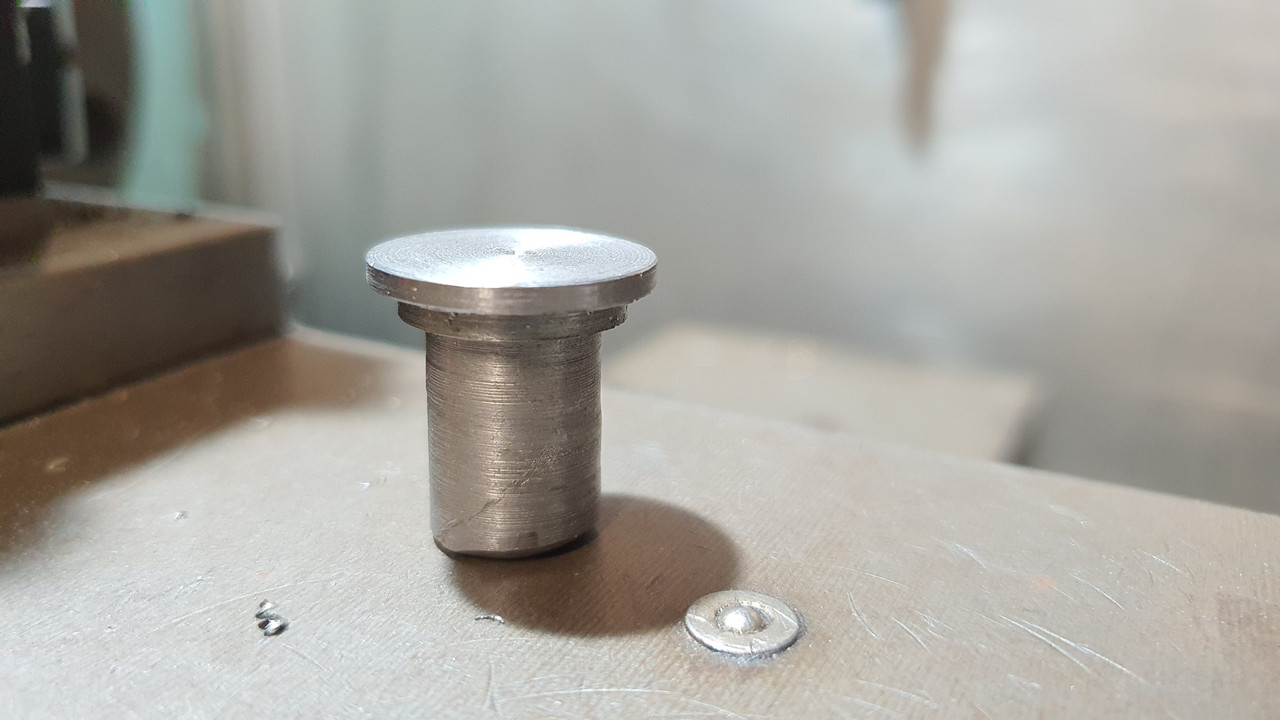
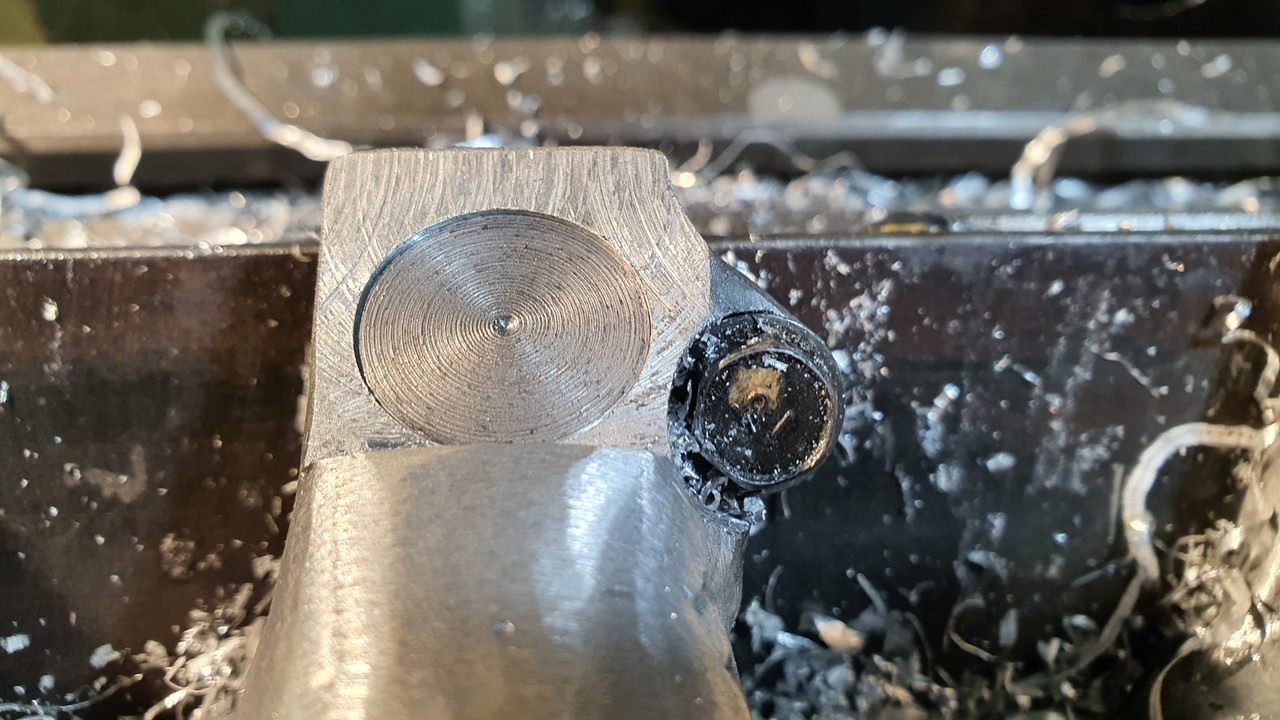
In order to aid with with marking and checking them I machined up a little button that fitted perfectly into the injector holes...
Annoyingly (silly me) I marked to first hole off wrong by 1mm and by the time I was at the last boss on that side I had to add some weld to make sure there was enough meat to house the O-ring...
I learned something and didn't repeat the mistake on the other side
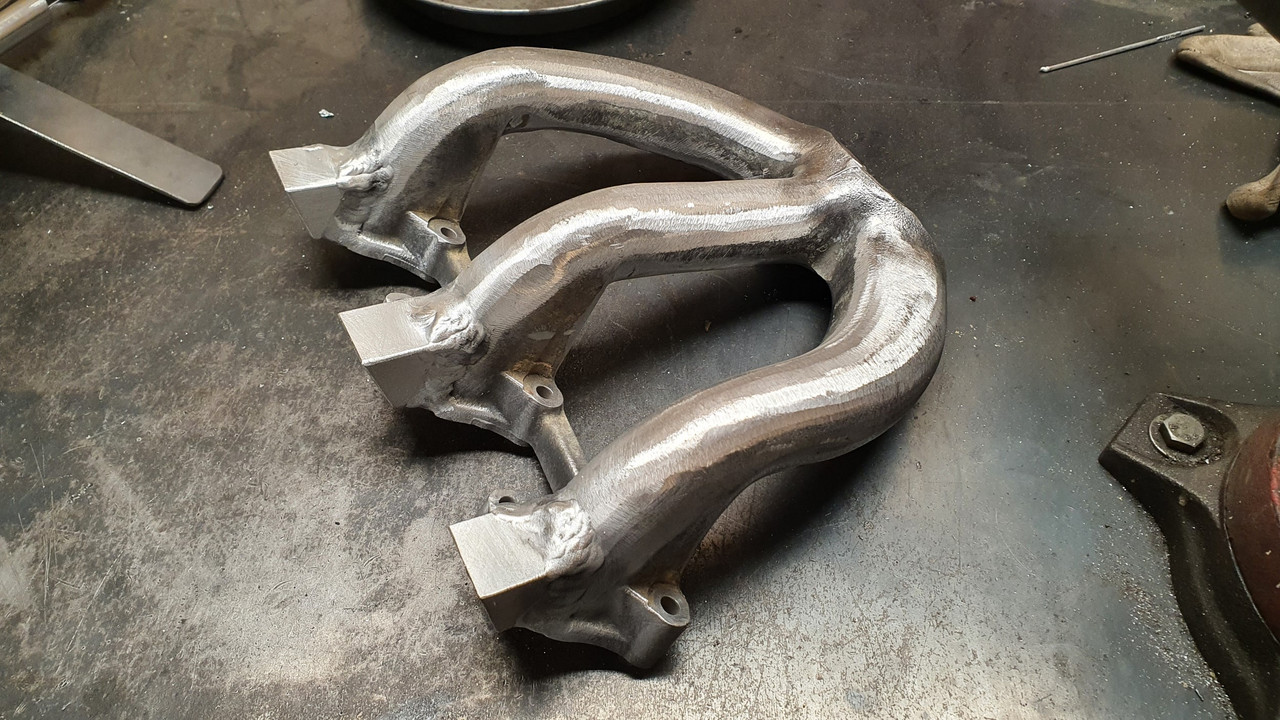
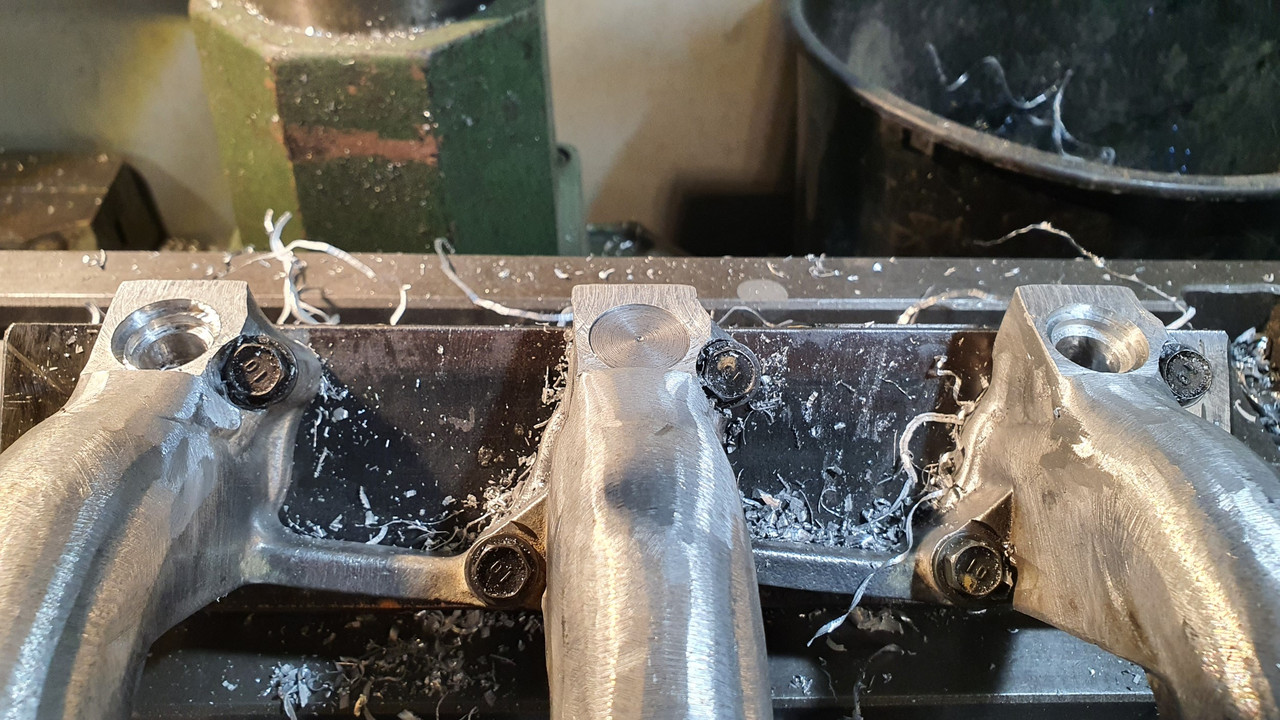
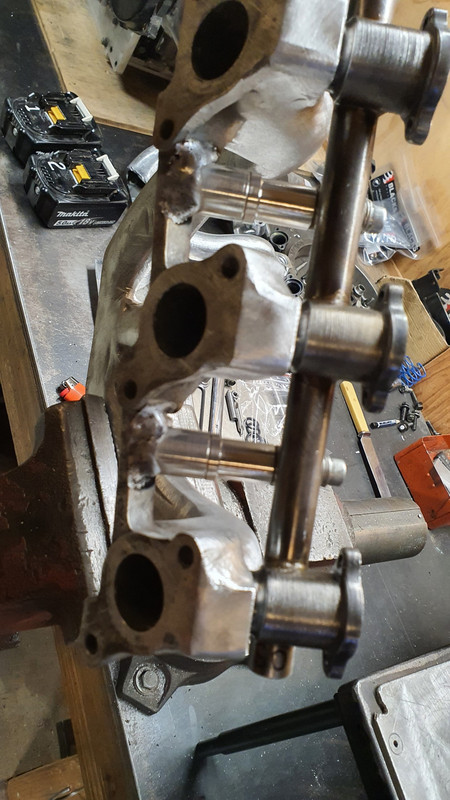
Now I had injector bosses and the holes were pointing in the right place..
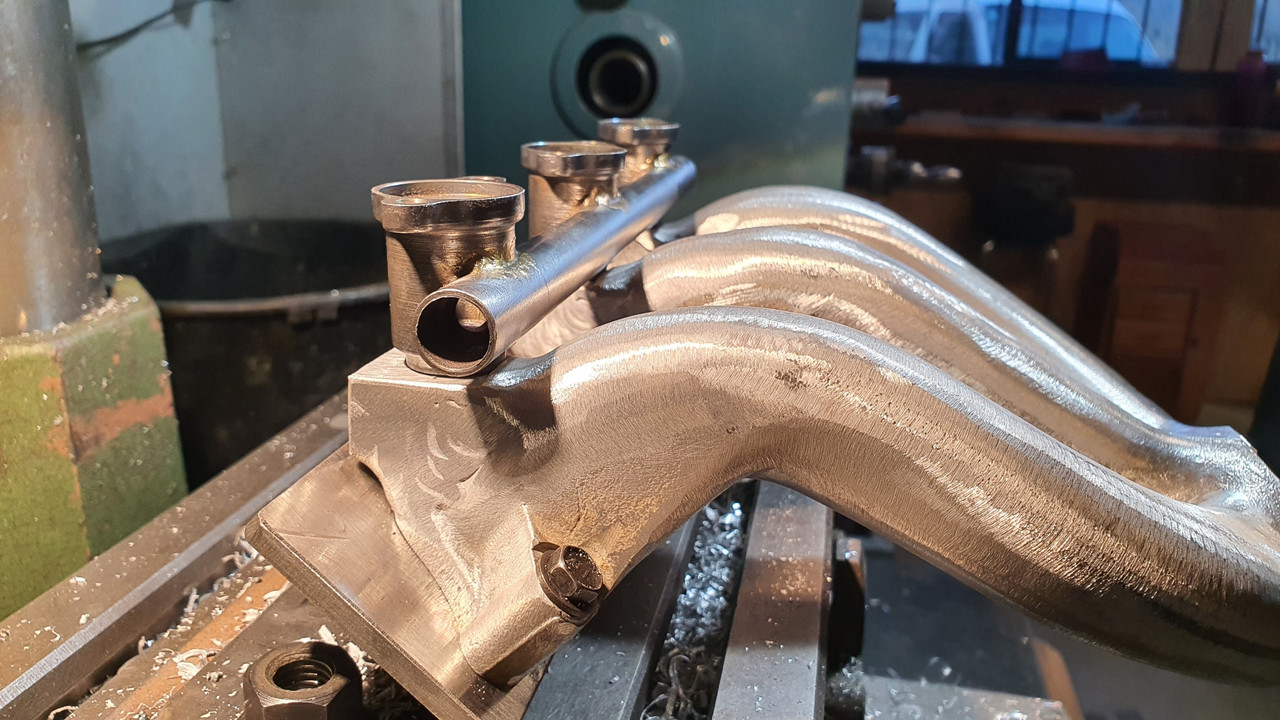
I have to hold them down in place though. So I made up some little steel bolt bosses..

Brazed them in place..
Machined up some bits of alloy, tapped out to suit the bolts and some spacers for between. Made a little clamp thingee to hold the injector rails in place along with some alloy O-rings (because well.. the rubber ones would probably have melted when I was welding)
Pics explain it fine..
Phew. That's that! Up to date now. Next thing is to design and build the plenum chamber. I'm going to have some fun with this bit. It's not going to be simple because I have a certain look I want along with a fun idea I have in mind.
Then he got covid in hospital. Bugger. Long story short he was on deaths door, pulled through with the aid of strong anti viral technology and great staff, slowly improved and is now in a home. His body is frail but his mind is strong. So I've been dealing with that.
Then Hannah and I got covid and it was not very fun. Being normally very fit out on the push bikes etc we have really noticed a huge loss in strength and lung efficiency. Getting better though.
So yeah.. this engine has been collecting dust. When I tested positive for covid I honestly thought I'd deal with it for a few days and then get heaps done on the engine while isolating. But my body had other ideas.
Anyway, I'm back onto it now. Quite a lot of photos to load up too.
Induction time. I have decided to make something from the existing inlet runners and use a central plenum chamber with a rear facing throttle body. Try to hide the TB and use a remote pod filter to draw in cool air from somewhere other than the top of the engine bay. I have a some very funky ideas for my plenum design and have a particular look I'm chasing with the setup. Looking forward to building that. But I need to sort out injection first.
Here are the stock runners, normally fed by two carbs that sit too high and would have fouled the rear parcel shelf...
Interestingly this engine has a neat feature in that the cylinder heads are identical as are the inlet runners. They could be swapped side to side. This was going to help with my modifications when setting up the mill etc.
in place..
Note the total lack of injector bosses..
First thing was to remove the (ugly) water jacket which was not going to be needed in my setup..
Much nicer looking and lighter too...
Lots of room for a suitable sized plenum..
Very nice smooth entries into the runners..
Now I needed to start looking at injector fitment. It has to be as neat and compact as possible. The spacing doesn't suit anything I could find so the rails will have to be custom. I decided against top feed injectors because they would be just too bulky. Side feed it was to be. I had a couple of ideas.
Bought another injector rail setup from a Nissan Micra K11 at the wreckers because the stock injectors have a very suitable rate (130cc) and are cheap and easy to get.
I also had a set of Mazda V6, as per fitted to my Viva, gifted to me by Steve @Transom
They were close and rather compact but it wasn't going to work without a lot of chopping and then the top caps with the wires set into the plastic would have been a pain to shorten and keep neat. Final nail for these was the injectors being just a bit high in flow rate (220cc) , running the risk of awkward tuning around idle on an engine with smaller fuel requirements.
K11 injectors it was. But the spacing is way off and they had ugly brackets all over them.
So I cut them up and ended up with just the injector housings and then played around with some 16mm tube and the mill. Bit of a test piece...
The fit was spot on..
Happy with that I welded two bits of tube onto a plate of steel and carefully milled the tubes, spaced to suit the inlet spacing...
a tidy up removing sharp edges with files and they came up neat..
I made a little jig to hold the injector housings onto the rail with the correct spacing so I could braze them in place..
Then out with the oxy acetylene and brazed them in place with silver solder. Note my sore nose where I had smacked it with a large branch when cleaning up a fallen tree. Hurty...
Now I have some side feed rails with the correct spacing
Next job was to create a place for them to fit. I needed to add some bosses to the inlet manifold and get the angle just right so the injectors would end up pointing as close to the back of the valve heads as possible. I cut up some chunks from a large bar of alloy. Then I milled them down to suit and tacked them in place...
Happy they were located correctly I fully welded them in place. The inlet casting was luckily of pretty decent quality and welded nice enough..
With them welded up and solid I could machine the bosses down in one hit, levelling them off at the correct angle and making sure the faces all lined up. I made a steel jig, set at the angle to suit (because my drill mill doesn't have an head adjustable for angle... oh how I'd love a larger knee mill)
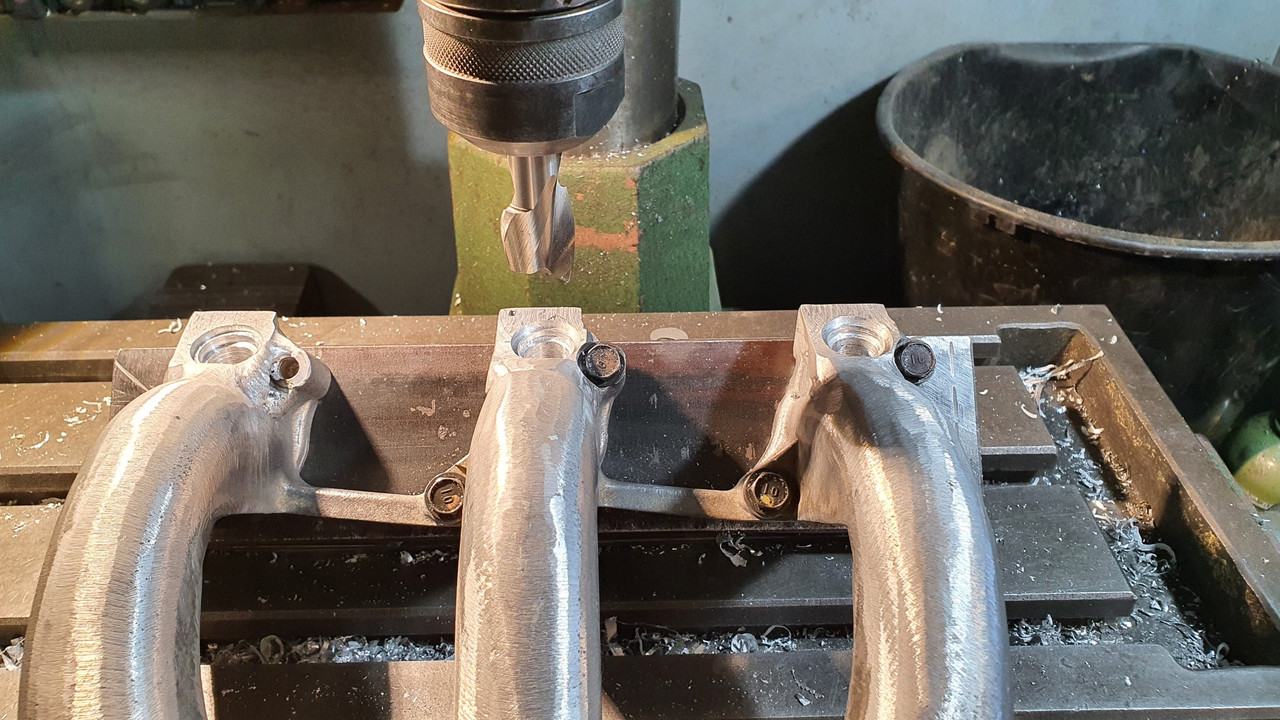
Now I was able to carefully mark and drill out the injector holes, then spot face the O-ring seats..
In order to aid with with marking and checking them I machined up a little button that fitted perfectly into the injector holes...
Annoyingly (silly me) I marked to first hole off wrong by 1mm and by the time I was at the last boss on that side I had to add some weld to make sure there was enough meat to house the O-ring...
I learned something and didn't repeat the mistake on the other side
Now I had injector bosses and the holes were pointing in the right place..
I have to hold them down in place though. So I made up some little steel bolt bosses..
Brazed them in place..
Machined up some bits of alloy, tapped out to suit the bolts and some spacers for between. Made a little clamp thingee to hold the injector rails in place along with some alloy O-rings (because well.. the rubber ones would probably have melted when I was welding)
Pics explain it fine..
Phew. That's that! Up to date now. Next thing is to design and build the plenum chamber. I'm going to have some fun with this bit. It's not going to be simple because I have a certain look I want along with a fun idea I have in mind.
Last edited by yoeddynz; 08-30-2022 at 07:30 AM.
08-30-2022, 04:02 PM
#51
Three Wheelin'
sorry to hear about the illnesses and very glad you seem past that now. what a great update. i continue to be very impressed with your metal skills!
the engine is looking cooler every day.
the engine is looking cooler every day.
The following users liked this post:
yoeddynz (08-30-2022)
08-30-2022, 05:35 PM
#52
Advanced
Thread Starter
Cheers. Yeah we are improving in time and as for Dad... well, he's bloody old and frail. He's never really been one for exercise though and he should know better because he's a retired doctor. He's just happy that he is still alive and has access to the internet
08-30-2022, 07:16 PM
#53
Pro
All I have to say is WOW! This entire project is beyond my comprehension.. Your workmanship and results are truly excellent.. Thank you very much for posting this story; I look forward to seeing it continue.
The following users liked this post:
yoeddynz (08-31-2022)
08-30-2022, 07:29 PM
#54
Rennlist Member
What a great build! Hope you and your dear ones health continues to improve. Looking forward to your updates.
The following users liked this post:
yoeddynz (08-31-2022)
The following users liked this post:
yoeddynz (10-06-2022)
10-06-2022, 06:52 AM
#57
Advanced
Thread Starter
Ok so I'm going split this next update up into a couple of posts spread apart because there's just too much to put up.
First off - the project and general life stuff was sort of put on hold for a while because sadly my Dad died about 3 weeks ago. I've been a bit over the place dealing with stuff and family things. I have not said anything about it except to a few friends but I wanted to mention it here now, not because I'm looking for sympathy but just to say what a cool old fella Dad was and in his memory I could pop up a few things I have learned over time more recently about the engineering history that's in my blood. Some of it is pretty neat I reckon and I thought I'd pop it up here.
My great grandfather, Alex Davidson and my grandfather, James Davidson, both worked at Argyll works in Scotland. Dad had written a letter to the NZ vintage car magazine, Beaded wheels, a few years ago about this along with some letters from Alex about his time at Argyll. I won't post it all up but here's the letter from my dad.
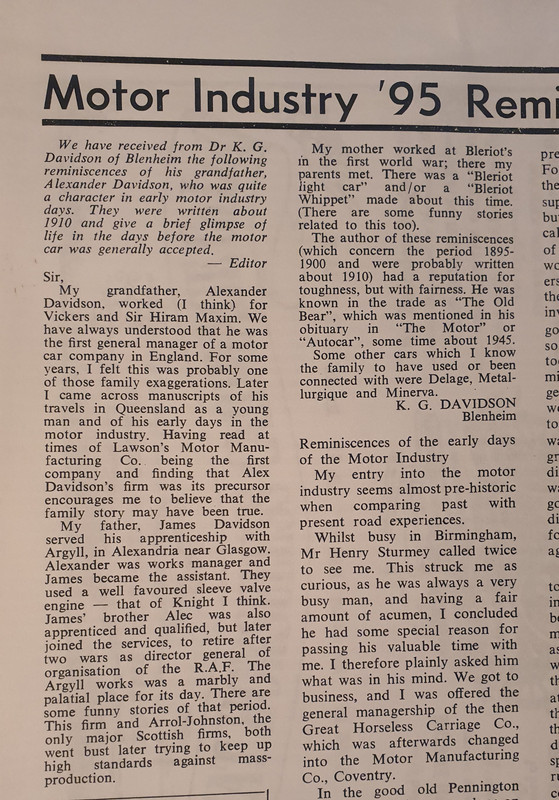
My great uncle Alexander Davidson was also an apprentice at Argyll but left after qualifying in his trade to join the Royal airforce. He went on to become Air vice marshell, served in both wars and eventually became director general of organisation. This was a pretty cool thing to find out. I have done some digging and found out more about him here..
https://www.rafweb.org/Biographies/Davidson_AP.htm
So in the last 2 months, going back and forth to see dad, finding out a few more bits of info about his past and dealing with his eventual downturn in health I have to say that other things like work, social outings, this project etc have been last on my mind. But I'm back into it. I had always wished that Dad might have got to go for a drive in the imp with the flat six but that just wasn't to be. Such is life. But at least he knew I was doing the project and he had knew full well that one of his sons was following in the Davidson footsteps of being a total engineer/petrol headDad was a good dude. I miss him and its a case of the the often heard thing - I wish I had spent more time with him and gained more insight into his past.
He was also very athletic. Must be where I got it from..
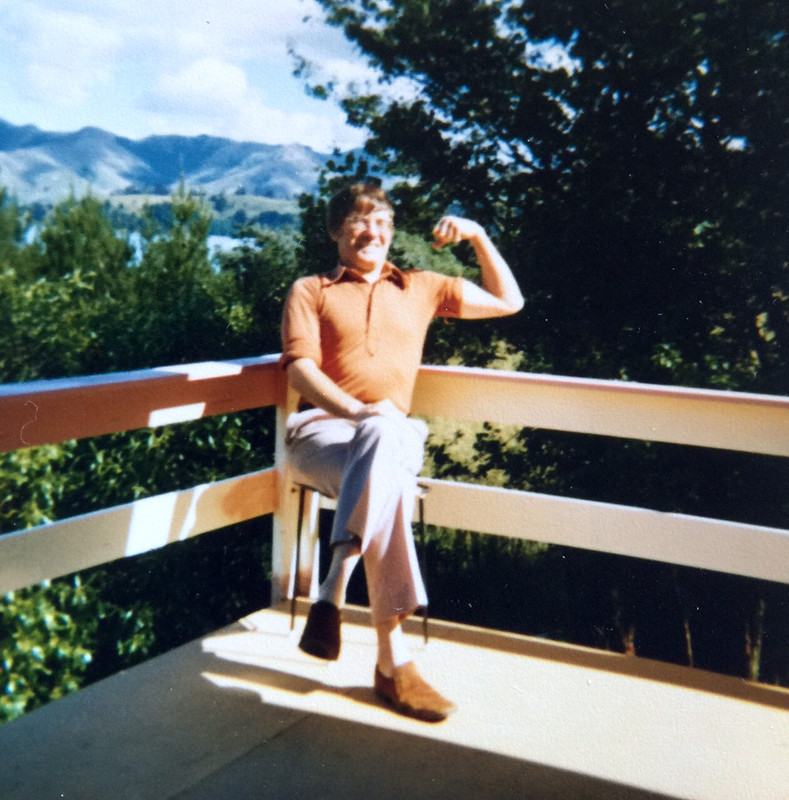
Its also neat that I have fallen for a wee Scottish car after all those years (although Dads last cars, and those of his Brother Jim who was a motor engineer, have mainly been Datsuns - but hey, there's a connection there too)
Here's dad in the last imp outing he had..

Yeah. So that happened. Back into it now, along with catching up on a huge list of (very patient) customers jobs.
Now where was I ?
Inlet stuff. I had some nice runners set up with some injectors. They looked like this when on the engine..
.jpg)
.jpg)
Now a while ago the very kind Chris @chris r sent me this package of delights. I'd only asked for an old Honda throttle body but look what I got...
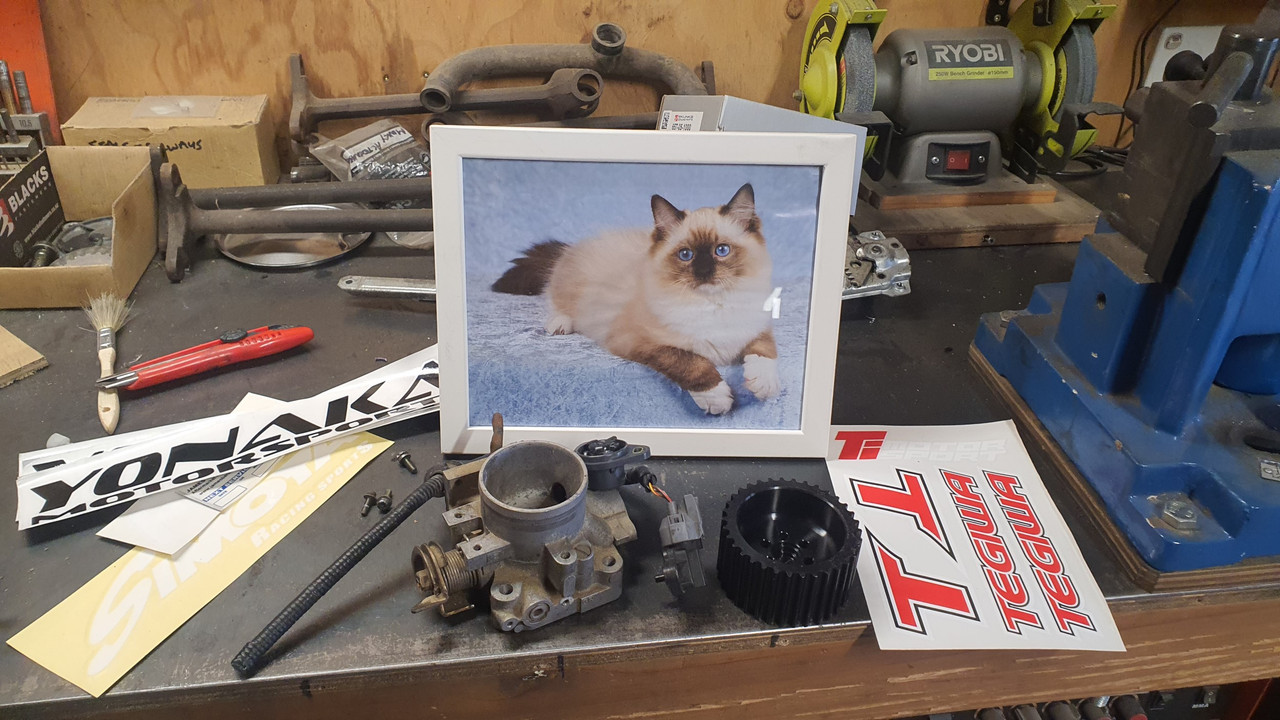
Wow. The random framed cat picture was really the icing on the cake! As for the super charger pulley, well I'm not sure what he might have been hinting at there. Anyway- now I had a 55mm throttle body that was just a bit more in butterfly surface area than the original twin honda items and was pretty compact. It would possibly sit about here, where I had roughly planned (because I was sort of making this up as I went along, with a few sketches that you might get to see later)...
.jpg)
inlet pointing this way? maybe? not sure...
.jpg)
Now I had to start building the inlet runners towards the centre and make some flanges to join to a plenum. I welded some bits of 3mm alloy plate cut roughly to size.
.jpg)
.jpg)
On the inside too. Awkward getting in there at the right angle. Guess where I touched the tungsten..
.jpg)
Now this plate was some random plate we got from a friend who imports all sorts of engineering stuff and timber, old caravan bases etc from Germany. Much of it comes from scrap a scrap metal dealer there because its amazing what they scrap there that is still of good value here. I have used some of it for a few jobs here and there but shouldn't really have used it on this because its a very very hard alloy and it cracks quite easily. I welded the bits in and even though I had pre-heated the inlets to reduce localised stress one of the weld zones still cracked. Suspect the wrong filler used too. Mostly I weld 5000 series and use appropriate rods but this is probably 7000. Silly me. You'll see that this created a bit of extra work later on for me.
Anyway- I sorted the crack out and continued on. Cut the bit down..
.jpg)
Milled it square in the jig I still had left set up on the mill so everything with the inlet runners/plenum build that has to be will be square and parallel..
.jpg)
then I cut some flanges out (6mm thick normal, not poncy, alloy)
.jpg)
Drilled them in pairs, spot facing and tapping bits as I went..
.jpg)
I'd bought a load of shiny stainless dome head socket screws and it was playtime assembling things at the bench..
.jpg)
Nice place to be for me at this time. Focus on something and enjoy the ambience. Fire going, music playing and many cups of coffee etc...
.jpg)
So now I had some flanges that matched I welded one half of each onto the runners...
.jpg)
Great!!! I'm getting somewhere. Bolted the runners up and had a look.
.jpg)
Oh curse word!!!! What have I done here? Some things not right. I'd gone and forgotten that the runners are offset to each other by about 15mm or thereabouts. I could try and work around it when I make the plenum but it'll just get messy and not look right. So I had to cut some little bits of alloy up...
.jpg)
welded them in place..
.jpg)
.jpg)
...and accepted the fact that the bolts are not symmetrical at each end any more. But they are still pretty shiny s/s bolts so there.
Then I cut some alloy up in the table saw and milled them out like this...
.jpg)
The reason why will become known next time I post.
So that throttle body. Well it turns out that facing it sideways wasn't the neatest way I do it. I was going to have to use a very tight alloy bend to make it work and the TB would have sat at a really awkward angle in two planes. Also, a big also... the engine would not have been symmetrical !
I sussed out a neater way to place it that will also allow for a nicer path of flexible pipe to feed it from the remote filter. Now I had a plan I could make more things. I cut a out a bit of that aforementioned 3mm plate and made a rectangular hole in it, a bit larger in surface area than the 55mm TB. I then cut some lobster sections from some 60mm tube and pieced together a transitional bit of tubework that would connect the round hole to the rectangle hole from underneath. This is to allow the runners to draw their required air from the centre, evenly like with no favouritism.
Well it works like this in my brain so I'm running with it.
.jpg)
.jpg)
.jpg)
I put the 4 jaw chuck onto the lathe and I threw a chunky bit of 8mm plate into it. Drilled a big hole and bored it out to suit the TB..
.jpg)
Drilled and tapped some holes and cut it closer to the shape of the TB flange. It will eventually be welded onto the pipe..
.jpg)
Then I had a sleepless night thinking about that 3mm plate. Will it crack down the line?.. as yet, until the engine is run up to temp over a few cycles I won't no how much it might expand and will there be enough heat soak and flexibility with what I am building to allow for expansion. Phew ! Yep - some thinking gets done about this as I try to sleep.
It played on my mind. So in order to sleep easier I bought some bog standard softer 3mm plate and this happened..
.jpg)
Cleaned up and re-welded onto the new bit of plate..
.jpg)
.jpg)
And that is about where I am up to with the inlet so far. I'm pretty happy with the progress given some mistakes etc.
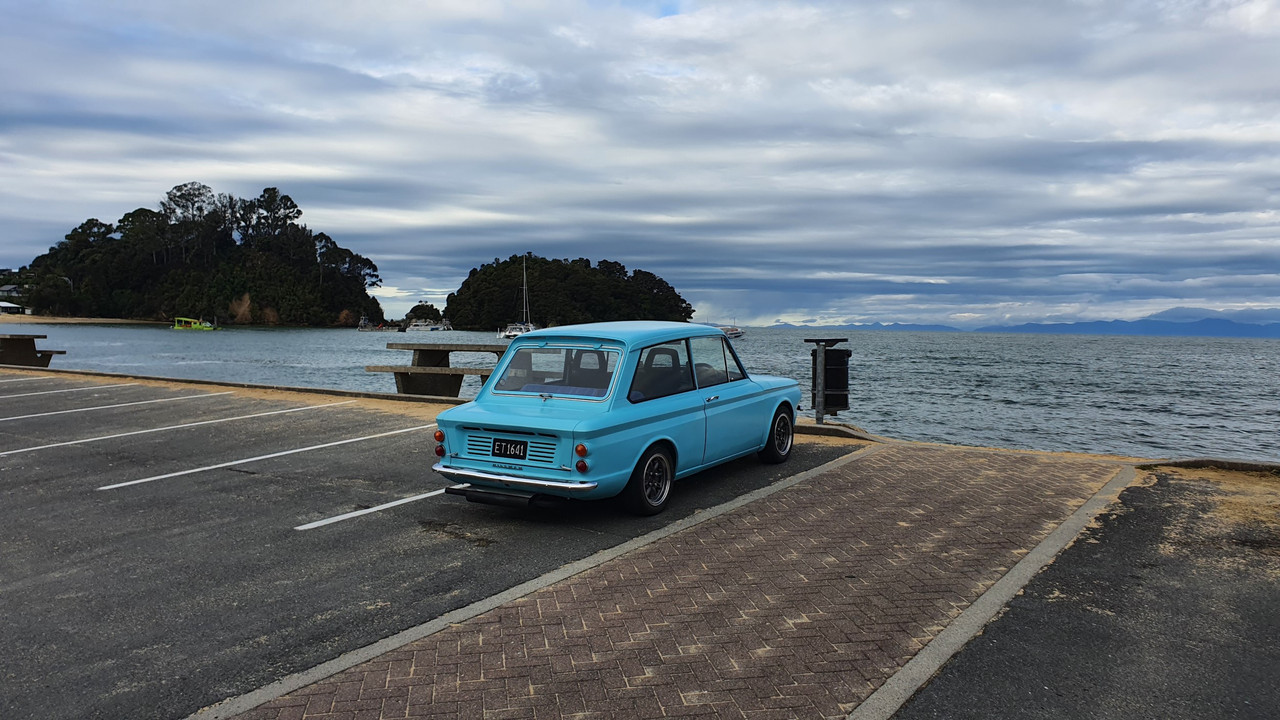
In other Imp news.. I finally got my new screen in place! Its been 5 months since I last drove the car, which was when a stone had decided to leave someone's tyre and make a bid for my cars interior. 5 months is the longest I've not driven the car since getting it on the road. But hey, it was safely stashed away in a very dry garage over a wet winter and I've had plenty of other things to do.
Screen fitted , a quick test drive to the beach. Its so fun to drive. I'd forgotten how nice it was.
Time for a warrant of fitness test. But I first had to sort out a number plate light. One that was hidden away and reliable. I made use of a couple of neat little sealed leds, 10mm in diameter, and placed them in some alloy. This was bolted to a stainless mount that I glued to the inside of the fibreglass engine cover. I ran the wires up the edge of the lid to hide them as best I could. Pics..
.jpg)
.jpg)
.jpg)
Finished the wiring yesterday morning in the comfort of the new garage. Very handy..
.jpg)
Took it for a wof and its now legal again
Hopefully back soon with more updates.
Alex.
First off - the project and general life stuff was sort of put on hold for a while because sadly my Dad died about 3 weeks ago. I've been a bit over the place dealing with stuff and family things. I have not said anything about it except to a few friends but I wanted to mention it here now, not because I'm looking for sympathy but just to say what a cool old fella Dad was and in his memory I could pop up a few things I have learned over time more recently about the engineering history that's in my blood. Some of it is pretty neat I reckon and I thought I'd pop it up here.
My great grandfather, Alex Davidson and my grandfather, James Davidson, both worked at Argyll works in Scotland. Dad had written a letter to the NZ vintage car magazine, Beaded wheels, a few years ago about this along with some letters from Alex about his time at Argyll. I won't post it all up but here's the letter from my dad.
My great uncle Alexander Davidson was also an apprentice at Argyll but left after qualifying in his trade to join the Royal airforce. He went on to become Air vice marshell, served in both wars and eventually became director general of organisation. This was a pretty cool thing to find out. I have done some digging and found out more about him here..
https://www.rafweb.org/Biographies/Davidson_AP.htm
So in the last 2 months, going back and forth to see dad, finding out a few more bits of info about his past and dealing with his eventual downturn in health I have to say that other things like work, social outings, this project etc have been last on my mind. But I'm back into it. I had always wished that Dad might have got to go for a drive in the imp with the flat six but that just wasn't to be. Such is life. But at least he knew I was doing the project and he had knew full well that one of his sons was following in the Davidson footsteps of being a total engineer/petrol head
Dad was a good dude. I miss him and its a case of the the often heard thing - I wish I had spent more time with him and gained more insight into his past.He was also very athletic. Must be where I got it from..
Its also neat that I have fallen for a wee Scottish car after all those years (although Dads last cars, and those of his Brother Jim who was a motor engineer, have mainly been Datsuns - but hey, there's a connection there too)
Here's dad in the last imp outing he had..
Yeah. So that happened. Back into it now, along with catching up on a huge list of (very patient) customers jobs.
Now where was I ?
Inlet stuff. I had some nice runners set up with some injectors. They looked like this when on the engine..
Now a while ago the very kind Chris @chris r sent me this package of delights. I'd only asked for an old Honda throttle body but look what I got...
Wow. The random framed cat picture was really the icing on the cake! As for the super charger pulley, well I'm not sure what he might have been hinting at there. Anyway- now I had a 55mm throttle body that was just a bit more in butterfly surface area than the original twin honda items and was pretty compact. It would possibly sit about here, where I had roughly planned (because I was sort of making this up as I went along, with a few sketches that you might get to see later)...
inlet pointing this way? maybe? not sure...
Now I had to start building the inlet runners towards the centre and make some flanges to join to a plenum. I welded some bits of 3mm alloy plate cut roughly to size.
On the inside too. Awkward getting in there at the right angle. Guess where I touched the tungsten..
Now this plate was some random plate we got from a friend who imports all sorts of engineering stuff and timber, old caravan bases etc from Germany. Much of it comes from scrap a scrap metal dealer there because its amazing what they scrap there that is still of good value here. I have used some of it for a few jobs here and there but shouldn't really have used it on this because its a very very hard alloy and it cracks quite easily. I welded the bits in and even though I had pre-heated the inlets to reduce localised stress one of the weld zones still cracked. Suspect the wrong filler used too. Mostly I weld 5000 series and use appropriate rods but this is probably 7000. Silly me. You'll see that this created a bit of extra work later on for me.
Anyway- I sorted the crack out and continued on. Cut the bit down..
Milled it square in the jig I still had left set up on the mill so everything with the inlet runners/plenum build that has to be will be square and parallel..
then I cut some flanges out (6mm thick normal, not poncy, alloy)
Drilled them in pairs, spot facing and tapping bits as I went..
I'd bought a load of shiny stainless dome head socket screws and it was playtime assembling things at the bench..
Nice place to be for me at this time. Focus on something and enjoy the ambience. Fire going, music playing and many cups of coffee etc...
So now I had some flanges that matched I welded one half of each onto the runners...
Great!!! I'm getting somewhere. Bolted the runners up and had a look.
Oh curse word!!!! What have I done here? Some things not right. I'd gone and forgotten that the runners are offset to each other by about 15mm or thereabouts. I could try and work around it when I make the plenum but it'll just get messy and not look right. So I had to cut some little bits of alloy up...
welded them in place..
...and accepted the fact that the bolts are not symmetrical at each end any more. But they are still pretty shiny s/s bolts so there.
Then I cut some alloy up in the table saw and milled them out like this...
The reason why will become known next time I post.
So that throttle body. Well it turns out that facing it sideways wasn't the neatest way I do it. I was going to have to use a very tight alloy bend to make it work and the TB would have sat at a really awkward angle in two planes. Also, a big also... the engine would not have been symmetrical !
I sussed out a neater way to place it that will also allow for a nicer path of flexible pipe to feed it from the remote filter. Now I had a plan I could make more things. I cut a out a bit of that aforementioned 3mm plate and made a rectangular hole in it, a bit larger in surface area than the 55mm TB. I then cut some lobster sections from some 60mm tube and pieced together a transitional bit of tubework that would connect the round hole to the rectangle hole from underneath. This is to allow the runners to draw their required air from the centre, evenly like with no favouritism.
Well it works like this in my brain so I'm running with it.
I put the 4 jaw chuck onto the lathe and I threw a chunky bit of 8mm plate into it. Drilled a big hole and bored it out to suit the TB..
Drilled and tapped some holes and cut it closer to the shape of the TB flange. It will eventually be welded onto the pipe..
Then I had a sleepless night thinking about that 3mm plate. Will it crack down the line?.. as yet, until the engine is run up to temp over a few cycles I won't no how much it might expand and will there be enough heat soak and flexibility with what I am building to allow for expansion. Phew ! Yep - some thinking gets done about this as I try to sleep.
It played on my mind. So in order to sleep easier I bought some bog standard softer 3mm plate and this happened..
Cleaned up and re-welded onto the new bit of plate..
And that is about where I am up to with the inlet so far. I'm pretty happy with the progress given some mistakes etc.
In other Imp news.. I finally got my new screen in place! Its been 5 months since I last drove the car, which was when a stone had decided to leave someone's tyre and make a bid for my cars interior. 5 months is the longest I've not driven the car since getting it on the road. But hey, it was safely stashed away in a very dry garage over a wet winter and I've had plenty of other things to do.
Screen fitted , a quick test drive to the beach. Its so fun to drive. I'd forgotten how nice it was.
Time for a warrant of fitness test. But I first had to sort out a number plate light. One that was hidden away and reliable. I made use of a couple of neat little sealed leds, 10mm in diameter, and placed them in some alloy. This was bolted to a stainless mount that I glued to the inside of the fibreglass engine cover. I ran the wires up the edge of the lid to hide them as best I could. Pics..
Finished the wiring yesterday morning in the comfort of the new garage. Very handy..
Took it for a wof and its now legal again
Hopefully back soon with more updates.
Alex.
Last edited by yoeddynz; 10-06-2022 at 04:10 PM.
The following users liked this post:
moburki (10-12-2022)
10-07-2022, 06:07 AM
#58
Three Wheelin'

Love the work, but this really does it for me!
I want to come and sit in a lawn chair beside the fire, chat, watch you work...
Does the plenum and TB need some rubber connectors or similar to absorb vibrations, or is a rigid run OK?
Stay tuned...
The following users liked this post:
moburki (10-12-2022)
10-07-2022, 02:57 PM
#59
Three Wheelin'
I'm sorry to hear about your loss.
i like your progress on the intake. looking great!
i like your progress on the intake. looking great!
11-01-2022, 06:34 AM
#60
Advanced
Thread Starter
I've finally finished the inlet plenum (although I want to add some paint/tidy some bits) and I'm pretty stoked with it.
The end result is a bit of fun. Just mucking about after I had some ideas pop into my head and wouldn't leave. I had to do it.
So where I left off last time I had made the base of the plenum which I continued on piecing together, changing some ideas and sussing out construction issues as I went along while keeping the design close to some original drawings that I'd done while visiting my parents.
Building the box...
.jpg)
.jpg)
made some stainless trims to smooth flow out of the rectangular hole feeding the plenum and also hide interior welds...
.jpg)
Tubey bit sticks up facing towards the front of the car...
.jpg)
Boxy bits getting tacked together. Welded on the inside too. Enough tacks and welds that it would hold fast and not 'pull' when the outside welds were added
.jpg)
Tacked together bits getting welded on the outside...
.jpg)
Stumpy elephant trunk... (it could be described worse)
.jpg)
Back to milling bits of alloy...
.jpg)
Making these bits..
.jpg)
Which were then very, very carefully bent to suit the curved lid of the plenum...
.jpg)
Drilled and tapped to suit the plenum body...
.jpg)
Lid fits nicely onto the body, sealed with high density foam and held in place with dome headed socket screws.
Then the throttle body flange needed welding on. I took my time so nothing warped but luckily it was pretty thick ally anyway. Tacks then welding. Added another layer so I could file it down flat and have a good sealing area. In pics..
.jpg)
.jpg)
.jpg)
Next thing to make was a little curved bit of alloy that would surround a bit of acrylic. I started with some small section alloy capping and milled it down..
.jpg)
It had to be bent in 2 planes. Out with the shrinker stretcher which luckily did almost all of what I needed, the rest being finished in a vice with hammers and pliers.
.jpg)
Turned out like this...
.jpg)
I got some 5mm acrylic and cut it to the right size. I made a form from two bits of alloy, shaped to the same curvature as the lid. Out with the heat gun...
.jpg)
Setting the forms and squeezing together...
.jpg)
Checking the curves formed are correct ..
.jpg)
Pretty good matches the alloy rim...
.jpg)
Drilled some holes in the alloy and through the acrylic (carefully.....! )
.jpg)
Around the same time as I was playing with bits of plastic some leds with a controller that I'd bought online turned up. I chopped them up and reconfigured bits to suit the underside of the lid. Tiny little solder pads on these. I checked they worked...
.jpg)
A hole was cut in the plenum lid to suit the acrylic and alloy rim, which was then bolted in place with little socket head screws, again sealed with foam.
Neat.
Now I could look inside.
Then I stuck those led lights to the underside of the lid.
This was all needed because these little treats turned up a while back after I first had the ideas pop into my head. (thanks Ali express)...
.jpg)
Lego fun..
.jpg)
The detail...
.jpg)
I glued the Mandos so they'd never come apart.
.jpg)
They got screwed and glued onto a little section of alloy. They were then bolted into their new forever spaceship home complete with some signage ...
.jpg)
.jpg)
Zooming out from the front of the spaceship/engine...
_(Custom).jpg)
_(Custom).jpg)
Plenum sits nice and low...
_(Custom).jpg)
I took a little video. I couldn't resist...
Fun is over. I now have to crack on with boring water pipes and exhaust manifold building (I must order some stainless bends!!!!)
But yeah- I'm pretty happy with what I have just made. A bit of silly fun I know but hey- I'm not a very serious person
I'll really enjoy seeing the response the 'Mandalorian spaceship' gets from the more serious type of enthusiasts at car shows in the future. I hope it works out for me and this is a thing that happens.
The end result is a bit of fun. Just mucking about after I had some ideas pop into my head and wouldn't leave. I had to do it.
So where I left off last time I had made the base of the plenum which I continued on piecing together, changing some ideas and sussing out construction issues as I went along while keeping the design close to some original drawings that I'd done while visiting my parents.
Building the box...
made some stainless trims to smooth flow out of the rectangular hole feeding the plenum and also hide interior welds...
Tubey bit sticks up facing towards the front of the car...
Boxy bits getting tacked together. Welded on the inside too. Enough tacks and welds that it would hold fast and not 'pull' when the outside welds were added
Tacked together bits getting welded on the outside...
Stumpy elephant trunk... (it could be described worse)
Back to milling bits of alloy...
Making these bits..
Which were then very, very carefully bent to suit the curved lid of the plenum...
Drilled and tapped to suit the plenum body...
Lid fits nicely onto the body, sealed with high density foam and held in place with dome headed socket screws.
Then the throttle body flange needed welding on. I took my time so nothing warped but luckily it was pretty thick ally anyway. Tacks then welding. Added another layer so I could file it down flat and have a good sealing area. In pics..
Next thing to make was a little curved bit of alloy that would surround a bit of acrylic. I started with some small section alloy capping and milled it down..
It had to be bent in 2 planes. Out with the shrinker stretcher which luckily did almost all of what I needed, the rest being finished in a vice with hammers and pliers.
Turned out like this...
I got some 5mm acrylic and cut it to the right size. I made a form from two bits of alloy, shaped to the same curvature as the lid. Out with the heat gun...
Setting the forms and squeezing together...
Checking the curves formed are correct ..
Pretty good matches the alloy rim...
Drilled some holes in the alloy and through the acrylic (carefully.....! )
Around the same time as I was playing with bits of plastic some leds with a controller that I'd bought online turned up. I chopped them up and reconfigured bits to suit the underside of the lid. Tiny little solder pads on these. I checked they worked...
A hole was cut in the plenum lid to suit the acrylic and alloy rim, which was then bolted in place with little socket head screws, again sealed with foam.
Neat.
Now I could look inside.
Then I stuck those led lights to the underside of the lid.
This was all needed because these little treats turned up a while back after I first had the ideas pop into my head. (thanks Ali express)...
Lego fun..
The detail...
I glued the Mandos so they'd never come apart.
They got screwed and glued onto a little section of alloy. They were then bolted into their new forever spaceship home complete with some signage ...
Zooming out from the front of the spaceship/engine...
Plenum sits nice and low...
I took a little video. I couldn't resist...
Fun is over. I now have to crack on with boring water pipes and exhaust manifold building (I must order some stainless bends!!!!)
But yeah- I'm pretty happy with what I have just made. A bit of silly fun I know but hey- I'm not a very serious person
I'll really enjoy seeing the response the 'Mandalorian spaceship' gets from the more serious type of enthusiasts at car shows in the future. I hope it works out for me and this is a thing that happens.