When you click on links to various merchants on this site and make a purchase, this can result in this site earning a commission. Affiliate programs and affiliations include, but are not limited to, the eBay Partner Network.
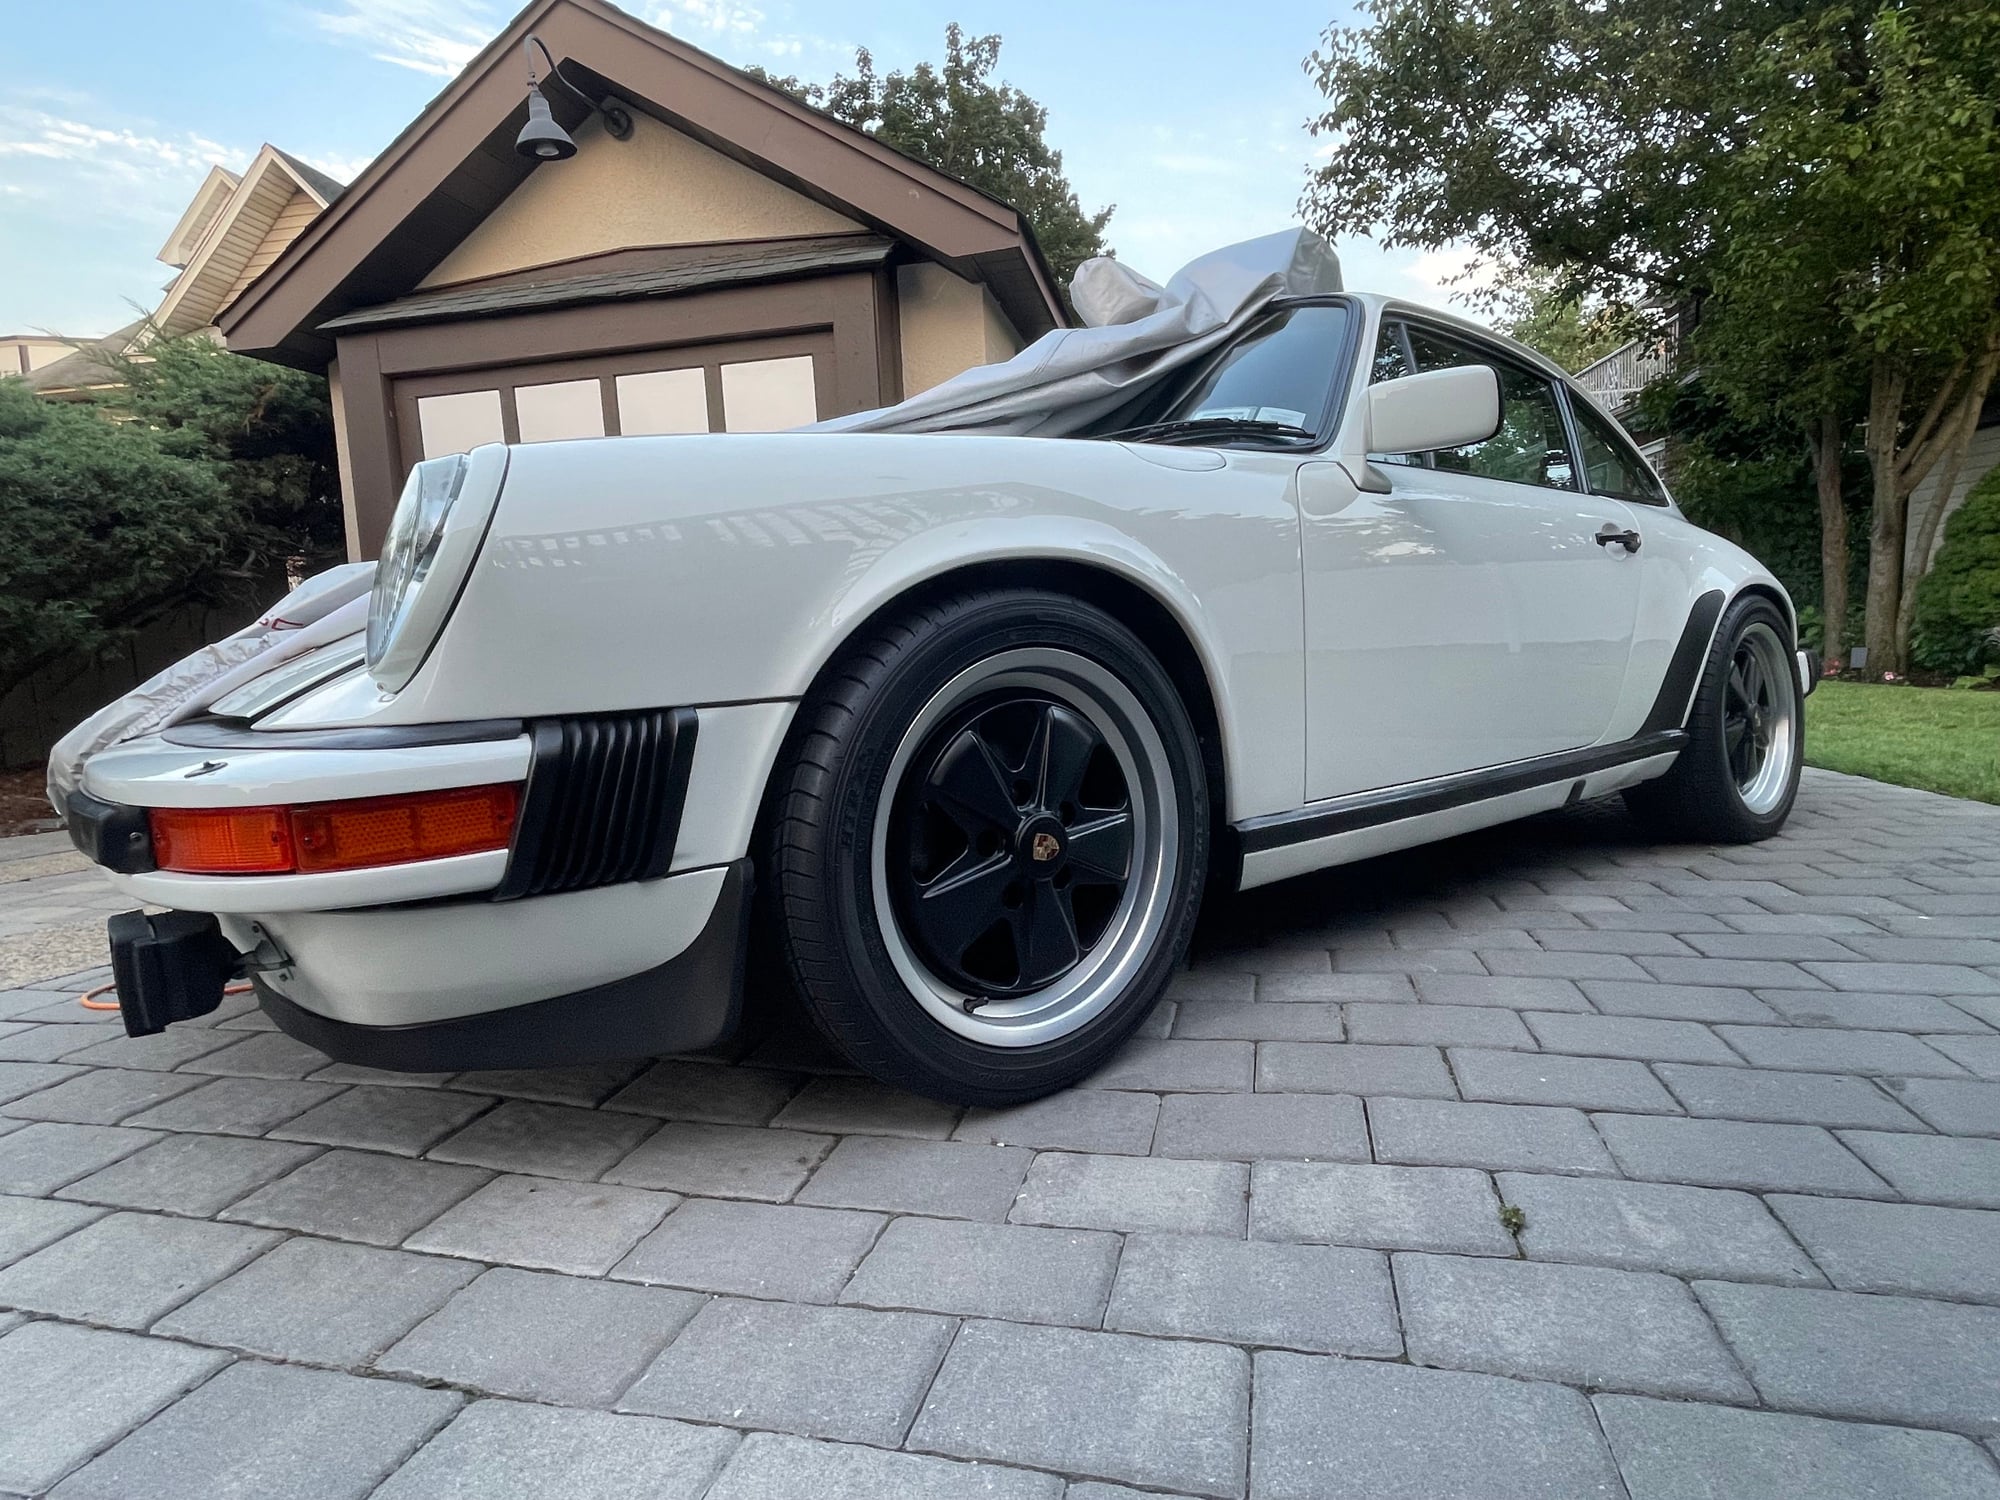
Picked this 911SC back in February 2023 and needed far more work then i initially anticipated (isn’t that always the case?). Had it shipped from Miami to the NYC/NJ area where i reside.
Added my touches/upgrades along the way and finally proud to drive her on the streets. It’s not a show queen, but I’ve tried to clean her up to present as best as she can!
I’ve had my ups/downs, bloody knuckles, tons of sweat & swearing put into this so far and learning a ton along the way!
my IG is @snwmble if anyone wants to take a journey there of stuff I’ve done along the way.
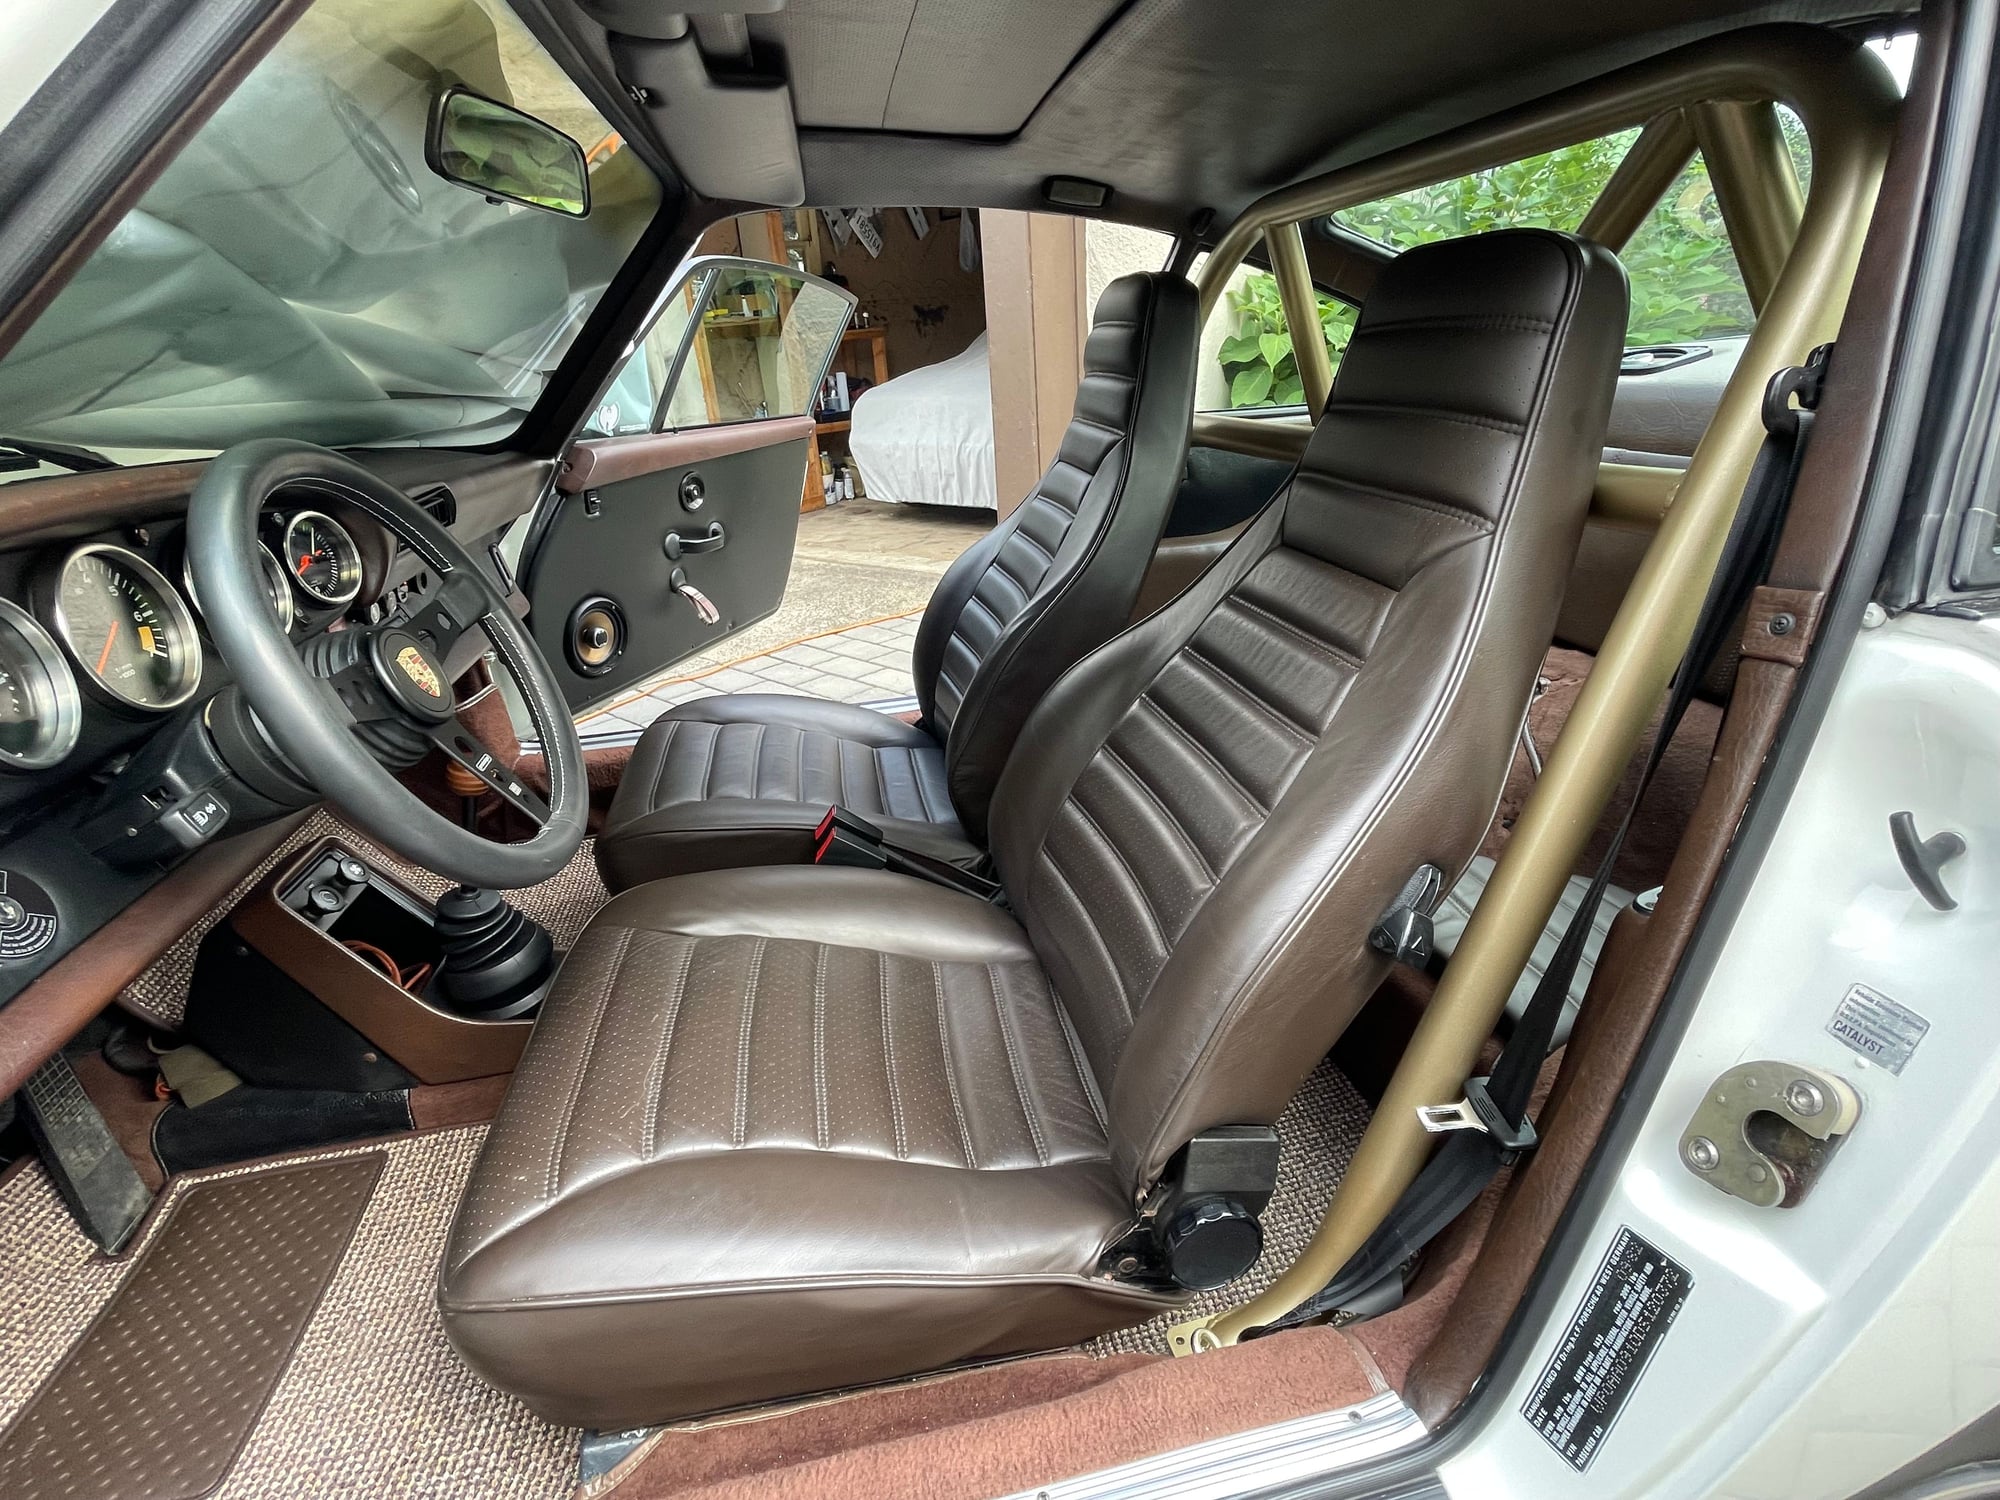
Took a Fuchs centercap, gutted it out and mated it to my Momo Prototipo horn Carbon airbox cover New mats to compliment the chocolate brown My fasten belt/brake light cover was missing (the red part). I couldn’t find these new, and the ones on eBay were selling for like $300-500. I found one made for a VW which had a different plug on the back. I was able to remove the red screen and clipped right into mine. Presto.
Had to replace both door stays since they didn’t hold the door much. Reinforced the door stay using Rennline reinforcement plates. This car had overspray on all the rubber trims, door handles, window trims. Removed all of them and replaced with new seals/trims The drivers door lock mechanism had a missing spring to the lock assembly. There was a little tab that kept me from locking this car door. I have a spare lock mechanism but for the time being i used JB weld putty and reached into the door to keep that tab from moving. Worked like a charm New door seals New door handles and seals Etched primed and painted the door trim New seals installed onto the door trims Looking all fresh now! No overspray!
takes me back , i did all this stuff when i got my car 15 years ago .... my advice, don't rush through it , its a labour of love. have had nothing to do on my SC for 10 years lol.
i imagine you are hitting it with Wurths satin black ? great stuff that
Was prepping my RS door card install and didn’t like how flimsy the lock/pin worked. Picked up a small screw & locking nut….and now i don’t have to fear that the locking pin will separate inside the door! Headlights worked only with the high beams on. Replaced the turn signal and fixed the issue Negative battery terminal was loose and wouldn’t tighten. Was in a bind, so a trip to AutoZone for a strap did the trick Replaced the gauge bulbs to a vintage led to keep it oem looking but brighter Speakers donated by a friend of mine Routed new wiring to all the speakers Blaupunkt Sqr-46 installed. Realized the reason the old radio didn’t work was the blown fuse by the ignition switch. I installed Kilmat to the floors and inside the doors Realized the RS door cards were going to expose the leading edge of the doors (which looked terrible). Got matte black vinyl and carefully cut them around the perimeter of the door. Worked like a charm! Aluminum door locks installed too along with brown tartan door pulls Car broke down….ended up being a bad coil Pulled the spark plugs and replaced them along with new plug wires, distributor cap Rear bumper removed for repaint and bumperette delete.
takes me back , i did all this stuff when i got my car 15 years ago .... my advice, don't rush through it , its a labour of love. have had nothing to do on my SC for 10 years lol.
i imagine you are hitting it with Wurths satin black ? great stuff that
thanks! I methodically worked on it on my free time over the last several months. I was actually using Duplicolor Trim paint. Works identical to the SEM trim paint i used to use
Didn’t really like the bumperette and was going to euro. Decided the cheaper route was just to have all the holes filled and repainted. My painter only charged me $300 to fill and paint. He used fiberglass to fill New bumper seals, bumper trim and license plate bracket installed
Removed the sugar scoop headlights with the Rennline LED headlights going in it’s place Took a long time for me to figure out how to install the painted trims, but finally got all the gaps right …installed all new orange turn signal lights as well as the rear tail light lenses Was going back and forth whether or not to remove the fog lights. Can’t seem to get them working (thinking it might be the switch itself which looks like a pain to get to). Found these grill covers online for $15. Looked like they were going to fit and figured a way to make them work! Not a look for everyone but i love it.
Lowered the front of the car since it was sitting too high from the time i got it The prior owner had blocked this for whatever reason. Was making the car run hot. I was going to plumb everything back to stock but tried out this flexible silicone hose and an exhaust reducer. Now the car runs cool and have heat! Replaced the steering rack, U-joint and turbo tie rods…..then had an alignment done 3.0 badge in light gold Old before pic of the interior Painted the rear side panels to match the RS cards
Car sprung an oil leak. Traced it down to this cam line. Didn’t want to remove the distributor so this crow socket was a lifesaver Drained the fuel tank since i had a fuel leak coming from the hose at the bottom of the tank. Replaced the filter along with fuel rated hoses U-joint replaced New belly pan cover Soaked the interior in leatherique oil Scrubbed all the leather now looking fresh! Installed brushed aluminum gauge rings 917 wood shift **** installed along w a Stomski short shifter assembly and coupling Liked the flexible silicone hose so i installed it on the SSI heat exchangers i have Old sticker was looking ratty. New one installed More stickefs Purists will hate me for this but growing up in Staten Island and loving Wu Tang, had to add my twist to my car Refreshed the spare with new paint Got SEM color matched Grand Prix white in a can and repainted my smugglers box cover and both rockers Rockers needed some love so i resprayed both sides Scrubbed all the wheel wells down
1. Your turn signal switch was likely melted keeping your high beam on . I hope you installed a relay kit to reroute headlight current directly to the lights and not the switch, or you will be replacing it again. I think jwest sells the kit if you have not put it in already..
2. Get rid of those clamps on your fuel line. There are special fuel line clamps specifically for that purpose.
don't get Walmart ones but this was just so you know what they look like ...
My coil also failed, but luckily i was literally on my street when it died after a 2 hour drive . I had the Brazilian paperweight. ( Silver coil ) i also got the MSD blaster but eventually got a used OE one as i just liked the original look.
looks like great projects
did you rebuild the pedal cluster with new bushings yet ? thats a fun one lol.. got my arm stuck in the bear trap.
i need to do do the steering shaft linkage universal joint also, its stopping my horn from working due to ground path isues.. how bad a job was it ?
i also ran the magnacor for a while but decided i liked stock look better so reverted to the braided shield lines...
interesting what you did for back dated heating, as you likely know there is left and right sheet metal ducting available for routing both driver and passenger side heat from engine to ducts, i see you kept original for drivers and used an adapter , but missed how you did passenger.
open to feedback for sure! Im learning as i go…..i actually already replaced those clamps with the kind that dont have the ridges. Had to redo that line bc i used the wrong hose the first time around.
as far as the backdated heat….i have just a hose from the engine bay into the right heat exchanger. I’m still debating if i want to retain my ac or not bc that will dictate replumbing hoses for the right side. The condenser is in the way.
the pedal aseembly was redone by the prior owner. All knew linkages on there

 11-01-2023, 12:17 PM