
New to Porsche.Just bought a 77 911 Coupe.
 06-25-2012, 10:01 PM
#1
Intermediate
Thread Starter

Join Date: Jun 2012
Posts: 46
Likes: 0
Received 0 Likes
on
0 Posts
Hey all,
My name is G.A., I'm 22 yeas old, like long walks on the beach, riding motorcycles, reading by a fire, and most recently, my newly acquired 1977 911 coupe.
The car has just a touch of 150k on it, but the previous owner put in a (supposed) 1983 3.0 with around 80k. Picked her up for a touch under $7,000 just a few weeks ago. I've been lurking here and over at Pelican to learn as much as I can before I start tearing into it completing the laundry list of little things she needs to be a spectacular car.
Want to say this is a great resource of info and it seems that most of the owners here are also pretty friendly and sociable as well.
Anyways, on to pictures, since I know that's the only reason most of you clicked on this thread. Going to have to switch from tablet to laptop to get these posted...
 06-25-2012, 10:31 PM
#2
Intermediate
Thread Starter
Join Date: Jun 2012
Posts: 46
Likes: 0
Received 0 Likes
on
0 Posts
Pardon the picture quality, they're off of my Evo. Most of them were taken before I bought the car as well, and I was in relatively tight quarters so the angles are less than stellar...


The second weekend I had it I was able to do a little cleaning up. Since it was father's day, why not spend some time at mom and dad's house to work on it together? Gotta dig a father/son project.
I bascially decided to vacuum out the frunk, but ended up finding rust and had a case of the "while I'm in here's". Ended up pulling all frunk frills and fuel tank to tackle the rust and decided to spray the well in a clean satin black. Porsche purists will probably hate it, but the car is getting new carpet up there and once it's there, nobody will know the difference.
Found lots of goodies in here, including a full factory tool kit, mini air compressor, an owner's manual in German, and even what have to be a few hundred dollars worth of legitimate Porsche shop binder manuals, a Chilton's manual, and other good-to-have literature.


Since I drove the Porsche (Bianca) to mom and dad's house, I had no choice but to button her up to drive home. Little bits of overspray cleaning and such will have to wait until the next day I have more time off.
I'll update the thread with new fixes and mods as time and money permit. I've been flipping cars for years on the side. Before I bought this, I figured I'd keep it for the Summer, clean it up and a bit, and then turn it out. After a few weeks of ownership, however, I'm 99.999% convinced this car is going to be with me for a long time. It's the most fun I've ever had in a car. That says a lot coming from a background like mine.
On the right-off-the-bat to do list, in no particular order:
1) Fix odometer and fuel gauge
2) Buy a gel-core battery
3) New gear lube (second grinds if you don't double clutch at high RPM)
4) Re-wrap sunvisors
5) Clean up overspray on trim from a lackluster prep job from the PO's body guy
6) Refinish wheels
7) Alignment and balance (including fixing a small bend in one of the front wheels
8) Weld in some reinforcement in the front subframe (?) where the battery acid collected and ate through the 'square' metail under the boot
9) Find which bushing in the front is causing a 'pop' sound when making hard left turns, then replacing that set
10) Sand, cut, and buff
11) Restore/replace body mouldings (rubber, sunroof, etc...)
12) Fix the sunroof!
13) New window regulators and levers/***** (It's a PITA rolling them up and down with no *****...)
14) Reposition/adhere the rubber on the whale tail as it's separating from the metal on the driver's side
15) Possibly tint
16) Have the radio wiring cleaned up by my stereo guy. Whoever put the aftermarket radio wiring in was either Helen Keller or someone who idolized her.
17) Replace the professionally taped up heather hose in the engine bay (can be seen in the pictures)
18) Oil/filter/plugs/wires/cap/rotor. Car runs great right now, but it wouldn't hurt to have a nice, documented baseline.
19) Fix the passenger's side mirror motor or connections. Driver's side works great, but the other side is manual only right now.
20) Adjust/ tighten the seat brackets and rails. They're a little sloppy.
Etc, etc... The car is really a very good one, especially for the age and miles. As stated before, lots of little things. It feels very tight, starts up with no hesitation, pulls strong, sounds great, etc... Mechanically, unless I have a specific reason, I'm not doing much to it in the immediate future. My dealerships' mechanic (one of those mad scientist genius types) has been through the car and I trust the guy wholeheartedly (mostly) when he tells me it's in good mechanical shape.
The second weekend I had it I was able to do a little cleaning up. Since it was father's day, why not spend some time at mom and dad's house to work on it together? Gotta dig a father/son project.
I bascially decided to vacuum out the frunk, but ended up finding rust and had a case of the "while I'm in here's". Ended up pulling all frunk frills and fuel tank to tackle the rust and decided to spray the well in a clean satin black. Porsche purists will probably hate it, but the car is getting new carpet up there and once it's there, nobody will know the difference.
Found lots of goodies in here, including a full factory tool kit, mini air compressor, an owner's manual in German, and even what have to be a few hundred dollars worth of legitimate Porsche shop binder manuals, a Chilton's manual, and other good-to-have literature.
Since I drove the Porsche (Bianca) to mom and dad's house, I had no choice but to button her up to drive home. Little bits of overspray cleaning and such will have to wait until the next day I have more time off.
I'll update the thread with new fixes and mods as time and money permit. I've been flipping cars for years on the side. Before I bought this, I figured I'd keep it for the Summer, clean it up and a bit, and then turn it out. After a few weeks of ownership, however, I'm 99.999% convinced this car is going to be with me for a long time. It's the most fun I've ever had in a car. That says a lot coming from a background like mine.
On the right-off-the-bat to do list, in no particular order:
1) Fix odometer and fuel gauge
2) Buy a gel-core battery
3) New gear lube (second grinds if you don't double clutch at high RPM)
4) Re-wrap sunvisors
5) Clean up overspray on trim from a lackluster prep job from the PO's body guy
6) Refinish wheels
7) Alignment and balance (including fixing a small bend in one of the front wheels
8) Weld in some reinforcement in the front subframe (?) where the battery acid collected and ate through the 'square' metail under the boot
9) Find which bushing in the front is causing a 'pop' sound when making hard left turns, then replacing that set
10) Sand, cut, and buff
11) Restore/replace body mouldings (rubber, sunroof, etc...)
12) Fix the sunroof!
13) New window regulators and levers/***** (It's a PITA rolling them up and down with no *****...)
14) Reposition/adhere the rubber on the whale tail as it's separating from the metal on the driver's side
15) Possibly tint
16) Have the radio wiring cleaned up by my stereo guy. Whoever put the aftermarket radio wiring in was either Helen Keller or someone who idolized her.
17) Replace the professionally taped up heather hose in the engine bay (can be seen in the pictures)
18) Oil/filter/plugs/wires/cap/rotor. Car runs great right now, but it wouldn't hurt to have a nice, documented baseline.
19) Fix the passenger's side mirror motor or connections. Driver's side works great, but the other side is manual only right now.
20) Adjust/ tighten the seat brackets and rails. They're a little sloppy.
Etc, etc... The car is really a very good one, especially for the age and miles. As stated before, lots of little things. It feels very tight, starts up with no hesitation, pulls strong, sounds great, etc... Mechanically, unless I have a specific reason, I'm not doing much to it in the immediate future. My dealerships' mechanic (one of those mad scientist genius types) has been through the car and I trust the guy wholeheartedly (mostly) when he tells me it's in good mechanical shape.
Last edited by MongooseGA; 06-25-2012 at 10:48 PM.
06-25-2012, 10:50 PM
#3
Intermediate
Thread Starter
Join Date: Jun 2012
Posts: 46
Likes: 0
Received 0 Likes
on
0 Posts
By the way, the VIN is 9117301805. I've been looking for an online decoder with little success. If anyone can point me in the right direction, it'd be greatly appreciated.
 06-26-2012, 01:29 AM
#5
Intermediate
Thread Starter
Join Date: Jun 2012
Posts: 46
Likes: 0
Received 0 Likes
on
0 Posts
The rust was pretty minor on the battery tray and the perimeter of the opening for the fuel tank. Mostly surface. I used a wire wheel to knock it down to bare metal then sprayed with a rust converter. Came along after with the satin black paint, which I just noticed, looks very glossy in the pictures. Damned flash...
06-26-2012, 07:13 AM
#6
Team Owner
Wow great car for the money and you have a few very doable projects. I can't tell from my tab but those look ike plastic fuel lines to the injectors. I think that makes it a 78 or 79 motor. The serial number is on the right side by the fan housing on the case
The 78 and I believe 79 have a bit lower compression ratio and can run regular gas if you like. A solid engine regardless
Also noticed the euro bumpers. Nice touch
Thanks for posting pics and welcome aboard
The 78 and I believe 79 have a bit lower compression ratio and can run regular gas if you like. A solid engine regardless
Also noticed the euro bumpers. Nice touch
Thanks for posting pics and welcome aboard
06-26-2012, 09:10 AM
#7
Rennlist Member
Very nice, and welcome! You'll have a blast in thje car.
As to the rust, that is what you can see. You need to be concerned about what is going on inside the cross-member below. The battery acid that caused what you see also worked it's way downhill. You need to look at the thread by 500_19B on his repair of that area. It is worth your time to investigate to avoid a suspension issue.
As to the rust, that is what you can see. You need to be concerned about what is going on inside the cross-member below. The battery acid that caused what you see also worked it's way downhill. You need to look at the thread by 500_19B on his repair of that area. It is worth your time to investigate to avoid a suspension issue.
Trending Topics
 06-28-2012, 03:58 AM
#11
Intermediate
Thread Starter
Join Date: Jun 2012
Posts: 46
Likes: 0
Received 0 Likes
on
0 Posts
Post copied from Pelican.
Window regulators. They truly do suck. What a pain it was to get this thing out, repaired, and back in again.
Notice how I mentioned being 22 in my first post? Well, due in large part to that fact, I opted to repair my regulator for free instead of spending $300+ for one.
Below are some pictures I took of both the sending unit repair as well as the window regulator repair.
Cleaned the sending unit with some fine grit sand paper. Primarily the main shaft for smooth travel, and the the lower connections. We also adjusted the little 'fingers' that make contact on either side of the thin wire so they were making more constant connection.
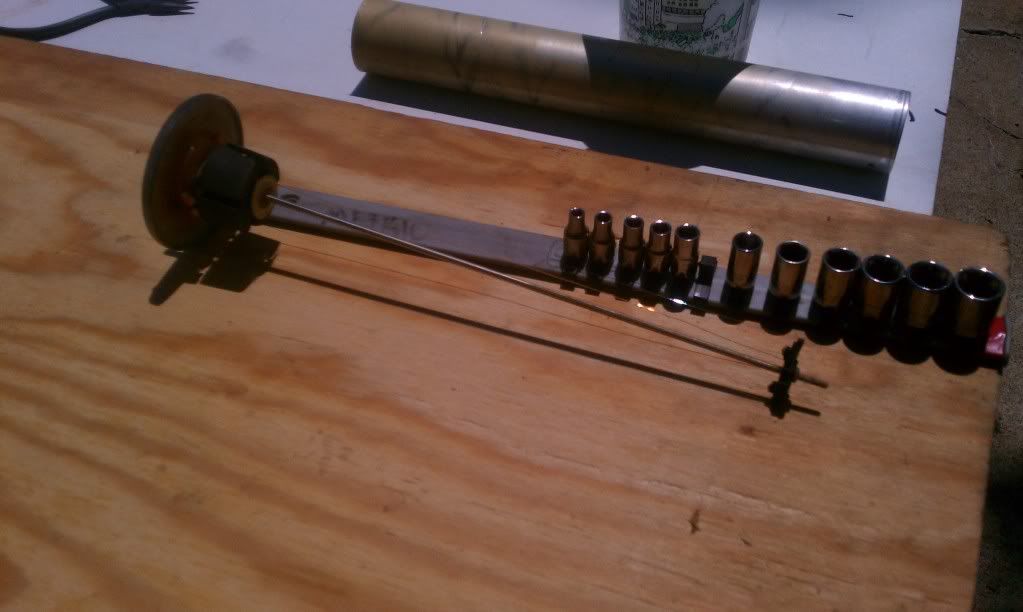
Also removed these three connections from the car's side of the sending assembly. Added a bit of di-electric grease, and gave them all a slight squeeze for a more secure connections.

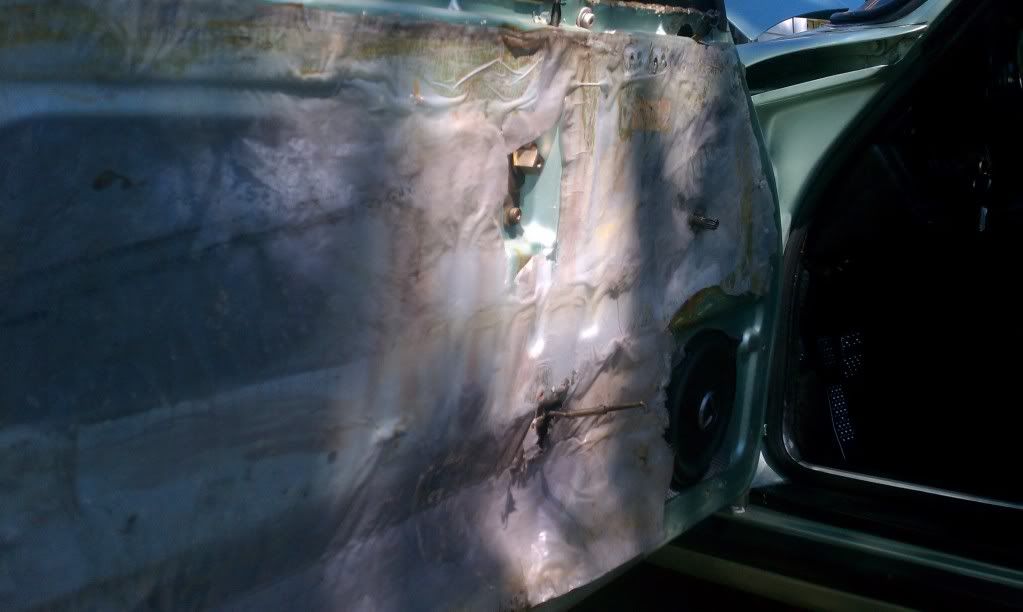
On to the window regulator. This may be a simple fix for some, but it was a royal pain for me. Beginning stages of removing the stuff in front of the goodies inside.
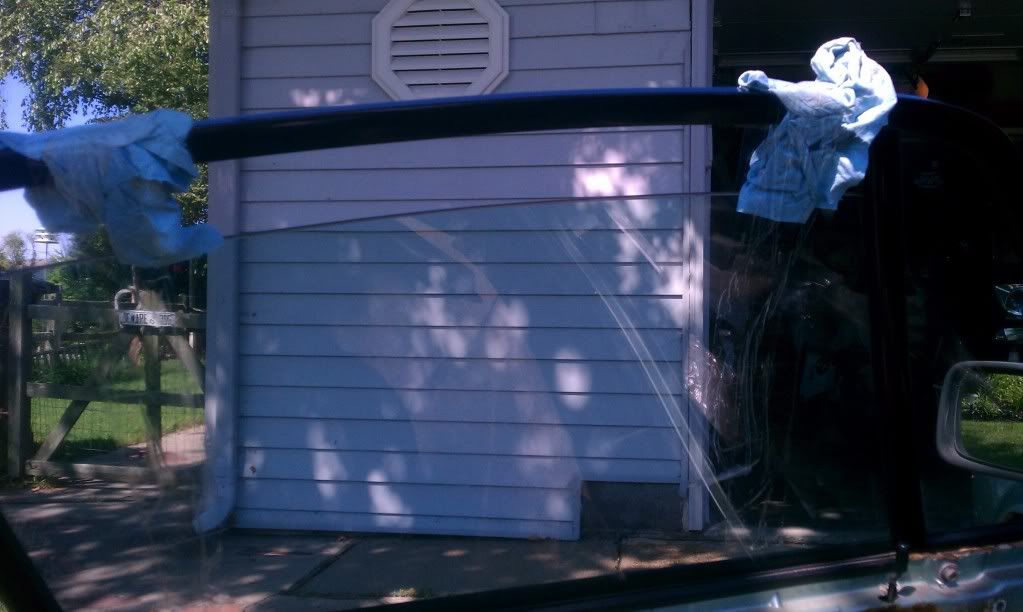
Taped the window up to keep it safe and out of the way.
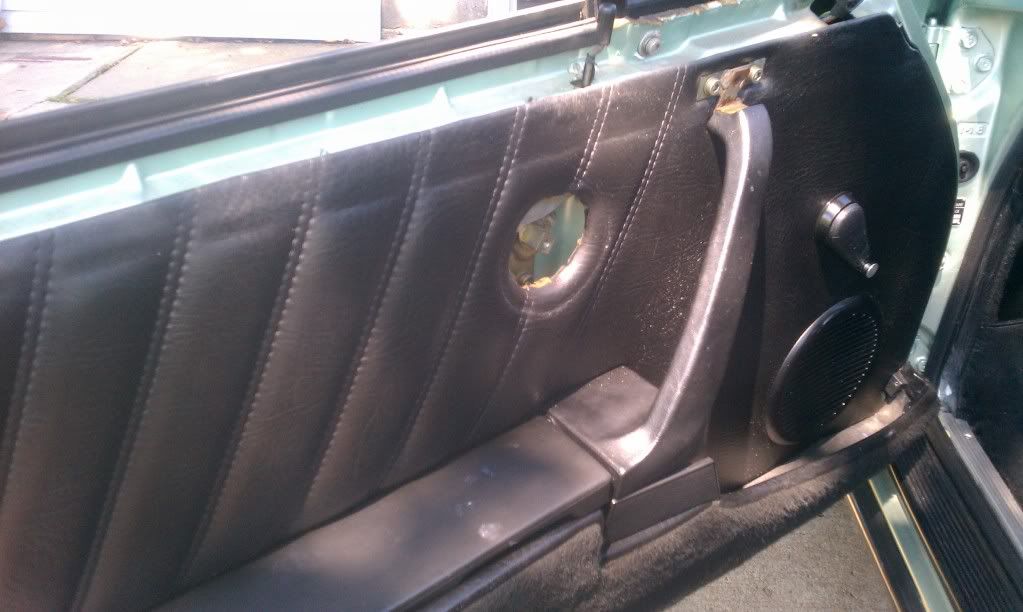
Finally got the regulator accessible through this inconveniently sized opening in the door. This isn't the first regulator I've removed/repaired/replaced, but it surely wasn't the easiest.

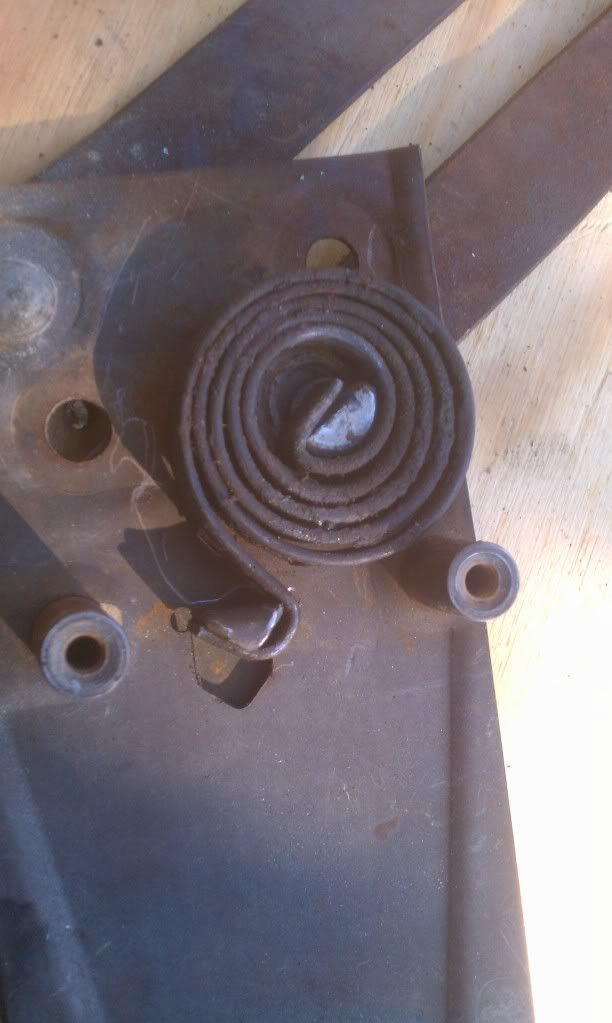
Here you can see the culprits of my problem. The window would roll down and then up about 3/4 of the way without problems. As it got higher in the frame, the gears would lose hold let out a painful "click", combined with the window 'jumping' in small increments.

We also found a broken piece of pot-metal in the door after removing the regulator. Here you can see what was broken. It was half of the pressed-in piece that the resistance spring was secured in.
The plastic slides of the window support bracket, looking to be dirty, gunked with old grease, and needing a cleaning and new lubrication.

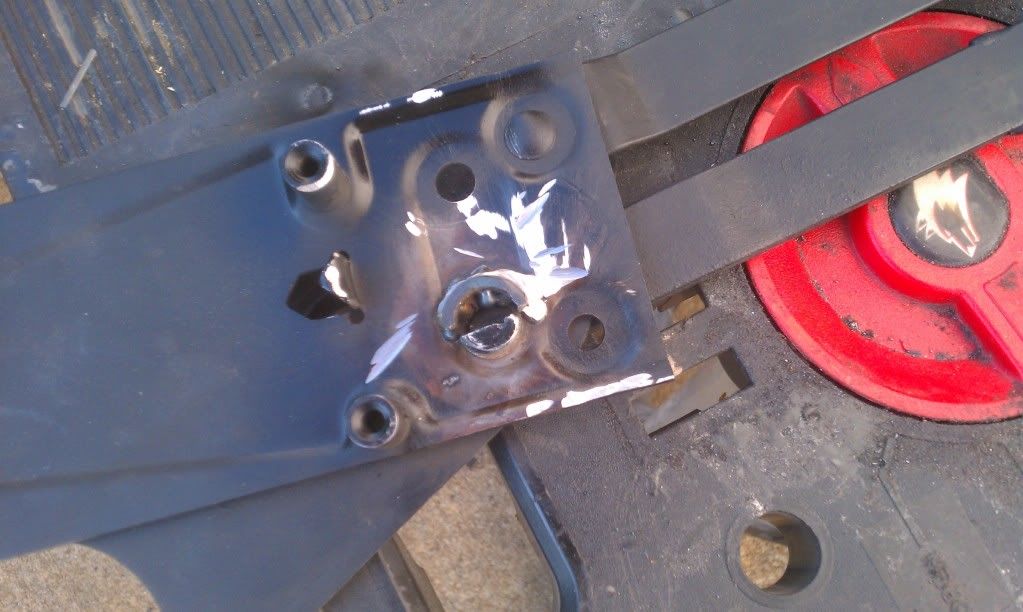
Having a neighbor with a welder is handy. He and my dad wrench on their Jeeps together all the time, and he was (fortunately) happy to lend a helping hand. The original plan was to place a section of 1/2" steel pipe in place of the other half of the broken piece for the spring to sit in.
Window regulators. They truly do suck. What a pain it was to get this thing out, repaired, and back in again.
Notice how I mentioned being 22 in my first post? Well, due in large part to that fact, I opted to repair my regulator for free instead of spending $300+ for one.
Below are some pictures I took of both the sending unit repair as well as the window regulator repair.
Cleaned the sending unit with some fine grit sand paper. Primarily the main shaft for smooth travel, and the the lower connections. We also adjusted the little 'fingers' that make contact on either side of the thin wire so they were making more constant connection.
Also removed these three connections from the car's side of the sending assembly. Added a bit of di-electric grease, and gave them all a slight squeeze for a more secure connections.
On to the window regulator. This may be a simple fix for some, but it was a royal pain for me. Beginning stages of removing the stuff in front of the goodies inside.
Taped the window up to keep it safe and out of the way.
Finally got the regulator accessible through this inconveniently sized opening in the door. This isn't the first regulator I've removed/repaired/replaced, but it surely wasn't the easiest.
Here you can see the culprits of my problem. The window would roll down and then up about 3/4 of the way without problems. As it got higher in the frame, the gears would lose hold let out a painful "click", combined with the window 'jumping' in small increments.
We also found a broken piece of pot-metal in the door after removing the regulator. Here you can see what was broken. It was half of the pressed-in piece that the resistance spring was secured in.
The plastic slides of the window support bracket, looking to be dirty, gunked with old grease, and needing a cleaning and new lubrication.
Having a neighbor with a welder is handy. He and my dad wrench on their Jeeps together all the time, and he was (fortunately) happy to lend a helping hand. The original plan was to place a section of 1/2" steel pipe in place of the other half of the broken piece for the spring to sit in.
06-28-2012, 03:59 AM
#12
Intermediate
Thread Starter
Join Date: Jun 2012
Posts: 46
Likes: 0
Received 0 Likes
on
0 Posts
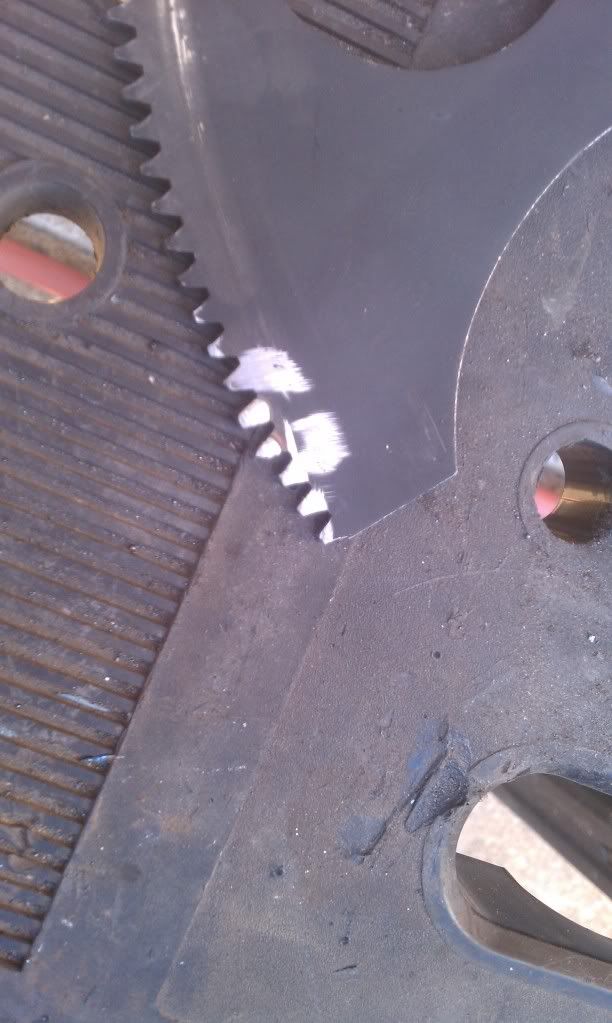
He also added some metal to the gears of the regulator to replace what had been worn down and causing the window to jump. We shaped/sized them using a grinder and file. They aren't as pretty as a new unit, but the gears rode smoothly through the pinion.
Welded in the new piece to support the spring. Also sprayed the whole unit with black rust converter to be safe.
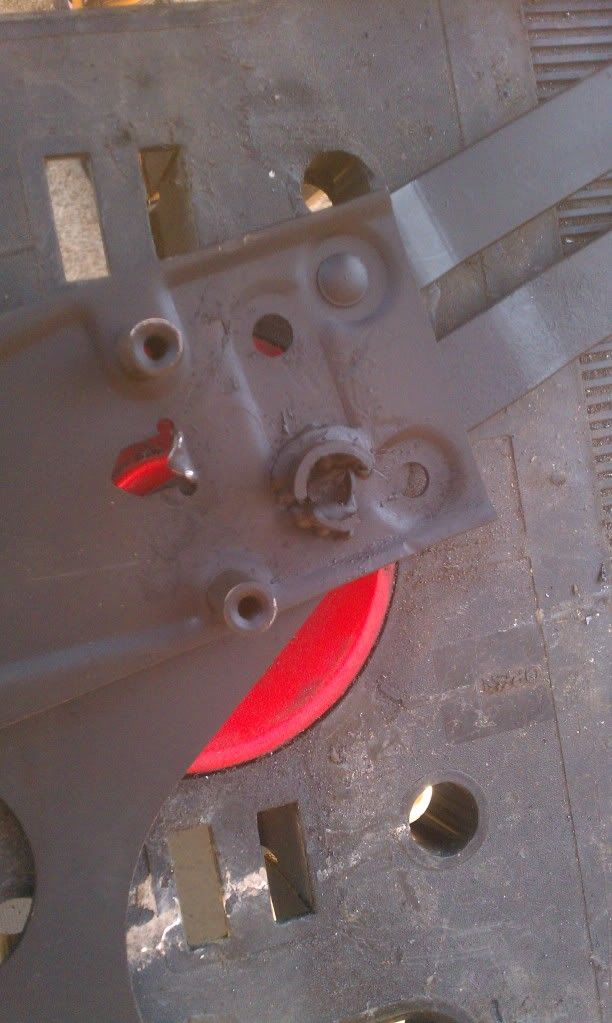
Spring happily seated and secured in its new home.
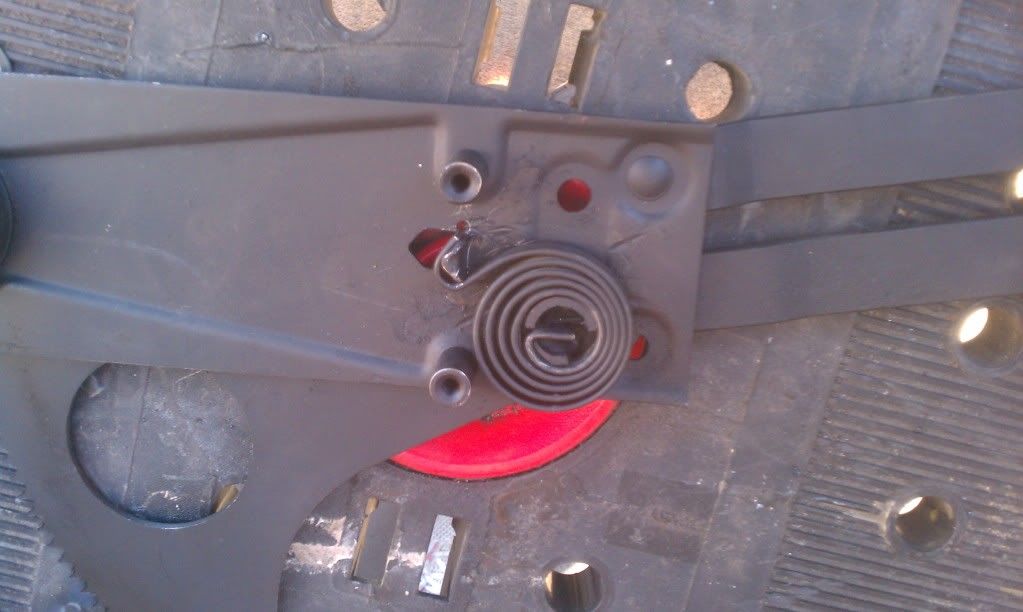
Here, we didn't want the bushings of the glass support rail jumping out if the window was rolled too far in one direction. This was remedied simply by installing a self tapping screw and off-set washer to keep it from traveling too far. The washer was off-set so it could be adjusted should I ever need to disconnect this part from the regulator assembly. Unfortunately, I didn't get a picture of the final product.

All in all, the fuel sending unit repair was a breeze, and the window regulator was a pain. Even getting the door panel back on was frustrating because at that point, we had all been in the sun for hours working on various projects, and everyone was getting a little testy. Add in frustrations of daylight running out, and I was really glad to be done. The window now operates smoothly but I do need to pick up some new levers with ***** because it's a pain not having them.
Welded in the new piece to support the spring. Also sprayed the whole unit with black rust converter to be safe.
Spring happily seated and secured in its new home.
Here, we didn't want the bushings of the glass support rail jumping out if the window was rolled too far in one direction. This was remedied simply by installing a self tapping screw and off-set washer to keep it from traveling too far. The washer was off-set so it could be adjusted should I ever need to disconnect this part from the regulator assembly. Unfortunately, I didn't get a picture of the final product.
All in all, the fuel sending unit repair was a breeze, and the window regulator was a pain. Even getting the door panel back on was frustrating because at that point, we had all been in the sun for hours working on various projects, and everyone was getting a little testy. Add in frustrations of daylight running out, and I was really glad to be done. The window now operates smoothly but I do need to pick up some new levers with ***** because it's a pain not having them.
06-28-2012, 01:56 PM
#14
Intermediate
Thread Starter
Join Date: Jun 2012
Posts: 46
Likes: 0
Received 0 Likes
on
0 Posts
I don't mind spending money when I have to, but no sense doing so when something like this is hidden and non-essential to a nicely-running car anyway.
But yeah, I've become incredibly cheap in the last few years. Threw money around in high school like candy, and now I cut open toothpaste tubes to get the last bit...
But yeah, I've become incredibly cheap in the last few years. Threw money around in high school like candy, and now I cut open toothpaste tubes to get the last bit...