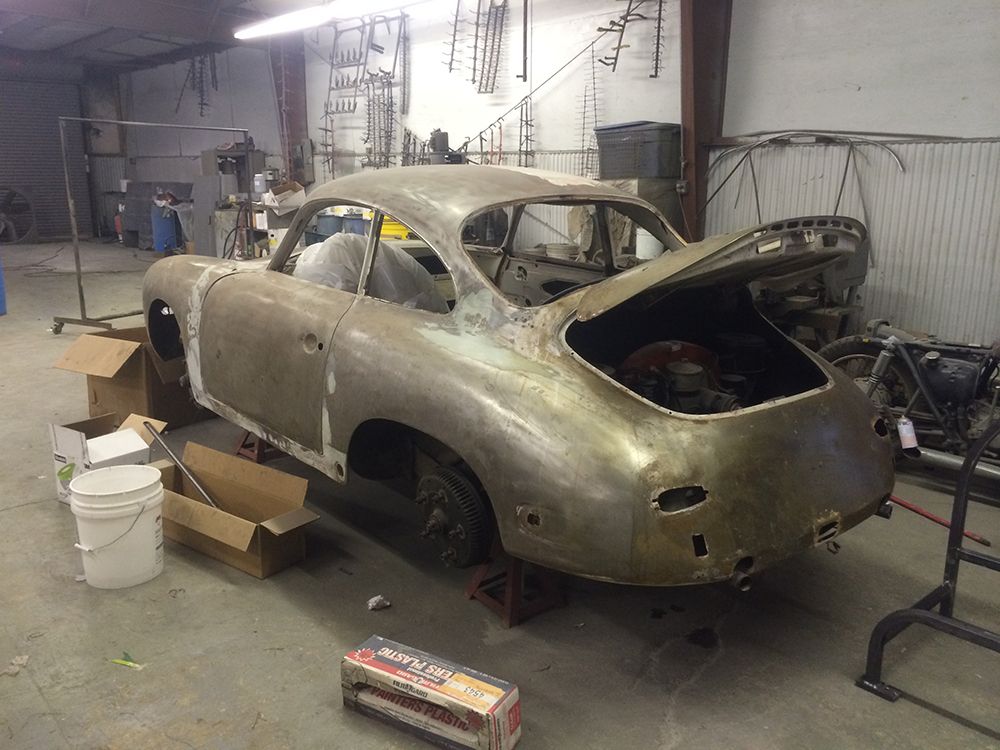
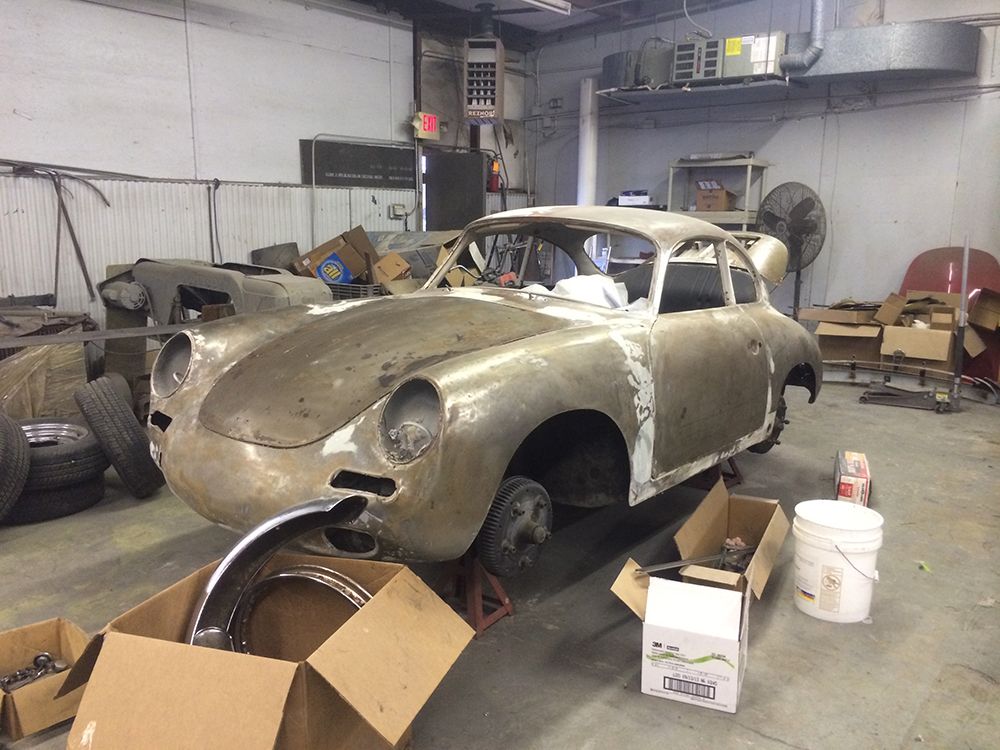
Projects on our (new to us) 1967 912-6
 03-31-2014, 11:58 PM
#211
Professor of Pending Projects
Rennlist Member
Rennlist Member
Really enjoying your journey. Car is coming along great!!! Thank you for sharing all the photos.

 04-02-2014, 11:36 PM
#212
Racer
Thread Starter

I should know better by now but it is difficult for me to stop once I get started on a project. However, once I clean the bottom it will be time to start putting things back together. It is spring and time to drive the car rather than work on it!!!
04-06-2014, 12:43 AM
#213
Racer
Thread Starter
Today was the 8th annual "Motori Italiani' held in the parking lot of the 131 Main restaurant in south Charlotte. Lots of Italian cars and bikes with 50 of those cars being Ferrari's.


A '67 330GTC and a '69 365 GT 2+2 were the oldest Ferrari's.


This '72 Daytona was outstanding.


On hand also were two Boxers, a ' 76 and an '82. What a motor!!


A couple of it's successors, the Testarossa, were also there.

This 550 was purchased three weeks ago from the same dealer where I bought my car. It was stunning.

Even more stunning was this California convertible. I loved the interior.


This 458 wasn't bad!!

Two classic Lambo's were the Countach and the Diablo.


This Alfa Gulietta was beautiful.

Another Alfa was this GTV-6 race car.

It was a fun day. The entry fee included a $10 gift certificate to the restaurant and the food was great. It was a well planned event, the people were very friendly and there was a lot of eye candy.
04-07-2014, 05:30 PM
#215
Racer
Thread Starter
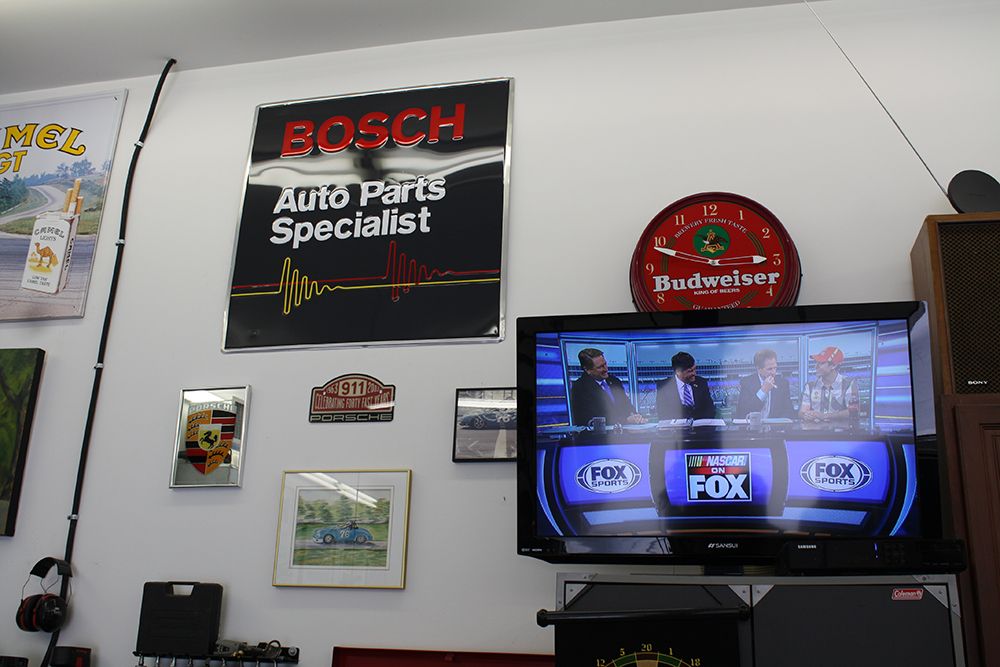
While at the Autofair car show this past weekend at the Charlotte Motor Speedway, I scored a mint condition Bosch sign.
I picked up my zinc plated parts today. They looked great. I was very surprised to see a 356 under restoration in their shop. It is a 1963 coupe. He recently finished a '62 coupe that will be competing in the Pinehurst concours in a few weeks.
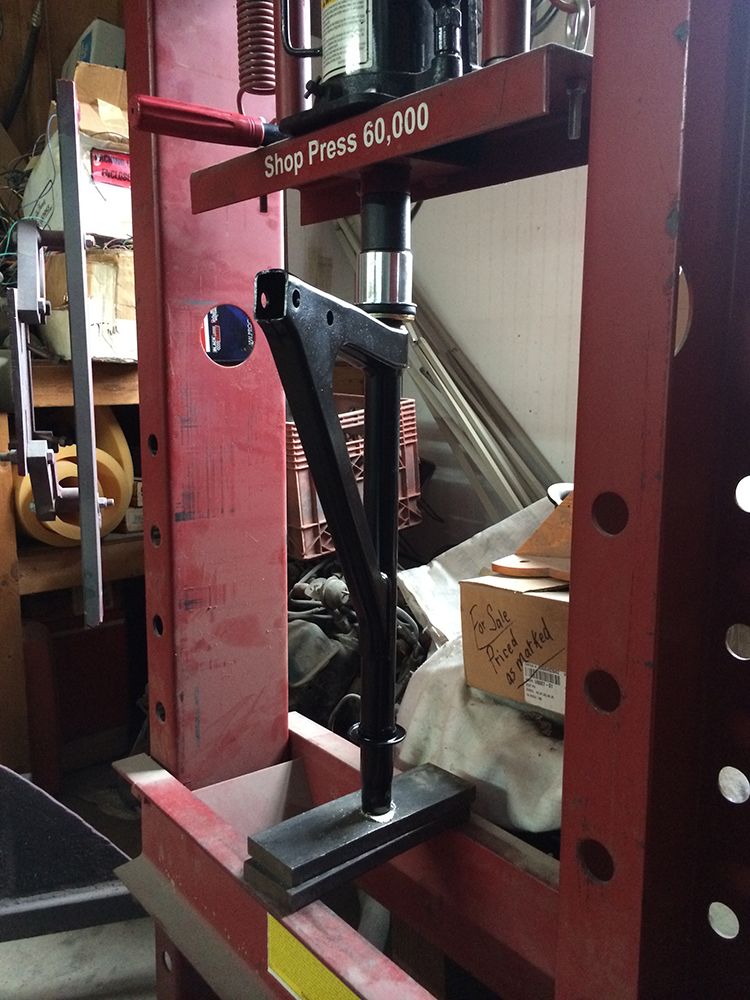
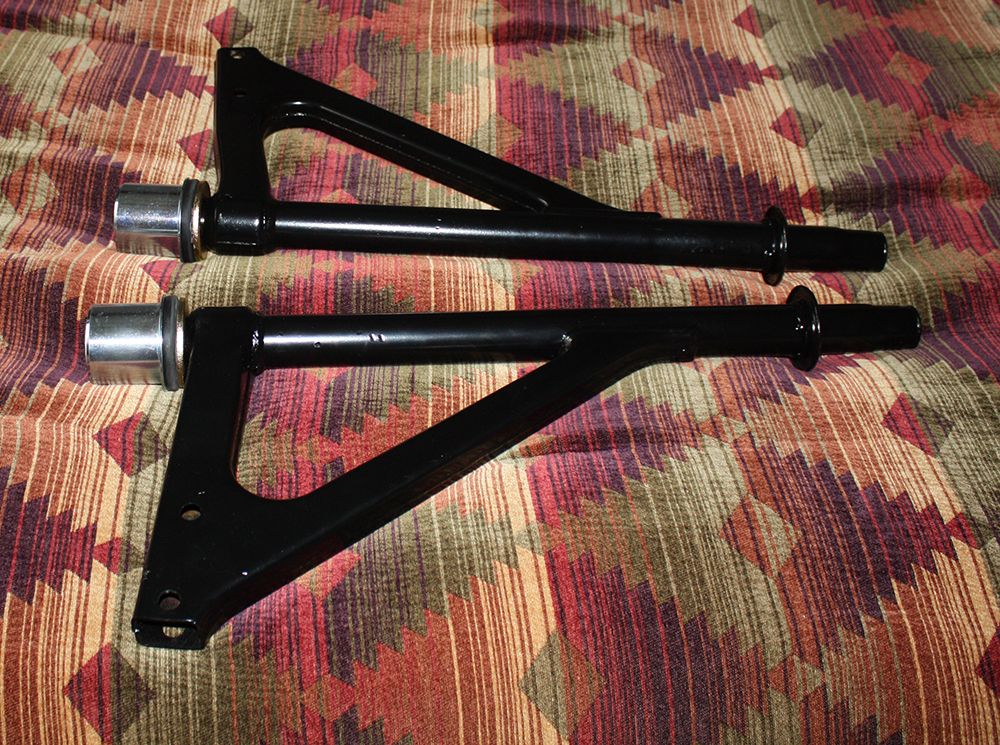
I was waiting on the newly zinc plated washer for the A-Arm so I could press on the rear bushing. From the zinc plater I drove to paint shop where the owner has said I could use his press. It worked great.
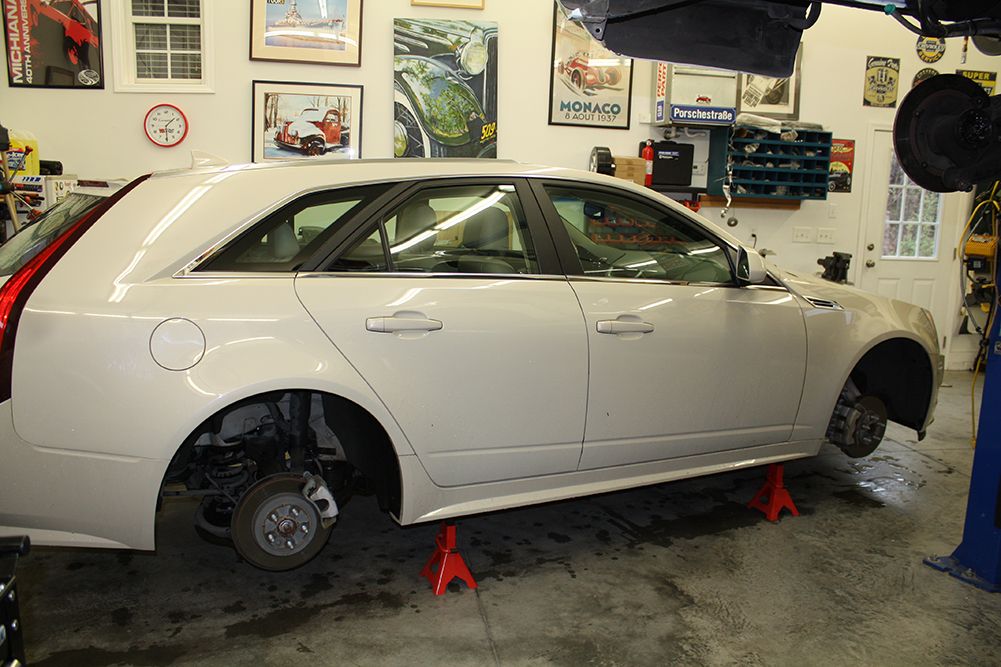
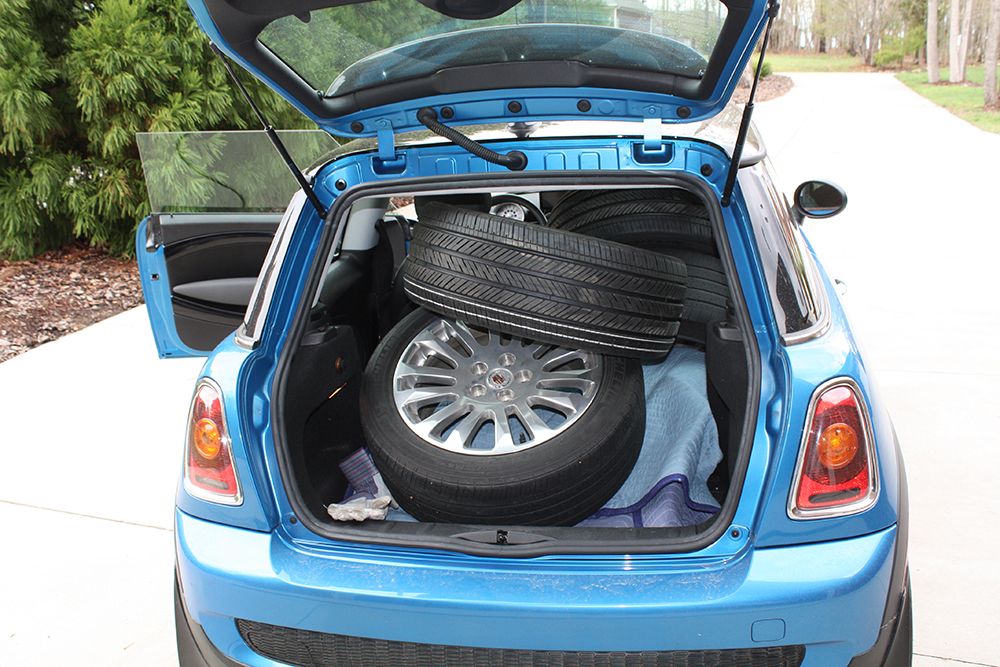
My Cadillac's tires made it to 50K but need to be replaced. I put it up on jack stands and will get the new tires mounted tomorrow.
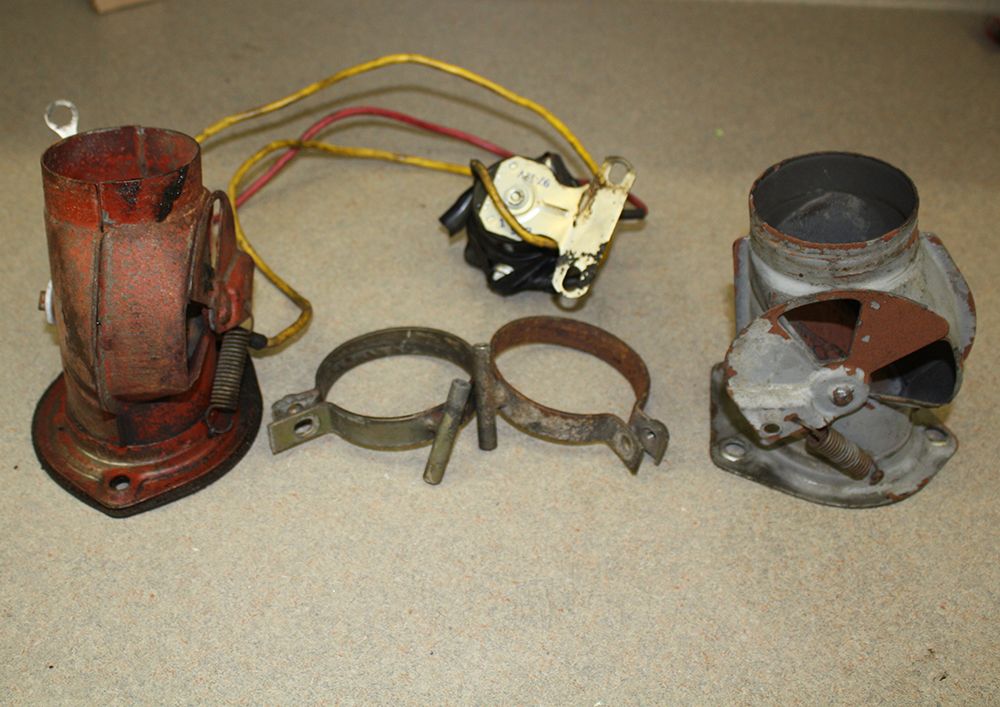
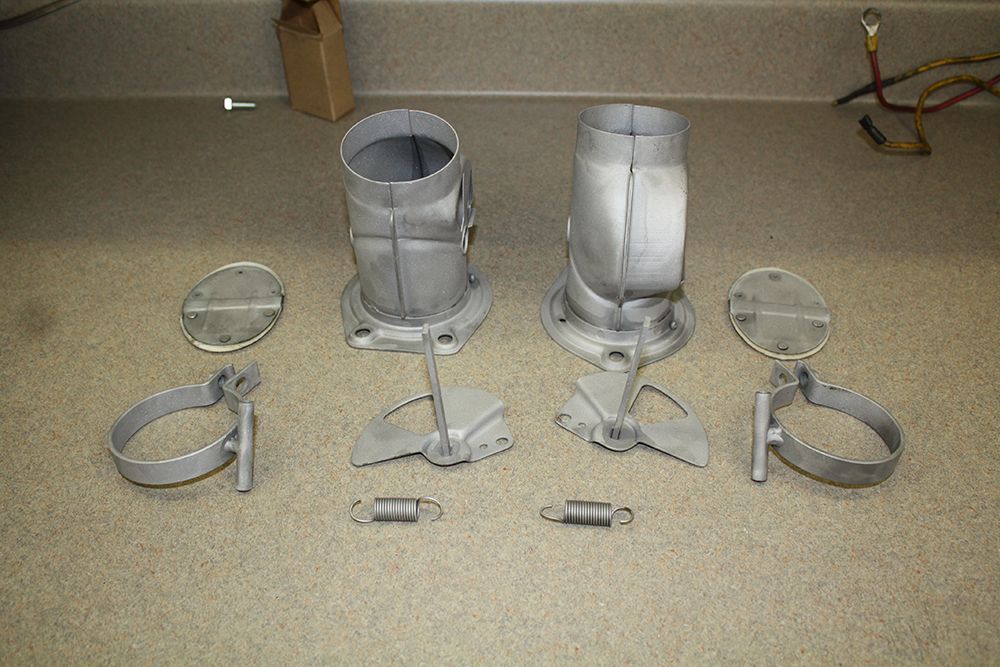
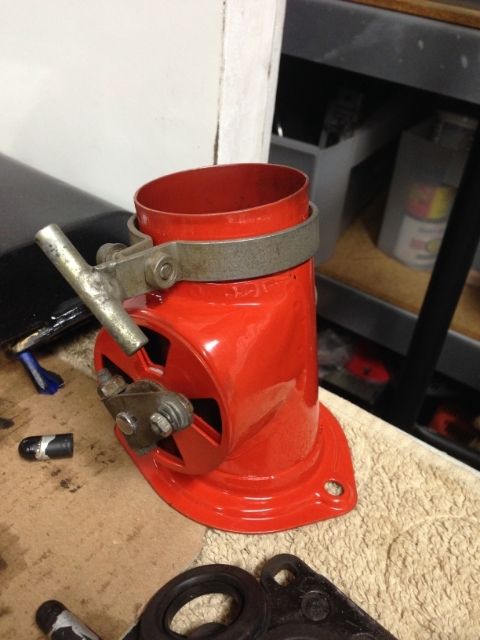
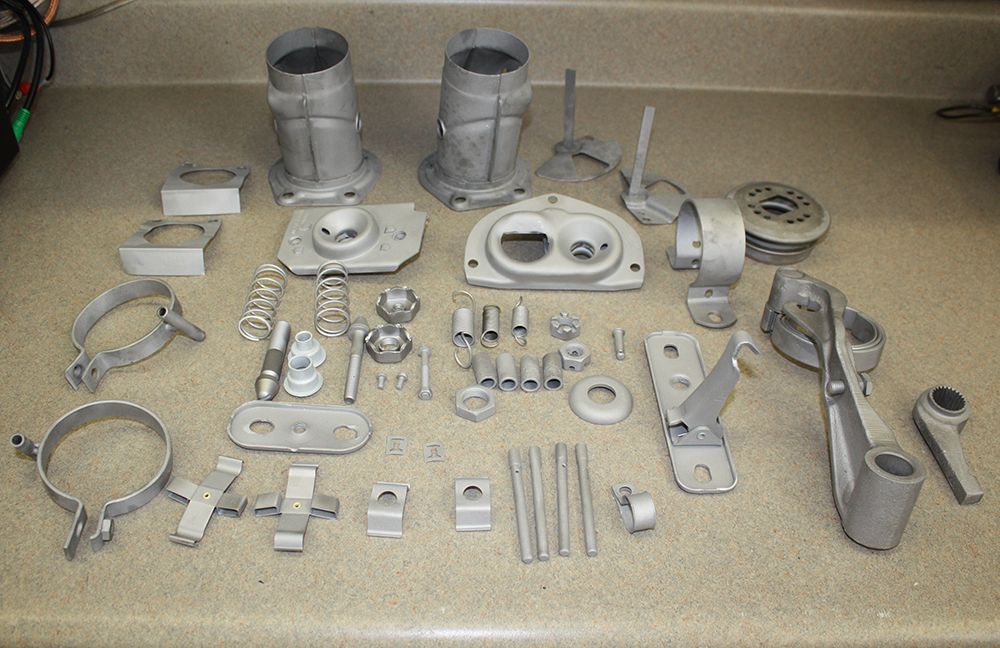
I then removed the hot air duct units. After disassembling them, into the bead blaster they went. They are now ready to be finished.

I picked up my zinc plated parts today. They looked great. I was very surprised to see a 356 under restoration in their shop. It is a 1963 coupe. He recently finished a '62 coupe that will be competing in the Pinehurst concours in a few weeks.


I was waiting on the newly zinc plated washer for the A-Arm so I could press on the rear bushing. From the zinc plater I drove to paint shop where the owner has said I could use his press. It worked great.


My Cadillac's tires made it to 50K but need to be replaced. I put it up on jack stands and will get the new tires mounted tomorrow.

I then removed the hot air duct units. After disassembling them, into the bead blaster they went. They are now ready to be finished.

 04-07-2014, 05:42 PM
#216
Professor of Pending Projects
Rennlist Member
Rennlist Member
Love this thread!!
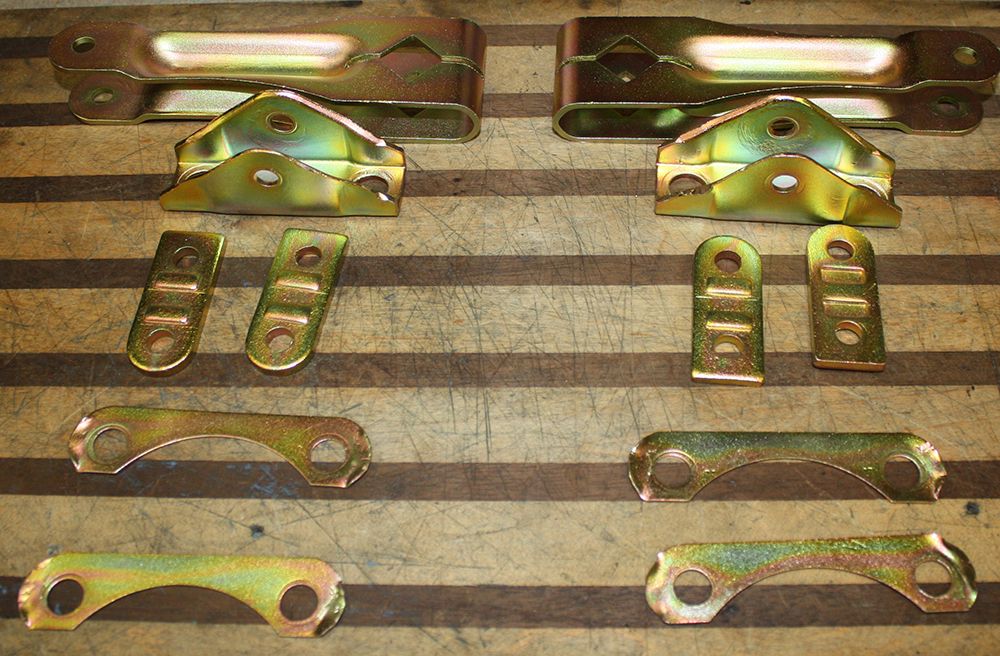
I just dropped those same parts for yellow zinc plating today...along with all the hardware from the front, the seat rails, etc.
And also took the brackets and the levers from the heather controls... forgot those when I took the hardware from the engine and rear suspension.
I just dropped those same parts for yellow zinc plating today...along with all the hardware from the front, the seat rails, etc.
And also took the brackets and the levers from the heather controls... forgot those when I took the hardware from the engine and rear suspension.
04-07-2014, 07:54 PM
#217
Racer
Thread Starter
Love this thread!!
I just dropped those same parts for yellow zinc plating today...along with all the hardware from the front, the seat rails, etc.
And also took the brackets and the levers from the heather controls... forgot those when I took the hardware from the engine and rear suspension.
I just dropped those same parts for yellow zinc plating today...along with all the hardware from the front, the seat rails, etc.
And also took the brackets and the levers from the heather controls... forgot those when I took the hardware from the engine and rear suspension.
04-07-2014, 08:11 PM
#218
Addict
Rennlist Member
Rennlist Member
This thread is full of eye candy, love it!
04-11-2014, 04:48 PM
#220
Racer
Thread Starter
Doesn't seem like I accomplished much this week. I did get the tires mounted on the Cadillac wheels. Had to make two trips using my wife's Mini Cooper to transport the tires and wheels to the tire shop.
Most of the rest of the week was spent on grunt work. The zinc coating turned out so well that I went through each of my bags of parts removed from the car to clean up the hardware and see what I wanted to have coated. Very tedious and slow work doing the cleaning part. Once I had selected parts for zinc coating, I blasted them to get them ready. I will be taking the parts to the coating shop in Monday.
And that is about all that I will get done next week. My mother passed away a little over a year ago and my five siblings and I are going through her things in her Indiana house next week to prepare it to be sold. It will not be a fun week but has to be done.
 04-14-2014, 06:22 PM
#221
Racer
Thread Starter
I took the rest of the pieces that I wanted yellow zinc coated to the coater this morning. I will pick them up next week when I get back from Indiana.
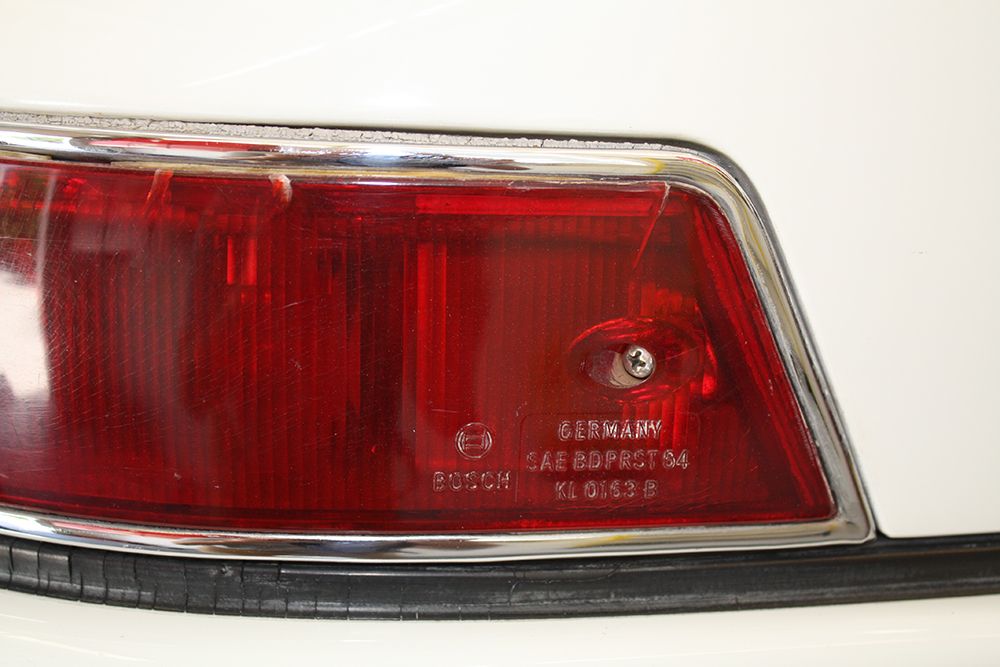
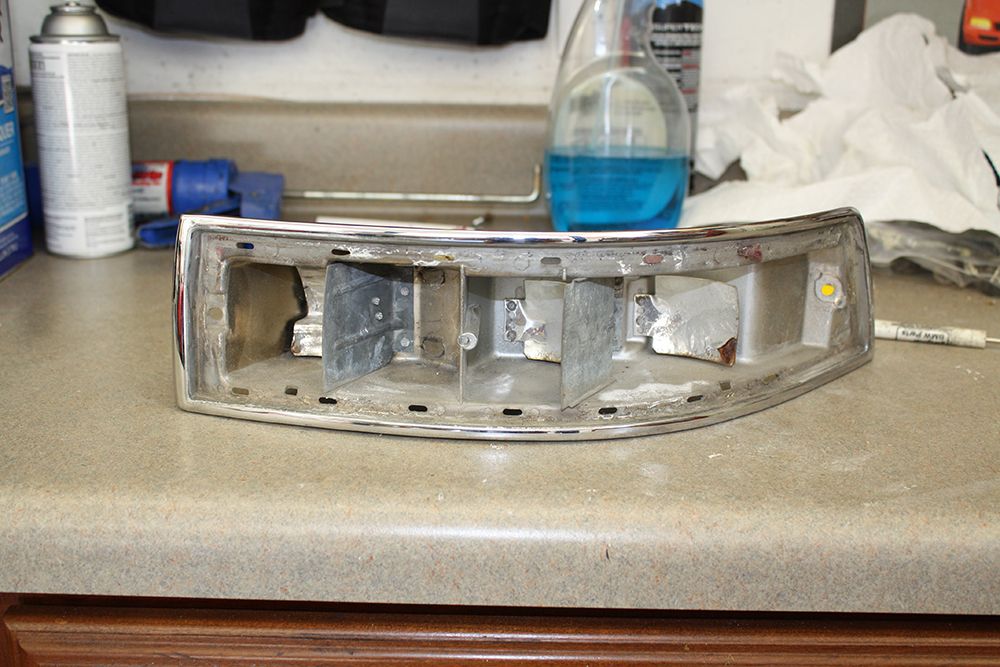
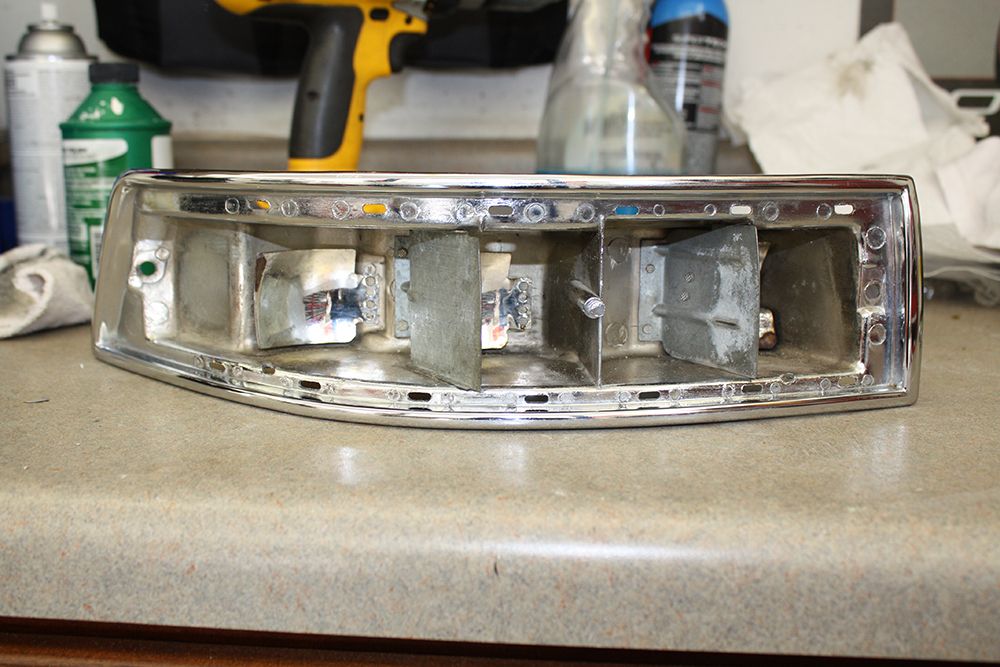
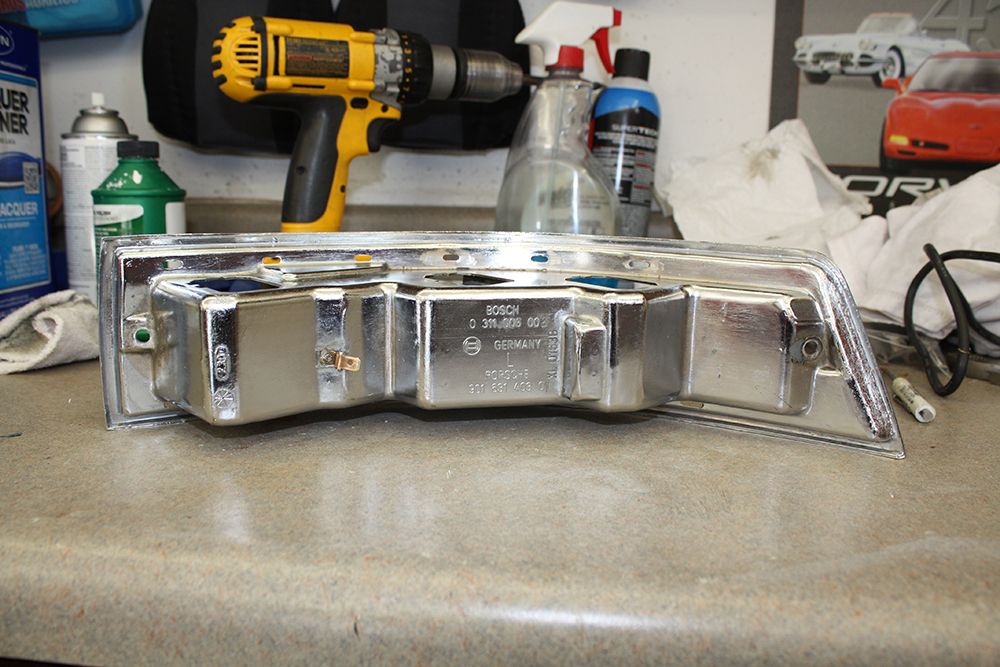
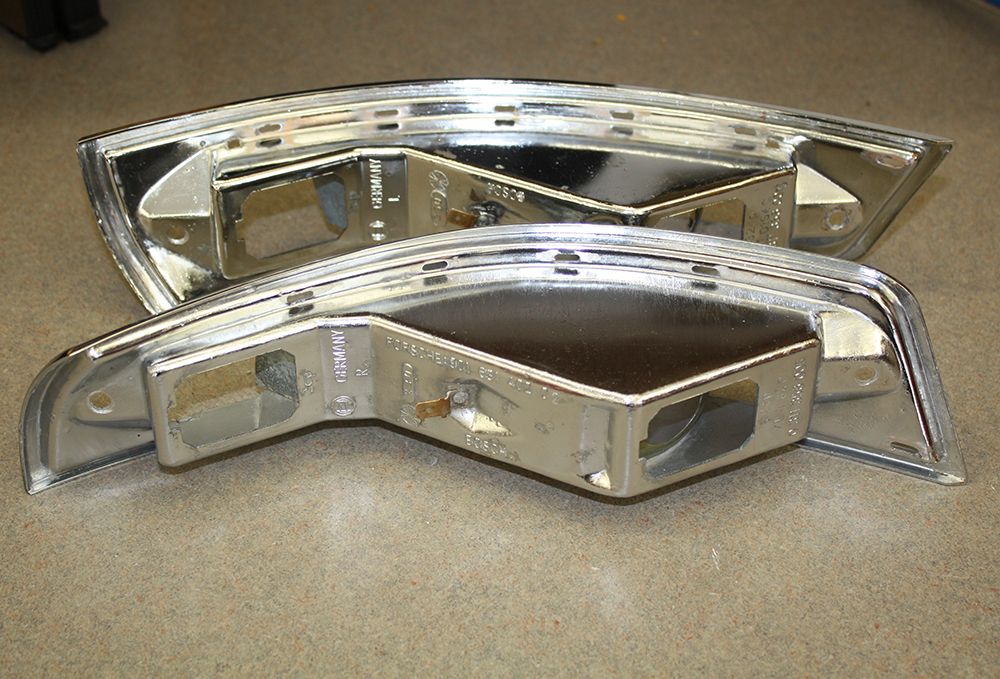
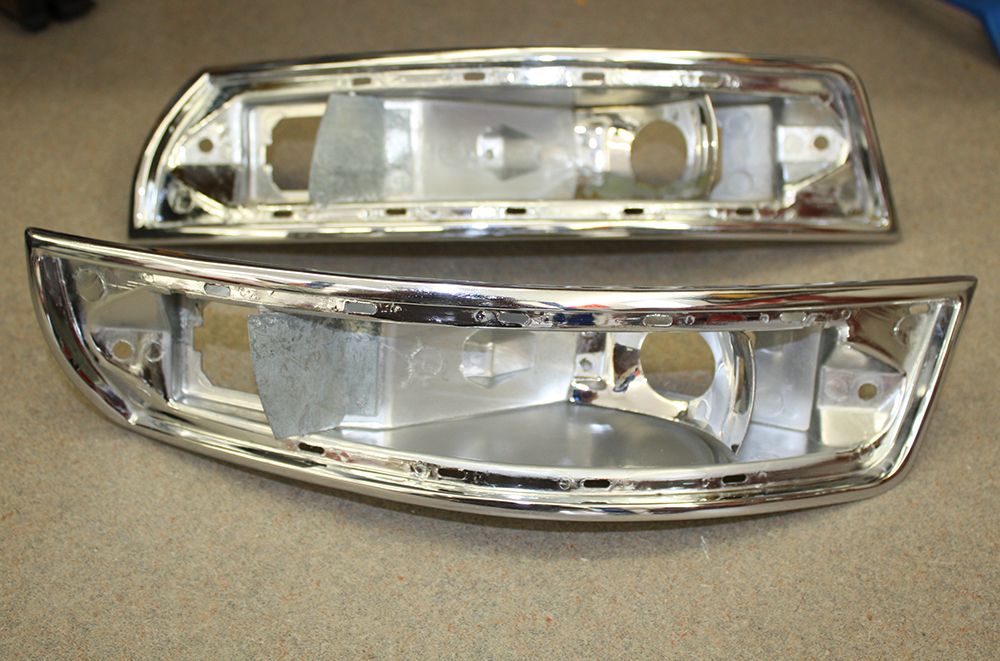
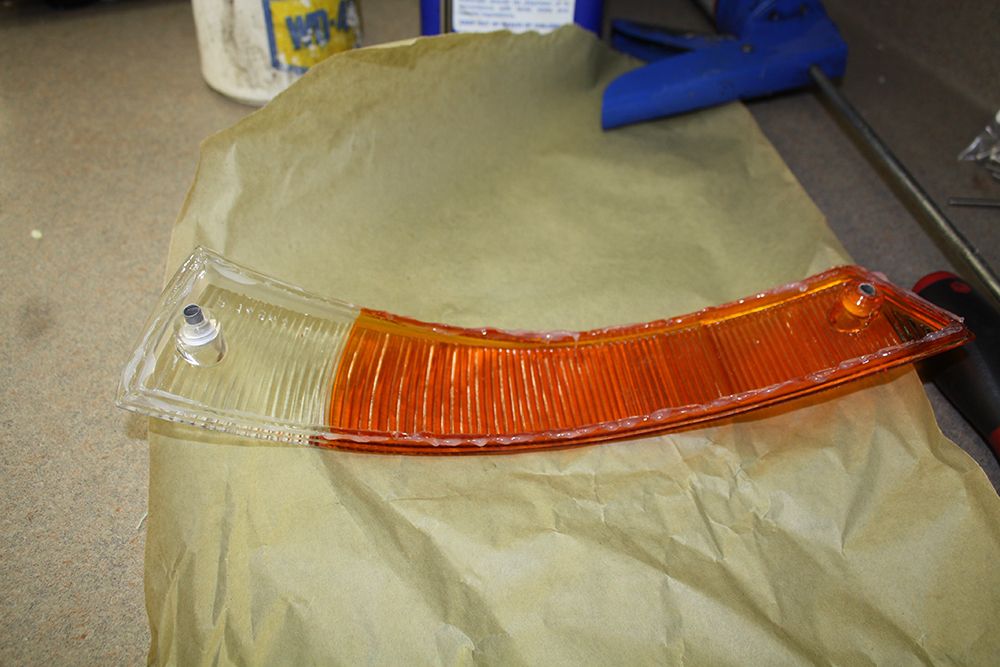
Since I am leaving in the morning, I did not want to start a big, dirty project. My turn signal and tail light lenses have seen better days and I have replacements.
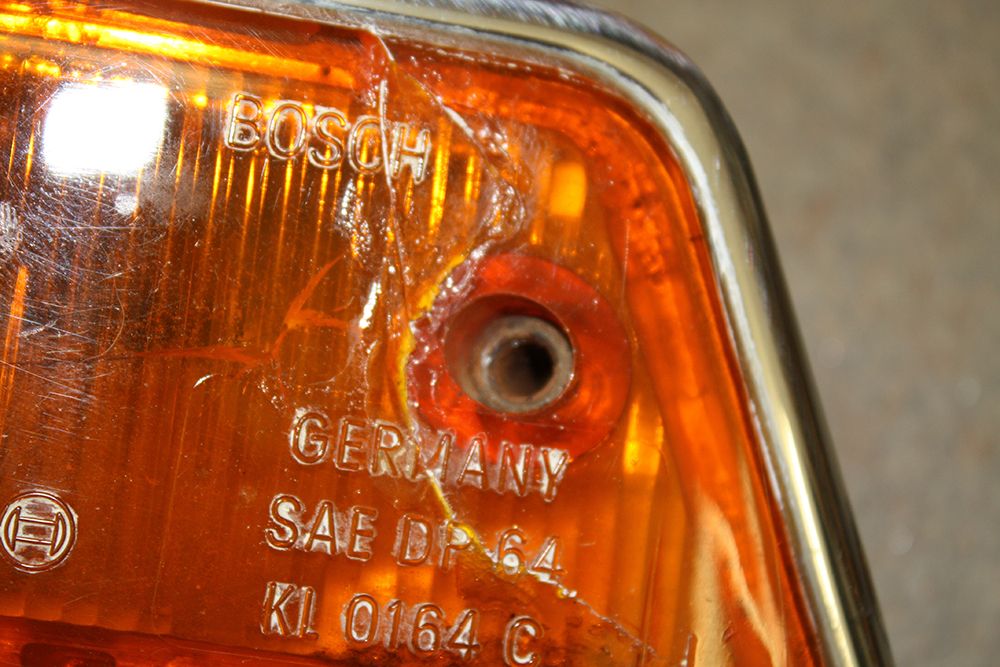
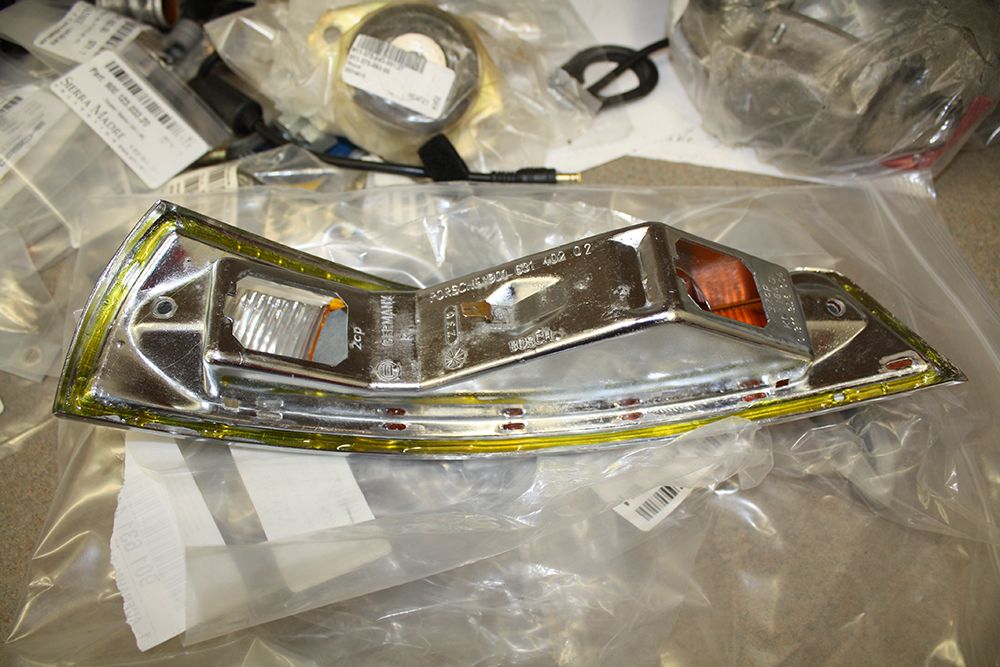
As many of you know, on the very early cars it is not a simple matter of removing the screws and replacing the lens. The lens is permanently attached to the housing. To remove the lens requires a number of steps. The first one is drilling out the mounting screw bushing on the rear of the housing. It is flared on the rear to help hold the lens in place and to provide crack protection from over tightening the screw. Once I had it drilled out I used a round file to grab the bushing to make it turn and then release.
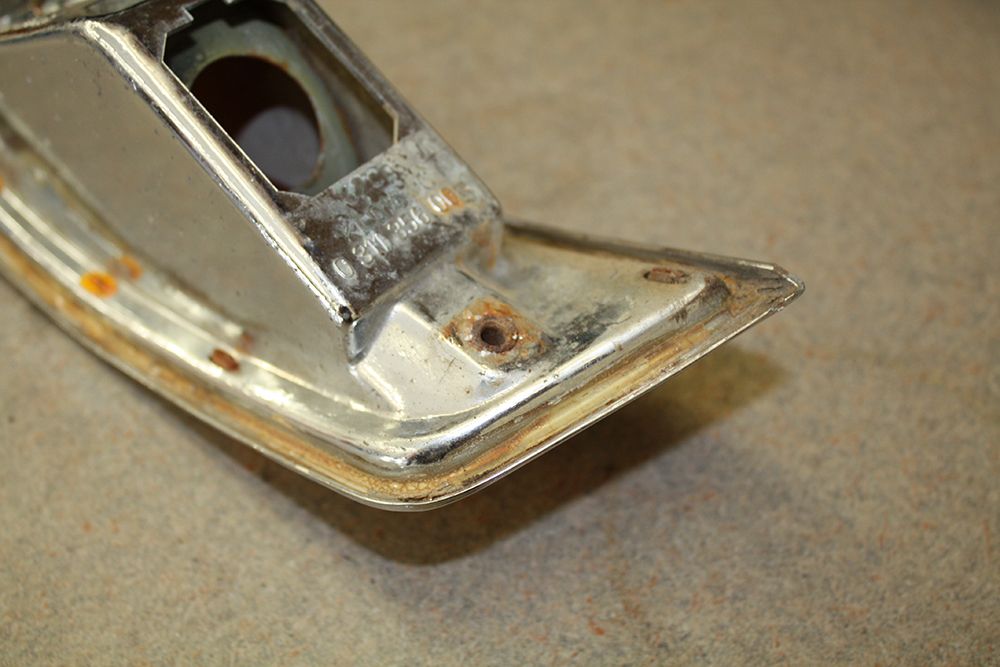

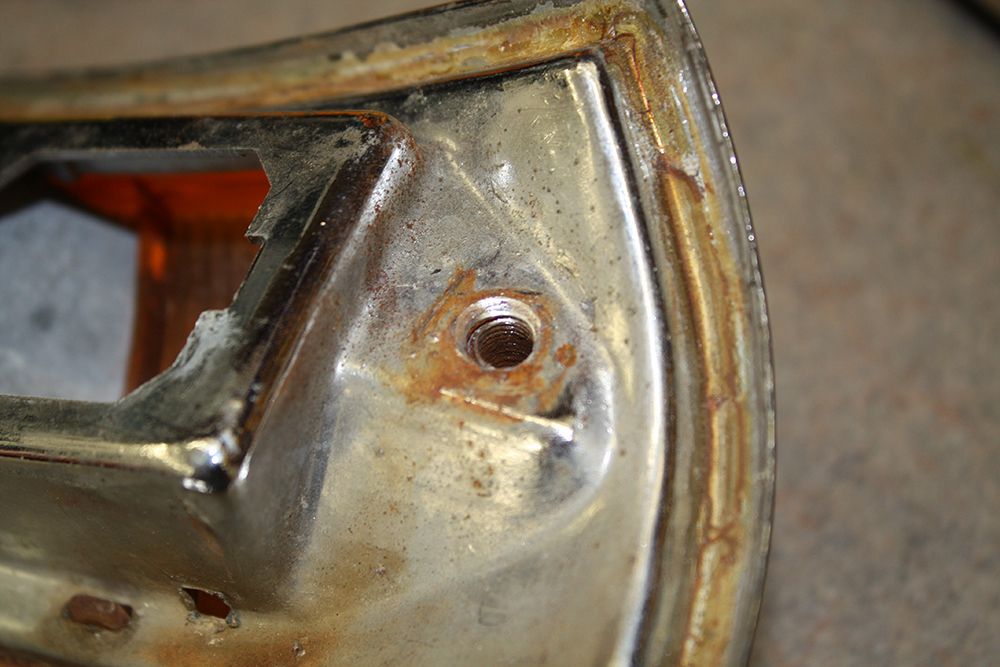
There are tabs on the original lens that protrude through the housing. A couple of them on each side have had heat applied to melt them enough to retain the lens. These tabs must be ground off and then the lens can be removed.
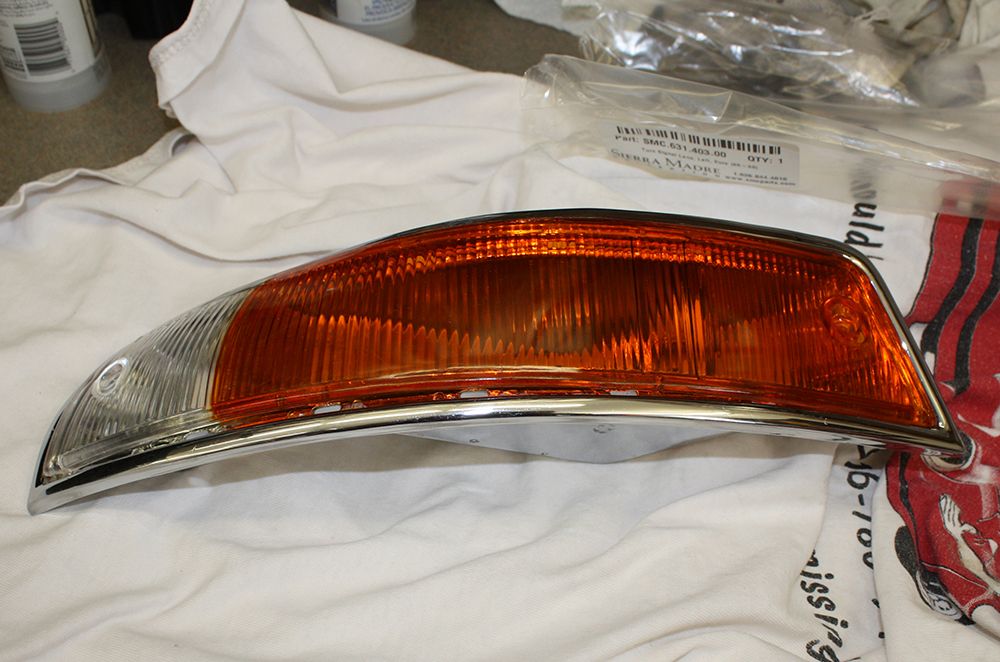
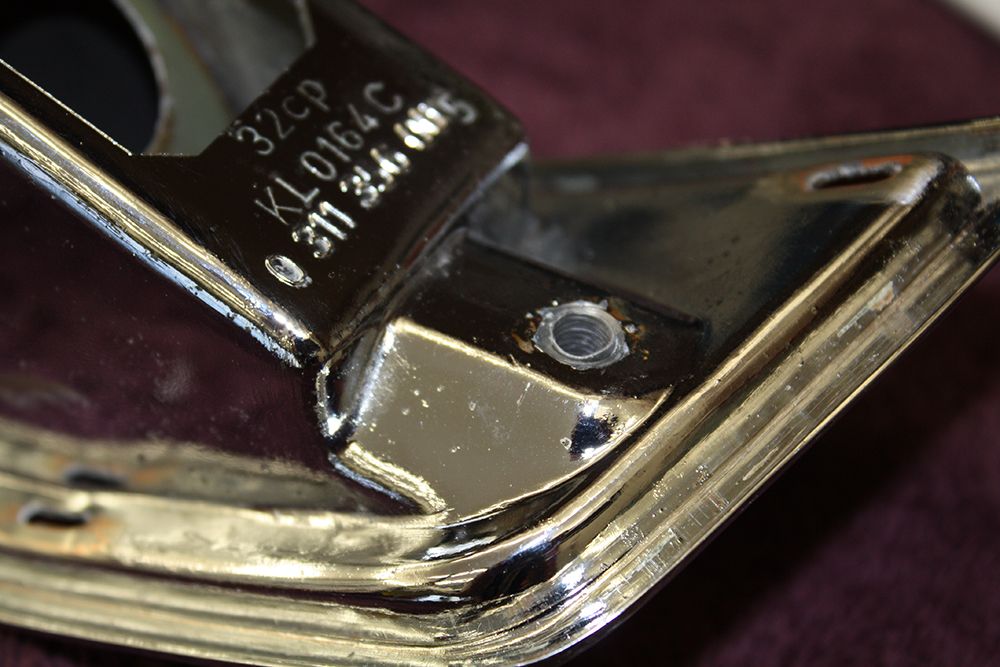
Once I had those tabs ground off, I then could remove the lens with a little persuasion. I began with the left front turn signal. As is usual, the right one took about one quarter as much time to remove. I then washed them with Windex. On the back side is a seal that goes against the body. The seal was easily removed but the adhesive took a bit more time. With the adhesive removed, I broke out the chrome polish to clean them up. They were in fantastic condition. Again I have found things on this car that have exceeded my expectations.
I did run into a problem that prevented me from reassembling the units. The bushings did not come with the lens and my vendor does not have them. I will be looking for them this evening. I purchased the European lens set and they will look great.
Since I am leaving in the morning, I did not want to start a big, dirty project. My turn signal and tail light lenses have seen better days and I have replacements.

As many of you know, on the very early cars it is not a simple matter of removing the screws and replacing the lens. The lens is permanently attached to the housing. To remove the lens requires a number of steps. The first one is drilling out the mounting screw bushing on the rear of the housing. It is flared on the rear to help hold the lens in place and to provide crack protection from over tightening the screw. Once I had it drilled out I used a round file to grab the bushing to make it turn and then release.


There are tabs on the original lens that protrude through the housing. A couple of them on each side have had heat applied to melt them enough to retain the lens. These tabs must be ground off and then the lens can be removed.


Once I had those tabs ground off, I then could remove the lens with a little persuasion. I began with the left front turn signal. As is usual, the right one took about one quarter as much time to remove. I then washed them with Windex. On the back side is a seal that goes against the body. The seal was easily removed but the adhesive took a bit more time. With the adhesive removed, I broke out the chrome polish to clean them up. They were in fantastic condition. Again I have found things on this car that have exceeded my expectations.


I did run into a problem that prevented me from reassembling the units. The bushings did not come with the lens and my vendor does not have them. I will be looking for them this evening. I purchased the European lens set and they will look great.
 04-25-2014, 05:47 PM
#222
Racer
Thread Starter
On my way to Indiana last Tuesday, at about two hours out, I stopped at a rest area. As I got out of the car, I found I was limping and had a sharp pain in my right leg. And that has been my problem since that day. After two emergency room visits, one chiropractor and an orthopedic doctor, the best guess is a pinched nerve caused by all of the driving I have done in the past month or so. Contributing to the issue may be having my billfold in my back pocket thus throwing off my back. It's not unusual for me to drive long distances and I have never had a problem in the past. I am now undergoing a regimen of steroids, pain killers and exercise. Hopefully it works. What a pain, literally, getting old is!!
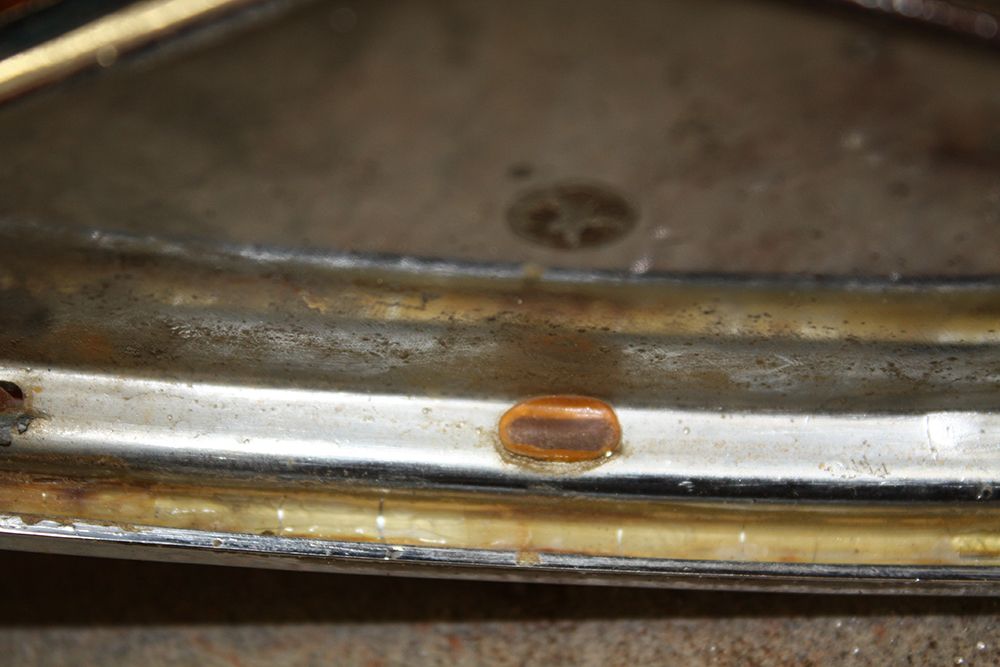
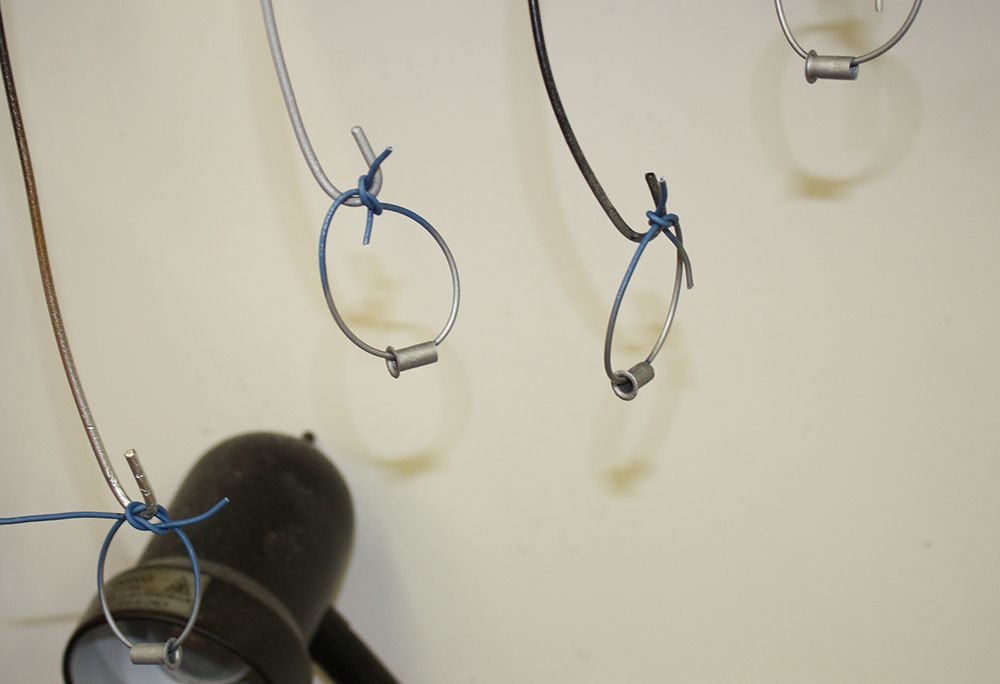
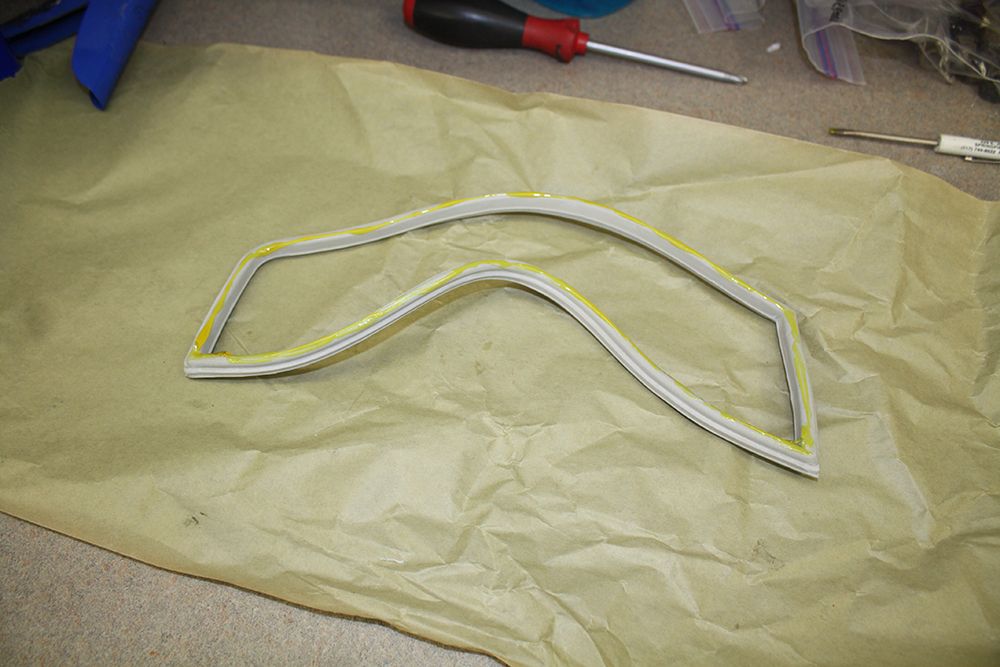
I was told to stay active as sitting around will not help the issue. So I washed my daily driver and the Ferrari yesterday to see what would happen. I was still ambulatory, so today I made it back to the garage. On my last post I was wondering what I was going to do for inserts into the turn signal lens for the mounting screws. I mentioned that I was going to try to remove the old inserts. I used a round file to grab the insert from the rear so I could turn it. Once I had it turning, I was able to push it out towards the front. However, the file was now firmly attached to the insert. By grabbing it with a needle nose vise grip pliers, I was able to loosen the file from the insert.
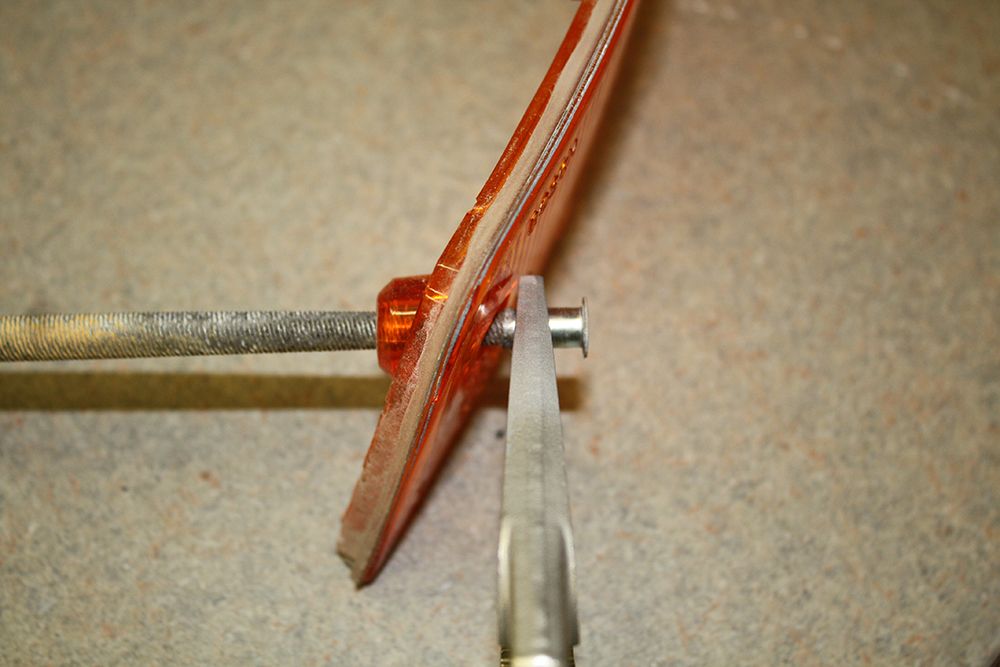
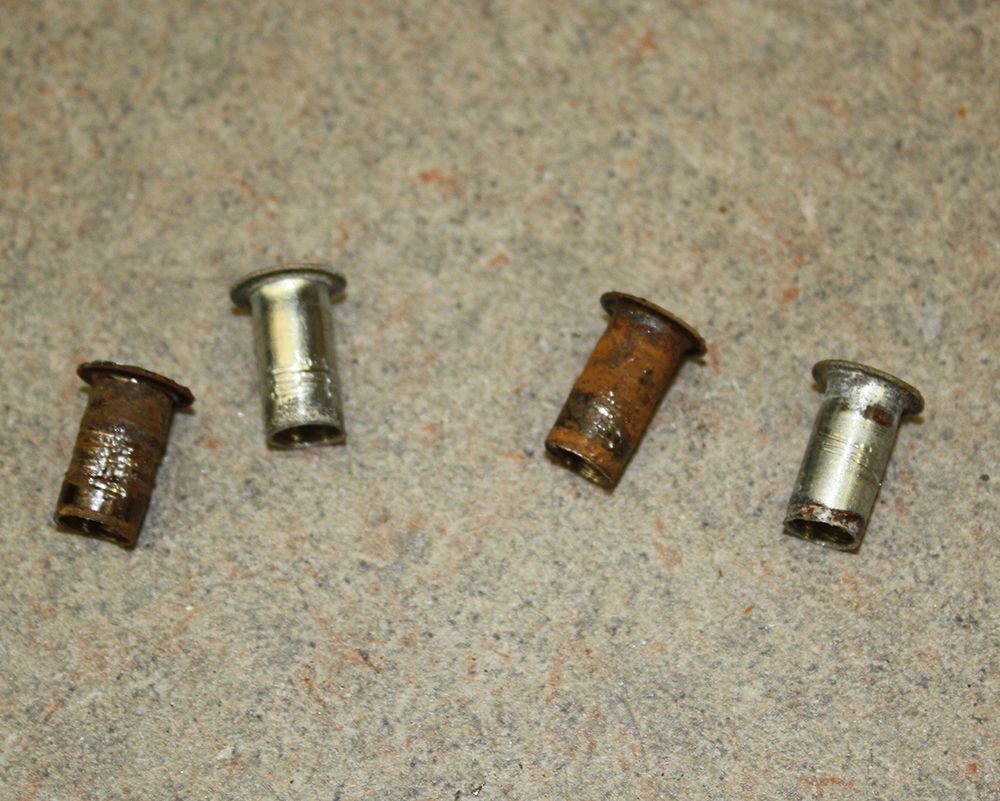
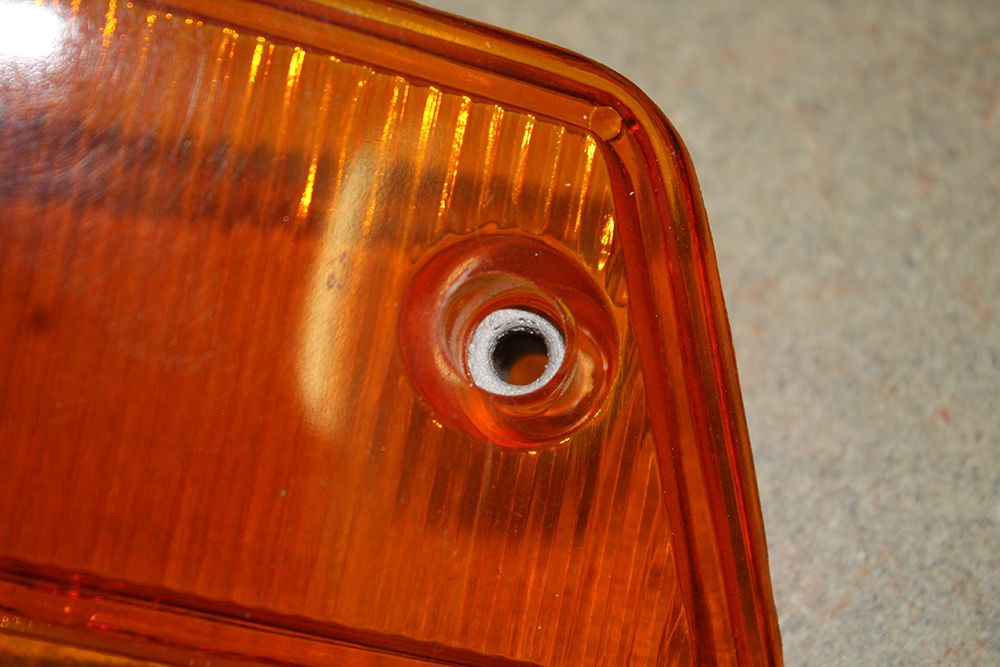
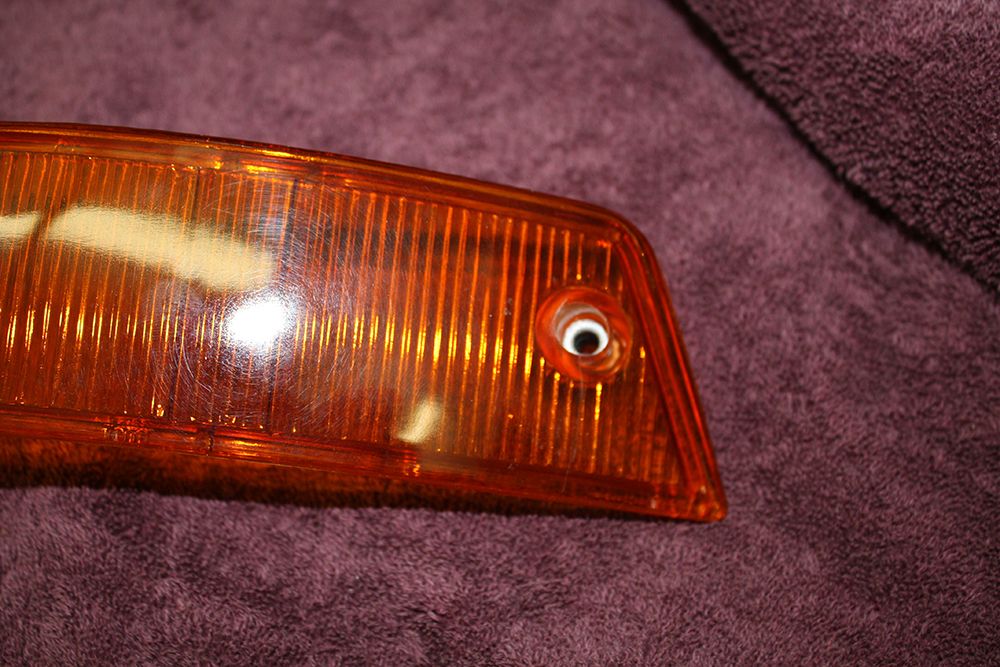
After bead blasting the inserts, I discovered that the holes in the new lenses were way too small. I used a couple drill bits to get close. I then used a dremel tool to get closer yet to the right size with the round file used to make the hole exactly the right size. I wanted the hole to be a relatively tight fit. As you can see in the photo below, there is enough of the insert protruding on the rear for me to flare it. Now all I have to do is figure out how to flare it without cracking the lens.
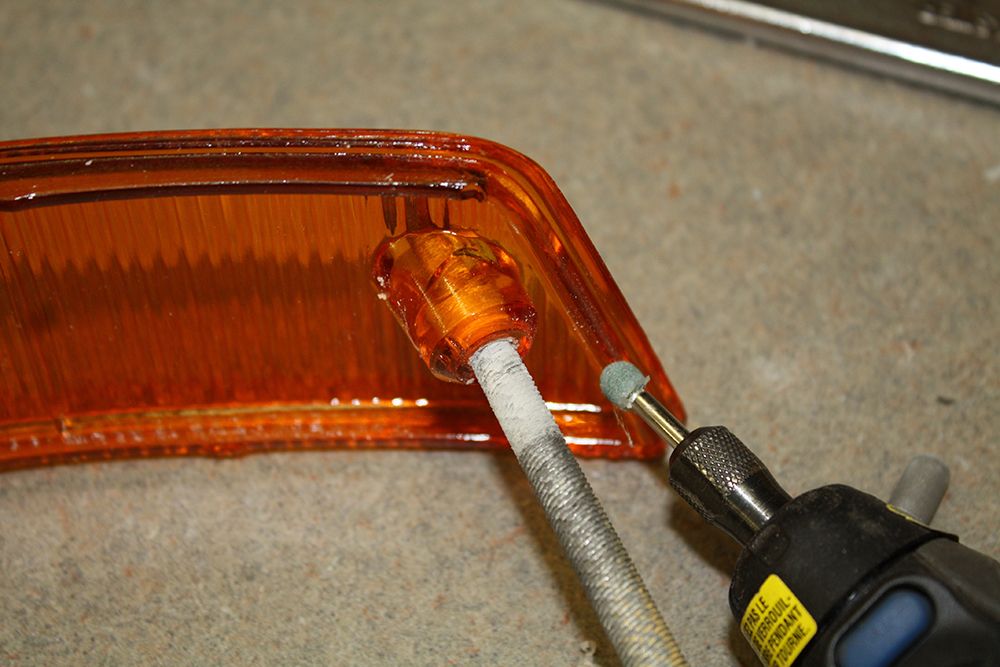
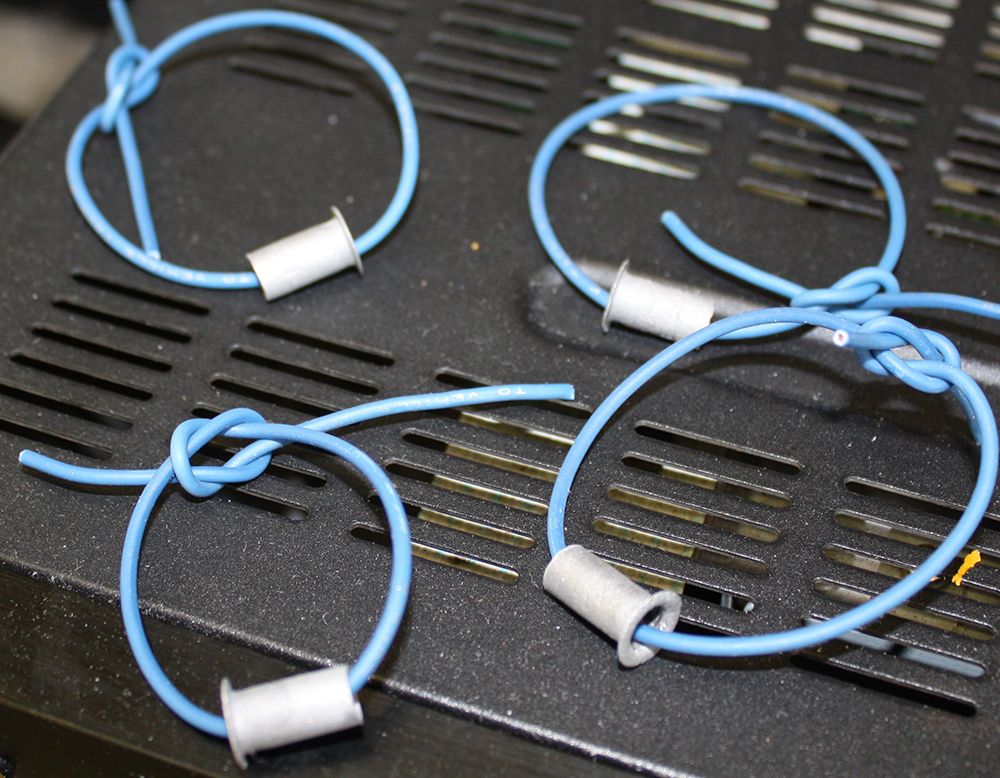
Once I had the holes correct, I used some wire so I could mount each insert to a hanger so I could paint them. And that is as far as I got today.
I was told to stay active as sitting around will not help the issue. So I washed my daily driver and the Ferrari yesterday to see what would happen. I was still ambulatory, so today I made it back to the garage. On my last post I was wondering what I was going to do for inserts into the turn signal lens for the mounting screws. I mentioned that I was going to try to remove the old inserts. I used a round file to grab the insert from the rear so I could turn it. Once I had it turning, I was able to push it out towards the front. However, the file was now firmly attached to the insert. By grabbing it with a needle nose vise grip pliers, I was able to loosen the file from the insert.


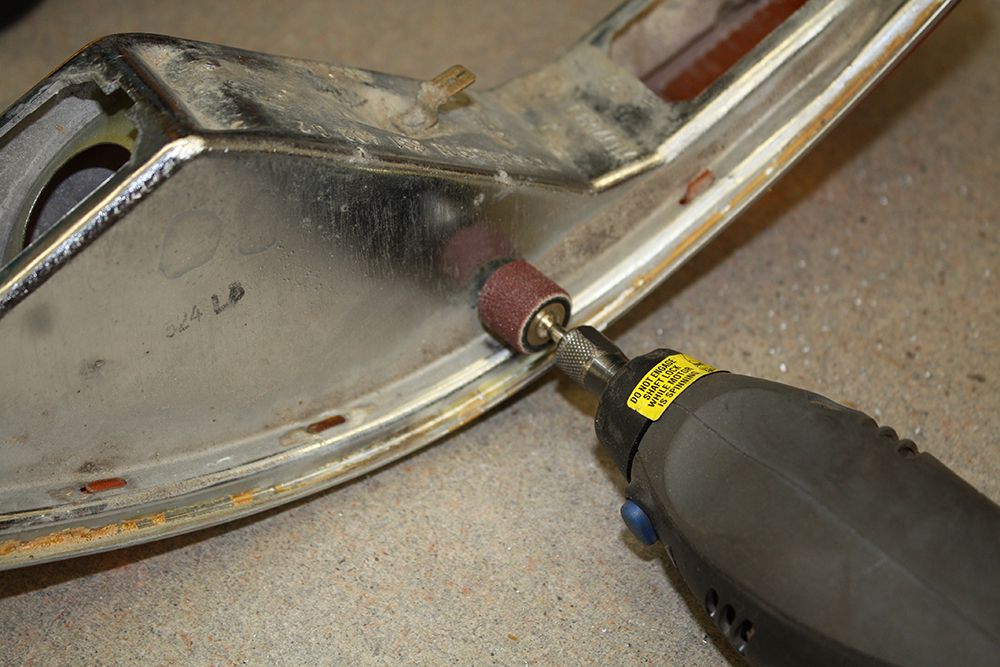
After bead blasting the inserts, I discovered that the holes in the new lenses were way too small. I used a couple drill bits to get close. I then used a dremel tool to get closer yet to the right size with the round file used to make the hole exactly the right size. I wanted the hole to be a relatively tight fit. As you can see in the photo below, there is enough of the insert protruding on the rear for me to flare it. Now all I have to do is figure out how to flare it without cracking the lens.


Once I had the holes correct, I used some wire so I could mount each insert to a hanger so I could paint them. And that is as far as I got today.

 04-27-2014, 12:06 AM
#223
Racer
Thread Starter
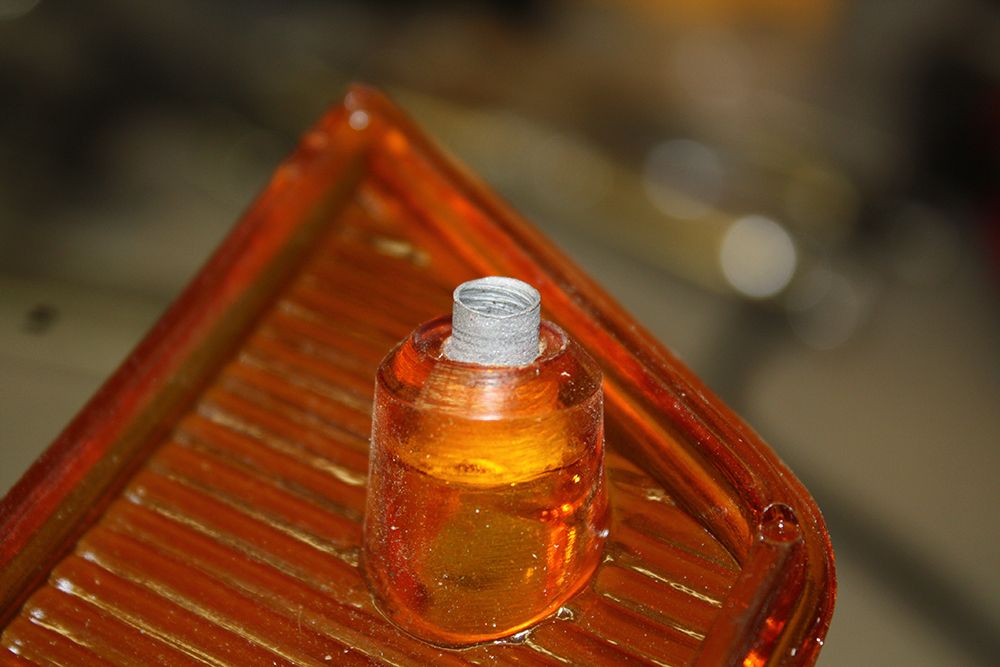
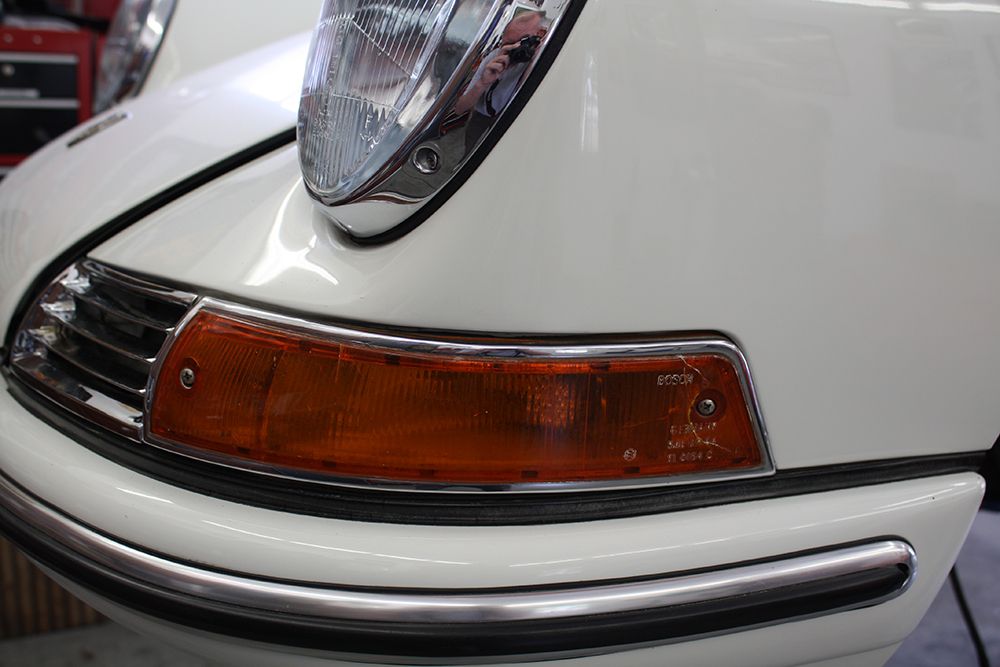
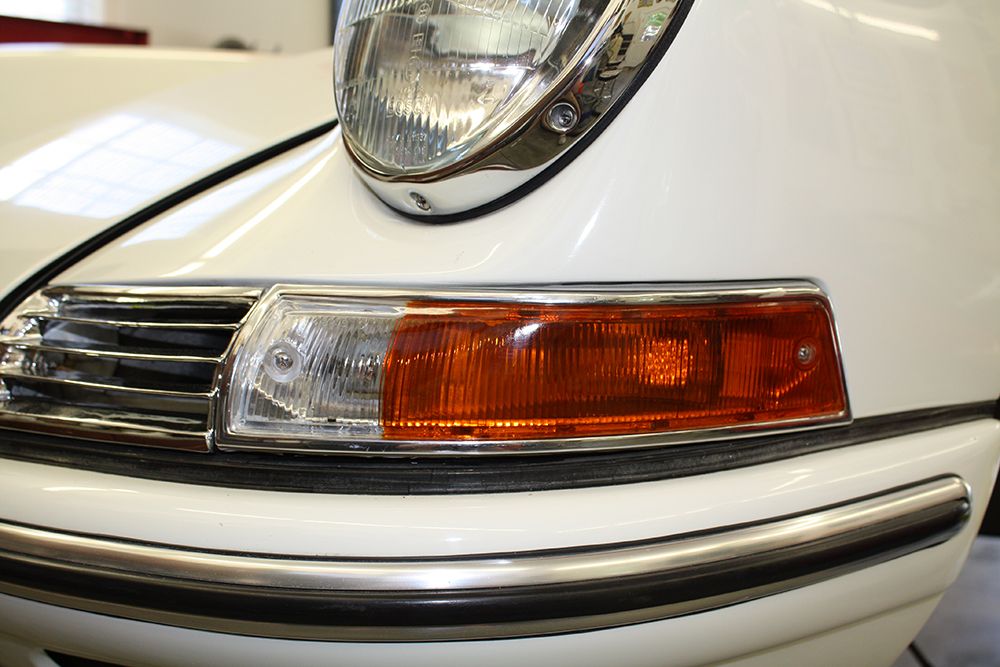
The paint was dry on the turn signal bushings. I inserted them into the lens. Yesterday I mentioned having to flare them but had forgotten that the part of the bushing exposed on the lens would be inserted into the housing where they were flush. They will be held in with the screws. I applied clear silicone to the rear of the lens and then attached the lens to the housing.

I then applied weatherstrip cement to the rear of the housing and to the housing to body seal.

Now it was time to install the turn signal housings to the body. The left side was soon attached. However, disaster struck on the right one. I had hooked up the wiring and bulbs and had rested the housing in the opening. I turned around to get the screws and the screw driver when the new lens fell out of the housing onto the floor with predictable results. The silicone had not hardened enough to hold the lens in place. After a few choice words, as it was lunch time anyway, I went into the house and ordered a new one. Lesson learned!!


I then applied weatherstrip cement to the rear of the housing and to the housing to body seal.


Now it was time to install the turn signal housings to the body. The left side was soon attached. However, disaster struck on the right one. I had hooked up the wiring and bulbs and had rested the housing in the opening. I turned around to get the screws and the screw driver when the new lens fell out of the housing onto the floor with predictable results. The silicone had not hardened enough to hold the lens in place. After a few choice words, as it was lunch time anyway, I went into the house and ordered a new one. Lesson learned!!

 04-27-2014, 12:07 AM
#224
Racer
Thread Starter
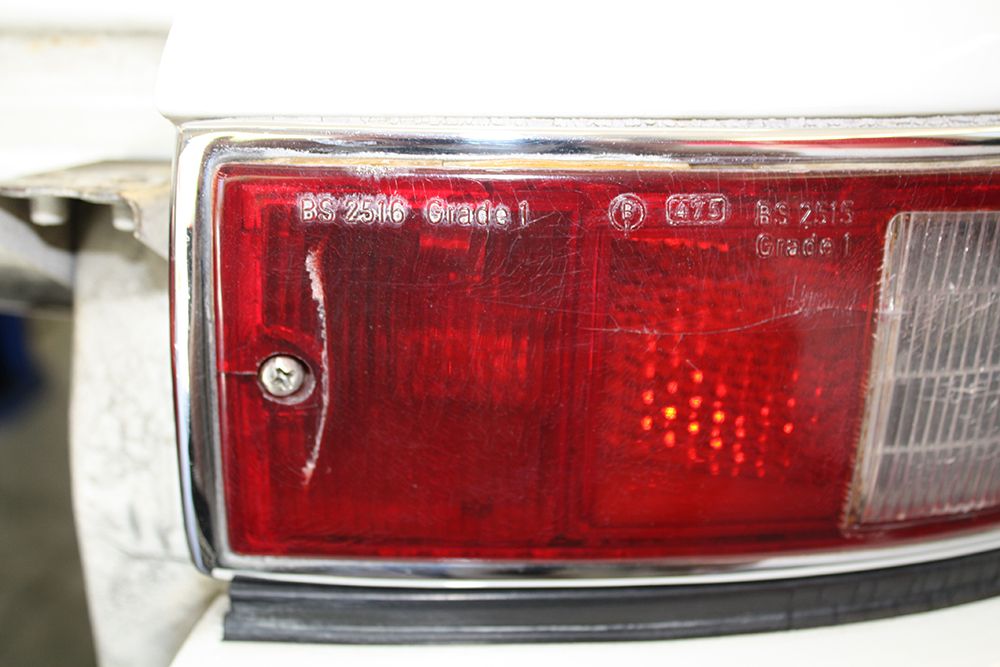
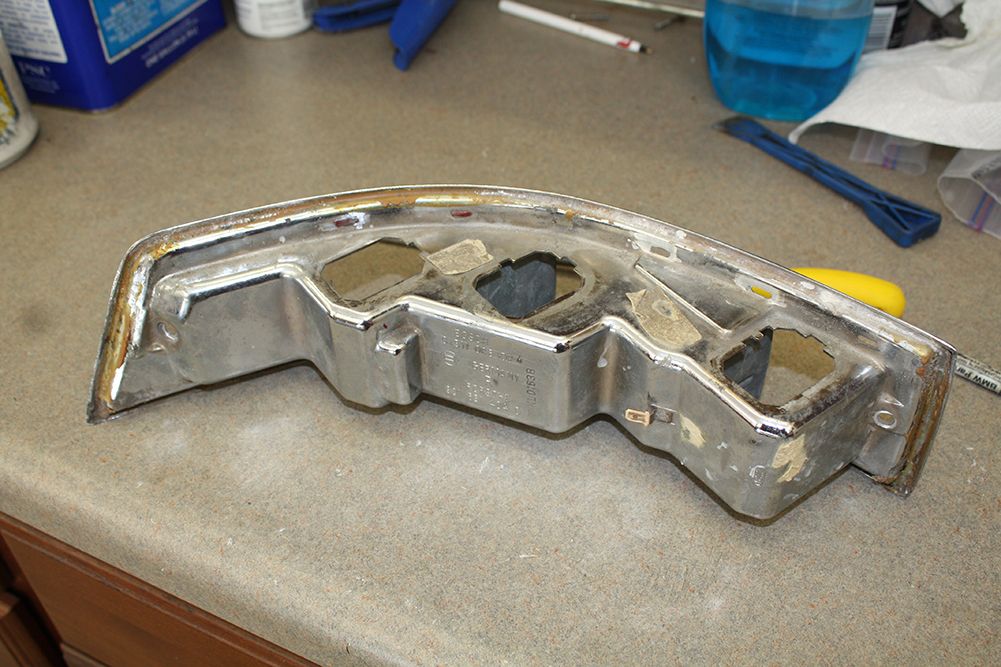
After lunch, I worked on the tail lights. After removing them, I used the same procedures as on the front to separate the lens from the housing as well as removing the bushings. The holes for the bushings were too small on the tail light lenses as well so some drilling and grinding was in order. I did get all four of the bushings painted and got one of the housing cleaned up. The reflectors condition is not as good on the tail lights. However I feel they will be acceptable.