
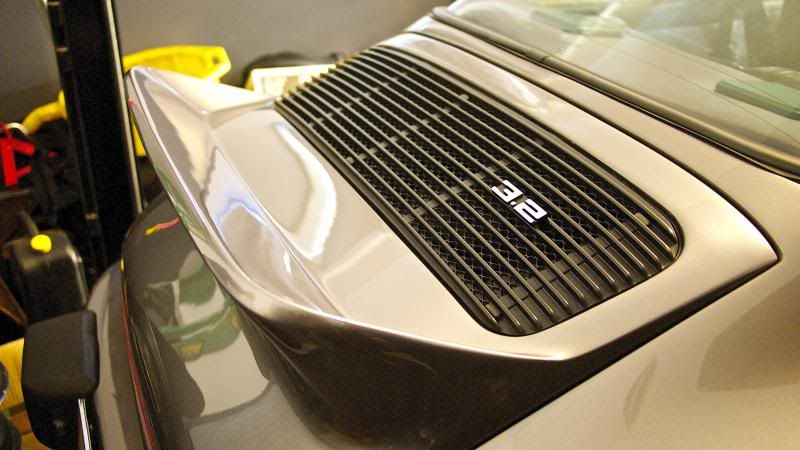
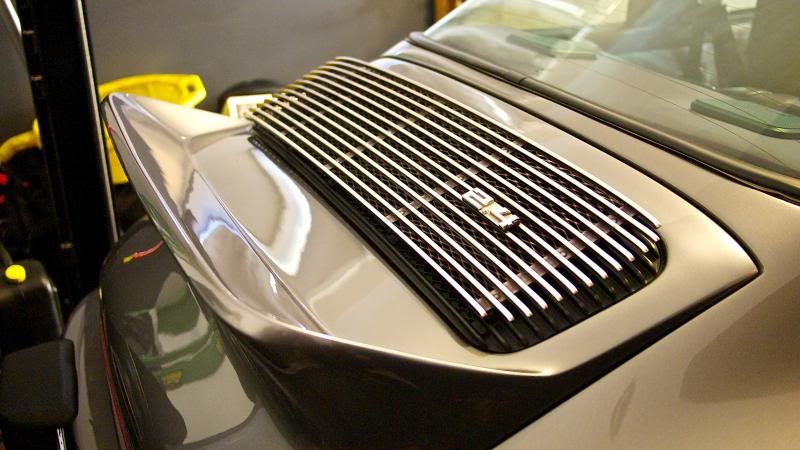
Just about finished with the refresh...

 11-19-2013, 03:25 PM
#19
Nordschleife Master
Thread Starter
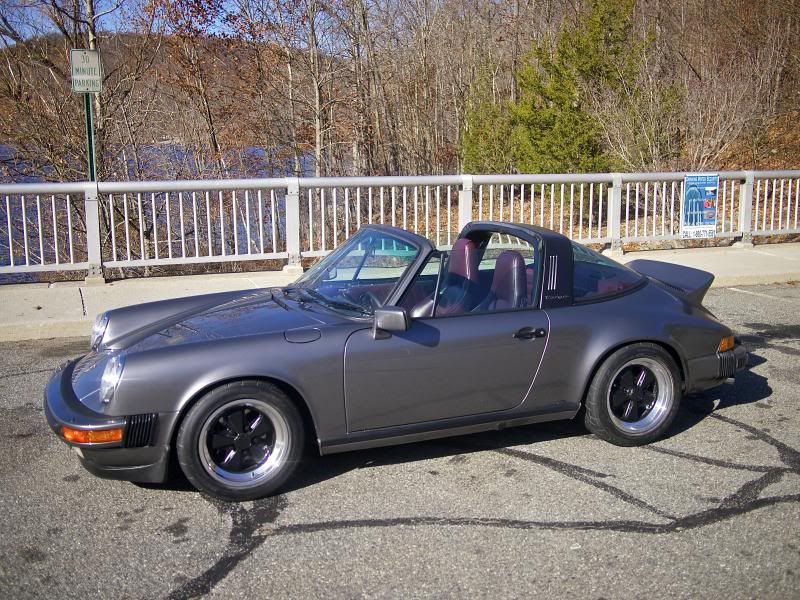
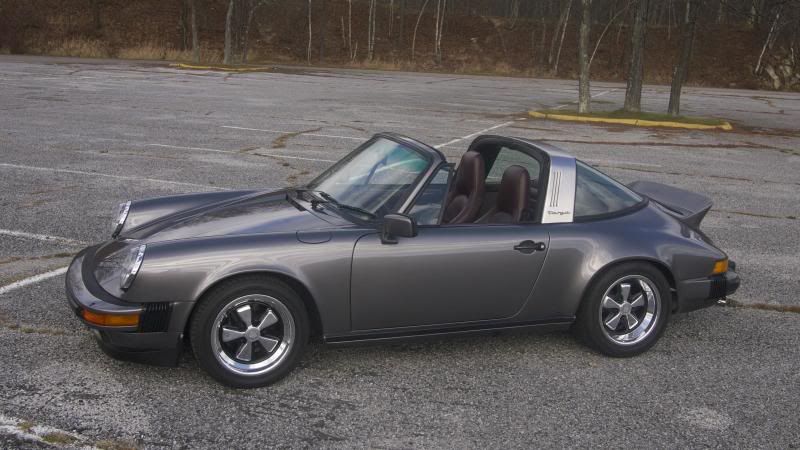
OK... per request, here's the newish wheels and SS bar. Still dont know which look Im gonna go with. Maybe Ill swap annually.  What do you think?
What do you think?

Last edited by redridge; 11-19-2013 at 04:15 PM.
11-19-2013, 03:57 PM
#20
Addict
I like 'em both. Yes, I do have a preference though..... The darker bar and the non-polished pedals is to my personal liking. BUT, having gone with the polished wheels and the chrome headlight rings I'll admit that she looks really good now. 
11-19-2013, 04:47 PM
#22
Advanced

Join Date: May 2012
Posts: 50
Likes: 0
Received 0 Likes
on
0 Posts
I'm going to have to go with Reiver, primarily because your overall theme with the duck tail, "shiny" headlight rings, appears more old school, which I associate with the shiny wheels. If you had a Carrera tea tray and black headlight bezels, I'd go black.
11-20-2013, 01:38 AM
#23
Instructor
I have to go with Reiver as well. I'm really digging the retro look. Compliments the duck tail perfectly. Simply beautiful!
What color is your car? Meteor metallic?
What color is your car? Meteor metallic?
11-20-2013, 01:01 PM
#25
Nordschleife Master
Thread Starter
yes, Meteor Gray Metalic... the first pic is a sunny day, 2nd pic is a cloudy day
Thanks guys, agreed. When I put the chrome H1's, sort of started the slippery slope looks wise. I then put on chrome exhaust tips, license plate frame... but it was getting nowhere. The whole package was the way to go...
Siberian... I will eventually get to the track, gonna smash some cones to feel her out first.
But now, I may be crossing the line. I do like the aluminum, but maybe in all black or leave it silver to compliment the bar.... hmmmm.


Last edited by redridge; 11-20-2013 at 01:20 PM.
11-20-2013, 01:13 PM
#26
Former Vendor
 12-13-2013, 06:22 PM
#27
Nordschleife Master
Thread Starter
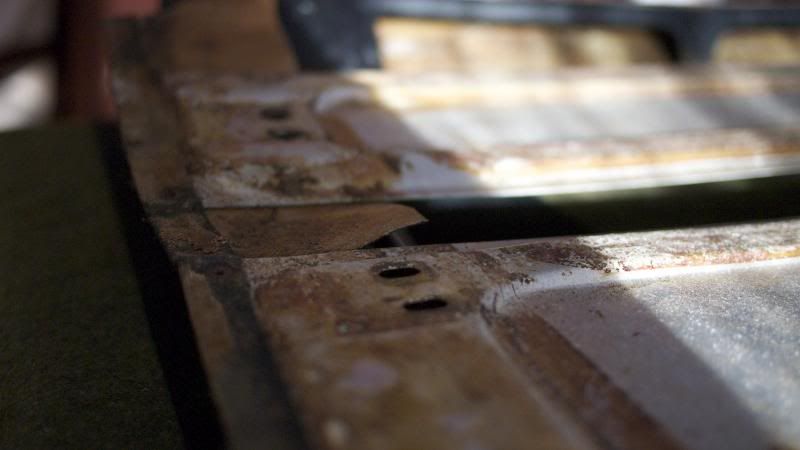
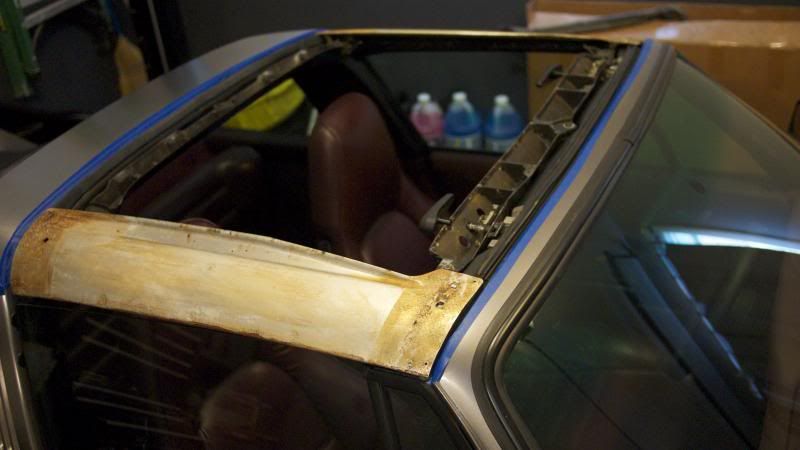
The Targa top was is bad shape, the usual ripping at the folds. Decided to take a look... and the insides was rotted. Unfortunately, the webbing was also ripping.
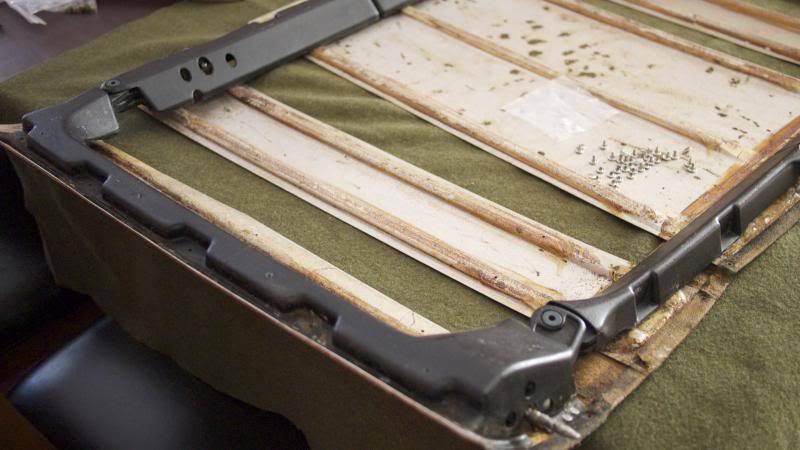
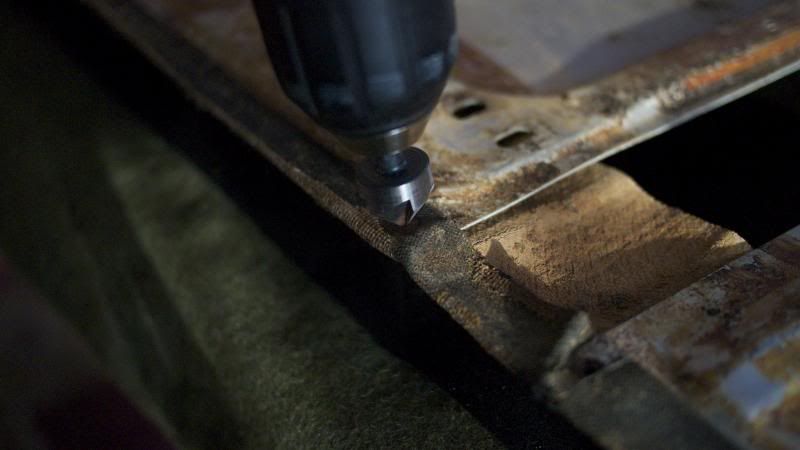
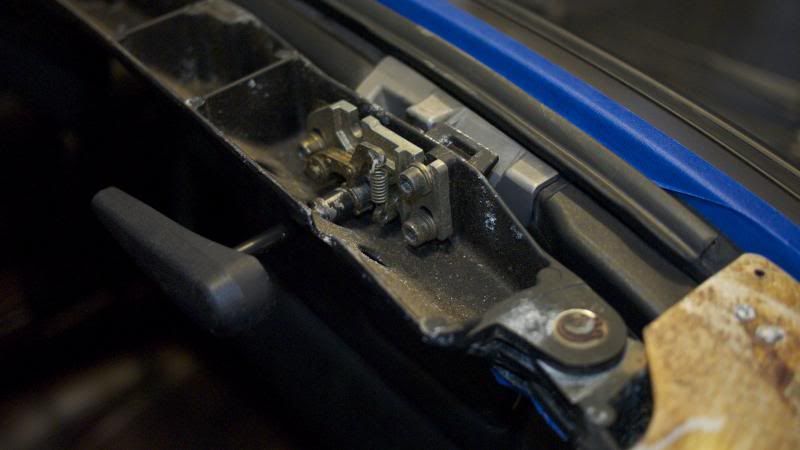
When I tried to unscrew the post, it was seized and wound up stripping the threads, I had to drill out the rivets to get at the siezed nut between the frame and aluminum boards. Installed new posts and and covers to stop the rattling from speeds and bumps.
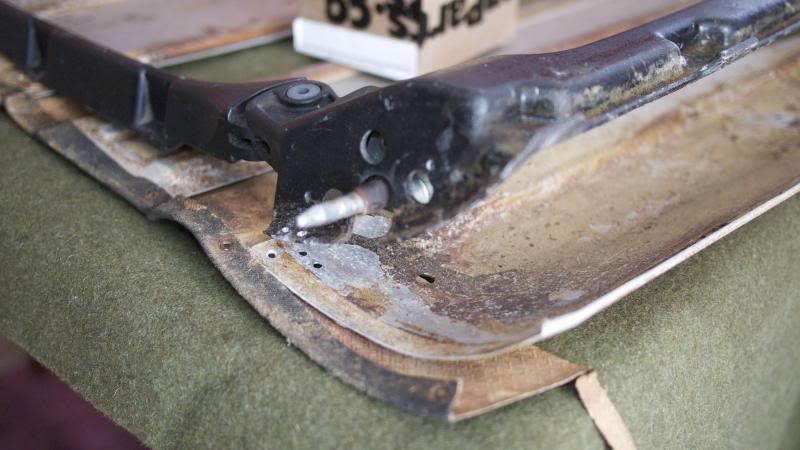
Once the new post was back on, I re-rivited the frame back on the boards.
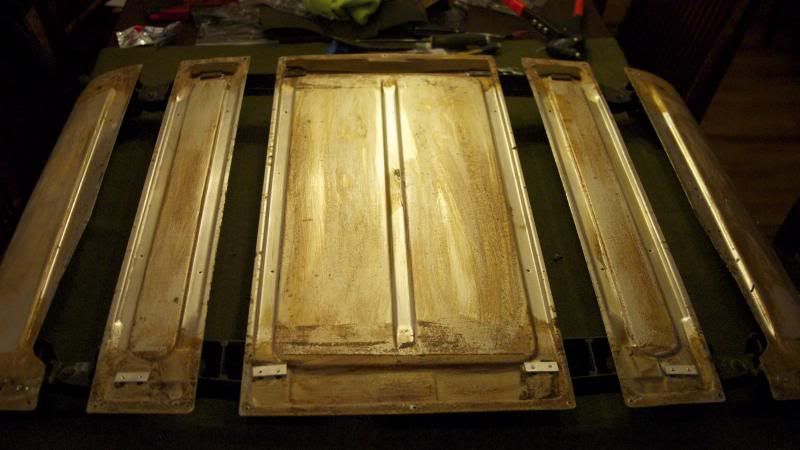
So, now I had to get rid of the rotted out webbing by drilling out the old rivets.
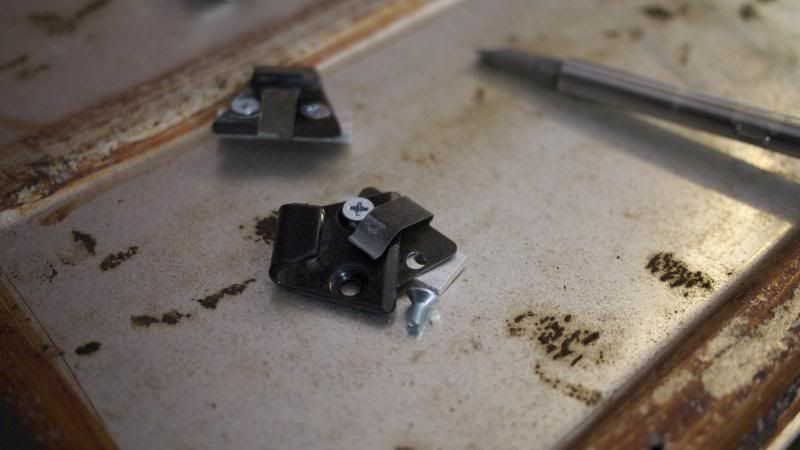
The steel plates that hold the brackets rusted out and I snapped the screws while trying to remove them… had to make new plates with new screws.
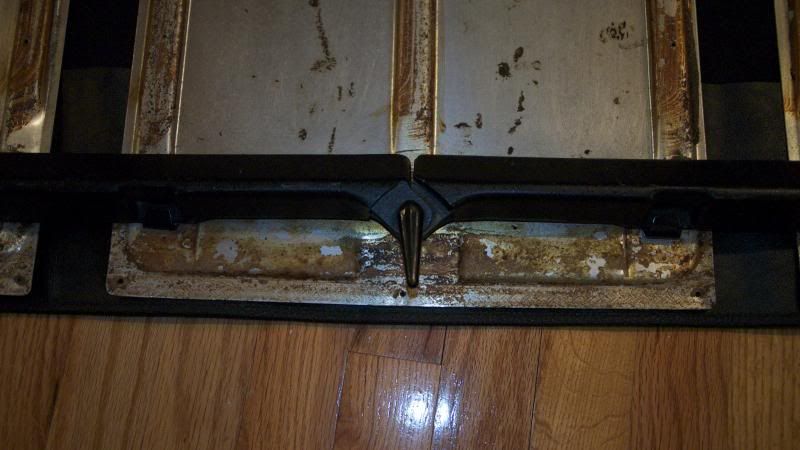
re-assembled the pieces back together to get the shape back. The little brackets needs to be adjusted to move the aluminum boards up/down. I used the new vinyl cover (under the frame in black) as the template to shape the top.

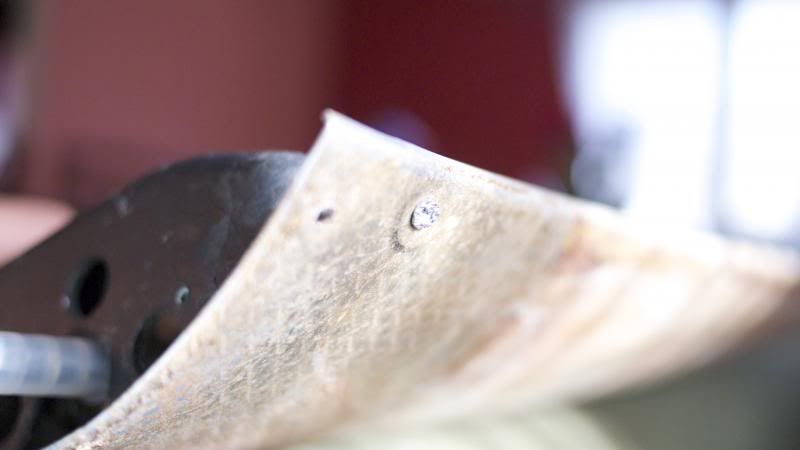
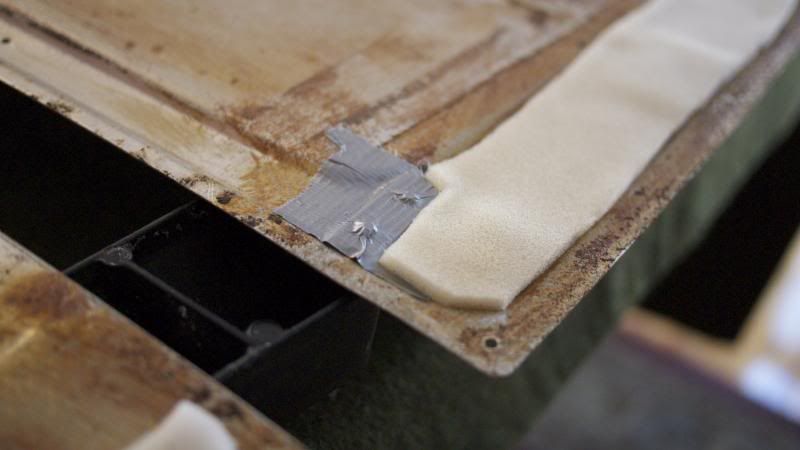
added new foam for the recessed area of the board to keep lumps out of the top and taped down the bracket nut in place.


When I tried to unscrew the post, it was seized and wound up stripping the threads, I had to drill out the rivets to get at the siezed nut between the frame and aluminum boards. Installed new posts and and covers to stop the rattling from speeds and bumps.

Once the new post was back on, I re-rivited the frame back on the boards.

So, now I had to get rid of the rotted out webbing by drilling out the old rivets.

The steel plates that hold the brackets rusted out and I snapped the screws while trying to remove them… had to make new plates with new screws.

re-assembled the pieces back together to get the shape back. The little brackets needs to be adjusted to move the aluminum boards up/down. I used the new vinyl cover (under the frame in black) as the template to shape the top.


added new foam for the recessed area of the board to keep lumps out of the top and taped down the bracket nut in place.
 12-13-2013, 06:23 PM
#28
Nordschleife Master
Thread Starter
placed the frame on the car and checked for squareness and adjustments, marked its position just in case I totally screw up the shape.
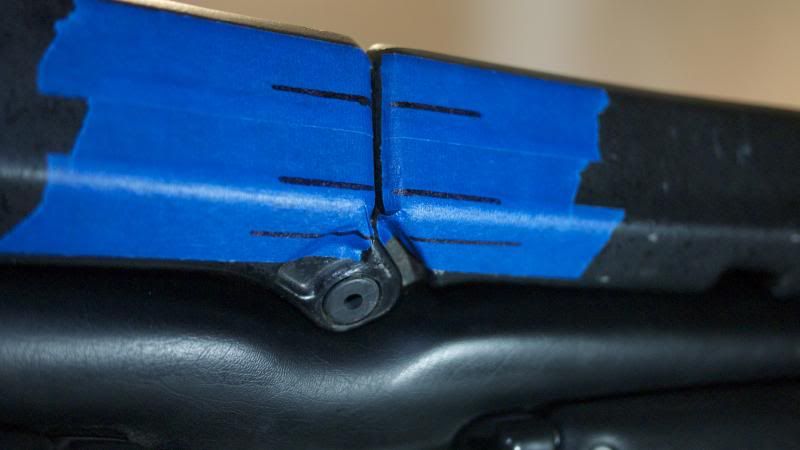
these 3 bolts adjusts the up/down of the top, there is also adjustments for the rear of the top. Once adjustments are made, take off the top carefully to put the boards and webbing on.
now ready for the new webbing… you can see the rectangular bar I made that holds dwon the bracket.
determine how much webbing you want to use (I used 4" from the edge). Clamp down one side and glue the board and webbing… pull to the other side making sure it taught but not to tight. Clamp down the other side.
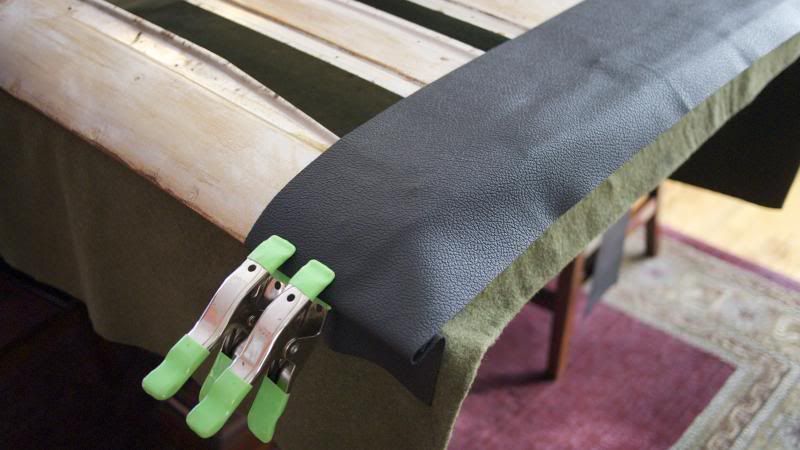
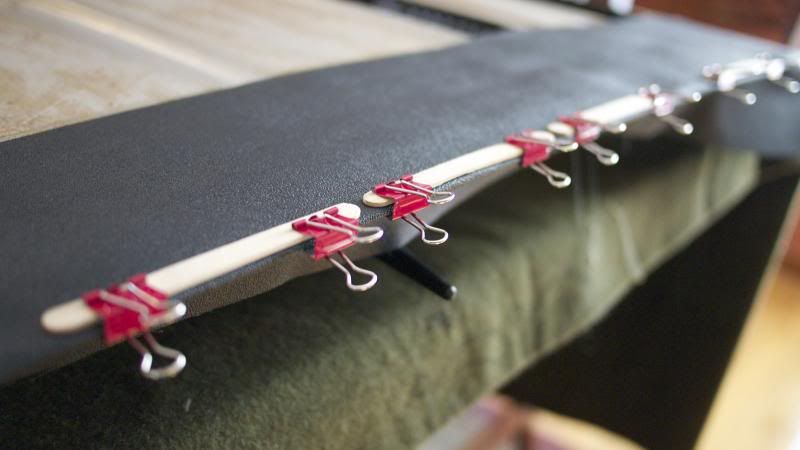
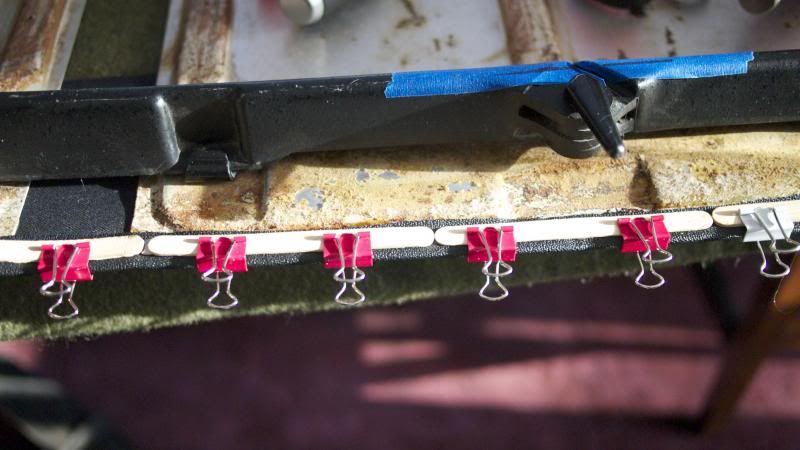
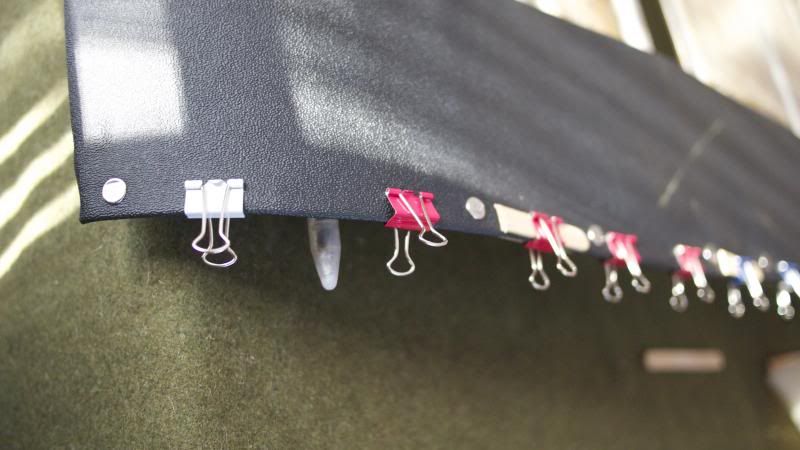
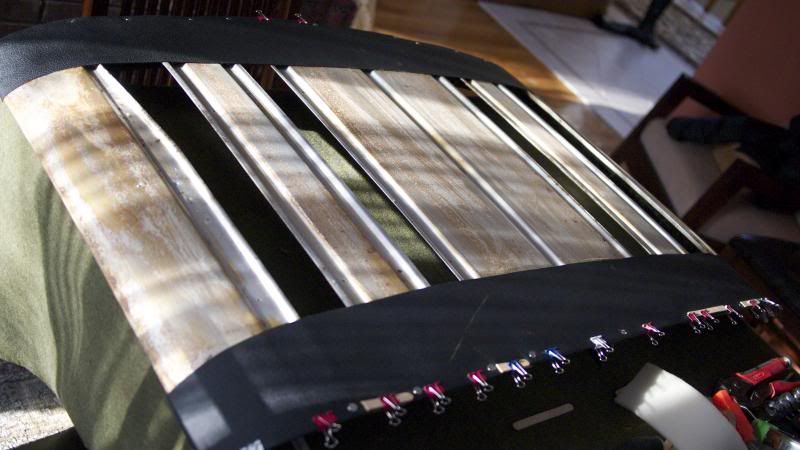
Cut off excess webbing. Use the rivets from the kit, add some glue to the board and webbing and rivet the webbing in place…. use PLENTY of clips and popsicle sticks to hold down the edges… Wait till dry.


these 3 bolts adjusts the up/down of the top, there is also adjustments for the rear of the top. Once adjustments are made, take off the top carefully to put the boards and webbing on.

now ready for the new webbing… you can see the rectangular bar I made that holds dwon the bracket.

determine how much webbing you want to use (I used 4" from the edge). Clamp down one side and glue the board and webbing… pull to the other side making sure it taught but not to tight. Clamp down the other side.

Cut off excess webbing. Use the rivets from the kit, add some glue to the board and webbing and rivet the webbing in place…. use PLENTY of clips and popsicle sticks to hold down the edges… Wait till dry.


