
Just about finished with the refresh...
 12-14-2013, 11:32 AM
#31
Burning Brakes
Join Date: Oct 2003
Location: Durban, South Africa
Posts: 883
Likes: 0
Received 0 Likes
on
0 Posts
Looking good Ferdinand.
Thing I love about 911 projects is when you're knee deep into it with the work in progress looking like a real mess, you can always turn to that picture in your mind of how pretty it's gonna be when you're done...
Thing I love about 911 projects is when you're knee deep into it with the work in progress looking like a real mess, you can always turn to that picture in your mind of how pretty it's gonna be when you're done...
 12-14-2013, 07:45 PM
#32
Nordschleife Master
Thread Starter
Thanks Guys....
here's some more progress while it snows outside…
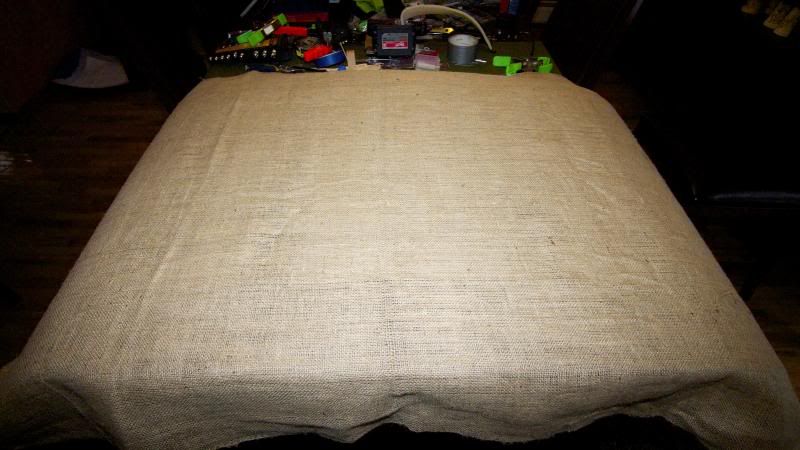
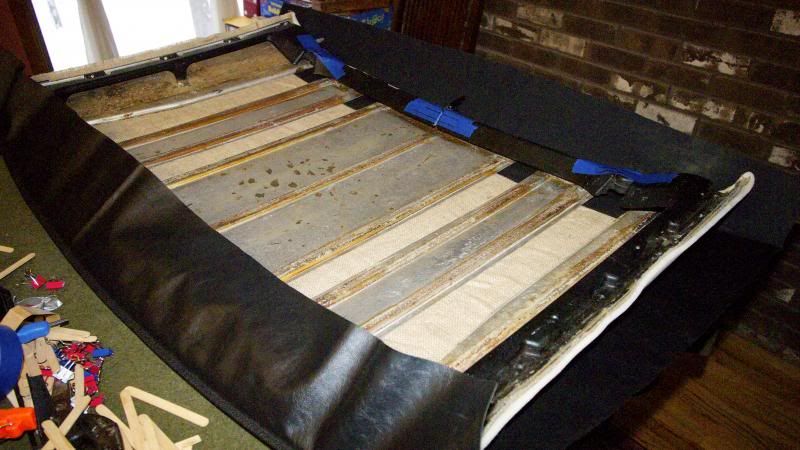
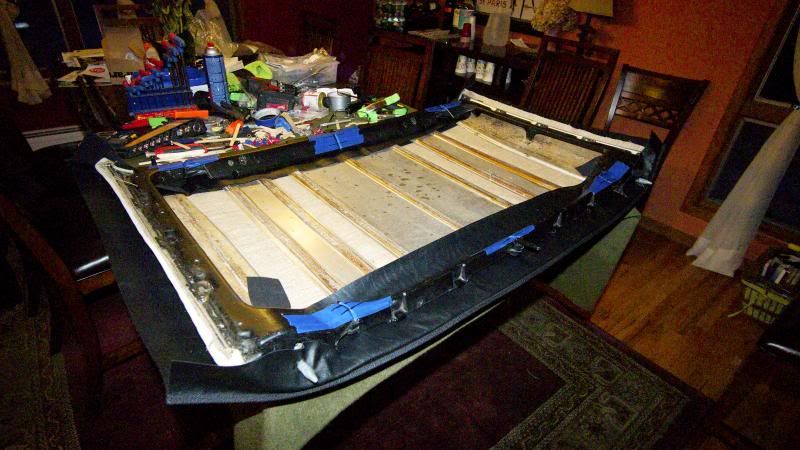
lay down some glue (I used spray glue here) on the boards and webbing. Put the burlap down… you need 2 people to stretch it out while laying it on the top.
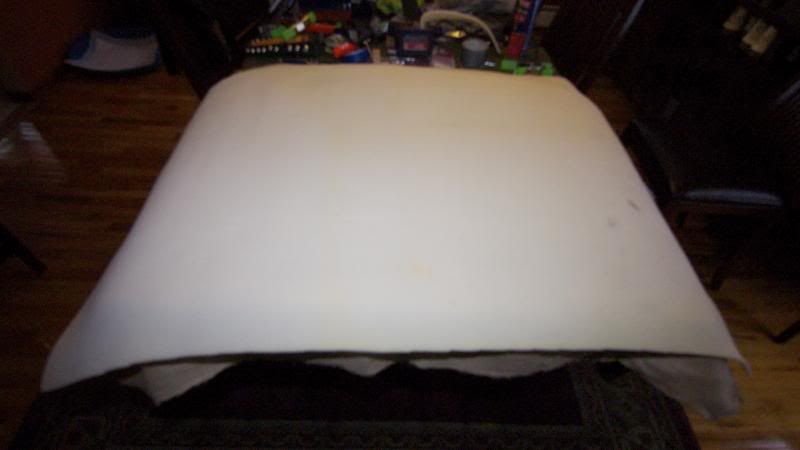
again with an extra hand, spray some glue on the burlap and lay down the new foam.
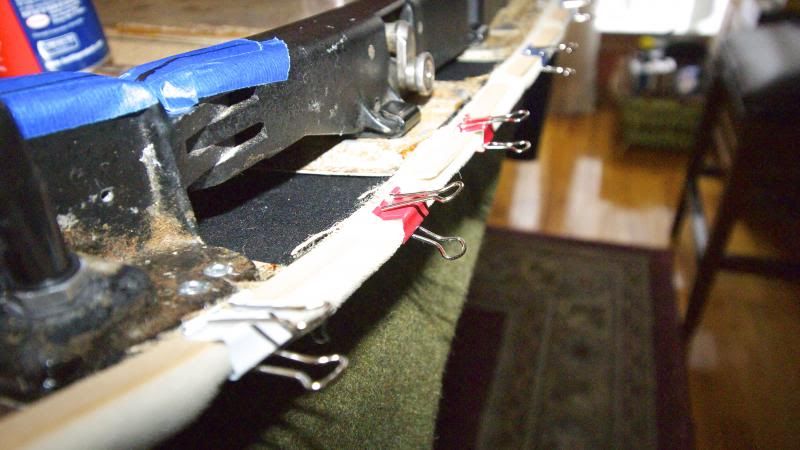
cut the excess material leaving about an 1" from the edges to fold over.
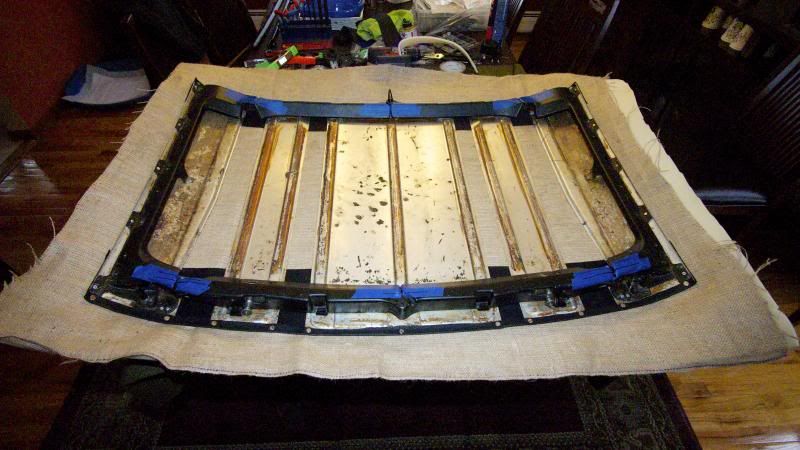
glue the burlap down to the boards and glue the foam down on the burlap… use clips and popsicle sticks to keep shape... wait to dry.
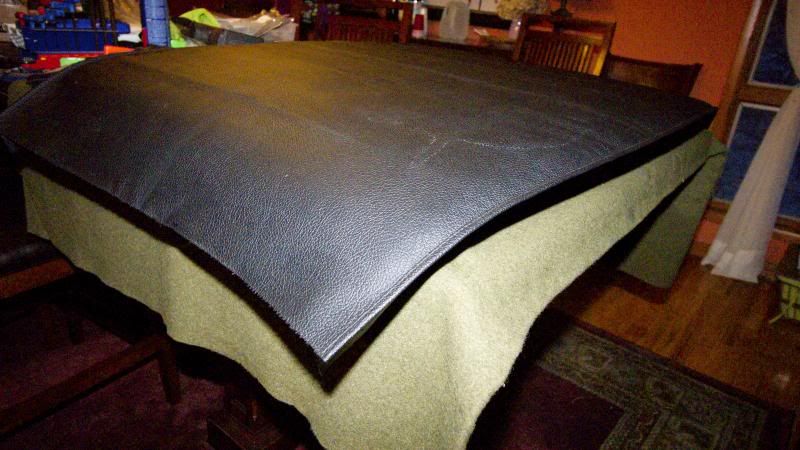
Take the new vinyl cover and mark its center (to find the center, just fold the cover in half). Slip the new vinyl cover on the center of the frame.
here's some more progress while it snows outside…
lay down some glue (I used spray glue here) on the boards and webbing. Put the burlap down… you need 2 people to stretch it out while laying it on the top.

again with an extra hand, spray some glue on the burlap and lay down the new foam.

cut the excess material leaving about an 1" from the edges to fold over.

glue the burlap down to the boards and glue the foam down on the burlap… use clips and popsicle sticks to keep shape... wait to dry.

Take the new vinyl cover and mark its center (to find the center, just fold the cover in half). Slip the new vinyl cover on the center of the frame.
 12-14-2013, 07:46 PM
#33
Nordschleife Master
Thread Starter
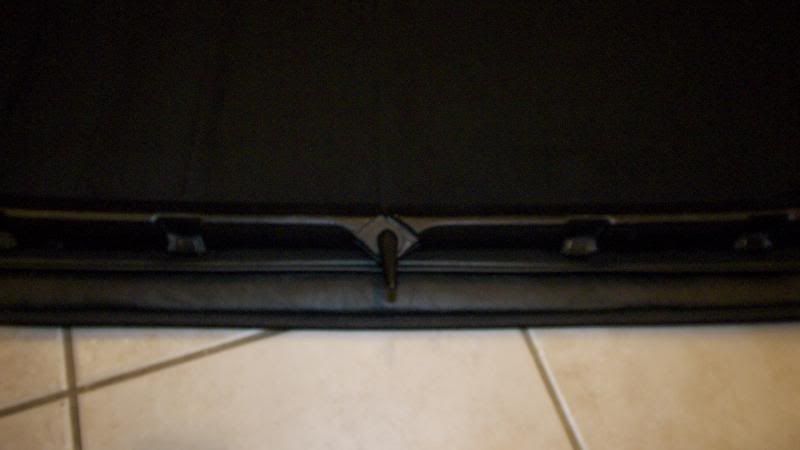
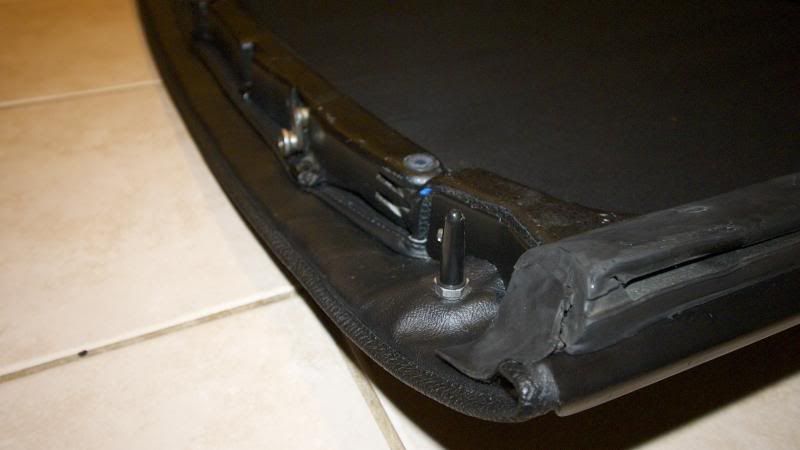
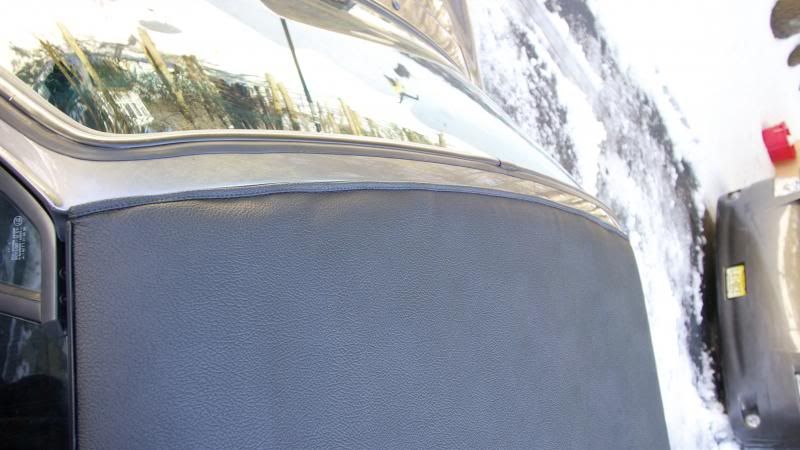
pull the vinyl cover to the tops front edge, while making sure it is flushed, instal the brackets. You need to pierce the vinyl to get the screw through to the rectangular nut that is tape down underneath. At this point the Top should be semi-folded to install the brackets. This is just to get the vinyl in place... Final adjustments will be needed once all the brackets, post and corner plates are in place.
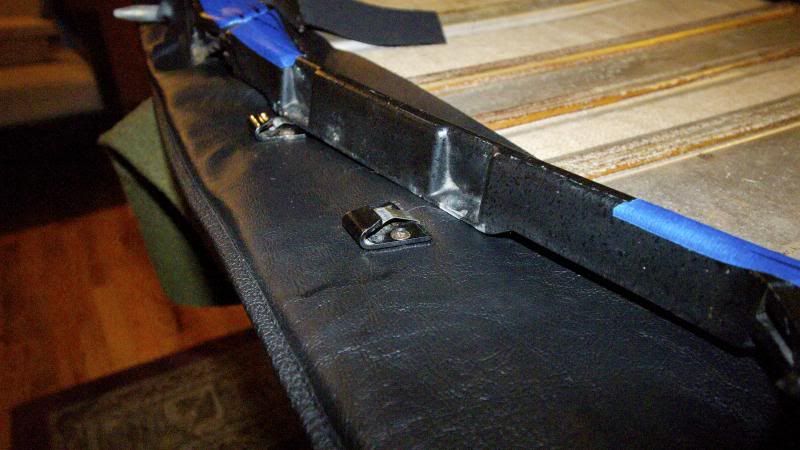
Install the posts.
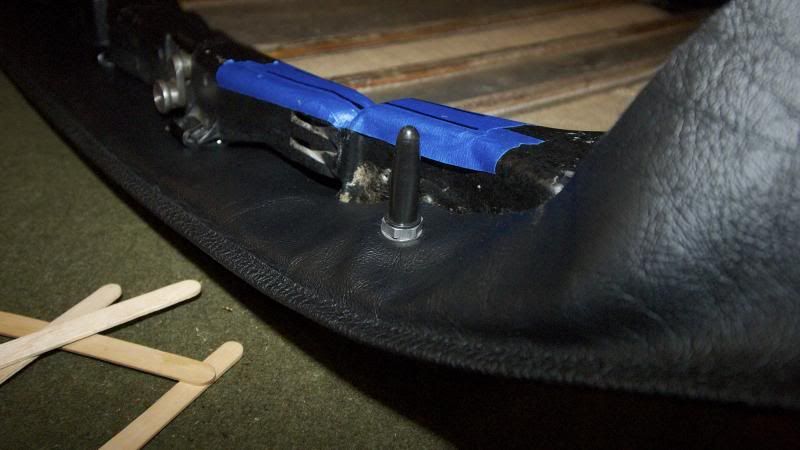
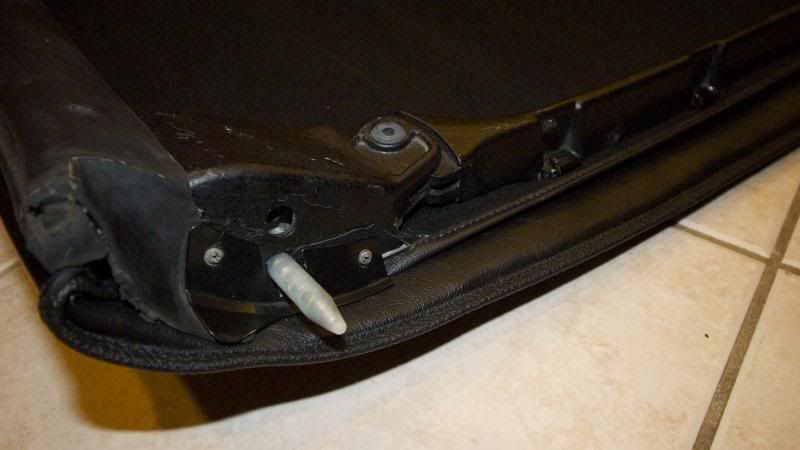
On the corners, cut the excess vinyl and glue down the vinyl. Tuck the vinyl under the frame while expanding the Top� Repeat the procedure on the other side� The vinyl will be cold so you need to pull and stretch the material to get it flushed on the edges. Once it is flushed, clamp it down and install the brackets� once the brackets are installed the vinyl will stay put.
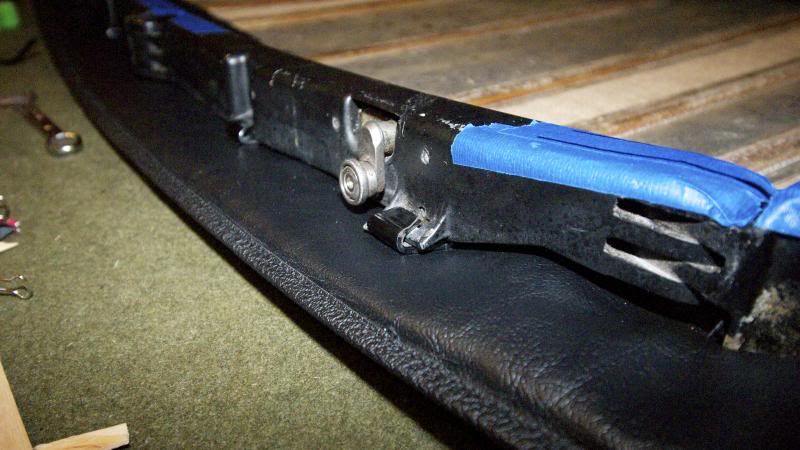
You need to pull and pull to get the vinyl flushed to the edges... with the top semi-folded, stretch and pull the vinyl to to sides. When the top gets expanded to the unfolded position, the vinyl will stretch, taking out the wrinkles.
I ran out of glue so this is it for now, I still need to do the sides and do some more stretching� hopefully the vinyl will stretch out some more overnight. Again, this is just to get the vinyl in place... Final adjustments will be needed once all the brackets, post and corner plates are in place.
Time to shovel some snow.

Install the posts.

On the corners, cut the excess vinyl and glue down the vinyl. Tuck the vinyl under the frame while expanding the Top� Repeat the procedure on the other side� The vinyl will be cold so you need to pull and stretch the material to get it flushed on the edges. Once it is flushed, clamp it down and install the brackets� once the brackets are installed the vinyl will stay put.


You need to pull and pull to get the vinyl flushed to the edges... with the top semi-folded, stretch and pull the vinyl to to sides. When the top gets expanded to the unfolded position, the vinyl will stretch, taking out the wrinkles.

I ran out of glue so this is it for now, I still need to do the sides and do some more stretching� hopefully the vinyl will stretch out some more overnight. Again, this is just to get the vinyl in place... Final adjustments will be needed once all the brackets, post and corner plates are in place.
Time to shovel some snow.
 12-16-2013, 08:09 PM
#34
Nordschleife Master
Thread Starter
just to finish this project… here are some final detail pics.
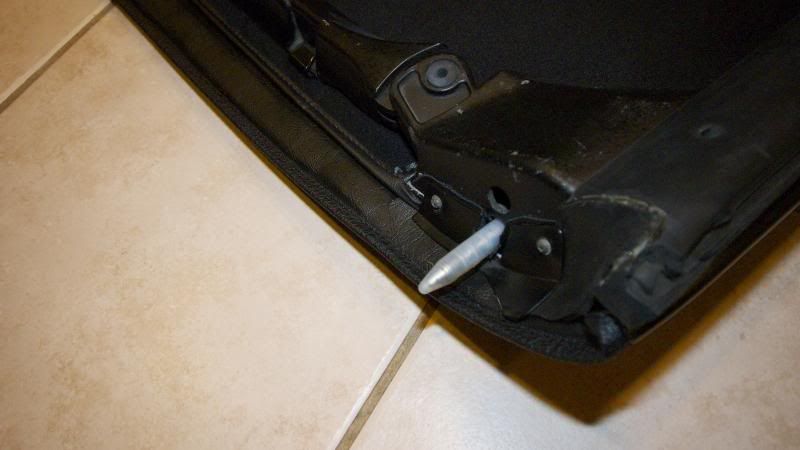
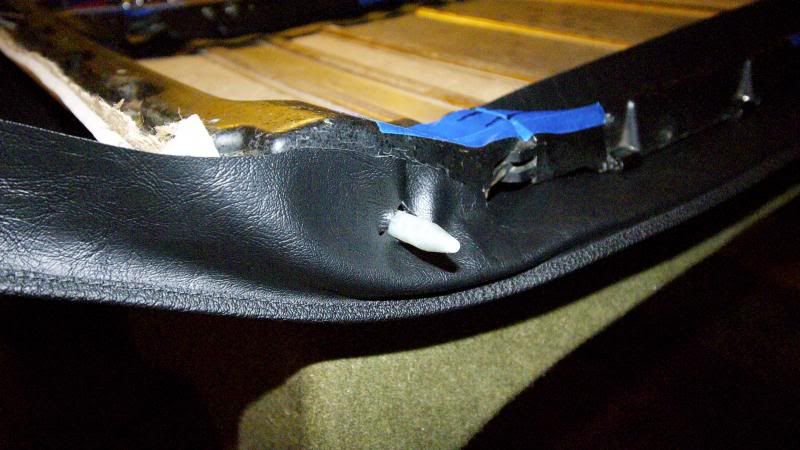
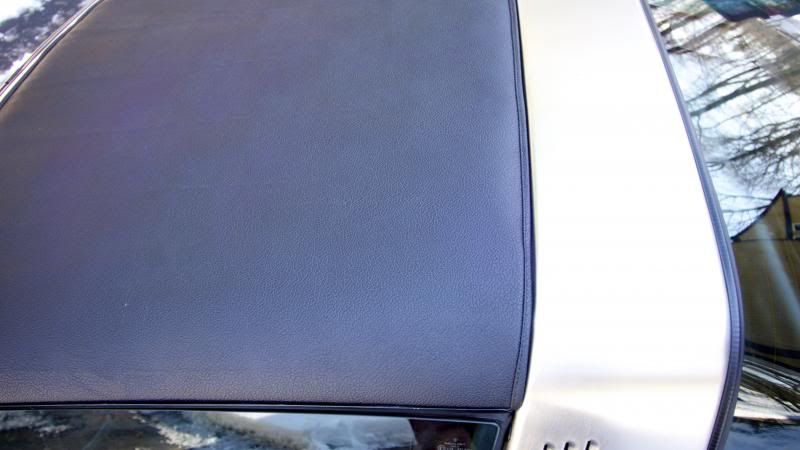
when putting the interior liner, you just transfer the bottom bracket holes to the liner and mount the bracket on top. Dont forget to glue the liner.
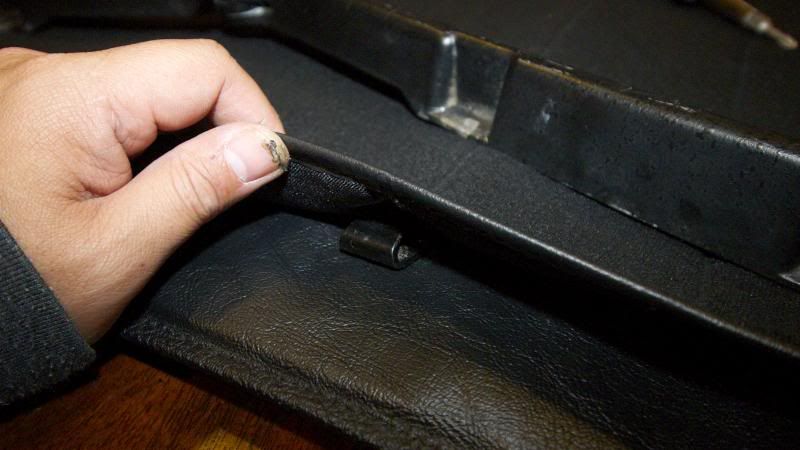


when putting the interior liner, you just transfer the bottom bracket holes to the liner and mount the bracket on top. Dont forget to glue the liner.


 12-17-2013, 11:28 AM
#36
Rennlist Member
Now if it'll only fit! 
That is an incredibly detailed job. When I had my Targa I used to think, "Man, why are these tops so hard to a) keep weathertight and b) expensive to rebuild?" You have answered both questions handily.
Enjoy that ride. This has been - and continues to be - inspiring!
That is an incredibly detailed job. When I had my Targa I used to think, "Man, why are these tops so hard to a) keep weathertight and b) expensive to rebuild?" You have answered both questions handily.
Enjoy that ride. This has been - and continues to be - inspiring!
12-17-2013, 08:59 PM
#37
Nordschleife Master
Thread Starter
yeah, if it'll only fit...
Well, I mounted the top and it needs a bit more tweaking… It looks great on the kitchen floor, but not so much on the car.
Im thinking that this DIY would prob work best during the summer months. The vinyl is hard to work with when it is cold. I also made the mistake of "folding" the top and it created the ridges up front. So I think I will need to tighten the cover up some more in warmer weather. Also, Ive changed all the gaskets and the top is going on pretty tight… the cold weather is def not helping with fitting the top.
The primary reason I wanted to do this project this winter is that I just got the Targa back from the shop for wheel alignment, corner balancing and ride height. I needed the top to drive the car and check the work that was done. I would hate to call the shop in the spring and tell them there was something wrong with the work they've done.
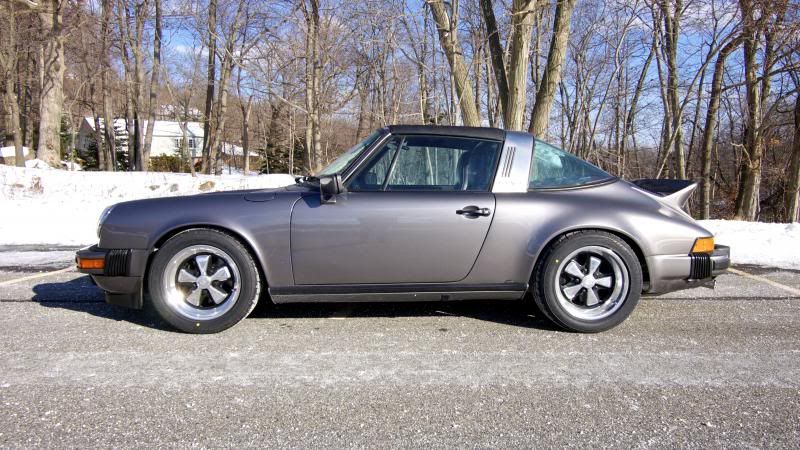
Here it is mounted on the car, its not perfect but will do for now… when warmer weather breaks, I will redo the cover and posts the results.
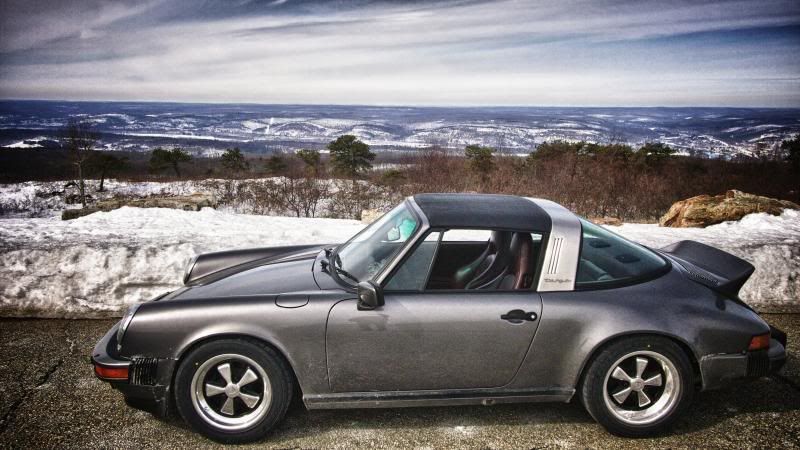
went for a drive to check the alignment and all is well.... here is the new stance.
Well, I mounted the top and it needs a bit more tweaking… It looks great on the kitchen floor, but not so much on the car.
Im thinking that this DIY would prob work best during the summer months. The vinyl is hard to work with when it is cold. I also made the mistake of "folding" the top and it created the ridges up front. So I think I will need to tighten the cover up some more in warmer weather. Also, Ive changed all the gaskets and the top is going on pretty tight… the cold weather is def not helping with fitting the top.
The primary reason I wanted to do this project this winter is that I just got the Targa back from the shop for wheel alignment, corner balancing and ride height. I needed the top to drive the car and check the work that was done. I would hate to call the shop in the spring and tell them there was something wrong with the work they've done.
Here it is mounted on the car, its not perfect but will do for now… when warmer weather breaks, I will redo the cover and posts the results.


went for a drive to check the alignment and all is well.... here is the new stance.

 03-03-2014, 02:41 PM
#39
Nordschleife Master
Thread Starter
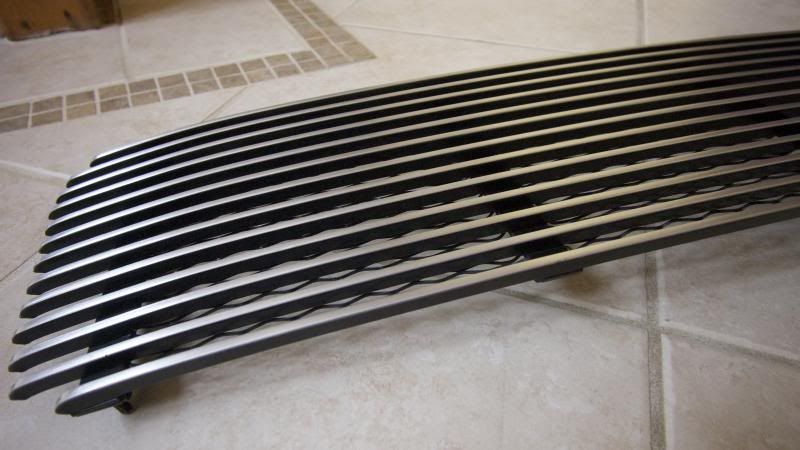
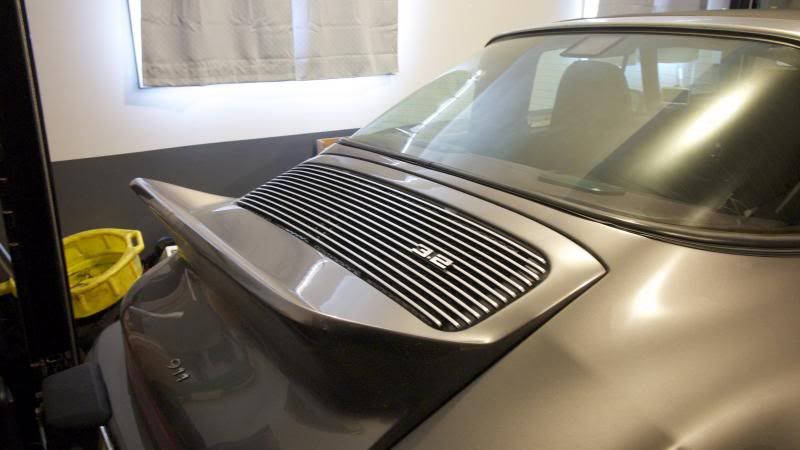
painted the Al grill and didnt like the all black look... so I started sanding (couple of hours) and now am happy with the results.
and I got this in the mail...


and I got this in the mail...
 03-05-2014, 02:50 PM
#41
Nordschleife Master
Thread Starter
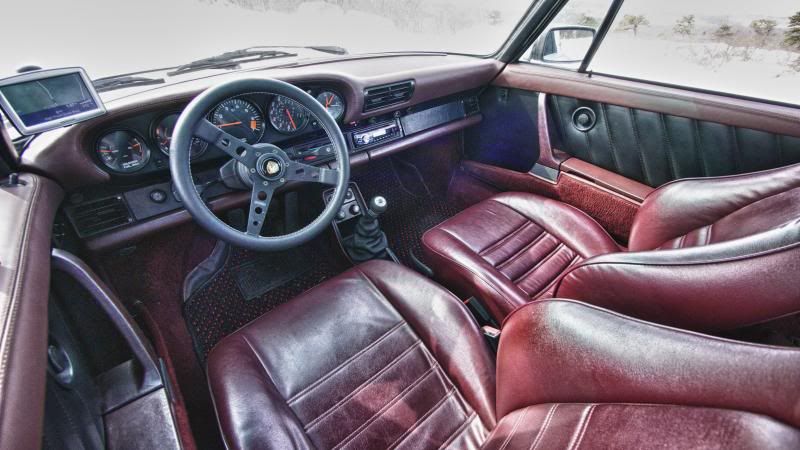
My door cards were shot so I bought a set of cards and vinyl covers from appbiz... not as good as the oem, Porsche use a better vinyl and more padded look... but it will do, I also like the front speaker delete look. Instal was easy to do and straight forward.
and a drive from today... this weather is killing me.

and a drive from today... this weather is killing me.

 That is a sweet patina.
  Totally love it.
03-10-2014, 02:03 PM
Totally love it.
03-10-2014, 02:03 PM
#43
Nordschleife Master
Thread Starter
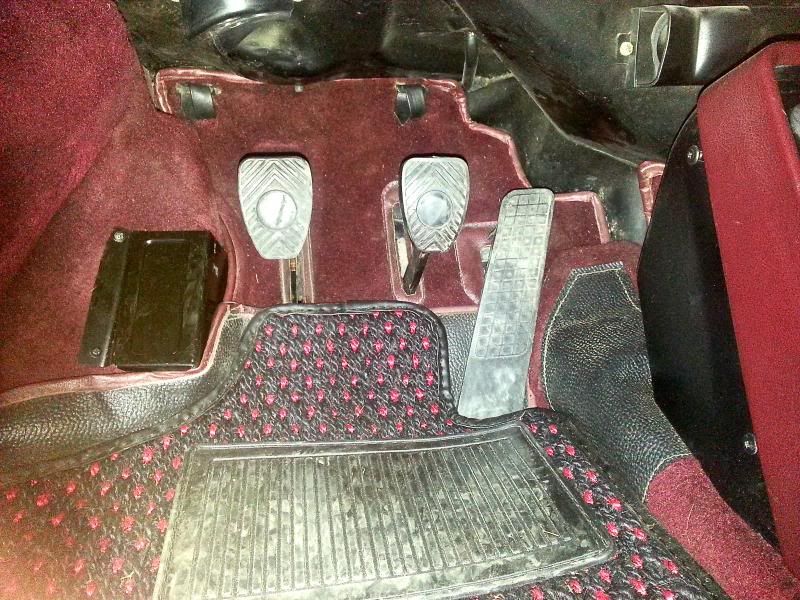
noticed that I was wearing out the carpet by my left foot, so I installed a dead pedal... I like it, no more foot wandering. Easy install.... used a shoe to find a nice placement...
 03-10-2014, 11:44 PM
#45
Redridge - Thanks for sharing. Your Targa looks great and I am looking to update/backdate my 1986 Targa. How were you changing from black to SS on the Targa Bar? I am a new Targa owner and not sure how you are doing that...is it am entirely new bar or a cover. Where can I find the SS Bar. Also, I love the Ducktail look. Where did you buy your lid? Car looks great and I like the SS/Chrome look the best! Thanks in advance for sharing  .
.
.