When you click on links to various merchants on this site and make a purchase, this can result in this site earning a commission. Affiliate programs and affiliations include, but are not limited to, the eBay Partner Network.
Kiln Red,
Thanks for the ref. point. Its good to know I am not losing my mind in a bottomless pit of minor bodywork repairs. I am right on schedule with 157 hours to date. By the time paint is on and buffed I will likely be close to 200.
Originally Posted by Kiln_Red
Not much faster..
I'm just south of 200 hours on an '85 Euro that I painted recently. Car is still with me for final buff and a little reassembly from there. It's of note, too, that the customer did some of the disassembly. Some of these sharks command serious TLC to get right from the body/refinish standpoint.. I greatly underestimated the work required on my most recent endeavor.
Earlier we had mentioned how difficult it was to get the front bumper cover to behave. The top surface of the cover has two (positive) bumps, next to the washer nozzle holes. Both would not go away with any normal body work methods. Desperate times - Desperate measures: I don't like adding any non-OEM parts to the restoration. But I made an exception in this case with two aluminum plates (aprox. 240mmx 40mm x 5mm both with a small right angle stiffener feature. Both plates have a dozen 10mm holes drilled in them. A two part epoxy was used after abrading the inside surfaces of the FBC. Clamps were used as shown. 12 hour cure. Two outcomes: 1) two bumps are completed gone and bonus 2) FBC overall is much stiffer. Parts fit with no clearance issues. Total weight gain less than 0.75 Kg. Final surface on the top of the is now as Mr. Lapine intended.
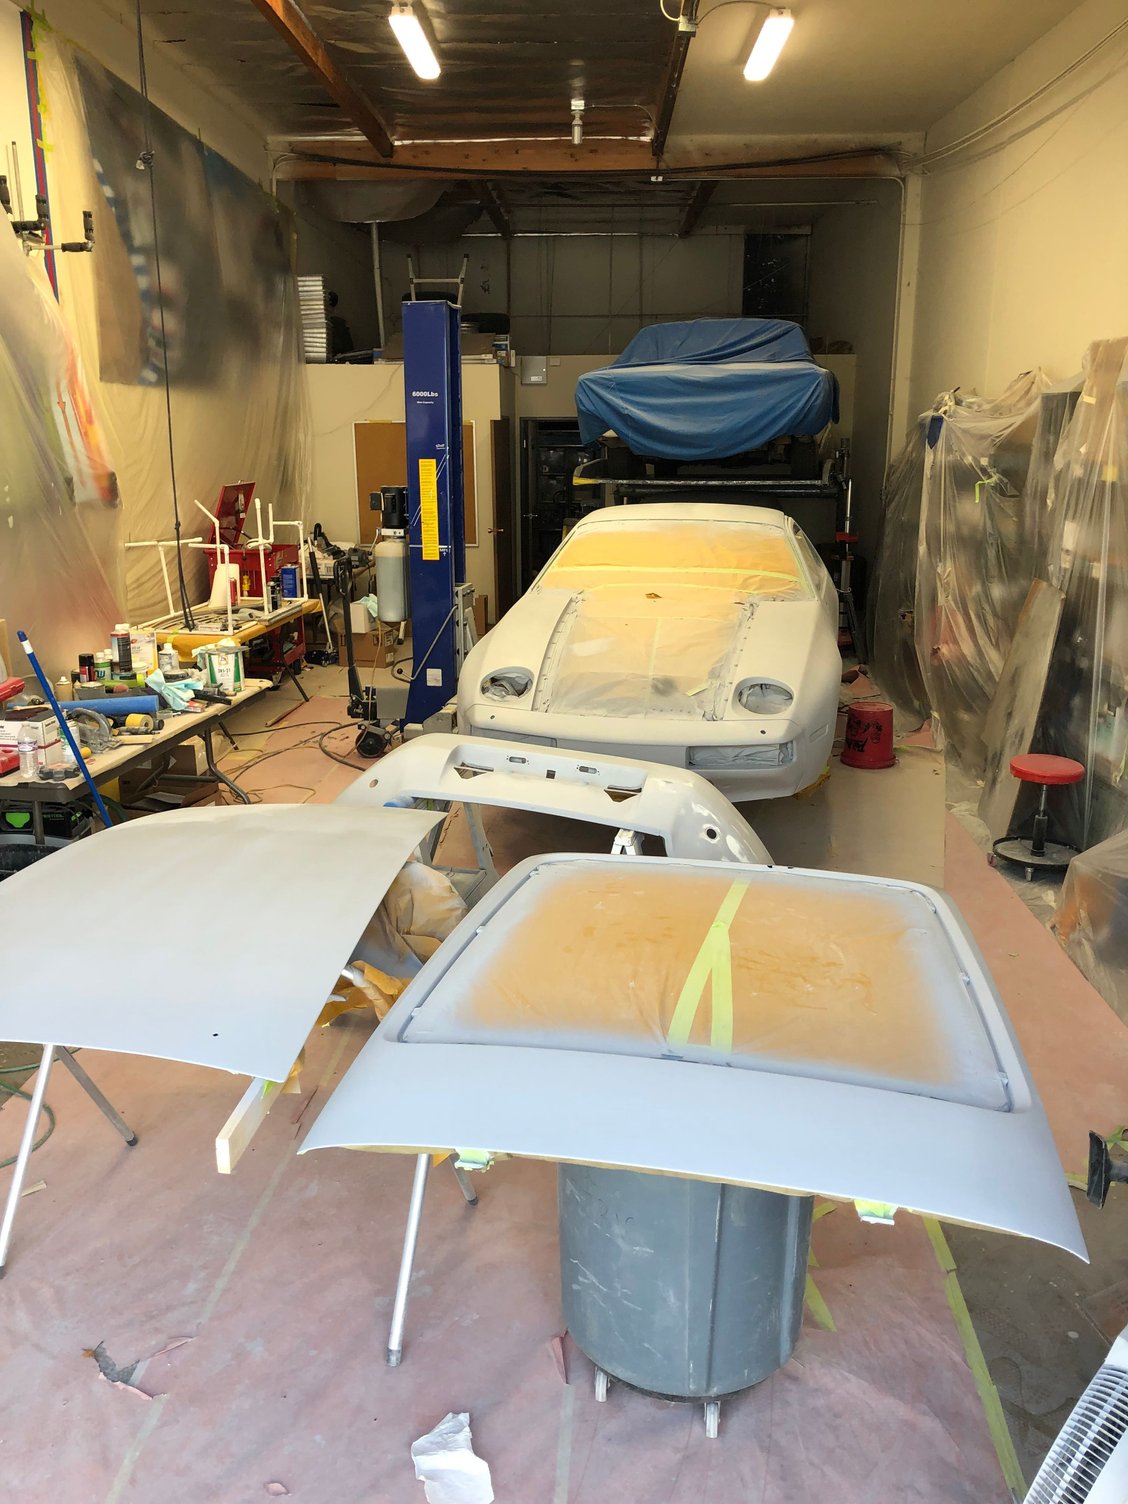
Apply High Build Primer / repeat / place in storage for 4 weeks / Cure / Cure
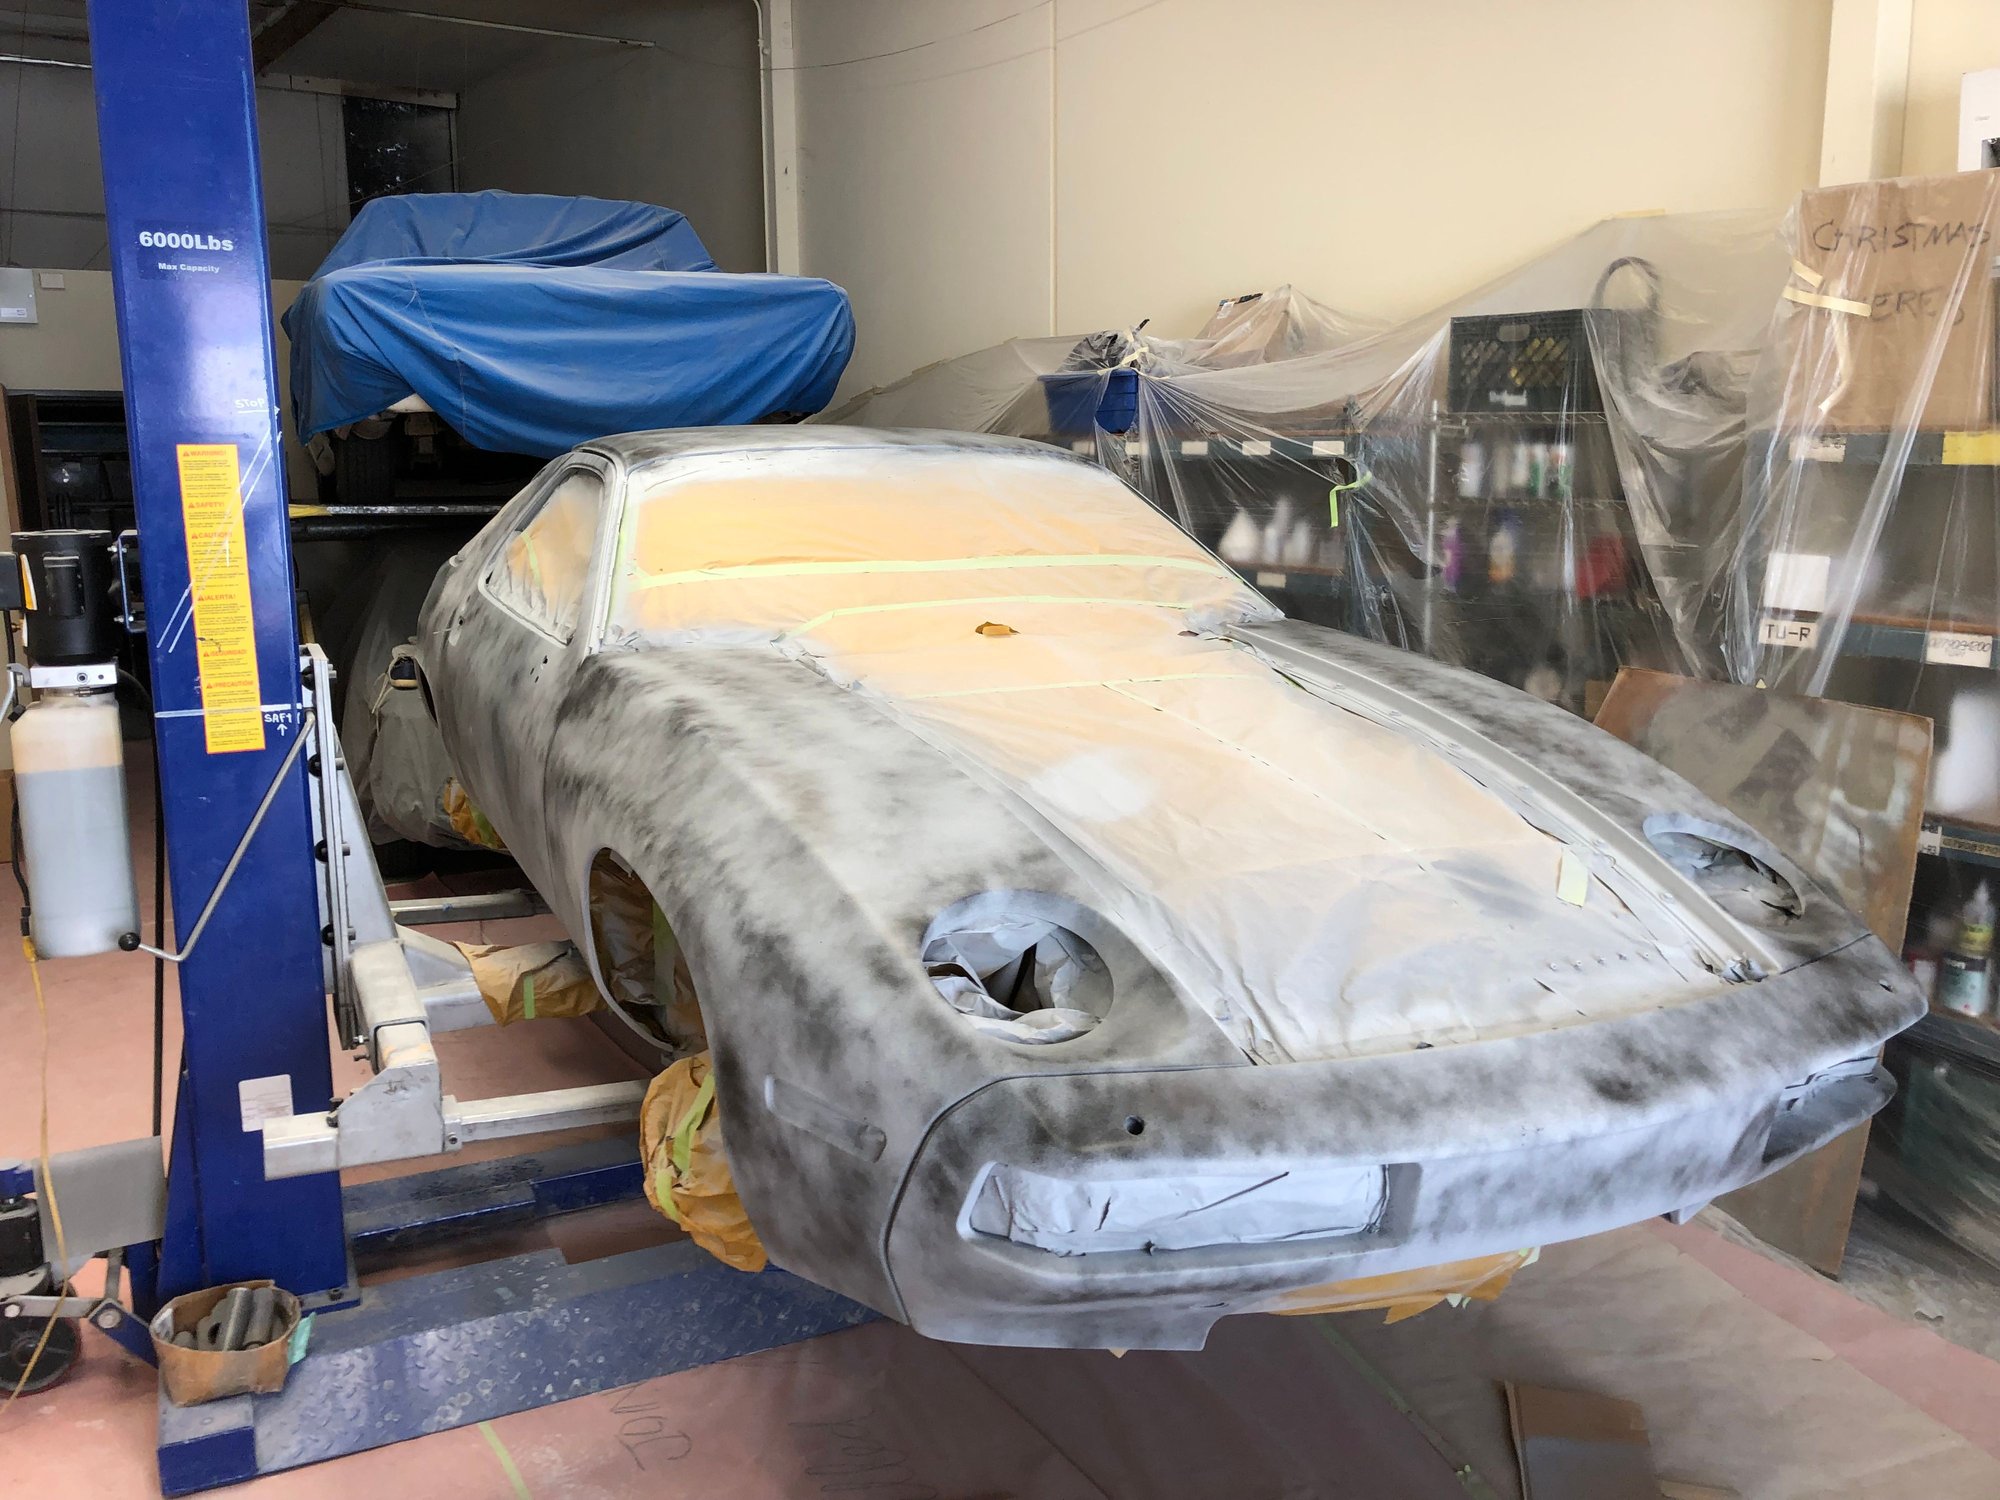
Big day. The second and final coat of Glasurit high build was applied today on all outside surfaces. Yesterday was the first coat. This morning I did a light block sand with 220 grit.
Two compressors, Two friends, and 6 more hours of prep and now done. Guide coat applied. Primer will cure for the next four weeks in this shop. Being August it makes for the ideal oven to completely cure the primer before we start final sanding in September. Final step for this phase. Guide coat applied.
GREAT IDEA to let that primer sit. It's good to leave clear coat alone for as long you can stand, too. I try to wait at least two weeks before cutting and polishing.
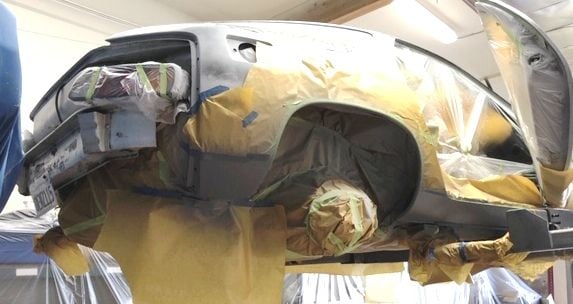
The absolute worst overspray in the entire world of restorations is the spray-on rocker schutz. Miss your target and this stuff is so heavy it will land on surfaces 6=8ft away. Today has 99 percent masking and 1% spraying on the Wurth Rocker Schutz. Trying to copy the exact cut line as the original application. Definitely get the Wurth spray gun that is specific to this high viscosity material. Goes on very smoothly and is very controllable at 75 psi. Tip: Pull the tape as soon as your last layer is applied. Put the can in the sun first or under hot water before you apply.
Wheel balancing test / Phone Dials / Impressive wheels
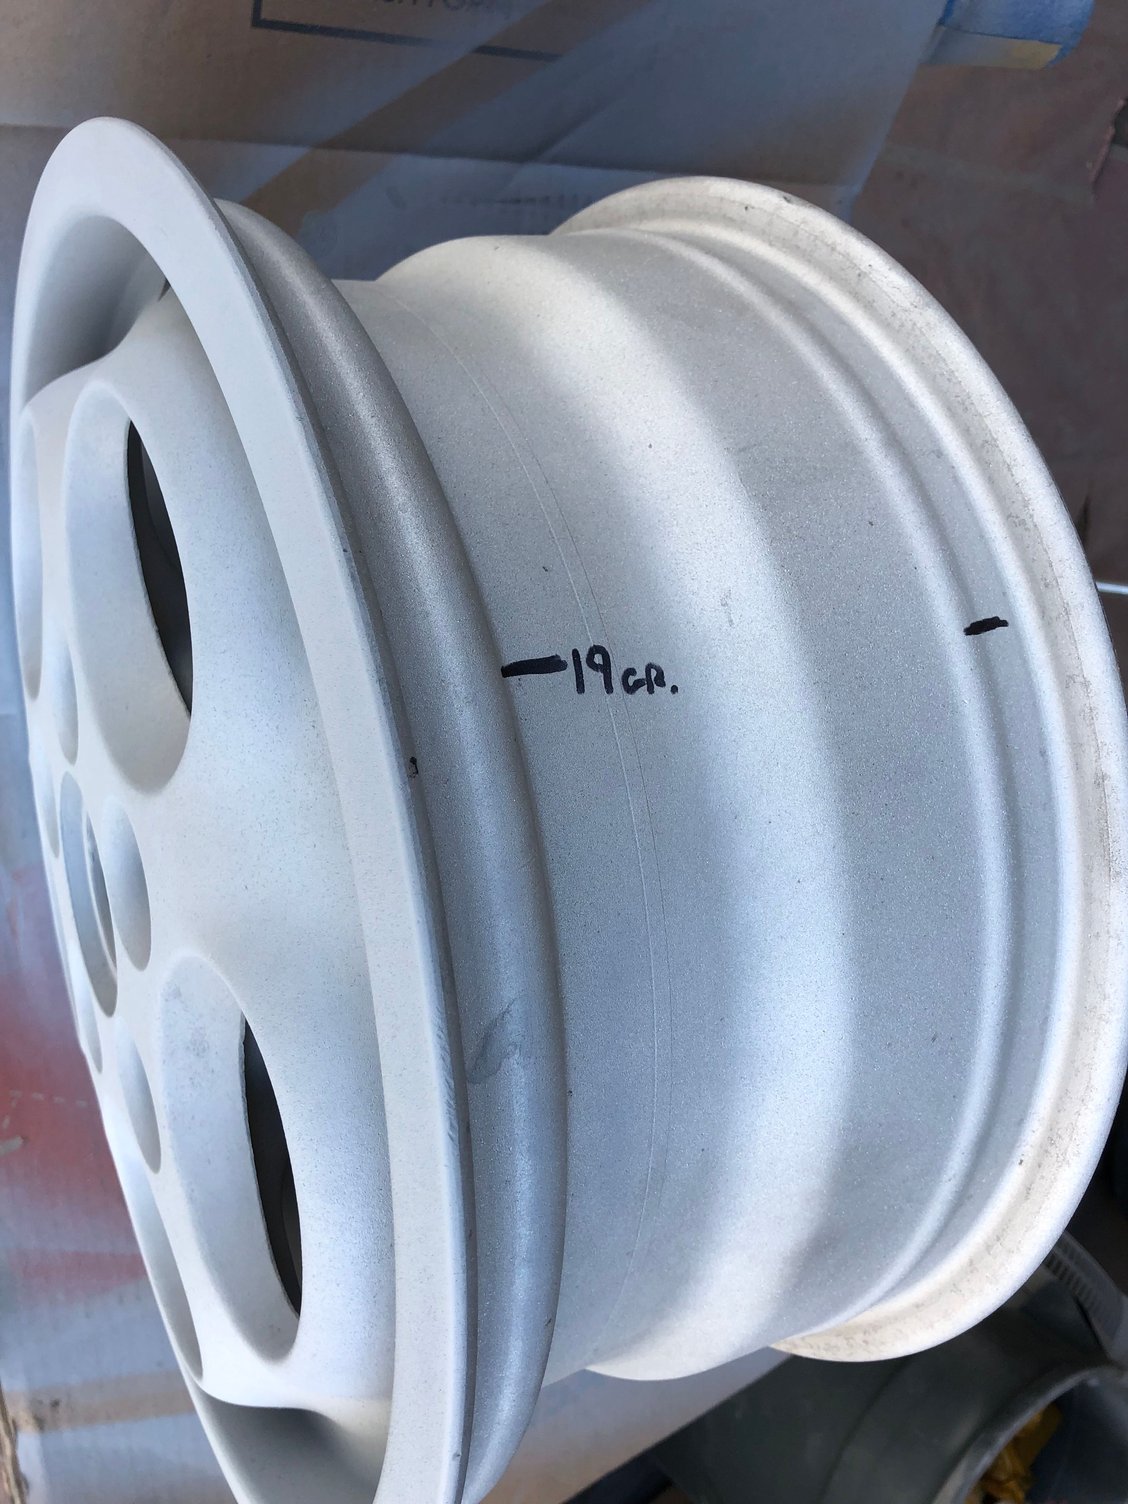
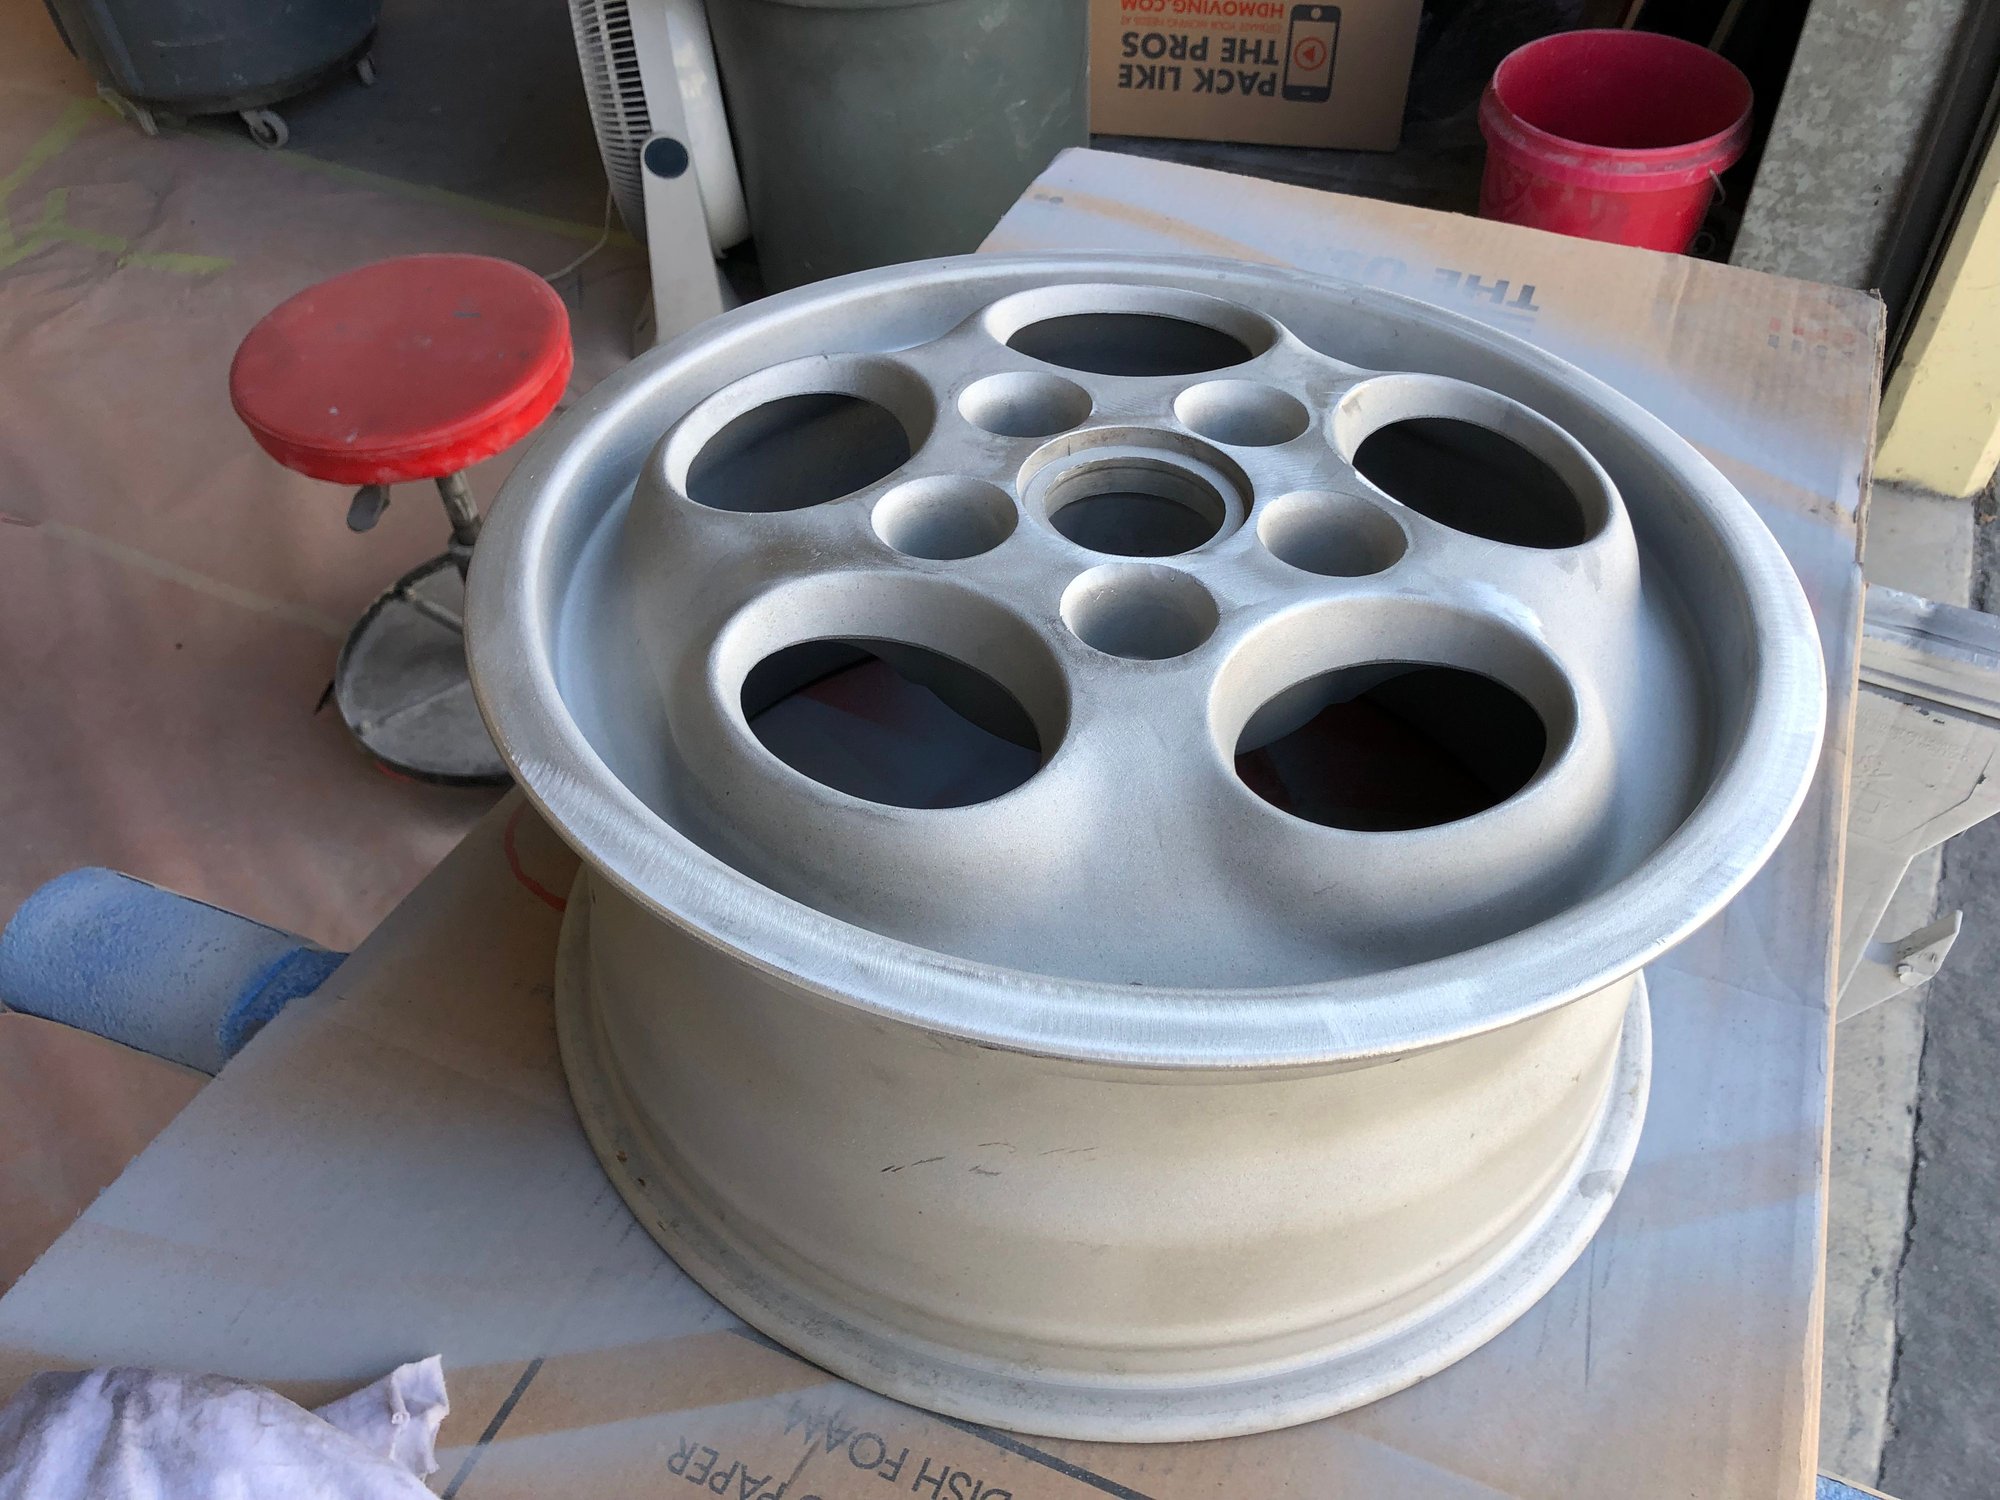
I was curious just how out of balance the factory phone dial wheels would be. So I took all four of them to Revco Precision Balancing in Long Beach. Larry is the owner and said he could balance each of them. I mentioned they were 40 year old Porsche wheels. He stated that he had done some wheels for the guys that run at Bonneville, So I figured my "fast" 928 would be just fine with Revco. http://revcoprecision.com/
This was more of a curiosity, to know if wheels are out of balance before you mount the tires. So, I had Larry fixture up the stock 928 front wheel bearing hub into in his balancing fixture.
Final outcome? Two of the wheels were only 2-3 grams out of being perfect. Certainly not worth any corrective action. The last two were 19 grams and 31 Grams out. 28 grams is one ounce. I am planning on epoxy bonding on these two weights prior to painting.
Now I know that all the balancing weights required will all be Pirelli related / tire issues.
Impressive process control and quality on those original wheels.
Location and amount of weight required.
Wheels all got media blasted before this exercise. Mostly looking for cracks or other substandard workmanship. All four where virgins with almost zero curb rash. Some had minor nicks in the face of the wheel were ground off prior to etching primer. Etching primer dries in seconds when it is blazin' hot outside. All four ready for high build primer.
Phase III will be to paint the car. Key phrase here�..ourselves.
This is the main event in purchasing this project. Doing a 'complete' paint job once in your life. This will be done with the same team, who, as I learned after starting 001117, had the same bucket list item of doing a �complete� at least once in their lifetime. So here we go.....
The goal of the painting project is to replicate the factory finish as close as possible. The original paint is Silver Metallic / Z2. Very specific attention will be taken in each area of preparation leading up to the application of base coat / color.
We are not professional painters or autobody repairmen.
For those following along, I just want to add that it's my opinion that the work being done here is OUTSTANDING! I am thoroughly impressed by your processes as they are quite thoughtful to the vehicle model being worked on. This is an excellent DIY reference so far for anyone on the fence about painting their own 928.
What I love about Phase III the most is the sight of a bunch of pals taking this thing on and figuring it out together. You guys are making memories that you'll never forget and I have no doubt the finished product will be phenomenal. While you are not "professionals", I expect the paint job on your car will be better than 90% of what the result would be at most shops you could have hired for the refinishing. Most 928 owners will have these same abilities without ever knowing it because they lack confidence, interest, equipment and/or tools, or some combo thereof. So these skills go untapped.
Sure, there are minor things I would do differently. Most of those small adjustments that come to mind just relate to making some of these jobs easier. Not necessarily better. I DO do this work every day and never forget for a moment the degree of fatigue that I endured as I adapted to my trade, and I know that you guys must be feeling some of that as it is the price you pay for brilliant prep work such as what you're executing. I forgot how much I enjoy living vicariously through RL revival threads..
Let us know what BC/CC combo you'll be using. It's almost gun time. I have daily use experience with 80% of every product currently on the market. If there's any way I can be of service, please let me know. Go ahead and buy the EZ Edger since you are not painting jambs. Foam tape edges don't compare. Stone guard application isn't the only function I use it for. Also, I suspect this car will be sprayed at night given the circumstances. That's a huge bonus for this time of year with high ambient temps. You'll want the slowest reducer you can get your hands on for that silver basecoat. The metallic will have more time to rise and flow so as to not show the path of the spray gun, or outright spraying errors. Create an environment for max forgiveness.
I guarantee there is rust under those windows, I have pulled and re-fitted so many of them it�s not funny. Always rust.....they are easy to get out, when you know how, I had my 9 year old push at the rear with his foot and I slowly started to get the corner to come up with my fingers, you can use a lever if you are careful and are repainting.
edit, I see you got the 1/4 windows out, ignore me...
For those following along, I just want to add that it's my opinion that the work being done here is OUTSTANDING! I am thoroughly impressed by your processes as they are quite thoughtful to the vehicle model being working on. This is an excellent DIY reference so far for anyone on the fence about painting their own 928.
What I love about Phase III the most is the sight of a bunch of pals taking this thing on and figuring it out together. You guys are making memories that you'll never forget and I have no doubt the finished product will be phenomenal. While you are not "professionals", I expect the paint job on your car will be better than 90% of what the result would be at most shops you could have hired for the refinishing. Most 928 owners will have these same abilities without ever knowing it because they lack confidence, interest, equipment and/or tools, or some combo thereof. So these skills go untapped.
Sure, there are minor things I would do differently. Most of those small adjustments that come to mind just relate to making some of these jobs easier. Not necessarily better. I DO do this work every day and never forget for a moment the degree of fatigue that I endured as I adapted to my trade, and I know that you guys must be feeling some of that as it is the price you pay for brilliant prep work such as what you're executing. I forgot how much I enjoy living vicariously through RL revival threads..
Let us know what BC/CC combo you'll be using. It's almost gun time. I have daily use experience with 80% of every product currently on the market. If there's any way I can be of service, please let me know. Go ahead and buy the EZ Edger since you are not painting jambs. Foam tape edges don't compare. Stone guard application isn't the only function I use it for. Also, I suspect this car will be sprayed at night given the circumstances. That's a huge bonus for this time of year with high ambient temps. You'll want the slowest reducer you can get your hands on for that silver basecoat. The metallic will have more time to rise and flow so as to not show the path of the spray gun, or outright spraying errors. Create an environment for max forgiveness.
Kiln_Red,
Thank you for your kind words and perspective. Given the level of prep on that image you just shared-those are high marks and give us the 'fuel' to stay on the details.
Yes, we are really enjoying the process. And we are sliding down a very step learning curve. But just as you've noted -and you are spot on- the end of day fatigue is substantial -A tip of the chapeau to you (and all other in the industry) doing this everyday.
01117 is going into bake and cure mode as we will all be blowing out of town for the Monterey car week. When we return I'll be most happy to get the base coat and clear coat details posted for your comment. Along with gun details. Thanks for the notice on the slow reducer.
Your comments are the encouragement that gives us the 'fuel' to stay on task and focus on the details before proceeding.
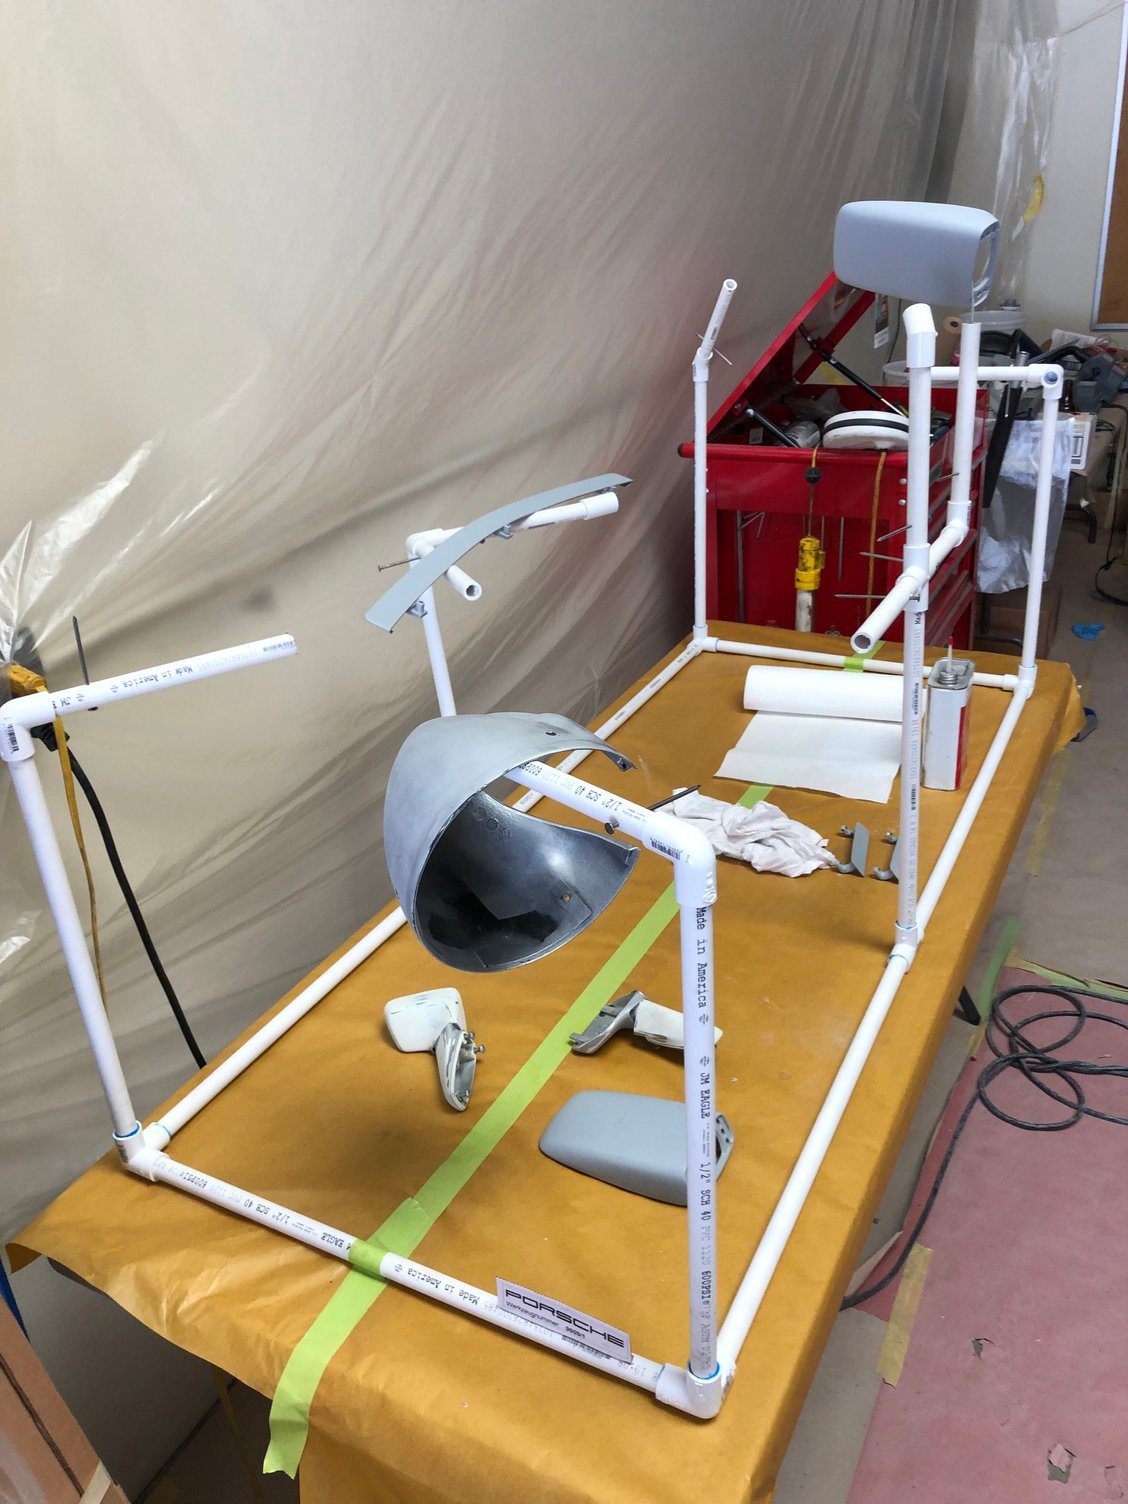
Trying to figure out the best method of spraying base coat and clear coat on all of the small / body colored parts on 01117. Came up with this "spray tree'' where you can rotate each part by turning each nail. Turns out it is a Porsche Tool. Who knew?
Porsche Werkes Spray Fixture Wire is stuffed into the PVC Pipe (not glued). Wire is 14-2 copper conduit -just stiff enough to hold position. Rotation handles are 16p nails and as Pelly noted -not OSHA certified. Just in from Zuffenhausen........
Porsche paint #936 is not Porsche paint #936 / a deep dive into Paint Code Z2 936
Silver Metallic (Silbermetallic) appears on the door jamb sticker and the COA document for 01117. The full number is Z2 936-9-3
Here is the label and an actual paint coupon cut out from a hidden section (behind the rubber bumperette) taken from the rear bumper of 01117 prior to soda blasting. The Glasurit dealer is using this as reference for both color matching and to match the metallic particle size.
This code has many names including� Silver Metallic, Silbermetallic, Silver Frost, Silber Met and Z2Z2 (S7)
According to how to Porsche website there are 45 unique Porsche color codes for the color �silver�. We want to make sure we are buying the correct silver.
According to achieved Porsche Documents this same silver was offered on 911�s from 1972 � 79 also as code 936
This code has many names including� Silver Metallic, Silver Frost, Silber Met Z2Z2 (S7)
The full number for 928's is: 936-9-3
The details on this code are: 936-9-3 with 936 being the color and the �9� indicating the plant, in this case �9� for the Porsche factory. Z is the paint manufacturer with �3�� designating 01117�s paint was Herberts. (NHOT)
The other paint supplier codes in this period are: 1- Lesonal 2-Glasurit and 3-Herberts.
For 928�s this particular silver was only available from 1978-80, and then brought back in 1985 and 86
The PPG equivalent code is 8914. Glasurit equivalent is POR-936.
When you enter this number (POR-936) in the BASF database (Glasurit�s owner). Then two codes come up for POR-936. With two time spans and more importantly, two different paint formulas.
Below is the correct formulation for Glasurit (2019) for the 1978 Porsche Z2 936 paint, as follows:
All manufacturers are on their 3rd, 4th or 5th generation of formulations from the original 1970's paint chemistry. If you are working with another Paint brand be very careful to confirm their code is correct. Hope this helps.
Herberts may be better known by its Standox/Spies Hecker brands.
What is your resource for the above info? I am STUNNED that I never knew Lesonal was an OEM vendor for Porsche. I always thought the 3 brands were Spies Hecker, Standox, and Glasurit. Spies and Standox were/are identical products. So, I had always thought that there were really only 2 players for Porsche's market share at that time.
I can't even remember what I was taught with regard to info label decoding. We discussed it in a BASF warranty certification course. At that time, it was thought to be more reliable to observe the undercoats for clues as to paint manufacturer assignment.
I had no idea that Standox went by any other name. Spies Hecker brand -thanks for that.
My sources are:
-Porsche archives for the history on when 936 was first used
-BASF database
-911S registry -D. J. Pateman -a Canadian anorak on Porsche Databases including 911, 912 & 914 Kardex source as well as Paint codes, Engine #'s and Transmission #'s

 08-08-2019, 12:40 AM