When you click on links to various merchants on this site and make a purchase, this can result in this site earning a commission. Affiliate programs and affiliations include, but are not limited to, the eBay Partner Network.
Semi-retired, as of Feb 1, 2023.
The days of free technical advice are over.
Free consultations will no longer be available.
Will still be in the shop, isolated and exclusively working on project cars, developmental work and products, engines and transmissions.
Have fun with your 928's people!
You could always try a right-sized shaft collar (possibly with a little shimming), since they're readily available, to both compress uniformly and grab. Possibly in conjunction with a drill bit as in that previous video.
That tool that Greg posted certainly looks like the best option if you want to add a tool to your collection.
Last edited by Ed Scherer; 09-10-2021 at 03:57 PM.
@namasgt I haven't quite worked out what I am going to do, but figured it is easier without them to work on a flat surface.
How did you clean and prepare yours?
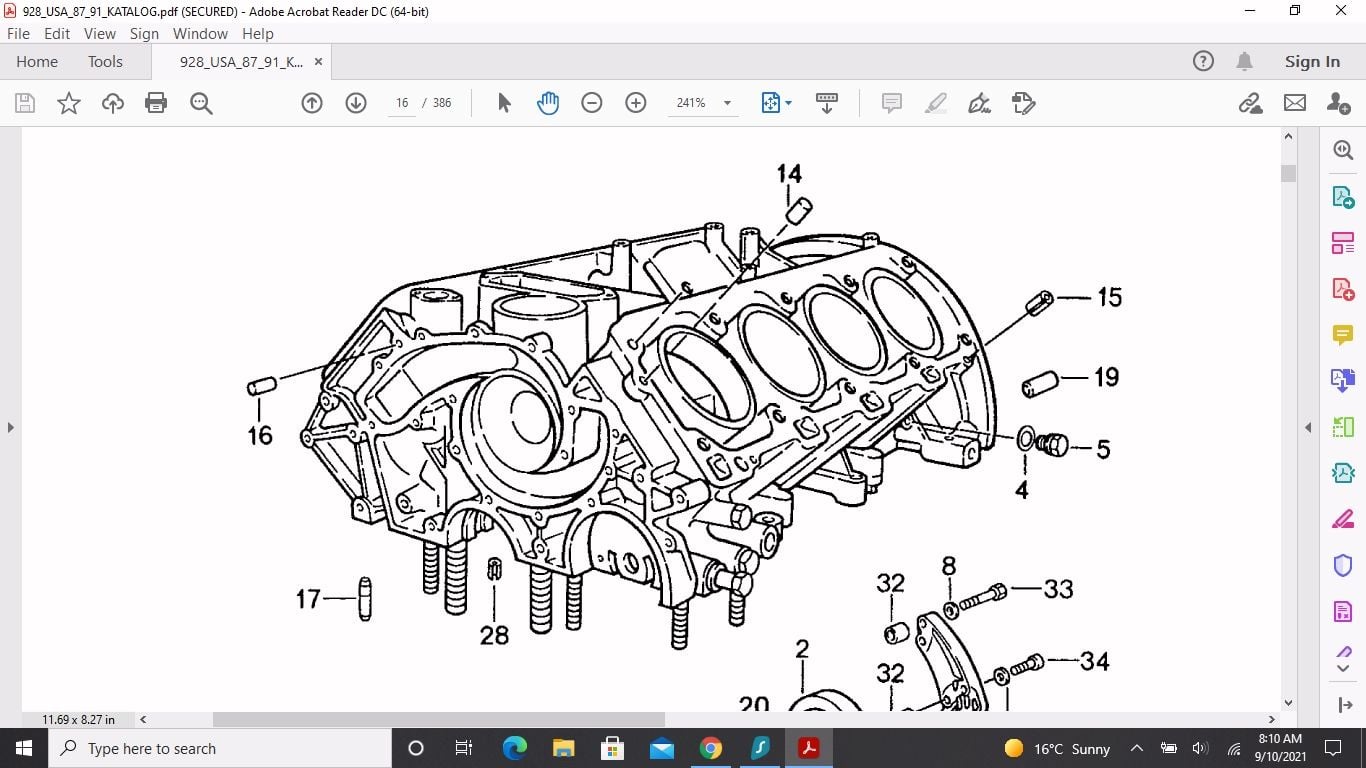
This can be an idea for the two tension sleeves #15. One of mine fell out when I removed the head, so that was obviously not in tight.
On the 4 straight pins # 14, this will not help.
Thanks Greg
I'll go visit my tool shop again. They got me the Hazet 8808-8 bit as well.
Fortunately my son is doing his automotive apprenticeship so I don't mind buying good tools that he can use later.
Originally Posted by GregBBRD
Vice grips, a hammer, a torch, and order new dowels.
Gets about 80% of them out.
When you get tired of that, are doing multiple engines, no longer want to spend hours doing a 4 minute job, this is what you need:
Goodson dowel remover. You order what size mandrels you need.
@namasgt I haven't quite worked out what I am going to do, but figured it is easier without them to work on a flat surface.
How did you clean and prepare yours?
I used a good quality razor blade for scraping. Have to make sure the edge is nice and straight with no dents otherwise it will scratch the surface. Hold it in a 20-30 degree angle from the surface and lightly scrape the old gasket off. You can spray the surface with WD40 first to soften the old gasket residue. Check the edge of the razor periodically to make sure it doesn�t have any damage. There was a suggestion years ago to hold the razor blade vertical to the surface. I wouldn�t recommend that as in my experience it scratched the surface.
The problem with removing the pins with the suggested methods above is that they can break the pin in the block. Then you have to somehow drill them out while the engine is in the car without damaging/ruining the block. Plus with the suggested puller tool above I do not think you will have room to use the slide hammer with the engine block in the car. You have to have that tool inline with the pin (perpendicular to the engine block surface) when you pull it. Don�t use any power tools or sand paper to clean the block surface. Just use the razor like I described. Clean the surface up with alcohol and paper towel and repeat as necessary until all the old gasket material is gone. For me on each side it took me at least 3 passes with the razor to carefully get all the old gasket material off and expose the original machining lines from the factory.
Before you put the new gasket on over the solid pin when you get ready to put the head back on you have to be careful, it�s an interference fit and if you force the gasket on it can break the gasket. Situate the hole on the gasket over the solid pin (lightly start it on the pin) then put a 1/4 drive 8mm socket (or 7mm can�t remember have to trial install the socket over the pin and see which one is close) over the gasket hole and pin and lightly tap on the socket to get the gasket on and bottomed against the block surface. You will have some raised material from the gasket once it�s bottom but it won�t be a problem as long as the pin hole in the head has a chamfer on it. If you can have a 8 mm ID sleeve made with a thin wall to clear the gasket bead it will work better and cleaner. Just blend out the edges so it�s not sharp.
The trick to razor blades is to always buy the .011" thick ones, made in the US.
Avoid the .009" razor blades, no matter where they are made.
They chip very easily and once they chip, they scratch.
One of the tricks I picked up somewhere in the past was to use a tap that would just start into the ID of the dowel. As it cuts deeper into the dowel it will usually bind and spin the dowel free, but if it doesn't break free on it's own during tapping, it give you the ability to thread a bolt in to use as a puller.
Thanks for the hints and tips. I'll get stuck in this weekend and see how I go.
I also got some plastic blades that I am interested to try. They worked well on the heads.
Cheers
the best way to use a razor blade is to hold it perpendicular to the surface and go back and forth,
This procedure will prevent gouging the metal,
it will remove the hi spots.
NOTE the quality of the blade is directly proportional to how long it will stay sharp while you move it over the surface your cleaning.
That said the green plastic blades dont seem to work very well,
but they wont scratch the metal.
Thanks Stan
On another note - do you have a photo of a modified head bolt showing the size and locations of the cuts you make in order to use it to clean the treads in the block?
Cheers
Dawid

 09-09-2021, 07:19 PM