When you click on links to various merchants on this site and make a purchase, this can result in this site earning a commission. Affiliate programs and affiliations include, but are not limited to, the eBay Partner Network.
Gave the turned down socket a try. Fits great, but still that switch will not budge. I have it soaking in PB Blaster again.
I'm considering a large breaker bar and using the floor jack. Have someone pump the jack on the breaker bar while I hold the socket to make sure it stays straight and true underneath the car.
I got pissed off and took a hammer to a service wrench handle while holding it as best I can. Can't even tell if it moved. Calling it a night
The reaction valve sometimes comes out from what the Mercedes guys told me. Mine was stuck. I used a bolt to wiggle it out.
Bad news was because I jacked the back wheels up only I lost about 1.5 quarts of ATF. I have all 4 wheels up in the air now to prevent anymore loss due to gravity.
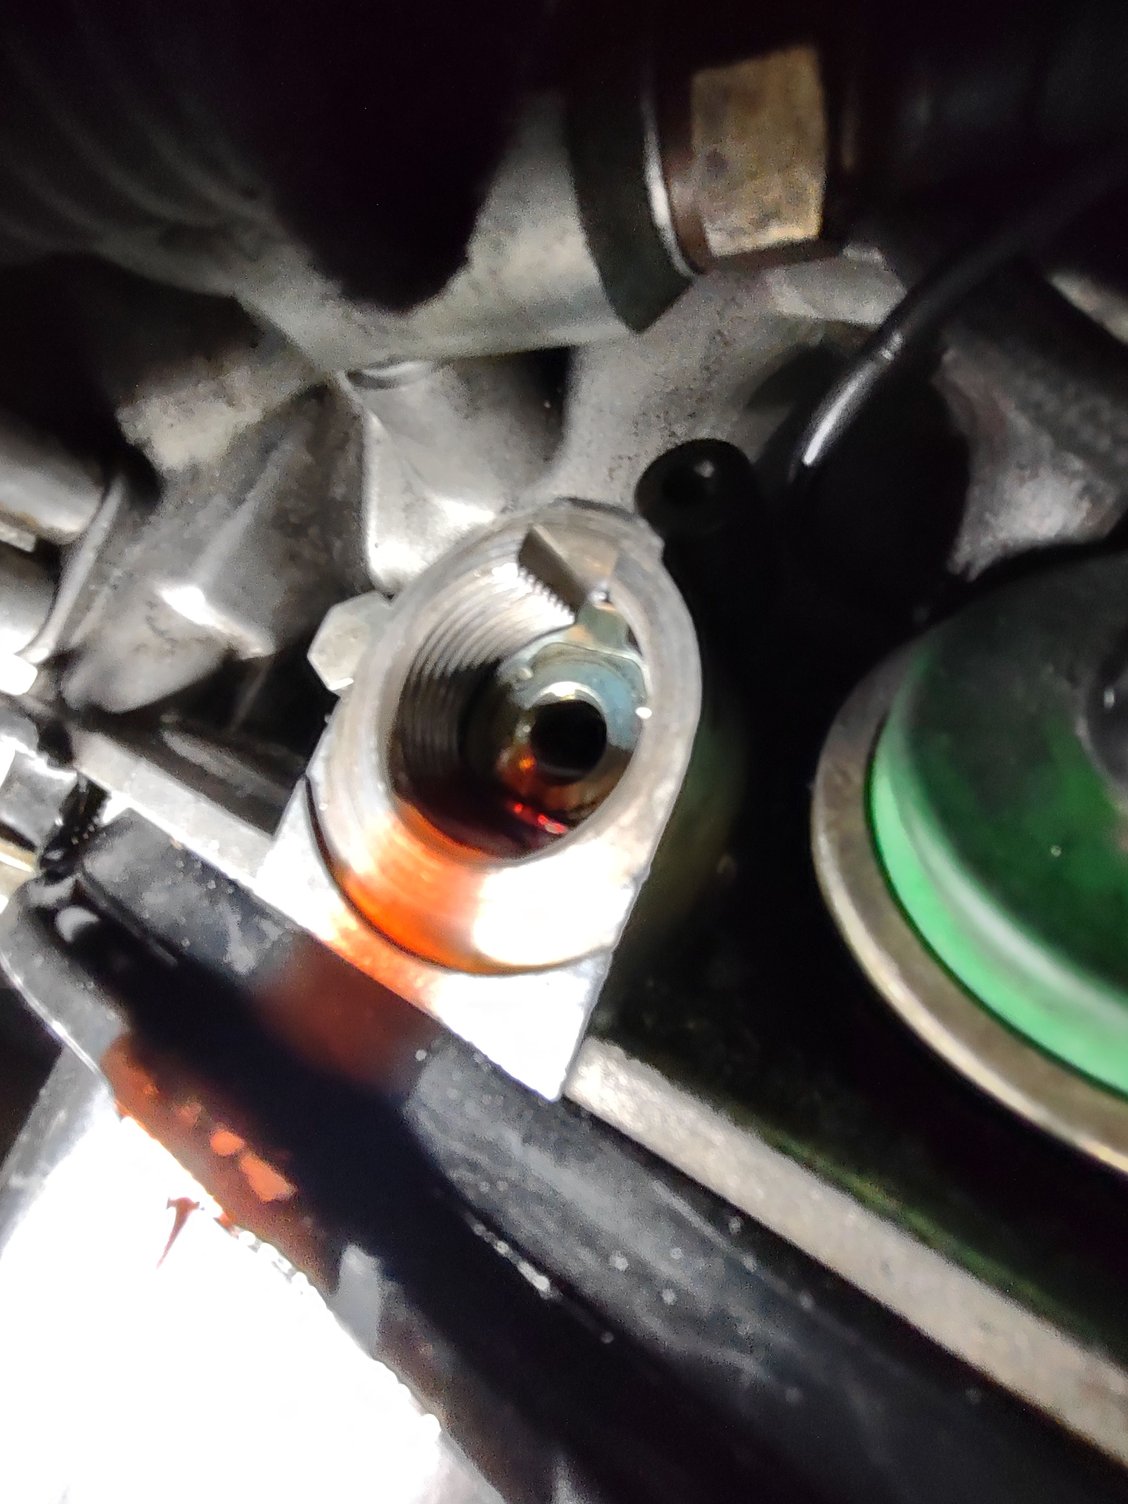
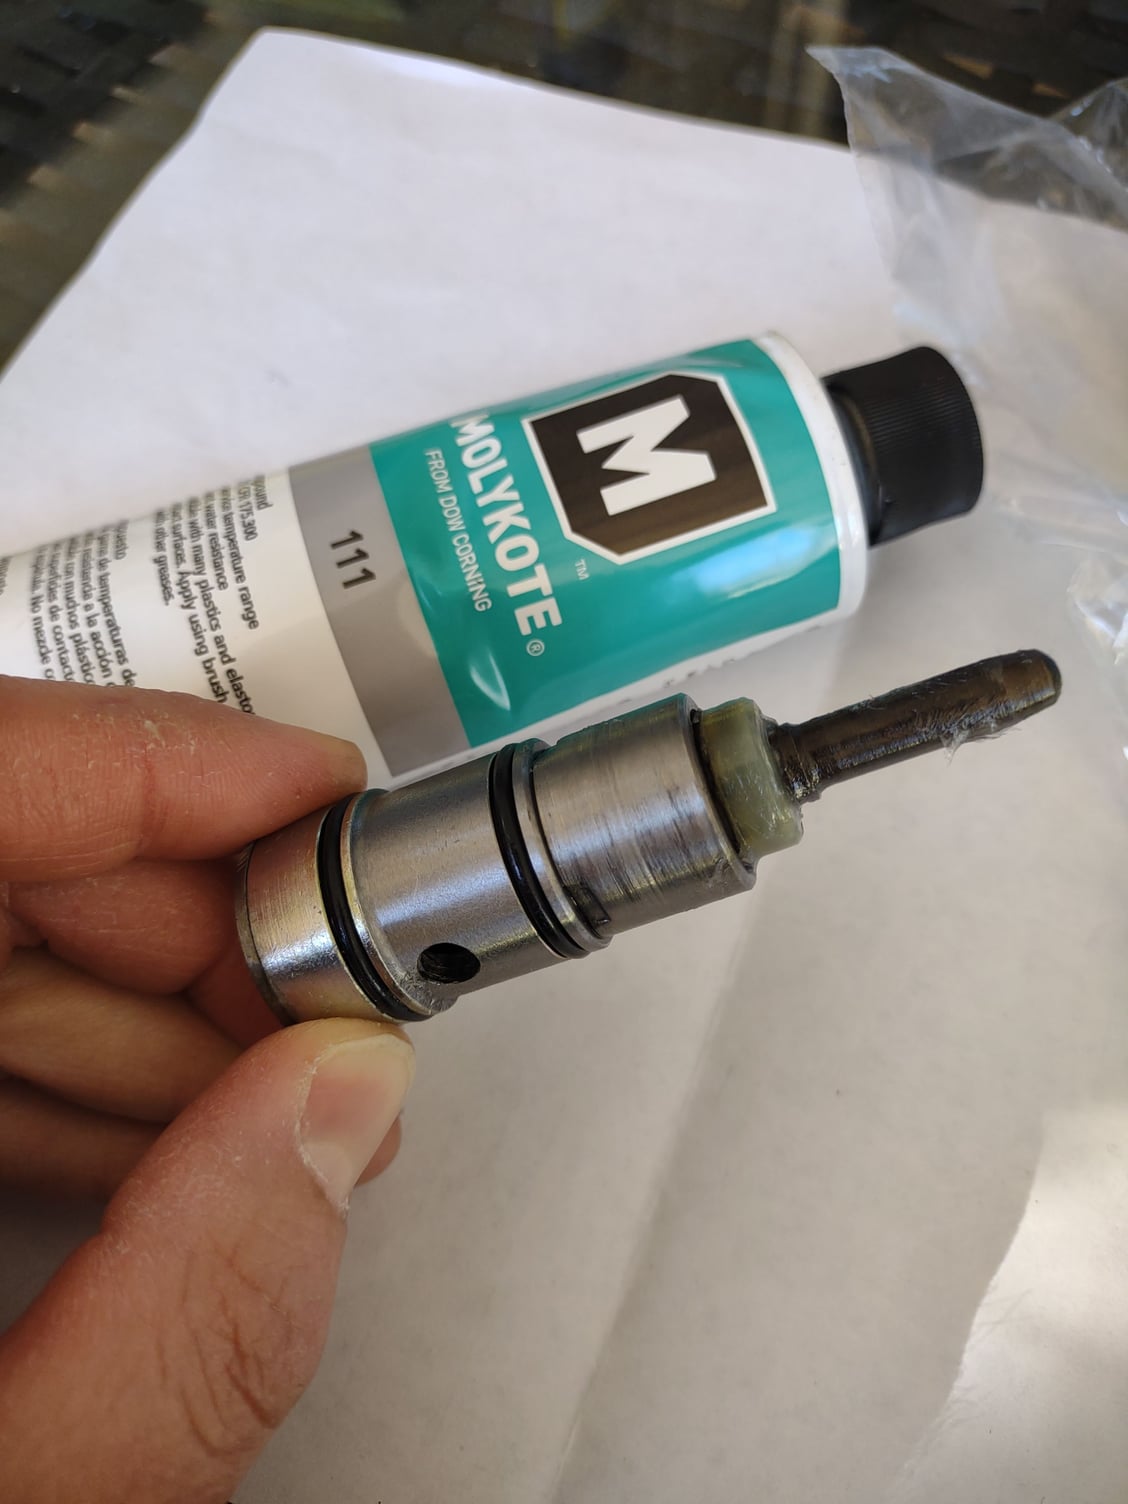
Here is my reaction valve. It will be disassembled and properly resealed. The current o-rings are there are extremely brittle as well as the plug seal on the top.
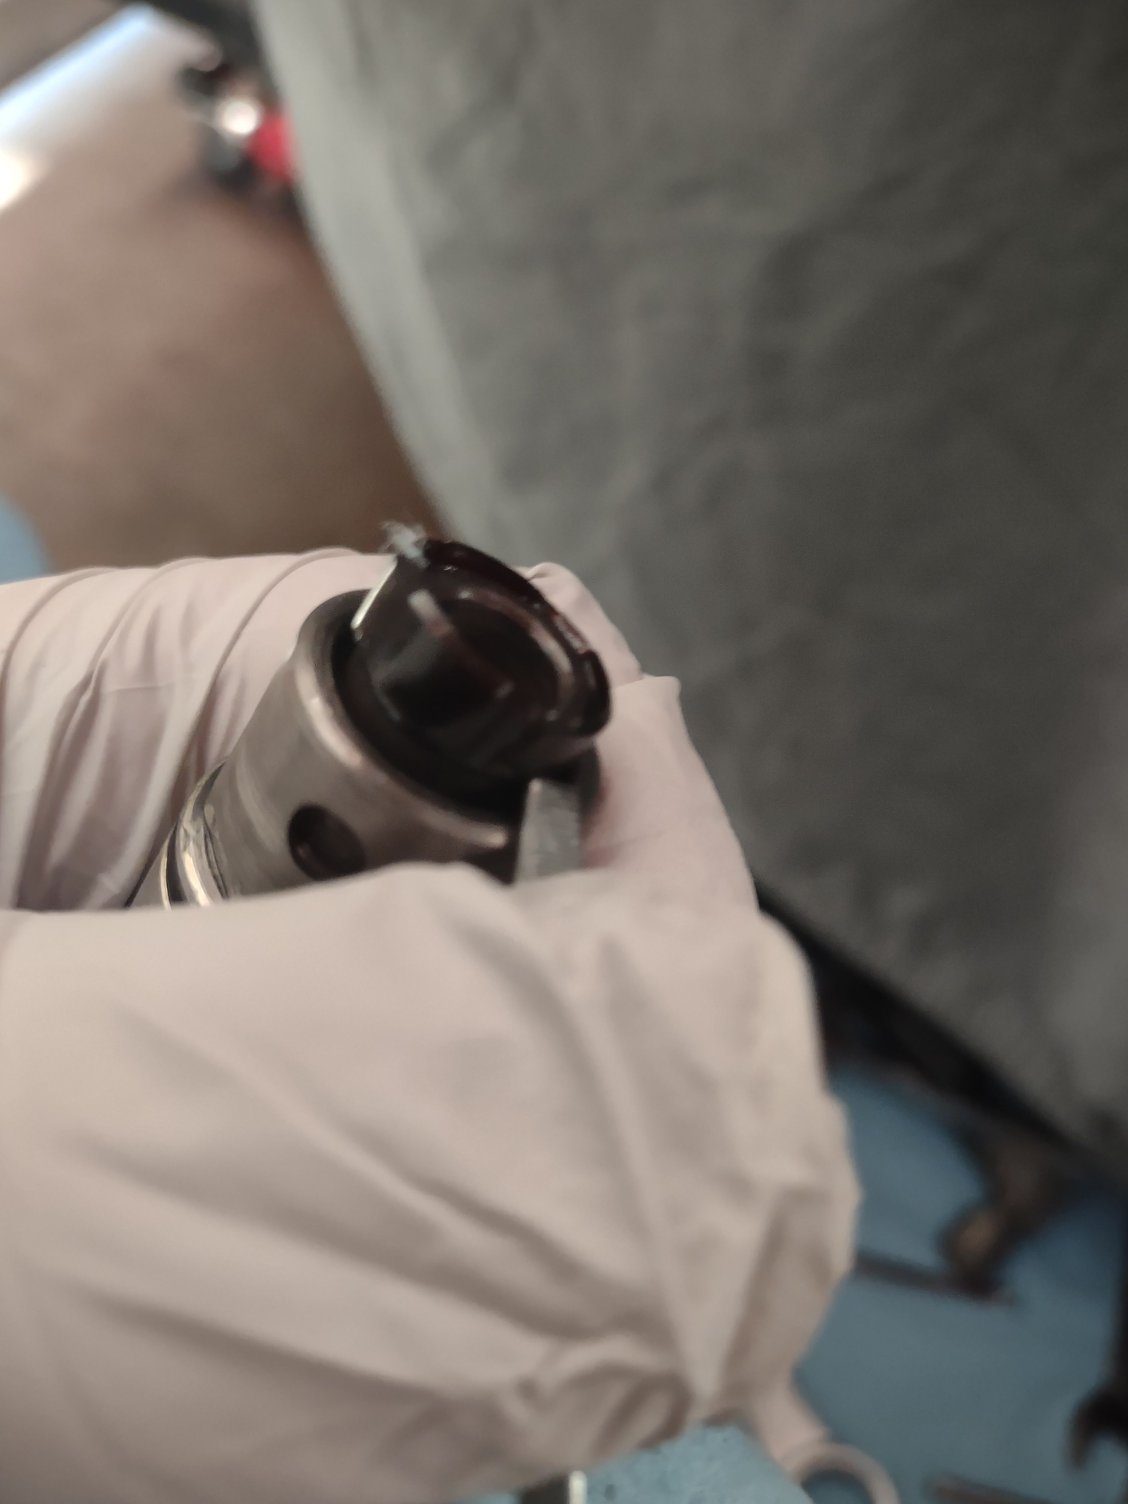
Once all the seals were removed with a pick and small flat blade screwdriver, the valve and pin were given a brake cleaner bath and bagged for later while I clean up the mess I made.
What's behind that reaction valve... Well, the brake band! And, the dimple the pin fits into. This is why it's important to install the valve first rather than torque the switch and the valve together.
If the pin is misaligned, the brake band is toast. Some MB guys in the forums made this same mistake with their 722.3 transmissions (distant cousin to the A28.01+ 928 trans).
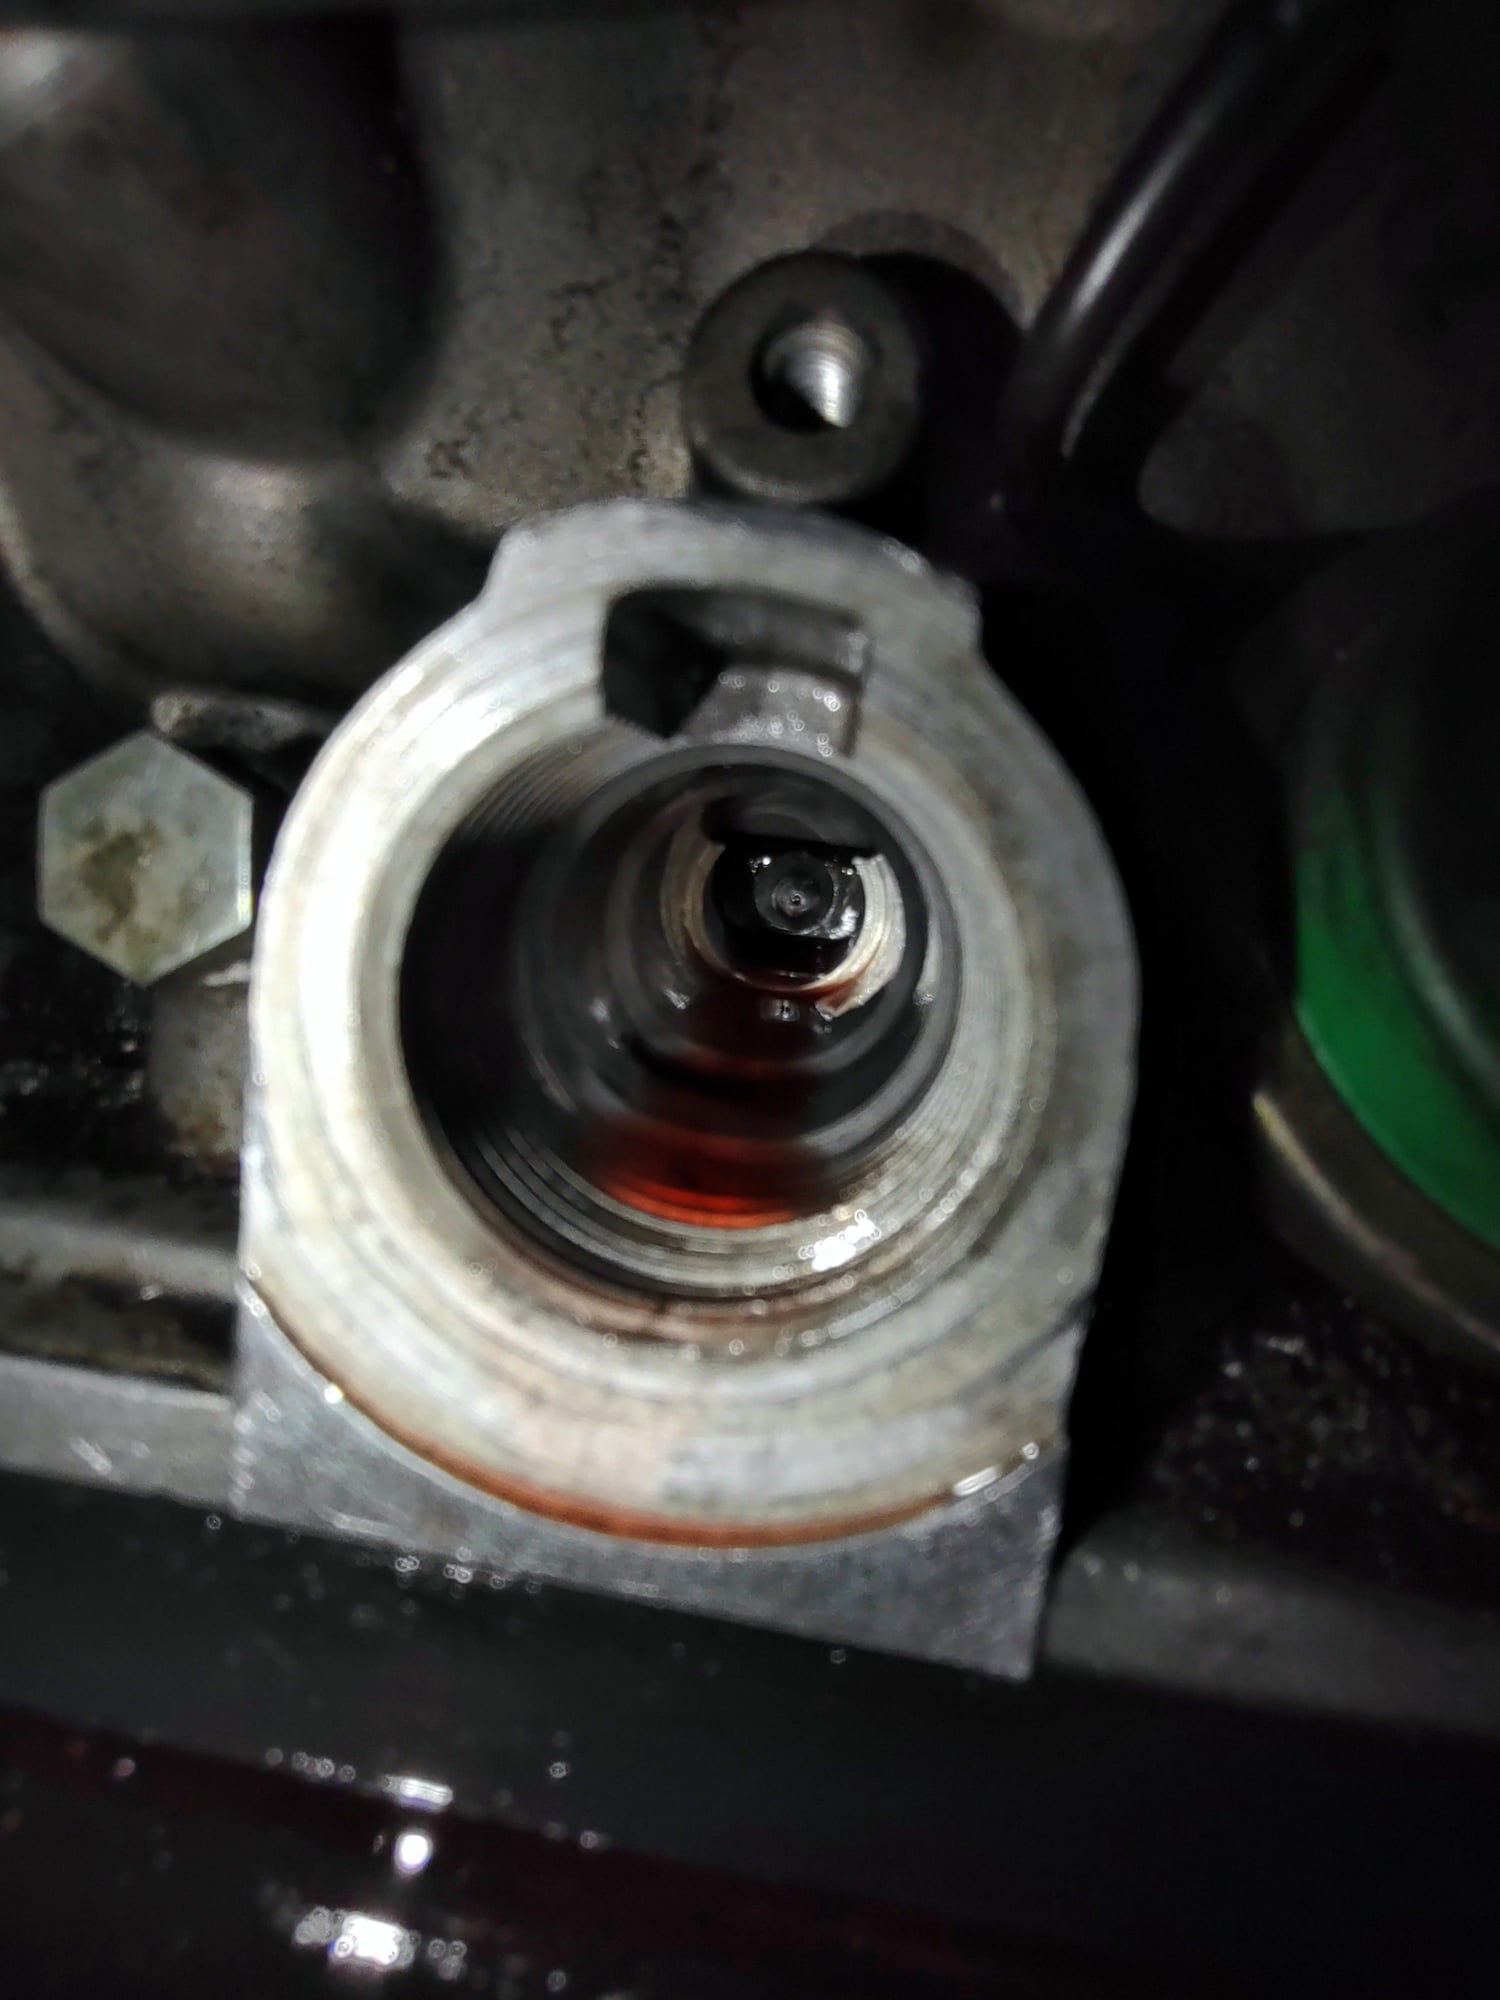
Looking good! I don't have a leak there (I don't think, but who really knows, there are definitely leaks from other places on the trans) but I sort of assume that my transmission must also be in need of some of this R&R so I'm following along closely.
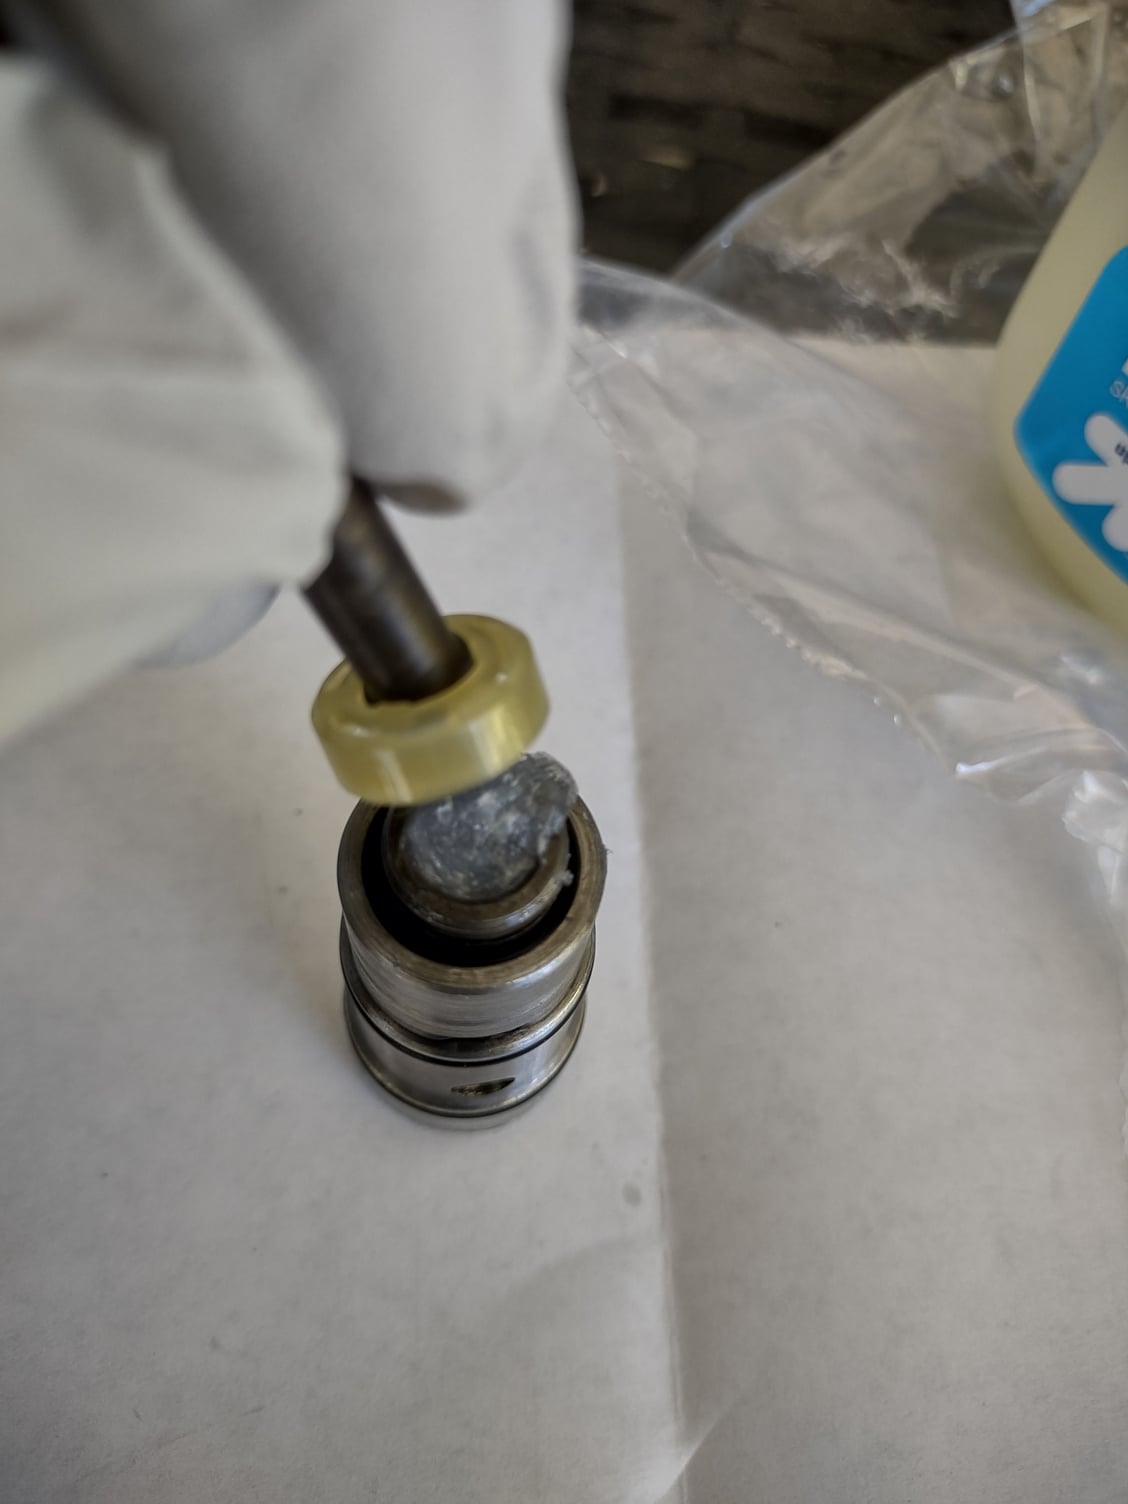
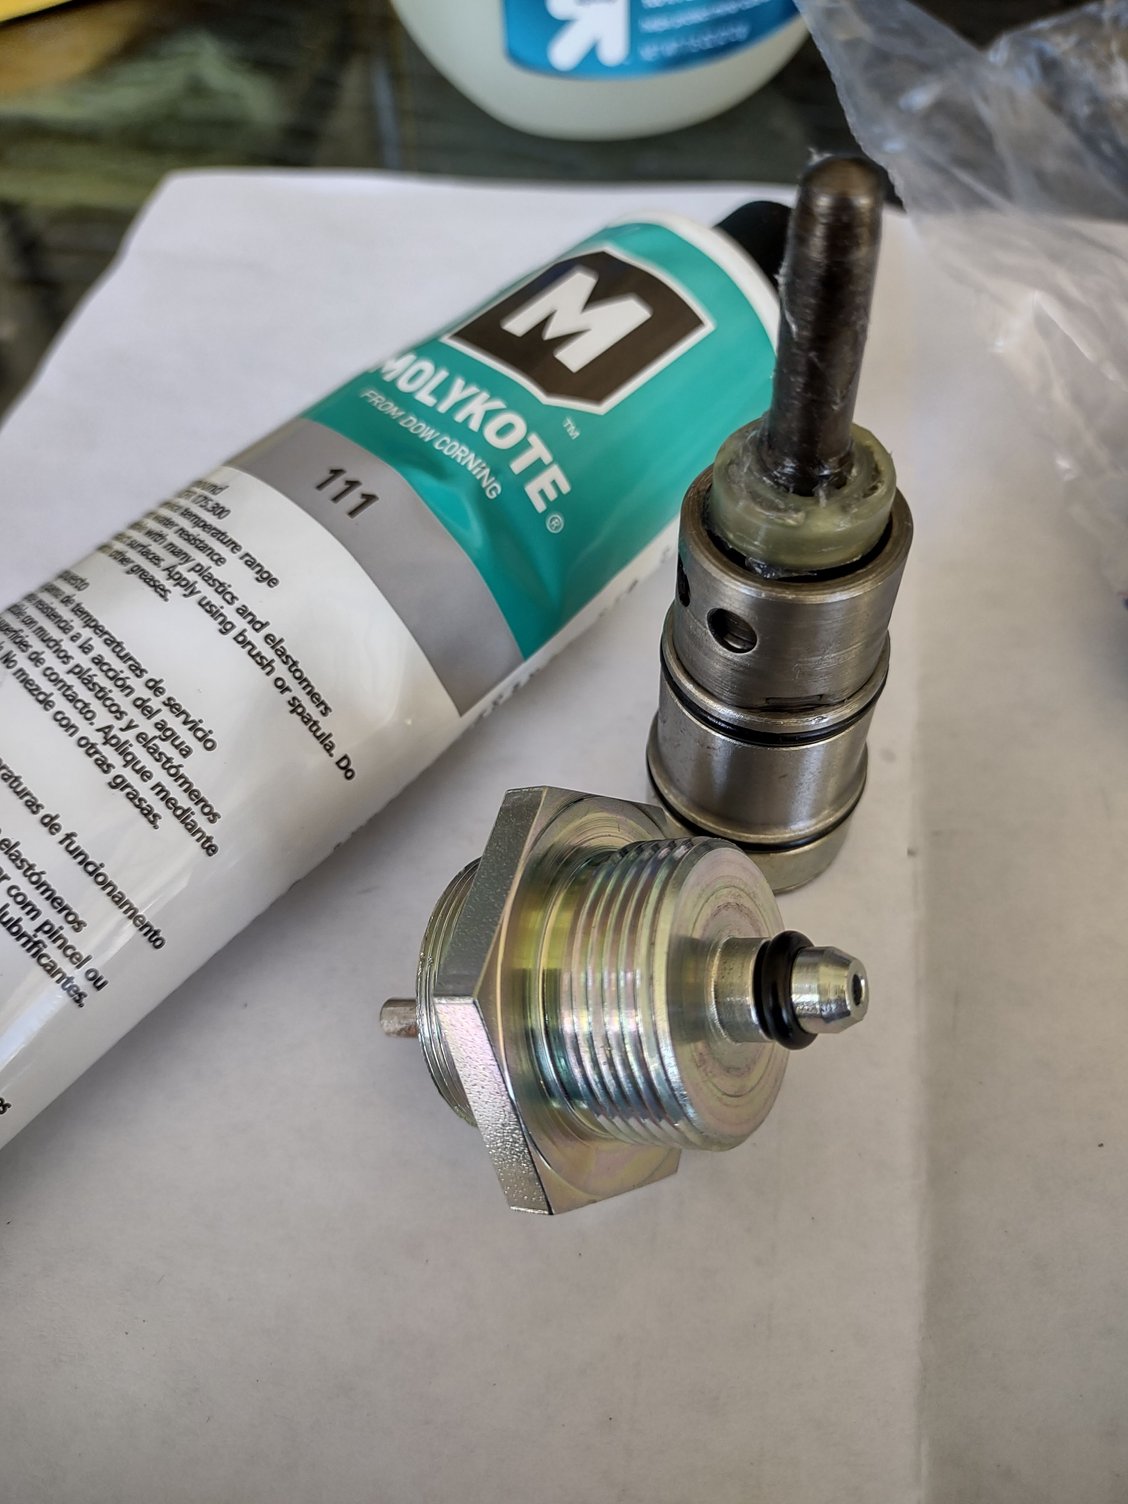
Vaseline or petroleum jelly is crucial to keeping the pin straight for installation.
You may notice in the picture before, the orientation of the divot or dimple on the brake band. I got lucky since mine is a straight shot. However, some have had this divot just a tiny bit higher. When you install the assembly again, try your best to angle the pin to engage the divot. From what I hear, you know you installed it right if the top tab of the reaction valve sits flush, past the threads where the switch screws in.
I will cover this again later...
For now, observe the application of petroleum jelly and installation of the pin with top retaining cap.
The Dow Corning 111 Molykote in the background is used ONLY for the black or-rings. Don't forget to install the smallest o-ring on the new overload switch.

 11-27-2022, 06:03 PM