When you click on links to various merchants on this site and make a purchase, this can result in this site earning a commission. Affiliate programs and affiliations include, but are not limited to, the eBay Partner Network.
Blew me away how much fading had happened for something generally never exposed to direct sunlight. (Flickr for more)
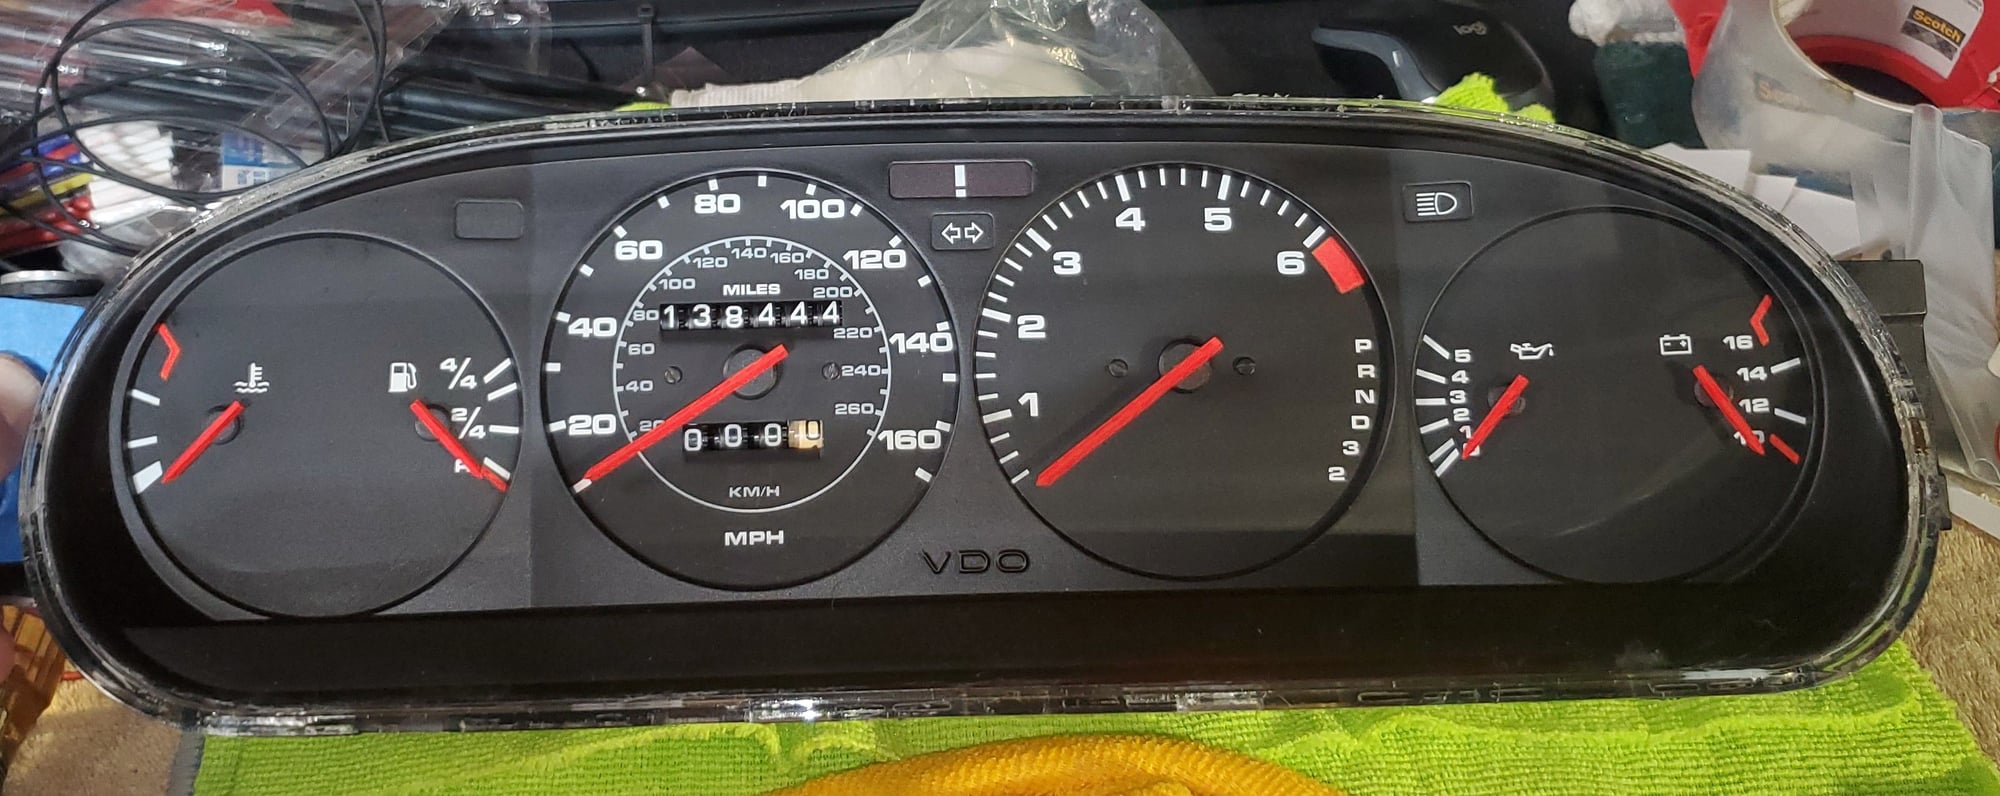
And this is OE lighting..amazing what fixing the effects of age can do without going LED and adding night vision issues and eye exhausting wavelengths and contrast to the cluster.
Clean yer grounds!
Replace dirty/high resistance 30-47yr old bulbs
Clean foil contacts
Clean/Replace dimmer
The photos don't capture the cluster as you see it well, but I did my best to reduce exposure and not do a multi-second exposure as well. And yes, I did do clean up after these were taken
What I really like, is that I used this on the pod surround, realllly makes the gauges pop a LOT harder.
Nice work @Speedtoys . I just got done doing the same on my cluster although mine turned into a bit of a rabbit hole. I went with the Lutz pcb board setup with LED lighting and warning indicators. I also replaced my gear indicator lights with LEDs. I removed what was left of the reflective coating on the light guides and replaced it with reflective tape that came with the Lutz kit. The lighting is much better than it was before but not at all too bright.
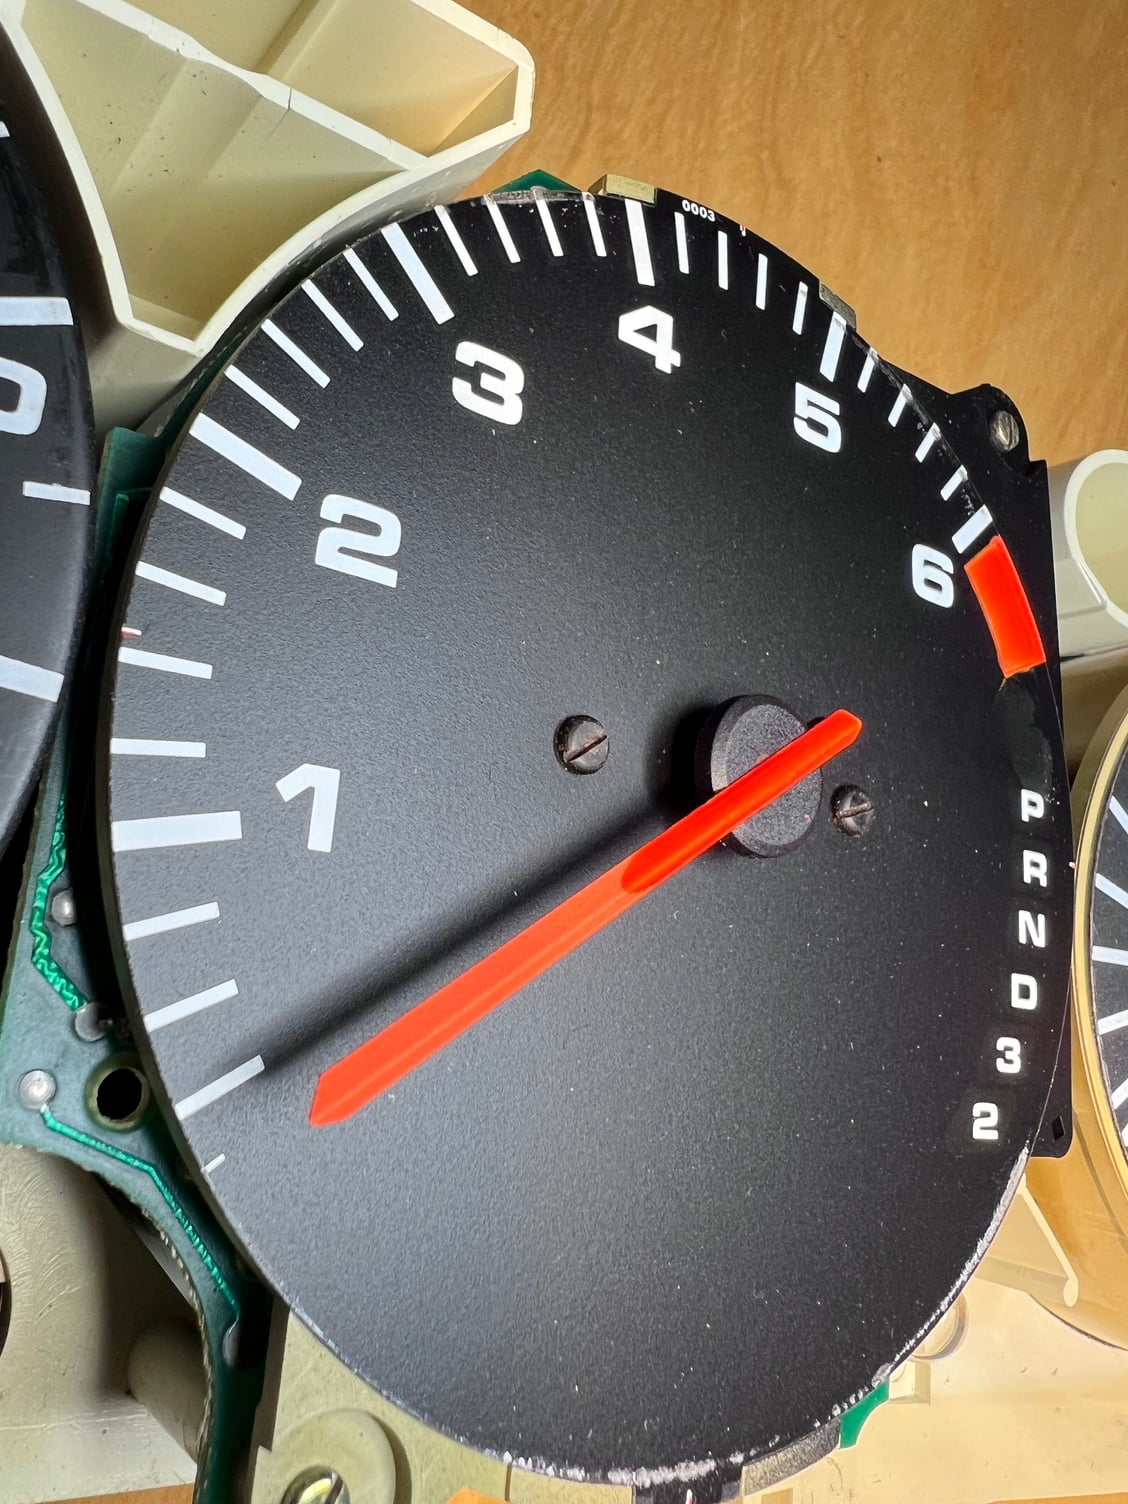
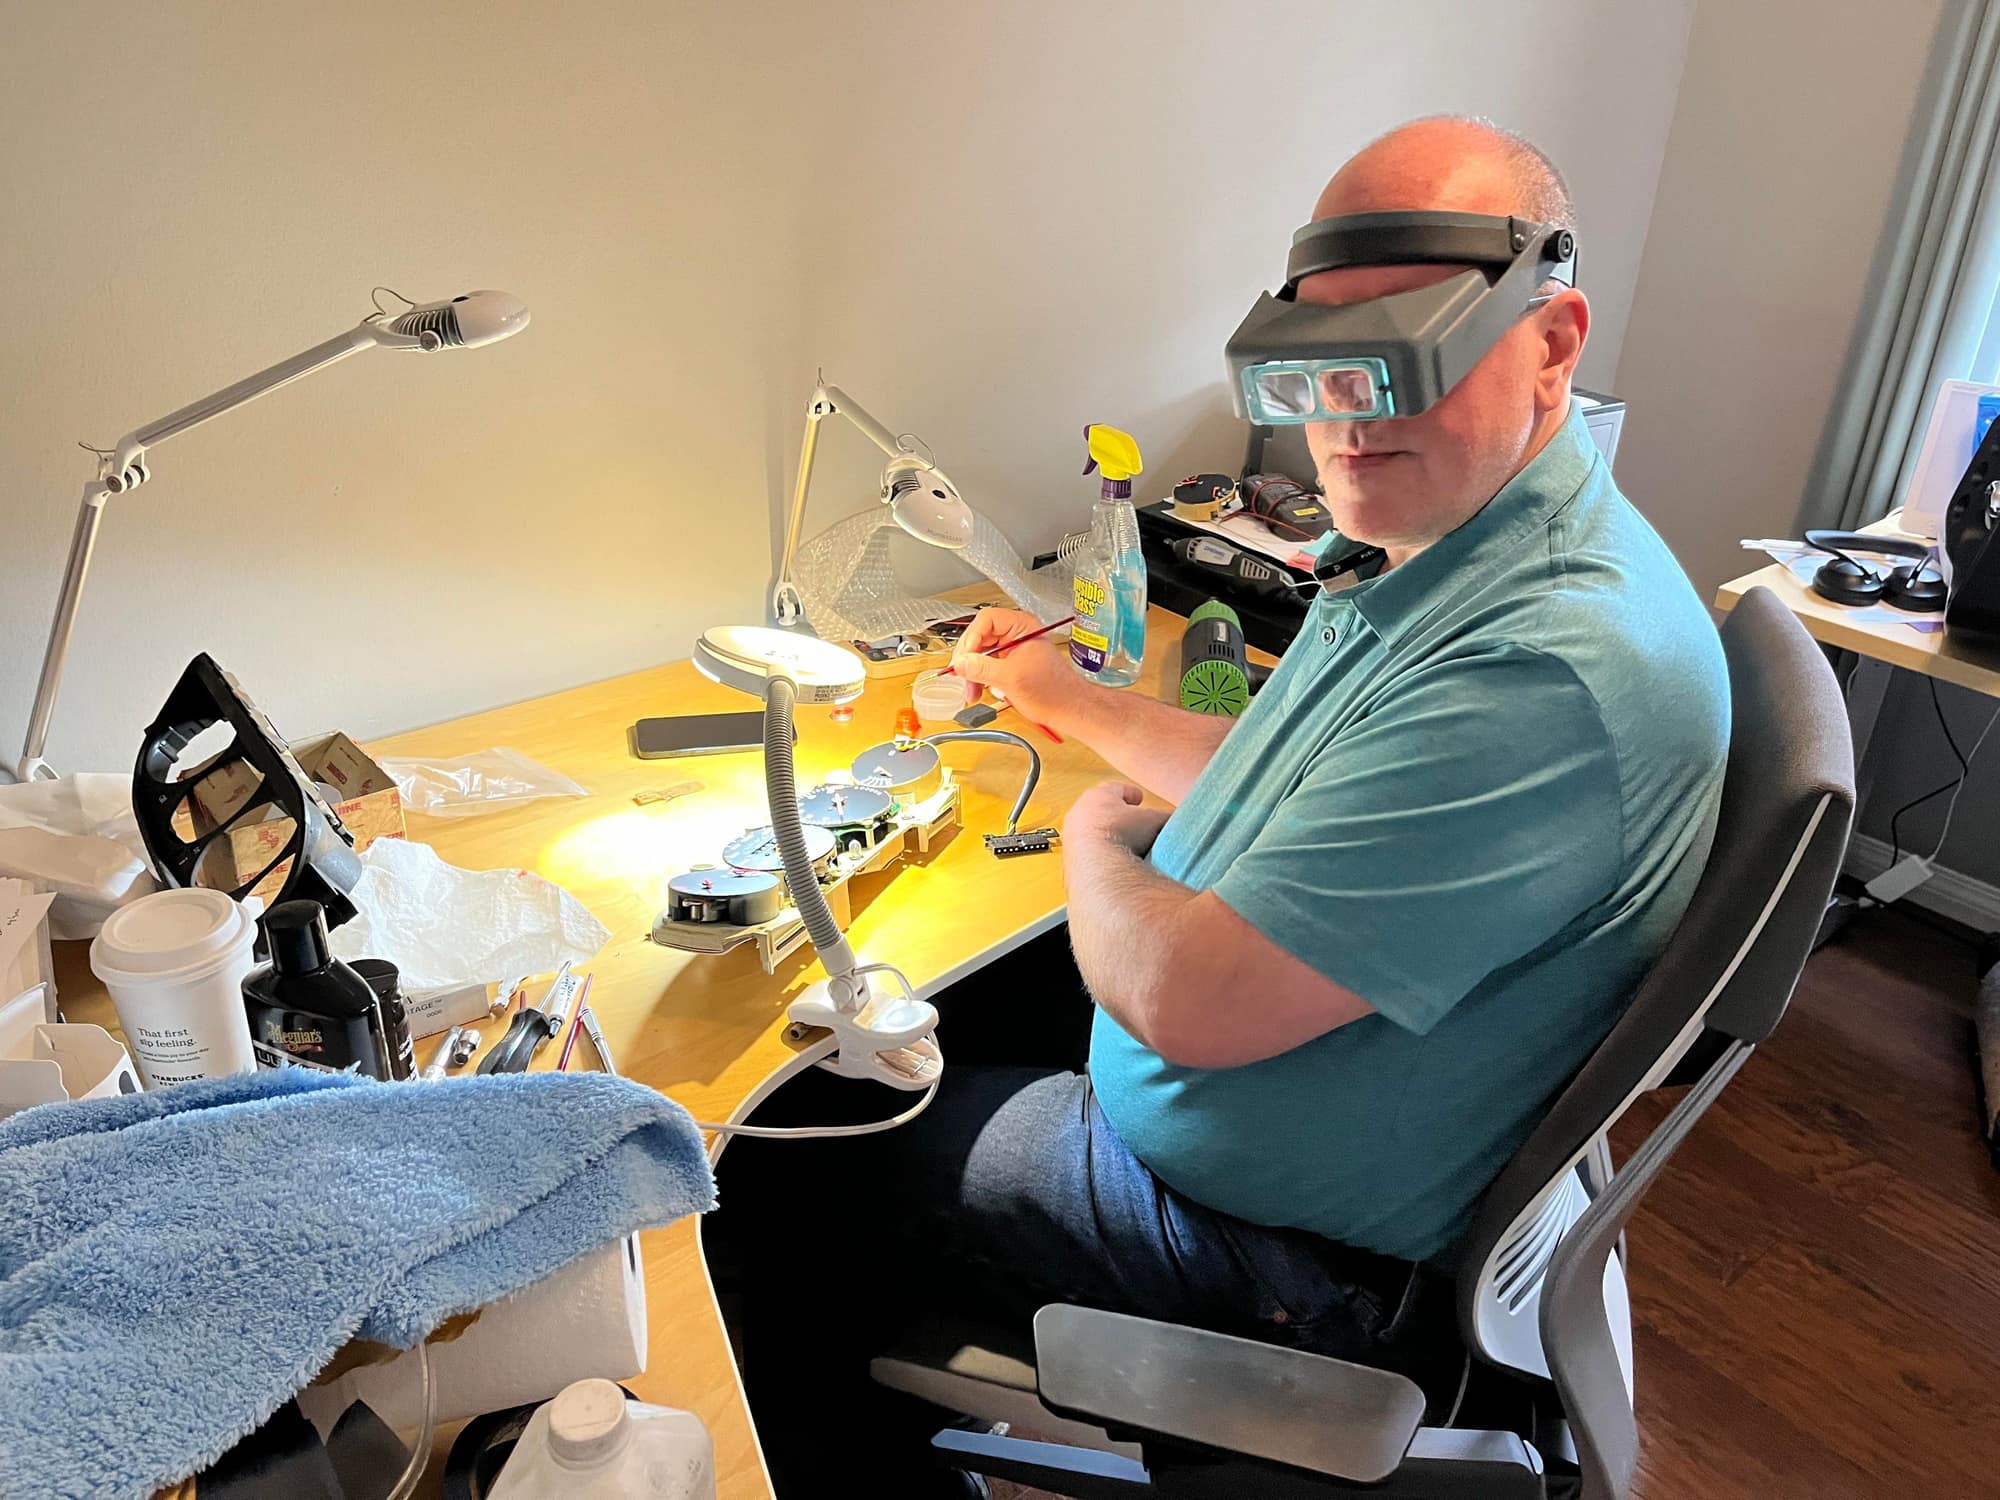
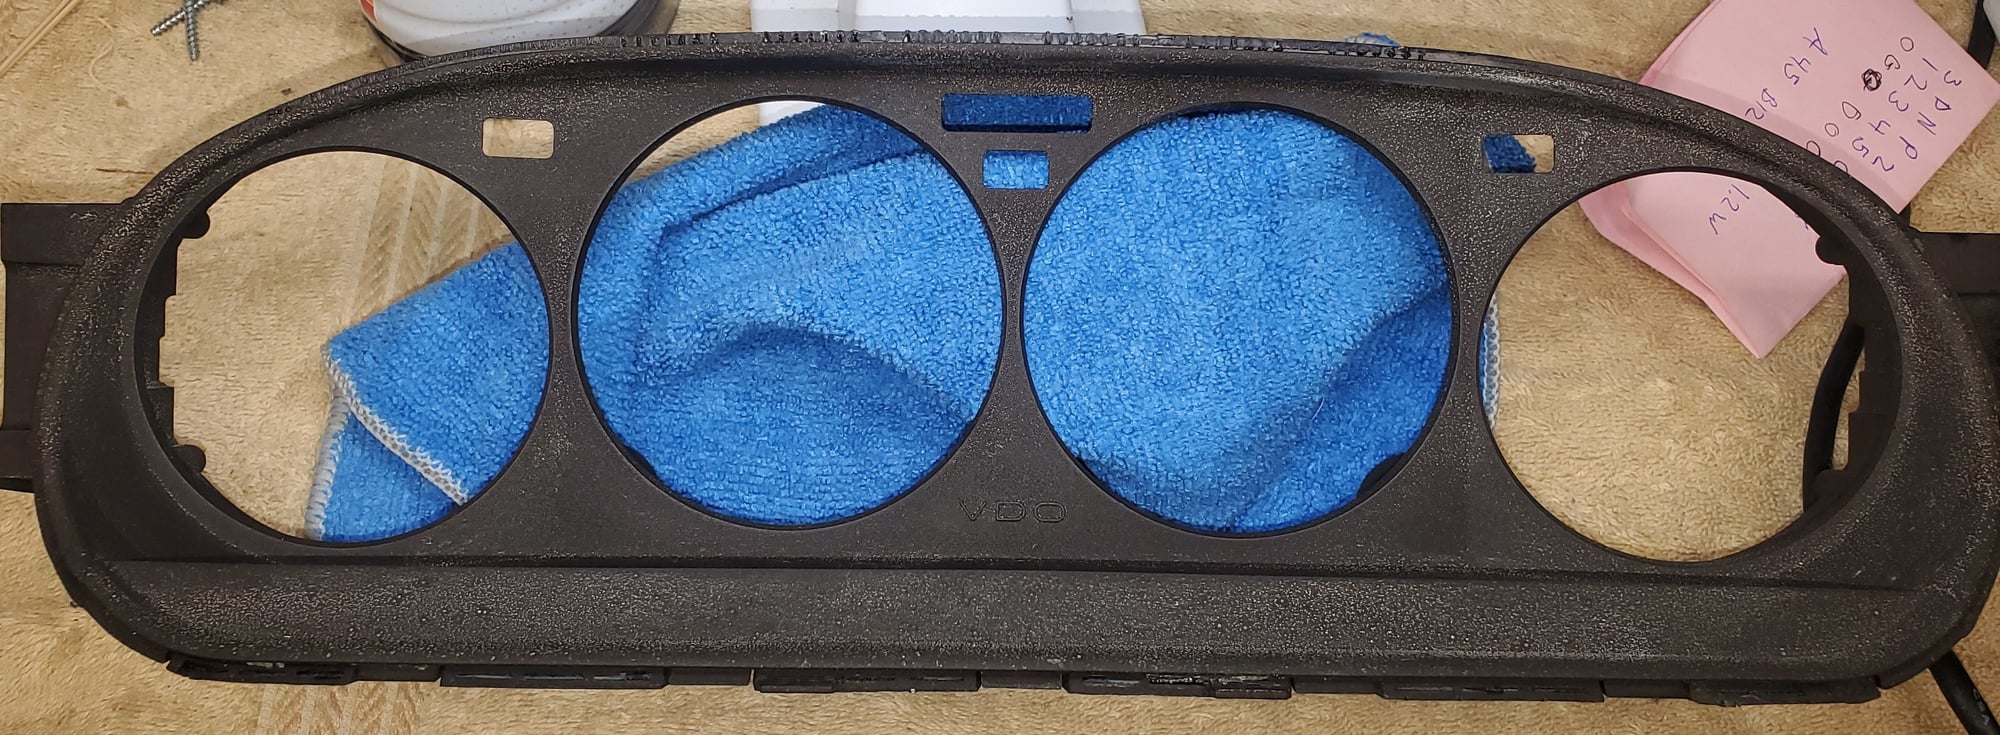
I was concerned that the job I was doing with the fluorescent paint on the needles and redlines was gong to look terrible because it didn't look all that great through my magnifying headset. I can't see the imperfections in the paint with the cluster at normal viewing distance so it works for me. I took a Scotchbrite pad to the gauge surround, painted it black, and then polished the lens a bit while I was there.

 02-04-2024, 06:04 PM