When you click on links to various merchants on this site and make a purchase, this can result in this site earning a commission. Affiliate programs and affiliations include, but are not limited to, the eBay Partner Network.
Michael, I have another couple of pointers for you about the French seam on the top surface of your handle cover. One is that I suggest that you use a heavier thread for the top stitches making up the French seam. I use 135 thread for just about all of my work with my main machine. That is because I bought the machine from a saddle maker who had the thread length permanently set at 1/8th inch, and it is geared down to sew very slowly. My friend, Doug Corson, who is an expert trim guy, commonly uses about 95 thread I like the 135 because I cannot shorten the stitch length and mainly because when I do French seams the thread is much more pronounced, which is actually the purpose of the French seam in the first place.
The other thing, kind of along with the suggestions above about ending the top stitching for the French seams, is that when you sew up one side of the main seam with your top stitching and end it at the other end, you will have a tendency to then go back to the beginning and then sew the other side in the same direction. (That will not happen if you choose to box the first end and then sew the other direction for the other side.) However, if you tie the first stitch off, you need to turn the work piece around and then sew the other side in the opposite direction. The reason for this is that when you get your tension correct, and especially if you choose, as I suggest, to top stitch with heavier thread, you will notice that for each stitch the thread goes into the hole on one side and comes out the other side. Each stitch is at a slight angle to the line of stitching. If you end one line of stitching up one side of the seam and then go back to the same beginning and do the other side, the lines of stitches will kind of look like looking at someone with two left feet. They look kind of ok, but then there is something not quite right about them. When you sew one side one way and the other side the other way the stitches look left and right. Probably not a big deal, but then perfection is just that, perfection.
Actually there is one more suggestion about the top French seam, but not about how to sew it. If I were doing this top French seam I would first cut my pieces with about a 3/8 inch seam allowance. Then I would sew my basic seam sewing them together. Then I would soak the seam allowance with water (assuming leather) and then butterfly the seam allowances and capture them between two clamps (like you did with the ends) until they dry. Only then would I trim the seam allowances to the net width to fill the grooves in the handle. Then I would sew my twill tape onto the under-side of the seam.
By the way, always sew your French seam stitching from the outside in and never from the inside out. The needle leaves a nicer looking hole when it goes in than when it comes out.
Last edited by Jerry Feather; 03-04-2024 at 10:52 AM.
@Jerry Feather, thanks for all the great suggestions. You bring up a lot of stuff I was thinking already considering, your guidance confirms it. And thanks for all the stuff I didn't think about, I'll definitely be taking that on as well. Progress will hold for a bit until I get heavier thread.
Last edited by Michael Benno; 03-04-2024 at 12:22 AM.
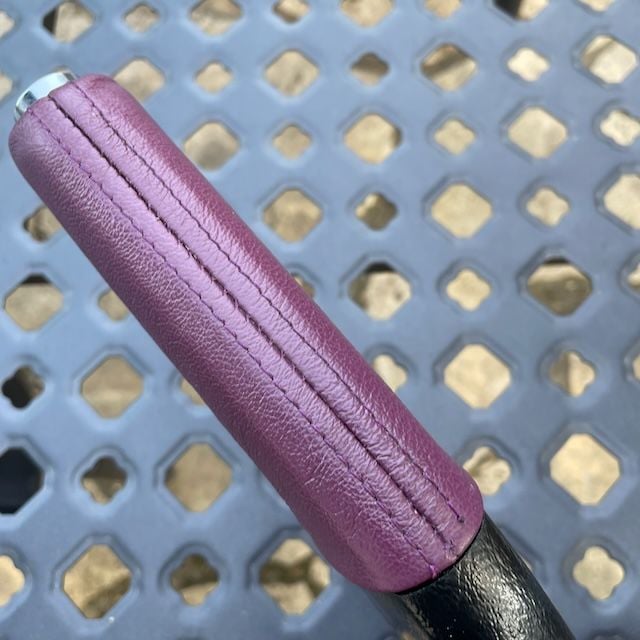
It's been a while since I worked on this project. Last night, I decided to revisit it again and made some really good progress. It all went so fast that I didn't think to take photos of the process. I am very happy with the results, so much so that I am calling this project complete. And, while you cannot see, I was able to fully reproduce the exact process the factory did, which I think was cool.
There is a small missed stitch at the base of the french seam. I decided not to fix it
The texture/crease near the base of the boot is more visible in pictures than to the eye.
Mike I would try some of this on your seats, it may help with the aging process
Thanks for the tip Stan, I will look into it. I have been using a variety of products on the seats (Girotts Leather Rejuvenator and Nivia Cream). However, I think the cracking on those seats are too sever. The problem seems isolated to the bolsters. They may have been filled and painted at one point. I am not an expert but they look too smooth, no texture.

 03-03-2024, 04:16 PM