When you click on links to various merchants on this site and make a purchase, this can result in this site earning a commission. Affiliate programs and affiliations include, but are not limited to, the eBay Partner Network.
My previous projects have been limited to what I could cut and glue. This winter I inherited this industrial sewing machine from Mom.
So, armed with more tools than skills, I decided to take the next step in projects. Starting with the handbrake cover.
Disclaimer: I don't have any qualified upholstery skills. When it comes to premium results, I go to the pros, @olmann is recovering a set of seats for me right now. This is me just playing around because it is fun and sharing my experiences for you all. I find DYI upholstery to be extremely satisfying and a way to recharge after a day at work.
The leather handbrake in my car was looking pretty tiered. I have some leather left over from the wiper delete project, so I figured this would be a good stepping stone; after all, there are only 2 seams.
Here is the deconstruction of the handle so a pattern could be made. It is glued onto the handle, so a long blunt pic was used to work the leather away from the glue. A little spray leather conditioner helped ease off the grip.
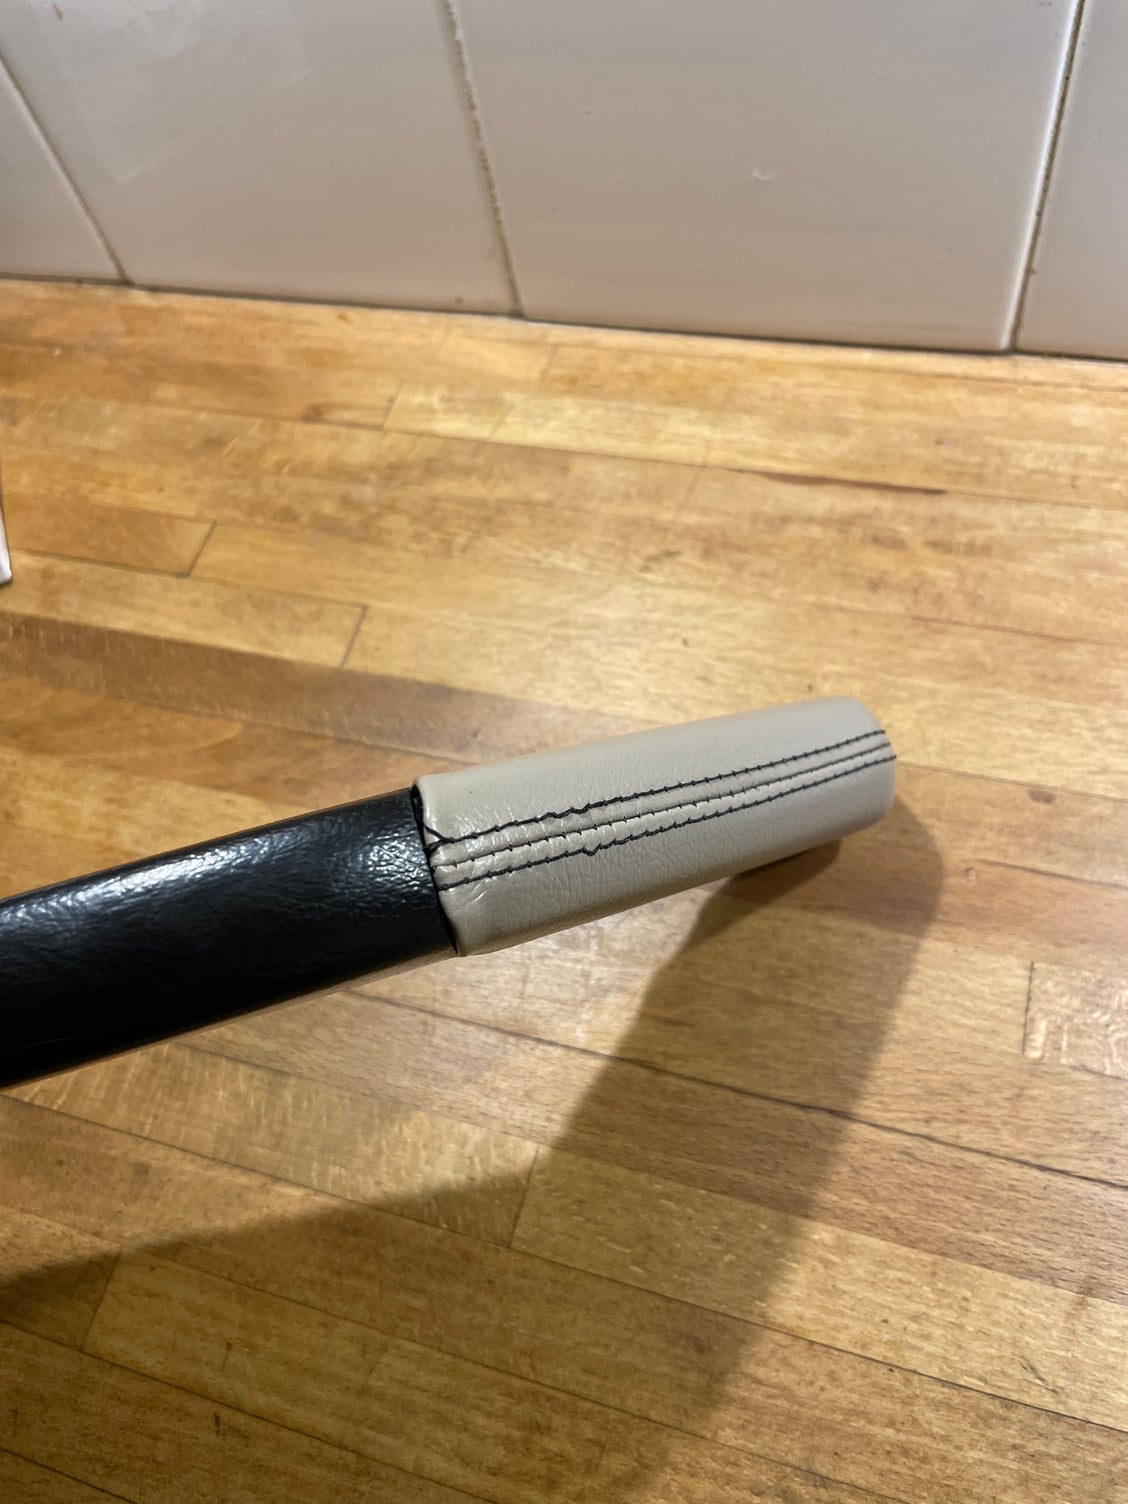
This rolled edge was glued. I need to figure out how to make such a compact glue job.Maybe clamps.
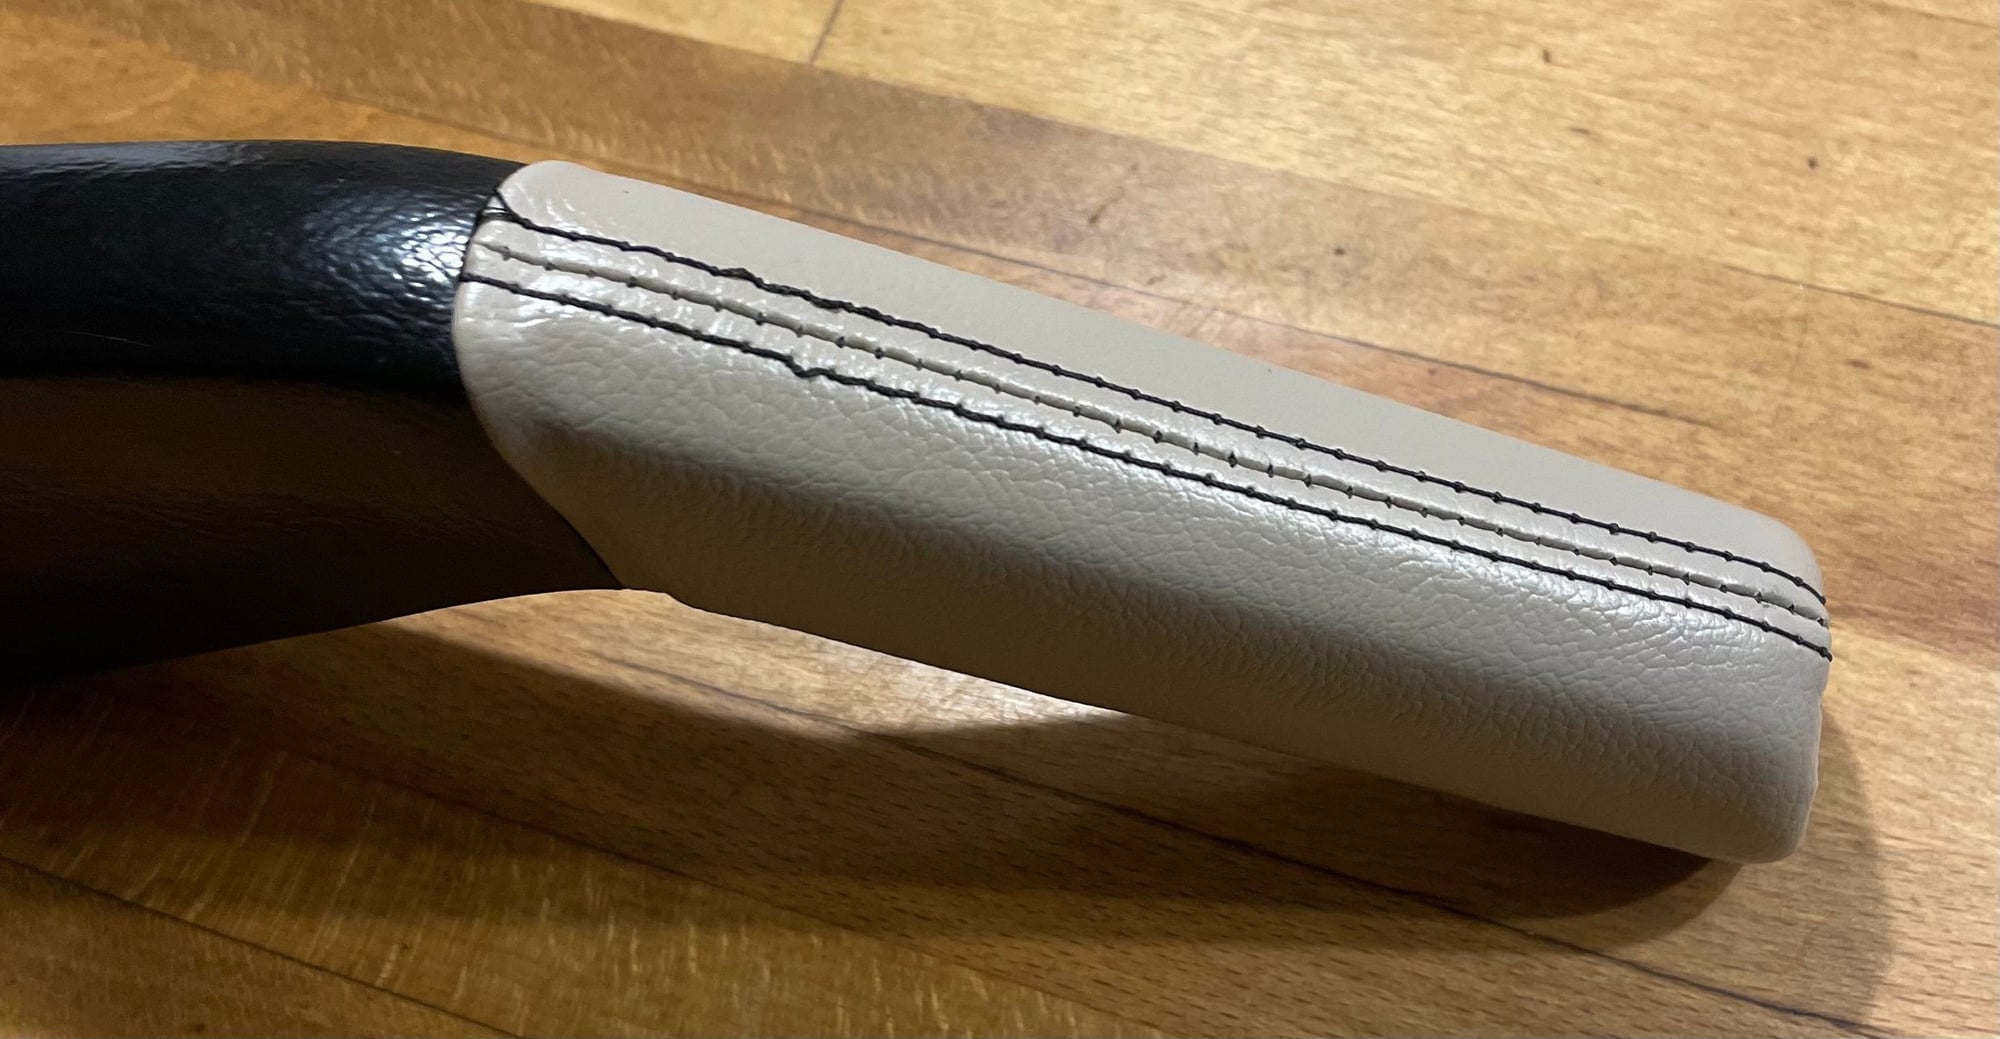
On the top side of the handle there is a standard seam in the middle and two side stitches. These side stitches are sewn into a reinforcing stip called "Twill Tape".
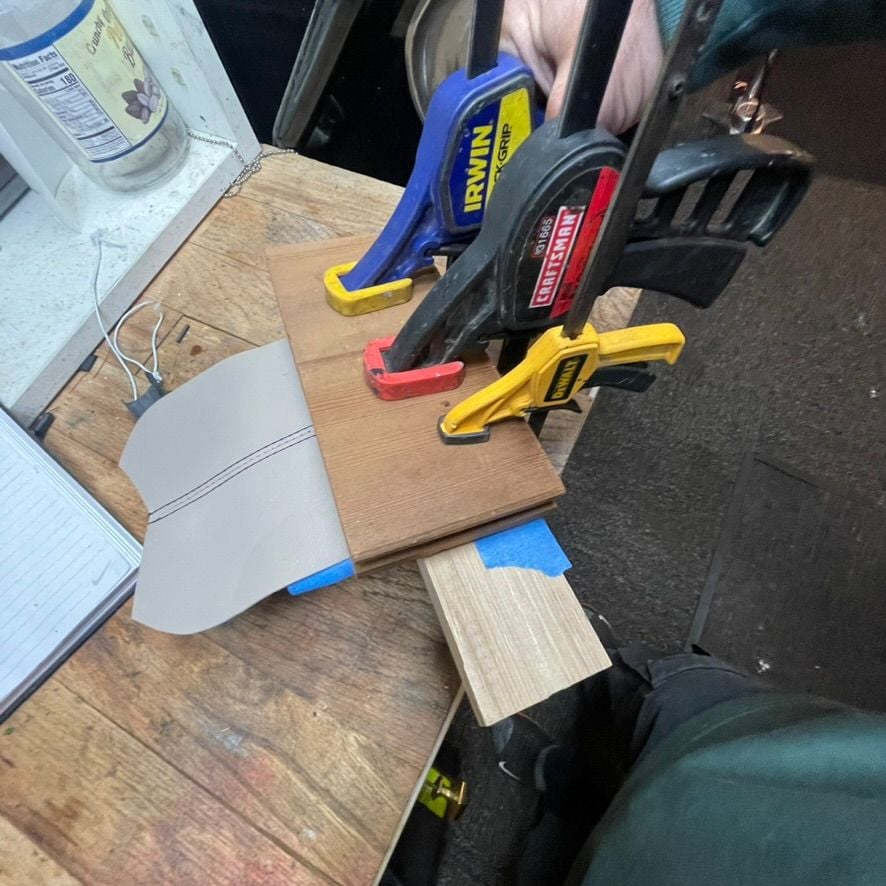
Decomposed and Making my first pattern using paper.
I decided to make a test grip using some scrap marine vinyl that Mom provided with the sewing machine.
Here the two pieced are sewn together with a stitch length that matches the original (7 stitches per inch). Next time, I will make the curves on the end more gradual to prevent awkward shapes when folding the lip over into the end of the handle. And maybe I'll trim a little closer to the stitch.
Here reverse the grip right-side out and test fit it on the handle. My first try turned out pretty good.
Mom thinks I need to adjust the upper stitch tension on the machine because the stitches look a little loose.
Also,My stitching needs improvement. I need better "backstitching" so the ends don't pull apart.
I am pretty happy with my first attempt. If you have suggestions or experiences, pass them along.
In the next attempt, I will try to recreate the original top seam with the twill tape (on order). Stay tuned for more entertainment.
Last edited by Michael Benno; 02-15-2024 at 10:23 PM.
I am certainly not knowledgeable about upholstery, but I suspect that the ends of these leather stitches were hand tied off, rather than backstitched. I haven't seen any sign of backstitching on leather trims.
Looking forward to seeing your progress, I've eyed that same Juki machine at work many times...
Good idea. I thought backstitching would be enough.
I have no suggestions, just a big up for your efforts. Looks amazing for your first try.
I'm doing a similar attempt with one of my other cars that is very near and dear to me as it was my first car and I want it to turn out perfect but it has been very intimidating to say the least.
Good idea. I thought backstitching would be enough.
I didn't mean to sound like the backstitching wasn't adequate, I think that option is more than strong enough. Lining up the stitch needle holes on backstitching can be very hard, which is why I suspect the ends were hand tied. Good luck however you decide to finish the ends!
Michal, it is great to see you working at some new and different skills. I have a limited amount of upholstery experience, but I have much more knowledge about it than what my experience might suggest. Based on that I have some suggestions about this little project of yours.
The seam on the top of your grip cover is called a French Seam. In most common practice it does not have the twill tape or other sewn in under it, even though that is included in its technical definition or description. Its purpose, aside from joining the two edges, is mostly for looks. In your case however, I think it is only for looks; and my thought is that that is totally unnecessary. I think the grip cover as shown needs only one seam, and I would make it with that seam on the underside with the finger grooves and bumps. Then I would butterfly the seam allowances on either side of the seam and glue them down with contact cement.
As to finishing each seam, in this case I would tie them all off rather than backstitching. My first industrial machine did not have the reverse capability, so I had to tie off just about every seam sewn with it. Not a big deal.
While the cover is still inside out, as sewn, I would paint the bottom edge with contact cement and then roll the edge over for the unsewn hem. However, since that will call for about 4 layers of leather at the corners of that folded edge I would first, before even sewing it together, skive the corners of the joint with my disc sander. That is done by gluing with only rubber cement the corners and a bit more onto a nice flat surface and then grinding off about half or more of the leather thickness at the corners. Then pull it off of the surface and rub the cement off. Then when you reverse the cover the rolled edges will not be sticking up so much at the bottom corners.
Also, since there is a nice groove around the handle at the base of the grip which allows for the rolled and glued edge, I think I would bury a nylon string in the rolled edge and when the installation is complete I would tighten the string and tie it off at the bottom and stuff the string ends under the cover.
Since the cover wants to be glued onto the handle, I would use a trick that I learned from a guy who made me a custom set of golf clubs. When the clubs were finished and ready for their rubber grips, he would coat the upper end of the shaft with contact cement and then when it dried he would spray it lightly with gasoline. Then he would slip the rubber grip over the slimy glue and then line it up correctly and let it set to dry. I would do the same in fitting the cover on the handle with your project.
The GTS handbrake has a groove in the rubber to seat the French seam, and if you don't put a seam there you will need to fill the groove.
In that case I would simply put the single seam on top rather than on the bottom. I would butterfly it and trim the seam allowance narrow to fit the groove.
Another choice might be to put the seam on top, but do not sew the seam. Rather, I would fold the seam edges over and glue them down and then punch the edges and lace them together with something like a baseball stitch or something like the steering wheel covers and/or gear shift handles. I might even lace the edges together with leather lacing.
Otherwise, good suggestion. The top groove in the grip does not show in any of Michael's pictures, but there does appear to be one also on the bottom. With my original suggestion and Big's suggestion I think I would follow what he suggests and that is simply fill the top groove.
Last edited by Jerry Feather; 02-17-2024 at 02:50 PM.
Thanks all for the excellent suggestions! I will take them all into consideration as I continue to practice and make test grips.
Originally Posted by dimi5928
Can I ask you if you can share with us the measurements on the pictures you posted?
Yes, once I have finalized the pattern, I will provide all the dimensions. Ideally, I would like to create a pattern as a PDF and upload it to this post so others can benefit from this work. Would anyone be able to help create a downloadable PDF file?
Originally Posted by Jerry Feather
Michal, it is great to see you working at some new and different skills.
Hi Jerry! Nice to hear from you again and thanks for all the useful insights. I will to incorporate them into my next test.
Originally Posted by Bigfoot928
The GTS handbrake has a groove in the rubber to seat the French seam, and if you don't put a seam there, you will need to fill the groove.
Correct, take a look at the detail of the GTS handbrake rubber. There is a relief for the top and bottom seams, as well as the rolled & glued edge at the rear of the handle.
Seam reliefs on the top and rear of handbrake handle. Seam reliefs on the bottom and rear of the handbrake handle.
My goal would be to reproduce the handle as it was originally made as a way to develop my skills. The reliefs for the seams sort of require I have a seam on the top and bottom. I don't need the French seam on top. A standard seam would do, but I like the original style, so I will attempt it. Here is how the french seam was finished under the twill tape:
Here is an update. Picture heavy. I've been spending time developing my sewing technique and figuring out how to make the best pattern that is easy to assemble and fits tightly. This prototype is pretty much exactly what I am looking for. Had I done this in the final leather I would call it good. There are flaws, I will go into those below. However, I am very pleased and proud of this work. Please feel free to provide feedback on how to improve or techniques.
Here are some pictures on the production: I was having problems getting the french seam to be flat and tidy because the top edge was curved which caused problems in gluing on the reinforcing twill tape on the back. So I hypothesized that the top edge must have been straight to make it easier to sew. I stretched the pattern to account for a straight edge.
Here you can see the 10mm twill tape glued and the french seam at about 8mm wide. I found the width of the twill tape affected the how well it wrapped around the top, especially at the folded edge. So I used a very narrow 10mm tape vs the 8mm width of the seam which is sewing from the top (blind). Also, note the rolled and glued edge at the bottom. I concluded this rolled edge was done before sewing both edges. I found the glued and folded edge needed to be smaller than the 5.5mm channel on the shift handle. I used 3.5mm foldover in this last try.
I used glue and pliers to secure the edge.
I used a wood press the flatten all the seams and rolled edges which really helped.
Michael, I think you Mom might have been correct about the stitching being off because of thread tension, but if you stitched the French seam top stitching from the top the adjustment in the tension should have been the other way. The top/outside top-stitch is essentially a straight thread and the bobbin thread is actually pulled clear through the material. They should be joined down in the middle of the material and out of sight. The tension on your top thread is way too tight.
Last edited by Jerry Feather; 03-04-2024 at 11:25 AM.
Michael, I think you Mom might have been correct about the stitching being off because of thread tension, but if you stitched the French seam top stitching from the top the adjustment in the tension should have been the other way. The top/outside top-stitch is essentially a straight thread, and the bobbin thread is actually pulled clear through the material. They should be joined down in the middle of the material and out of sight. The tension on your top thread is way too tight.
I think you are correct, Jerry.
Using a feel test of pulling both threads y hand. The top tension feels a lot tighter than the bottom. Balancing the tension is something I have been trying to dial in the correct tension but still having trouble because if I loosen the top tension then I get loops on the bottom.
You might want to check the manual to see if you have your top thread woven thru the machine correctly. And it doesn't take much on the top tension **** to make a difference.
Last edited by Jerry Feather; 03-03-2024 at 01:27 PM.
A couple of other pointers, Michael. One is in regard to the glued hem at the bottom. If I were doing this in vinyl, I would fold the hem twice so that there is enough material to actually fill the groove in the handle. Your groove is telegraphing thru, and it needs to be filled. Also, when you get to leather, I would fold it only once, but I would fold enough over to actually fill the groove rather than narrowing it 2mm from the width of the groove. Also check the angle of the end of your work piece in comparison to the angle of the groove. I think yours might be a little bit off.
Next, I think you need to do the top stitching for the French seam a little bit differently. I know there was some discussion above about how to end your stitching, whether by back stitching or by tying the thread off, and my position is that you will almost never back stitch in doing French seams, since that is not very visually pleasing, which most of the time that is the purpose of French seams. The other thing about that is that I would end the top stitching for the French seams just short of the end. I would top stitch up to just one stitch from the visual end and then either box the stitch or simply end it there and tie it off underneath. The box stitch is done by stitching up to just one stitch or slightly less from the visual end, then turn your work piece 90 degrees and sew two stitches across the seam then turn another 90 degrees and sew the other side of the seam back to the beginning. You may even want to do the same at both ends and then tie the threads off underneath. I would prefer ending each side top seam just short of the end and then tying each off at each end.. In your case the two ends that go around the top corner don't look so bad as the ones at the other end.
As to the thread tension, it might be the bobbin tension that is the problem. it might not be tight enough. The bobbin has a tiny screw on it holding the tension spring, You might tighten it some to see if that will help with the problem.
Also, when you straightened the edge of your material for the top seam I think that was a mistake because the bottom end of your cover does not fit very well now since the opening is too big.
Last edited by Jerry Feather; 03-04-2024 at 10:58 AM.

 02-15-2024, 08:33 PM


 up for your efforts. Looks amazing for your first try.