
I have MASTERED the twin-disc adjustment!
 03-23-2006, 11:00 AM
#1
Addict
Rennlist Member
Rennlist Member
Thread Starter
Ok, here's a keeper to be filed. The One-time dual-disc adjustment sequence.
1. Put car "up" (4 jackstands, lift, whatever), leave in "Neutral"
2. Remove exhaust if necessary to access (remove) bellhousing
3. Remove Bellhousing, & slave cylinder (wrap tape around end of shaft to ensure it does not "remove" itself during this procedure). let the Slave hang just below the bellhousing, all taped up.
4. Using a racheting strap (like to secure stuff in the bed of a pickup truck), put one end of a hook onto the release arm, where the slave cylinder shaft engaged. The otherhook can be hooked the lower cross-member below the transaxle.
5. take up slack in the strap, but do not tension yet.
6. I used layered masking tape for my slave. Using a pen, mark on the tape the position of the release arm @ the tip (where slave shaft engages) above. Your release arm only moves about 3/4" or so once the clutch is pressed.
7. Tighten up the rachet slowly, to "learn it" if you've not done so before, like me. Tighten up the strap to move the release arm about 3/4" & re-mark the tape of this position.
8. verify with a probe/skinny flathead screwdriver & a good light that there is air in between the rear disc & the PP & IP (pressure plate & Intermediate plate).
9. the rear disc should be loose on the shaft, with a bit of air. The front disc may not be loose at all (as mine wasn't).
10. Now to adjust. There are three tabs equally spaced on the intermediate plate that need to be pulled away from the disc that still has contact even with the clutch arm pulled back.
Using a 1/2" rachet & a deep 27mm socket, turn the engine clockwise (from the front of the motor) until one of the three tabs is accessible from below. Each tab looks like a "T", with a thicker trunk & skinnier arms up top. The trunk of the T is secured to slide up & down (if viewing it as a T) to allow the IP to sit in different positions, relative to the discs. The object of the game is to find a happy place: where both discs have air on both sides of them, for all 3 T's.
Using a medium flat-head screwdriver, pry the arms of the T's upwards (equally, as it will teeter to each side every time you pry upwards) to increase the space towards the front disc. If you pull up too far, the space around the rear disc will decrease or be eliminated altogether. If this happens, pry against the pressure plate to lower the T and start over. For me, with new discs & PP, just barely seeing the center hole in the T was my happy place. Once both discs appear to have air on both sides of them, make a mental note where the T is in relation to the hole (where it slides up/down on) is.
Rotate the engine 120 degrees until the next tab is accessible. You do not need to release the tension on the arm, just leave it for now.
Perform the T adjustment for this tab as well. Remember, don't shove it all the way up/down: try to find air on both sides of both discs before moving on. Your resultant T position will be about the same as it was on the first you did.
Perform the T adjustment for the final tab. Once your done, you should be able to reach up & grab the intermediate shaft coupler, and spin the driveshaft & the two discs. This is good! If you cannot spin it easily, then you need to rotate 120d again (or 240) to see if one disc has begun to to drag & the T needs to be adjusted again.
Once the intermediate shaft spins easily, & you're comfortable with your adjustment, release the tension on the arm (the racheting strap) so that your clutch is fully engaged. Using the rachet, turn the motor over a few times & then using the racheting strap, pull back the arm again to the same position (about 3/4" or so). Reach up & ensure the intermediate shaft spins easily. Double check your equal air around both discs for all 3 tabs once more. By "equal air", I had about 1/32" between front and rear of each disc: just enough to make it look "too thick" to be engaged.
You're done! Remove strap, replace slave/bellhousing, exhaust, & go drive.
1. Put car "up" (4 jackstands, lift, whatever), leave in "Neutral"
2. Remove exhaust if necessary to access (remove) bellhousing
3. Remove Bellhousing, & slave cylinder (wrap tape around end of shaft to ensure it does not "remove" itself during this procedure). let the Slave hang just below the bellhousing, all taped up.
4. Using a racheting strap (like to secure stuff in the bed of a pickup truck), put one end of a hook onto the release arm, where the slave cylinder shaft engaged. The otherhook can be hooked the lower cross-member below the transaxle.
5. take up slack in the strap, but do not tension yet.
6. I used layered masking tape for my slave. Using a pen, mark on the tape the position of the release arm @ the tip (where slave shaft engages) above. Your release arm only moves about 3/4" or so once the clutch is pressed.
7. Tighten up the rachet slowly, to "learn it" if you've not done so before, like me.
Tighten up the strap to move the release arm about 3/4" & re-mark the tape of this position.8. verify with a probe/skinny flathead screwdriver & a good light that there is air in between the rear disc & the PP & IP (pressure plate & Intermediate plate).
9. the rear disc should be loose on the shaft, with a bit of air. The front disc may not be loose at all (as mine wasn't).
10. Now to adjust. There are three tabs equally spaced on the intermediate plate that need to be pulled away from the disc that still has contact even with the clutch arm pulled back.
Using a 1/2" rachet & a deep 27mm socket, turn the engine clockwise (from the front of the motor) until one of the three tabs is accessible from below. Each tab looks like a "T", with a thicker trunk & skinnier arms up top. The trunk of the T is secured to slide up & down (if viewing it as a T) to allow the IP to sit in different positions, relative to the discs. The object of the game is to find a happy place: where both discs have air on both sides of them, for all 3 T's.
Using a medium flat-head screwdriver, pry the arms of the T's upwards (equally, as it will teeter to each side every time you pry upwards) to increase the space towards the front disc. If you pull up too far, the space around the rear disc will decrease or be eliminated altogether. If this happens, pry against the pressure plate to lower the T and start over. For me, with new discs & PP, just barely seeing the center hole in the T was my happy place. Once both discs appear to have air on both sides of them, make a mental note where the T is in relation to the hole (where it slides up/down on) is.
Rotate the engine 120 degrees until the next tab is accessible. You do not need to release the tension on the arm, just leave it for now.
Perform the T adjustment for this tab as well. Remember, don't shove it all the way up/down: try to find air on both sides of both discs before moving on. Your resultant T position will be about the same as it was on the first you did.
Perform the T adjustment for the final tab. Once your done, you should be able to reach up & grab the intermediate shaft coupler, and spin the driveshaft & the two discs. This is good! If you cannot spin it easily, then you need to rotate 120d again (or 240) to see if one disc has begun to to drag & the T needs to be adjusted again.
Once the intermediate shaft spins easily, & you're comfortable with your adjustment, release the tension on the arm (the racheting strap) so that your clutch is fully engaged. Using the rachet, turn the motor over a few times & then using the racheting strap, pull back the arm again to the same position (about 3/4" or so). Reach up & ensure the intermediate shaft spins easily. Double check your equal air around both discs for all 3 tabs once more. By "equal air", I had about 1/32" between front and rear of each disc: just enough to make it look "too thick" to be engaged.
You're done! Remove strap, replace slave/bellhousing, exhaust, & go drive.

 03-23-2006, 01:14 PM
#4
Race Car
Originally Posted by MarkRobinson
Ok, here's a keeper to be filed. The One-time dual-disc adjustment sequence.
...
Using a 1/2" rachet & a deep 27mm socket, turn the engine clockwise (from the front of the motor) until one of the three tabs is accessible from below.
...
Using a 1/2" rachet & a deep 27mm socket, turn the engine clockwise (from the front of the motor) until one of the three tabs is accessible from below.
The ratchet is a good idea. I used a large carpenter's clamp from Sears.
Dan
'86 928S 5-spd w/LSD
 03-23-2006, 01:20 PM
#6
Addict
Rennlist Member
Rennlist Member
Thread Starter
true, but I use latex gloves & not "manly gloves"
FWIW: I didn't have to touch the starter, but did have to loosen my exhaust from the manifolds to get the two rear-most bolts out.
FWIW: I didn't have to touch the starter, but did have to loosen my exhaust from the manifolds to get the two rear-most bolts out.
Trending Topics
03-23-2006, 09:36 PM
#9
Addict
Rennlist Member
Rennlist Member
Join Date: Nov 2001
Location: Endwell, New York
Posts: 620
Likes: 0
Received 0 Likes
on
0 Posts
Mark - Great tips. Especially the part about the ratcheting strap. I wish I heard about that one before I did mine. Anyhow, I'd only like to add one thing and that is that you really don't have to get the intermediate plate centered to adjust it correctly. Simply adjust the intermediate plate so it is as far rearward (towards the transaxle) as it will go. Now when you engauge the clutch (remove the ratcheting strap) the pressure plate will move the intermediate plate to the correct position. This will allow to maximum space for the clutch disk between the flywheel and the intermediate plate when the clutch is disengaged.
01-16-2012, 10:00 PM
#11
Rennlist
Basic Site Sponsor
Basic Site Sponsor
Very interesting way to approach this problem.
I must say, It's never occurred to me to even try doing this, in this manner.
Thanks for the tip!
I must say, It's never occurred to me to even try doing this, in this manner.
Thanks for the tip!
__________________
greg brown

714 879 9072
GregBBRD@aol.com
Semi-retired, as of Feb 1, 2023.
The days of free technical advice are over.
Free consultations will no longer be available.
Will still be in the shop, isolated and exclusively working on project cars, developmental work and products, engines and transmissions.
Have fun with your 928's people!
greg brown
714 879 9072
GregBBRD@aol.com
Semi-retired, as of Feb 1, 2023.
The days of free technical advice are over.
Free consultations will no longer be available.
Will still be in the shop, isolated and exclusively working on project cars, developmental work and products, engines and transmissions.
Have fun with your 928's people!
01-16-2012, 10:01 PM
#12
Rennlist Member
For most of us, this will do:
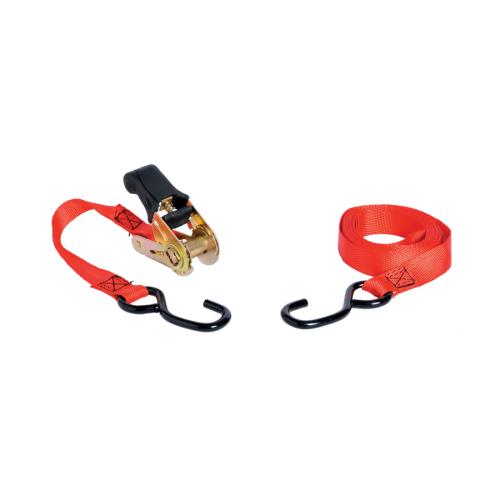
http://www.lowes.com/pd_106828-37340...rap&facetInfo=
For the others - you know who you are, tool snobs! use this:

http://www.fastenal.com/web/products...0509117&ucst=t
I used one of the first type, because I have dozens around from my motorcycle days.
http://www.lowes.com/pd_106828-37340...rap&facetInfo=
For the others - you know who you are, tool snobs! use this:
http://www.fastenal.com/web/products...0509117&ucst=t
I used one of the first type, because I have dozens around from my motorcycle days.
01-17-2012, 09:54 AM
#13
Administrator - "Tyson"
Lifetime Rennlist
Member
Lifetime Rennlist
Member
After one time the strap came loose off the arm, that was the end of that method. Thankfully the mechanic working on the car was in front rotating the engine and nobody else was under it.
It's a lot easier (and safer) to simply use a pry bar or a modified lower bell-housing cover.
01-17-2012, 04:25 PM
#14
Rest in Peace
Rennlist Member
Rennlist Member
This method was the first way I ever saw someone adjust one of these clutches years ago.
After one time the strap came loose off the arm, that was the end of that method. Thankfully the mechanic working on the car was in front rotating the engine and nobody else was under it.
It's a lot easier (and safer) to simply use a pry bar or a modified lower bell-housing cover.
After one time the strap came loose off the arm, that was the end of that method. Thankfully the mechanic working on the car was in front rotating the engine and nobody else was under it.
It's a lot easier (and safer) to simply use a pry bar or a modified lower bell-housing cover.
I have made a copy of your cover, so do you use a lockout valve on your clutch or just but a stick in the seat to hold it in?
Also do you have a photo sequence from start to finish on IP adjustment?