
Hood Removal, Liner Repair, installation procedure (w/pics)
 02-08-2009, 10:55 PM
#1
Rennlist Member
Thread Starter
Join Date: Sep 2007
Location: Ridgecrest, California
Posts: 1,363
Likes: 0
Received 143 Likes
on
28 Posts
The hood liner on Virginia was disintegrating when we got her last year so when I had the hood off for other repairs in November, I decided to repair the liner and try Nicole's hood liner and decal kit. I've tried the OEM type liner before (on California) and like it alot. But when I showed my wife the options for hood liners with decals for Virginia (her daily driver) she really liked the decal option with the shark so I gave it a try - she loves it.
So I thought I'd post a few pics of the process for my fellow newbies out there that want to repair the liner on their hood. You can order the kit from Nicole's HookedOnCars website. Other things I used include:
Odorless Mineral Spirits (for cleaning the old residue off the hood)
Distilled water in a spray bottle
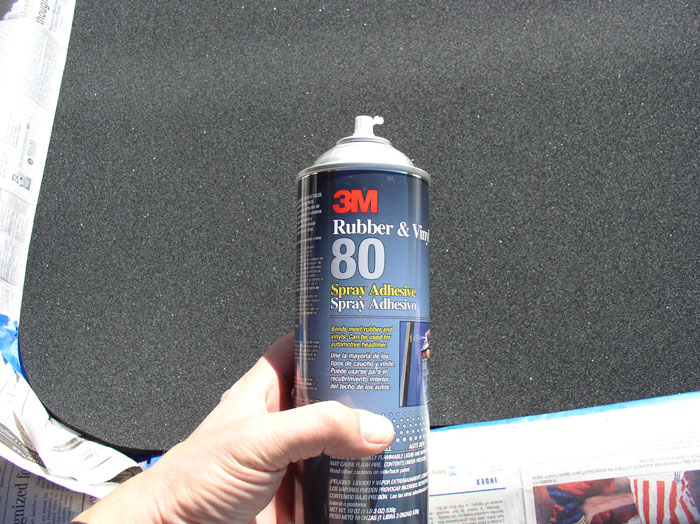
3M Spray adhesive #80
Wax Paper
Painters Masking Tape
Newspaper
Squeege
Towels
Tape Measure
Tools needed are:
A 13mm socket, ratchet, 3" extension bar,
Stiff nylon brush (1 wide one, 1 narrow one)
Large drywall taping knife.
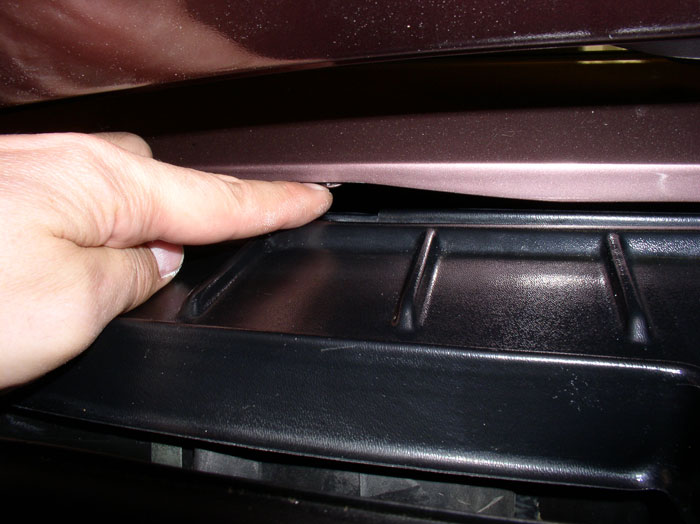
First, remove the hood. Removing the hood is easier with 2 people but can be done with one which is what I did here. First, remove the wiper motor and blower motor cover by lifting up on the rubber trim side to seperate it from the firewall and pull forward.
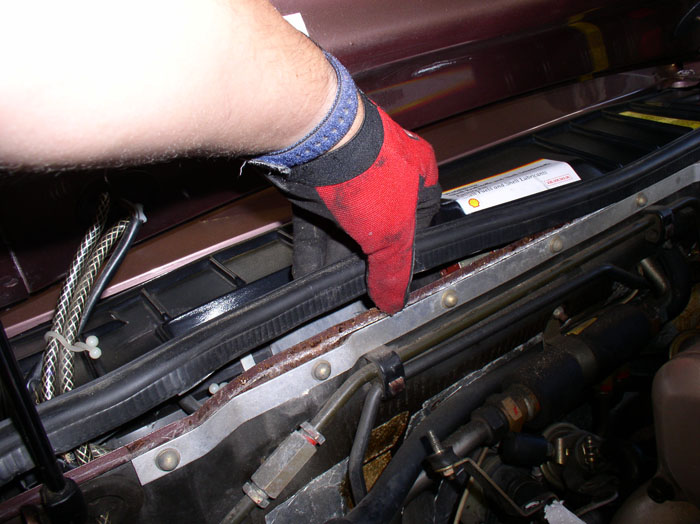
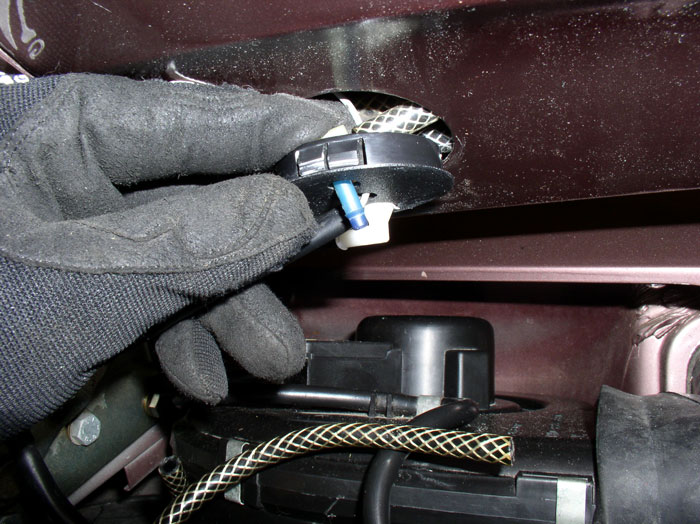
Follow the electrical wiring from the hood and disconnect the 3-pin and 2-pin electrical connectors - one wire on each side of the hood.
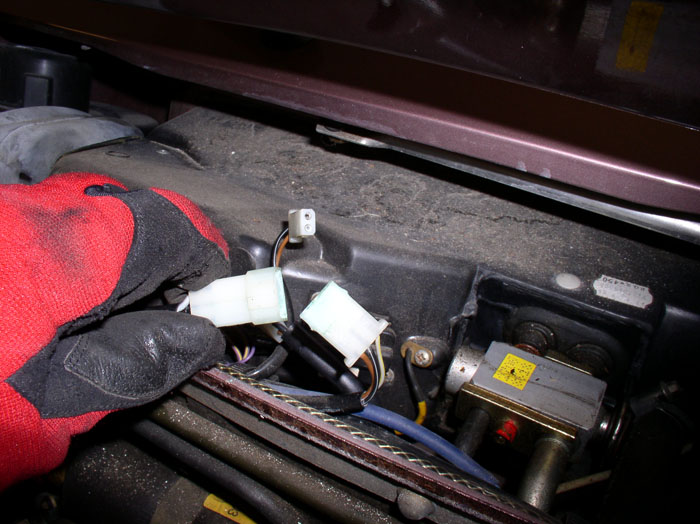
You may have to "un-route" the driver's side electrical wire from under the A/C lines so it is free to move with the hood.
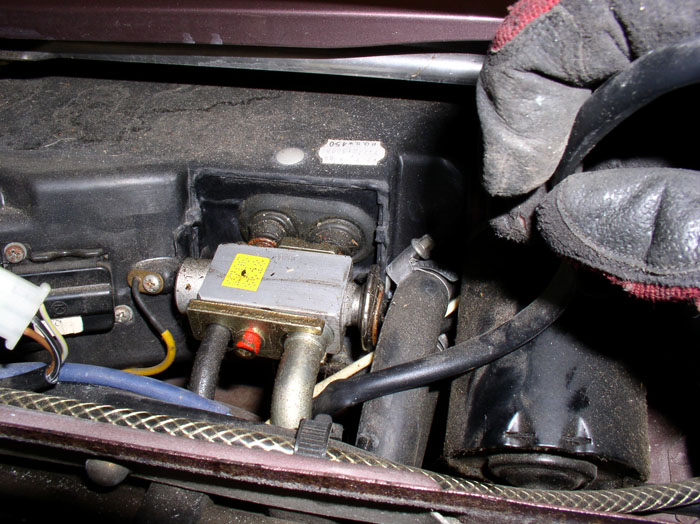
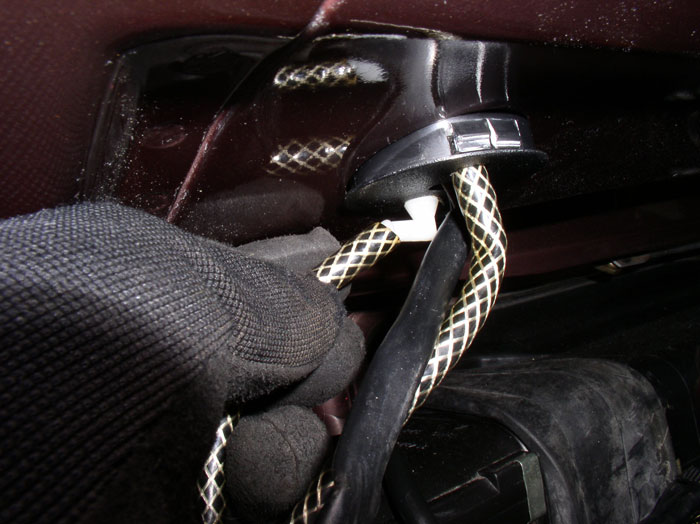
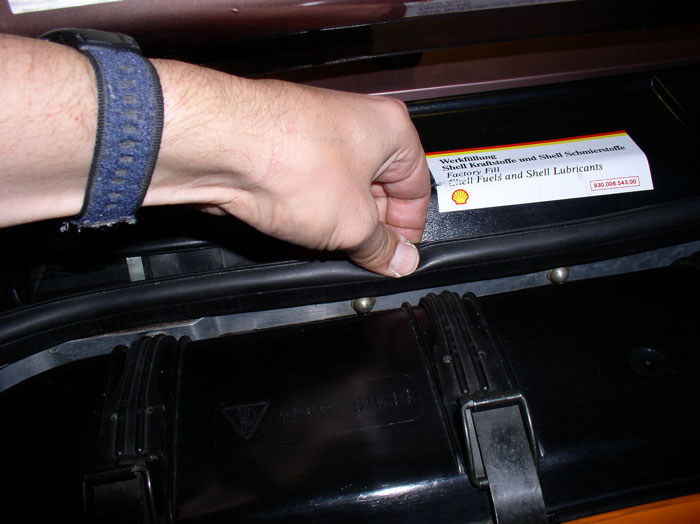
Next, disconnect the two wiper washer fluid supply lines. On mine, one connection was external to the cover plug and the other was internal. Mark one of the lines with tape to indicate whether it was the internal or external connected line so you can connect it back the same way on install.

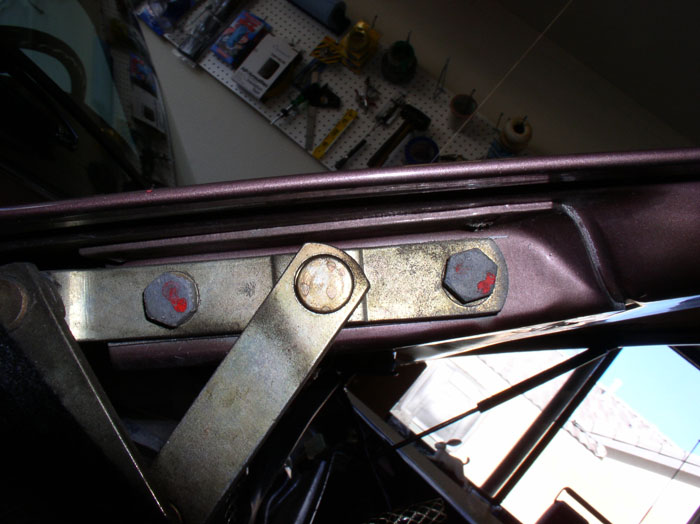
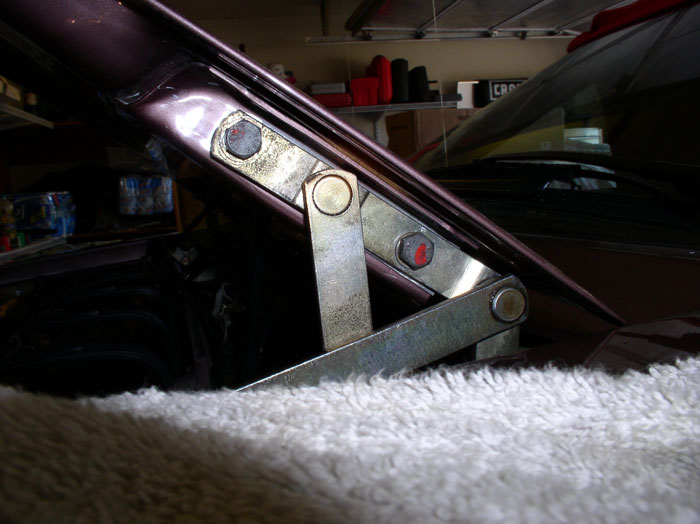
It is best to mark or photograph the orientation of the hood bracket to the hood before disassembly so you can install the hood "in the neighborhood" of where it was originally on install and fine tune from there. Also, don't wash the area around the hood bracket when you have it off. Sometimes the dirt lines will outline the location of othe bracket for you when your ready to install.
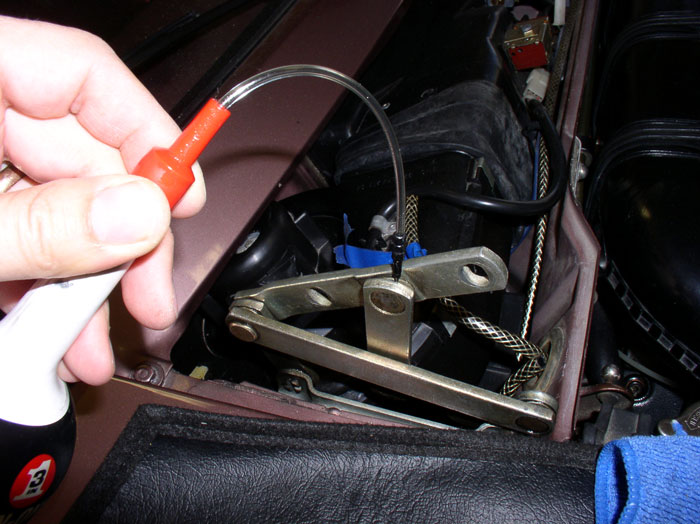
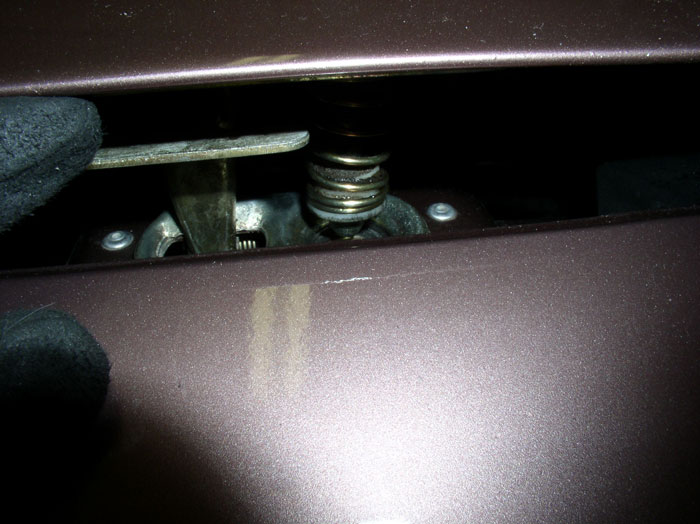
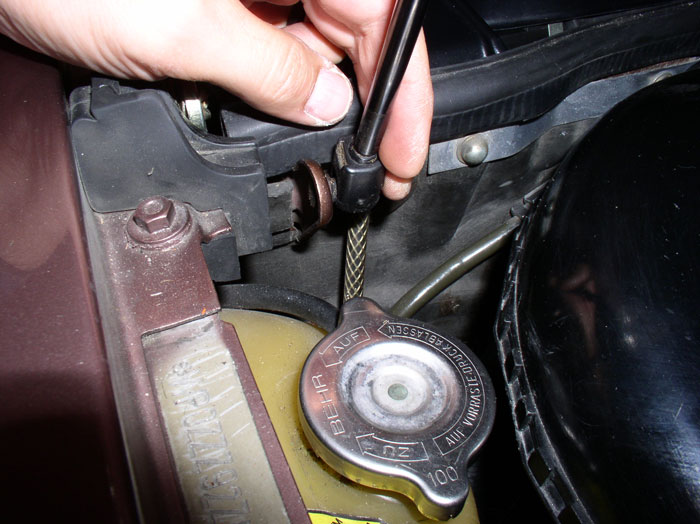
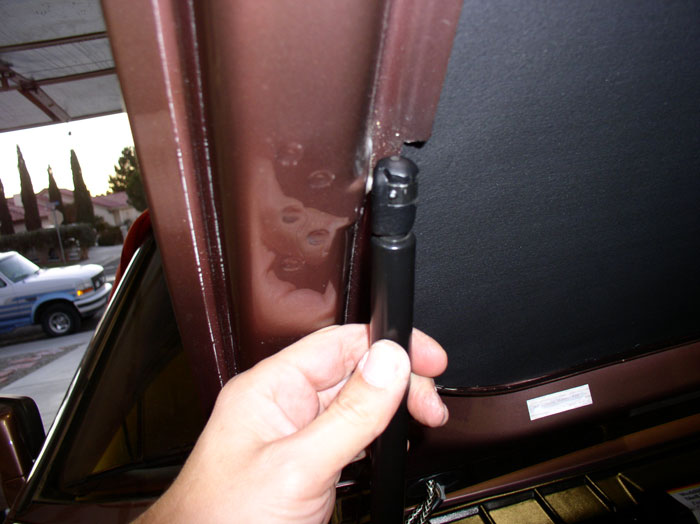
Next, detach the hood shocks. You can use a small screwdriver or a pick tool to pry the spring clamp away from the shock mount. With the clamp pulled away....
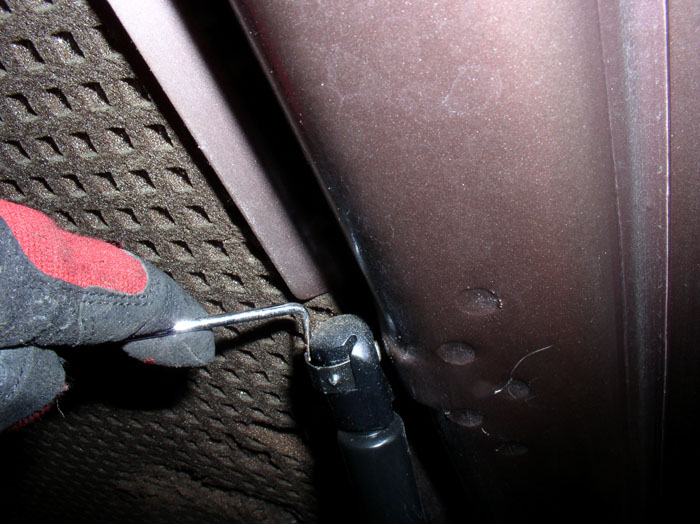
...pull the shock away from the hood. Do the same for the other side but be prepared to support the weight of the hood after you disconnect the last shock.

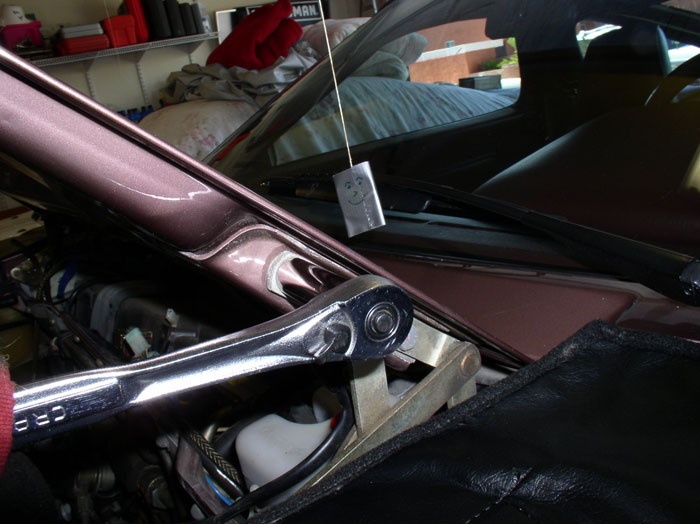
Next, support the hood with a 3'-4' rod or pole

Finally, use a 13mm socket to remove the 4 hood bolts (2 each side). My hood had spacers between the bracket and hood so be prepared to catch those when you remove the bolts. If you're doing this by yourself, I place towels between the hood and exposed fender locations such as near the windshield and at the front hood latch so as not to scratch any body paint. You will need to support the hood with one hand while removing the last bolts with the other.
The hood is not heavy and can easily be handled by one person. When you have it removed, find an open area to work in and place a blanket or soft material underneath the hood to protect it from scratches.
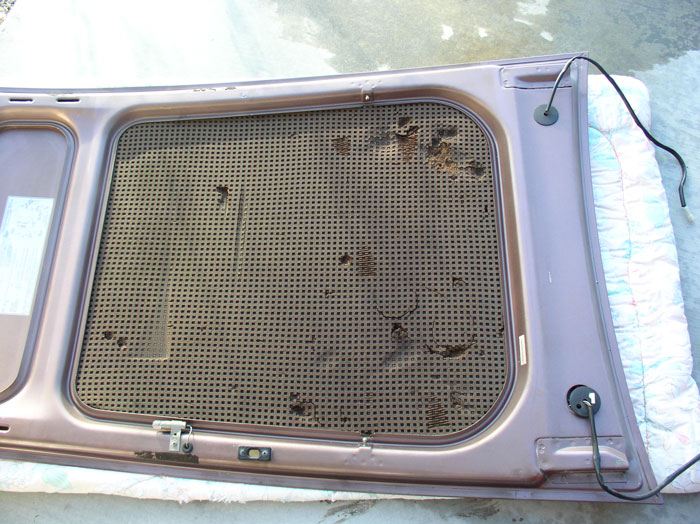
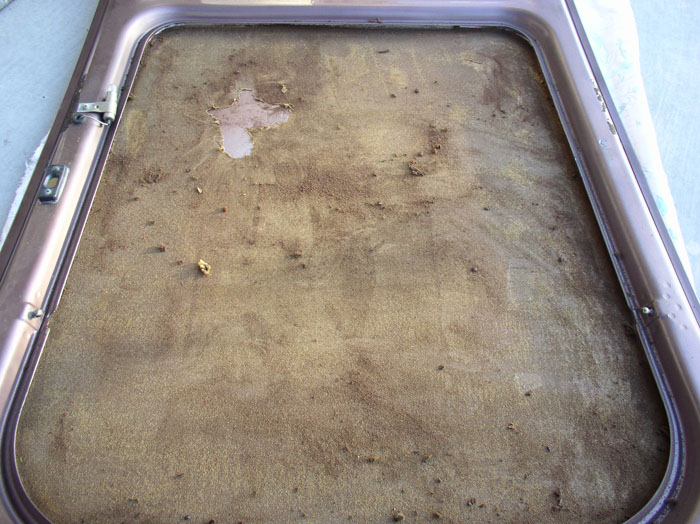
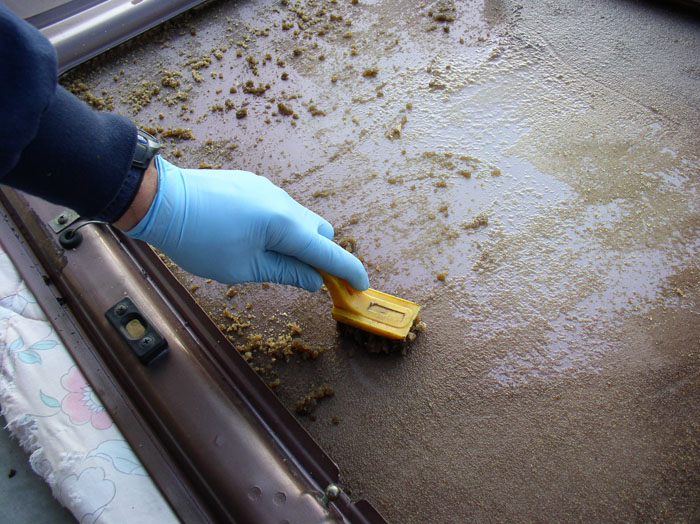
I used a drywall taping knife to scrape the old liner off the hood. Don't worry about trying to scrape it completely off the metal because the old adhesive is usually alive and well underneath and will require a solvent to get off without scratching the paint.
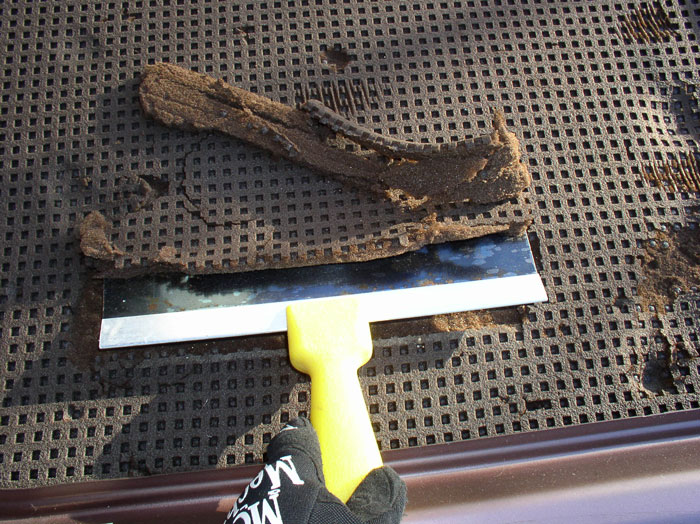
Once you've scraped the old loose material off, it should look something like this. It's best to remove this material as well in order to get good contact for the new material and adhesive.
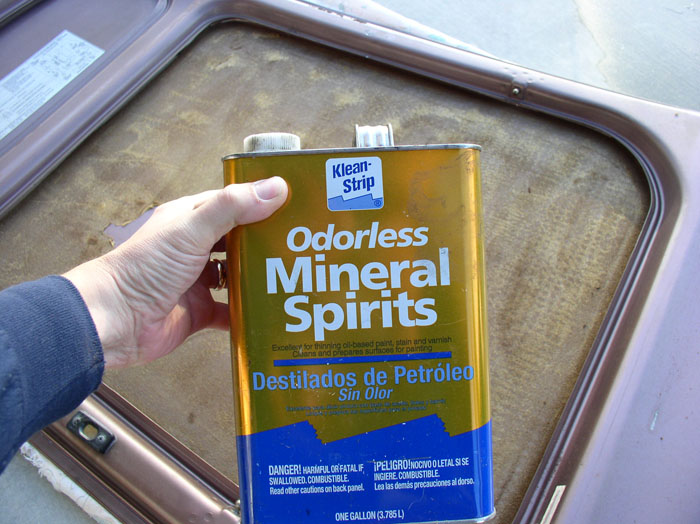
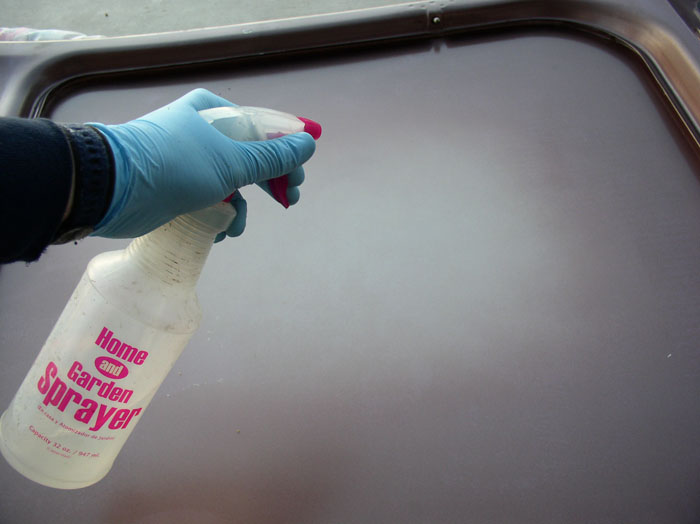
I have found Odorless Mineral Spirits to work very effectively at removing the old adhesive.
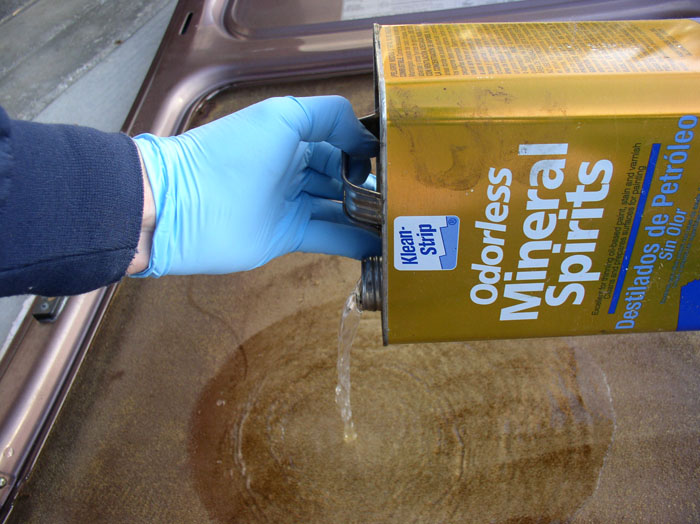
Pour enough mineral spirits (or other solvents you may have good luck with) on the old liner material to generously soak the material but not pool in the center of the hood.
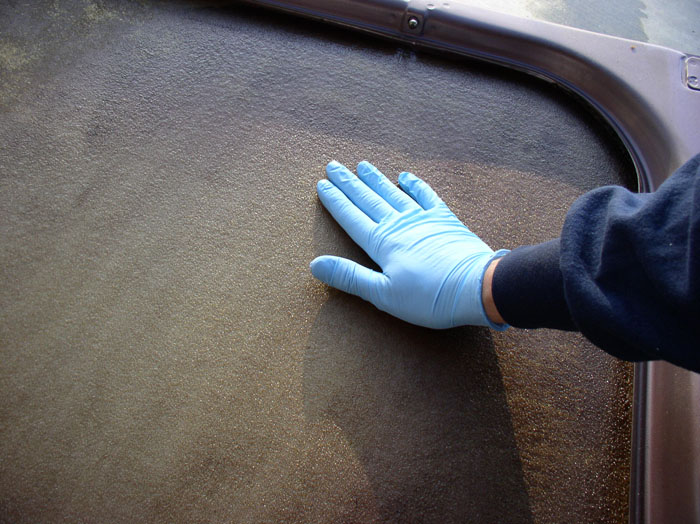
Use protective gloves to spread the solvent around the hood evenly.
continued.....
So I thought I'd post a few pics of the process for my fellow newbies out there that want to repair the liner on their hood. You can order the kit from Nicole's HookedOnCars website. Other things I used include:
Odorless Mineral Spirits (for cleaning the old residue off the hood)
Distilled water in a spray bottle
3M Spray adhesive #80
Wax Paper
Painters Masking Tape
Newspaper
Squeege
Towels
Tape Measure
Tools needed are:
A 13mm socket, ratchet, 3" extension bar,
Stiff nylon brush (1 wide one, 1 narrow one)
Large drywall taping knife.
First, remove the hood. Removing the hood is easier with 2 people but can be done with one which is what I did here. First, remove the wiper motor and blower motor cover by lifting up on the rubber trim side to seperate it from the firewall and pull forward.
Follow the electrical wiring from the hood and disconnect the 3-pin and 2-pin electrical connectors - one wire on each side of the hood.
You may have to "un-route" the driver's side electrical wire from under the A/C lines so it is free to move with the hood.
Next, disconnect the two wiper washer fluid supply lines. On mine, one connection was external to the cover plug and the other was internal. Mark one of the lines with tape to indicate whether it was the internal or external connected line so you can connect it back the same way on install.
It is best to mark or photograph the orientation of the hood bracket to the hood before disassembly so you can install the hood "in the neighborhood" of where it was originally on install and fine tune from there. Also, don't wash the area around the hood bracket when you have it off. Sometimes the dirt lines will outline the location of othe bracket for you when your ready to install.
Next, detach the hood shocks. You can use a small screwdriver or a pick tool to pry the spring clamp away from the shock mount. With the clamp pulled away....
...pull the shock away from the hood. Do the same for the other side but be prepared to support the weight of the hood after you disconnect the last shock.
Next, support the hood with a 3'-4' rod or pole
Finally, use a 13mm socket to remove the 4 hood bolts (2 each side). My hood had spacers between the bracket and hood so be prepared to catch those when you remove the bolts. If you're doing this by yourself, I place towels between the hood and exposed fender locations such as near the windshield and at the front hood latch so as not to scratch any body paint. You will need to support the hood with one hand while removing the last bolts with the other.
The hood is not heavy and can easily be handled by one person. When you have it removed, find an open area to work in and place a blanket or soft material underneath the hood to protect it from scratches.
I used a drywall taping knife to scrape the old liner off the hood. Don't worry about trying to scrape it completely off the metal because the old adhesive is usually alive and well underneath and will require a solvent to get off without scratching the paint.
Once you've scraped the old loose material off, it should look something like this. It's best to remove this material as well in order to get good contact for the new material and adhesive.
I have found Odorless Mineral Spirits to work very effectively at removing the old adhesive.
Pour enough mineral spirits (or other solvents you may have good luck with) on the old liner material to generously soak the material but not pool in the center of the hood.
Use protective gloves to spread the solvent around the hood evenly.
continued.....
 02-08-2009, 11:19 PM
#2
Rennlist Member
Thread Starter
Join Date: Sep 2007
Location: Ridgecrest, California
Posts: 1,363
Likes: 0
Received 143 Likes
on
28 Posts
I used a stiff nylon brush to remove the old adhesive and liner off the hood. The stiffer the better. The old material tends to ball up like little ***** of rubber cement.
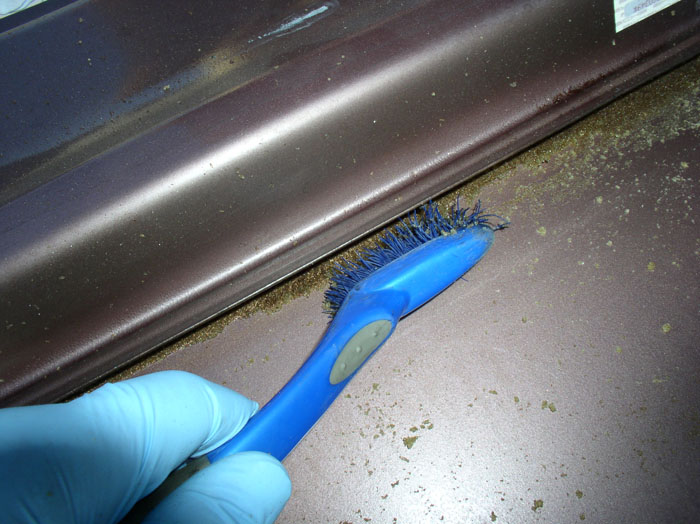
I used a stiff narrow nylon brush to get at the material under the hood liner lip as shown.
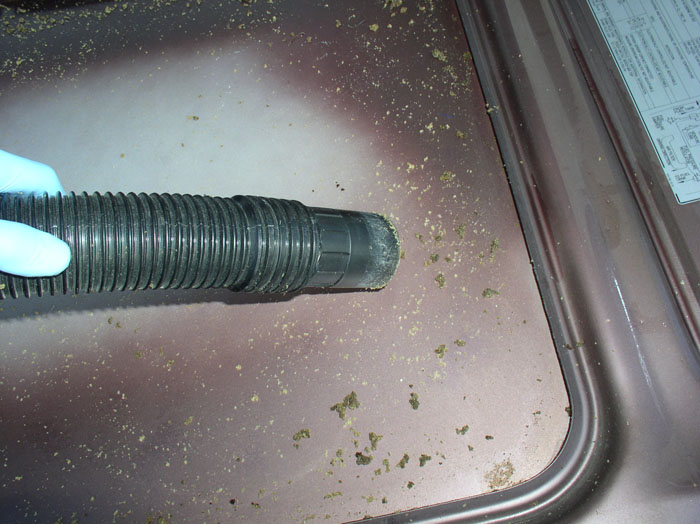
You can use a heavy duty shop vac to vacuum up the loose particles that come off during the process.
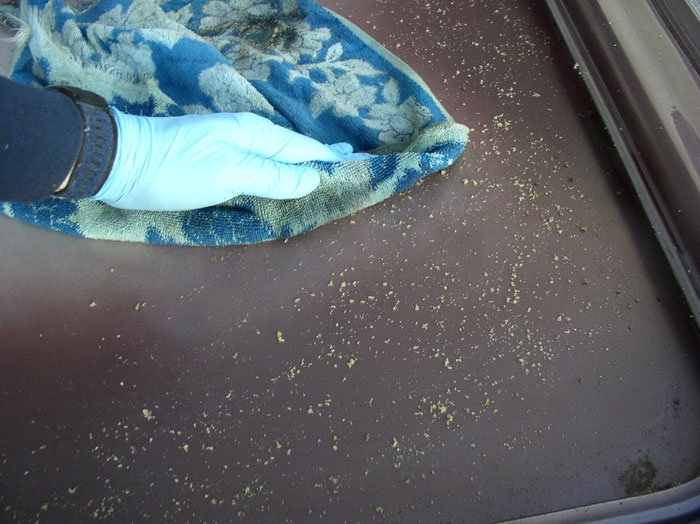
After the vacuum, use a rag to wipe off the remaining debris from the hood so that there is none remaining.
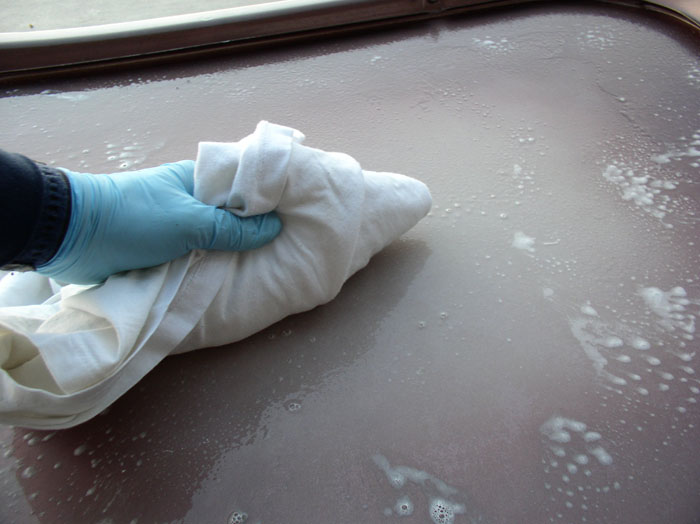
The mineral spirits leaves an oily residue that needs to come off before new adhesive can be applied. I use a degreaser such as Orange Blast. Spray the degreaser on the hood surface as shown.
And wipe off with a clean rag.
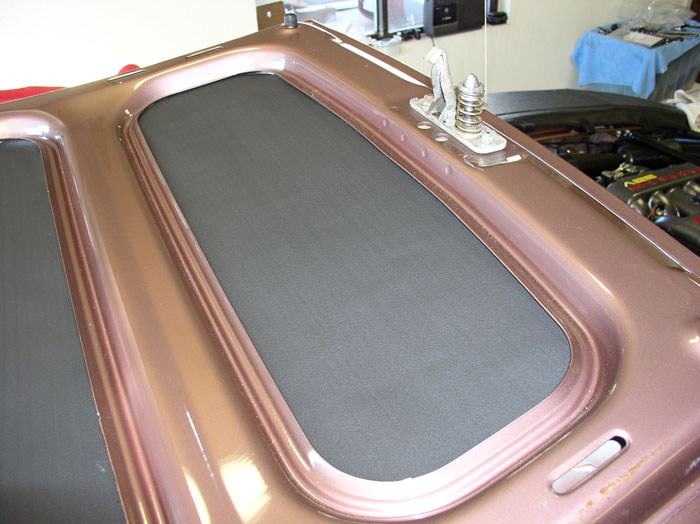
Next, dry fit the new hood liner to ensure it fits properly. It's also a good idea to test fit so you know how tight the side and top margins are for when you install it - this will give you some idea how to position it for installation with adhesive applied.
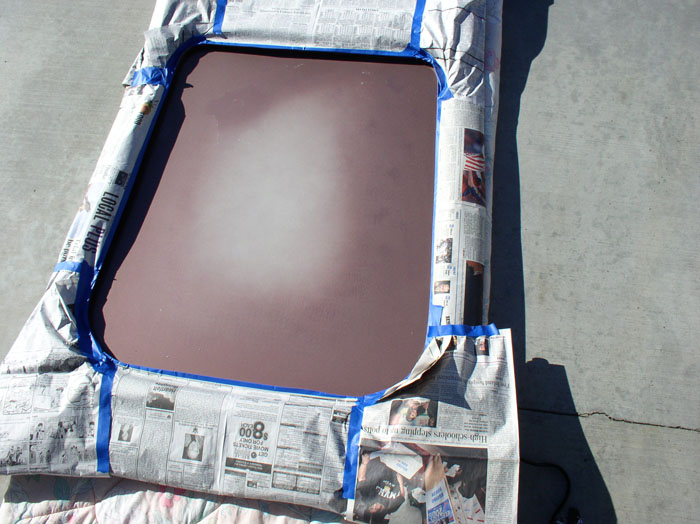
After the test fit, you will need to mask off all of the underside of the hood except the area that is to receive the adhesive and liner. Use painters masking tape and newspaper and mask the hood as shown.
The instructions that came with Nicole's kit recommend 3M #80 Rubber and Vinyl adhesive. I found mine at HD.
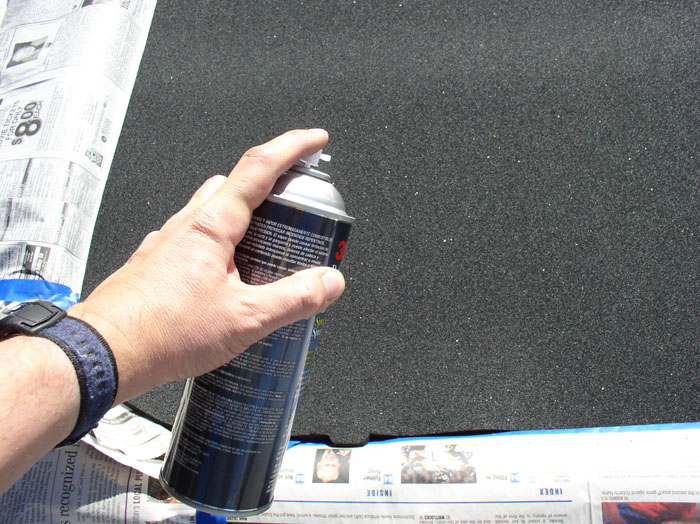
You can flip the liner over so the back is exposed and lay it on the hood as shown. Then spray the backing with a moderate coat of the adhesive.
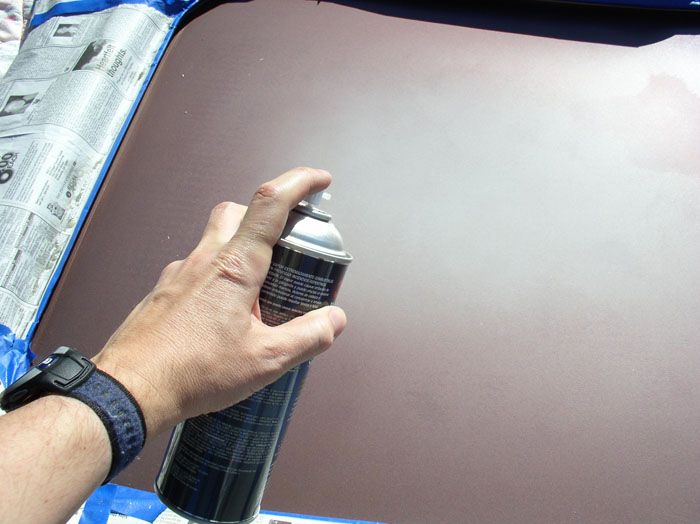
Move the liner to a clean workspace and then spray the hood surface with a moderate amount of adhesive as well.
Use wax paper to provide a protective, non-stick layer between the hood and the new foam liner.
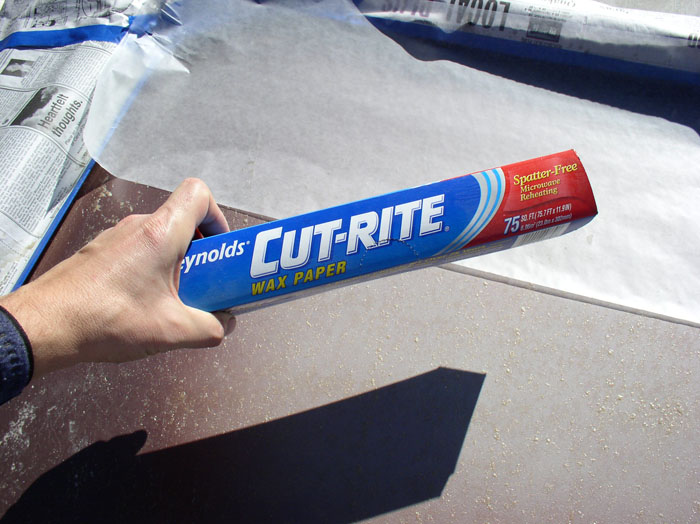
It took 3 strips of wax paper to cover the whole hood.
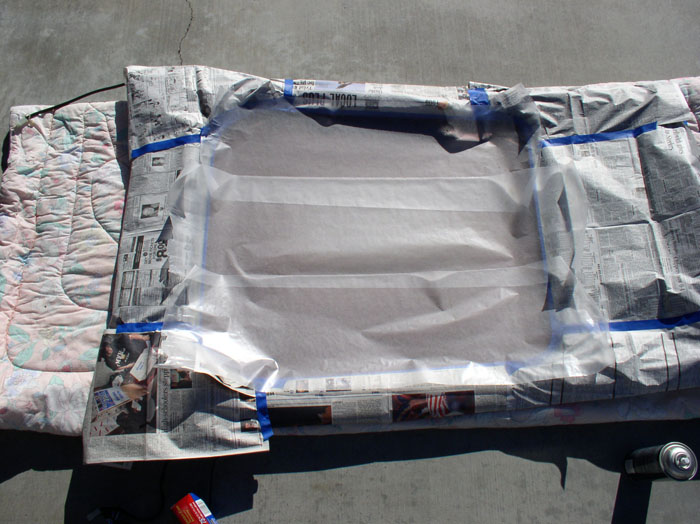
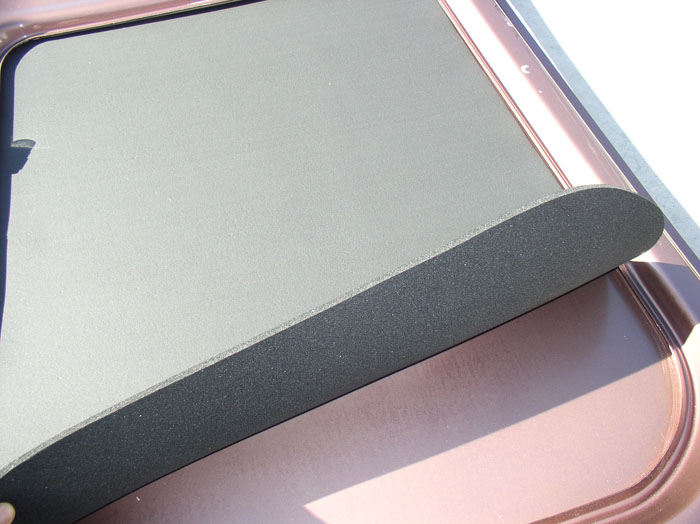
Position the new foam liner with adhesive side down on top of the wax paper. Position it so that there is equal margin of foam liner all around the edge of the hood. With the wax paper underneath, the liner will not fit under the hood lip just yet.

Next, begin removing the wax paper. Start with one of the outer strips and pull it out toward the side of the hood as shown. Hold the hood liner in place with one hand over the remaining wax paper areas while pulling out the strip of wax paper.
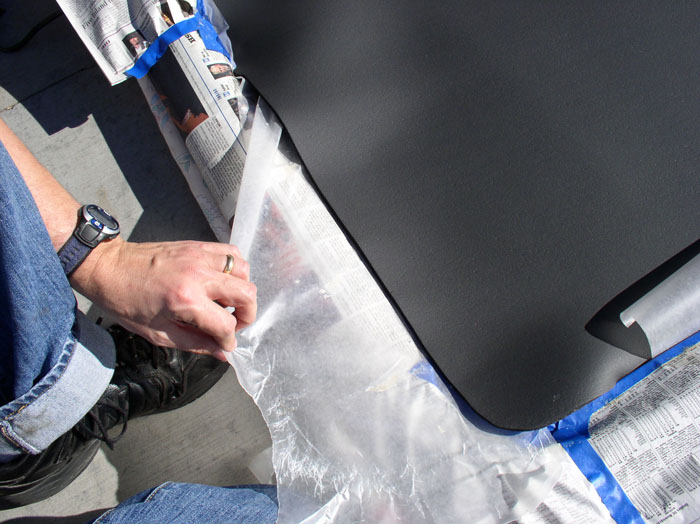
continued.....
I used a stiff narrow nylon brush to get at the material under the hood liner lip as shown.
You can use a heavy duty shop vac to vacuum up the loose particles that come off during the process.
After the vacuum, use a rag to wipe off the remaining debris from the hood so that there is none remaining.
The mineral spirits leaves an oily residue that needs to come off before new adhesive can be applied. I use a degreaser such as Orange Blast. Spray the degreaser on the hood surface as shown.
And wipe off with a clean rag.
Next, dry fit the new hood liner to ensure it fits properly. It's also a good idea to test fit so you know how tight the side and top margins are for when you install it - this will give you some idea how to position it for installation with adhesive applied.
After the test fit, you will need to mask off all of the underside of the hood except the area that is to receive the adhesive and liner. Use painters masking tape and newspaper and mask the hood as shown.
The instructions that came with Nicole's kit recommend 3M #80 Rubber and Vinyl adhesive. I found mine at HD.
You can flip the liner over so the back is exposed and lay it on the hood as shown. Then spray the backing with a moderate coat of the adhesive.
Move the liner to a clean workspace and then spray the hood surface with a moderate amount of adhesive as well.
Use wax paper to provide a protective, non-stick layer between the hood and the new foam liner.
It took 3 strips of wax paper to cover the whole hood.
Position the new foam liner with adhesive side down on top of the wax paper. Position it so that there is equal margin of foam liner all around the edge of the hood. With the wax paper underneath, the liner will not fit under the hood lip just yet.
Next, begin removing the wax paper. Start with one of the outer strips and pull it out toward the side of the hood as shown. Hold the hood liner in place with one hand over the remaining wax paper areas while pulling out the strip of wax paper.
continued.....
02-08-2009, 11:46 PM
#4
Rennlist Member
Thread Starter
Join Date: Sep 2007
Location: Ridgecrest, California
Posts: 1,363
Likes: 0
Received 143 Likes
on
28 Posts
Next, pull out the middle strip of wax paper by pulling it out one end of the liner as shown. Again, hold the liner in place with one hand while pulling the wax paper out with the other.
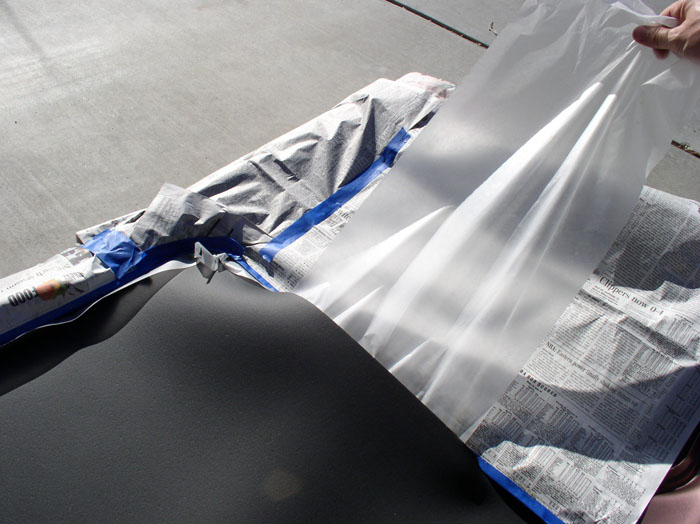
As you remove the wax paper, also remove the newspaper and masking tape and allow the liner to fit under the hood lip.
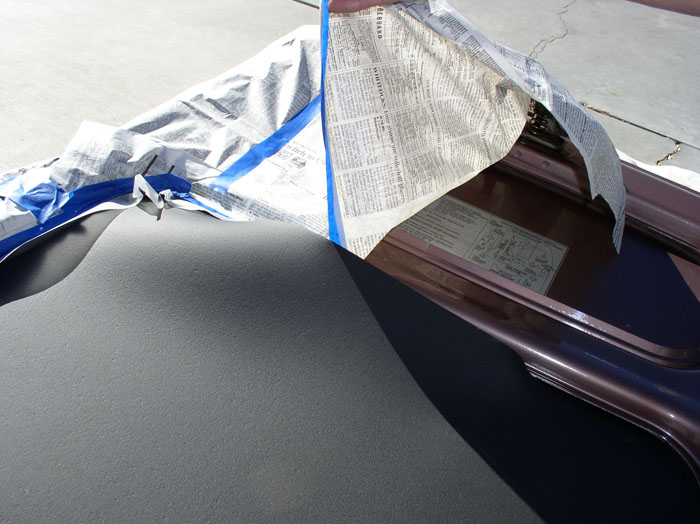
When all the wax paper has been removed and the newspaper and masking tape as well, press the liner down on the hood over the entire surface with your hands to ensure the whole surface area is "glued" down.
The liner kit also came with a smaller piece that fits on the front of the hood. Since the front of the hood has a nice emissions sticker that I did not want to cover up permanently, I decided to experiment with a temporary solution - industrial strength velcro. I cut strips of heavy duty velcro and attached them to the back side of the small liner as shown. Use the "soft" side of the velcro to attach to the foam liner and the the "hard" side of the velcro to the hood.
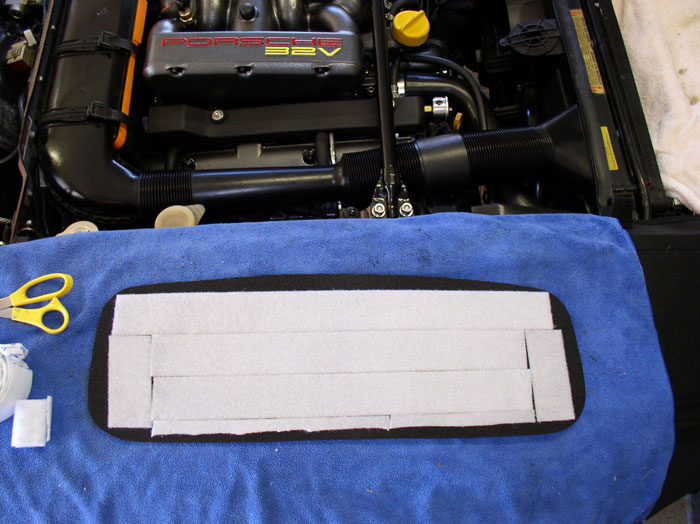
For the hood, I thought I'd try small squares of velcro at first to see how they held up. I wanted it to come off easy enough so didn't cover the entire area with the "hard" side of the velcro.
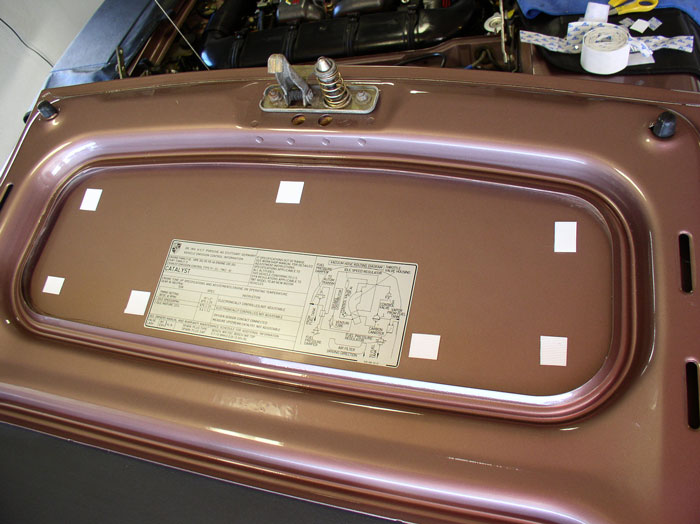
Position the small liner over the hood and attach.
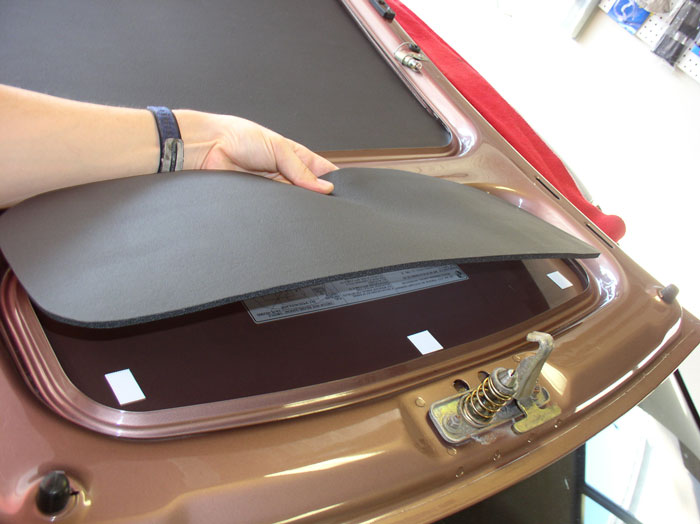
Smooth out the surface with your hand to make sure all the velcro makes contact. At first, it looked great (see below). However, after a few weeks of hanging upside down under the hood with engine heat applied, I noticed the liner wasn't laying flat against the hood any longer so I will have to readdress this with more velcro soon and see if it takes care of the problem.
At this time, you're ready to install the decal. However, I did not have the decal at the time and I needed to install the hood. The decal can be installed while the hood is on the car and that process will be demonstrated here. So, you can jump ahead and follow the decal procedure then jump back here to install the hood. To install the hood, first, lubricate the hinge joints. I used a light general purpose oil. Work the hinges up and down several times to work in the oil.
If you're working alone, like me, lay out your bolts and shims and wrenches so they are easily accessible near the hinges. I had two shims for each side.
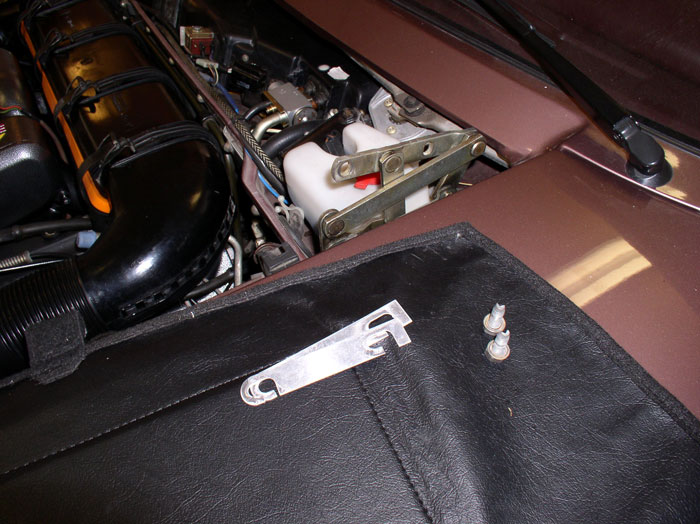
Place a towel under the hood near the hinge and cowl to protect it from scratches. I also left the service covers on for fender protection. Bring the hood over and gently lay it into position as shown.
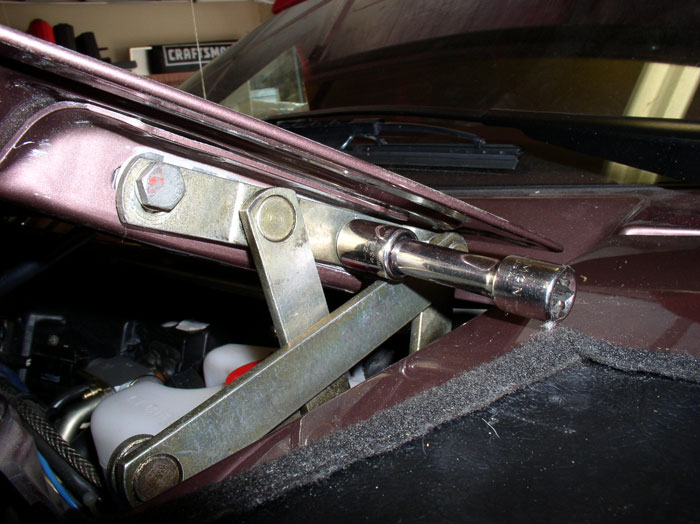
Next, lift up one side of the hood at the hinge and insert the shims. Line up the holes for the front bolt and install the 13mm bolt - I used the 13mm socket and 3" extension bar. Do the same for the other side of the hood.
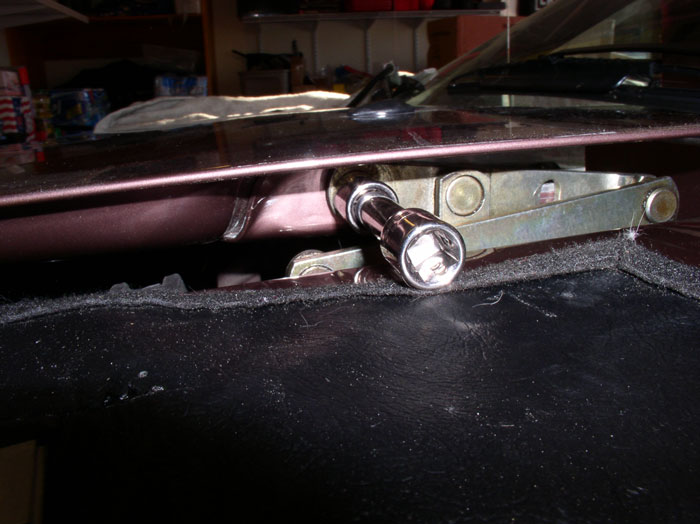
I then lifted the hood with one hand and used the other to start the rear bolt using the extension again. The objective is to simply get the bolt well started in the hole. Do the same for the other side of the hood.
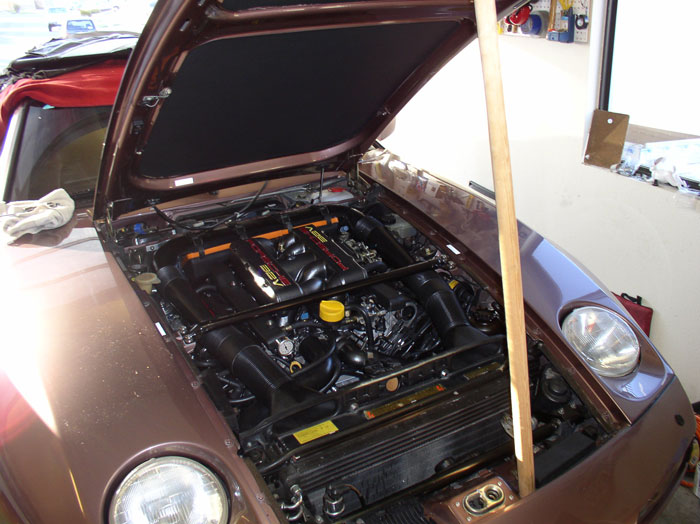
Next, support the hood with a wooden or rubber tipped rod. I used a clothes hangar dowel you find in your closet. Remove the service covers at this time so you can check for proper alignment.
Now you can fine tune the adjustment. First position the hinge so that it is approximately where it was when you removed it. I was careful not to wash or wax the area at the hinge since the original 'dirt' left a marker where the hinge should go.
When it's lined up as close as you can get it to it original position, snug all four of the bolts down LIGHTLY - just enough to hold them in place as you make final adjustments.
continued....
As you remove the wax paper, also remove the newspaper and masking tape and allow the liner to fit under the hood lip.
When all the wax paper has been removed and the newspaper and masking tape as well, press the liner down on the hood over the entire surface with your hands to ensure the whole surface area is "glued" down.
The liner kit also came with a smaller piece that fits on the front of the hood. Since the front of the hood has a nice emissions sticker that I did not want to cover up permanently, I decided to experiment with a temporary solution - industrial strength velcro. I cut strips of heavy duty velcro and attached them to the back side of the small liner as shown. Use the "soft" side of the velcro to attach to the foam liner and the the "hard" side of the velcro to the hood.
For the hood, I thought I'd try small squares of velcro at first to see how they held up. I wanted it to come off easy enough so didn't cover the entire area with the "hard" side of the velcro.
Position the small liner over the hood and attach.
Smooth out the surface with your hand to make sure all the velcro makes contact. At first, it looked great (see below). However, after a few weeks of hanging upside down under the hood with engine heat applied, I noticed the liner wasn't laying flat against the hood any longer so I will have to readdress this with more velcro soon and see if it takes care of the problem.
At this time, you're ready to install the decal. However, I did not have the decal at the time and I needed to install the hood. The decal can be installed while the hood is on the car and that process will be demonstrated here. So, you can jump ahead and follow the decal procedure then jump back here to install the hood. To install the hood, first, lubricate the hinge joints. I used a light general purpose oil. Work the hinges up and down several times to work in the oil.
If you're working alone, like me, lay out your bolts and shims and wrenches so they are easily accessible near the hinges. I had two shims for each side.
Place a towel under the hood near the hinge and cowl to protect it from scratches. I also left the service covers on for fender protection. Bring the hood over and gently lay it into position as shown.
Next, lift up one side of the hood at the hinge and insert the shims. Line up the holes for the front bolt and install the 13mm bolt - I used the 13mm socket and 3" extension bar. Do the same for the other side of the hood.
I then lifted the hood with one hand and used the other to start the rear bolt using the extension again. The objective is to simply get the bolt well started in the hole. Do the same for the other side of the hood.
Next, support the hood with a wooden or rubber tipped rod. I used a clothes hangar dowel you find in your closet. Remove the service covers at this time so you can check for proper alignment.
Now you can fine tune the adjustment. First position the hinge so that it is approximately where it was when you removed it. I was careful not to wash or wax the area at the hinge since the original 'dirt' left a marker where the hinge should go.
When it's lined up as close as you can get it to it original position, snug all four of the bolts down LIGHTLY - just enough to hold them in place as you make final adjustments.
continued....
02-09-2009, 12:00 AM
#5
Rennlist Member
Thread Starter
Join Date: Sep 2007
Location: Ridgecrest, California
Posts: 1,363
Likes: 0
Received 143 Likes
on
28 Posts
Move to the front of the hood and check the alignment of the hood pin to the receiver latch. It should be perfectly centered in the hole. Mine was very close on first try but I had to fine tune it. Do not try to latch the hood (i.e., press it all the way down into the receiver) unless it looks perfectly centered - otherwise it can get wedged in there and be difficult to "unlatch". If it's not lined up perfectly, raise and support the hood enough to gain access to the bolts at the hinges and loosen enough to adjust the hood slightly. For example, when looking at the hood from the front of the car, my hood pin was a little to the left of the center of the receiver hole. I loosened the passenger side bolts at the hinge and moved the hood forward about 1/16 of an inch then snugged the bolts down again. Then go to the pin and receiver at the front and check alignment again. It took me two adjustments to get it centered. It's trial and error mixed with a little patience and you can get it perfect. When it's aligned in the center of the receiver, close the hood all the way and try opening it from the hood release lever in the car to check for normal operation. I have found this method also ensures the gaps between the hood and fender consistently come out even as well. The final adjustment check to make is hood height. It should be flush with the fenders. If it's too high or low, you will need to make an adjustment at the hinge again. This time, when you loosen the bolts, simply raise or lower the hood a the hinge to get the right height - trick is to keep the bolts snug enough that you can move the hood at the hinge without allowing it to slip forward or back. After the height adjustment, check for normal operation again.
When the hood operation check out, torque the 13mm hood bolts to 15 ftlbs.
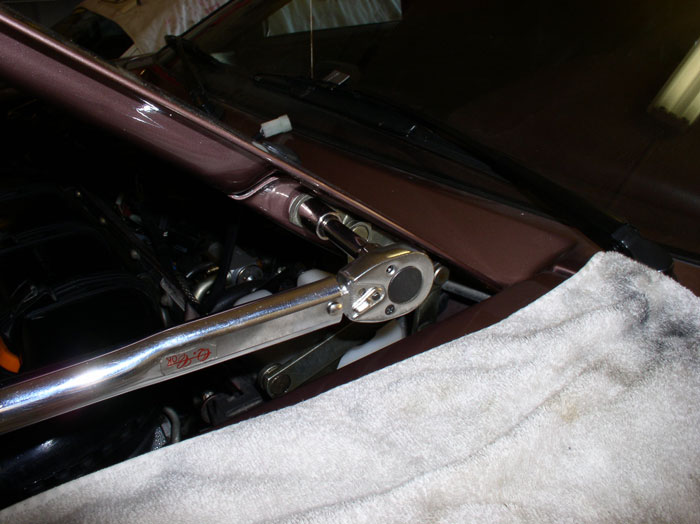
Next, make the electrical connections. There should be a 2 pin connector and a 3 pin connector to the hood. These are for the heated windshield washer nozzles and hood light. Make both of these connections as shown.

Next comes the windshield washer fluid hose connections. When I removed the hoses, you may remember that I marked (taped) one of the hoses with "external" because one of the hoses was connected external to the hood and the other hose was connected internally. First, connect the internal hose fitting. On mine, it was located up inside the hood. After locating it.....
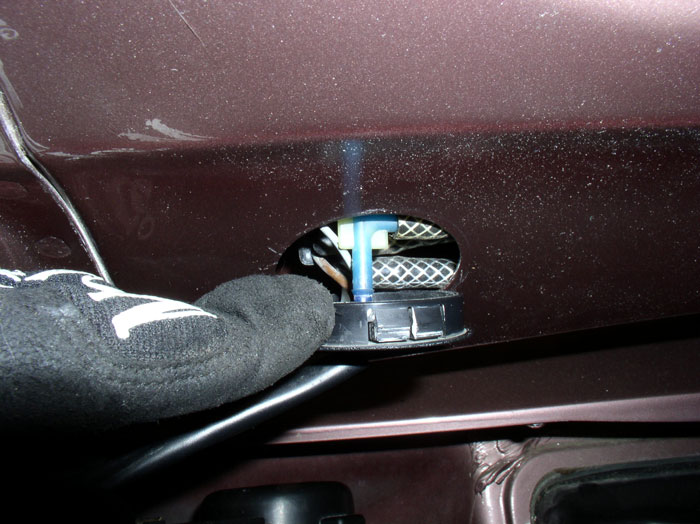
....push it down through the hole in the plastic cover plate and connect the "internal" hose.
Then, connect the "external" hose to the other external fitting.
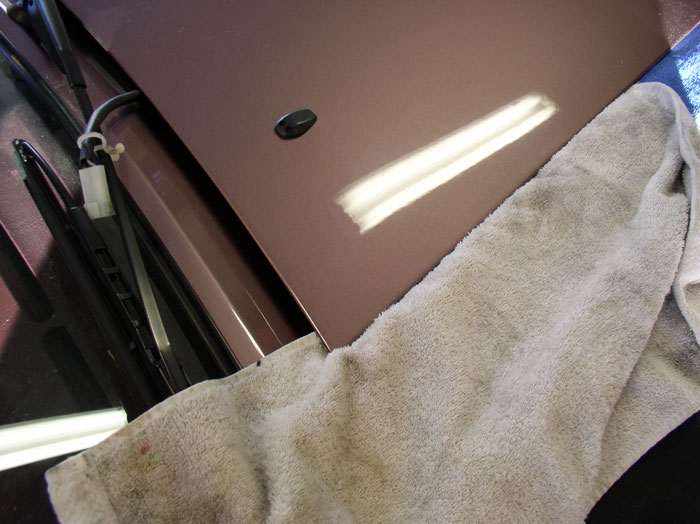
Fit the plastic cover over the hole in the hood and push it in until it snaps into place. Bundle the wire and hoses together with a plastic bungee or zip tie.
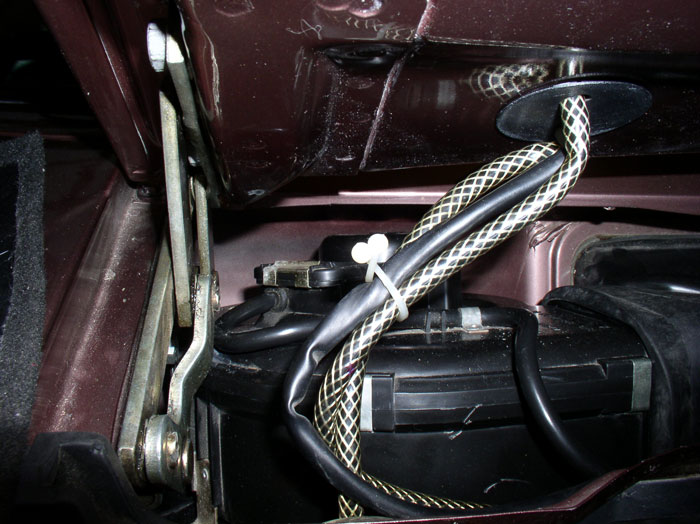
Now you can install the wiper motor and fan blower motor cover. Place the cover into position, guiding the hood wires at each end into their recessed openings.
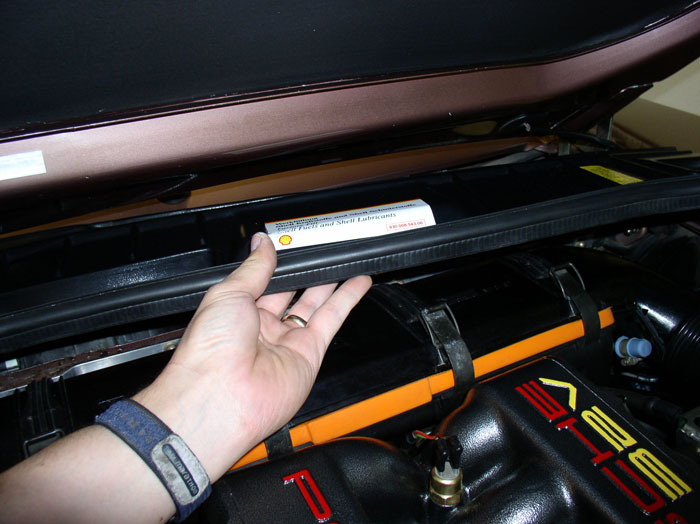
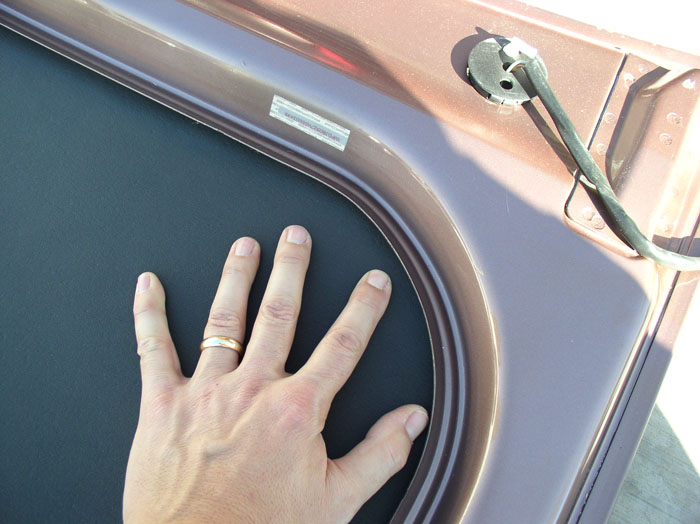
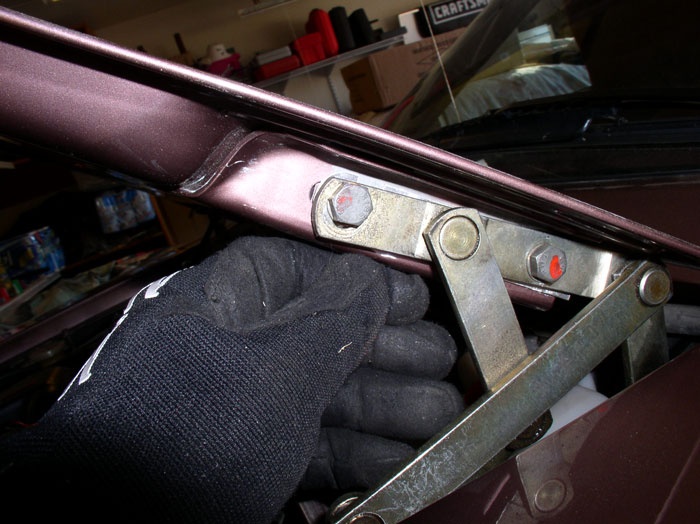
There are two tabs that hold the rear edge of the cover in place. They are located just under the cowl. Ensure the rear edge of the plastic cover fits on top of these tabs and slides under the cowl. See pic below where tab is at the end of my finger. I needed to pry one of my tabs open slightly as it looked like it was too tight to allow the cover to slip in.
Next, press the front of the cover down over the firewall top edge.
Attach the bottom of the hood shock to the ball connector as shown. These connections simply "snap" on without the use of a tool.
Attach the top of the hood shock to the ball connector on the hood as shown.
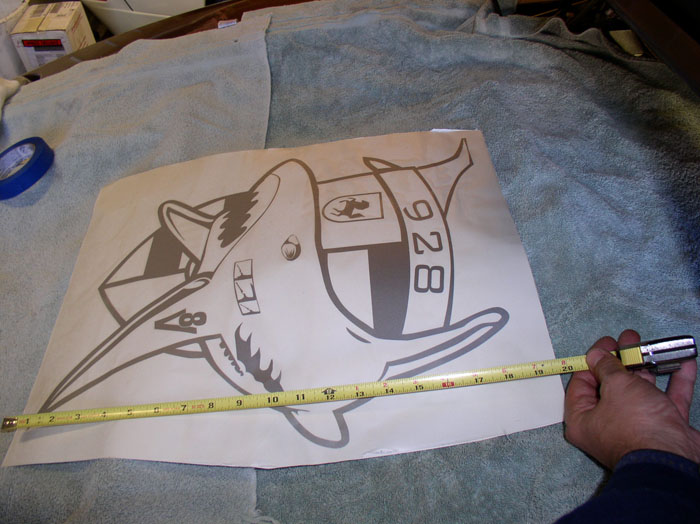
To install the decal while the hood is on the car, lay out towels across the engine bay. Then lay out the decal.
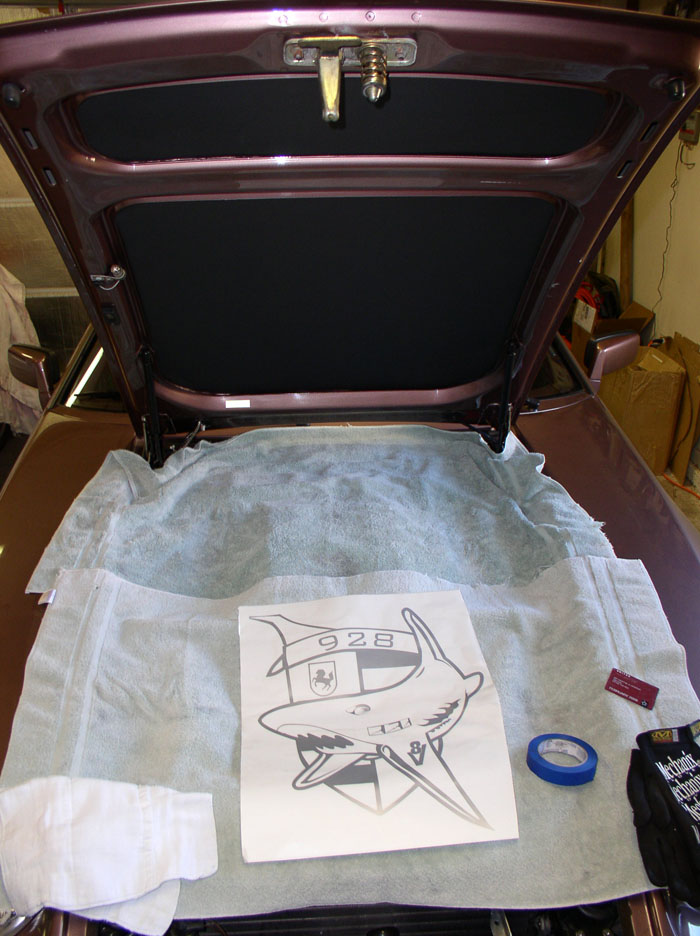
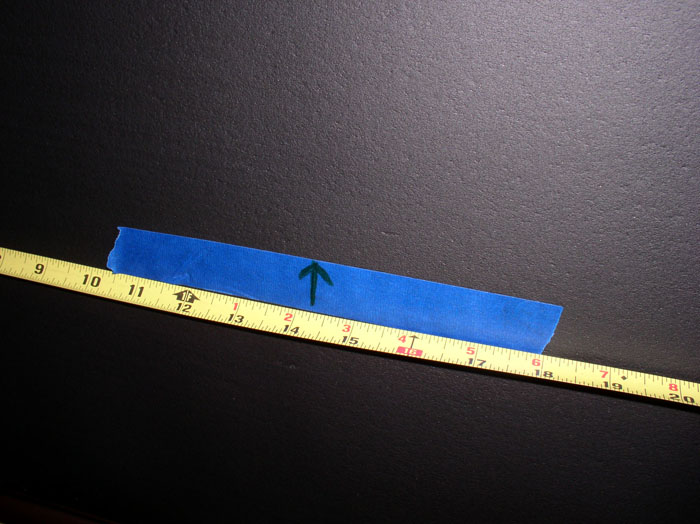
Measure the decal height. This one is about 20".
Since I wanted the decal to be approximately centered vertically on the hood, that left about 6 inches of margin at the top and 6 inches at the bottom. Measure about 6 inches from the top of the hood liner and place a piece of painter masking tape across the hood as shown (centered approximately horizontally on the hood pad) - ensure the tape is level by making sure each end of the tape is also 6 inches from the top of the liner. Perform the same operation on the bottom of the hood - about 6 inches up from the bottom of the liner place another piece of masking tape.
continued.....
When the hood operation check out, torque the 13mm hood bolts to 15 ftlbs.
Next, make the electrical connections. There should be a 2 pin connector and a 3 pin connector to the hood. These are for the heated windshield washer nozzles and hood light. Make both of these connections as shown.
Next comes the windshield washer fluid hose connections. When I removed the hoses, you may remember that I marked (taped) one of the hoses with "external" because one of the hoses was connected external to the hood and the other hose was connected internally. First, connect the internal hose fitting. On mine, it was located up inside the hood. After locating it.....
....push it down through the hole in the plastic cover plate and connect the "internal" hose.
Then, connect the "external" hose to the other external fitting.
Fit the plastic cover over the hole in the hood and push it in until it snaps into place. Bundle the wire and hoses together with a plastic bungee or zip tie.
Now you can install the wiper motor and fan blower motor cover. Place the cover into position, guiding the hood wires at each end into their recessed openings.
There are two tabs that hold the rear edge of the cover in place. They are located just under the cowl. Ensure the rear edge of the plastic cover fits on top of these tabs and slides under the cowl. See pic below where tab is at the end of my finger. I needed to pry one of my tabs open slightly as it looked like it was too tight to allow the cover to slip in.
Next, press the front of the cover down over the firewall top edge.
Attach the bottom of the hood shock to the ball connector as shown. These connections simply "snap" on without the use of a tool.
Attach the top of the hood shock to the ball connector on the hood as shown.
To install the decal while the hood is on the car, lay out towels across the engine bay. Then lay out the decal.
Measure the decal height. This one is about 20".
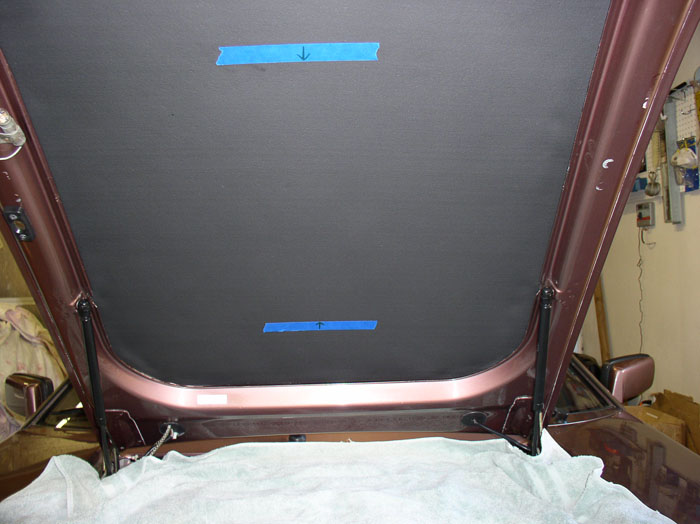
Since I wanted the decal to be approximately centered vertically on the hood, that left about 6 inches of margin at the top and 6 inches at the bottom. Measure about 6 inches from the top of the hood liner and place a piece of painter masking tape across the hood as shown (centered approximately horizontally on the hood pad) - ensure the tape is level by making sure each end of the tape is also 6 inches from the top of the liner. Perform the same operation on the bottom of the hood - about 6 inches up from the bottom of the liner place another piece of masking tape.
continued.....
Last edited by Dwayne; 02-09-2009 at 12:31 AM.
02-09-2009, 12:29 AM
#6
Rennlist Member
Thread Starter
Join Date: Sep 2007
Location: Ridgecrest, California
Posts: 1,363
Likes: 0
Received 143 Likes
on
28 Posts
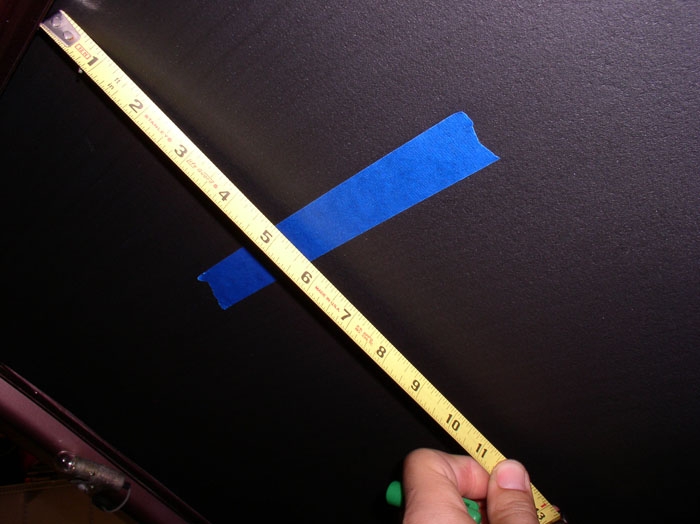
To center the decal horizontally on the hood, you will need to mark the center of the hood with a mark on the tape. the center of the upper part of the hood is approximatly 13.5 inches. Measure 13.5 inches from one edge of the liner to the masking tape and mark the center with a line as shown.
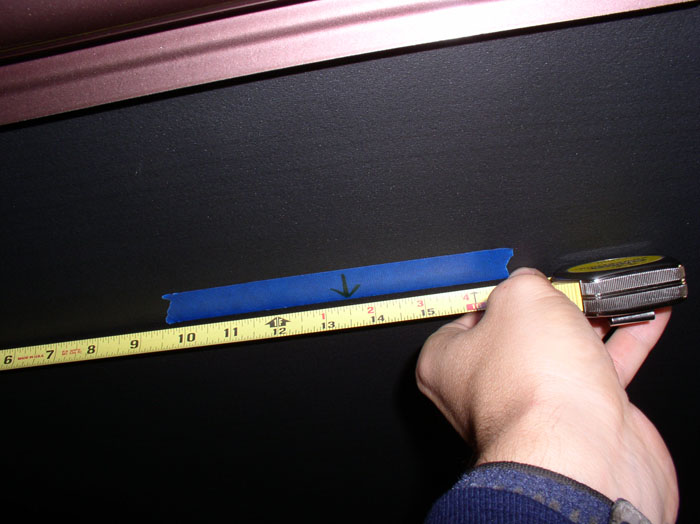
The center point near the bottom of the hood is approximately 14.25" inches. Measure from the edge of the liner to the masking tape and mark accordingly.
The tape and center markings should look like this. I used the number "2" in "928" at the top of the decal as the center point to line up with the arrow on the upper piece of tape and I used the pointy end of the shield at the bottom of the decal to line up with the arrow on the bottom piece of tape.
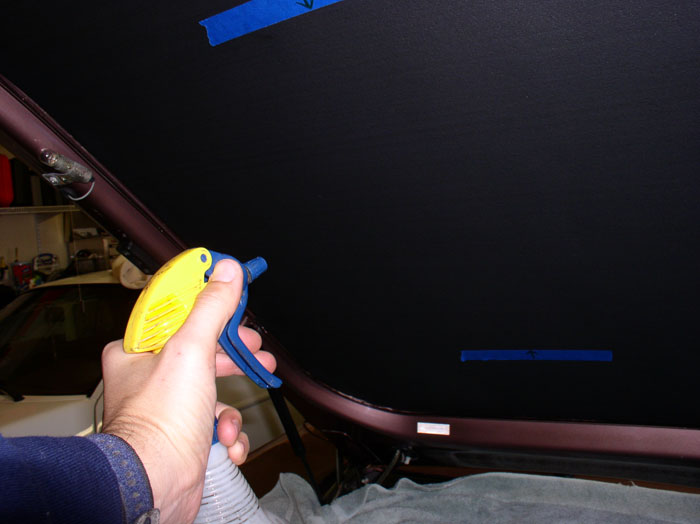
Next, I used distilled water in a spray bottle to spray a light amount of water on the hood liner across the area where the decal would go.
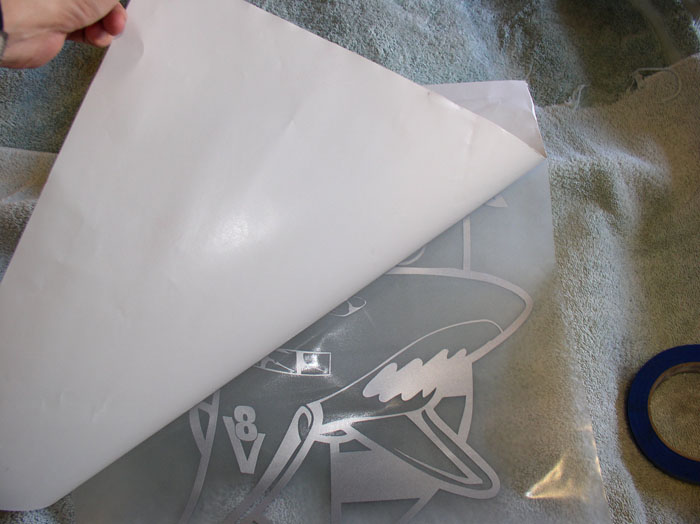
Then, remove the protective backing from the decal as shown. Be sure to pull the backing away in a parallel fashion rather than straight up. This will help keep the decal attached to the film underneath.
Next, spray the decal surface with a light amount of water.
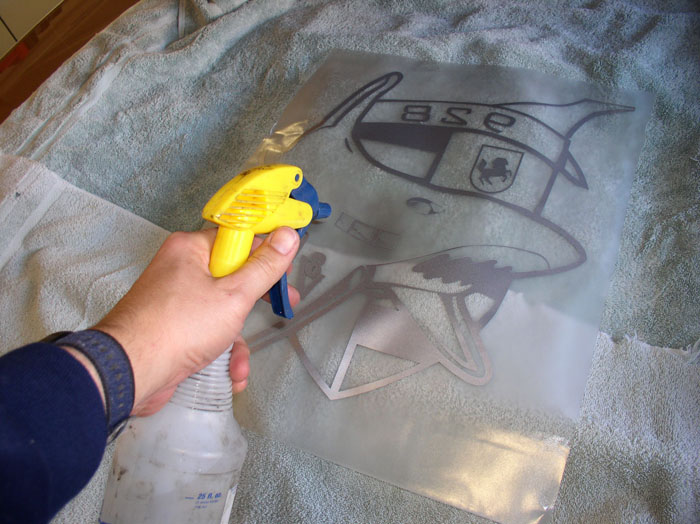
Then, position the decal so the "2" and the pointy end of the shield line up with the arrows on the tape. Smooth out the decal so that it sticks to the liner.
Once your happy with the position of the decal, use a squeegee to press out the air bubbles and excess water behind the decal.
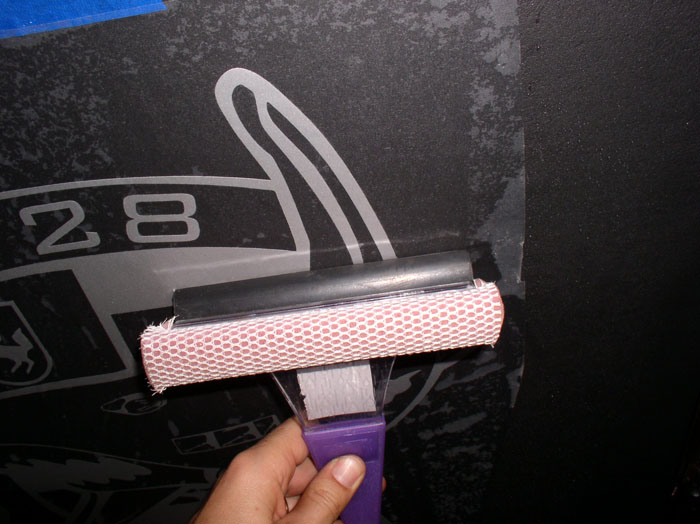
When done with the squeegee, it should look something like this.
Wipe the excess water from the liner and decal with a clean towel.
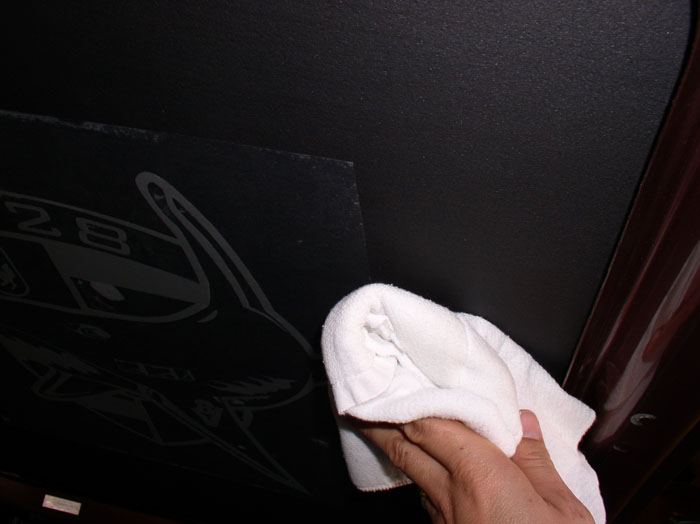
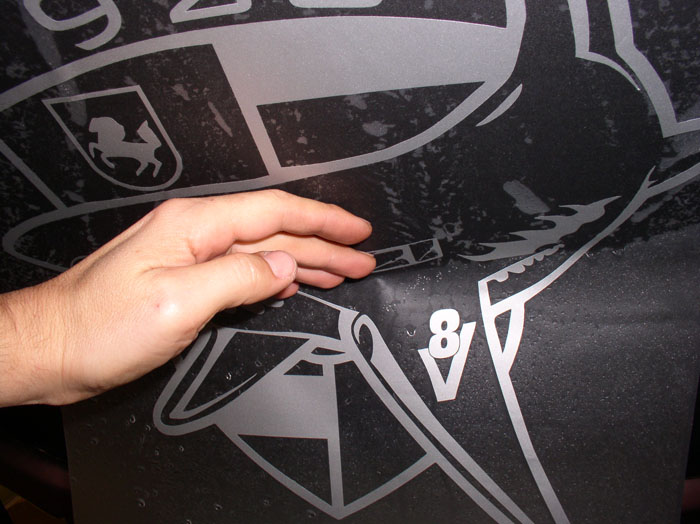
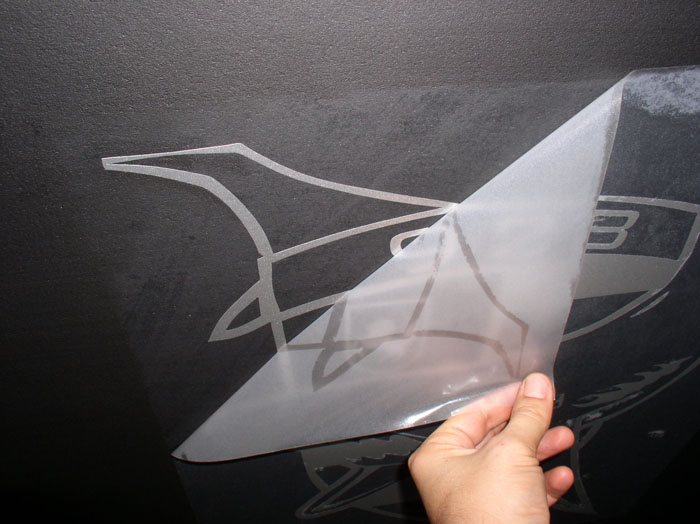
After the decal has had time to dry (I waited about 30 minutes but you could wait longer), you can begin peeling the protective layer off. Keep the peeled material as close to the liner as possible while peeling. If you peel it off straight up, you may dislodge the decal that remains behind. Take it slow and careful. See below.
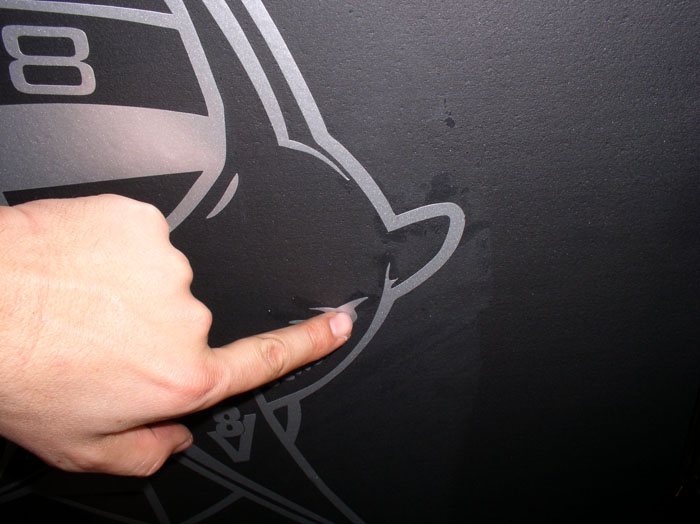
After you removed the protective film, use you finger to "squeegee" the remaining water out from under the decal material and ensure it is smooth.
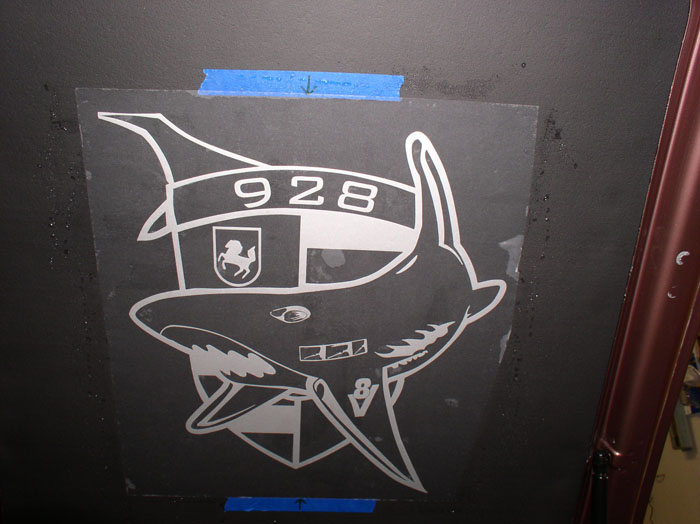
Dry off the excess water with a towel. Your installed decal should look something like this.
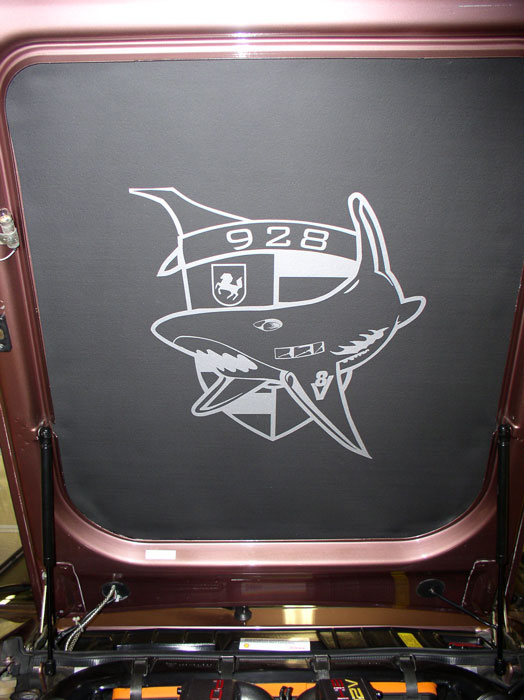
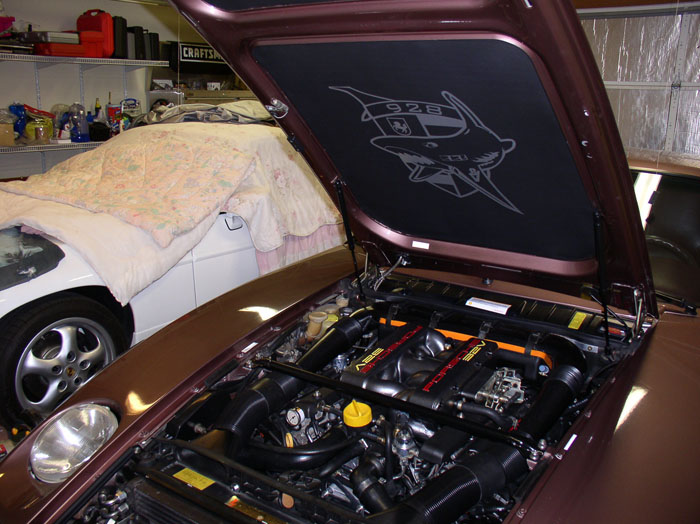
Congratulations - You're done!!
Please feel free to comment or recommend tips/improvements to this thread - I'm always interested in improving the quality of these threads. I'd also like to thank Nicole for a great product - THANK YOU!
THANKS for reading!
The center point near the bottom of the hood is approximately 14.25" inches. Measure from the edge of the liner to the masking tape and mark accordingly.
The tape and center markings should look like this. I used the number "2" in "928" at the top of the decal as the center point to line up with the arrow on the upper piece of tape and I used the pointy end of the shield at the bottom of the decal to line up with the arrow on the bottom piece of tape.
Next, I used distilled water in a spray bottle to spray a light amount of water on the hood liner across the area where the decal would go.
Then, remove the protective backing from the decal as shown. Be sure to pull the backing away in a parallel fashion rather than straight up. This will help keep the decal attached to the film underneath.
Next, spray the decal surface with a light amount of water.
Then, position the decal so the "2" and the pointy end of the shield line up with the arrows on the tape. Smooth out the decal so that it sticks to the liner.
Once your happy with the position of the decal, use a squeegee to press out the air bubbles and excess water behind the decal.
When done with the squeegee, it should look something like this.
Wipe the excess water from the liner and decal with a clean towel.
After the decal has had time to dry (I waited about 30 minutes but you could wait longer), you can begin peeling the protective layer off. Keep the peeled material as close to the liner as possible while peeling. If you peel it off straight up, you may dislodge the decal that remains behind. Take it slow and careful. See below.
After you removed the protective film, use you finger to "squeegee" the remaining water out from under the decal material and ensure it is smooth.
Dry off the excess water with a towel. Your installed decal should look something like this.
Congratulations - You're done!!
Please feel free to comment or recommend tips/improvements to this thread - I'm always interested in improving the quality of these threads. I'd also like to thank Nicole for a great product - THANK YOU!
THANKS for reading!
02-09-2009, 01:15 AM
#7
Burning Brakes
Dwayne,
Thanks a million. I am about to remove a hood and replace it (and put a new heat shield in) and this information and the photos are fantastic. Very timely and thorough.
Matt
Thanks a million. I am about to remove a hood and replace it (and put a new heat shield in) and this information and the photos are fantastic. Very timely and thorough.
Matt
Trending Topics
02-09-2009, 01:31 AM
#8
Rennlist Member
Dwayne - I think you should move to Bozeman.
Let me tell you, it is beautiful here, and you can really drive on these great mountain roads. Your family would surely love it here too. Oh, and did I mention, we could work on sharks!
Let me tell you, it is beautiful here, and you can really drive on these great mountain roads. Your family would surely love it here too. Oh, and did I mention, we could work on sharks!
02-09-2009, 01:51 AM
#9
Addict
Rennlist Member
Rennlist Member

Join Date: May 2003
Posts: 1,118
Likes: 0
Received 0 Likes
on
0 Posts
Once again, thanks for the excellent write-up and pics. I have been planning to do this for a few months now. It is great that you came along and provide such a wonderful detail of your work. I enjoyed reading about your projects.
02-09-2009, 03:00 AM
#10
Addict
Rennlist Member
Rennlist Member
At this pace your cars won't need anything else done to them. I'll tell ya what. I'm just down here in Riverside. I'm more than willing to bring my car up so you can continue your excellent work!
02-09-2009, 04:50 AM
#11
Nordschleife Master
Dwayne,
Dare i say it, but your posts are almost TO DETAILED
great work as always. I honestly hope you never rebuild an engine though, that would blow up the rennlist servers with all the pics and posts.
KEEP UP THE GOOD WORK
Dare i say it, but your posts are almost TO DETAILED
great work as always. I honestly hope you never rebuild an engine though, that would blow up the rennlist servers with all the pics and posts.
KEEP UP THE GOOD WORK
02-09-2009, 02:20 PM
#12
Nordschleife Master

There is little that the average person COULD NOT do to a 928 if each process had your hard work writing it up and documenting it with photos! Seriously, with your detailed pictures and technical writing, I could freaking rebuild the automatic transmission on my car if I needed too!
WOW! Thanks for another great foray into the world of DIY 928's! Like many, this is very timely as Blue82's underhood shield is starting to disintegrate and needs to be replaced at some point. I will remember this thread when that day comes!
Thanks again!
WOW! Thanks for another great foray into the world of DIY 928's! Like many, this is very timely as Blue82's underhood shield is starting to disintegrate and needs to be replaced at some point. I will remember this thread when that day comes!
Thanks again!
02-09-2009, 05:22 PM
#13
Team Owner
Nice work, Dwayne
your doing a great job on those machines
your doing a great job on those machines
02-09-2009, 11:50 PM
#15
Rennlist Member
Fantastic writeup! I've been waiting for that one for quite a while!!