
Powder coating intake/cam covers/etc. best practices (for the zillionth time!)
 09-07-2010, 07:13 PM
#1
Addict
Rennlist Member
Rennlist Member
Thread Starter
Latest Updates
(The original point of this thread was to learn about and collect best practices for powder coating. See the "Original Background and Questions" section of this post for that original content. What follows immediately below is updated content based on the experience of going through this process.)
I've prepared the following guide (good for '87 through '95 model years) that you can either fill in with a few details (like the date and your contact information, your choice of powders, etc.) or even just rewrite as you see fit. This guide is intended to be provided to the people doing the powder coating work. It provides the kind of information a powder coater would probably like to know: what metals (e.g., aluminum, magnesium) are used for the various parts, how to mask/plug/cap the parts, how they should be prepped, etc.
I'm providing this in various forms: a PDF (good enough for printing if you just want to hand-write-in a few last details) and a Microsoft Word document (in both ".docx" format and the older ".doc" format) if you want to make more substantial modifications.
This guide worked for me and was the result of what I learned by asking a lot of questions in this thread. I make no claim that it represents the one and only correct way of powder coating these parts. It's your choice to use it as is, or to modify it in any way you want, or to do something entirely different.
As with many people, my refinishing work was done in conjunction with an intake refresh job; see the thread "Yet another top-end refresh (WAS: Trying to fix irregular/poor idle ...)" if you're interested in that entire rather lengthy project.
Remember that during the prep work for powder coating the intake, it'll be baked to eliminate oils and other contaminants; this will also melt the seals on the two flappy bearings. So... remember to order some replacement flappy bearings (see, for example, "Flappy Bearing - Change to design - Comments Please").
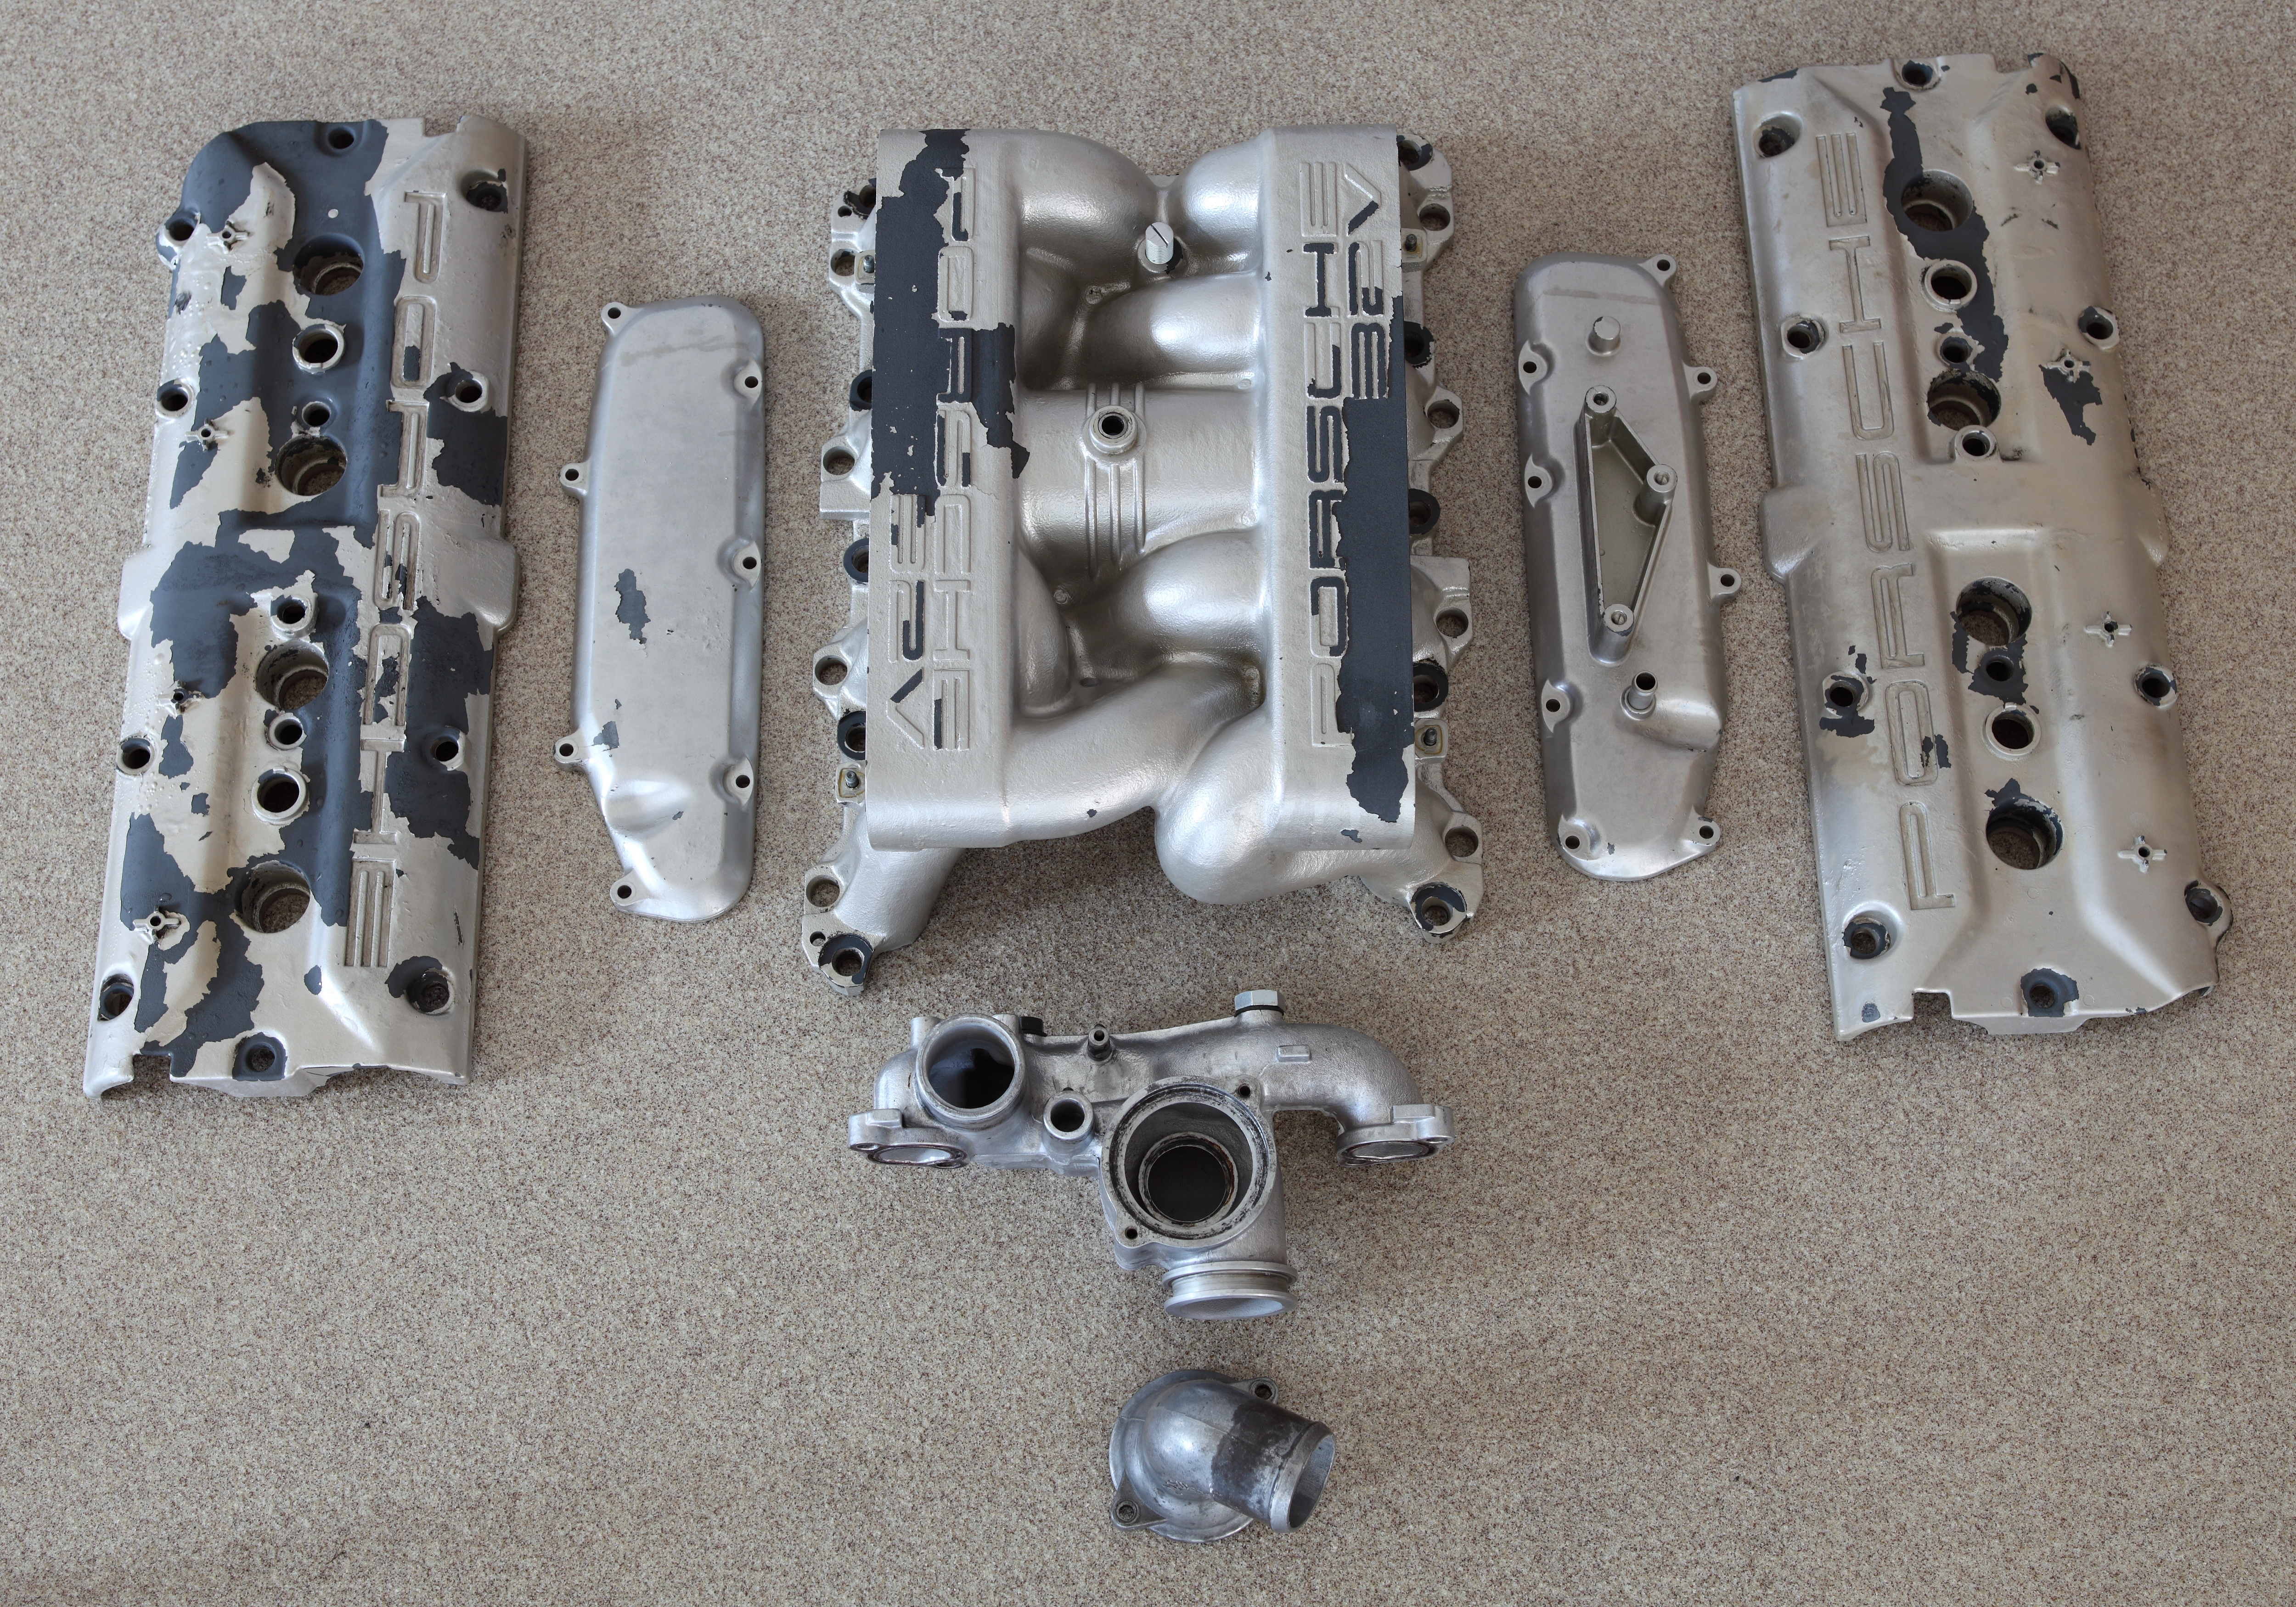
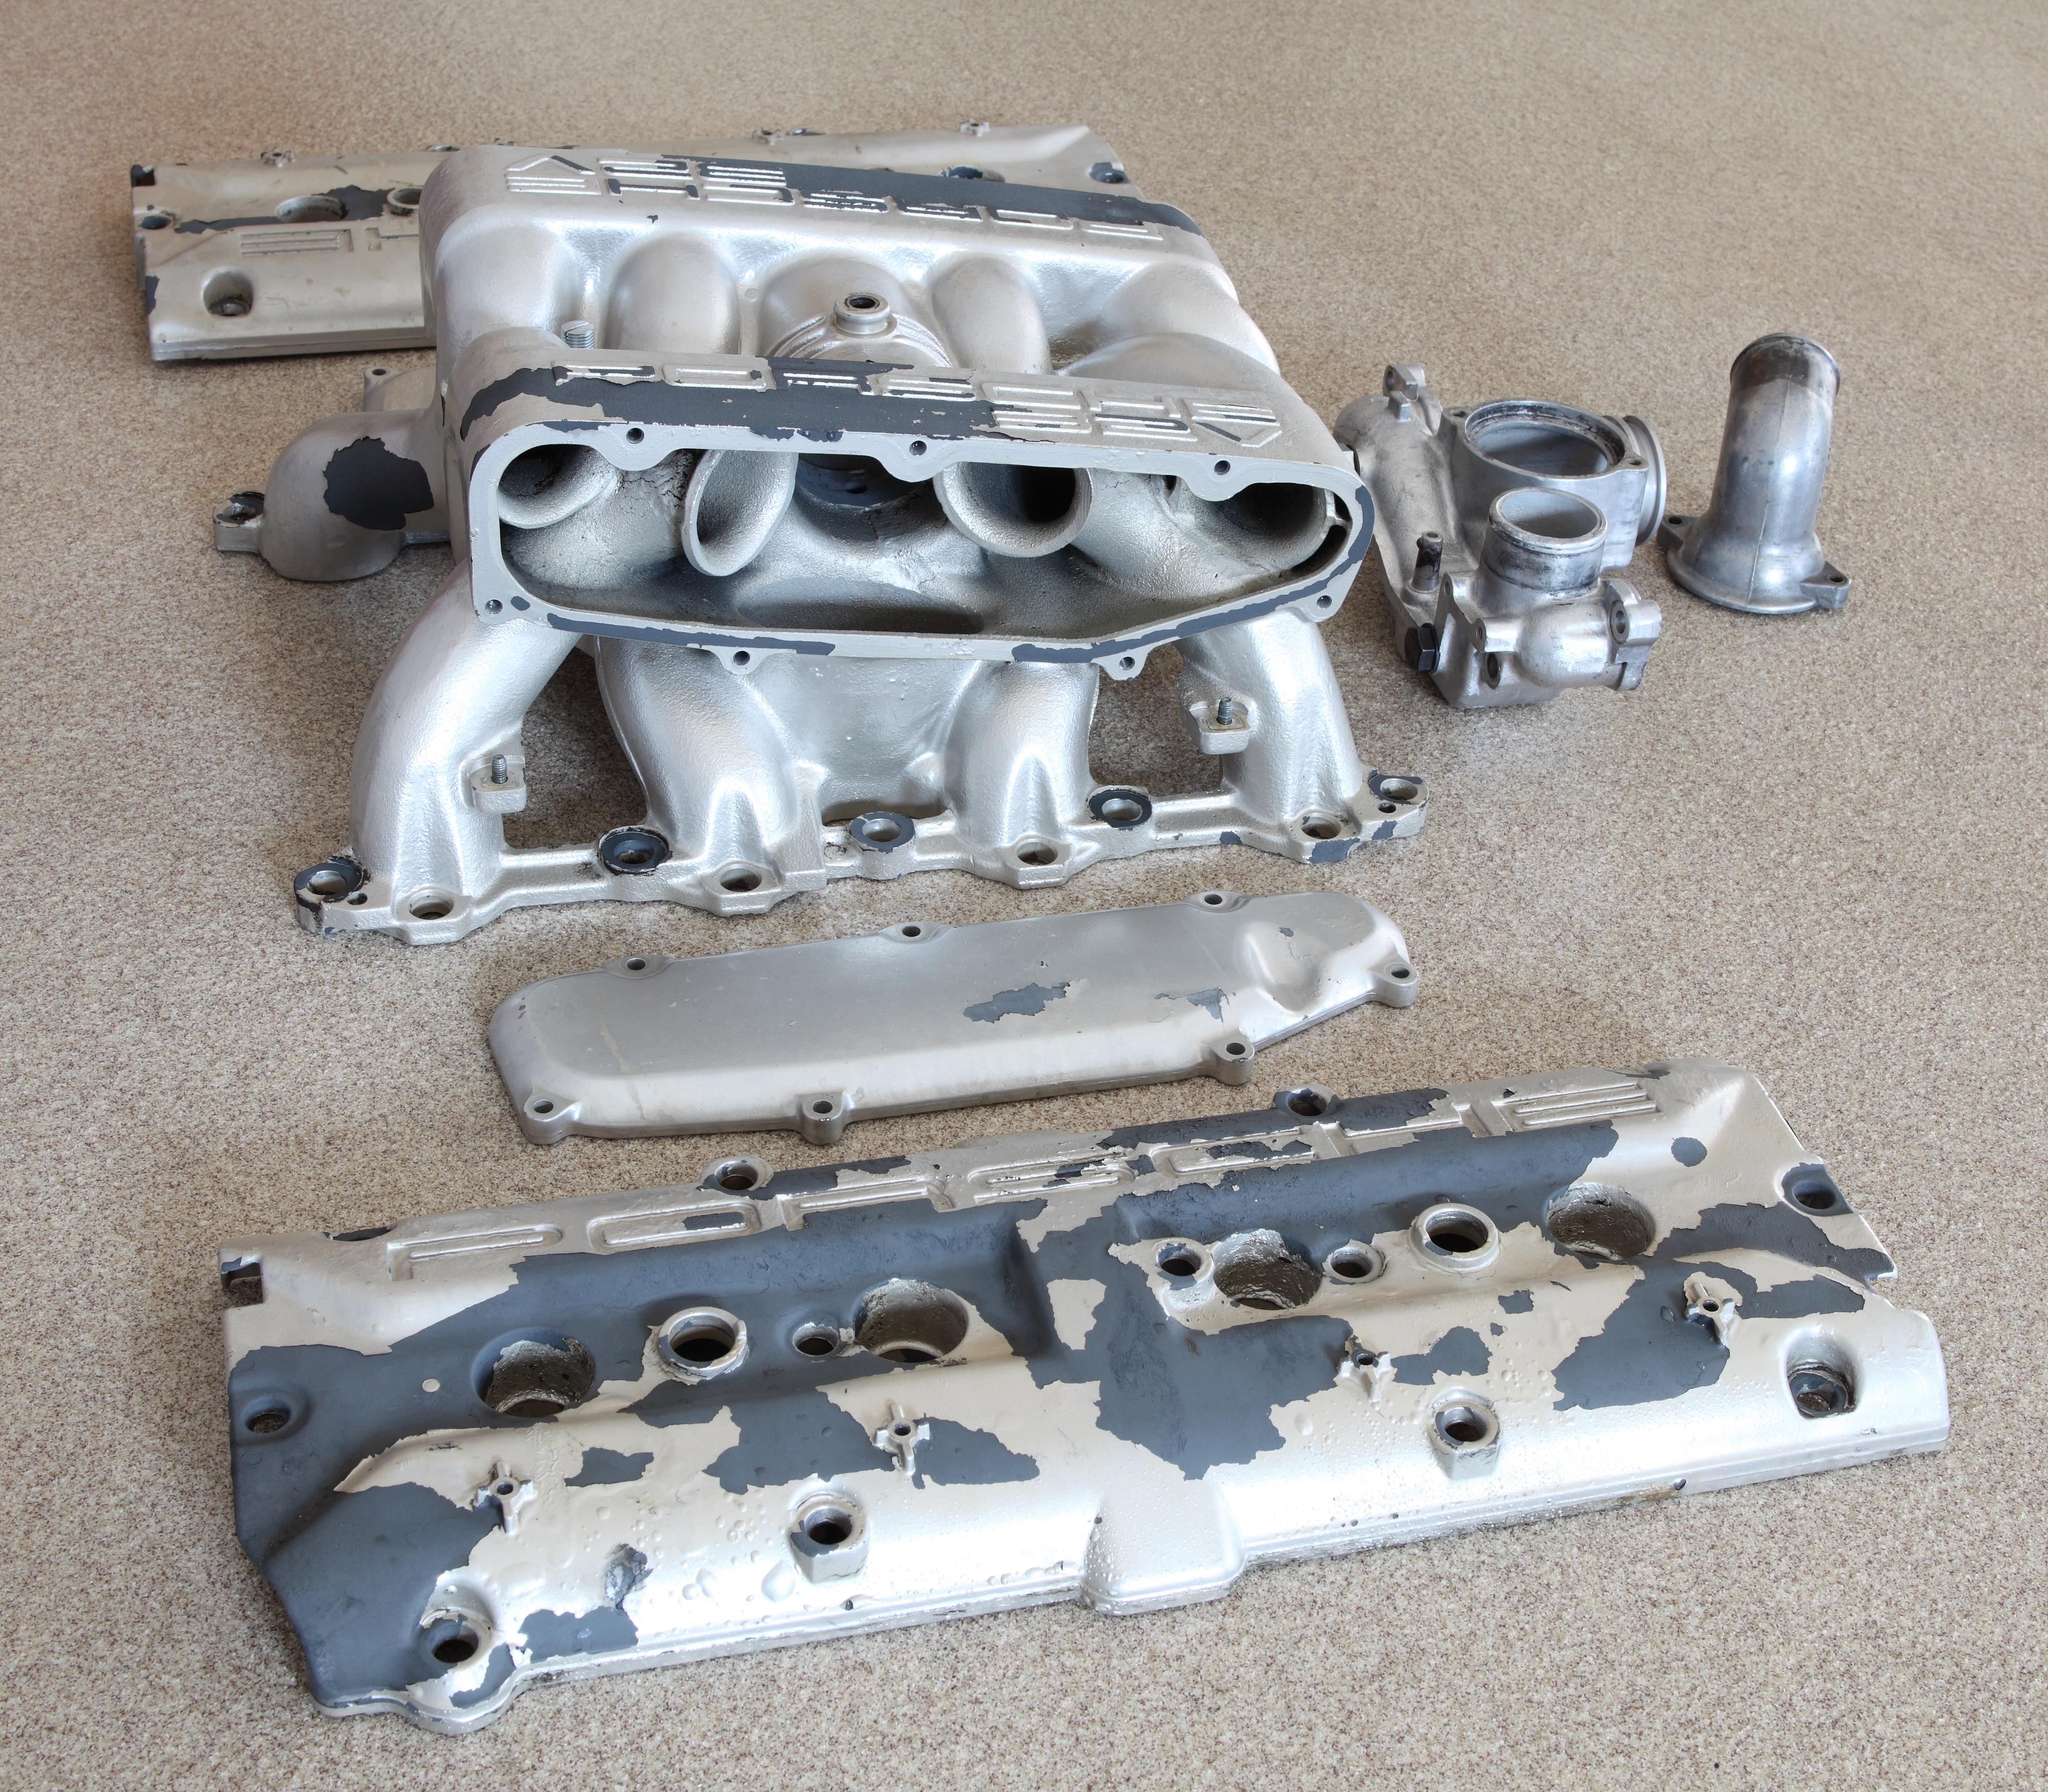
Before
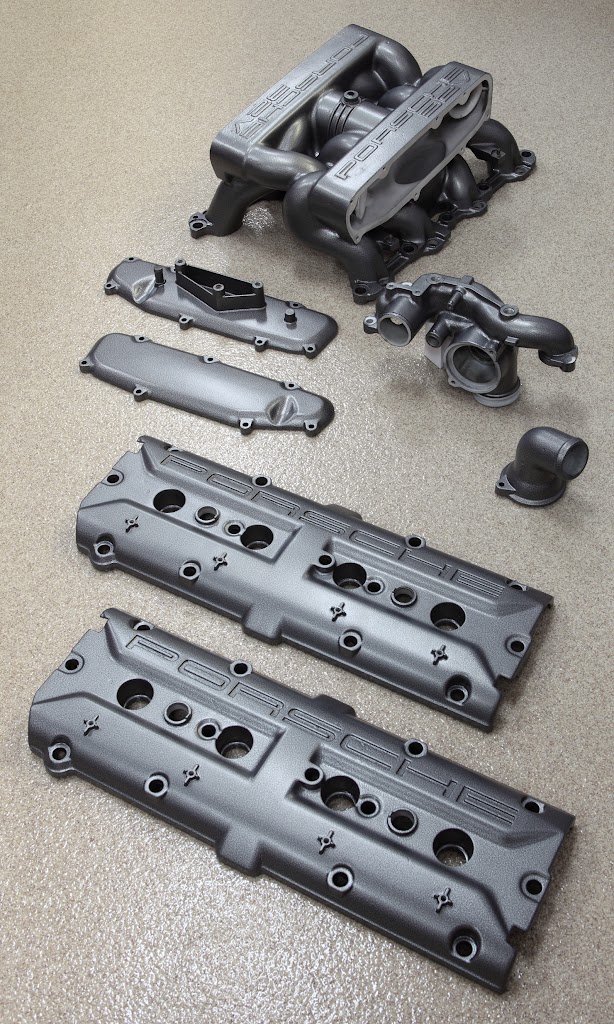
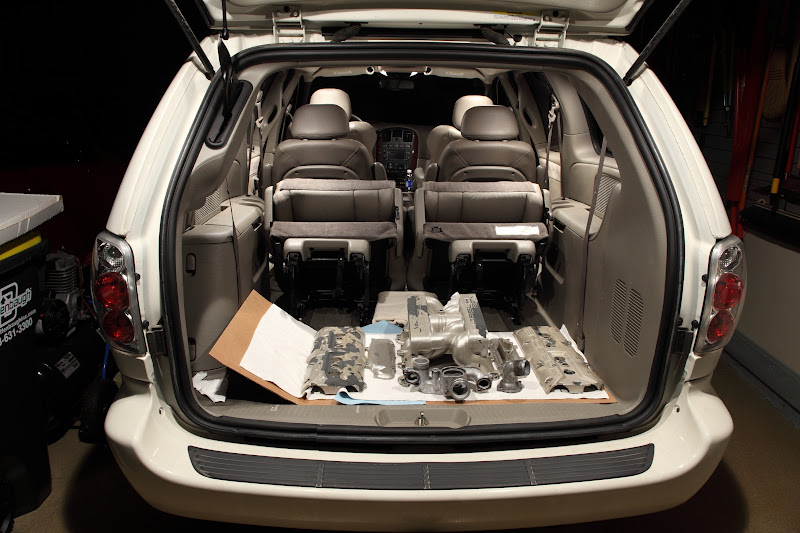
For my own parts (on my '90 S4), I started with this:


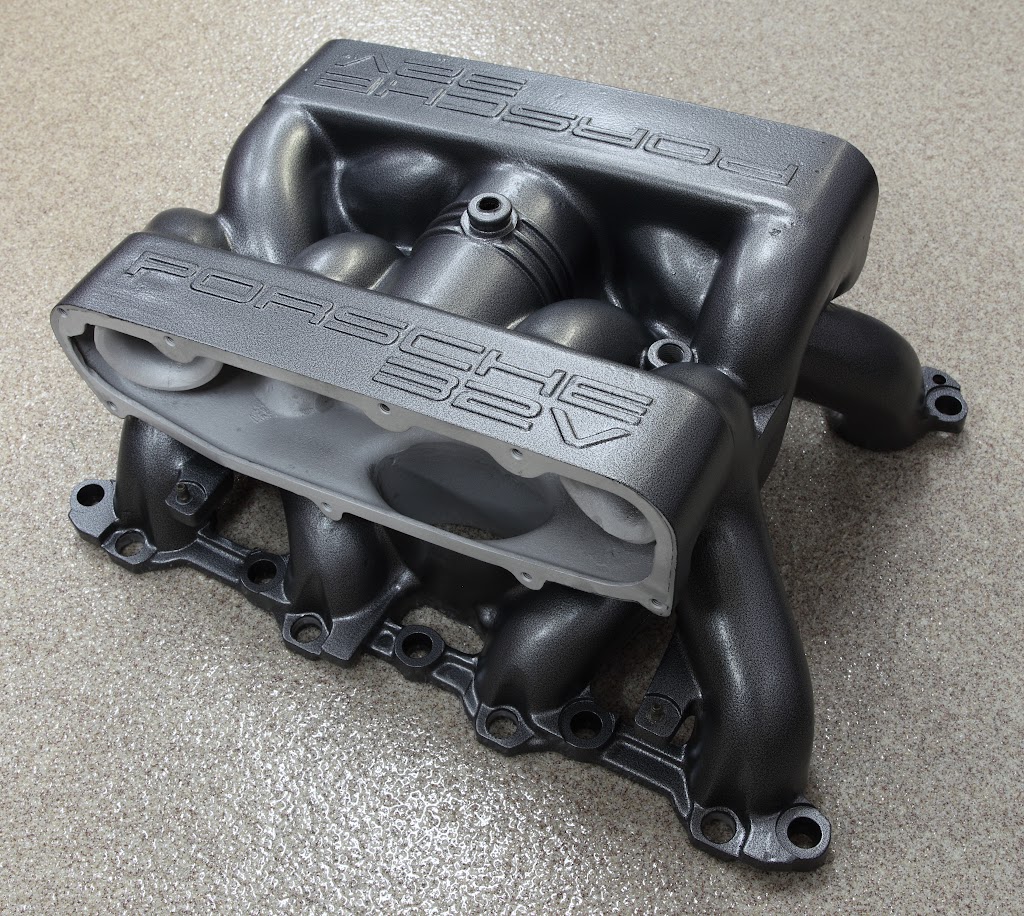
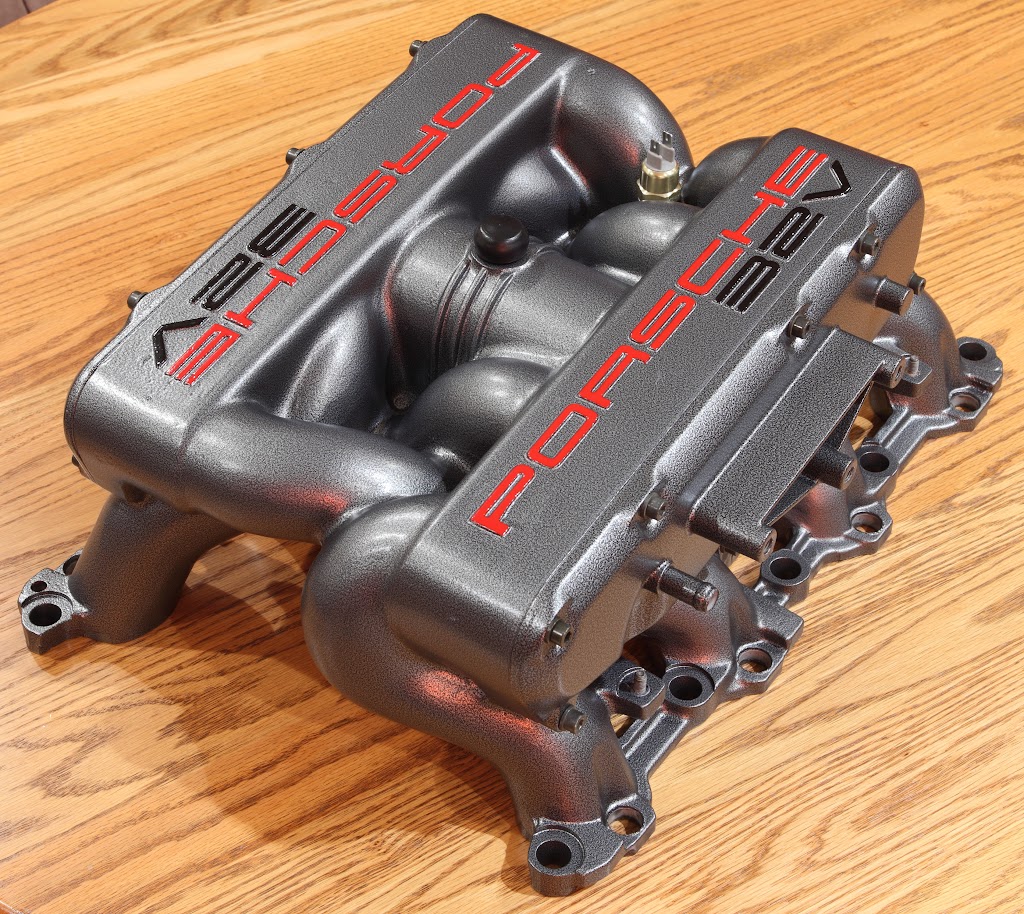
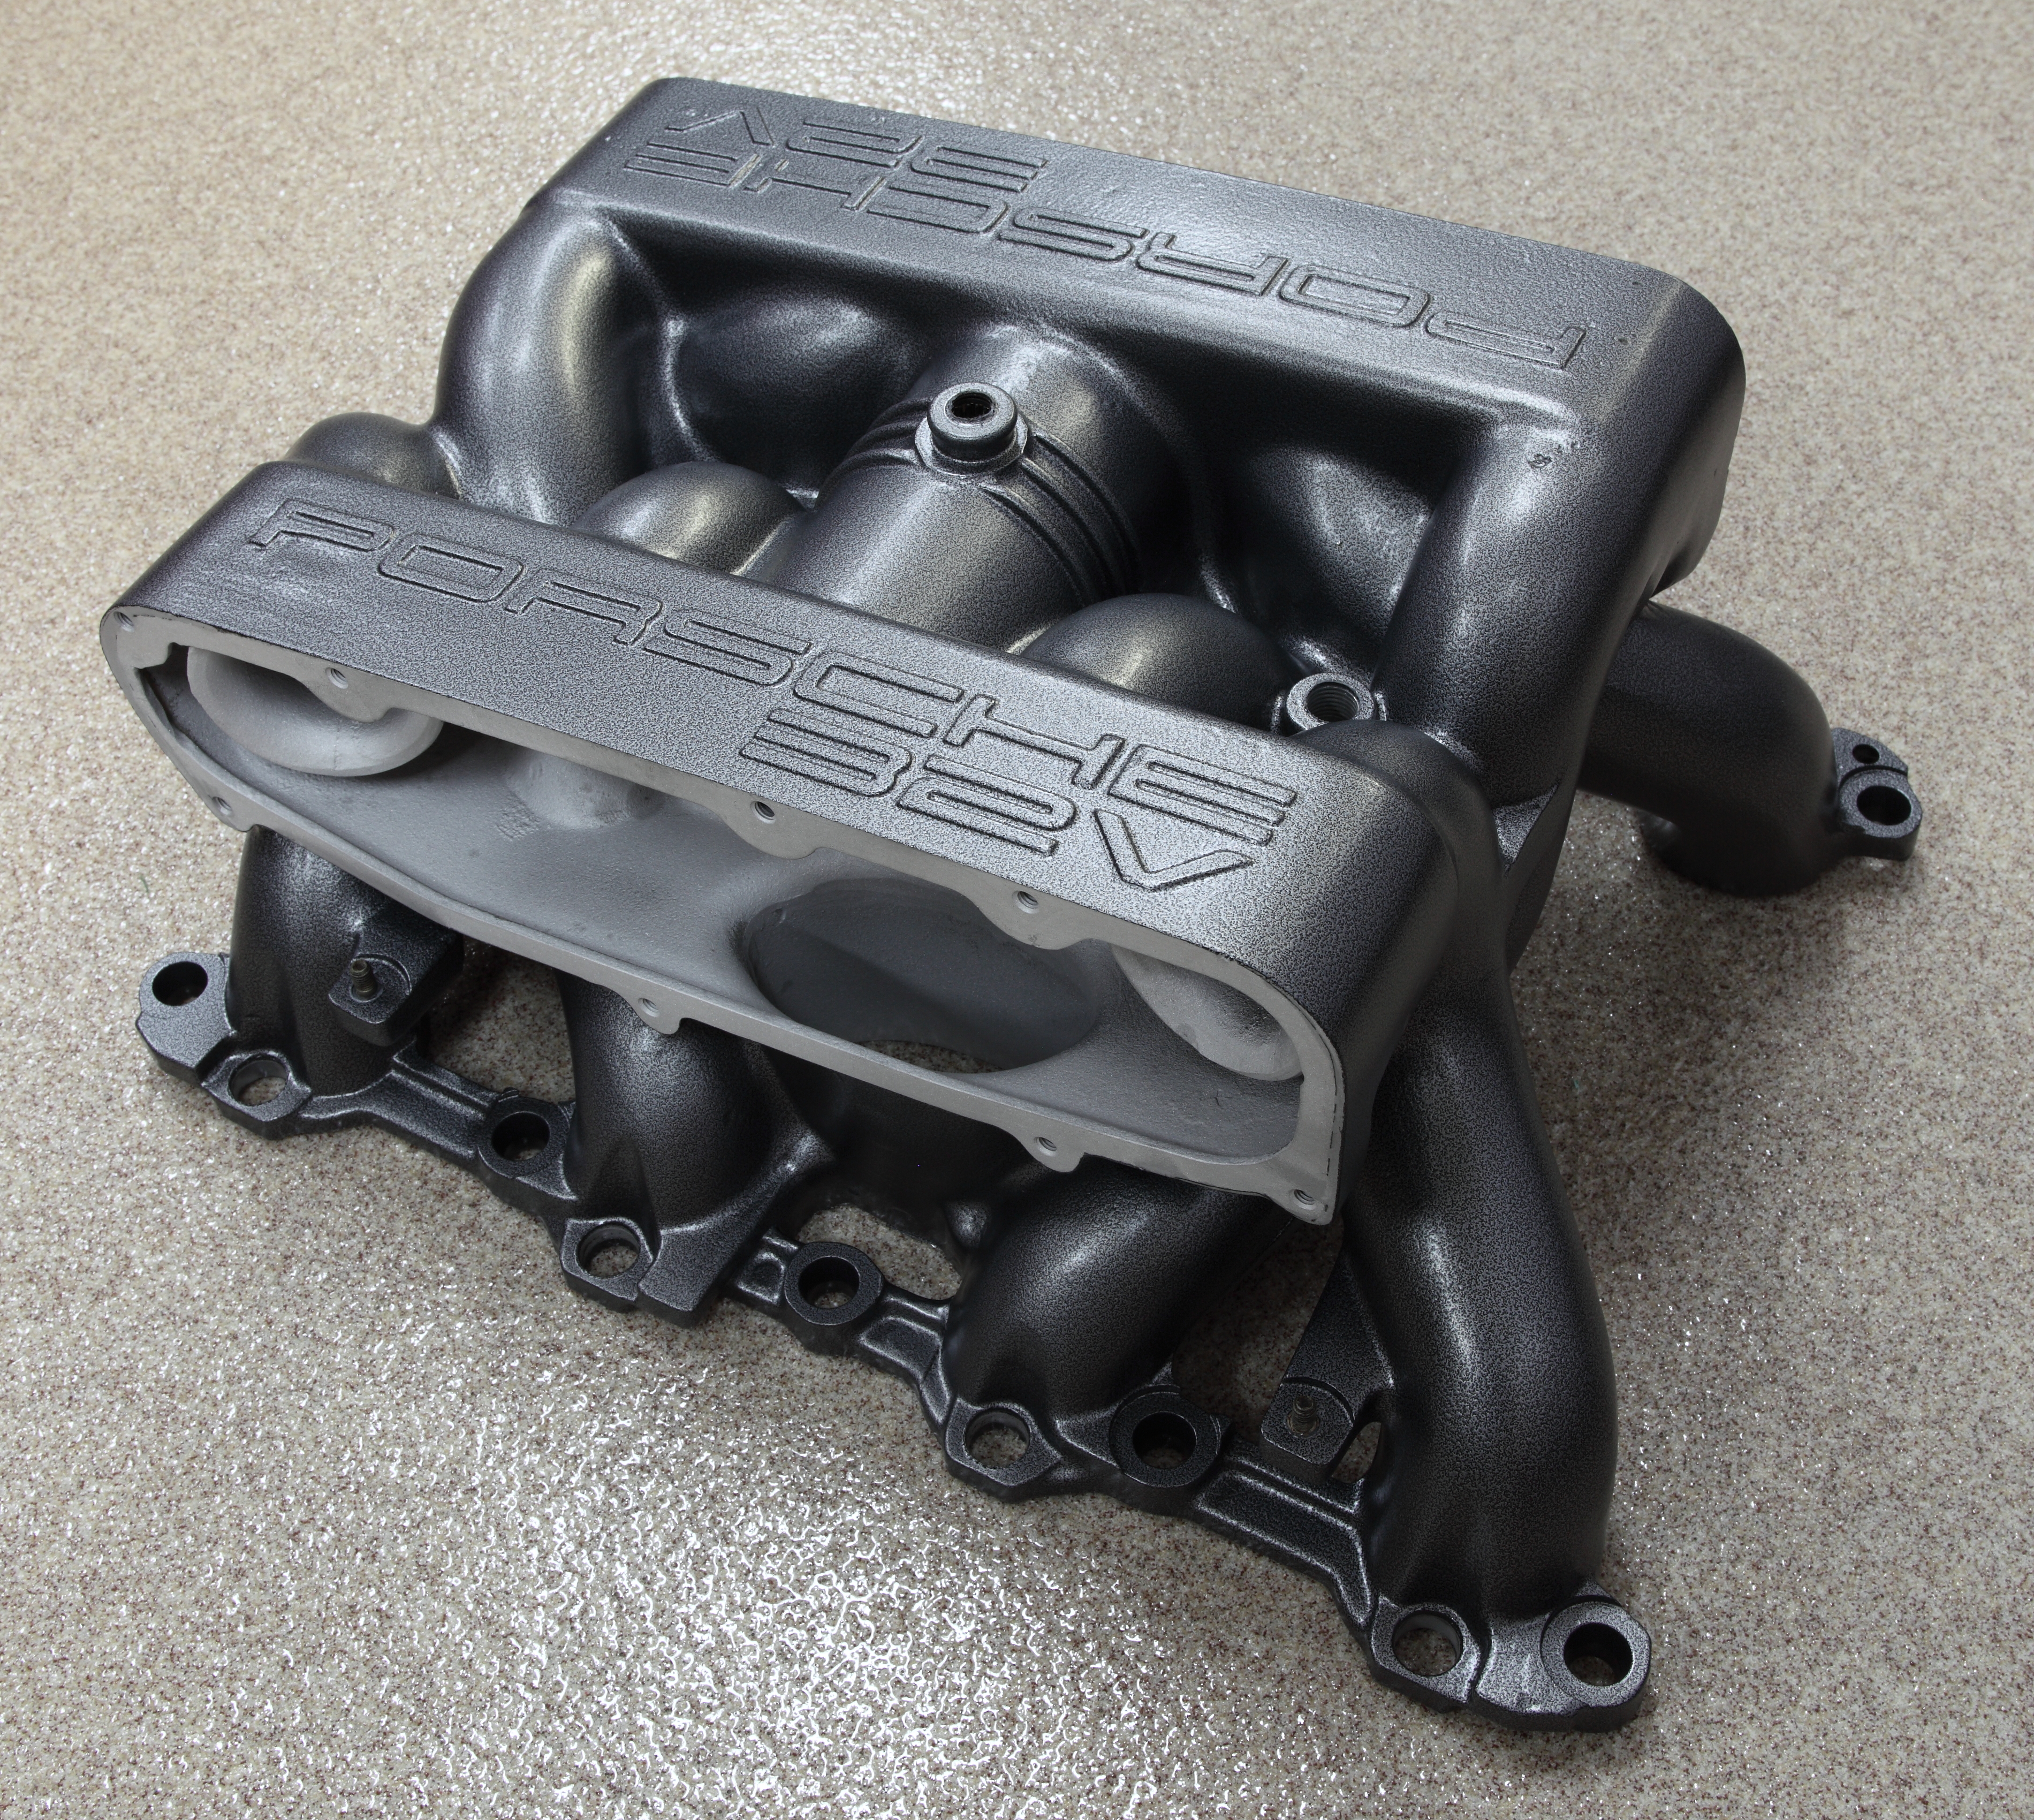
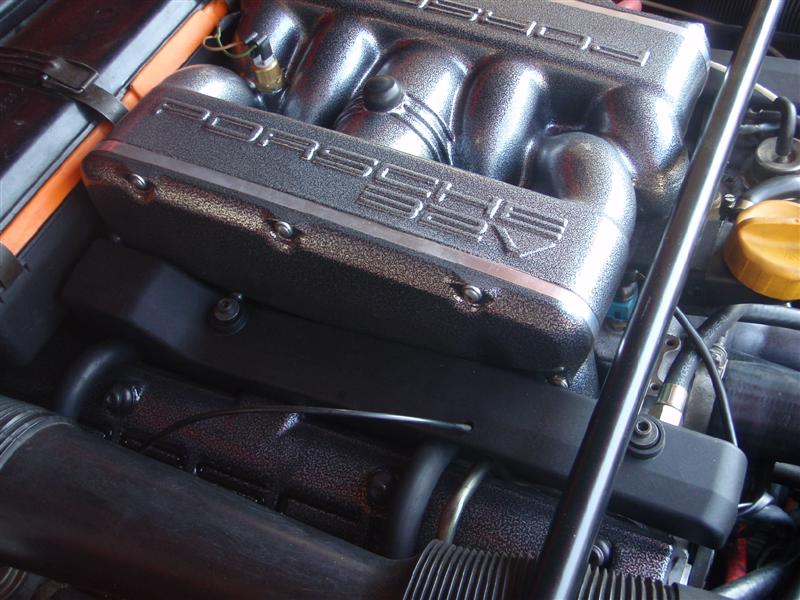
After
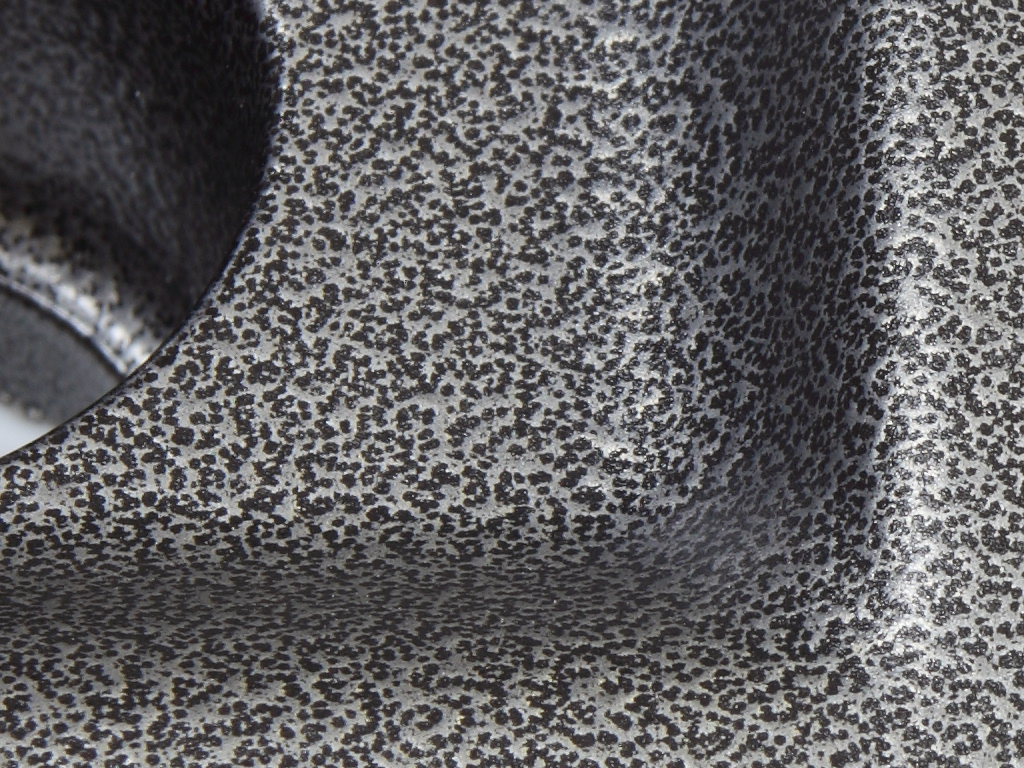
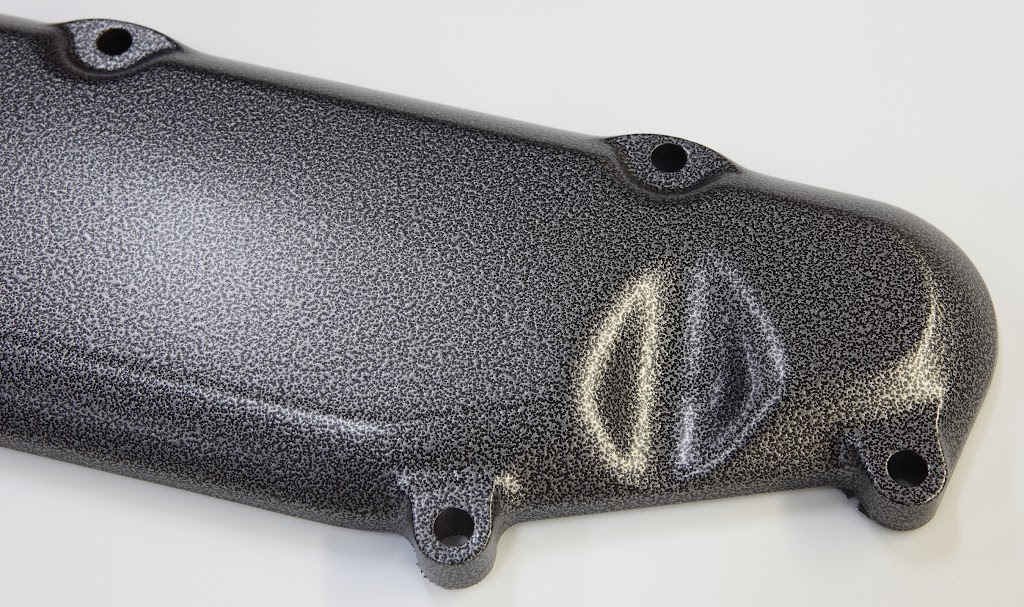
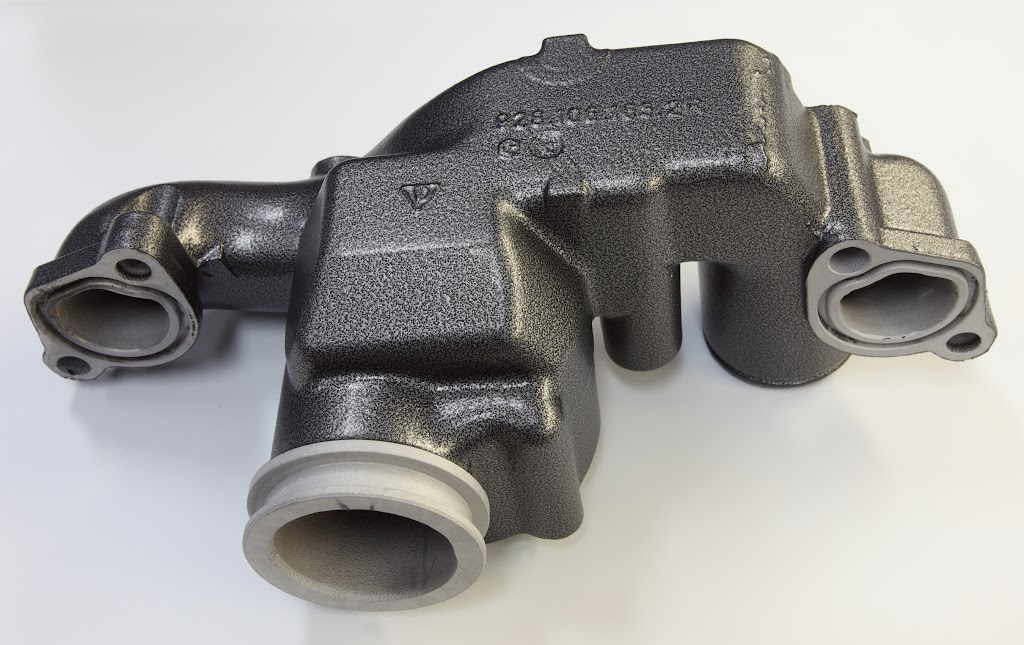
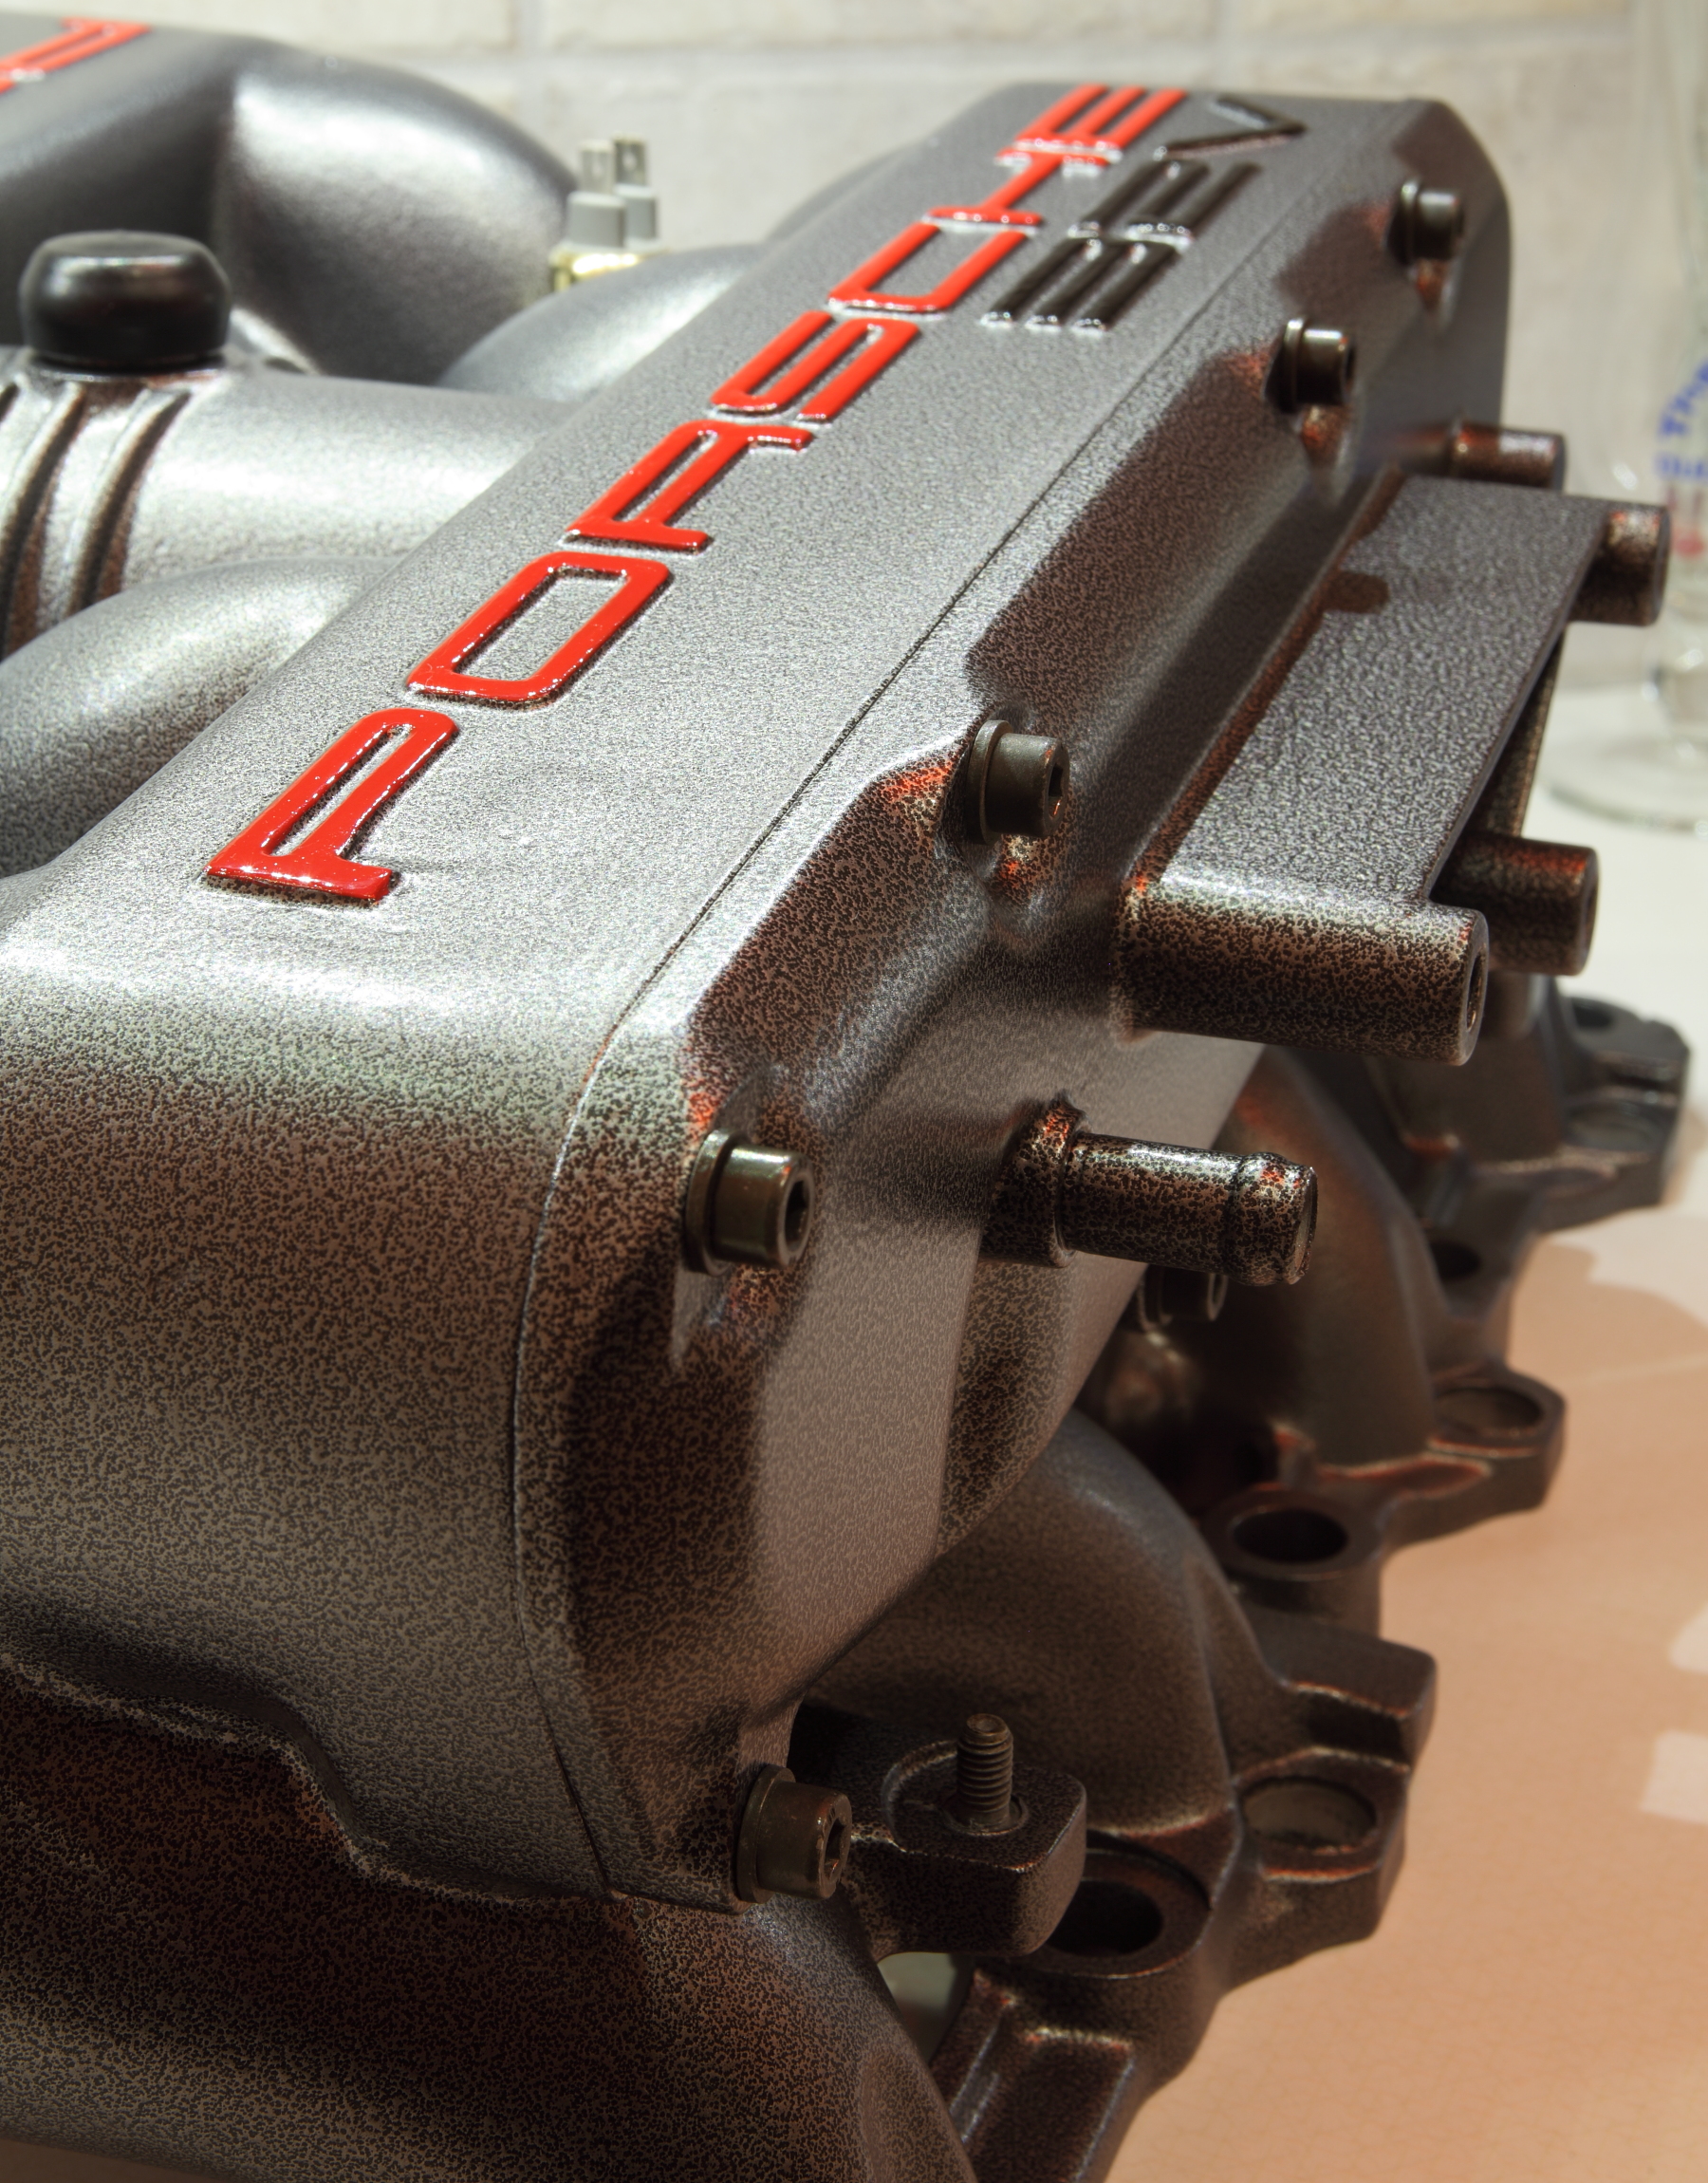
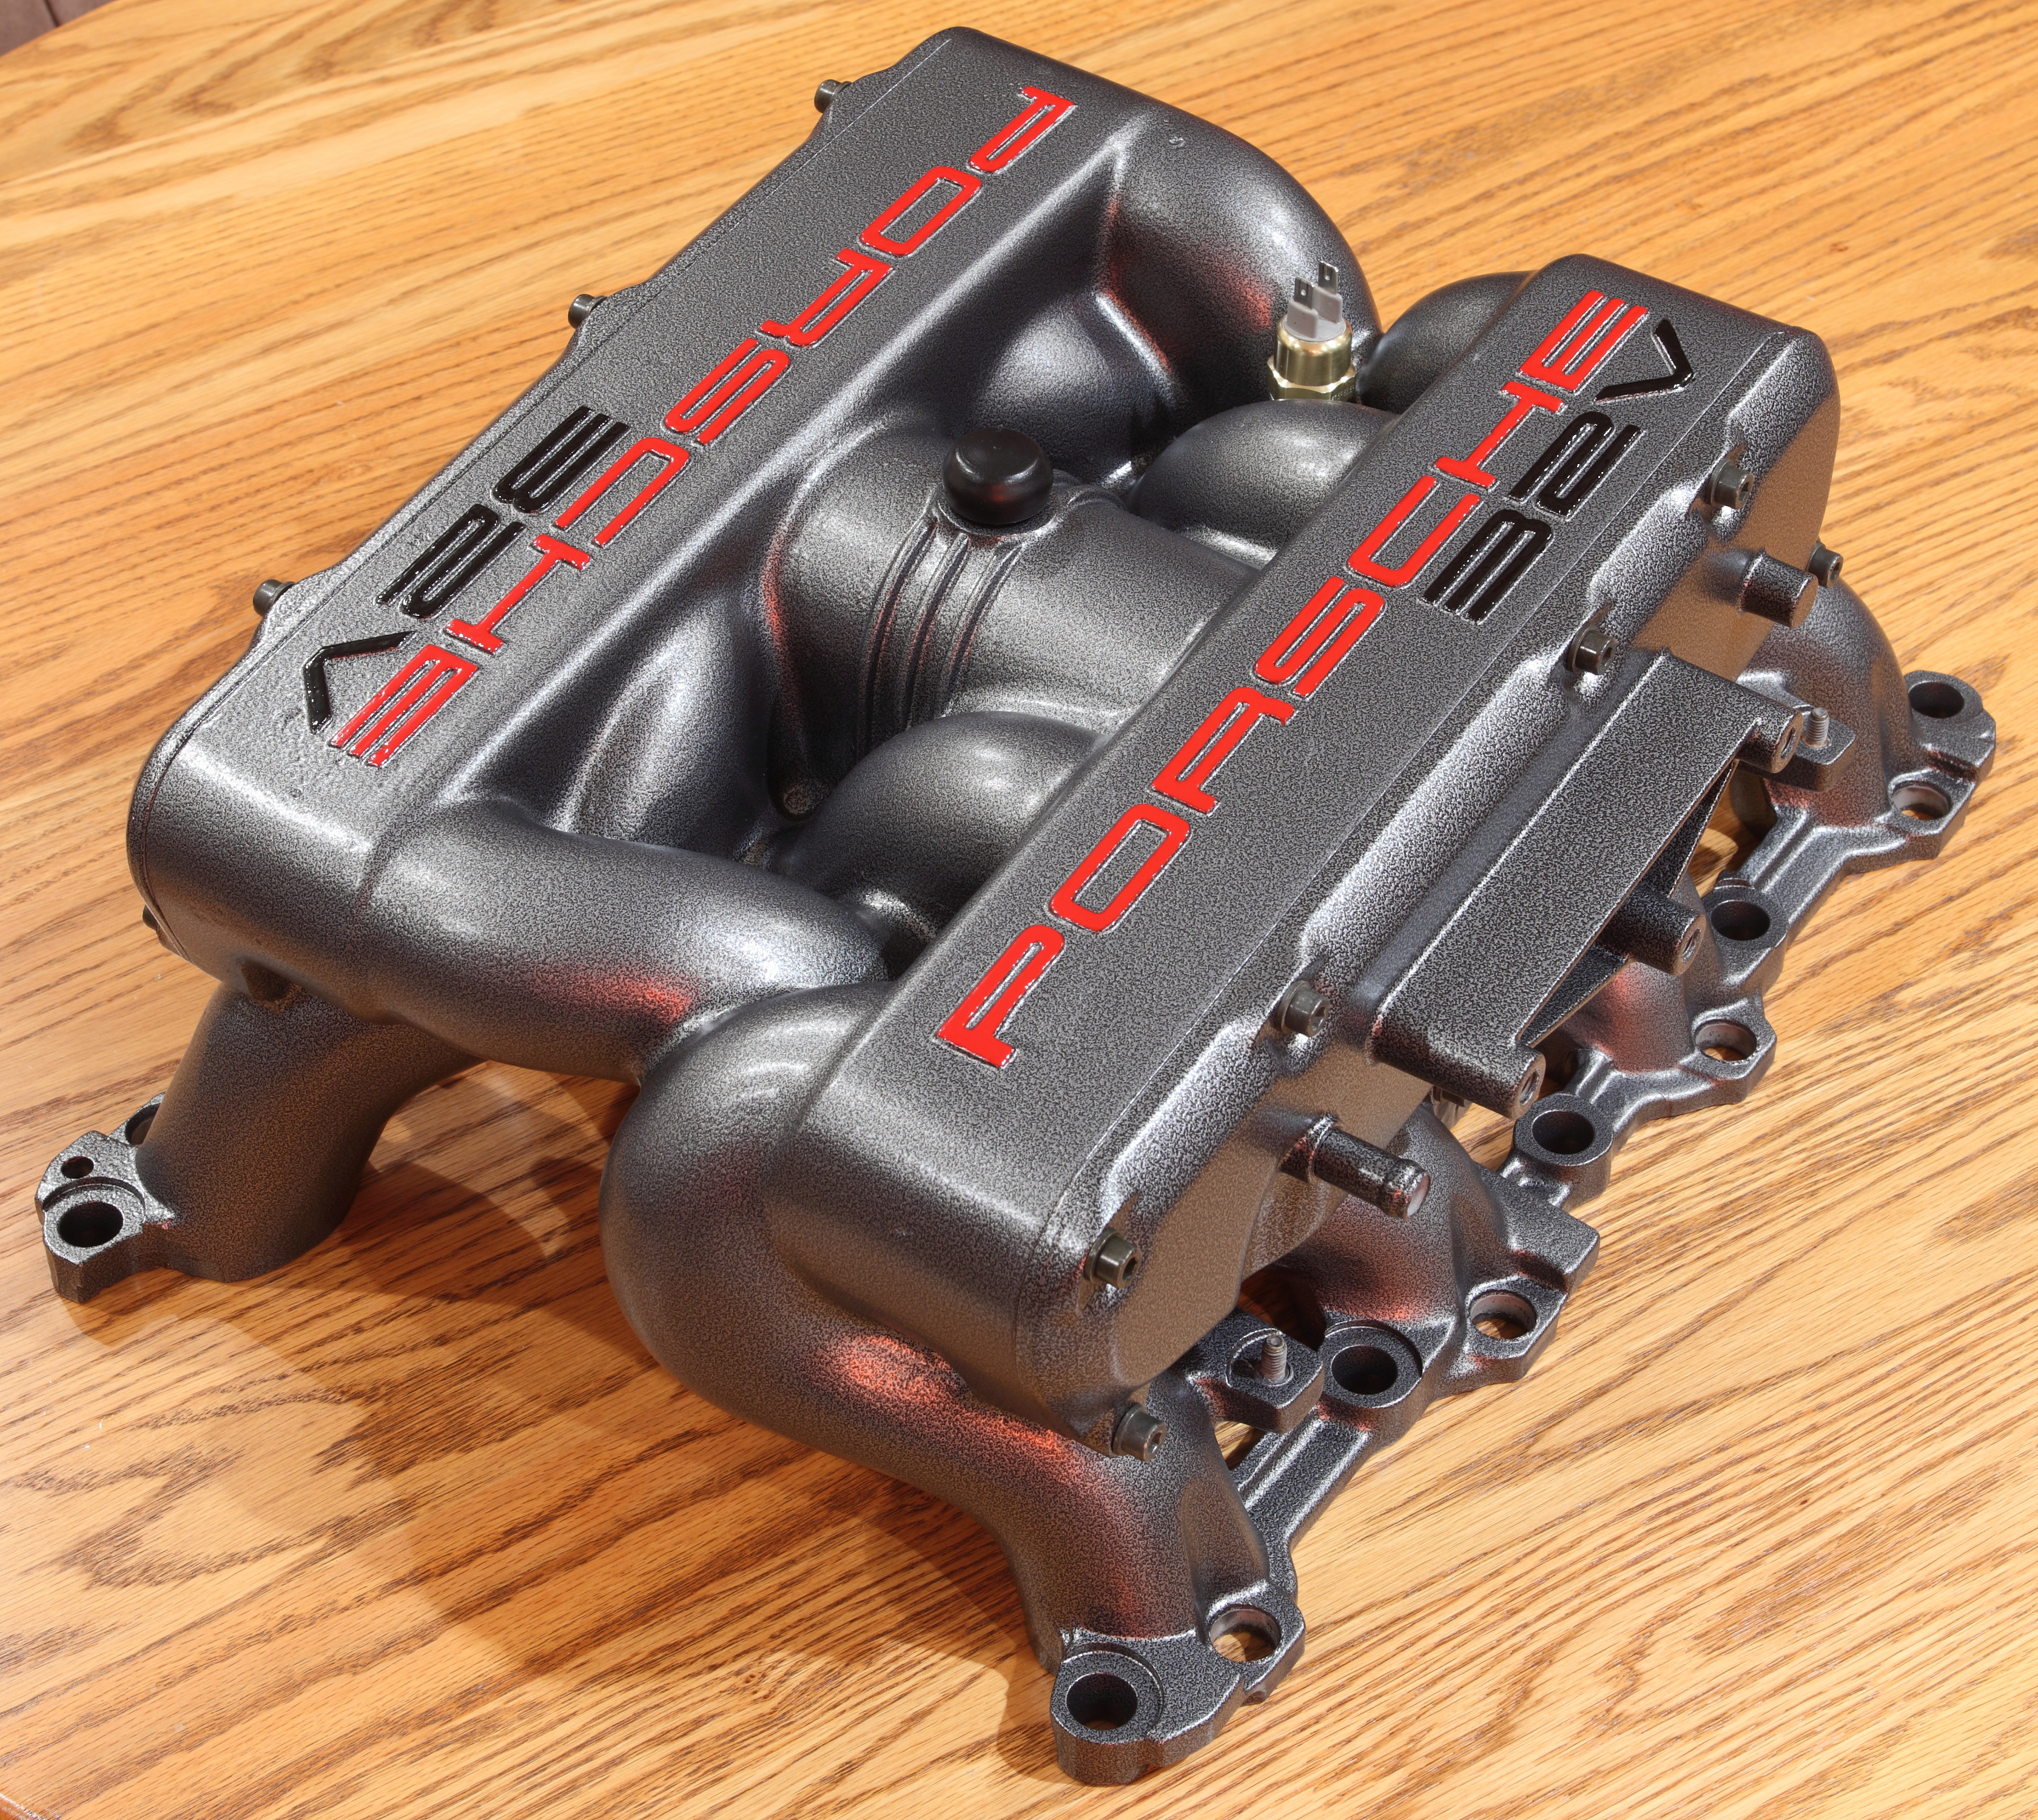
Powder coating work was done by Industrial Coatings in Kansas City, KS, using aluminum oxide as the blast media, TIGER Drylac Silver Hybrid 09/90190 for the base coat, and TIGER Drylac Satin Clear for the top coat.
(24-May-2012 update: Silver Hybrid 09/90190 apparently has been discontinued. Antique Silver Metallic 59/90820 looks very similar based on the photo in their catalog; it might be an acceptable substitute.)
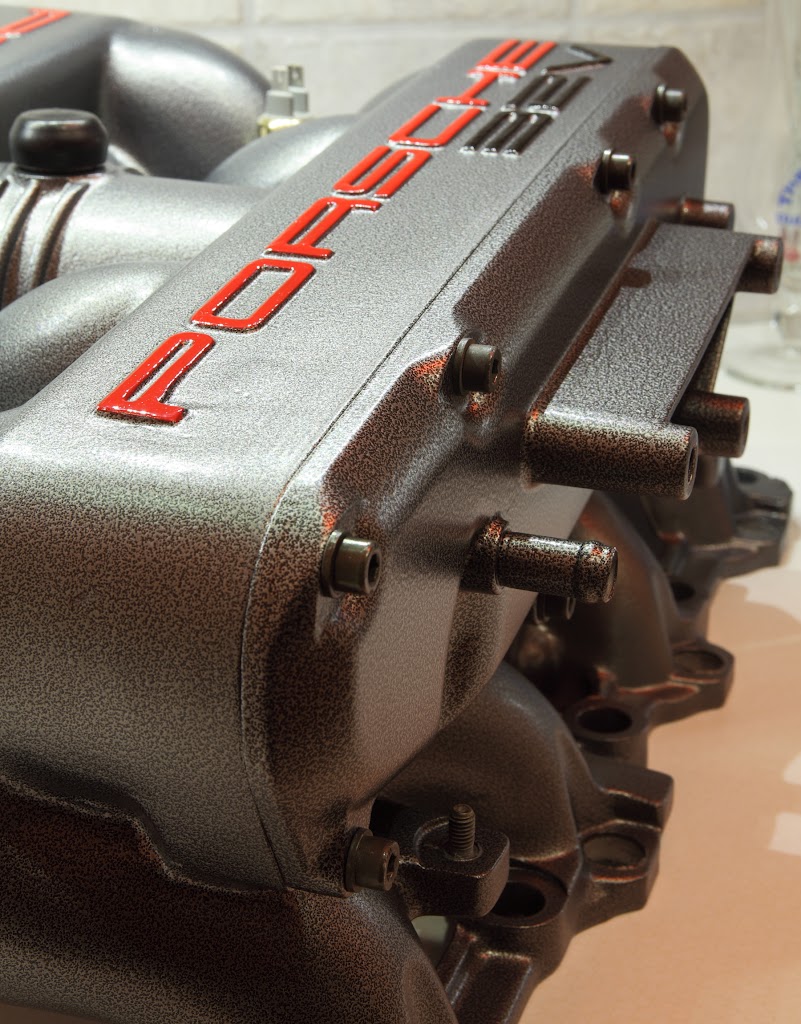
Results:


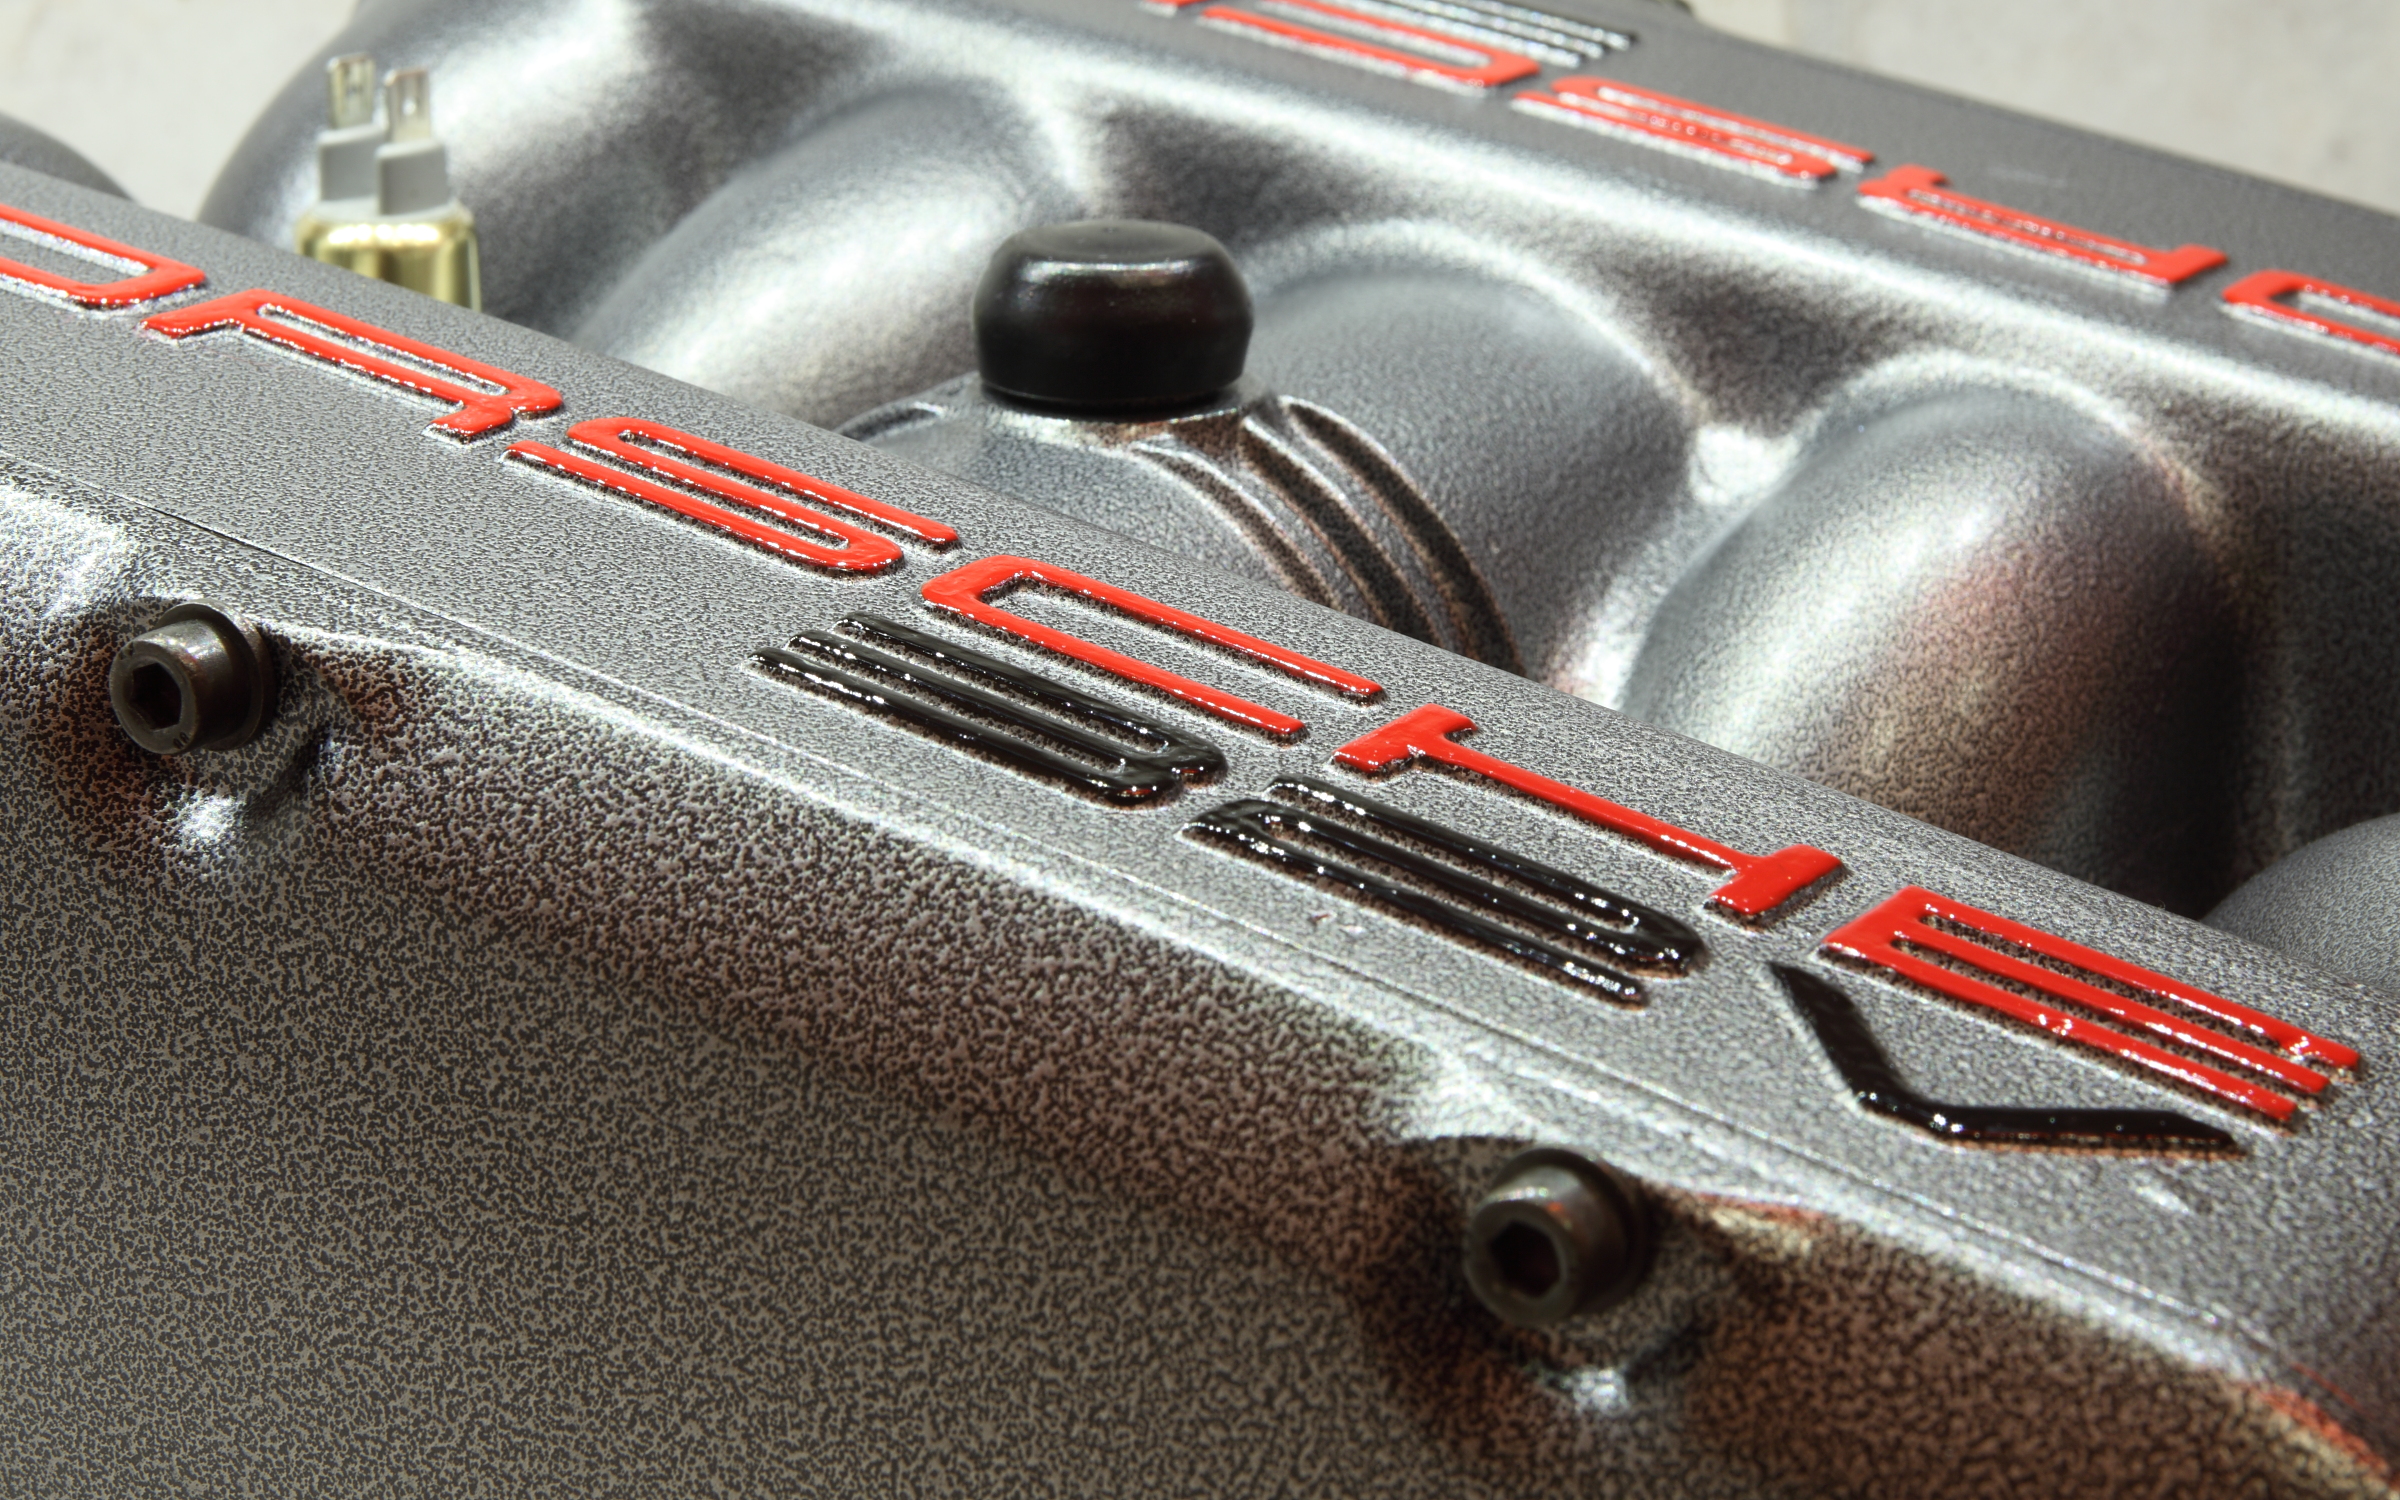
To finish it off even more, I used lettering (from Hooked on Cars) installed on the head (a.k.a. valve/cam) covers.

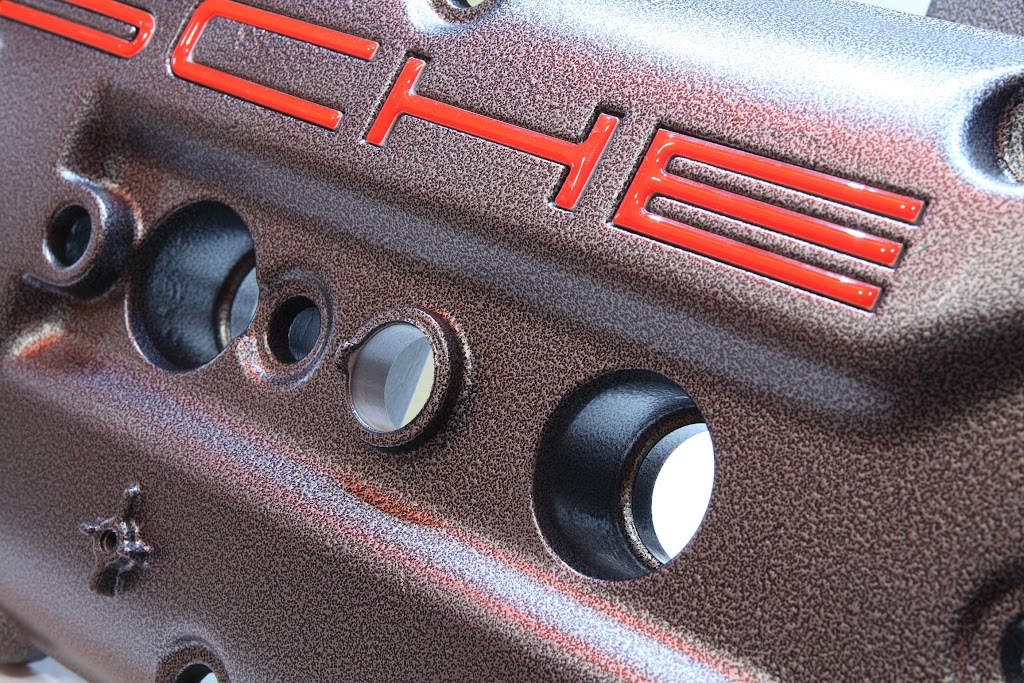
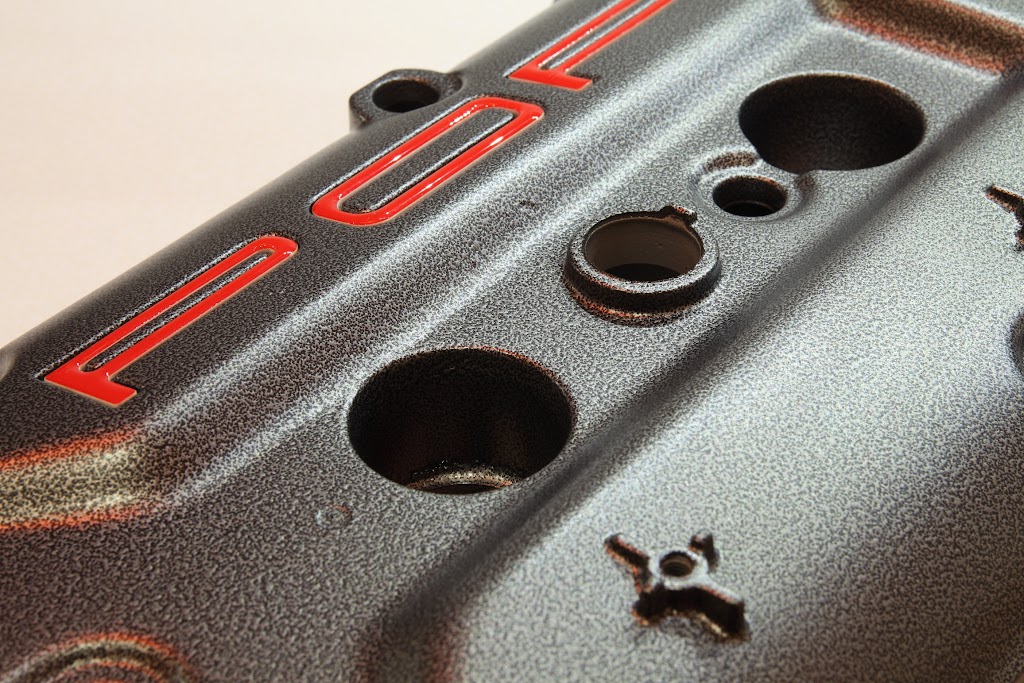
I thought that the Hooked on Cars lettering for the intake stuck out a bit too far (based on dry-fitting them and seeing what they looked like), so I decided to just paint the lettering (Dupli-Color "Scratch Fix 2in1" Universal Black NG SF 100 and Dupli-Color "Scratch Fix 2in1" Victory Red NG GM 519; got these at a local AutoZone; I used the brushes, not the rollers):


After reinstalling everything, it looked like this:

and, as of 11-Jun-2012, after installing a 928s R Us EIS, a 928MS cross brace, and a 928s R Us billet oil filler cap (all powder coated the same as everything else):


Original Background and Questions
After having read through a ton of threads on powder coating (or otherwise refinishing) intake, cam covers, and water bridge (and sometimes, upper timing belt covers, which I'm not planning on doing), I'm not seeing consensus on a few issues, or certain minor details haven't been answered to my satisfaction. And some of the threads are old, but people "tried things", yet I don't know how they turned out. (E.g., "elected to powder coat the gasket sealing area": did it eventually leak?) Are there new experiences that might alter our thinking on some powder-coating-related issues?
I'm looking for and wish to organize for future use ("for the general good" ) clear, unambiguous, best practices that anyone who's about to go the powder coating route could be armed with, such that mistakes can be avoided and quality results obtained.
At this point, I'll just tackle S4/GT/GTS, as those are the only models I'm very familiar with.
My need is immediate (as I've got parts ready to be powder coated sitting my car, ready to go, and I'm expecting to take them in tomorrow morning and might delay further if I'm unsure of some details). But I'd be happy to continue maintaining this best practices list beyond my immediate needs and perhaps evolve it into a more comprehensive guide.
As I see it, there are the following considerations:
What I'd like to do is summarize what I believe to be the best practices based on what I've read so far, potential practices (initially shown as "(open issue)") and then, based on feedback, I'll update this post.
Ultimately, I'd like to have a complete "Instructions for Powder Coaters" that could be given to your powder coater that, separately for each piece to be coated, would give one or more photos of that piece, annotated with clear instructions on what to mask or plug, and any other special instructions that apply.
General Cosmetics, Overall Procedures, and General Information
Avoiding Reassembly Problems, Leaks, and Damage
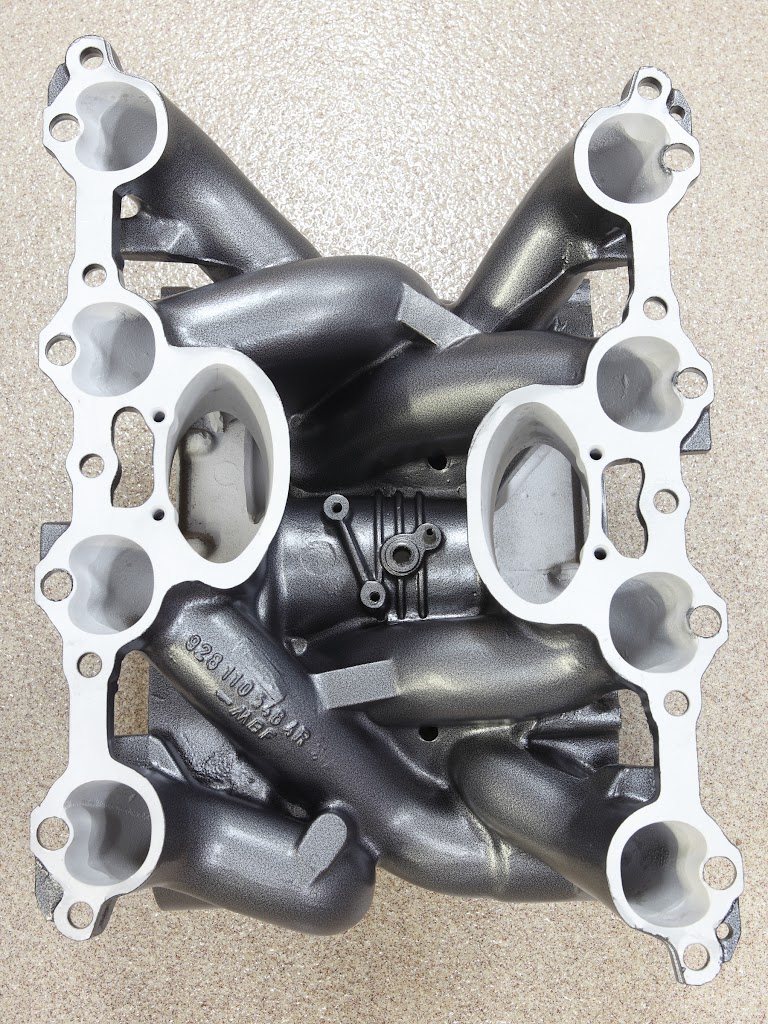
Intake
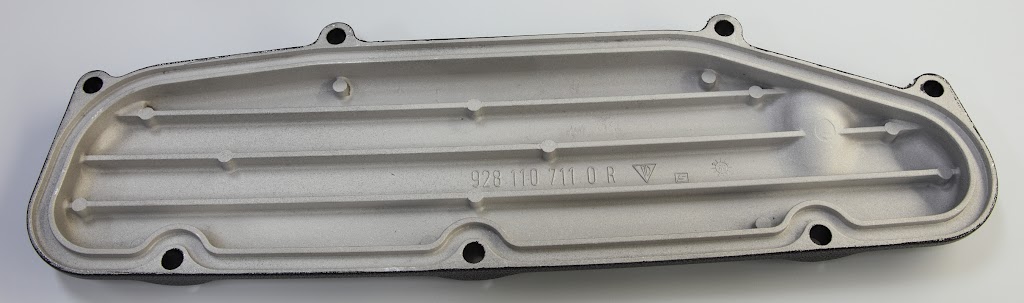
Intake Side Plates
Cam Covers
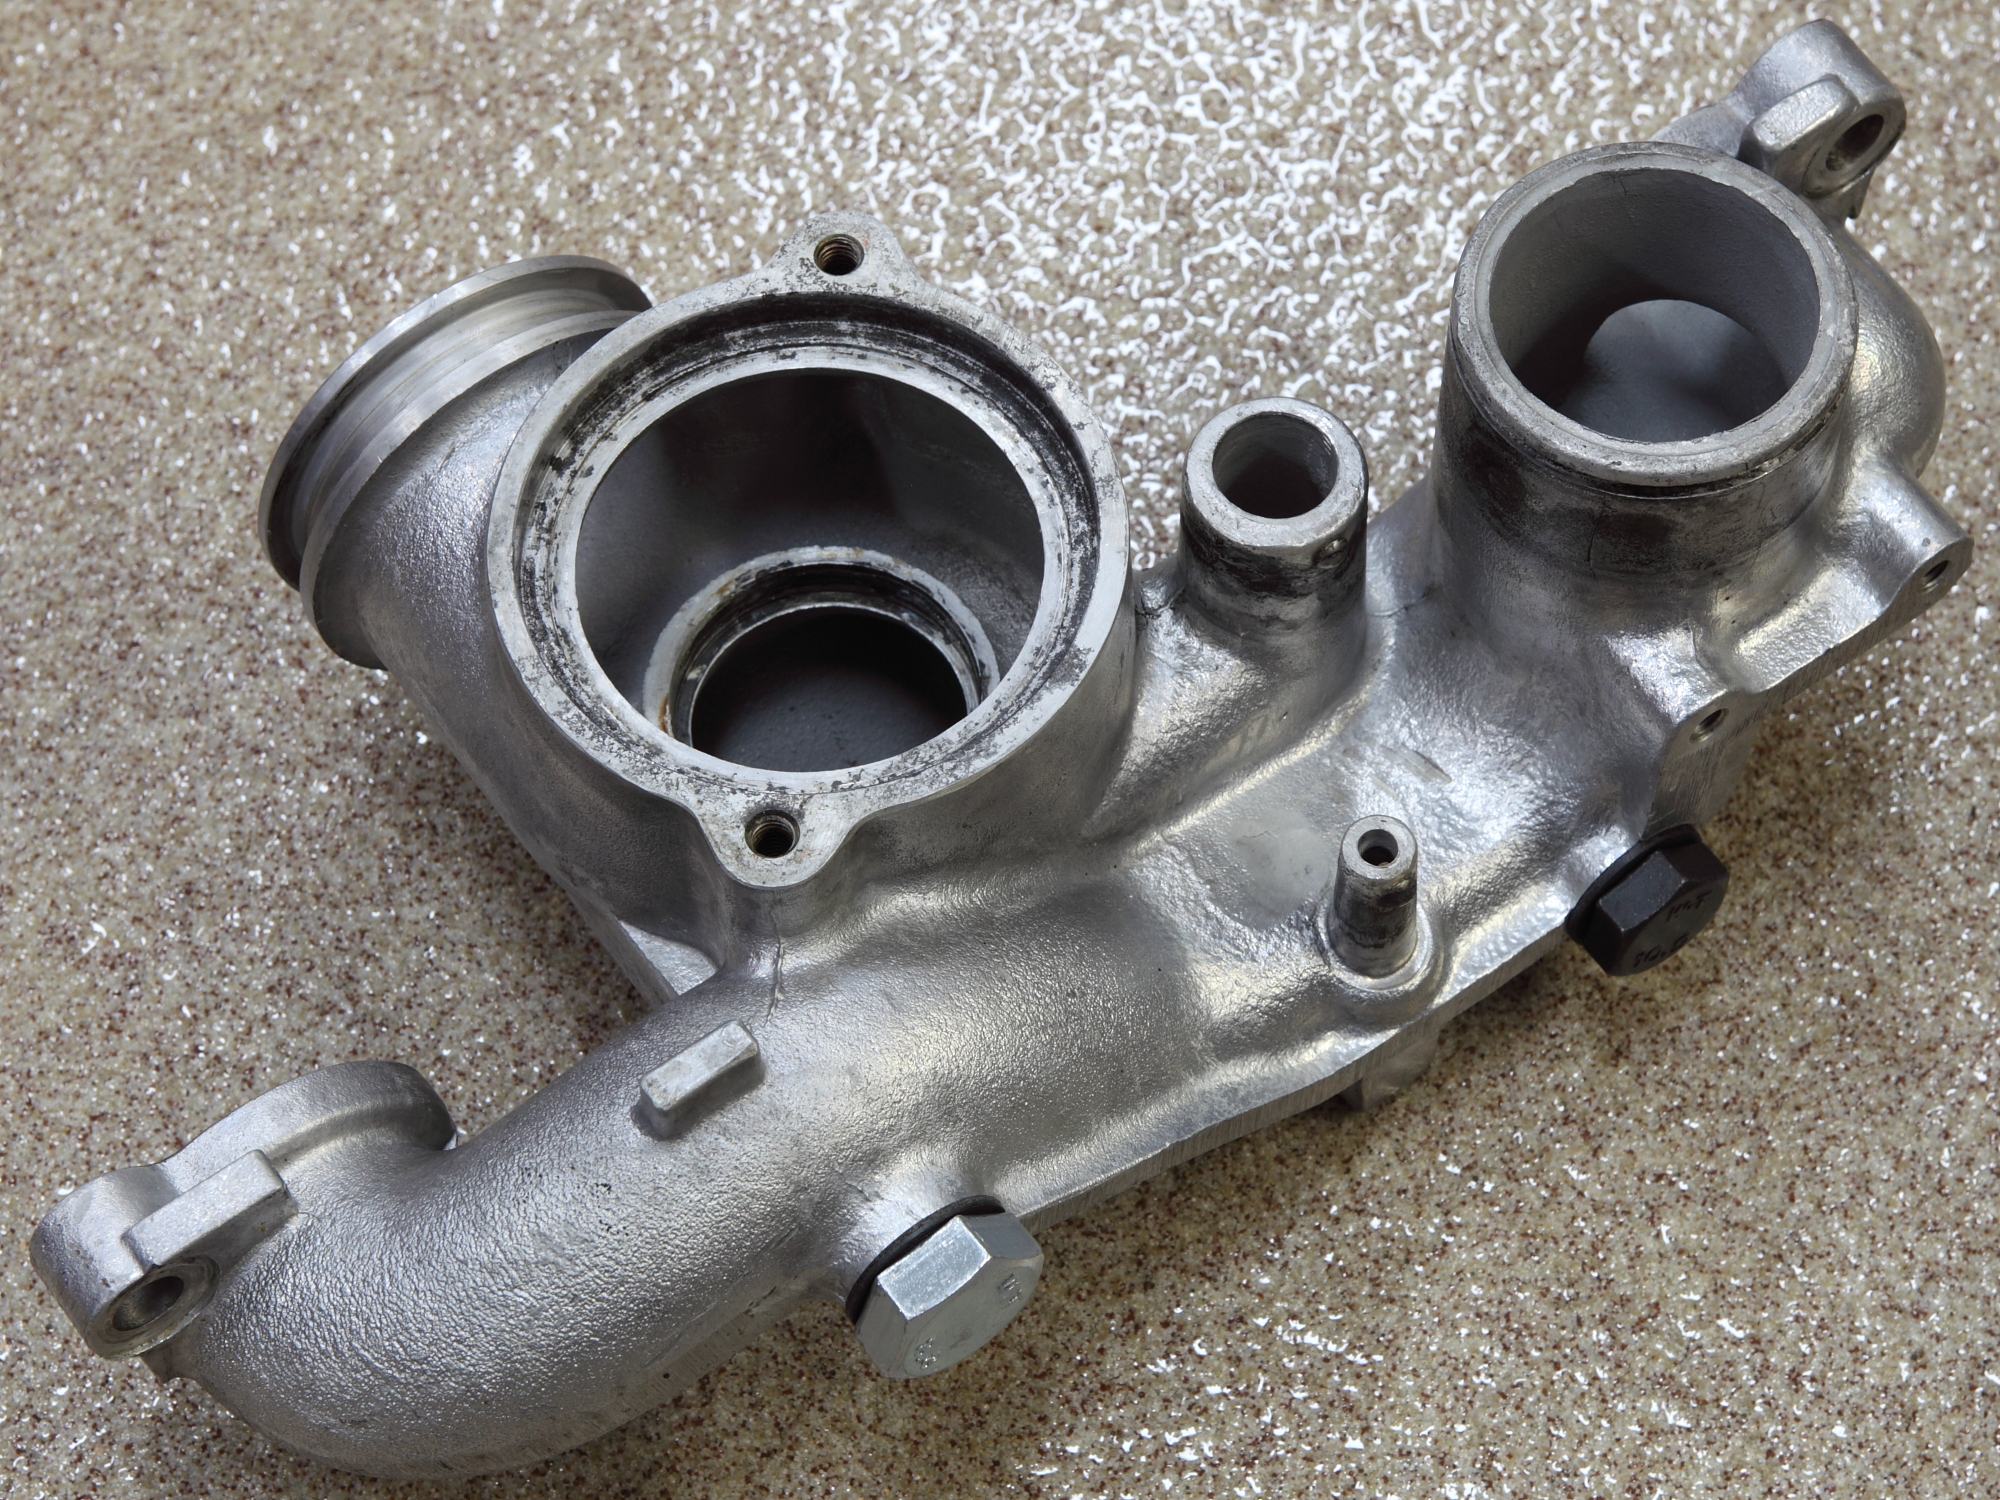
Water Bridge and Thermostat Elbow
Other Open Issues and Questions
Reassembly Notes
(The original point of this thread was to learn about and collect best practices for powder coating. See the "Original Background and Questions" section of this post for that original content. What follows immediately below is updated content based on the experience of going through this process.)
I've prepared the following guide (good for '87 through '95 model years) that you can either fill in with a few details (like the date and your contact information, your choice of powders, etc.) or even just rewrite as you see fit. This guide is intended to be provided to the people doing the powder coating work. It provides the kind of information a powder coater would probably like to know: what metals (e.g., aluminum, magnesium) are used for the various parts, how to mask/plug/cap the parts, how they should be prepped, etc.
I'm providing this in various forms: a PDF (good enough for printing if you just want to hand-write-in a few last details) and a Microsoft Word document (in both ".docx" format and the older ".doc" format) if you want to make more substantial modifications.
This guide worked for me and was the result of what I learned by asking a lot of questions in this thread. I make no claim that it represents the one and only correct way of powder coating these parts. It's your choice to use it as is, or to modify it in any way you want, or to do something entirely different.
- Porsche 928 87-95 Intake Powder Coating Guide, PDF format
- Porsche 928 87-95 Intake Powder Coating Guide, Microsoft Word (.docx) format
- Porsche 928 87-95 Intake Powder Coating Guide, Microsoft Word (.doc) format
As with many people, my refinishing work was done in conjunction with an intake refresh job; see the thread "Yet another top-end refresh (WAS: Trying to fix irregular/poor idle ...)" if you're interested in that entire rather lengthy project.
Remember that during the prep work for powder coating the intake, it'll be baked to eliminate oils and other contaminants; this will also melt the seals on the two flappy bearings. So... remember to order some replacement flappy bearings (see, for example, "Flappy Bearing - Change to design - Comments Please").
Before
For my own parts (on my '90 S4), I started with this:
After
Powder coating work was done by Industrial Coatings in Kansas City, KS, using aluminum oxide as the blast media, TIGER Drylac Silver Hybrid 09/90190 for the base coat, and TIGER Drylac Satin Clear for the top coat.
(24-May-2012 update: Silver Hybrid 09/90190 apparently has been discontinued. Antique Silver Metallic 59/90820 looks very similar based on the photo in their catalog; it might be an acceptable substitute.)
Results:


To finish it off even more, I used lettering (from Hooked on Cars) installed on the head (a.k.a. valve/cam) covers.

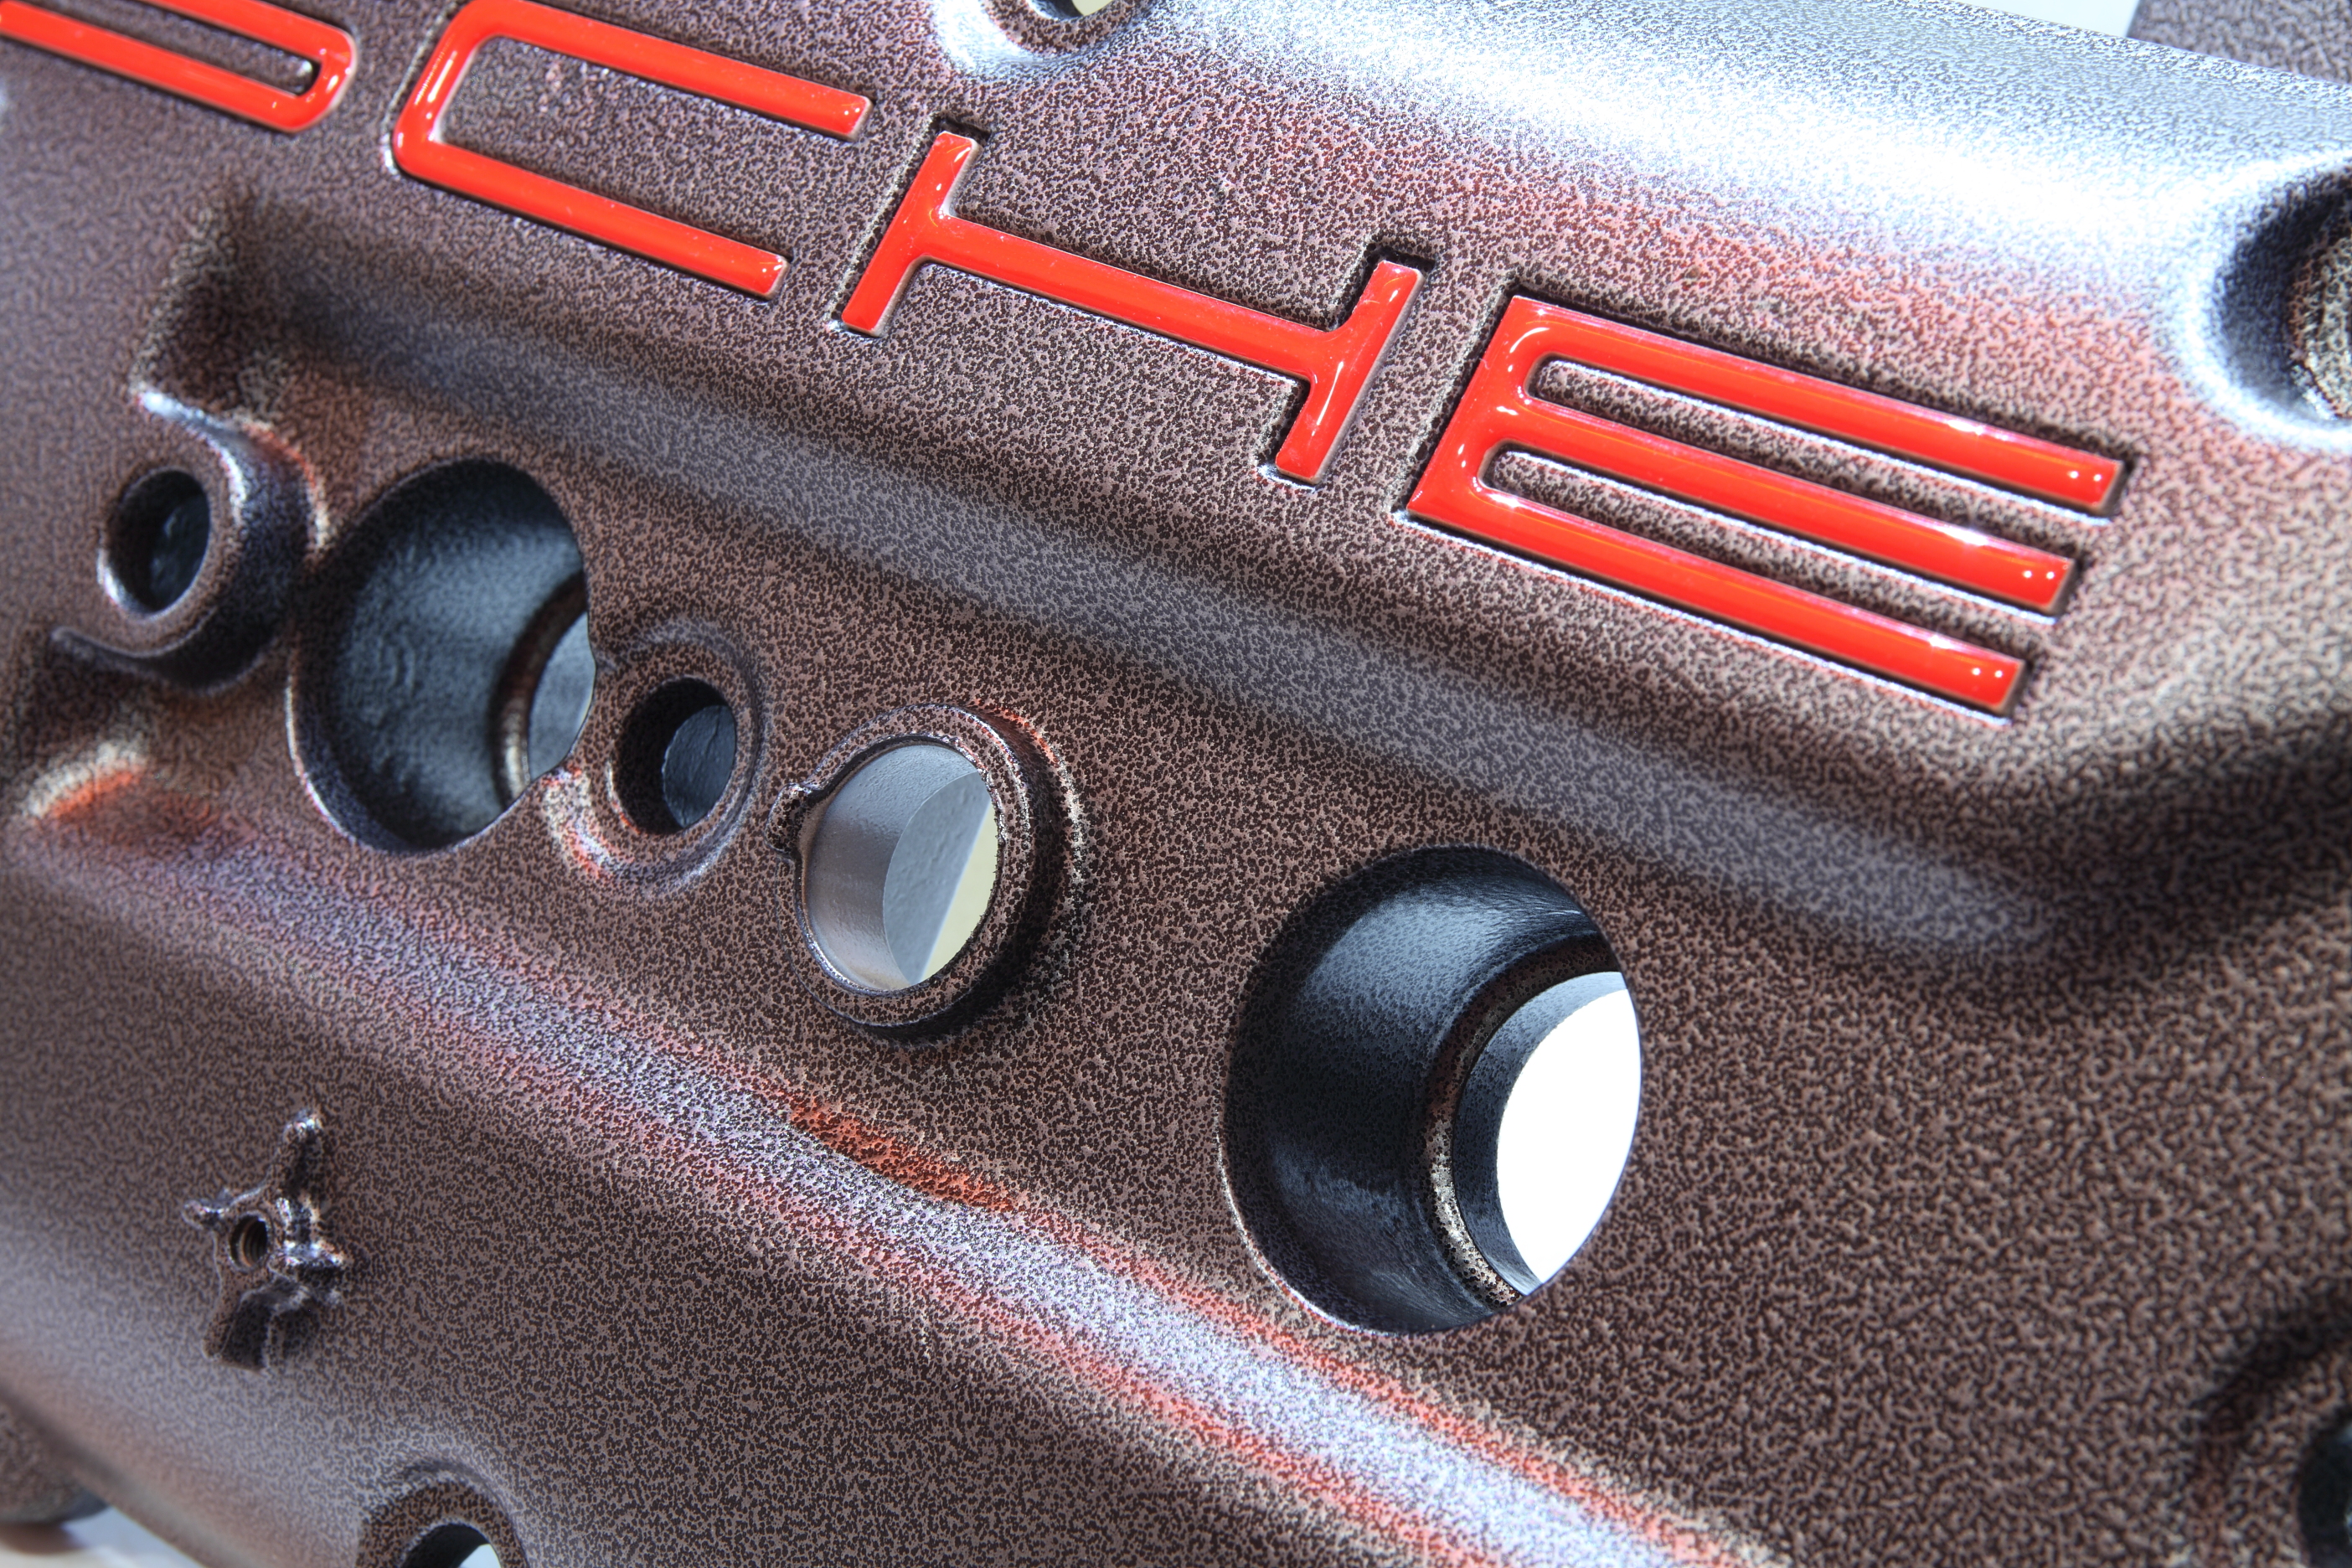

I thought that the Hooked on Cars lettering for the intake stuck out a bit too far (based on dry-fitting them and seeing what they looked like), so I decided to just paint the lettering (Dupli-Color "Scratch Fix 2in1" Universal Black NG SF 100 and Dupli-Color "Scratch Fix 2in1" Victory Red NG GM 519; got these at a local AutoZone; I used the brushes, not the rollers):
After reinstalling everything, it looked like this:
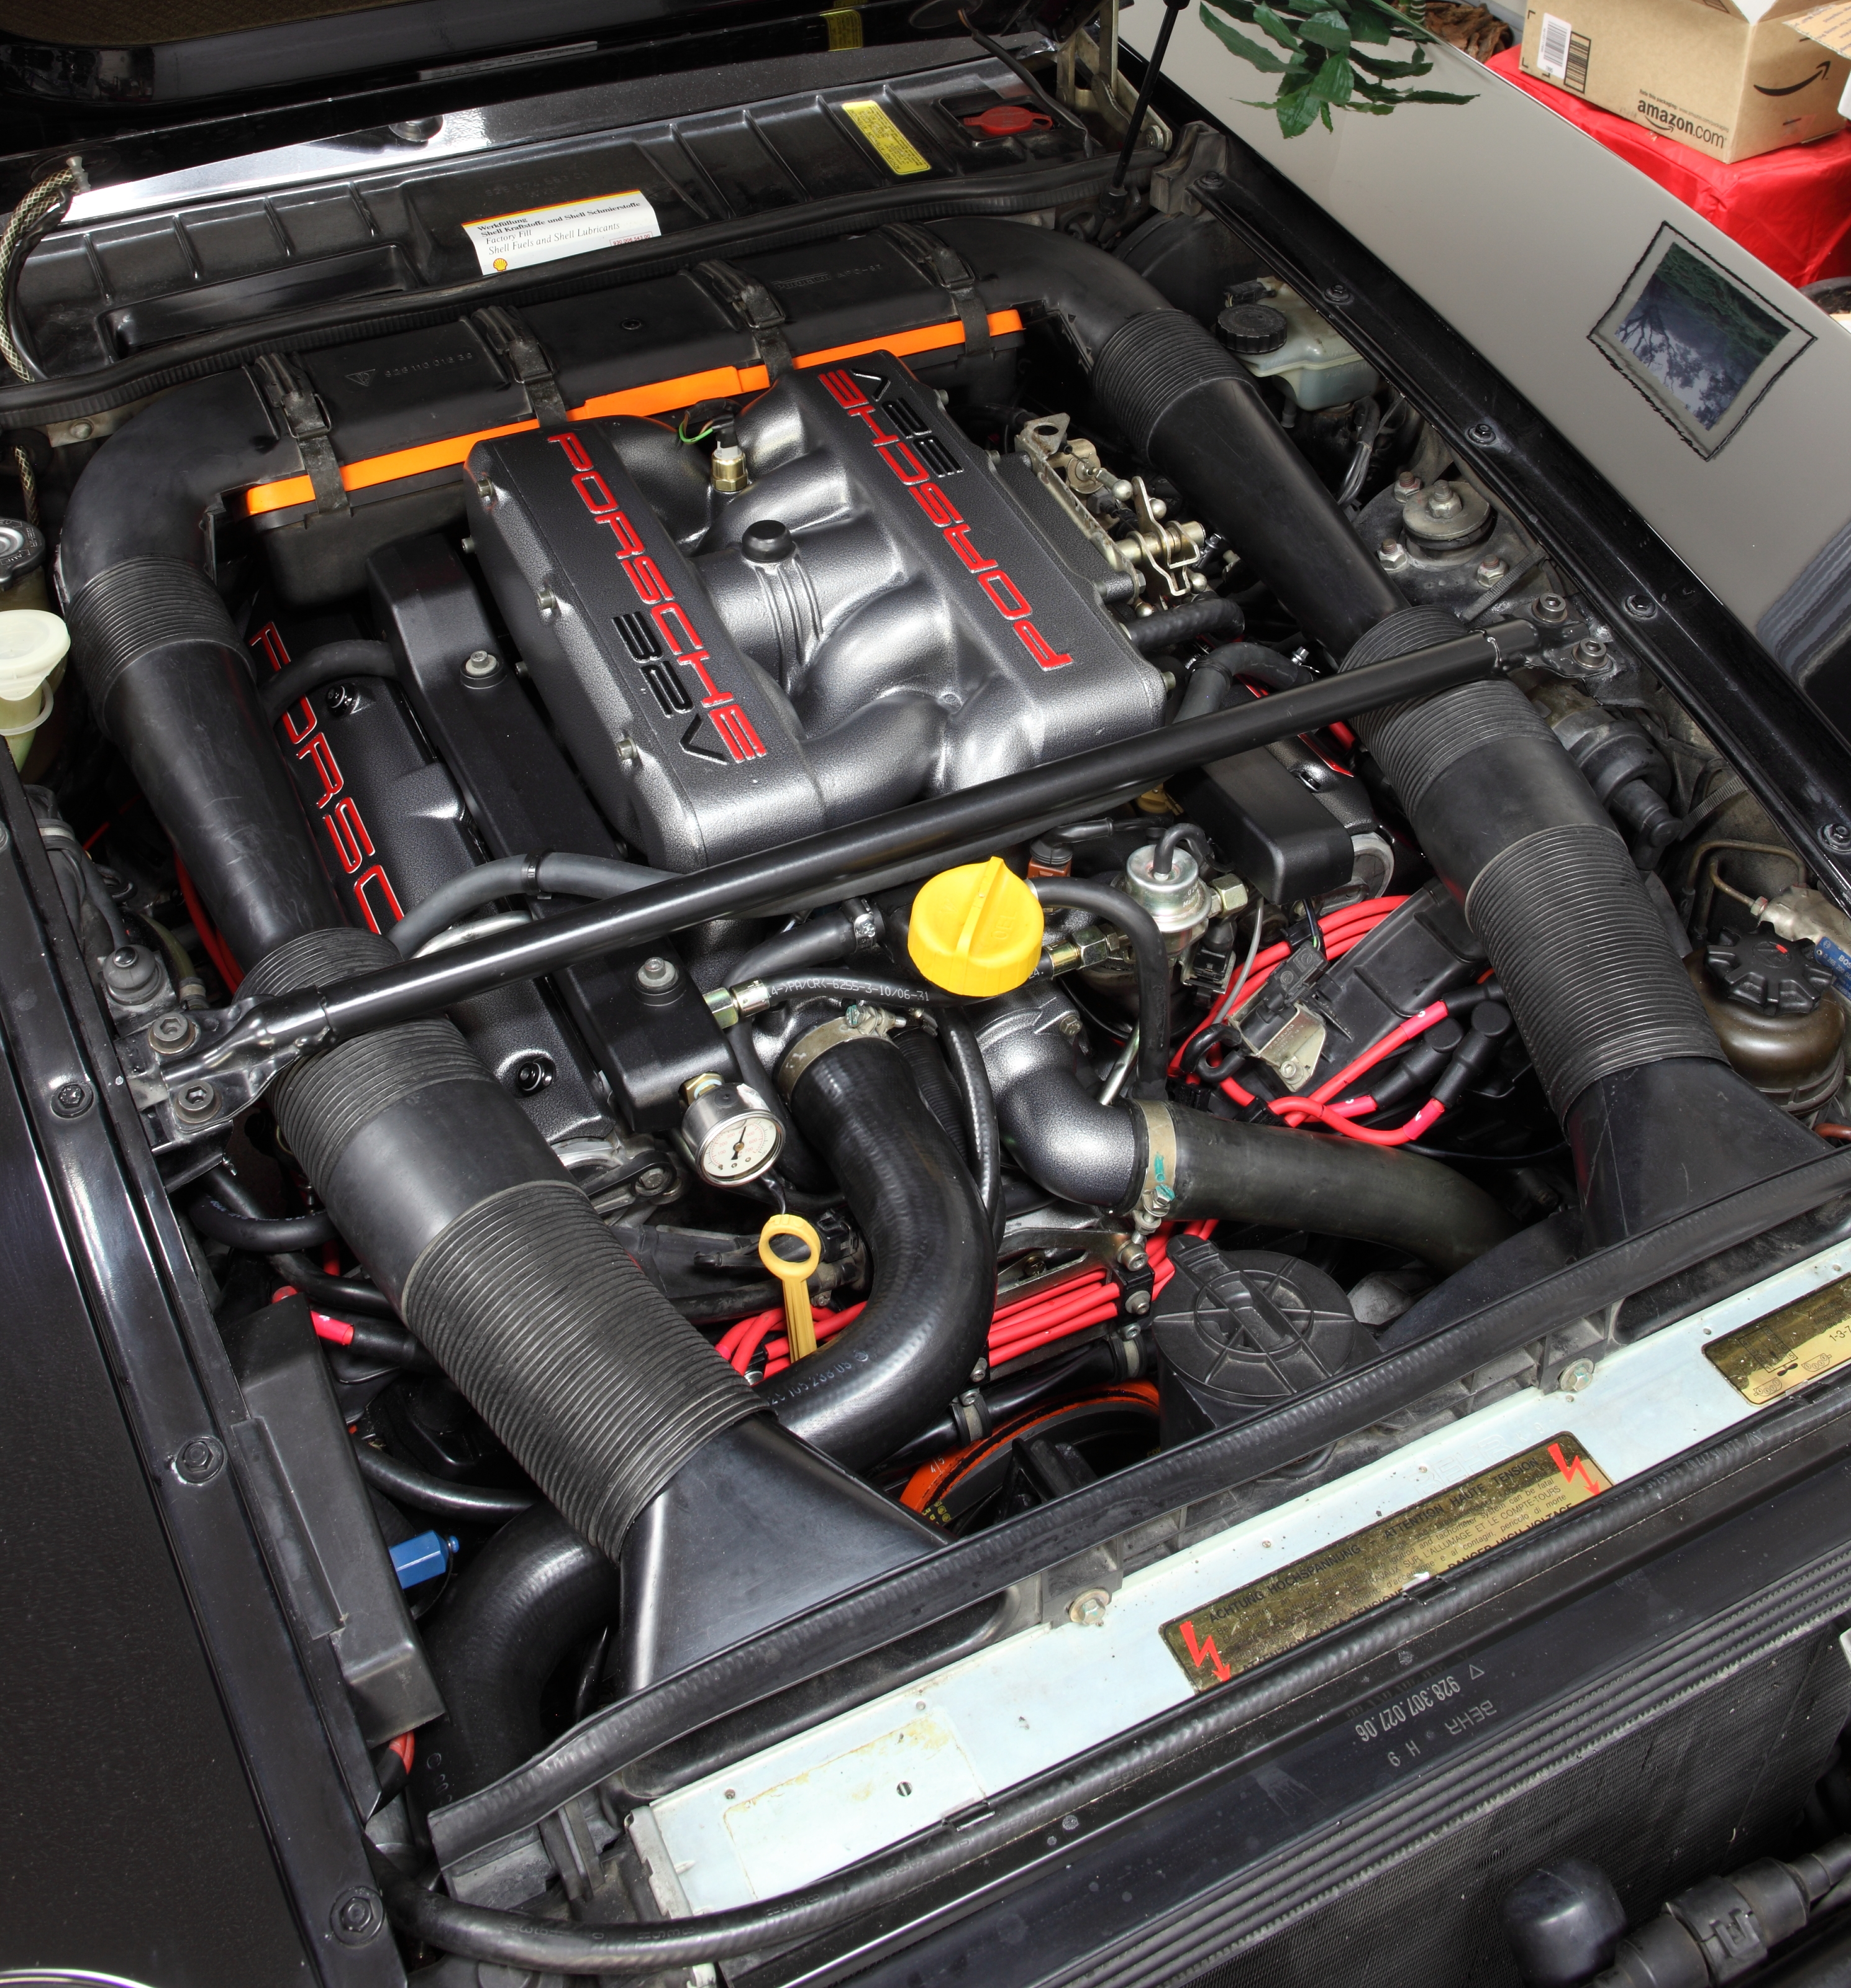
and, as of 11-Jun-2012, after installing a 928s R Us EIS, a 928MS cross brace, and a 928s R Us billet oil filler cap (all powder coated the same as everything else):


Original Background and Questions
After having read through a ton of threads on powder coating (or otherwise refinishing) intake, cam covers, and water bridge (and sometimes, upper timing belt covers, which I'm not planning on doing), I'm not seeing consensus on a few issues, or certain minor details haven't been answered to my satisfaction. And some of the threads are old, but people "tried things", yet I don't know how they turned out. (E.g., "elected to powder coat the gasket sealing area": did it eventually leak?) Are there new experiences that might alter our thinking on some powder-coating-related issues?
I'm looking for and wish to organize for future use ("for the general good"
) clear, unambiguous, best practices that anyone who's about to go the powder coating route could be armed with, such that mistakes can be avoided and quality results obtained.At this point, I'll just tackle S4/GT/GTS, as those are the only models I'm very familiar with.
My need is immediate (as I've got parts ready to be powder coated sitting my car, ready to go, and I'm expecting to take them in tomorrow morning and might delay further if I'm unsure of some details). But I'd be happy to continue maintaining this best practices list beyond my immediate needs and perhaps evolve it into a more comprehensive guide.
As I see it, there are the following considerations:
- Good cosmetic results (both short term and long term, i.e., longevity of finish, durability, etc.).
- Avoiding things that will result in reassembly problems ("Oops, crap!, the injectors won't fit in the seats anymore!").
- Avoiding things that will result in leaks (vacuum or oil), or, worse yet, damage.
What I'd like to do is summarize what I believe to be the best practices based on what I've read so far, potential practices (initially shown as "(open issue)") and then, based on feedback, I'll update this post.
Ultimately, I'd like to have a complete "Instructions for Powder Coaters" that could be given to your powder coater that, separately for each piece to be coated, would give one or more photos of that piece, annotated with clear instructions on what to mask or plug, and any other special instructions that apply.
General Cosmetics, Overall Procedures, and General Information
- Intake, intake end plates, and cam covers are (with a few exceptions of prototypes) generally a magnesium/aluminum alloy (powder coater might want to know this).
- Water bridge and thermostat elbow are aluminum (powder coater might want to know this).
- Existing finish should be removed by (optional) chemical stripping (any particular chemicals to use or avoid?) and media blasting with aluminum oxide (there might be other acceptable blast media, but some choices may not strip thoroughly enough).
- Bake for up to 24 hours at up to 475 �F (245 �C) to outgas the oils.
- Parts should be coated soon (how soon?) after prep work is complete, as bare parts will quickly oxidize.
- (open issue) Powders to use or avoid (polyester, epoxy, polyester/epoxy, etc.)?; appearance and durability are considerations.
- If you don't do significant prep work and sand or use any filler, there will be casting imperfections that might be effectively hidden using some kind of a textured finish.
- Clear coat can be applied over textured finish; this both protects the textured finish and smooths it out a little. (E.g., Eastwood recommends Super Gloss Clear be applied over Silver Vein).
- If you apply clear over a textured finish (e.g., Silver Vein), decide what sheen level you want. (E.g., is "Super Gloss Clear" too glossy? Might semi-gloss or satin be better for a 928 engine compartments?) (note: I used and was happy with satin)
Avoiding Reassembly Problems, Leaks, and Damage
Intake
- The outside should be (optional) chemically stripped and media blasted.
- The inside and the end plate gasket sealing surfaces should be chemically stripped and/or media blasted and left bare.
- For coating:
- Use tape to mask off where the side plates would go, as well as all the sealing surfaces on the bottom.
- Leave, but use a silicone cap to protect the four fuel rail mounting studs.
- Use a flanged silicone cap to protect the two flappy bearings (bearing replacement is also advised upon reassembly).
- Use a silicone plug to protect the intake temperature sensor hole.
- Use a silicone plug to protect the two flappy bracket tapped mounting holes.
- Use a silicone cap to protect the tension pin for the flappy stop nut.
- The fuel injector seating holes can be coated.
Intake Side Plates
- The outside should be (optional) chemically stripped and media blasted.
- The inside and the gasket sealing surfaces should be chemically stripped and/or media blasted and left bare.
- For coating:
- Use silicone plugs to protect the three tapped holes that hold the throttle cable bracket.
- Use tape to mask off the inside, starting at the outer gasket sealing surface. Consider using an old gasket to hold the tape in place.
Cam Covers
- The outside should be (optional) chemically stripped and media blasted.
- The inside and the gasket sealing surfaces should be chemically stripped and/or media blasted and left bare.
- For coating:
- Bolt holes should be closed with tape on the back.
- Spark plug holes should be closed with tape on the back.
- Breather holes should be closed with tape on the back.
Water Bridge and Thermostat Elbow
- The outside should be chemically cleaned and media blasted.
- The inside and should be chemically cleaned and/or media blasted and left bare.
- For coating:
- Use silicone flanged plugs at least as large as the sealing rings for the temperature sensors on top of the water bridge; this will prevent leaks in this area, particularly for textured finishes.
- Use tape to mask off the faces (on both the water bridge and the thermostat elbow) of where the neck attaches to the water bridge.
- Use tape to mask off the sealing surfaces on the bottom of the water bridge where it mates to each head.
- Use silicone plugs on all hose fittings.
- Use tape to mask off the water bridge to block opening; the area immediately above the O-ring seating area can be coated; everything below should be masked with tape.
Other Open Issues and Questions
- (probably a resolved issue; don't leave any of the original finish) If any surface of a piece (e.g., intake; e.g., intake end plate; e.g., cam cover) is to retain its original finish, that is a significant constraint on the whole process (especially prep work), isn't it? Does it preclude:
- chemical stripping? (at least in a bath; maybe a local surface stripper could still be carefully applied, with sensitive areas to be preserved well masked)?
- baking (to bake out the oils)?
- What cleaners or other things must be avoided to prevent damage to the original finish?
Reassembly Notes
- Thoroughly clean all finished items and make damn sure that no foreign material (well, German and American are OK... ) is left in the parts. Of particular concern is any blast media that wasn't cleaned out. It can kill engines.
- All sealing surfaces should be clean, smooth, and bare. If any such areas are not bare, use a gasket cleaning pad or a scotch-brite pad with a die grinder until the surface is smooth and bare. A razor or utility knife might also work, but be very careful not to nick the metal.
- Since gasket sealing areas are bare, no special additional sealant (beyond what's already recommended in the WSM) needs to be used.
- Make sure that the water bridge is electrically grounded to the block via at least one of the bolts; if the area under the washers isn't bare metal (from proper masking), scrape away enough material and/or use a star washer until a good ground is achieved.
Last edited by Ed Scherer; 06-11-2012 at 08:48 PM.
 09-07-2010, 07:19 PM
#2
Not the sharpest tool in the shed
Rennlist Member
Rennlist Member
Least work with least risk is just to spray them with high quality paint. I would not PC any mating surface. Problem then becomes flaking along abrupt edges like the cam cover.
Color is also an issue if you are looking for an authentic Porsche color PC can be tough to get right.
Color is also an issue if you are looking for an authentic Porsche color PC can be tough to get right.
09-07-2010, 07:33 PM
#3
Addict
Rennlist Member
Rennlist Member
Thread Starter
I just need to tell them what to do. I don't mind paying for good work.As to risk, I'd definitely like to know about any "sad stories" and misfortune so as to not repeat a mistake. I'm aware of the "left over blast media killed engine" story. I'd definitely do some post cleaning to make damn sure that nothing evil is left inside the parts. (Hey, I just added that to my original post).
That is, however, a worthy topic and experience in this area would also be useful: e.g., a nice list of specific colors that work / don't work / match original colors / etc.
Thanks for the comments, Dan.
09-07-2010, 07:52 PM
#4
Hi Ed
I used high quality paint for mine which has held up great. I would of powder coated but ran out of time....One issue I read about from Andrew Olson was a temp sensor on the water bridge that lost ground when reset on the powder coating, he resolved with an extra wire to ground on a bolt nearby. Hopefully Andrew O will see this and clarify as I am going from memory about his issue.
I think that is what you are speaking of with # 1 on the water bridge and thermostat.
Ole
09-07-2010, 07:57 PM
#5
Rennlist Member
Nice job on this thread, it would be great to get the process detailed.
I stripped mine and used Duplicolor directly on the bare metal and its flaking off. Bad call.
I stripped mine and used Duplicolor directly on the bare metal and its flaking off. Bad call.
09-07-2010, 08:01 PM
#6
Addict
Rennlist Member
Rennlist Member
Thread Starter
One issue I read about from Andrew Olson was a temp sensor on the water bridge that lost ground when reset on the powder coating, he resolved with an extra wire to ground on a bolt nearby. Hopefully Andrew O will see this and clarify as I am going from memory about his issue.
I think that is what you are speaking of with # 1 on the water bridge and thermostat.
Ole
I think that is what you are speaking of with # 1 on the water bridge and thermostat.
Ole
Last edited by Ed Scherer; 05-09-2011 at 11:50 PM. Reason: Added photo.
Trending Topics
09-08-2010, 12:46 AM
#8
Rennlist Member
Inspect inspect inspect upon re-assembly.
Have a tap handy to clean up the manifold temp sensor hole. No I don't remember the size.
I used chemical strip (AIRCRAFT STRIPPER (tm)) + media. It took forever.
I did not do the underside/inside of the covers. I cleaned up the edges a bit so they wouldn't flake, but didn't coat them.
I did not do the water bridge.
If I remember correctly, the inside of the injector holes was coated and it wasn't a problem.
I believe the inside of the side plates was left raw but I cannot recall for sure.
The results are awesome. This is an Eastwood coat, silver-vein. I have no idea if it was clearcoated or not!
This is all I remember right now!!!
09-08-2010, 01:00 AM
#9
Addict
Rennlist Member
Rennlist Member
Thread Starter
Inspect inspect inspect upon re-assembly.
Have a tap handy to clean up the manifold temp sensor hole. No I don't remember the size.
I used chemical strip (AIRCRAFT STRIPPER (tm)) + media. It took forever.
I did not do the underside of the covers.
I did not do the water bridge.
The results are awesome. This is an Eastwood coat, silver-vein. I have no idea if it was clearcoated or not!
I'd expect that the intake temp sensor hole would have been plugged like any other tapped holes, wouldn't/shouldn't it? I've got a bolt that will fit it (it's the same size as temp gauge sensor hole in the water bridge).
I'll update my original post to indicate "don't finish inside of cam covers and intake end plates."
Yeah, I really like that Eastwood Silver Vein and your photo is probably the best one I've seen to show it off. How smooth is yours? Were your injector seats coated? Any problems getting injectors back in?
I was going to finish the lettering in red, but after seeing your photo, I might just leave it as is; it looks nice and classy.
Also, I note that your vac line to the (IIRC) fuel tank vent actuator passes through your passenger side fuel rail cover. Was that your idea? I don't think I've seen that before, but it seems rather nice.
Oh, and am I seeing this correctly?: Are the edges of your intake end plates polished (and maybe clearcoated), but not powder coated? They look different than the rest of the intake. Is that what you meant by "I cleaned up the edges a bit so they wouldn't flake, but didn't coat them"? Please explain more.
Last edited by Ed Scherer; 09-08-2010 at 01:15 AM.
09-08-2010, 01:09 AM
#10
Rennlist Member
If you've got a bolt handy that fits the intake sensor hole, sure plug that one up. It'll save you the need for the tap!
We were worried about long term peeling under the cam covers. After I cleaned them up the surface was pretty stable, thus voted to leave it alone. I cleaned them up a little where the stripper ran over the edges, that's what I meant about cleaning it up so it wouldn't flake. At the outset I used a 1300psi pressure washer (one of the home depot electric jobs), then stripper + wire brush for prep.
I'm pretty sure the Injector seats were coated. No issues that I recall. Just a little WD40 required on install. 9 months post install and it all still looks good.
I couldn't remember what that hole in the fuel rail cover was there for when I put everything back together (I did a full top end rebuild, so the motor was on the floor for about 6 months) so I threaded that vacuum line through because it seemed "right". I didn't drill it myself, and you're not the first one to notice.
I got sneaky, I have a set of Roger's intake spacers on there. I trimmed all the fuel rail covers to fit so it looks close to stock. That's why the end plates look polished.
I also spent an afternoon with Caswell's black coating kit after buffing and polishing all the washers and hardware.
I'll have to think of a similar surface for comparison of the roughness of the finish.
09-08-2010, 01:22 AM
#11
Rennlist Member
Ed, I PC'd my 89GT intake and cam covers. The guy I used did a lot of aircraft parts and was familiar with FAA requirements. Based on his recommendations and my requirements we did the following:
1. Media blasted all parts, inside and outside. Used walnut shells IIRC but I'm sure it was not sand.
2. Baked all parts for 24 hours to get rid of all oil. (The intake is an aluminum magnesium alloy, not pure magnesium.)
3. PC'd only the outside of all parts. (The original finish is some sort of epoxy and it flakes off so the PC will too with expansion/contraction etc.) We did PC the injector holes. The rubber o-rings have enough give to still fit well.
4. Did not PC any mating surface or internal or external thread areas. One mistake he made was two studs with external threads somehow got PC'd. Man were they a bitch to run a dye down them to re-cut the threads. Every turn of the dye I expected the stud to break off. Hence, any internal thread may not accept the bolt/sensor that came out of that hole. This would include the holes for the flappy bearings. And per AO's comments you will lose any ground connection.
5. When I got it back I washed, back flushed, scrubbed, rinsed and blew out every hole, port, and opening several times.
6. Re-installation was per the MM directions, using Porsche gaskets, seals and permetex only where recommended.
Bottom line; The engine still looked perfect 4 years later, with no flaking, cracking or damage to the PC finish. One last item, I run the Nology ignition wires which will not fit in the stock wire supports. So, I ground off the little + castings on the cam covers and filled the bolt holes with Devcon aluminum putty P/N 10610. These areas were also perfect 4 years later.
09-08-2010, 01:27 AM
#12
Rennlist Member
Ah yes, mine was coated WITH the old flappy bearings in place. Pulling them out afterwards was stressful but at least I knew there was no goo messing up the holes.
09-08-2010, 01:30 AM
#13
Addict
Rennlist Member
Rennlist Member
Thread Starter
Ed, I PC'd my 89GT intake and cam covers. The guy I used did a lot of aircraft parts and was familiar with FAA requirements. Based on his recommendations and my requirements we did the following:
1. Media blasted all parts, inside and outside. Used walnut shells IIRC but I'm sure it was not sand.
2. Baked all parts for 24 hours to get rid of all oil. (The intake is an aluminum magnesium alloy, not pure magnesium.)
3. PC'd only the outside of all parts. (The original finish is some sort of epoxy and it flakes off so the PC will too with expansion/contraction etc.) We did PC the injector holes. The rubber o-rings have enough give to still fit well.
4. Did not PC any mating surface or internal or external thread areas. One mistake he made was two studs with external threads somehow got PC'd. Man were they a bitch to run a dye down them to re-cut the threads. Every turn of the dye I expected the stud to break off. Hence, any internal thread may not accept the bolt/sensor that came out of that hole. This would include the holes for the flappy bearings. And per AO's comments you will lose any ground connection.
5. When I got it back I washed, back flushed, scrubbed, rinsed and blew out every hole, port, and opening several times.
6. Re-installation was per the MM directions, using Porsche gaskets, seals and permetex only where recommended.
Bottom line; The engine still looked perfect 4 years later, with no flaking, cracking or damage to the PC finish. One last item, I run the Nology ignition wires which will not fit in the stock wire supports. So, I ground off the little + castings on the cam covers and filled the bolt holes with Devcon aluminum putty P/N 10610. These areas were also perfect 4 years later.
1. Media blasted all parts, inside and outside. Used walnut shells IIRC but I'm sure it was not sand.
2. Baked all parts for 24 hours to get rid of all oil. (The intake is an aluminum magnesium alloy, not pure magnesium.)
3. PC'd only the outside of all parts. (The original finish is some sort of epoxy and it flakes off so the PC will too with expansion/contraction etc.) We did PC the injector holes. The rubber o-rings have enough give to still fit well.
4. Did not PC any mating surface or internal or external thread areas. One mistake he made was two studs with external threads somehow got PC'd. Man were they a bitch to run a dye down them to re-cut the threads. Every turn of the dye I expected the stud to break off. Hence, any internal thread may not accept the bolt/sensor that came out of that hole. This would include the holes for the flappy bearings. And per AO's comments you will lose any ground connection.
5. When I got it back I washed, back flushed, scrubbed, rinsed and blew out every hole, port, and opening several times.
6. Re-installation was per the MM directions, using Porsche gaskets, seals and permetex only where recommended.
Bottom line; The engine still looked perfect 4 years later, with no flaking, cracking or damage to the PC finish. One last item, I run the Nology ignition wires which will not fit in the stock wire supports. So, I ground off the little + castings on the cam covers and filled the bolt holes with Devcon aluminum putty P/N 10610. These areas were also perfect 4 years later.
You say "media blasted all parts inside and outside." Does that include the intake? So are all of these parts bare metal on the inside now? Are there any issues with that? If not, why wouldn't Porsche have done it that way in the first place? It seems prudent, if there are no drawbacks, since that means there's no finish to ever peel off and be ingested.
Yeah, I'll make sure those four fuel rail mounting studs are covered. That's one of the reasons I wanted to work all this out in advance. I'd really like to give the PCer guy very clear instructions for each part so that no mistakes will be made.
I've got the Nology "fatties", too, and I think only one wire on each side fits in the supports. I'll probably leave them, though, in case I ever revert to standard cables.
09-08-2010, 01:31 AM
#14
Addict
Rennlist Member
Rennlist Member
Thread Starter
Yeah, I'm going to replace mine, so I'll just make sure they get masked/plugged so they're not too hard to extract.
Last edited by Ed Scherer; 09-21-2010 at 12:20 PM.
09-08-2010, 01:35 AM
#15
Addict
Rennlist Member
Rennlist Member
Thread Starter
BTW, at this point, I still regard "the insides of intake / intake end plates / cam covers should be left with the original finish" vs. "strip and media blast the insides of intake / intake end plates / cam covers" as controversial. And maybe the same thing with the gasket sealing surfaces on those same parts.
I've heard two schools of thought on this and would really like to understand the issues better.
If either way is acceptable, that would be good to know, too. Seems like the finish on the inside of the intake is pretty robust; I'm not so sure about the cam covers and intake end plates, though.
I've heard two schools of thought on this and would really like to understand the issues better.
If either way is acceptable, that would be good to know, too. Seems like the finish on the inside of the intake is pretty robust; I'm not so sure about the cam covers and intake end plates, though.