
Advice please re. replacing sheared wing stud
 09-08-2013, 11:22 PM
#1
Pro
Thread Starter
Join Date: Dec 2010
Location: Palgrave, Ontario, Canada
Posts: 700
Likes: 0
Received 2 Likes
on
2 Posts
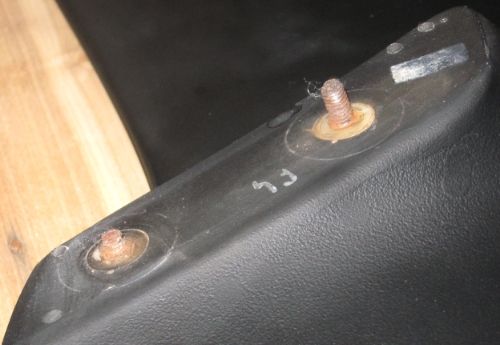
The rear wing on my recently acquired '90 is in great shape, except that one of the securing studs is sheared off level with the hatch surface. It looks like the nut rusted in and someone broke the stud removing the bolt:
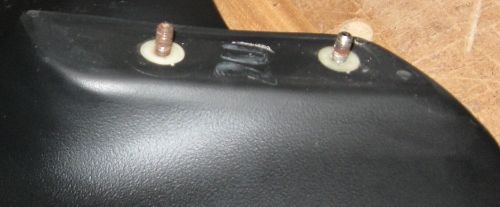
In comparison, the ones on the other side are great:
I have searched and seen many posts where the whole stud assembly has pulled out of the wing, but not seen this particular situation.
I assume that the stud and surrounding white plastic is cast into the wing in one piece, and that attempts to remove the broken stud by twisting or pulling will rip the white plastic out of the wing.
Therefore my plan is to cut off the protruding piece of stud, drill out the rest of the stud in stages (increasing size bits), tap the hole, then remove the head of a metric bolt of the correct size and screw it in to the white plastic, securing it with epoxy.
Does that make sense? Is there a better approach?
Thanks.

In comparison, the ones on the other side are great:

I have searched and seen many posts where the whole stud assembly has pulled out of the wing, but not seen this particular situation.
I assume that the stud and surrounding white plastic is cast into the wing in one piece, and that attempts to remove the broken stud by twisting or pulling will rip the white plastic out of the wing.
Therefore my plan is to cut off the protruding piece of stud, drill out the rest of the stud in stages (increasing size bits), tap the hole, then remove the head of a metric bolt of the correct size and screw it in to the white plastic, securing it with epoxy.
Does that make sense? Is there a better approach?
Thanks.
 09-08-2013, 11:36 PM
#2
Team Owner
that sounds like a good idea JB weld should work to hold the new bolt in place,
clean the other studs and apply some antiseize,
might be wise to invest in some new cap nuts
clean the other studs and apply some antiseize,
might be wise to invest in some new cap nuts
 09-08-2013, 11:43 PM
#3
Nordschleife Master
First check the sheared one is solid at the base - see if it wiggles.
If not, then great - just cut off the sheared but at the base of the stump, and drill a 5mm diam. hole and tap for an M6 thread. Then screw in a stud of appropriate length with some red loctite.
That worked for me on the one of mine which had a solid base. My other one had somehow got moisture into the base and rusted underneath the white plastic bushing, so was much more involved.
One other handy hint - measure the holes on the hatch center-to-center, then make a wooden jig with two 6mm holes drilled parallel to each other perpendicular to the face.
Test the jig on the side with 2 good studs to make sure its accurate and fits over both studs, then use that to make sure you're drilling and tapping straight on the one that needs repair.
09-08-2013, 11:45 PM
#4
Team Owner
good idea on the drill guide Hilton
09-12-2013, 12:00 PM
#6
Pro
Thread Starter
Join Date: Dec 2010
Location: Palgrave, Ontario, Canada
Posts: 700
Likes: 0
Received 2 Likes
on
2 Posts
Well the job is done - but not how I originally planned.
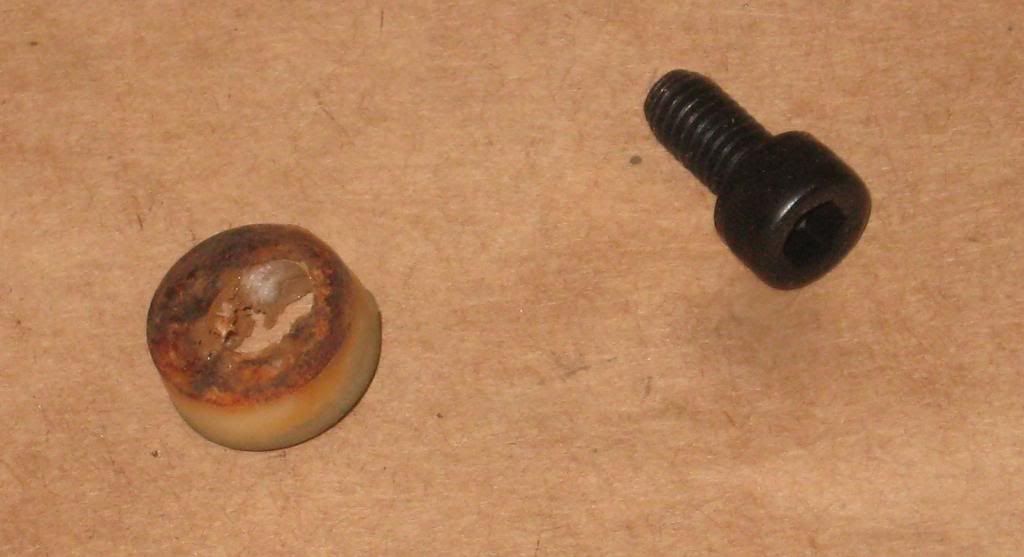
I cut off the stub. I then attempted to drill the remainder out. I found it very hard to stay centered on the stud, as the drill bit tended to wander to the side, and as soon as it hit the plastic surrounding the stud it drove sideways. In the end, after I was in about 1/4" the white plastic popped out (pic below). I was not keen on repeating this as I drove in to the wing below. So I tried something different.
I noticed that one of my shorter hex head metric bolts was almost exactly the correct length, with the bolt head fully in the recess:
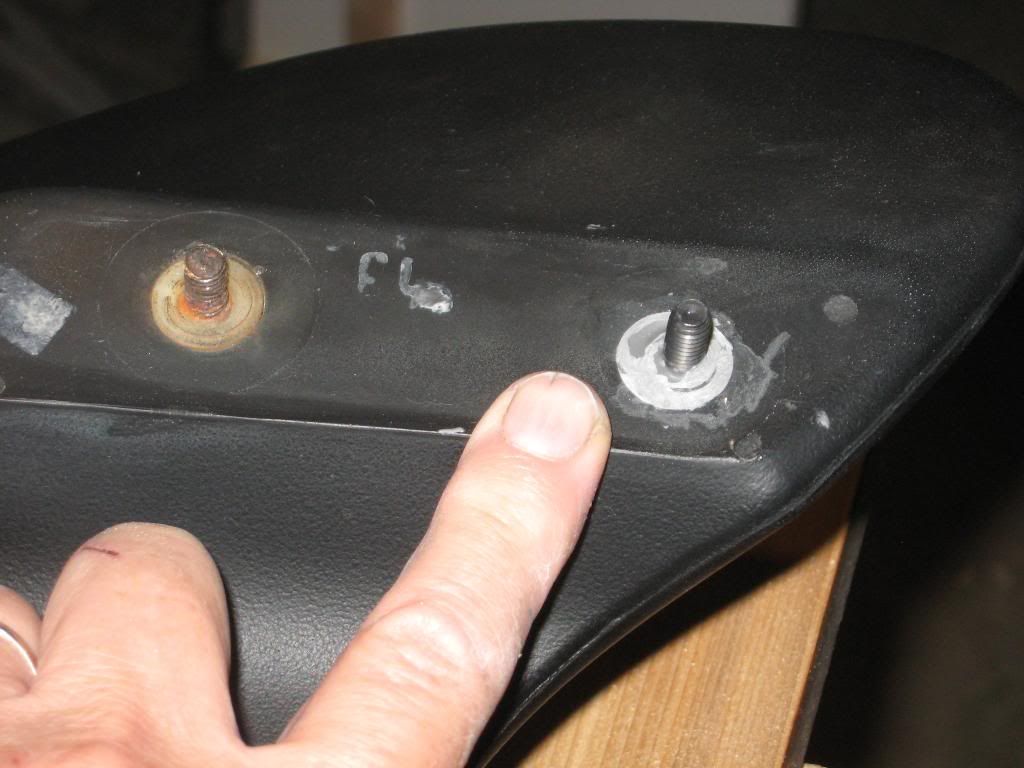
I drilled out the hex socket with a bit so that it actually fitted over the remaining stud stub. I then masked off the wing around the hole and filled the recess with JB Weld. I ensured that the bolt was aligned correctly using the aluminum backing plate that goes on the underside of the hatch between the two holes.
After curing overnight, I scored around the edges of the JB where it had flowed on the masking tape, then peeled off the tape and overlapping epoxy:

After a little bit of grinding with my Dremel and a conical grind stone, here is the result:
I'm going to give it a full 24hr+ to cure before attempting to reattach. The obvious question is, "Will it hold?" TBD... but I would say that the connection between the new bolt head and the old stud will be critical.
I cut off the stub. I then attempted to drill the remainder out. I found it very hard to stay centered on the stud, as the drill bit tended to wander to the side, and as soon as it hit the plastic surrounding the stud it drove sideways. In the end, after I was in about 1/4" the white plastic popped out (pic below). I was not keen on repeating this as I drove in to the wing below. So I tried something different.
I noticed that one of my shorter hex head metric bolts was almost exactly the correct length, with the bolt head fully in the recess:

I drilled out the hex socket with a bit so that it actually fitted over the remaining stud stub. I then masked off the wing around the hole and filled the recess with JB Weld. I ensured that the bolt was aligned correctly using the aluminum backing plate that goes on the underside of the hatch between the two holes.
After curing overnight, I scored around the edges of the JB where it had flowed on the masking tape, then peeled off the tape and overlapping epoxy:

After a little bit of grinding with my Dremel and a conical grind stone, here is the result:

I'm going to give it a full 24hr+ to cure before attempting to reattach. The obvious question is, "Will it hold?" TBD... but I would say that the connection between the new bolt head and the old stud will be critical.
09-12-2013, 12:29 PM
#7
Electron Wrangler
Lifetime Rennlist
Member
Lifetime Rennlist
Member
Humm - I suspect it won't hold against much stress due to the small contact patch.
If you need to redo it - I'd suggest using a small holesaw (1/2" - 5/8"?) - start it then remove the center bit and keep going to a reasonable depth ~1". I'd use either the holesaw angled variously to make the cut more reverse conical before snapping it off off with a chisel, or just remove and use a dremmel to widen the bottom of the hole (asymmetrically is best) - then using your alignment jig - I'd epoxy or JB- Weld a hex head bolt into that at the bottom - let it set - then finish the top part with the jig removed for finishing access.
Alan
Trending Topics
09-12-2013, 12:39 PM
#8
Archive Gatekeeper
Rennlist Member
Rennlist Member
For those looking for additional approaches to wind studs that are farther gone than Martinss', here's a link.
https://rennlist.com/forums/928-foru...t-started.html
https://rennlist.com/forums/928-foru...t-started.html