When you click on links to various merchants on this site and make a purchase, this can result in this site earning a commission. Affiliate programs and affiliations include, but are not limited to, the eBay Partner Network.
Hello, my '86 has been standing for +5 years, had a Vitesse turbo kit that was going in but I decided to sell it and look for a 968 engine but that never happened.
Car was last running 2012 and I kind of forgot how to put it back together, sort of
Status when I left it;
swapped to manual steering rack,
PU bushings
installed a Vitesse MAF kit, tested fine with smooth running
Decided to rebuild the turbo (a little smokey and slack bearing)
Other cars came in the way but now this car is a "classic" (and cheap to keep on the road) and I am going to finish it and prep it slightly for regularity rally and track day use. Original turbo, original wastegate, only engine mod is really the MAF kit.
New PC's and changes made me loose my "best saved threads" and now I'd be happy if somone could point me in the direction to "official":
DIY timing belt change?
Cleanup the vacuum system?
TheVenturi delete will be this one I suppose, dont even remember if I have the venturi (86.5)
The Cycling valve delete? I did not find an official thread but from what I read I will replace the valve with a Manual boost controller? Is it really needed?
The process has started, I just got a rebuilt K26 in the mail, have silicone hoses for the coolant, vaccum, basically the whole engine room, new timing belt, engine mounts etc. My goal is to have engine running in a few weeks time weeks time and then proceed with small mods and reduce the weight of the car.
Any advice will be appreciated, I need a "push in the back" and hope I can use this thread if I get stuck.
One of the last time it was out, must have been at least 6 years ago but perhaps even 2011, it is on 16" wheels now, dont like the handling with anything larger in diameter.
Since your turbo is off, perhaps you should change the AOS seals.
When searching for good threads and write-ups, I simply use terms that describe what I'm doing plus "951"; this usually results in good Rennlist threads and leads.
I really like the Youtube videos on many procedures: Van Svenson, edredas, irina25661 (German guy), etc.
The work you're looking to do on the "top" is fun work! Enjoy it. You'll remember it well when you go to do the clutch
AOS seals, thanks yes I have them on the shopping list now!
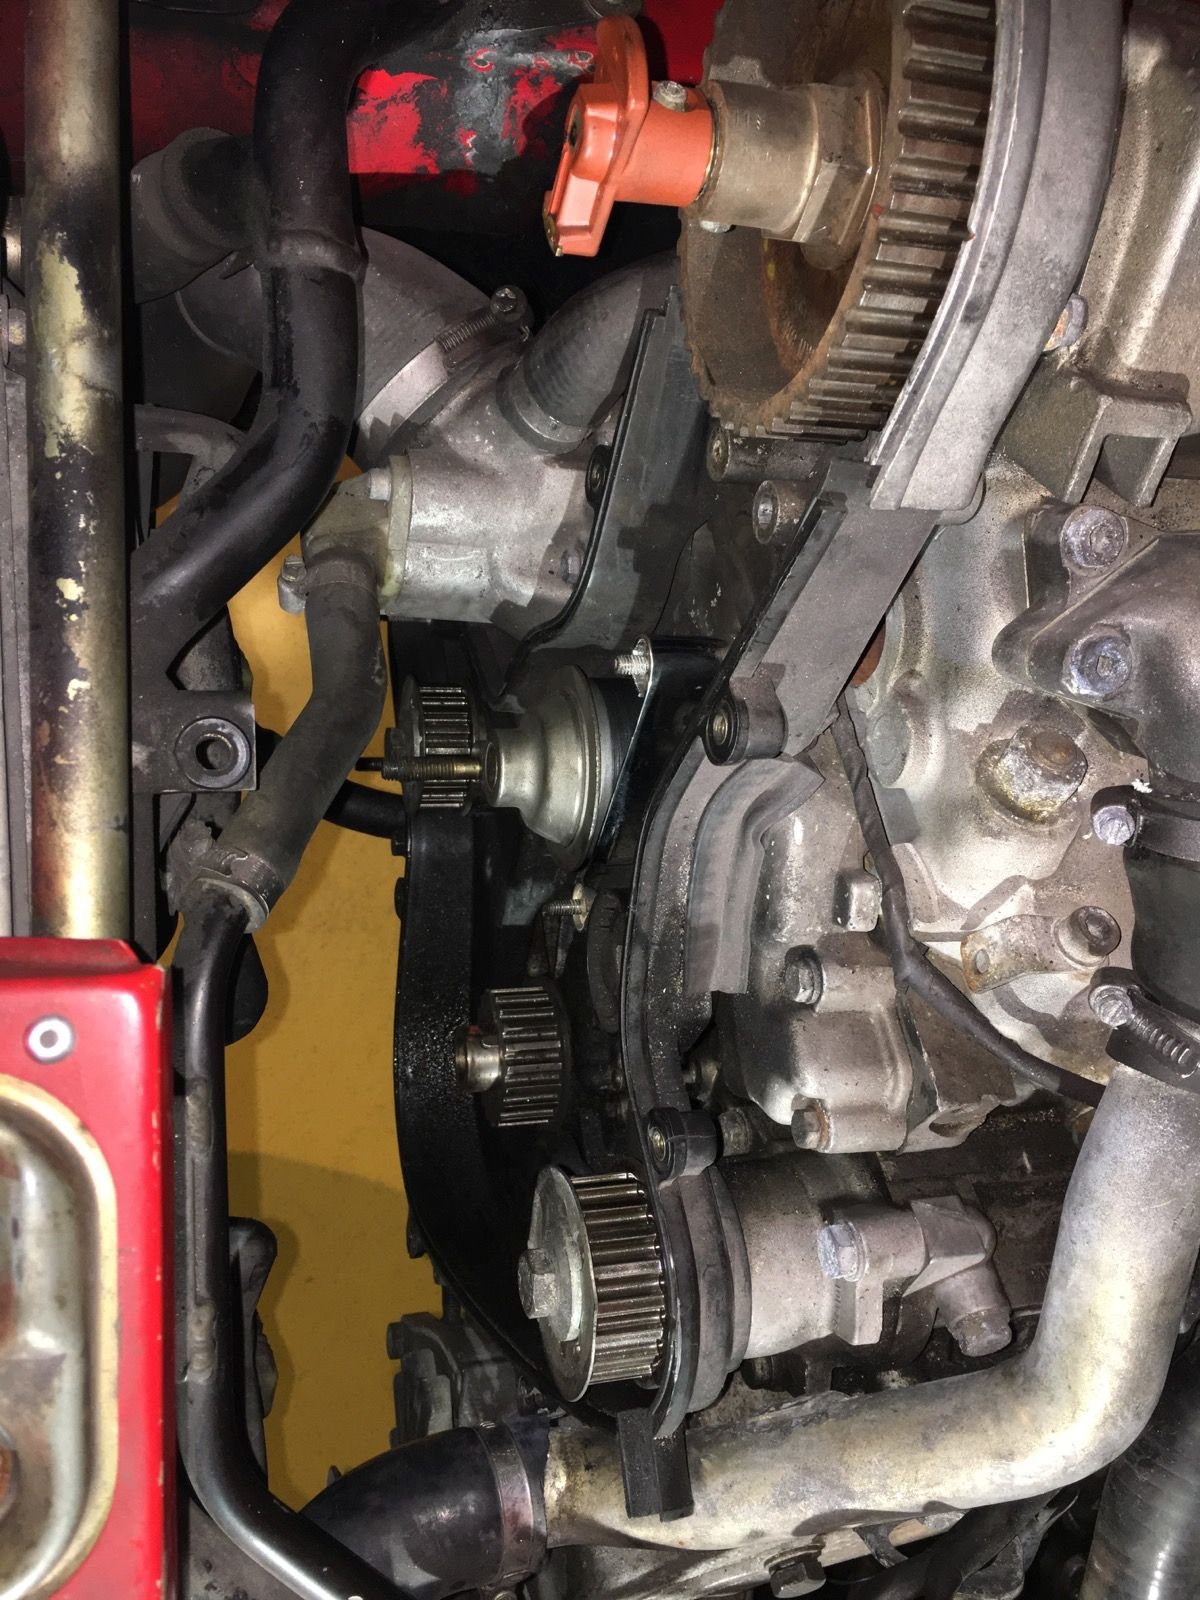
Belts out, quite straightforward and the flywheel lock in place.
The lift made the job comfortable Balancer belt was like new, timing belt somewhat slack and a little dry. New style tensioner, will clean it up a little. All cogs and wheels were "on the mark"
I have to figure out how to check the tension when I have installed the new belts, I do have one of these tools but never used it and would need some reference/numbers if anyone did a 944 series belt with it.
The car is a very late '86 car so I suppose it is model year '87, dont think the tensioner was changed.
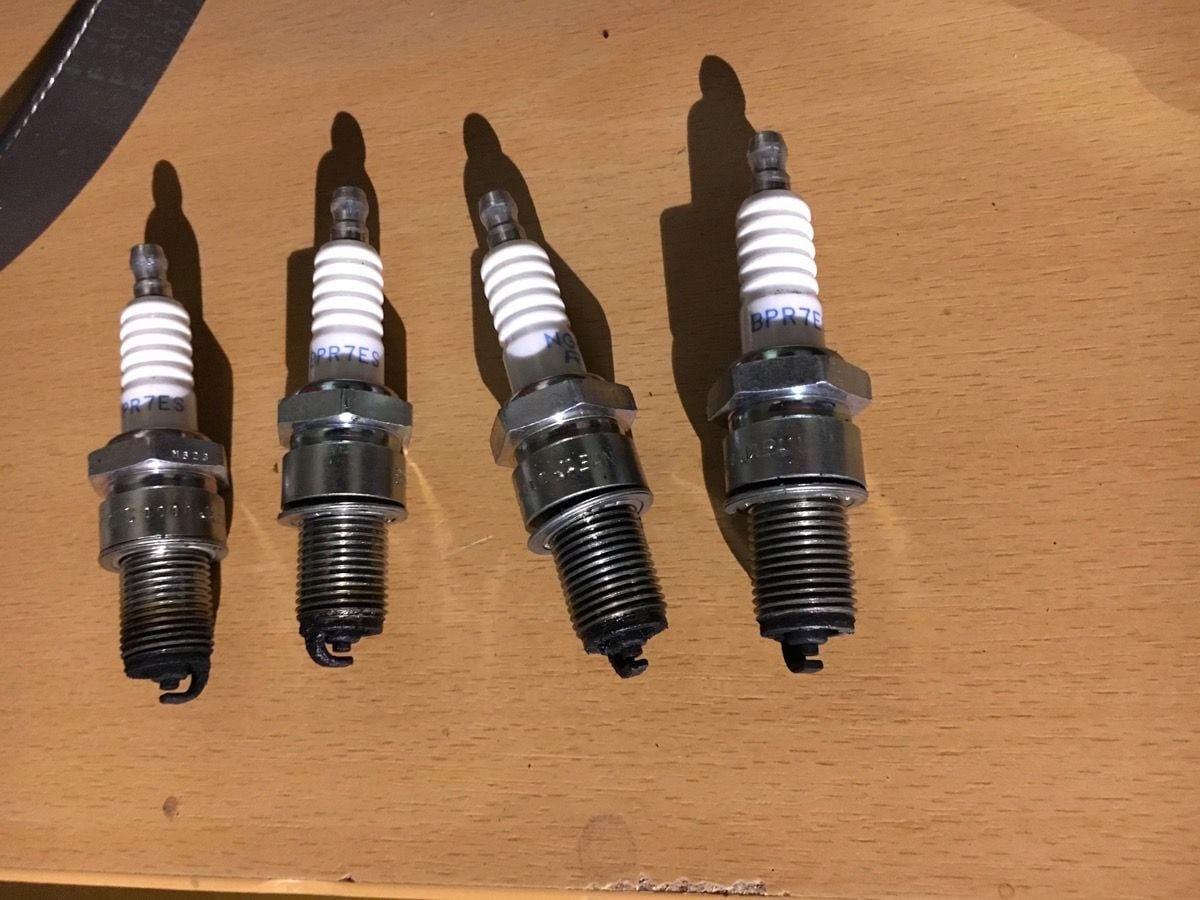
AOS out, quite dirty behind it. Plugs have carbon deposits but did not foul what I remember. The car was not run with Vitesse MAF, just tested and I hope it ran "too rich" or that the old turbo bearing is the culprit.
I forgot the sequence, is it possible to mount the heat shield for break cylinder and booster after turbo is mounted?
Am getting lots of parts tomorrow but not new AOS seals, have to wait for those and can�t proceed since that piece must be mounted before the turbo.
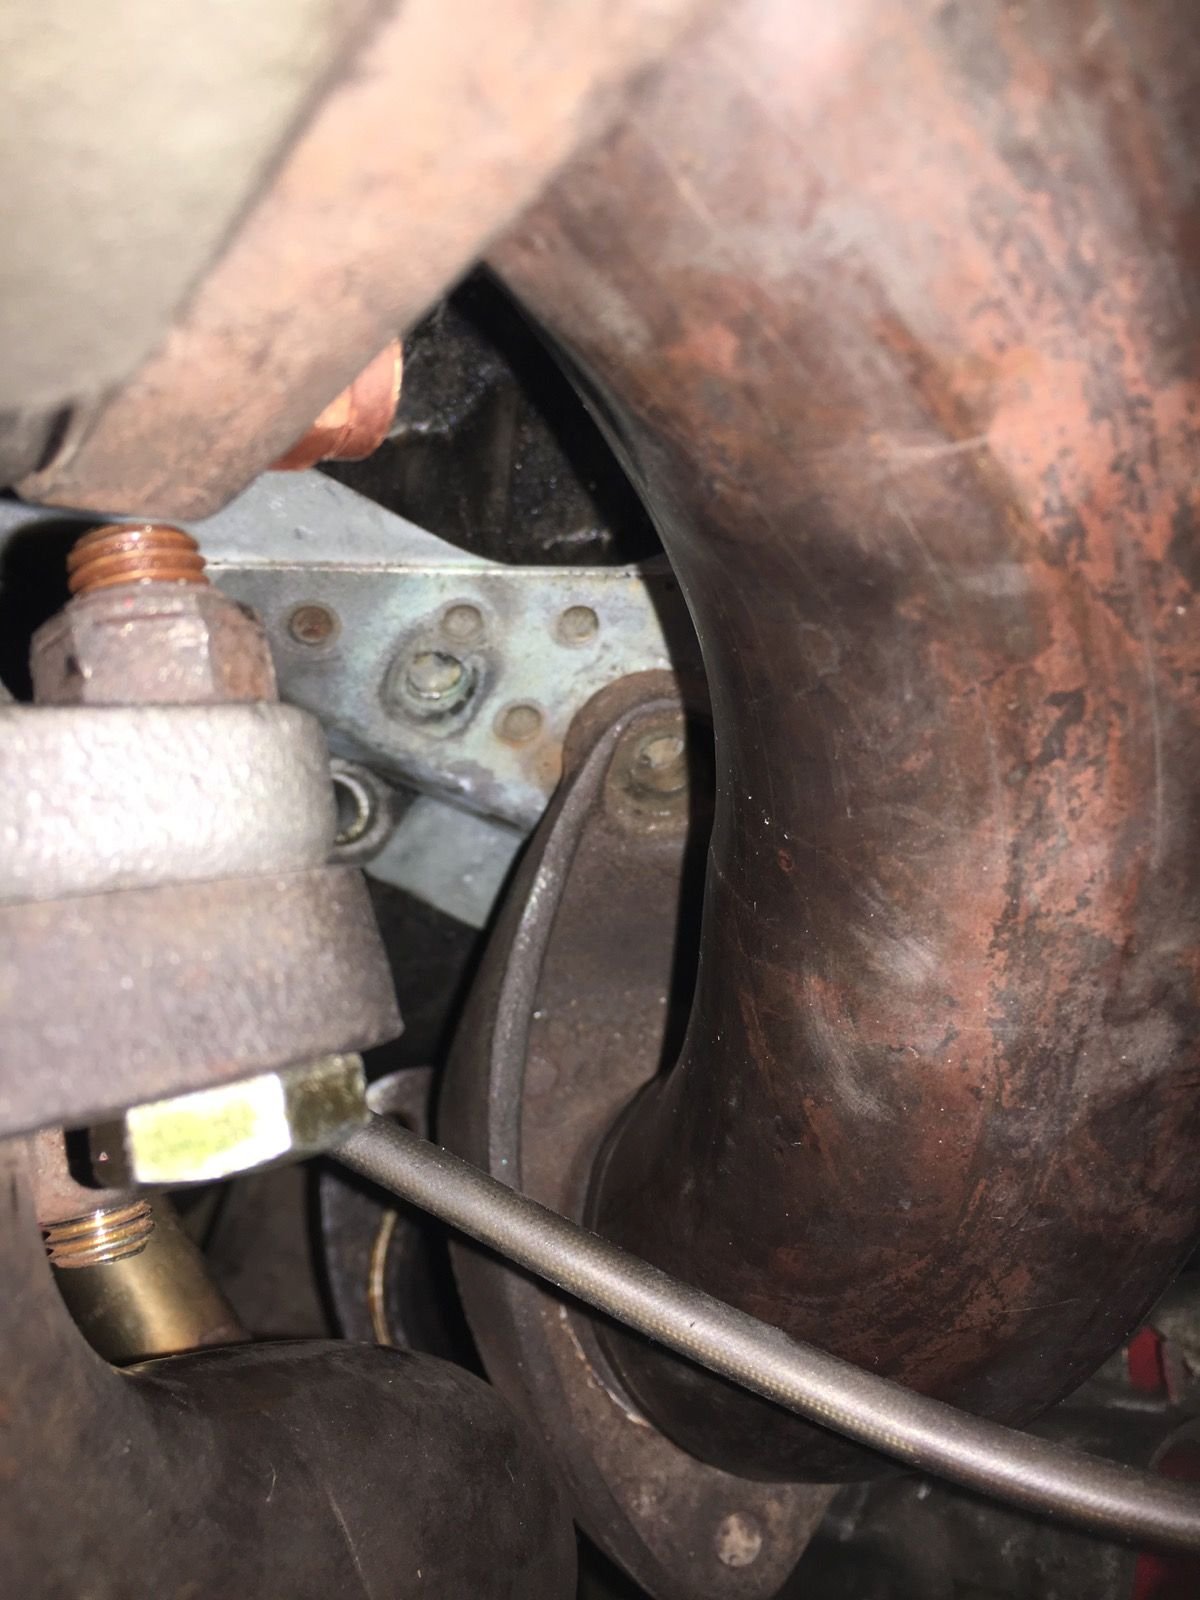
Another question, where do this piece lower left in photo go?
Cleaned parts but piece lower left in photo, steering cover?
I forgot the sequence, is it possible to mount the heat shield for break cylinder and booster after turbo is mounted?
Am getting lots of parts tomorrow but not new AOS seals, have to wait for those and can�t proceed since that piece must be mounted before the turbo.
Another question, where do this piece lower left in photo go?
Cleaned parts but piece lower left in photo, steering cover?
Lower left is the heat shield for the steering axle. Shield mounts to the Turbo enginemount.
The turbo sure was less hassle taking off than putting back in, it is almost there now but the bolt from the downpipe that goes into the block seem to be very hard to fit. Suppose I have to loosen everything else and mount that first.
On timing belts, would it be safe to just let the spring tensioner set the timing belt and check that the balanceshaft belt has approx 90 degrees flex? Thinking about running the engine but not stressing it and later have a mechanic set the correct tension on both belts before driving the car.
New belts and turbo, am going venturi delete and maybe MBC to clean up further.
This bolt is a PIA to install, (bracket is not there in the photo).
Yep--been there, done that. Wee bit frustrating. How did the old sealing rings come out? I find that part the most frustrating!
You are going to get all kinds of responses re: timing belt tension, most likely suggesting a special $$$ tool.
I have always used the spring tensioner without issue. I take it off, clean it, make sure it isn't seized or anything, and put it back. 100k US miles and 2 timing belts later, all is good.
Have fun getting the balance belt just right so it doesn't whine. Note: it will whine on first startup no matter what but should disappear when warm and if driven daily, no more whine. If sits, it whines again when cold. PS the way I read that diagram is for the roller to touch the belt, not a 1mm space (top roller)
Hello, the AOS popped out with little force, the seals were semi-dry but not toasted. Thanks for the advice on the belts, I suppose I will try to get them "right" without tensioner tool.
After a couple evenings under/over/aside the car and numerous ups and downs in the lift I managed to install the bolt on the downpipe and finally bracket. Everything tightened up and proceeded to vacumm lines.
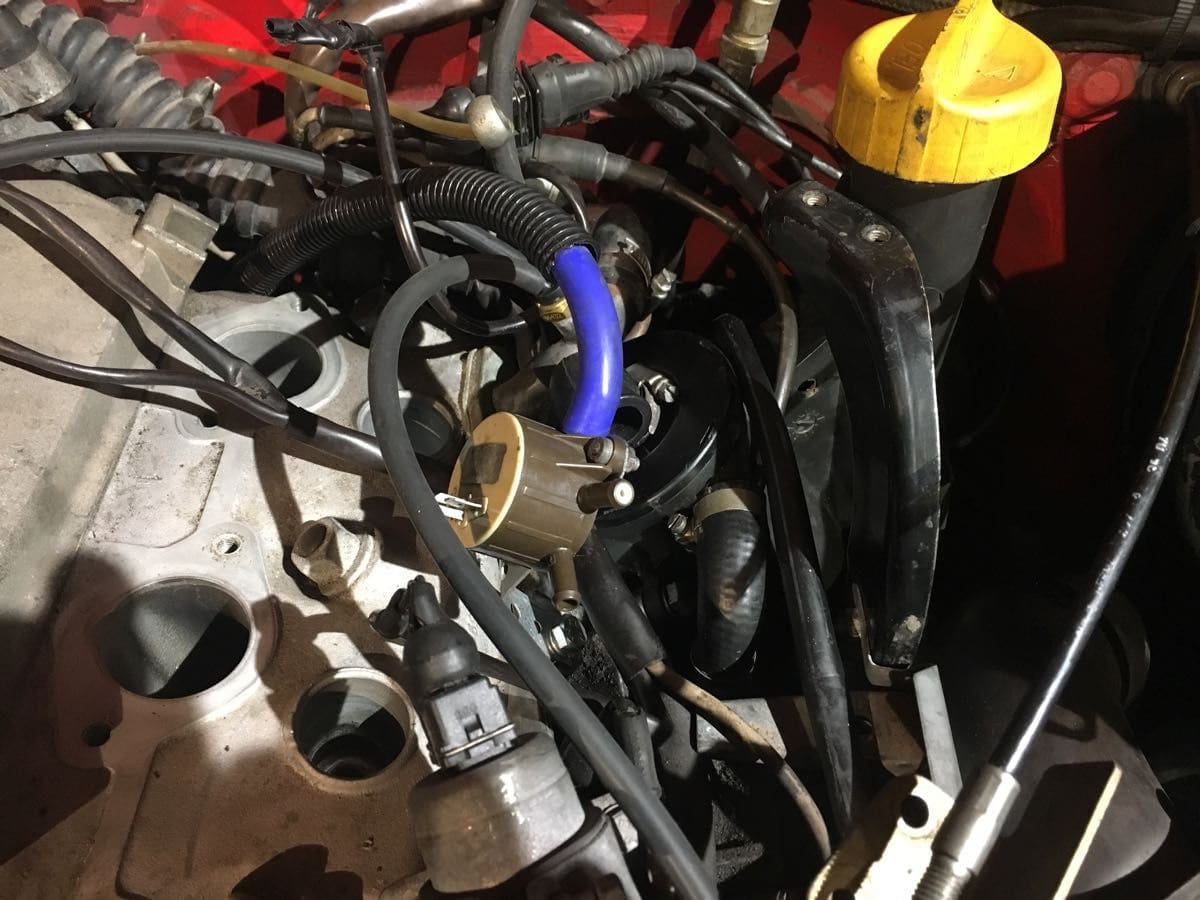
I am following the diagram for venturi delete from Lindsey Racing and it is almost there but I will need 7-8 mm inner diameter vaccum hose for the boost controller to inlet pipes before I will mount the inlet manifold. All the metal pipe is out and I am hoping to replace it wih good silicon hose.
The vacum metal lines being left out, there are some power steering hoses here as well. The boost controller need 7 mm inner diameter quality hoses/lines to be finished. Changed the steering to manual rack, suppose I can forget about the upper pulley but is a spacer needed? Suppose the KLR is connected but what is the other line? (AC is removed from car) Vacum canister and another vacum item, not needed with the venturi delete modification? 20 mm inner diamater hose from AOS to inlet pipe, correct placement? The big one is for the Forge valve and there is a non visible one for a line from the boost controller.
I was asking you about the exhaust seal rings; did you replace those?
If you are keeping the CV (Cycling Valve--brown thing boost control), are you not keeping the metal vacuum line tree? The AOS line is the big "trunk". You might want to keep the vac hose from the trunk to your intake pipe.
Believe it or not, lindsay says their standard vac line (I think it's 6mm but the small one regardless) stretches over to fit ALL fittings. I couldn't do it for banjo bolt and a couple others, using brass adapters instead.
In the one pic it looks like the vac line for the heater valve next to the heater coolant hoses.
Nice wrench.. I like the slight offset on the open end
I changed both seals on the turbo but did not bother the one down at the end of the downpipe where it hooks up to the rest of the exhaust. The old ones came out with a little help of a mini chisel. Based on visual inspection I think I could have reused them.
For me, absolutely the worst part of working on the exhaust, those seal rings. I'm too afraid to re-use, given that they get squished on install. Next time, I'm considering buying the reusable copper gaskets from LR...

 09-11-2018, 07:24 AM