
One way to install oil temp / water temp gauges
 09-20-2008, 08:27 PM
#1
Nordschleife Master
Thread Starter
Here is one take on installing water temp and oil temp gauges into your car. I did this job previously on my n/a using VDO gauges. The wiring behind the gauges in console was a nightmare. Basically you needed 2x leads for the light and 3x leads coming off the gauge itself for the sender, 12v supply and ground. So for each gauge, your running 5 wires each, which creates alot of bulk in the tight spot under the radio.
The SPA gauge setup is very nice and also super easy to setup and install. It even includes a premade wire harness with a nice Molex connector on the end for connection to the gauge itself. No fussing around with making a harness yourself. The harness also has weather proof connectors. Very trick stuff. The wire harness for each sender connector is about 7 feet long, so plenty of room to run the harness from the center console, through the firewall and up to the front of the radiator (with .5 foot to spare).
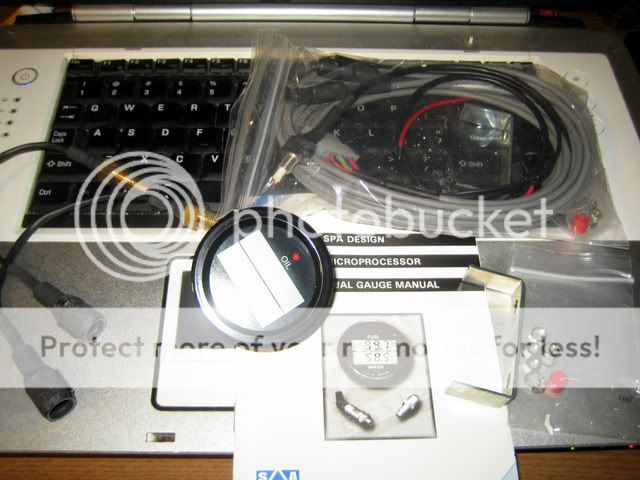
The SPA gauge is also very nice, no nonsense all functionality. They are maybe .25-.5'' shorter in depth than most normal gauges, but nothing beats the Innovate gauge which has gotta be about .5'' thick.
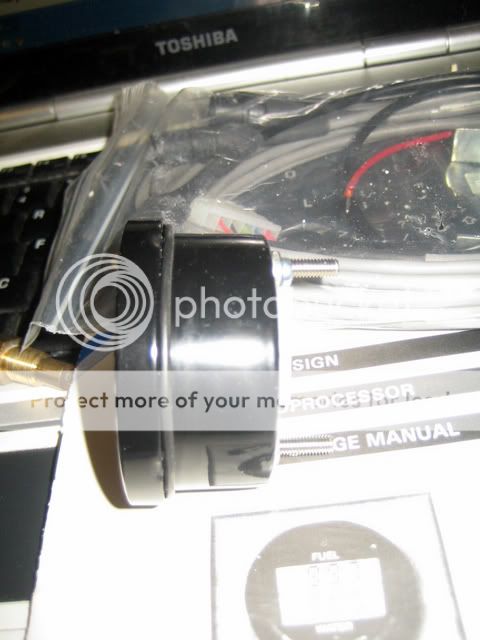
Another nice thing is the wiring is pretty simple for these. All the gauge needs is a 12v supply and a ground lead. No fussing around with hooking up a 12v source for lighting or another 12v lead for the sender power supply.
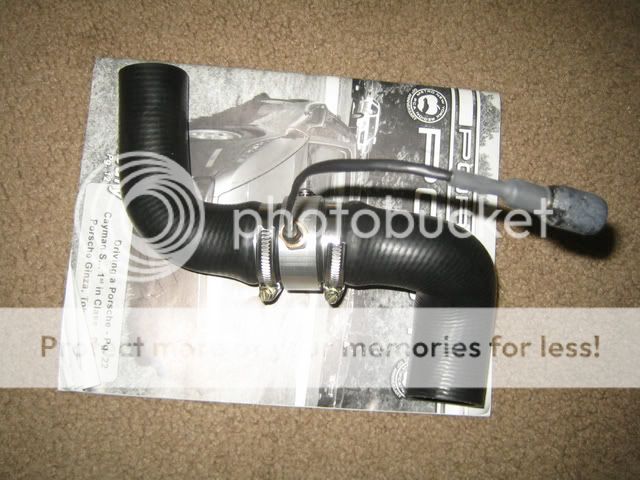
Now to hook up the watertemp sender, i bought a 35mm adapter which splices inline to the upper coolant hose. I had the same adapter on my n/a and it fit perfectly. Unfortunatley the 951 upper radiator hose is slightly different in size..instead of being 35mm --> 35mm, its more like 35mm --> 32mm. The hose was a very tight fit on the adapter, but squeezed on with a light coat of ATF. IT feels kind of weird to take a knife to a brand new radiator hose.. =).
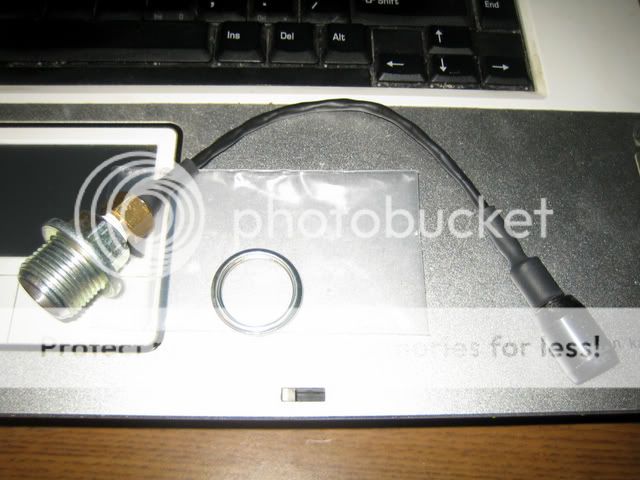
For the oil temp sender i drilled and tapped a hole into a drain plug..
The most complex part of this install was the wireharness, which wasnt even too bad. It does require removal of the glovebox though. I routed the wiring behind the console and up to a grommet which leads into the battery tray.
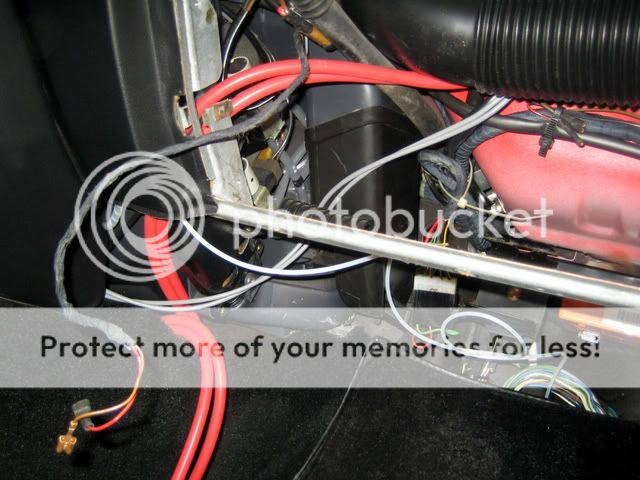
Looking straight up from the glove box area, you can see exactly where the wires are running into the battery tray..

Here is all the wiring (and two vacuum lines for the boost controller) running through the grommet..

Now i needed to get the wiring past the fire wall. There is another grommet on the lower end. I poked a hole through it and passed the wires through this into the engine bay.
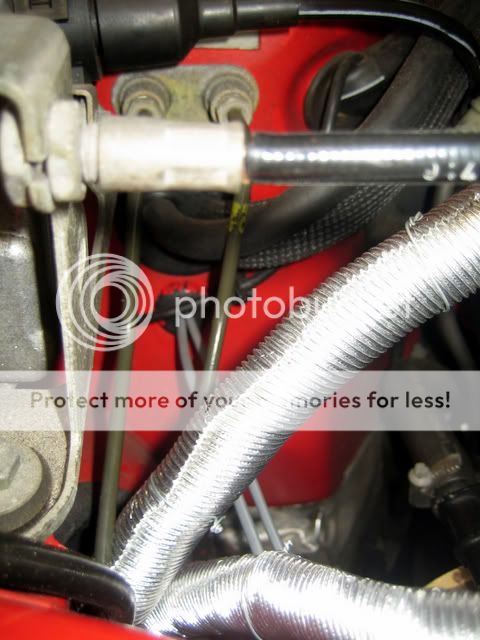
Here is my frankenstien radiator hose setup. The teal wire is the ground connection, you basically just connect this to anywhere on the engine block or chassis.
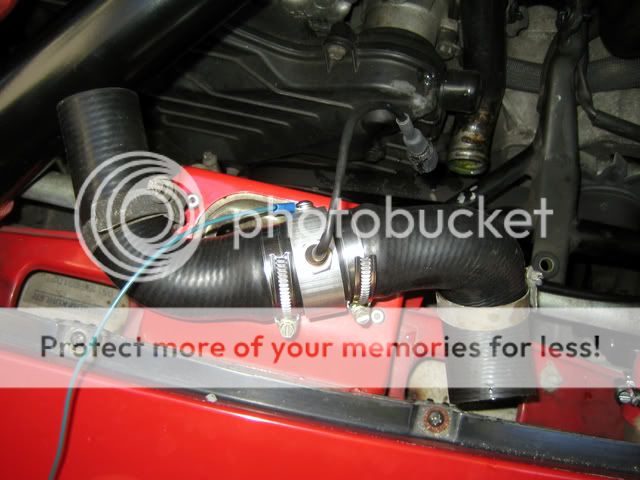
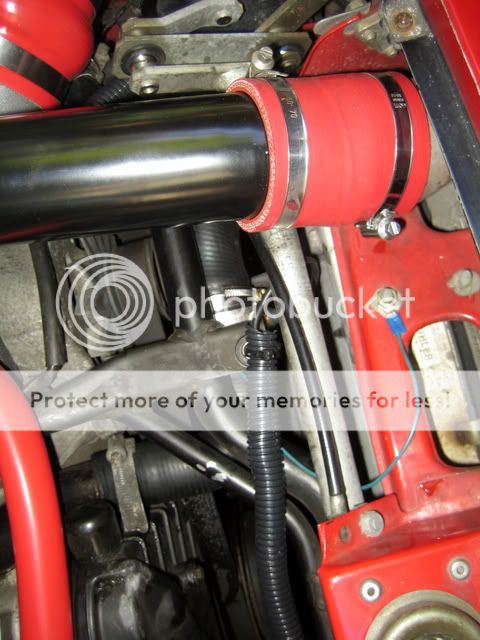
And here is the hose contraption in place..
I dont have any pictures of the oil temp sender wiring, but its pretty self explanitory. I just ran the wiring straight down, up against the right frame rail. Be mindful not to let the wiring touch the crossover or headers. I havent had a chance yet, but will put the wiring in a thermal sleeve to protect. Its not to big an issue as the wire is anchored away with a zip tie around the control arm. But it definetley couldnt hurt.
And here are some not so great pictures of the gauge on. The backlight can be set as red or green. The gauge is very easy to read and also has adjustable brightness..so no problem reading it in direct sunlight and not annoying at night. The red button on the console controls the gauge functions. The gauge has all sorts of features.. visible high temp alarms for each channel (red light on gauge comes on). The gauge can also be hooked up to an extrenal light source or audible alarm to signal high temps. It also features highest temp record...etc. The resolution is also very good. Reads in .1 degree incraments and updates very quickly.
The gauge panel i made out of .5'' MDF. Its very ghetto and i really halfassed it. Its only temporary until i get oil pressure and EGT gauges.
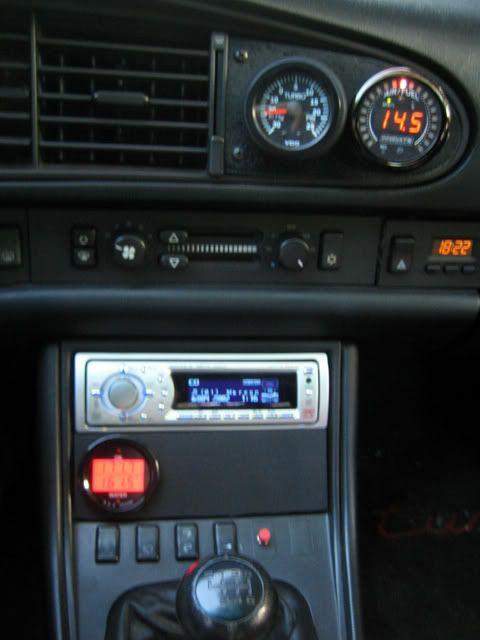
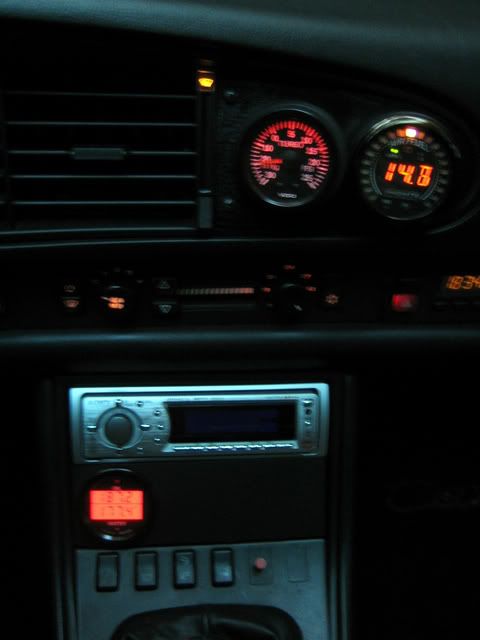
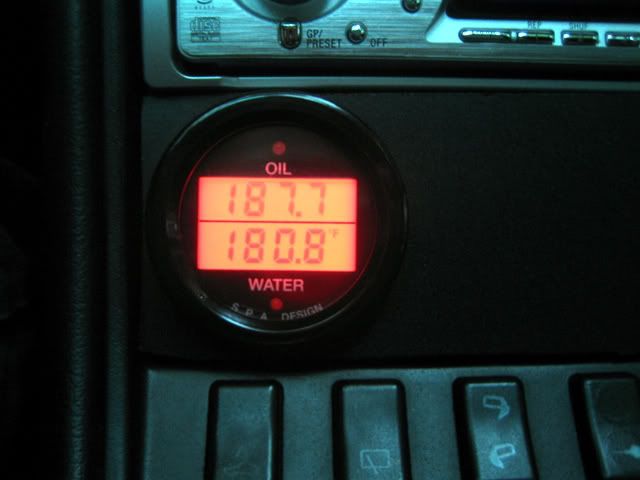
Overall i like the gauge alot. Its nice to be able to see exact numbers from the digital readout instead of ballpark numbers from a analog gauge. They make all sorts of combinations (oil pressure, fuel pressure...etc), but i wouldn't recommend a digital pressure gauge. It would be far to hard to read. Its true that analog is better for quick glimpses to make sure your in the 'ok range', but honestly the temps arent going to go up so quickly that you wouldnt catch it. Pressures..now that is a different story. I plan to get a VDO oil pressure and EGT gauge to match the reset of the interior.
The SPA gauge setup is very nice and also super easy to setup and install. It even includes a premade wire harness with a nice Molex connector on the end for connection to the gauge itself. No fussing around with making a harness yourself. The harness also has weather proof connectors. Very trick stuff. The wire harness for each sender connector is about 7 feet long, so plenty of room to run the harness from the center console, through the firewall and up to the front of the radiator (with .5 foot to spare).
The SPA gauge is also very nice, no nonsense all functionality. They are maybe .25-.5'' shorter in depth than most normal gauges, but nothing beats the Innovate gauge which has gotta be about .5'' thick.
Another nice thing is the wiring is pretty simple for these. All the gauge needs is a 12v supply and a ground lead. No fussing around with hooking up a 12v source for lighting or another 12v lead for the sender power supply.
Now to hook up the watertemp sender, i bought a 35mm adapter which splices inline to the upper coolant hose. I had the same adapter on my n/a and it fit perfectly. Unfortunatley the 951 upper radiator hose is slightly different in size..instead of being 35mm --> 35mm, its more like 35mm --> 32mm. The hose was a very tight fit on the adapter, but squeezed on with a light coat of ATF. IT feels kind of weird to take a knife to a brand new radiator hose.. =).
For the oil temp sender i drilled and tapped a hole into a drain plug..
The most complex part of this install was the wireharness, which wasnt even too bad. It does require removal of the glovebox though. I routed the wiring behind the console and up to a grommet which leads into the battery tray.
Looking straight up from the glove box area, you can see exactly where the wires are running into the battery tray..
Here is all the wiring (and two vacuum lines for the boost controller) running through the grommet..
Now i needed to get the wiring past the fire wall. There is another grommet on the lower end. I poked a hole through it and passed the wires through this into the engine bay.
Here is my frankenstien radiator hose setup. The teal wire is the ground connection, you basically just connect this to anywhere on the engine block or chassis.
And here is the hose contraption in place..
I dont have any pictures of the oil temp sender wiring, but its pretty self explanitory. I just ran the wiring straight down, up against the right frame rail. Be mindful not to let the wiring touch the crossover or headers. I havent had a chance yet, but will put the wiring in a thermal sleeve to protect. Its not to big an issue as the wire is anchored away with a zip tie around the control arm. But it definetley couldnt hurt.
And here are some not so great pictures of the gauge on. The backlight can be set as red or green. The gauge is very easy to read and also has adjustable brightness..so no problem reading it in direct sunlight and not annoying at night. The red button on the console controls the gauge functions. The gauge has all sorts of features.. visible high temp alarms for each channel (red light on gauge comes on). The gauge can also be hooked up to an extrenal light source or audible alarm to signal high temps. It also features highest temp record...etc. The resolution is also very good. Reads in .1 degree incraments and updates very quickly.
The gauge panel i made out of .5'' MDF. Its very ghetto and i really halfassed it. Its only temporary until i get oil pressure and EGT gauges.
Overall i like the gauge alot. Its nice to be able to see exact numbers from the digital readout instead of ballpark numbers from a analog gauge. They make all sorts of combinations (oil pressure, fuel pressure...etc), but i wouldn't recommend a digital pressure gauge. It would be far to hard to read. Its true that analog is better for quick glimpses to make sure your in the 'ok range', but honestly the temps arent going to go up so quickly that you wouldnt catch it. Pressures..now that is a different story. I plan to get a VDO oil pressure and EGT gauge to match the reset of the interior.


 09-20-2008, 09:15 PM
#5
Rennlist Member
 10-06-2012, 12:16 PM
#7
WRONGLY ACCUSED!
Rennlist Member
Rennlist Member
Join Date: Nov 2011
Location: Connecticut Valley Region
Posts: 14,452
Received 3,244 Likes
on
1,578 Posts
Just bought this gauge and said to myself "wonder if anyone did a writeup on the best way to install". Awesome and thanks!