
zerMATT951's re-assembly thread

 09-02-2011, 11:20 PM
#77
Addict
Lifetime Rennlist
Member
Lifetime Rennlist
Member
Thread Starter
Yanked out this mess...
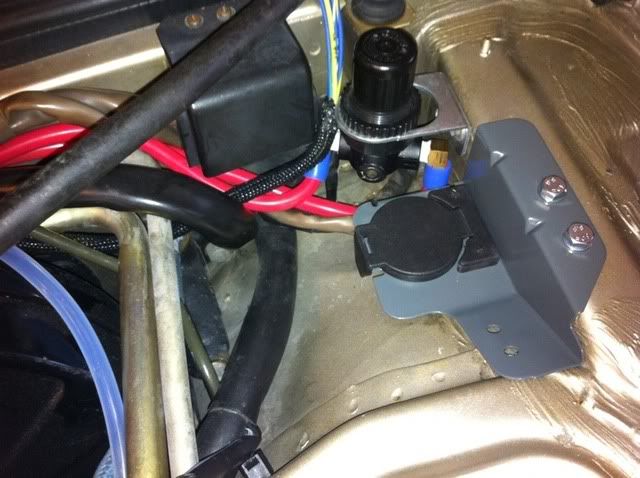
Removed evaporate stuff, installed steam vent line, ran new MBC lines.
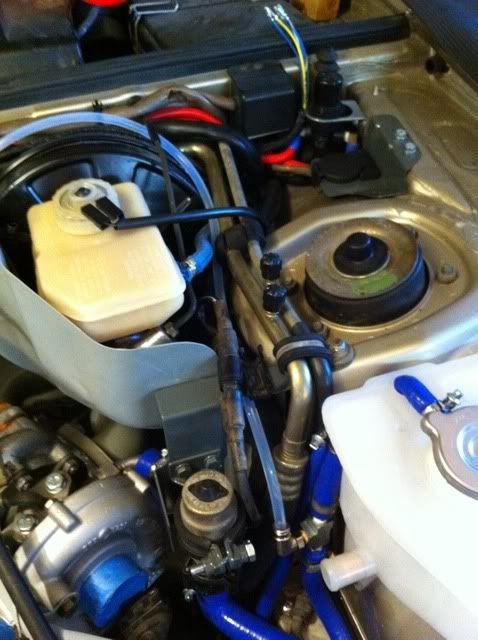
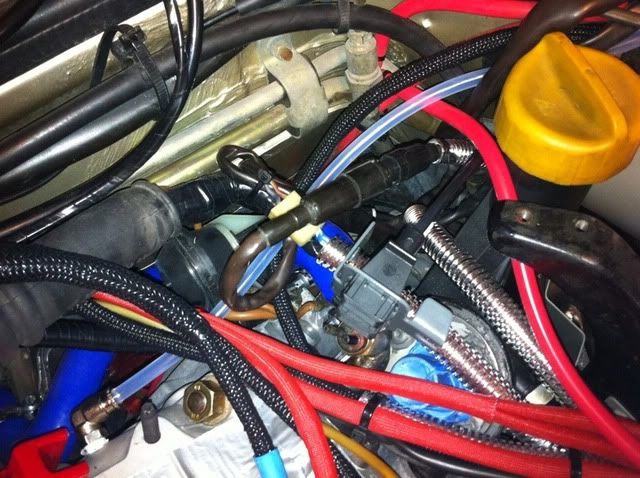
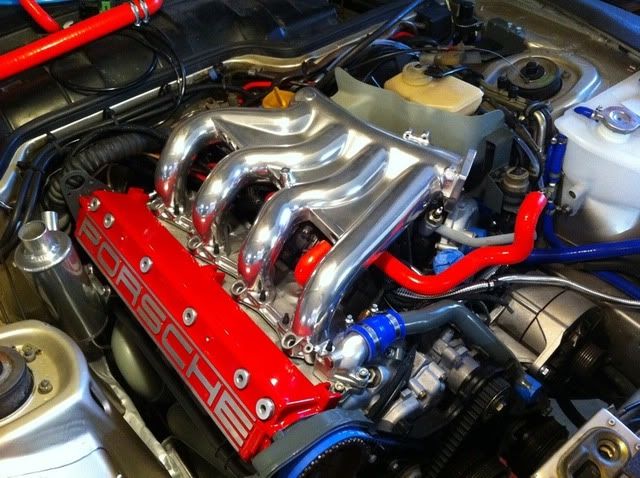
Getting crowded, but trying to stay organized...
Crank case breather can...
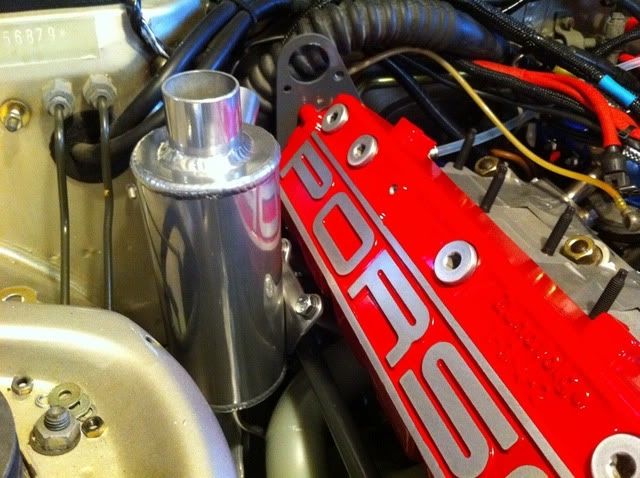
Had to set this on top for just a minute... I hope to be bolting it on in a couple of days once I'm happy with the ECU wiring inside the car...
Removed evaporate stuff, installed steam vent line, ran new MBC lines.
Getting crowded, but trying to stay organized...
Crank case breather can...
Had to set this on top for just a minute... I hope to be bolting it on in a couple of days once I'm happy with the ECU wiring inside the car...
09-03-2011, 12:37 AM
#79
Rennlist Member
It looks awesome, Matt! what are the benefits/effects of removing the vapor purge system... I mean, getting rid of all that junk is a major advantage, but are there any disadvantages?
09-03-2011, 12:41 AM
#80
Addict
Lifetime Rennlist
Member
Lifetime Rennlist
Member
Thread Starter
I read several threads on the topic, could not find any negatives besides it being needed for emissions testing. I'll need to disconnect the fuel tank vent line in the back at the tank and put a simple filter on the line to prevent debris from getting into the tank but still allow an air source to prevent a vacuum build up.
09-03-2011, 12:44 AM
#81
Rennlist Member
I read several threads on the topic, could not find any negatives besides it being needed for emissions testing. I'll need to disconnect the fuel tank vent line in the back at the tank and put a simple filter on the line to prevent debris from getting into the tank but still allow an air source to prevent a vacuum build up.
09-03-2011, 09:34 AM
#82
Addict
Rennlist Member
Rennlist Member
Join Date: May 2001
Location: Melbourne, Florida
Posts: 942
Likes: 0
Received 0 Likes
on
0 Posts
I read several threads on the topic, could not find any negatives besides it being needed for emissions testing. I'll need to disconnect the fuel tank vent line in the back at the tank and put a simple filter on the line to prevent debris from getting into the tank but still allow an air source to prevent a vacuum build up.
09-03-2011, 09:44 AM
#83
Race Car
oh, its so clean. Just wait until you have to change the oil and the oil filter covers everything in oil. That is always a bad day for me, but I wash it up.
09-03-2011, 10:17 AM
#84
Addict
Rennlist Member
Rennlist Small
Business Sponsor
Rennlist Member
Rennlist Small
Business Sponsor
OK, maybe this is a little late for this project�.
Here is some basic info on the �breather� system in a 944. The purpose of the �breather� system (I keep doing the ��thing because its not really a �breather� system) is two fold � it allows for venting of excess pressure from the crank case when the engine is under load, but it also supplies a small vacuum to the crankcase at deceleration and idle. This helps evacuate the crankcase and it also supplies additional suction to help the turbo oil drain.
So if your engine starts smoking at idle once it is warm is because you don�t have any crankcase vacuum with the catch can system. The oil is not draining from the turbo fast enough and the extra is leaking out of the hot side turbo seals into the exhaust. Not all turbos do this � but its extremely annoying when it does happen.
Yes, its true you don�t want to be dumping a ton of oil into your intake piping. But if you are then there is something wrong with your engine. An engine in good shape will not have much blow by and the intake track will not see anything more than a very slight trace of oil.
09-03-2011, 03:21 PM
#85
Addict
Lifetime Rennlist
Member
Lifetime Rennlist
Member
Thread Starter
Chris, thank you for the insight. I saw you mention this potential issue previously, but I decided to forge ahead and see what happens. If I end up with the smoking issue that you mention, I will likely go the route of a different style can that completes the loop back to the intake but removes the oil first. I just don't like the idea of that film of oil on everything from the factory setup. I've seen other types of cans pictures that mount up front where the air filter box used to sit - I like those, but there isn't a ready-made kit available from what I've seen. Another option would be to adapt the top of my LR can and route that back under the manifold into the intake.
We'll just see how it goes, and I'm glad you are here to bring up potential issues like this for us engine tear-down noob's. Now I know what to watch for, and what the solution will be. Thanks!

We'll just see how it goes, and I'm glad you are here to bring up potential issues like this for us engine tear-down noob's. Now I know what to watch for, and what the solution will be. Thanks!
09-03-2011, 03:45 PM
#86
Three Wheelin'

Looking really good. It's amazing how clean that area around the brake MC is once you get rid of all that evap junk.
I like the blue bits of silicone holding on the vac lines going to the MBC, nice touch.
Is that what the picture in your signature is showing? 
I like the blue bits of silicone holding on the vac lines going to the MBC, nice touch.
09-03-2011, 05:08 PM
#87
Chris, thank you for the insight. I saw you mention this potential issue previously, but I decided to forge ahead and see what happens. If I end up with the smoking issue that you mention, I will likely go the route of a different style can that completes the loop back to the intake but removes the oil first. I just don't like the idea of that film of oil on everything from the factory setup. I've seen other types of cans pictures that mount up front where the air filter box used to sit - I like those, but there isn't a ready-made kit available from what I've seen. Another option would be to adapt the top of my LR can and route that back under the manifold into the intake.
We'll just see how it goes, and I'm glad you are here to bring up potential issues like this for us engine tear-down noob's. Now I know what to watch for, and what the solution will be. Thanks!
We'll just see how it goes, and I'm glad you are here to bring up potential issues like this for us engine tear-down noob's. Now I know what to watch for, and what the solution will be. Thanks!
09-04-2011, 01:02 AM
#88
Addict
Lifetime Rennlist
Member
Lifetime Rennlist
Member
Thread Starter
Thanks! I found that tip on the LR tech section instead of using a zip tie, it makes for a very tight connection. I'll use that wherever there is room and the connection is visible. I don't think they will fit on the Laust vacuum manifold though...
09-04-2011, 01:07 AM
#89
Addict
Lifetime Rennlist
Member
Lifetime Rennlist
Member
Thread Starter
Worked on belt tensions today, used my new Arnworx tension gauge. I took a couple of videos of the tool in action and I'll try to get those posted up soon.
Also got the fuel rail, injectors, and rebuilt TB attached, but in the process I discovered that someone at Lindsey forgot to drill a hole in one of the support legs... oops. Had to break out the center punch and a drill.
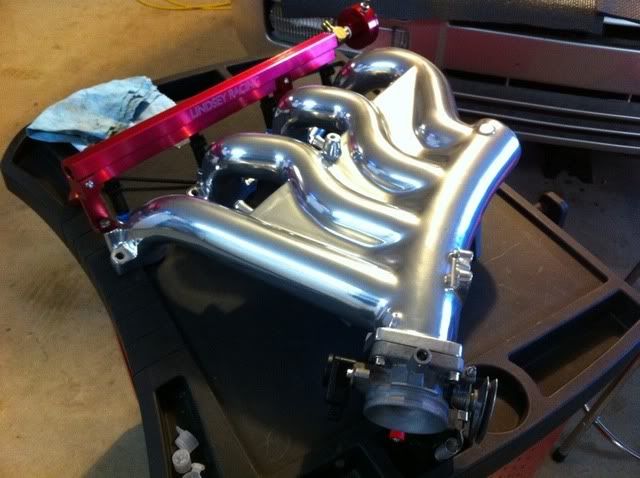
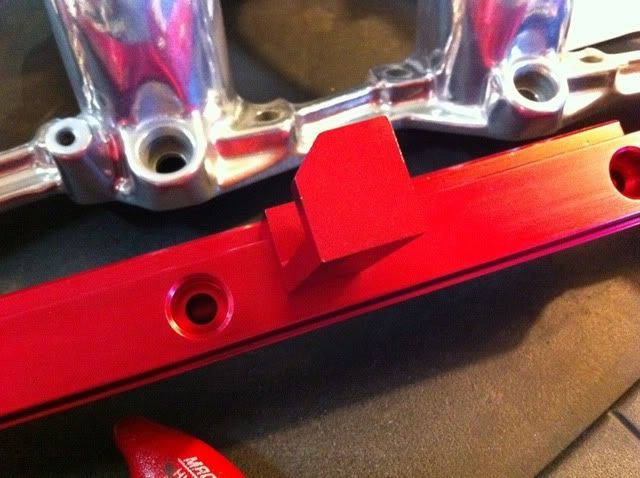
Also got the fuel rail, injectors, and rebuilt TB attached, but in the process I discovered that someone at Lindsey forgot to drill a hole in one of the support legs... oops. Had to break out the center punch and a drill.
09-04-2011, 02:03 AM
#90
Rennlist Member
That's pretty snazzy, Matt. Does that fuel rail not have the support brackets that go to the cam tower? I can only imagine that those do a good job of dampening any vibrations in the rail...