When you click on links to various merchants on this site and make a purchase, this can result in this site earning a commission. Affiliate programs and affiliations include, but are not limited to, the eBay Partner Network.
thanks GG! It def qualifies as madness .. How did you afix - I used 3M's thinnest Dsided tape - its not rock steady but it hasn't fallen off yet
I had thought about doing mine that way. But i decided in the end to use a two part epoxy. It's been fine so far. If i do it again I'm going machine into the aluminum and do a reverse negative space kind of look. Likely w the dbfd logo .
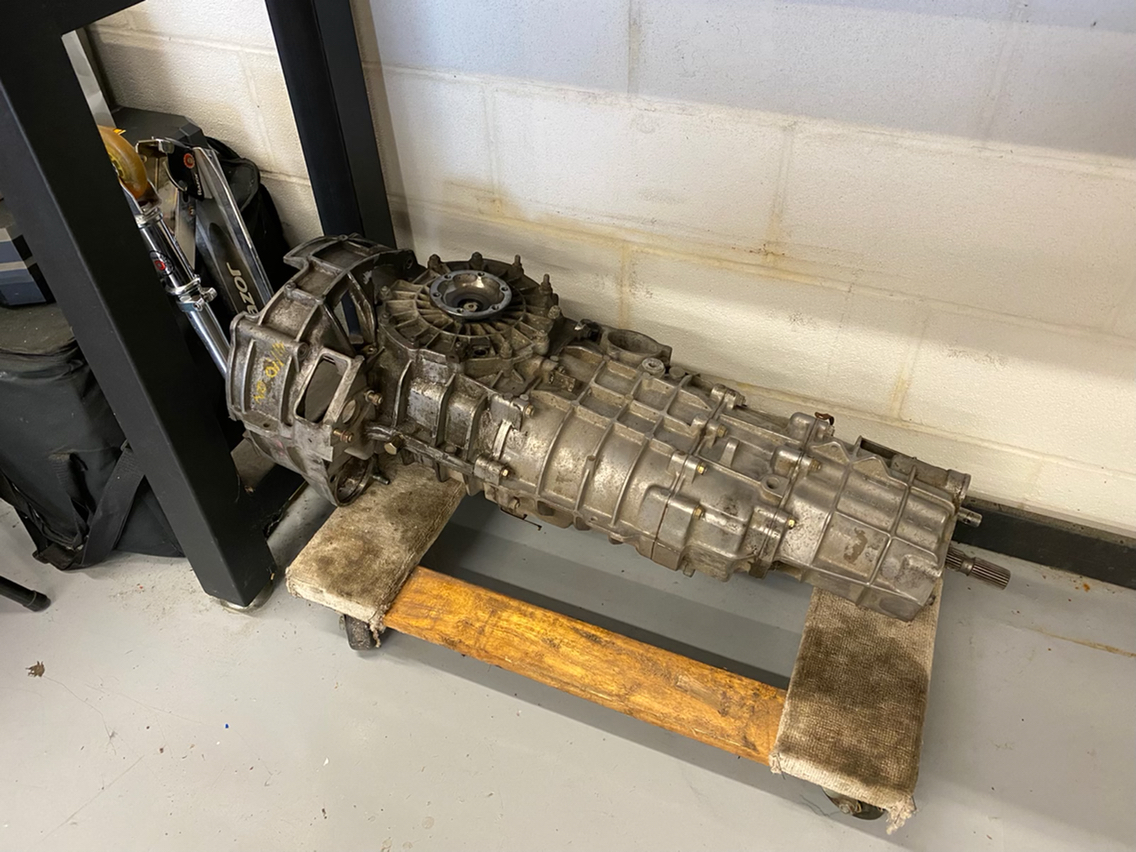
Back at it. Need to get a few things done before moving on to distributer madness...which is gearing up to be fairly extensive...
- Gearing up - for those of you close to me...you got the pun there....
This arrived to me in houston the other day...I, however, am not in houston....so we have a problem....gotta figure out a way to get it from there to here. Maybe if i buy a Casio calculator watch, I'll have to computing power to figure that one out.
Alas. It wasn't the Casio...it was the people. I am one. So may take some time to process.
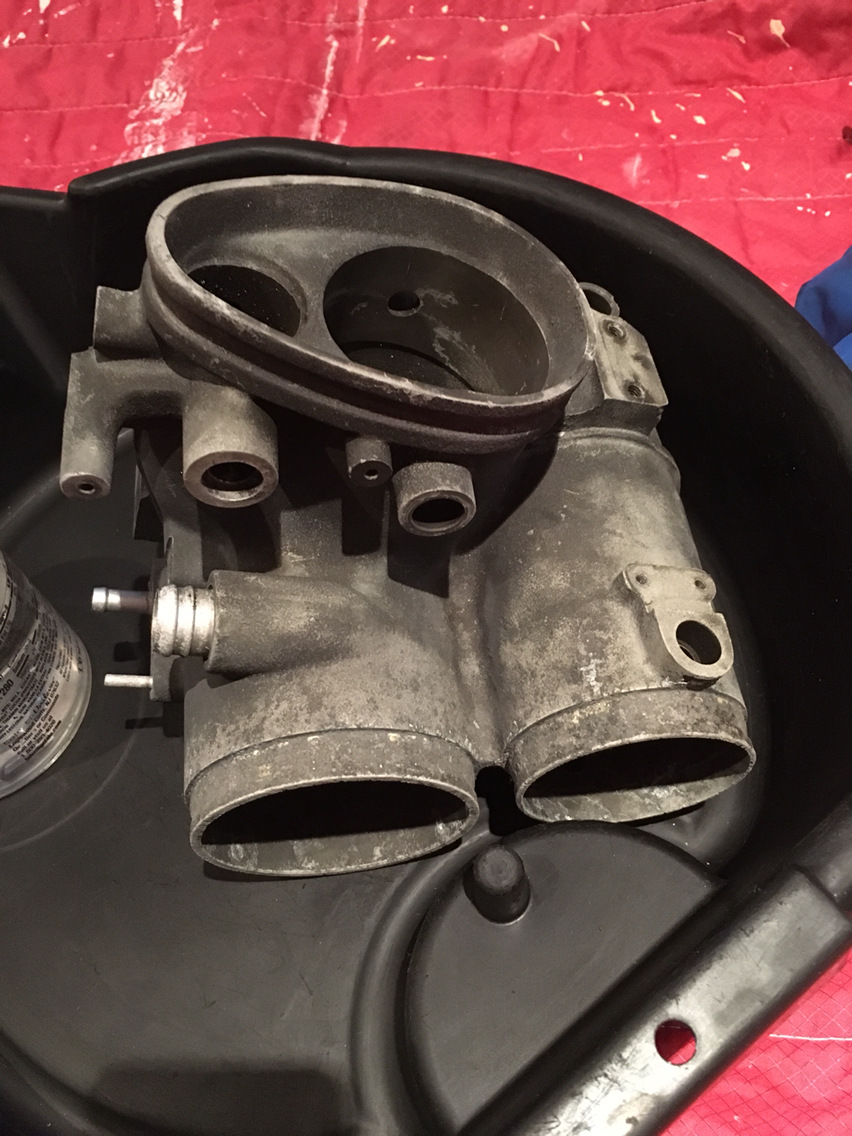
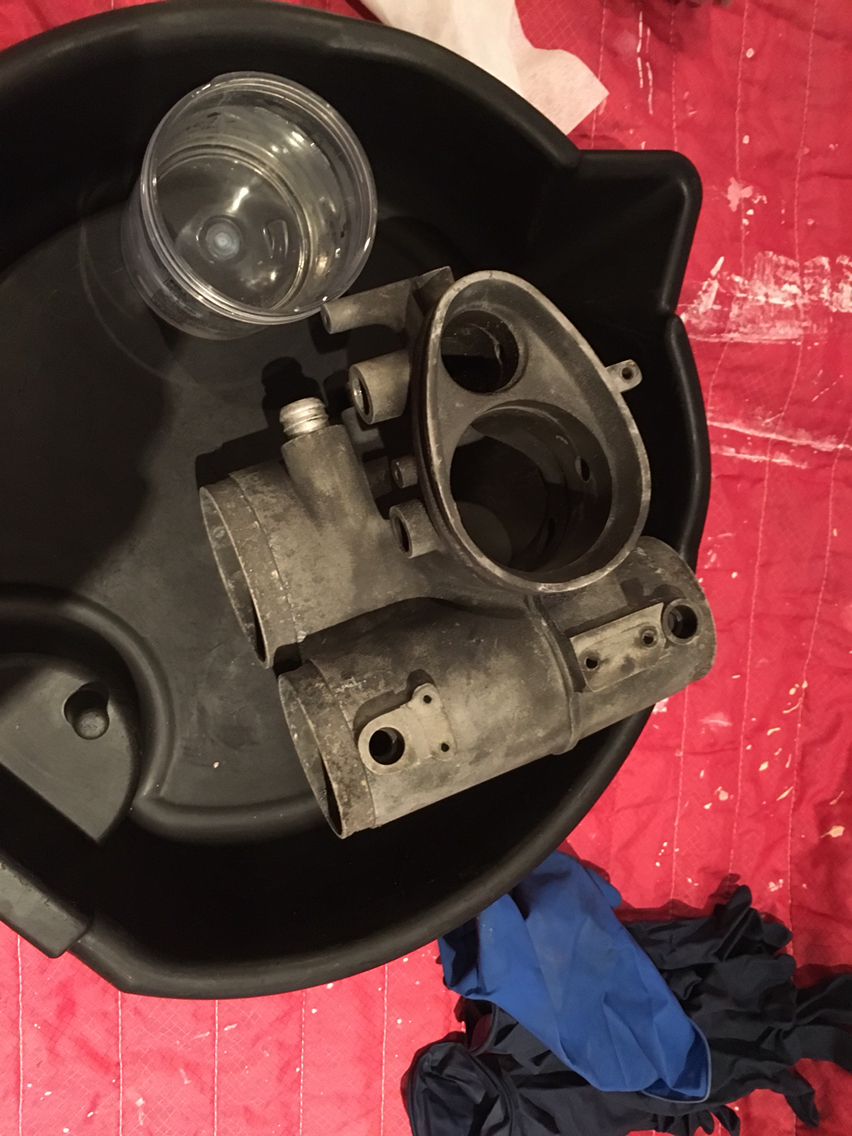
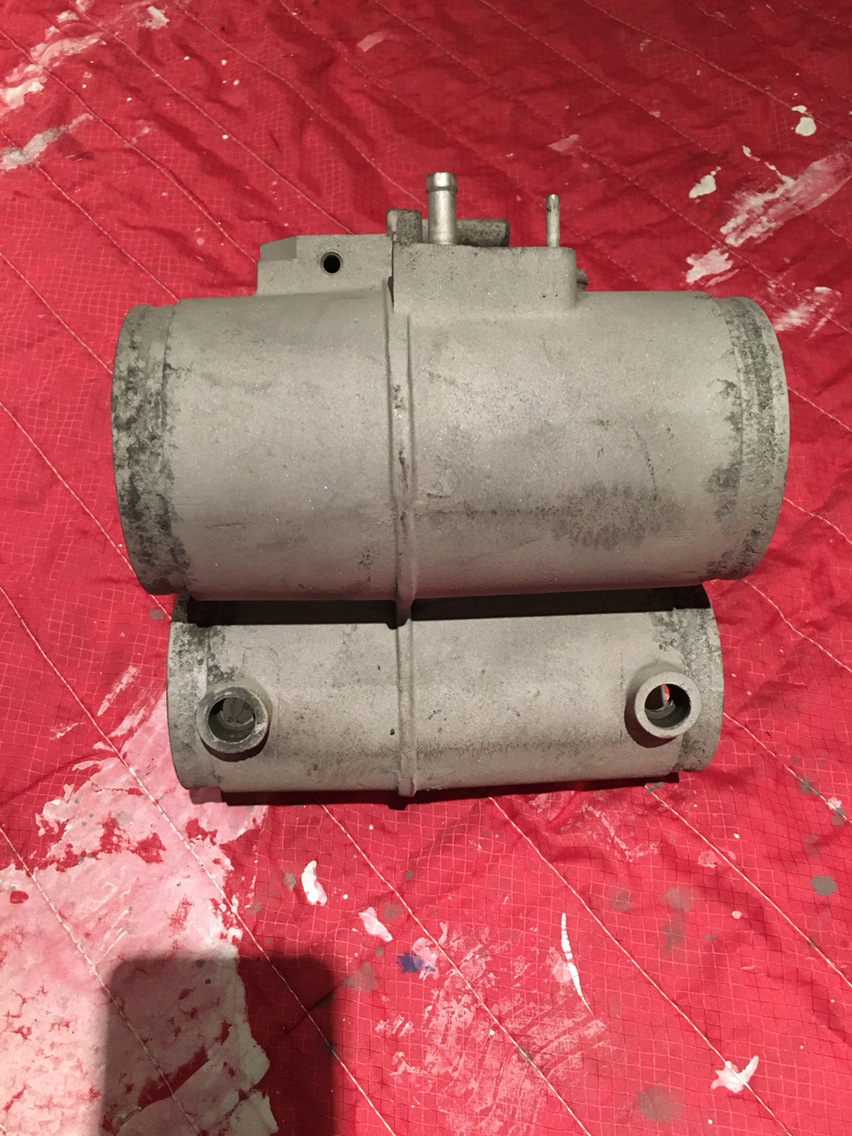
So in the meantime, i have had this throttle body on the bench waiting for quite a long time. And in that time, I've been studying....this magnesium stuff is for the birds. What i would like to do, to be honest, is to make a 3d printed duplicate of this throttle body, shaped behind the plenums like an IPD, and printed in carbon.
Why? Because that would be crazy cool. Just swap in all the bits off this mag piece and done.
If we have any 3D guys in the house...let's do it.
But now back to reality. Here it is in its current state:
It's corroded, as they get...and needs to be freshened up...but how? It's gooky. Cruddy. Crispy. Crackly. Fuzzy. And pitted. So now what?
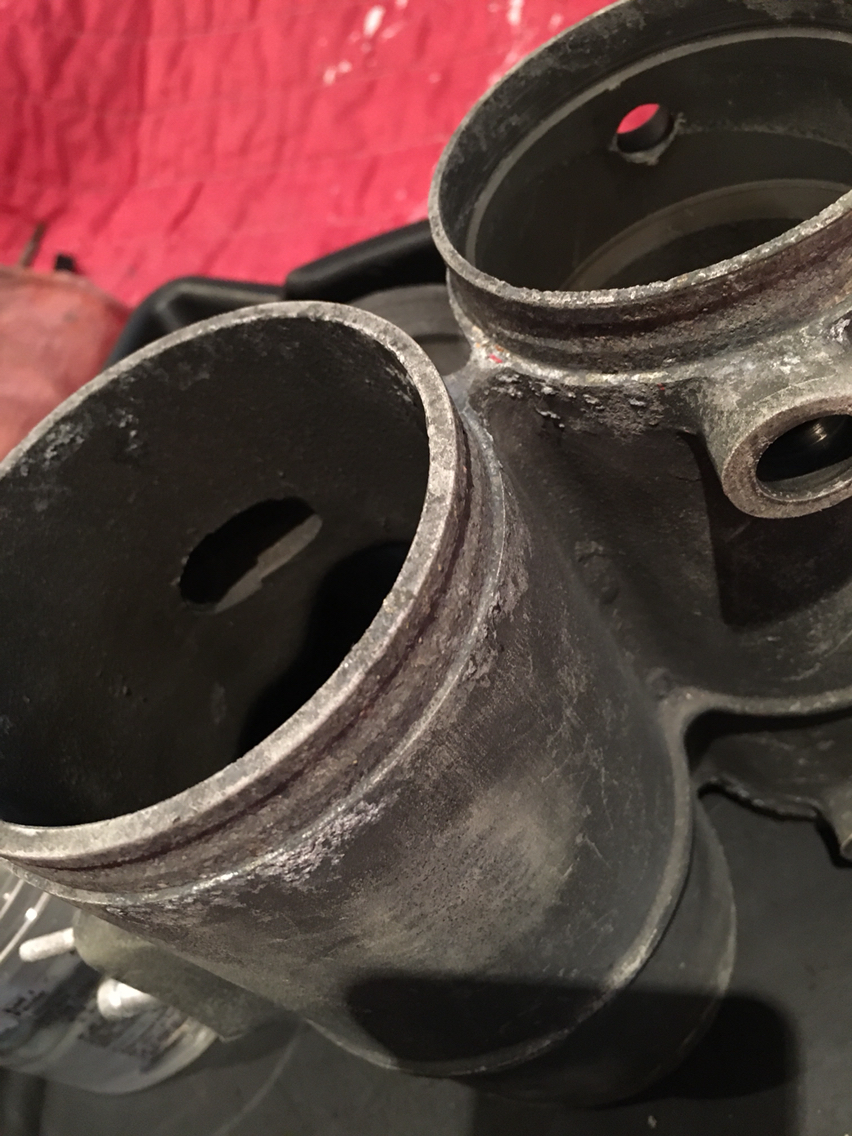
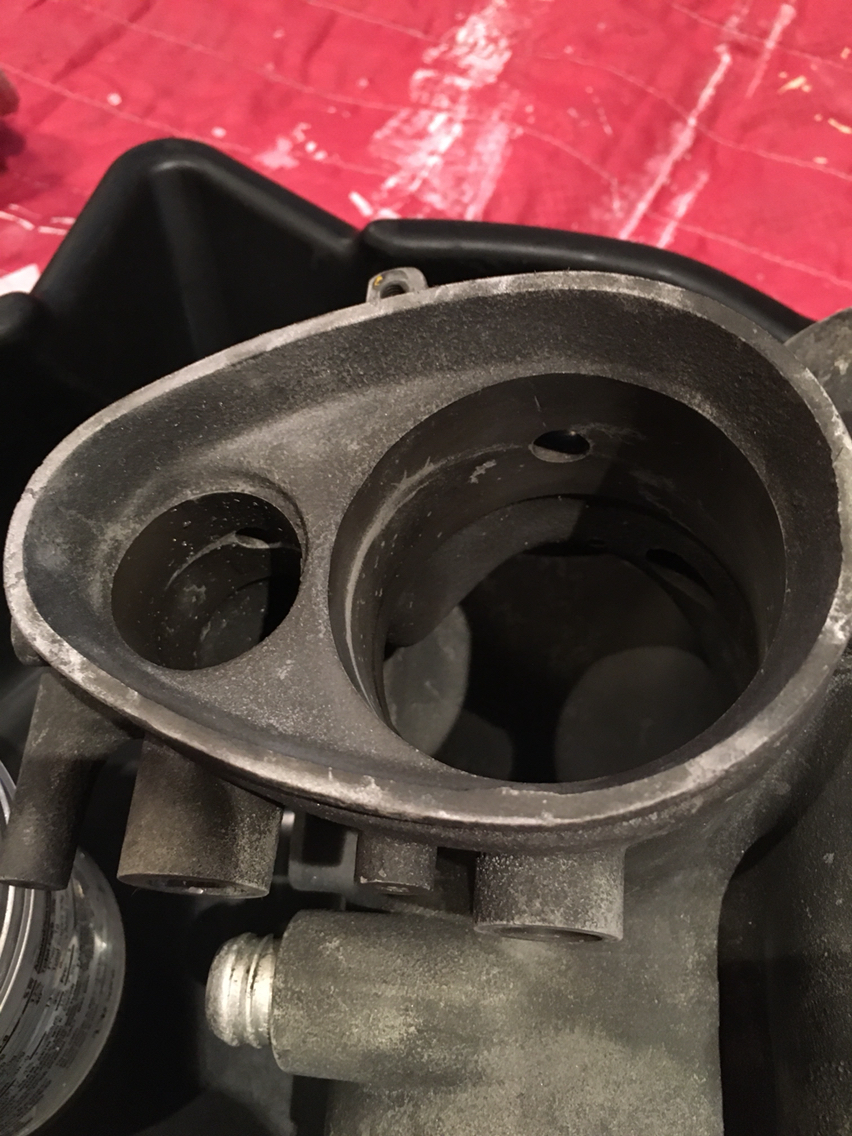
Start with a little wet sanding...
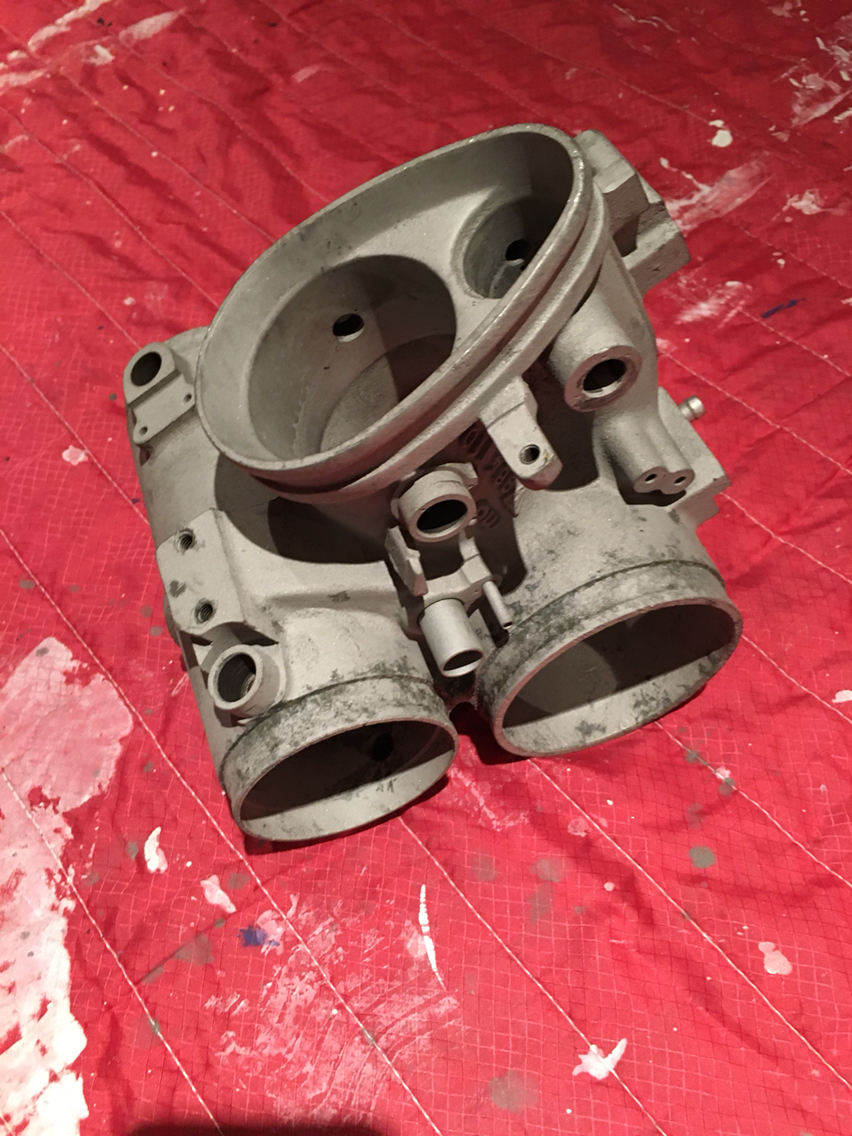
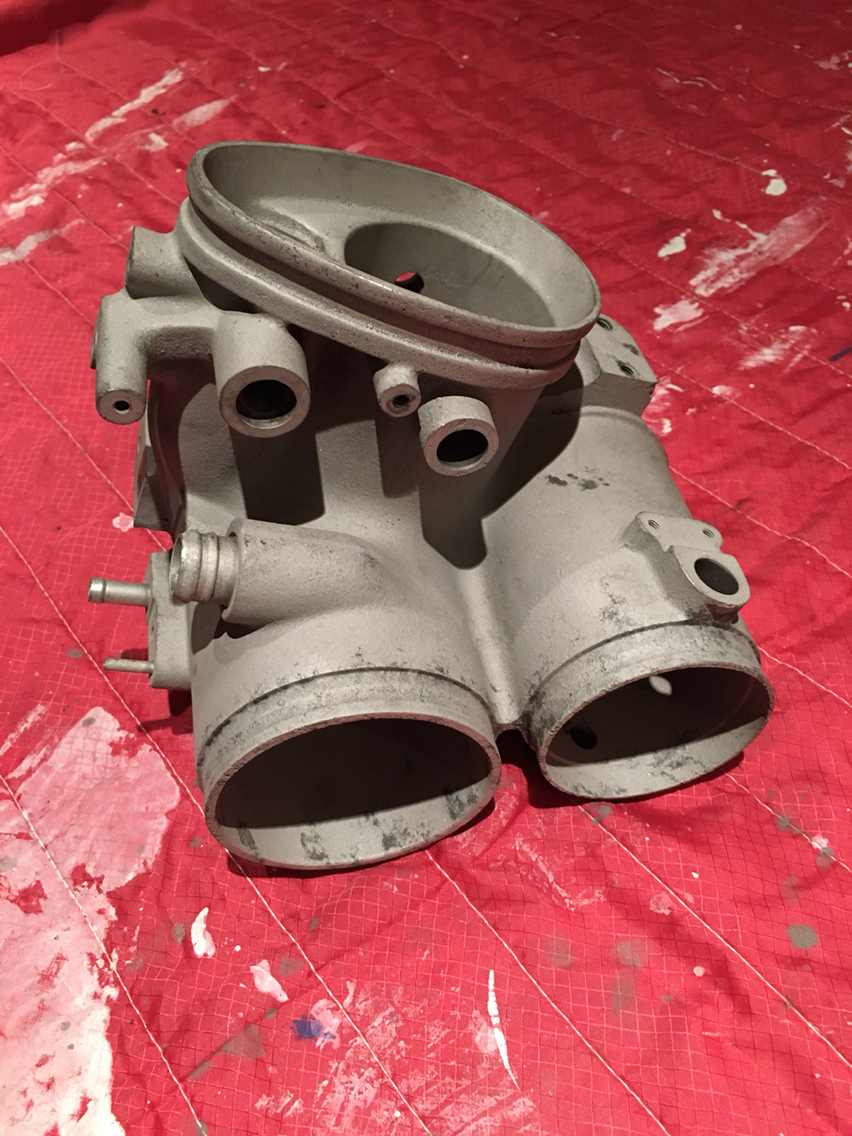
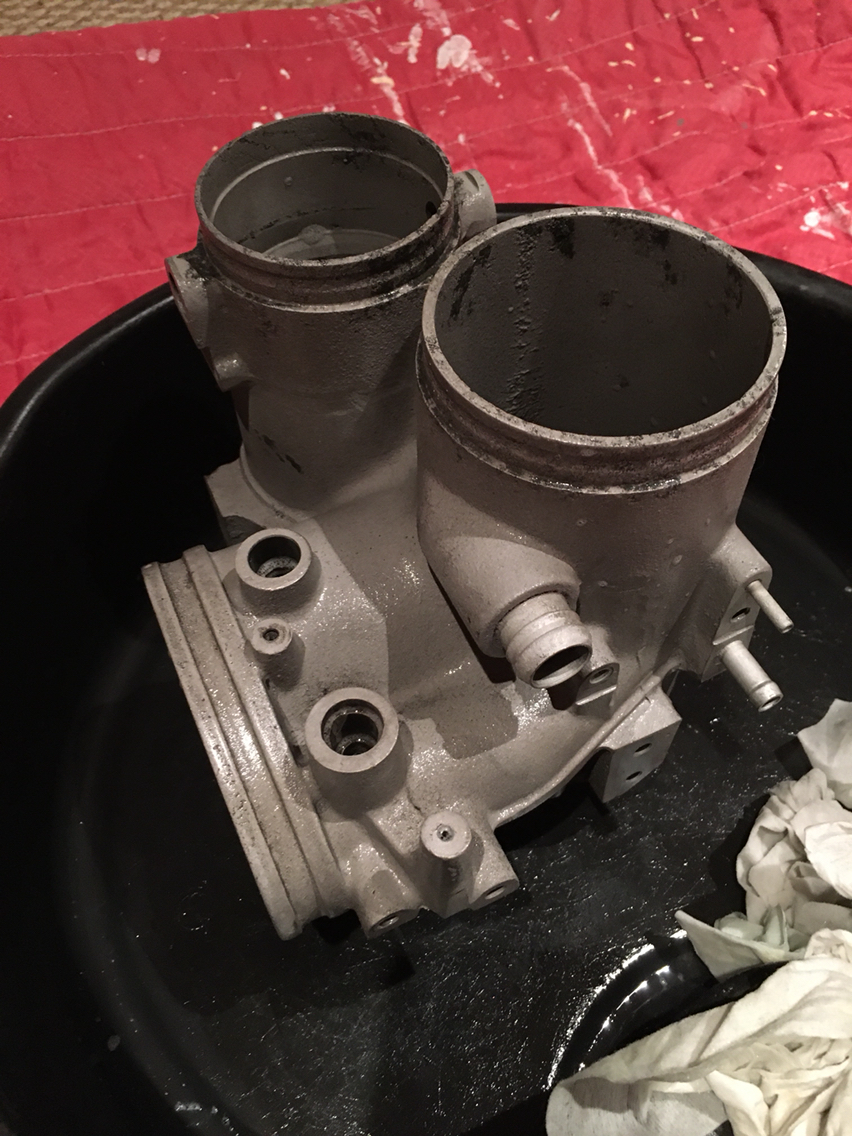
Well that was a few hours. And i still can't tell what I'm looking at. So in frustration, i used the call a friend option....and off i went, to the blasting cabinet.
Now- aluminum oxide is a little harsh. But what I'm not saying, is that i went out to my driveway and shot it with walnut shells----and that did nothing for me. I gave up....so what i wanted to do was to get aggressive in the cabinet. And then come home and do some corrosion protection....and then get back to sanding when i can see more clearly where it needs attention.
And here we are out of the cabinet...
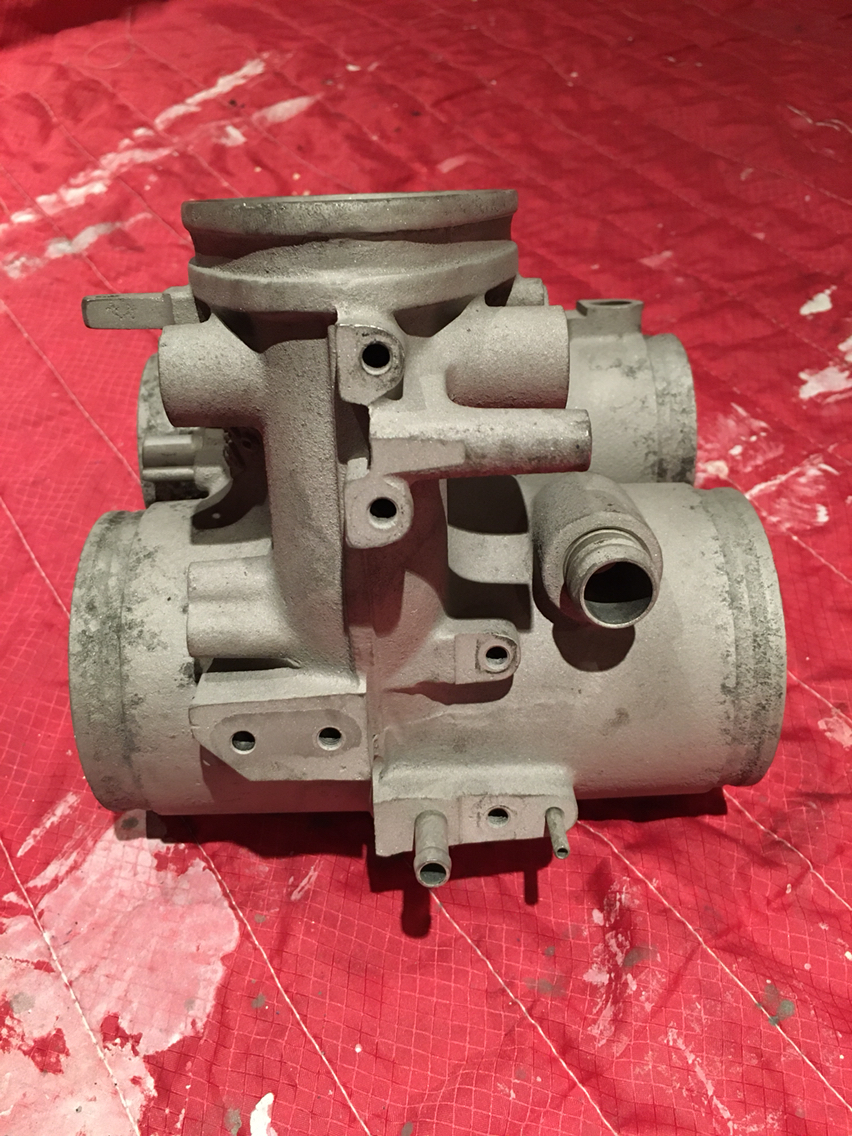
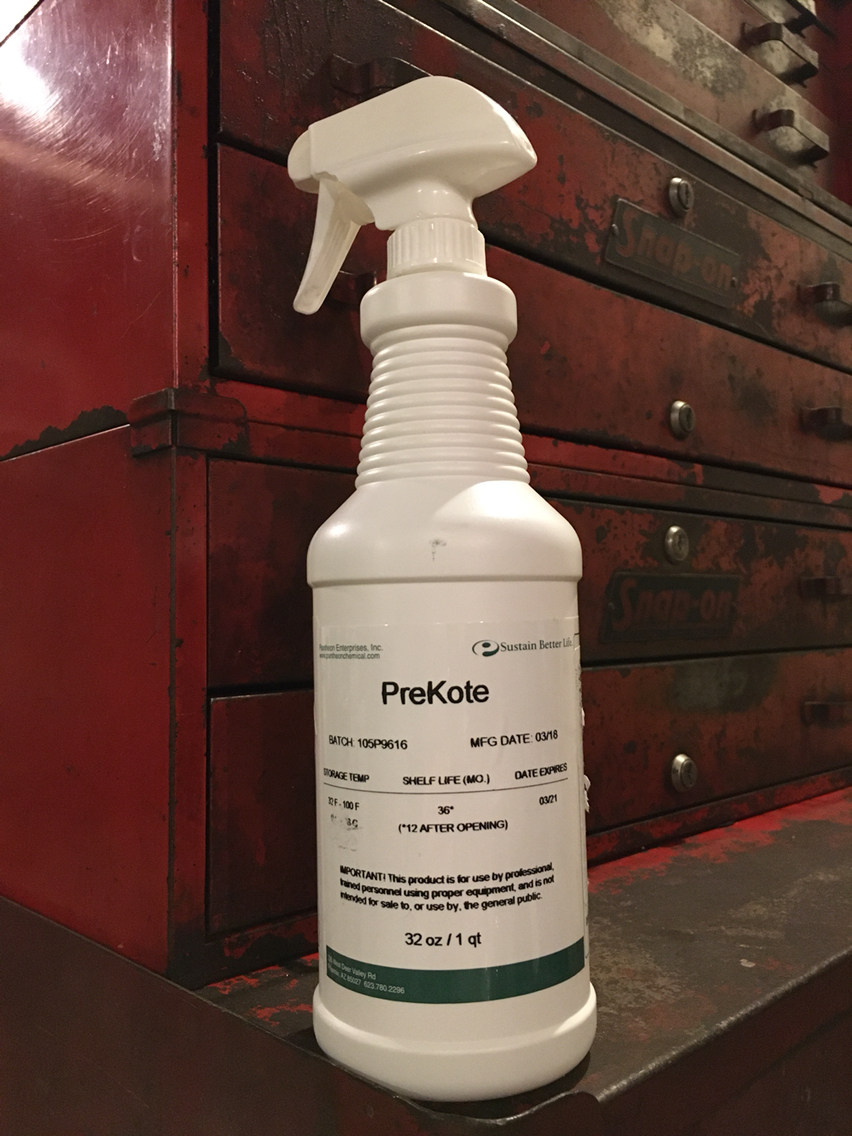
I got it home and blew it off with the air hose and then sprayed it with Prekote
And now it's drying...
That's all for now. When i get a chance this week I'll get back to sanding and prepping. And then it'll be time to Cerakote...
Rob, I thought we agreed these were magnesium not aluminum.
I have access to a vapor honing machine. Pretty much a wet sandblast using a supper fine glass beed and water. It doesn't remove grime so blasting is required first but leaves an amazing finish when done.
I use vapor blasting (very fine glass bead) for the outers of these and the engine parts but I wash very carefully and prefer to plug up anything thats internal to the engine/feed to bearing surfaces... the bead is so fine it's tricky - the case & head on my 356 project came out lovely and minty fresh tho
I use vapor blasting (very fine glass bead) for the outers of these and the engine parts but I wash very carefully and prefer to plug up anything thats internal to the engine/feed to bearing surfaces... the bead is so fine it's tricky - the case & head on my 356 project came out lovely and minty fresh tho
Nice,
Yes you have to wash and dry everything very carefully. I did not see any dimensional changes but made covers to prevent any honing of tight tolerance machined surfaces to be safe. My friend did his engine case as well. He clamped it together and made covers to prevent any beed from entering the case internals. Not sure I would do it unless it was heavily oxidized and I want it looking fresh again. The natural oxide skin when not disturbed is always best left untouched IMO.
I don't know. But it's the version from the early literature- we discussed this waaaaaaay back in this thread...don't know if you saw that part...these threads get lengthy!
Anyway. The interesting thing is the change Porsche made to the casting- they didn't change the part number...which i found odd.
Have never seen another - not on any car that has passed through. So I'm sure it's a very very rare bit...if someone wants to take it off my hands and finish the restore themselves...just putting it out there....it's 10k usd as is where is.
Come get it!
Short of that....back to my fun...
Although this arrived yesterday:
So all else will once again go on the back burner...
The nice post I had written was eaten and I don't feel like redoing it.
Last week I ambled out to the garage to reinstall the blower motor in the engine bay so I could have a little heat on the 40-degree drive up to the local Porsches & coffee on Sunday. While peering into the mechanical abyss, I decided against that course of action as one of the mounting bosses needed to be re-epoxied into the intake manifold. In my normal fashion, I did the next best course of action - I removed all of the fuel injectors.
(Instead I took the Boxster up to the meet and enjoyed having the top down. I'm sure I looked like an idiot to someone. )
With those sent off to WitchHunter for servicing, I found the intake stacks to be less than pleasing for overall cleanliness. I also learned that they are not easily removed while the intake manifolds are also in place, so those were pulled too. This led to the discovery of a huge pool of oil in the lower crossover tube, bisected by the resonance flap. Cleanup in Aisle 12...
So now I've fallen victim to this... madness.
The intake stacks and manifolds are cleaned thoroughly inside and out, they all had a nasty layer of carbonized oil inside.
The boots between the manifolds and stacks, and manifolds and crossovers are being replaced.
I diagnosed the Pierburg and Bosch solenoids to be in bad condition, the Pierburg making no action and the Bosch only partial. Turns out the 9v battery I pulled from "Batteries tested good with multimeter" bin was not, in fact, good enough for testing. A fresh battery showed both solenoids working as intended.
The throttle body was cleaned thoroughly, and the pinhole for vacuum now free of the oily crud buildup on both sides of the plate.
The AFM has been rid of the oily buildup.
The resonance flap vacuum pod easily functions.
Curiously I discovered I do not have a vacuum reservoir at all. Am I missing this, or is it chalked up to differences in the C2 vs C4 setups? PET doesn't note any variation on what the reservoir applies to.
Are the bearings for the throttle plate on the late (single plate) throttle body the same as the large plate on the early throttle body? Mine came with the late/composite setup from the factory (the C2 Targa built immediately after mine also has this). I'll go re-re-reread the thread.
For a third oddity, unless I'm totally blind or just stupid (maybe a bit of both), I could not find any peening on screws for either the throttle plate or the resonance flap. The resonance screws came out without any slivers protruding from the pivot rod, and the threads on both parts are clean. I haven't yet removed the plate from the throttle body pending confirmation on the bearings. I will, however, follow the practices set here and deform the ends prior to reinstallation to the car.
Once the intake is completed, onto the fuel lines - the sheathing on the supply line to the left rail is looking like a pelican's neck pouch.
Curiously I discovered I do not have a vacuum reservoir at all. Am I missing this, or is it chalked up to differences in the C2 vs C4 setups? PET doesn't note any variation on what the reservoir applies to.
Knowing you have a nice clean intake with no leaks, will totally be worth all the effort! Adding the vacuum reservoir alone you will find some lost power. There�s no way the flap was being opened at 5500rpm without vacuum.
I will, however, follow the practices set here and deform the ends prior to reinstallation to the car.
And loctite 270. Cleaning the throttle body and plate is one thing. Dismantling it is a recipe for disaster and completely unnecessary. Just ask any of the 997GT3RS-4.0 owners that lost their engines when their throttle butterfly screws came loose. They were kinda lucky in that Porsche to had cover the replacement costs. We don't have that luxury.
And loctite 270. Cleaning the throttle body and plate is one thing. Dismantling it is a recipe for disaster and completely unnecessary. Just ask any of the 997GT3RS-4.0 owners that lost their engines when their throttle butterfly screws came loose. They were kinda lucky in that Porsche to had cover the replacement costs. We don't have that luxury.
Applying threadlocker was a given, and just ordered the 270.
Loctite 270 and resonance flap seals (thanks Ubipa for linking those in #294) arrived. Also did some digging on for late throttle body.
The throttle bearings for the late TB are not identical to the large flap on the early TB. They’re an INA F-210146, which equates to an HK 1014 2RS. Identical internal and external diameters but 2mm wider. Now it’s time to acquire those and document for posterity.

 10-26-2020, 08:01 PM


 )
)
