
987.2 Thermostat Replacement
 03-31-2019, 06:54 PM
#1
Rennlist Member
Thread Starter
I'm in the middle of replacing my water pump and I'm planning on swapping the thermostat too. The shop manual shows the need to lower the engine (not completely remove), mainly to be able to remove the coolant pipe (1) going into the thermostat housing.

I've read tons of people replacing the thermostat on the 987.1 which is more straightforward, and for others who've done it on their 987.2, seems like it was done by an indy shop or the dealer. Lowering the engine requires other special tools and seems beyond the scope of your typical DIY task.
So my question is, has anyone removed the thermostat in their 987.2 and if so, were you able to do so without lowering the engine?
 04-01-2019, 12:42 AM
#2
Rennlist Member
Thread Starter
I think I figured it out. There's 1 last E10 bolt that's at the top of the thermostat housing but hard to access since there's not much room between it and the firewall.
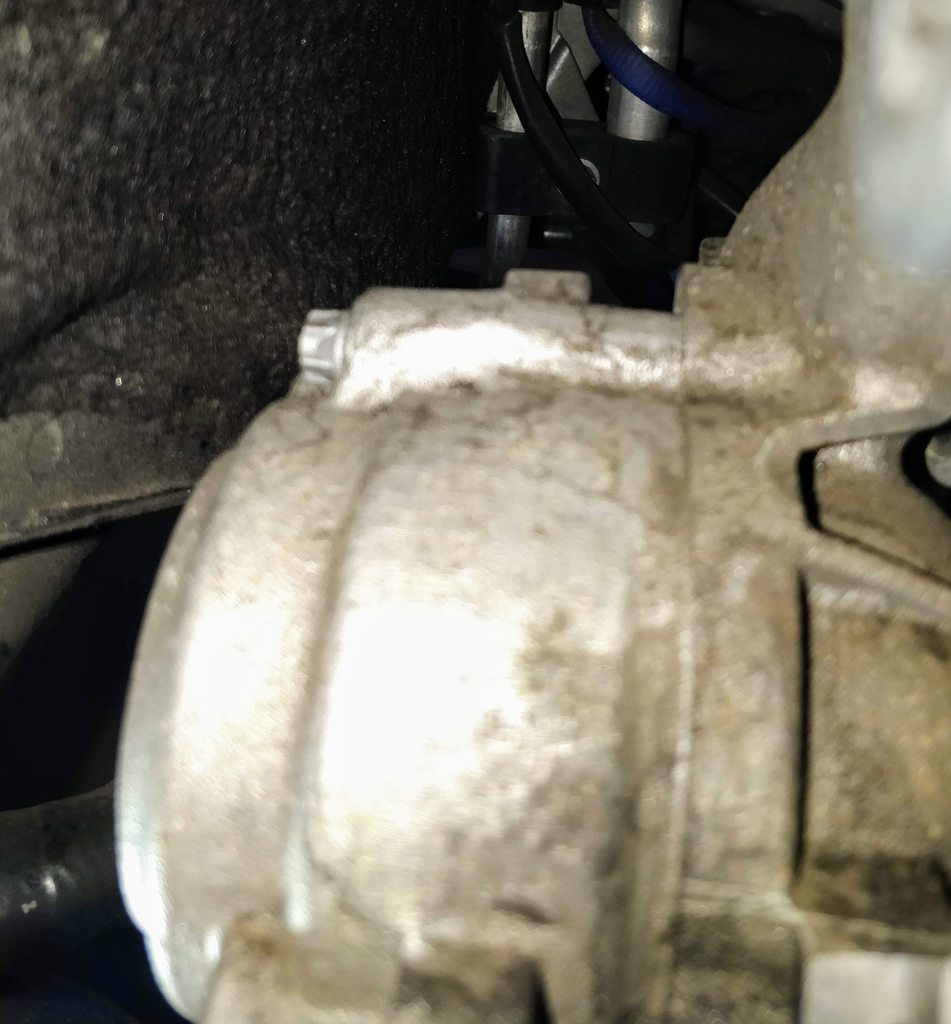
I can get a socket on it (shiny part in the middle of the photo) but not enough room to get a ratcheting socket wrench on there. My ratcheting E10 wrench is too big so I'll need to get a non-ratcheting type.
Lowering the engine would make this easier but right now I'm thinking it's possible to do it without going that far.
04-01-2019, 01:37 AM
#3

I have no information to help you with this but I appreciate you posting. I'm a diy guy and use the help of forums a lot. It seems like a lack of information for the 987.2 exists for diy projects. Glad to see information posted.
04-01-2019, 04:11 PM
#4

I didn't drop the engine to change my t-stat when I did the water pump. Glad you figured it out.
04-01-2019, 04:30 PM
#5
Rennlist Member
Thread Starter

Makes sense, otherwise it's an unreasonable amount of work to replace what's essentially a maintenance item. The wrench should be coming tomorrow so I'll update this thread.
04-16-2019, 12:23 AM
#6
Rennlist Member
Thread Starter
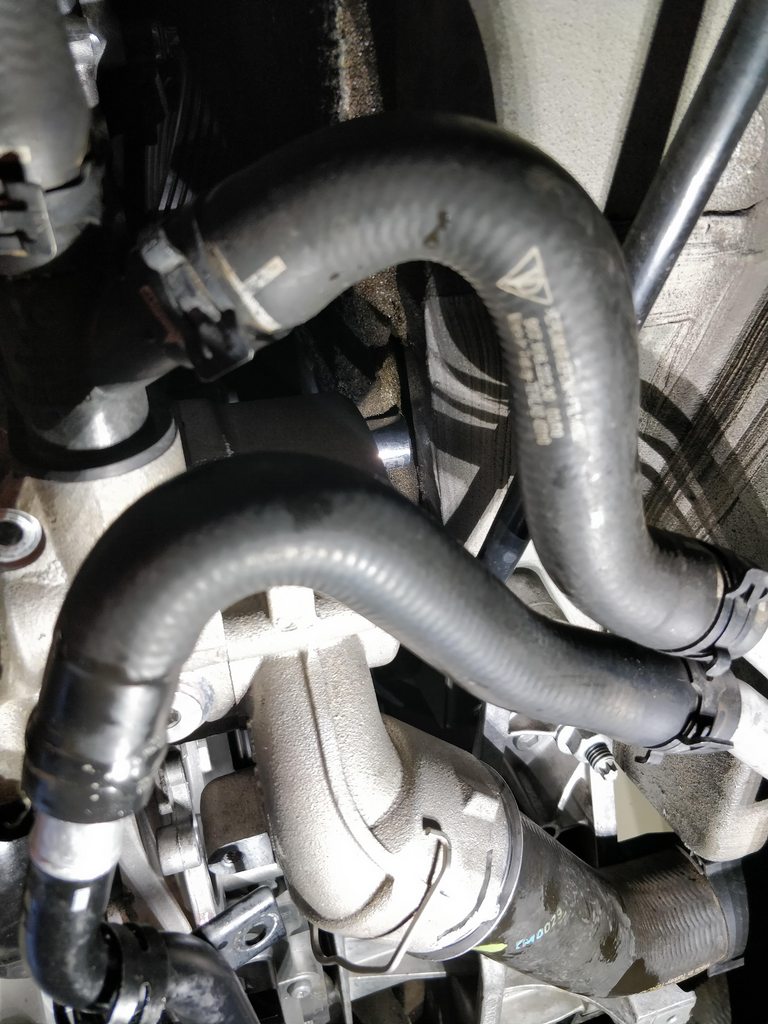
Just to close this out, removing the t-stat housing just requires getting the 3, E10 bolts out. The one at the top needs a regular box-end wrench since access is tight. Once the housing is out, the t-stat easily popped out.
Attachment 1347110
Attachment 1347111
Attachment 1347112
Definitely want to replace both the O-ring for the t-stat and the housing seal, but you can leave the Dichtring shown in the lower left. Removing it is a royal PITA and doesn't seem like it was meant to be a serviceable part.
Attachment 1347113
I tried picking it at, grabbing it with pliers, and I just couldn't get it to budge. I then decided I should just leave it, except by this point it was already too damaged.
Attachment 1347114
So went over to my buddy's place who's got way more tools than me, and ended up using this monstrosity to pull it out while using a vise to hold it. It's a slide hammer that he bought from Harbor Freight a long, long time ago.
Attachment 1347115
Attachment 1347116
Then to install the new one, we had to press it in while making sure it didn't get stuck as the clearance is really tight. So yeah, don't do this.
Attachment 1347117
The following users liked this post:
Roy Inge (05-09-2023)
Trending Topics
06-05-2019, 05:27 PM
#8
Instructor

I'm getting ready to replace the water pump and thermostat in my 2010 Cayman S and now I'm at the point of dealing with that 9A1-106-558-00 Thermostat Seal aka Dichtring. I'm thinking an easier way of dealing with the replacement is to heat the aluminum thermostat housing and freeze the new seal. When the housing is hot I think the old seal will come out easier (possibly with a few relief cuts in the steel metal ring) and I'm hoping the new frozen seal will drop into (or lightly tap into) the hot thermostat housing. This is all due to the different thermal expansion rates of the aluminum housing vs. steel dichtring.
Two questions:
1. If you buy a new thermostat housing does it include the 9A1-106-558-00 Thermostat Seal aka Dichtring already pre-installed?
2. Do any of you have any thoughts on my idea of heating the thermostat housing and freezing the new seal?
My car is approaching 90k miles and I really don't want to leave that original seal in the thermostat housing. Thanks for any help you can provide!
06-06-2019, 02:15 AM
#9
Rennlist Member
Thread Starter

Otherwise I think heating the housing will definitely help. Just be aware the Dichtring has a rubber gasket as well which you don't want to damage, but unless you're using liquid nitrogen, probably isn't an issue in terms of it becoming brittle.
06-27-2019, 10:46 AM
#10
Instructor
I'm going to guess the Dichting isn't supplied with a new housing, but I recommend calling a supplier and verifying, then updating us. Because if it does include it, then question #2 is (thankfully) moot.
Otherwise I think heating the housing will definitely help. Just be aware the Dichtring has a rubber gasket as well which you don't want to damage, but unless you're using liquid nitrogen, probably isn't an issue in terms of it becoming brittle.
Otherwise I think heating the housing will definitely help. Just be aware the Dichtring has a rubber gasket as well which you don't want to damage, but unless you're using liquid nitrogen, probably isn't an issue in terms of it becoming brittle.
I rigged up a simple dichtring puller and when combined with a thermostat housing heated to ~275 degrees F the old dichtring popped out without difficulty and the new dichtring went in with a few taps of the hammer and a large socket. The car has been back together for a few weeks now and no issues from the parts that were replaced, including the dichtring.
Hopefully this info helps some folks in the future as there is very little info on the web regarding replacing that 9A1-106-558-00 thermostat seal / dichtring!

Last edited by Kaefer; 06-27-2019 at 02:52 PM.
The following users liked this post:
Roy Inge (05-09-2023)
06-27-2019, 01:51 PM
#11
Rennlist Member
Thread Starter
06-27-2019, 02:31 PM
#12
Instructor
Edit: I used our BBQ grill to heat up the thermostat housing and an infrared thermometer to check the temp of the housing. I thought about using the kitchen oven but my wife was around and I didn't want to stink up the house! It turns out the process didn't really create any weird smells (I had cleaned the housing first to remove any traces of coolant) so a kitchen oven could probably be used without a problem.
Last edited by Kaefer; 06-27-2019 at 02:35 PM. Reason: Forgot some info
09-23-2019, 07:00 PM
#13

Love threads like this.
So to be clear @kiznarsh you did NOT drop the engine at all? And there was enough clearance from the bolt to the firewall to allow you to back the bolt out all the way?
It might've been a good thing your ratcheting E-wrench didn't fit. I've seen folks use those in tight spots where the get the bolt partially backed out, then realize they can't get it ALL the way out.... and now they have the wrench stuck on the bolt head with no way to thread it back IN to remove the wrench.
09-23-2019, 11:47 PM
#14
Rennlist Member
Thread Starter
Love threads like this.
So to be clear @kiznarsh you did NOT drop the engine at all? And there was enough clearance from the bolt to the firewall to allow you to back the bolt out all the way?
It might've been a good thing your ratcheting E-wrench didn't fit. I've seen folks use those in tight spots where the get the bolt partially backed out, then realize they can't get it ALL the way out.... and now they have the wrench stuck on the bolt head with no way to thread it back IN to remove the wrench.
So to be clear @kiznarsh you did NOT drop the engine at all? And there was enough clearance from the bolt to the firewall to allow you to back the bolt out all the way?
It might've been a good thing your ratcheting E-wrench didn't fit. I've seen folks use those in tight spots where the get the bolt partially backed out, then realize they can't get it ALL the way out.... and now they have the wrench stuck on the bolt head with no way to thread it back IN to remove the wrench.
I didn't mention it here but in my main thread, I marked the bolt where I was able to use my 1/4" drive torque wrench after it was snug, then noted how much it rotated. I then used that as a guideline for torquing the other 2 bolts since there's no room for a standard torque wrench. No leaks so far.
09-24-2019, 12:26 PM
#15
Correct, the engine was not dropped at all and there's sufficient clearance to remove the bolt. It's tight, but definitely doable.
I didn't mention it here but in my main thread, I marked the bolt where I was able to use my 1/4" drive torque wrench after it was snug, then noted how much it rotated. I then used that as a guideline for torquing the other 2 bolts since there's no room for a standard torque wrench. No leaks so far.
I didn't mention it here but in my main thread, I marked the bolt where I was able to use my 1/4" drive torque wrench after it was snug, then noted how much it rotated. I then used that as a guideline for torquing the other 2 bolts since there's no room for a standard torque wrench. No leaks so far.
If one were just to do the T-stat.... can you get to it from under the car? Or does it require getting at the front of the engine via the access panel?