When you click on links to various merchants on this site and make a purchase, this can result in this site earning a commission. Affiliate programs and affiliations include, but are not limited to, the eBay Partner Network.
Has anyone changed their belt DIY? How do you get the crank oil line off to remove and replace the belt. Can it done with engine in the car? Service manual shows procedure for regular 911 without the crank pulley oil pipe. Thanks for any help.
OK. Confirmed. The belt has been successfully replaced on my 991.2 GT3. The info needed to do so is in this thread, it�s just not all in one place. Here is my attempt at documenting the procedure, hopefully this will be of benefit to those attempting a belt replacement..
My bumper was already removed, but once I figured out the secret, I got this done in about an hour.
1. Open rear deck lid.
2. Remove tail lights, bumper, and crash bar.
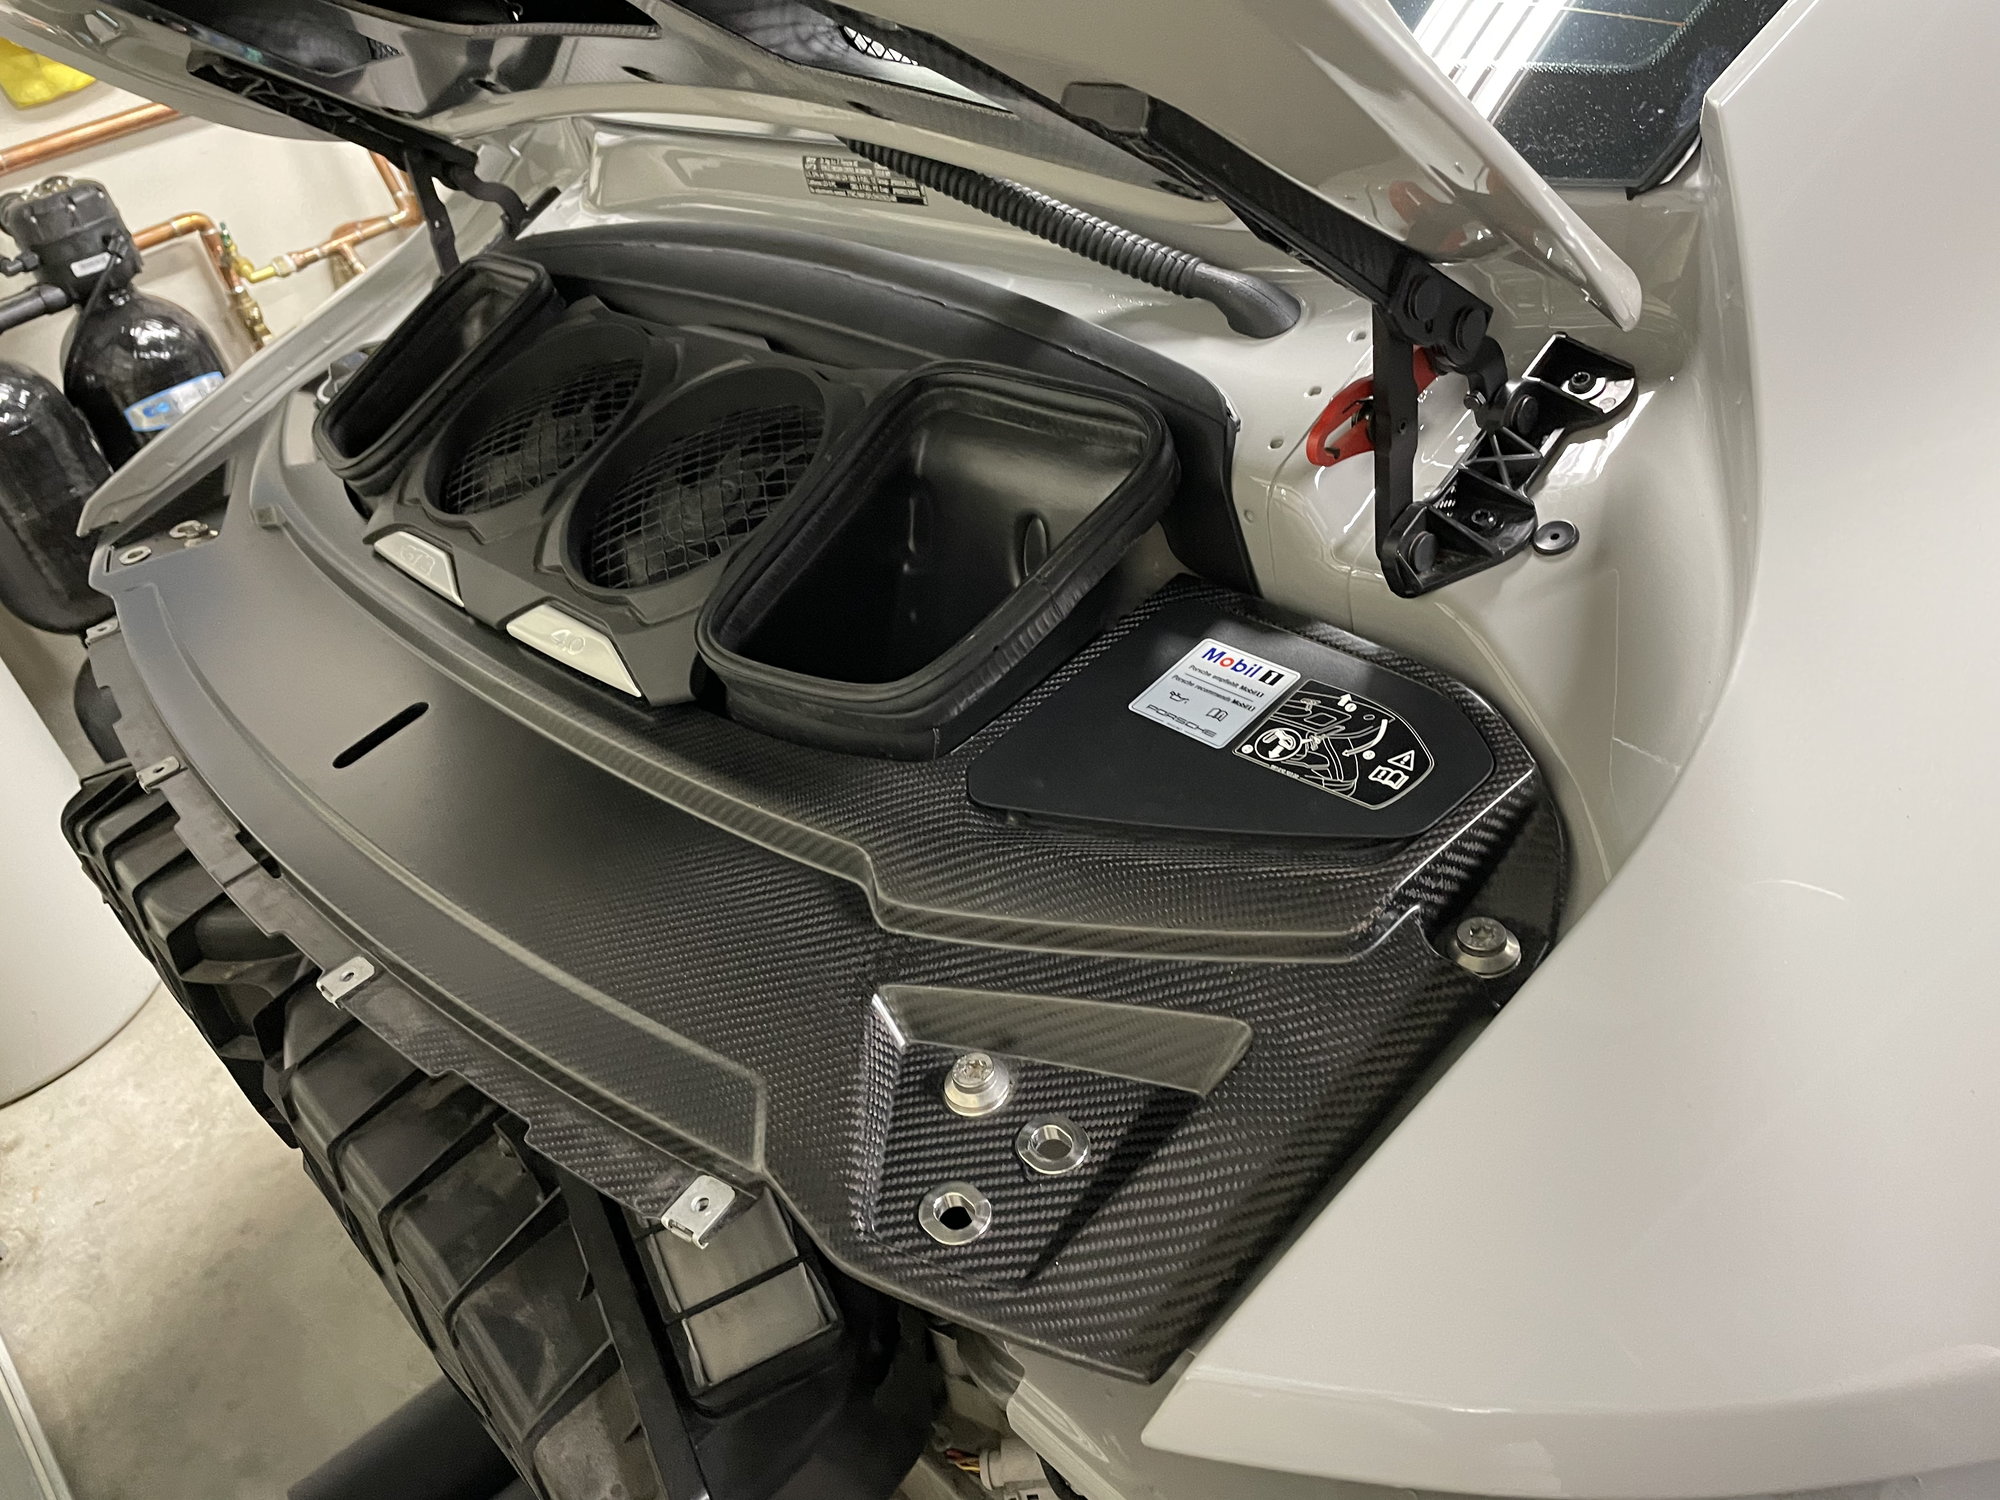
3. Remove fans and carbon fiber engine cover.
4. Remove air box, this will give you access to the top of the belt as well as the tensioner. (You will probably find the tensioner damper leaking, so you can replace at the same time.)
5. Remove the access plate, secured with 3 bolts, 10mm wrench required. You can access from above the muffler. Removing the diffuser will also make access to the lower part of this install easier.
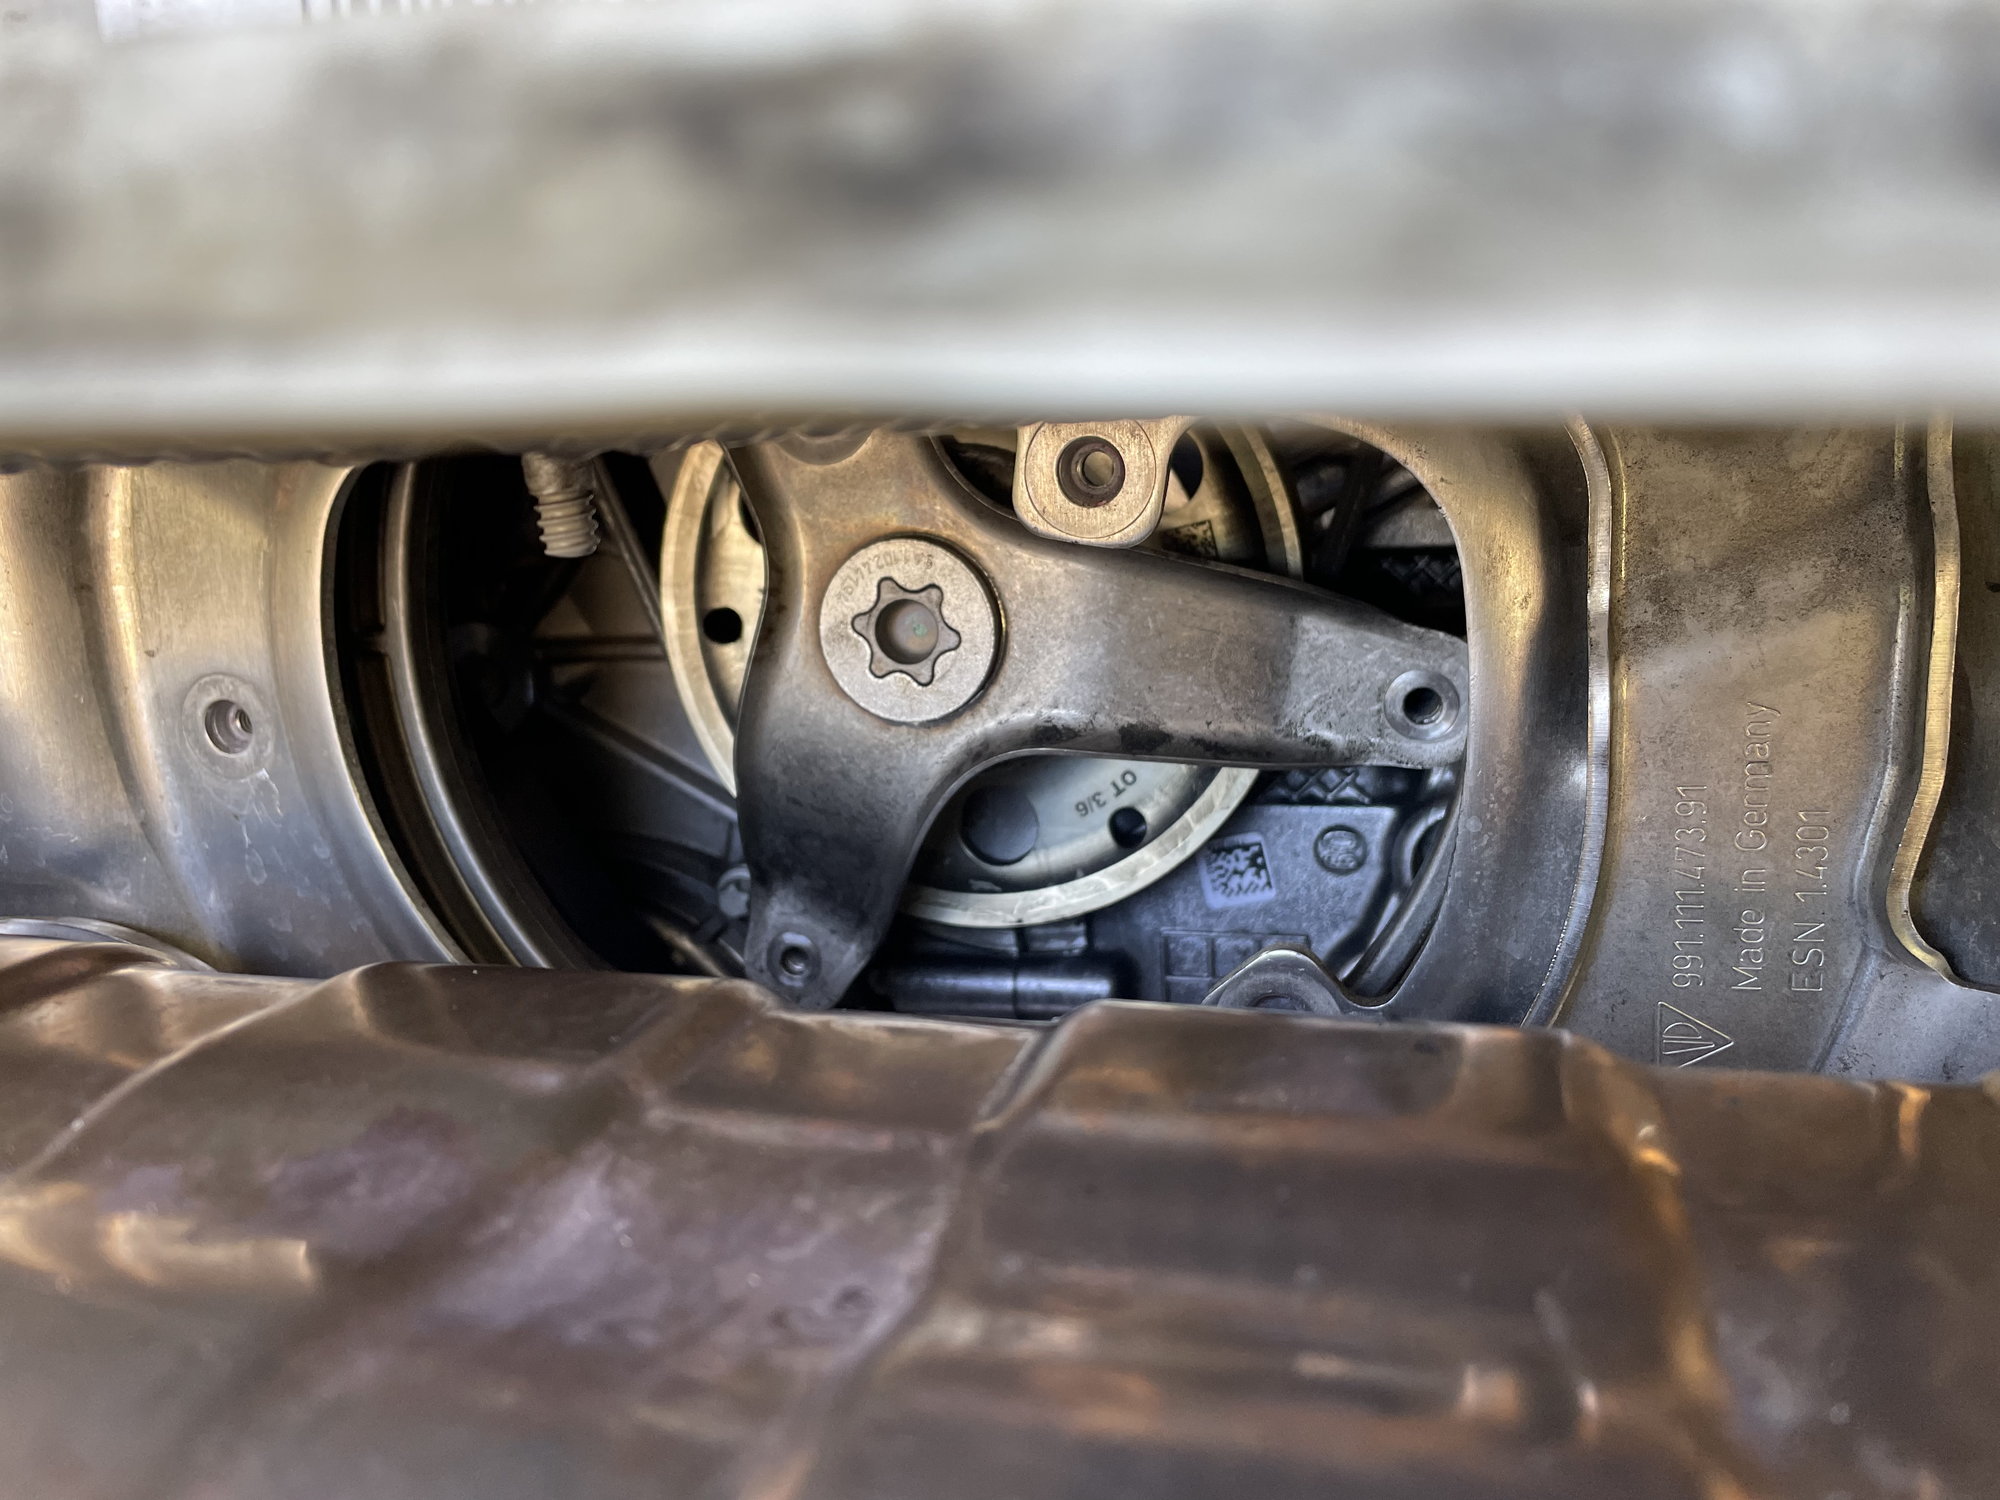
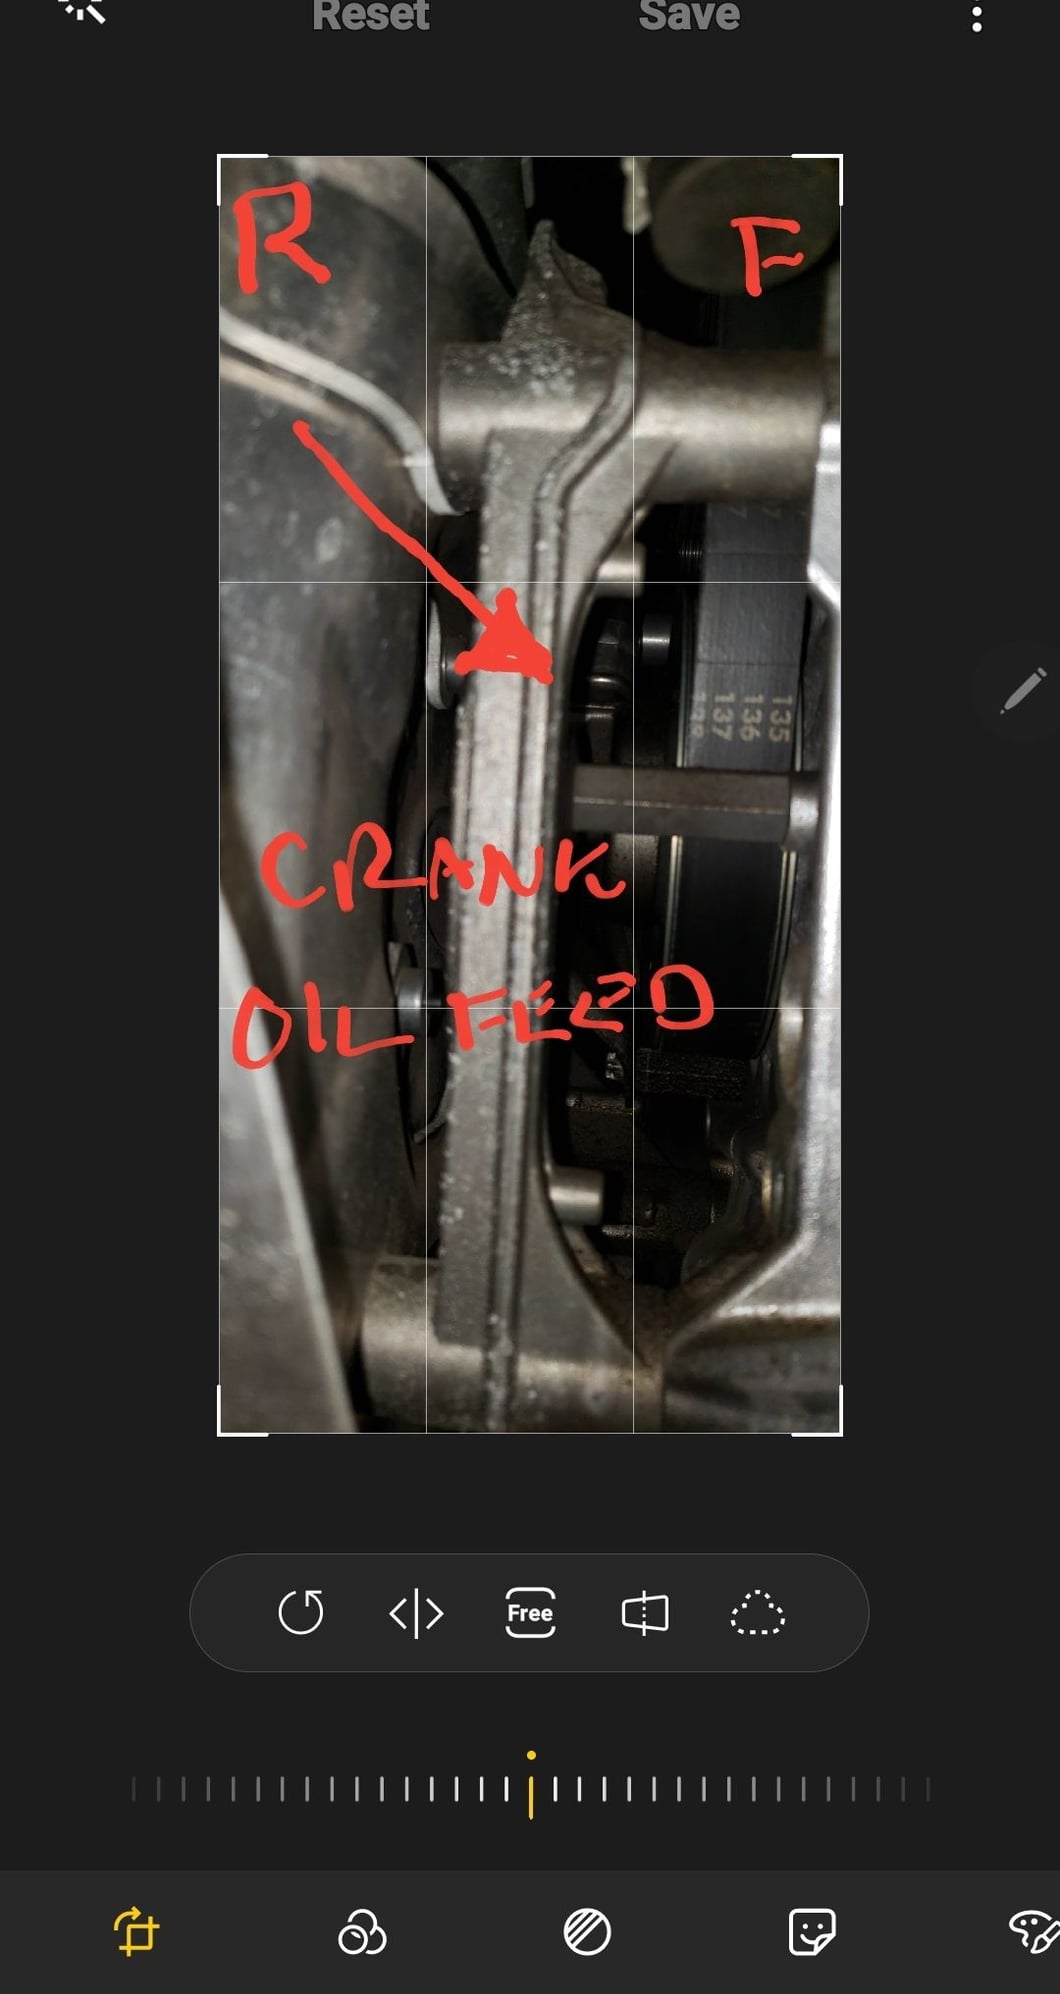
6. Remove the 2 E-Torx (E11) fasteners that are on 2 of the legs of the oil feed retaining bracket. (Shown already removed in the photo below). There is no need to remove the hex shaped standoff posts.
7. Remove the large bolt that secures the top leg of the oil feed retaining bracket. 16mm socket and extension required. (I supported the bottom of the engine with a floor jack and block of wood, but is probably not necessary.)
8. Using a drift and hammer, knock the spacer out of the way. This is what fooled me on the first attempt. This spacer looks very much like it is part of the casting. It will come out, but it�s a tight fit.
9. Wiggle the oil feed retainer out through the opening in the rear access hole.
10. Release the belt tension by rotating the tensioner with a 30mm wrench or crescent wrench. You can now pull the belt out. You will have to squeeze it past the oil feed line, but it will fit.
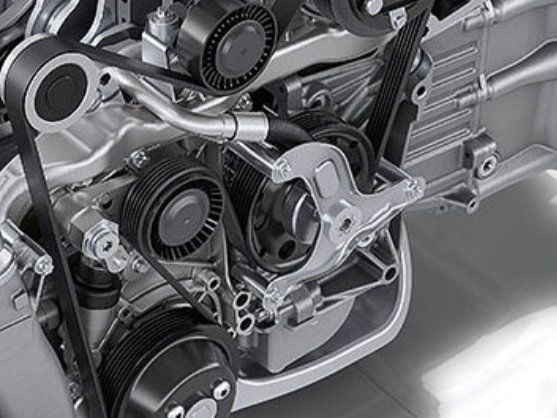
11. Installation is basically the reverse operation from here. Install the belt, snake past the oil feed line and make sure the routing matches the diagram below.
12. Reinstall the oil feed retainer bracket. Start the E-Torx screws, but do not tighten yet, because you will not be able to get all of the bolts aligned unless left loose.
13. Reinstall the spacer, this is the hardest part, because it will not go back in. You can gain the needed clearance by using a long pry bar, and leveraging between the rear sub frame and the 30mm hex nut on the tensioner. This will allow you to slip the spacer back into place. Reinstall the 16mm bolt. Torque all fasteners.
14. Reinstall the rest of the things you removed and enjoy.
I don�t know how to do it DIY, but I do know that my dealer just did mine under warranty (tensioner failed). And, I know that they did not pull engine. So there must be a way to do it with engine in.
I believe that you only need to remove (or maybe just loosen) the bracket that holds the oil line. Take a careful look at the routing -- it looks to me like the oil line does not pass through the center of belt, topologically speaking:
Subbed. I just ordered my serpentine belt. Also tackling this myself. From what I gathered reading. Remove one bolt. Turn tensioner clockwise until it stops, remove belt. It can be cut. Allow tensioner back to normal position slowly. Then throw the new one on and when ready turn tensioner again and release slowly.
if I�m wrong please feel free to correct me. I won�t know exactly what�s going on until belt gets here and I start.
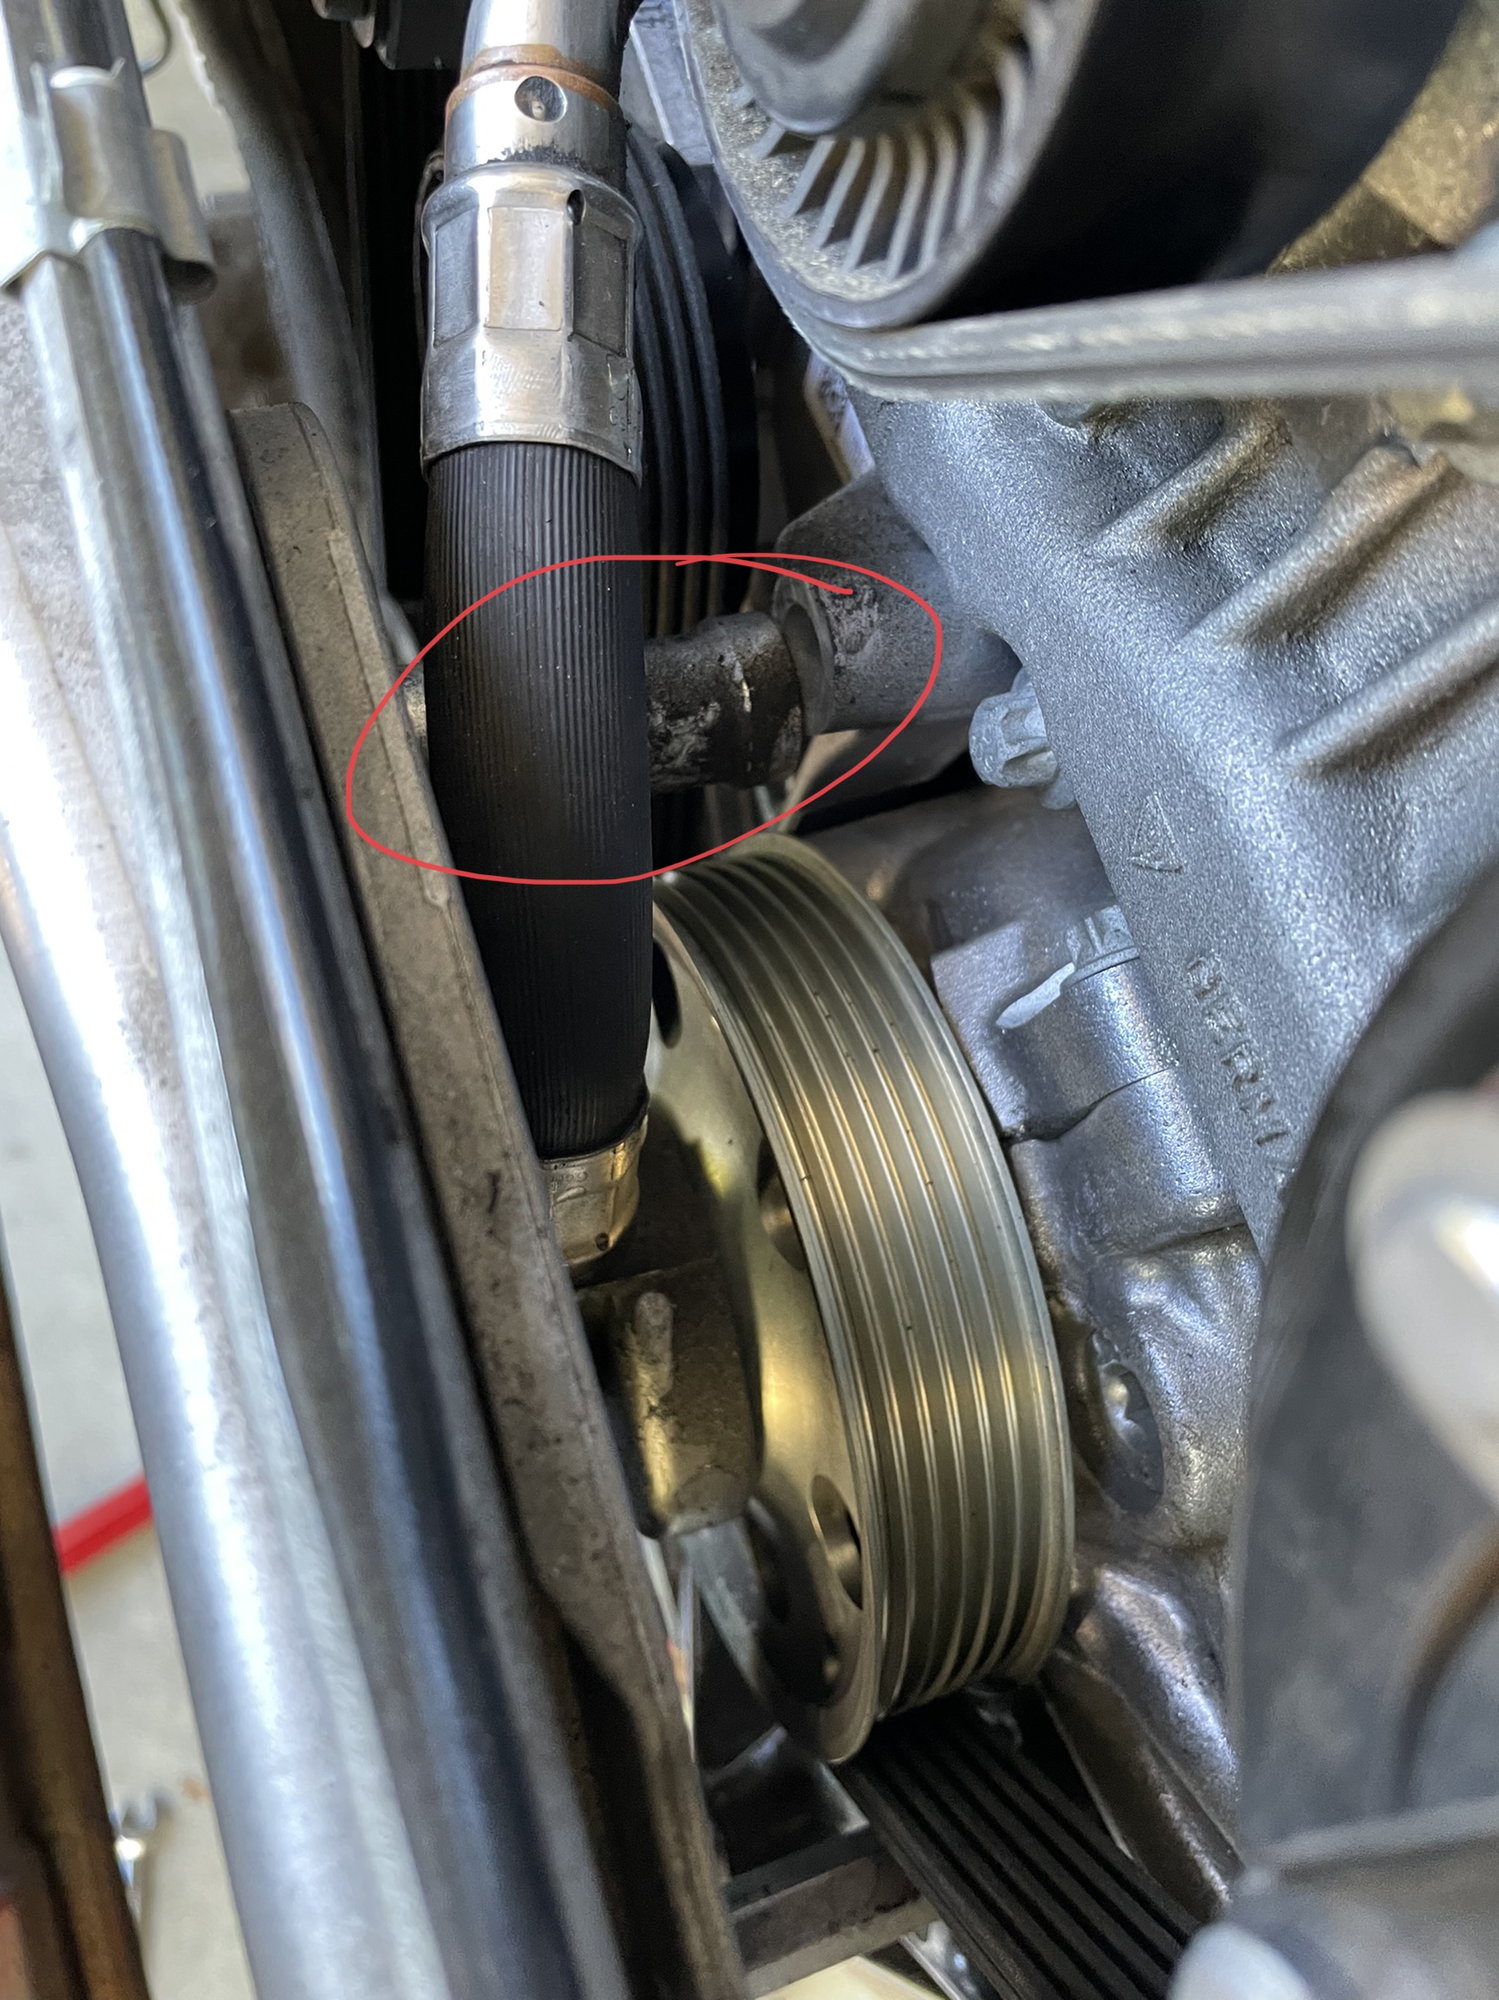
Thanks Tubwreck. That is a great shot of the belt. Problem is nothing is easy to get to as access to tri bracket is almost non-existent. See photo where oil line connects to crank.
Regular 911 doesn’t have the crank oil feed. Job relatively speaking would be easy. GT3 is not the same. My advise so far, is don’t cut your belt. I was glad I didn’t cut mine.
Regular 911 doesn�t have the crank oil feed. Job relatively speaking would be easy. GT3 is not the same. My advise so far, is don�t cut your belt. I was glad I didn�t cut mine.
Take some pictures when you do it. Let me know if center exhaust must be removed and how that oil feed comes off the crank pulley to get the belt on and off.
Oil feed does not need to be removed. Just remove the bracket/spaceers around crank pulley. Once bumper is off takes all but 5-10 mins to exchange the belt. $1,100 is laughable
Take some pictures when you do it. Let me know if center exhaust must be removed and how that oil feed comes off the crank pulley to get the belt on and off.
will do
Originally Posted by Airbag997
Oil feed does not need to be removed. Just remove the bracket/spaceers around crank pulley. Once bumper is off takes all but 5-10 mins to exchange the belt. $1,100 is laughable
 03-20-2022, 12:09 AM