
Replacing the P-O-R-S-C-H-E emblem.
 04-16-2014, 08:06 PM
#16

 04-16-2014, 08:54 PM
#17
 04-17-2014, 04:36 PM
#19
I was going to have the lettering painted to match the Platinum Satin wheels, but that is just too much work for too little payoff. I'm going to slap the black on and see how I like it.
04-18-2014, 11:10 AM
#20
Track Day

Join Date: Apr 2011
Posts: 21
Likes: 0
Received 0 Likes
on
0 Posts
1) Take some 2" blue painters tape and lay it as snug as you can all the way across the bumper; use light pressure with a pencil on the back of the tape of highlight the outlines of the Porsche letters.
2) Lay a second line of tape just below and just above the first, snugging the seams so there is 6" of tape.
3) Mark vertical hash lines between the seams of the center piece of tape and the ones above and below. This will get you your horizontal alignment later.
4) Remove the first piece of tape and then go about removing the letters from your car.
5) Lay the first piece of tape on a smooth surface like an old piece of formica (sticky side down) and carefully place the letters you removed from the car on top of your pencil outlines. Use an exacto knife to trim around the exterior profile of each letter.
6) Place the tape back on the car lining up your hash marks and place your new letters.
I have a buddy who used thick cardboard to make two rectangular templates with a hole big enough for the letters. He then sandwiched about 1/2" of modeling clay in between them, making a mold which he pressed against the old letters on the car. Once he removed the old letters, he placed the new ones into the impressions in the clay and just laid it back on the car (he used some removable foam weatherstripping laid horizontally under the template and just rested it there and tilted it forward to place the new ones). It worked pretty slick, but the replacement letters have to be identical in size.
04-18-2014, 11:34 AM
#21
1) Take some 2" blue painters tape and lay it as snug as you can all the way across the bumper; use light pressure with a pencil on the back of the tape of highlight the outlines of the Porsche letters. 2) Lay a second line of tape just below and just above the first, snugging the seams so there is 6" of tape. 3) Mark vertical hash lines between the seams of the center piece of tape and the ones above and below. This will get you your horizontal alignment later. 4) Remove the first piece of tape and then go about removing the letters from your car. 5) Lay the first piece of tape on a smooth surface like an old piece of formica (sticky side down) and carefully place the letters you removed from the car on top of your pencil outlines. Use an exacto knife to trim around the exterior profile of each letter. 6) Place the tape back on the car lining up your hash marks and place your new letters. I have a buddy who used thick cardboard to make two rectangular templates with a hole big enough for the letters. He then sandwiched about 1/2" of modeling clay in between them, making a mold which he pressed against the old letters on the car. Once he removed the old letters, he placed the new ones into the impressions in the clay and just laid it back on the car (he used some removable foam weatherstripping laid horizontally under the template and just rested it there and tilted it forward to place the new ones). It worked pretty slick, but the replacement letters have to be identical in size.
04-19-2014, 08:13 AM
#22
04-19-2014, 08:43 AM
#23
Racer
Join Date: Jan 2014
Location: You Don't Mess with the Zohan
Posts: 487
Likes: 0
Received 3 Likes
on
3 Posts
ez and cool way out to get older style emblem from 356
Spray paint it any color you like
Sand down the pins and use adhesive
http://www.ebay.com/itm/Porsche-356-...p2054897.l5660

Spray paint it any color you like
Sand down the pins and use adhesive
http://www.ebay.com/itm/Porsche-356-...p2054897.l5660
04-19-2014, 08:45 AM
#24
the more visible the Porsche logo or a red S................the more likely the fat pig rednecks in their uninsured pickup trucks try to hump your rear end at traffic lights just to **** you off  ........... they hate Ducktails too
........... they hate Ducktails too
The following users liked this post:
tourenwagen (11-24-2020)
04-19-2014, 10:10 AM
#26
04-19-2014, 10:37 AM
#27
Burning Brakes
There must be a template. On a nat geo special featuring assembly of a 991 I saw a tech using a template to install the lettering. Anyone have access to the factory to inquire?
Sent from my iPhone using Rennlist
Sent from my iPhone using Rennlist
04-19-2014, 11:59 PM
#30
Well...I gave it a whirl. Let's just say I wasted $75 and a few hours of my time. It doesn't look terrible, but I'm not happy with the result. I didn't listen to the advice of finding a shop with a template.
I decided to test out a badge again after seeing kmatt's post with his satin black Sport Technos.
https://rennlist.com/forums/991/7228...rt-techno.html
I wanted it to look like this but in black lettering.

I ordered up the badge from Suncoast.

I got my tools ready.

After much consternation, I settled on using some envelopes as a straight edge. I also found what I thought to be the center-line. I used a wax pencil to make a mark. I lined up the center line of the envelopes with the center of the car. Then I measured from the left and right corners of the envelopes and to the top of the bumper to make sure they were equidistant.


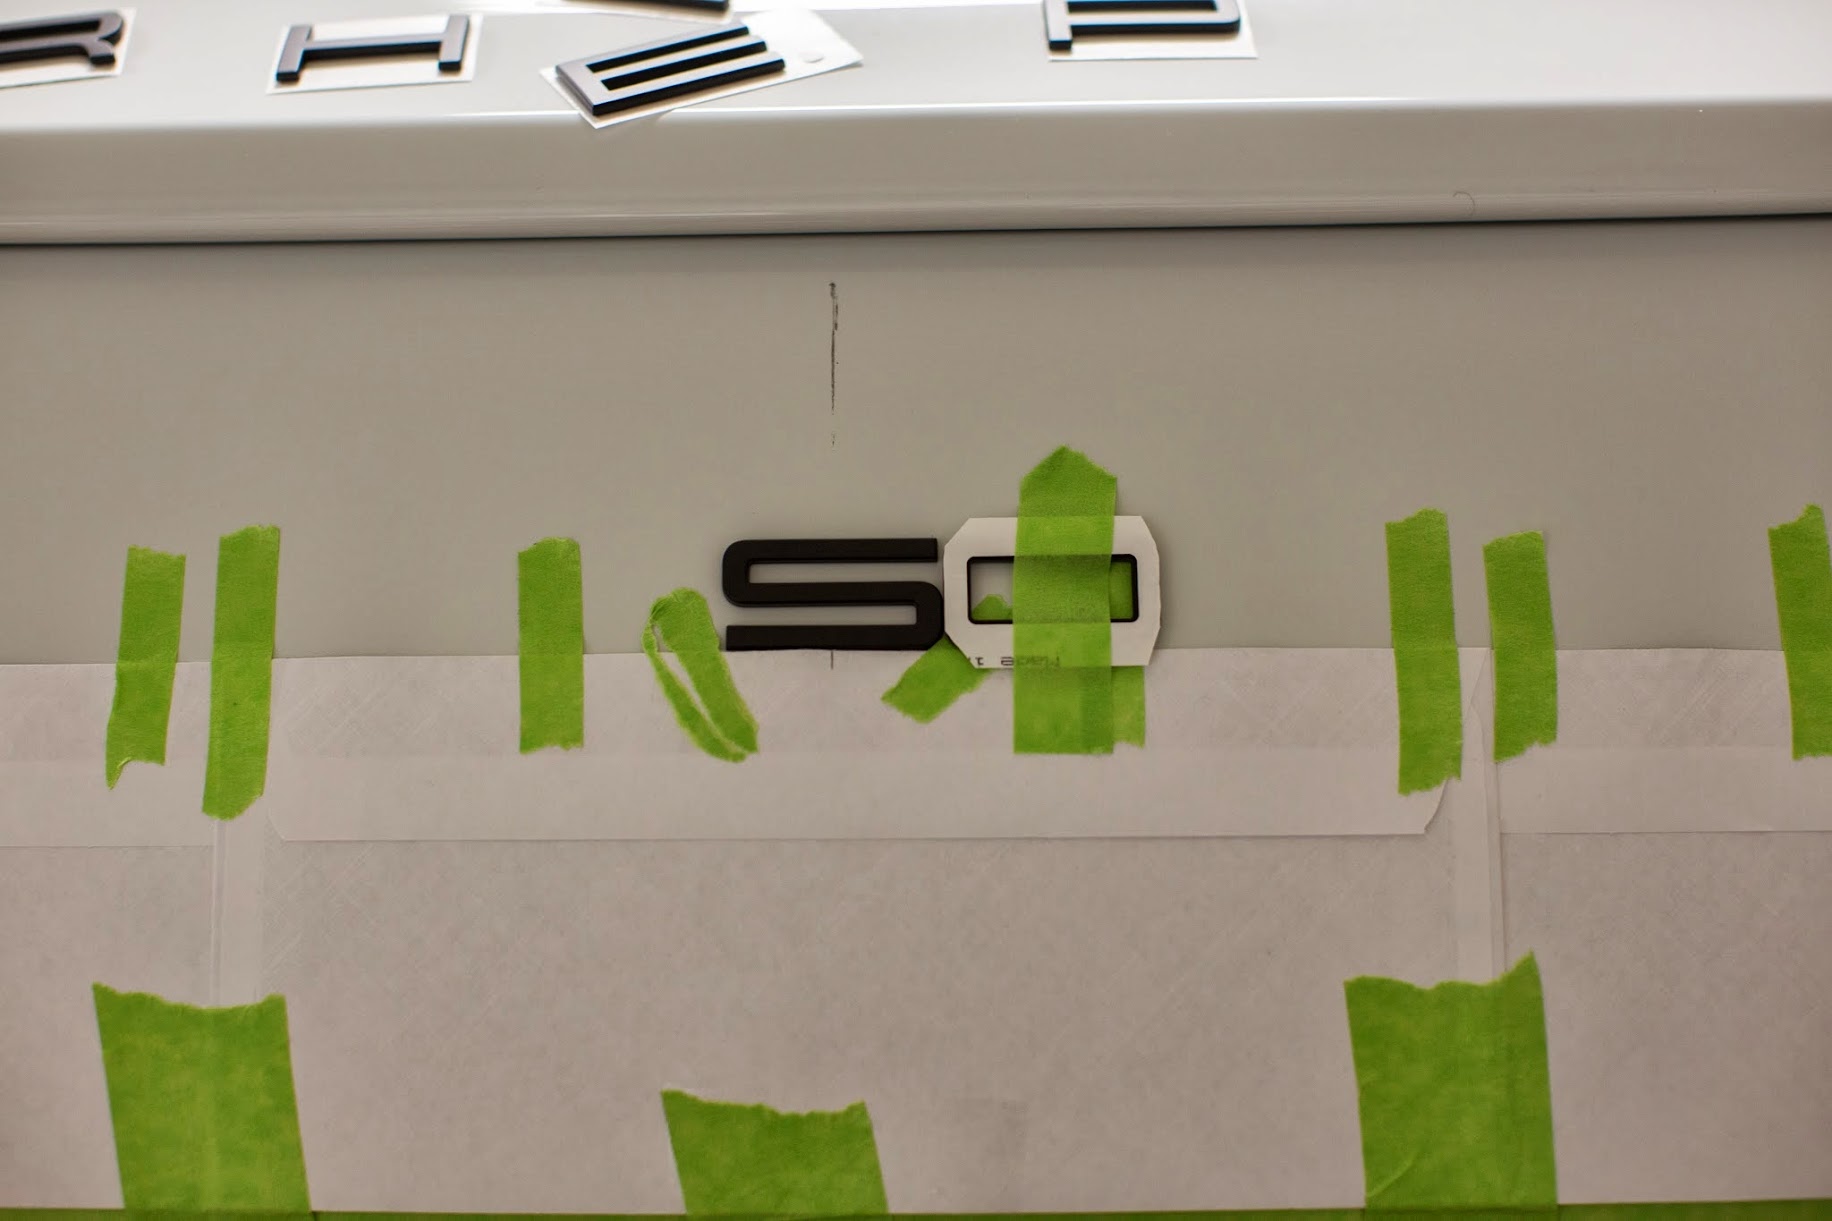
I test fit all of the letters. The vertical lines are taped just to keep the letters from falling under the envelopes.
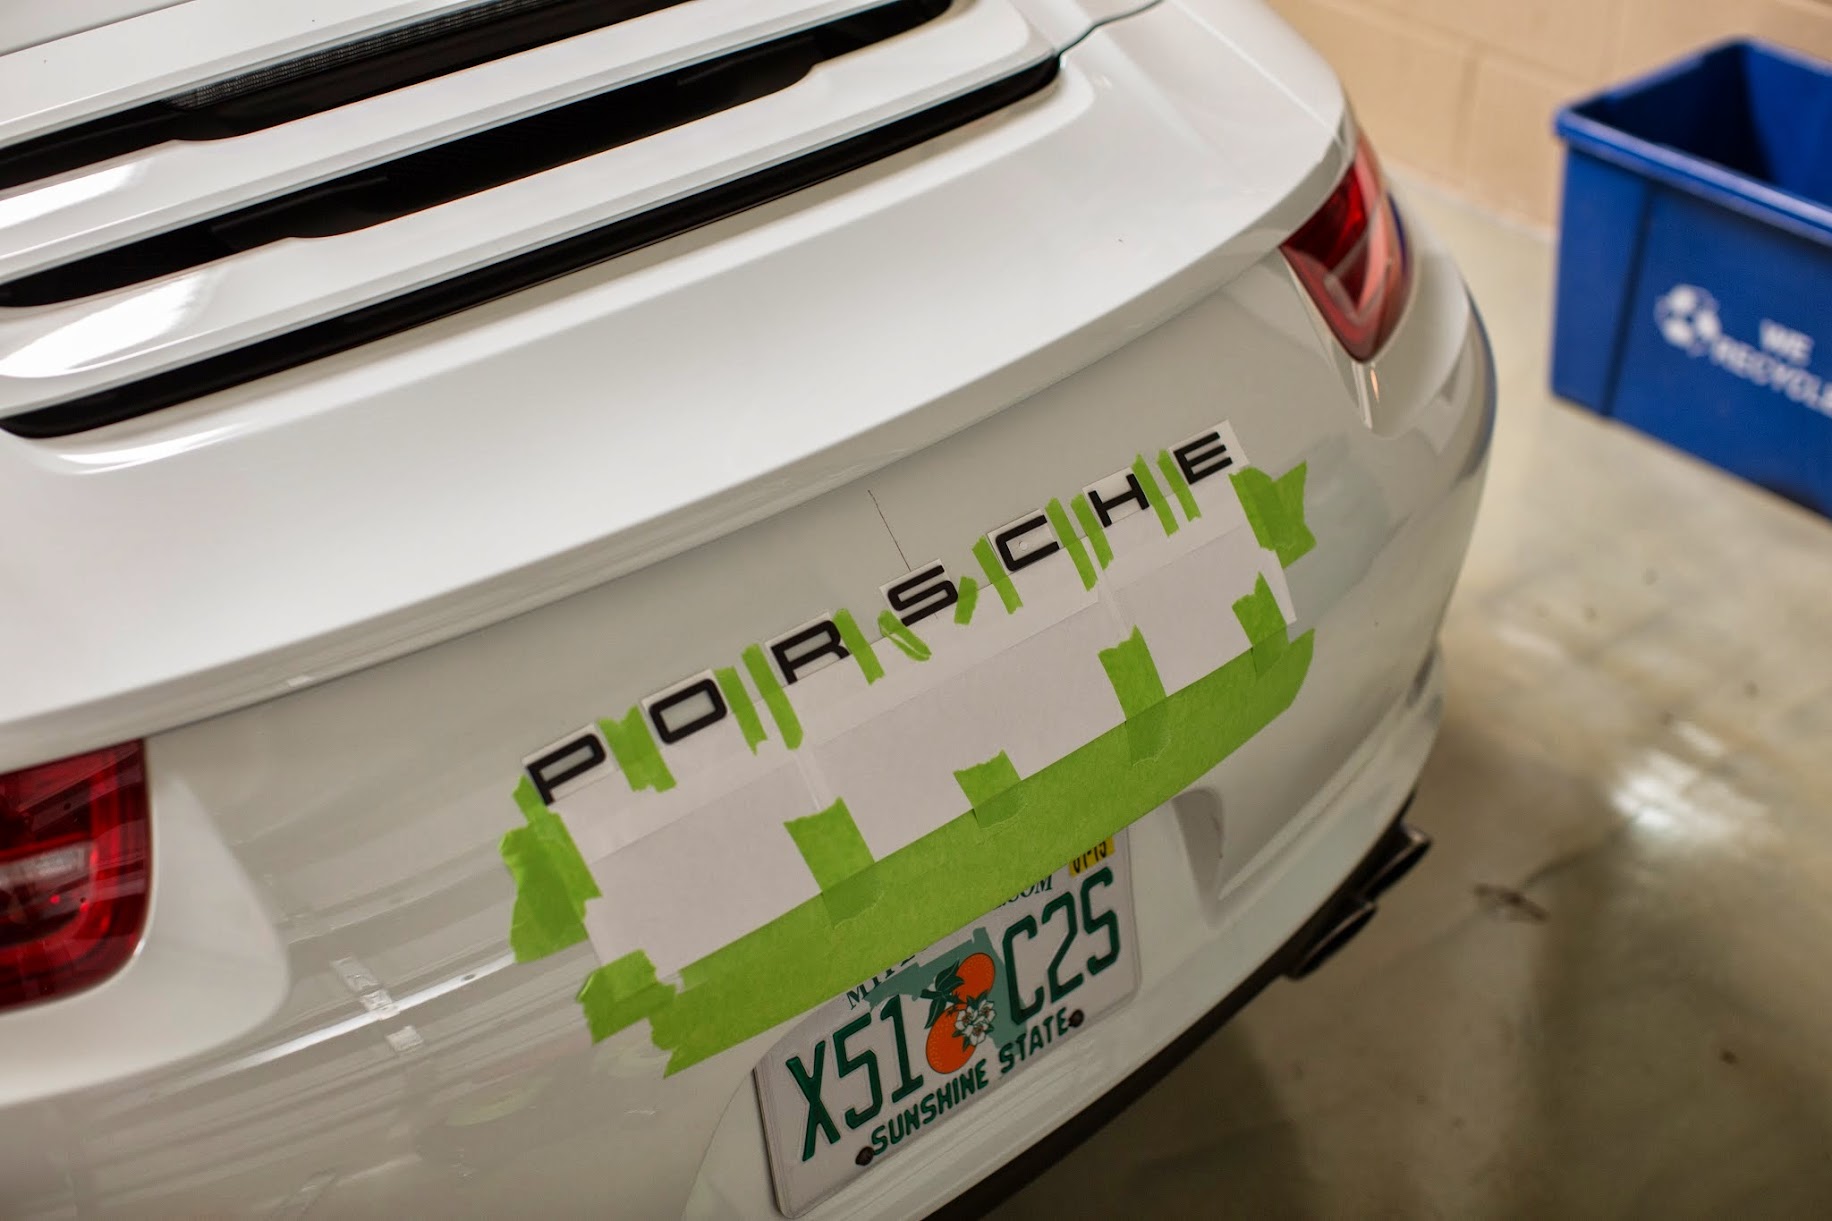

I prepped the surface with some IPA.


I used someone's suggestion that the "O" could be used to set the spacing.

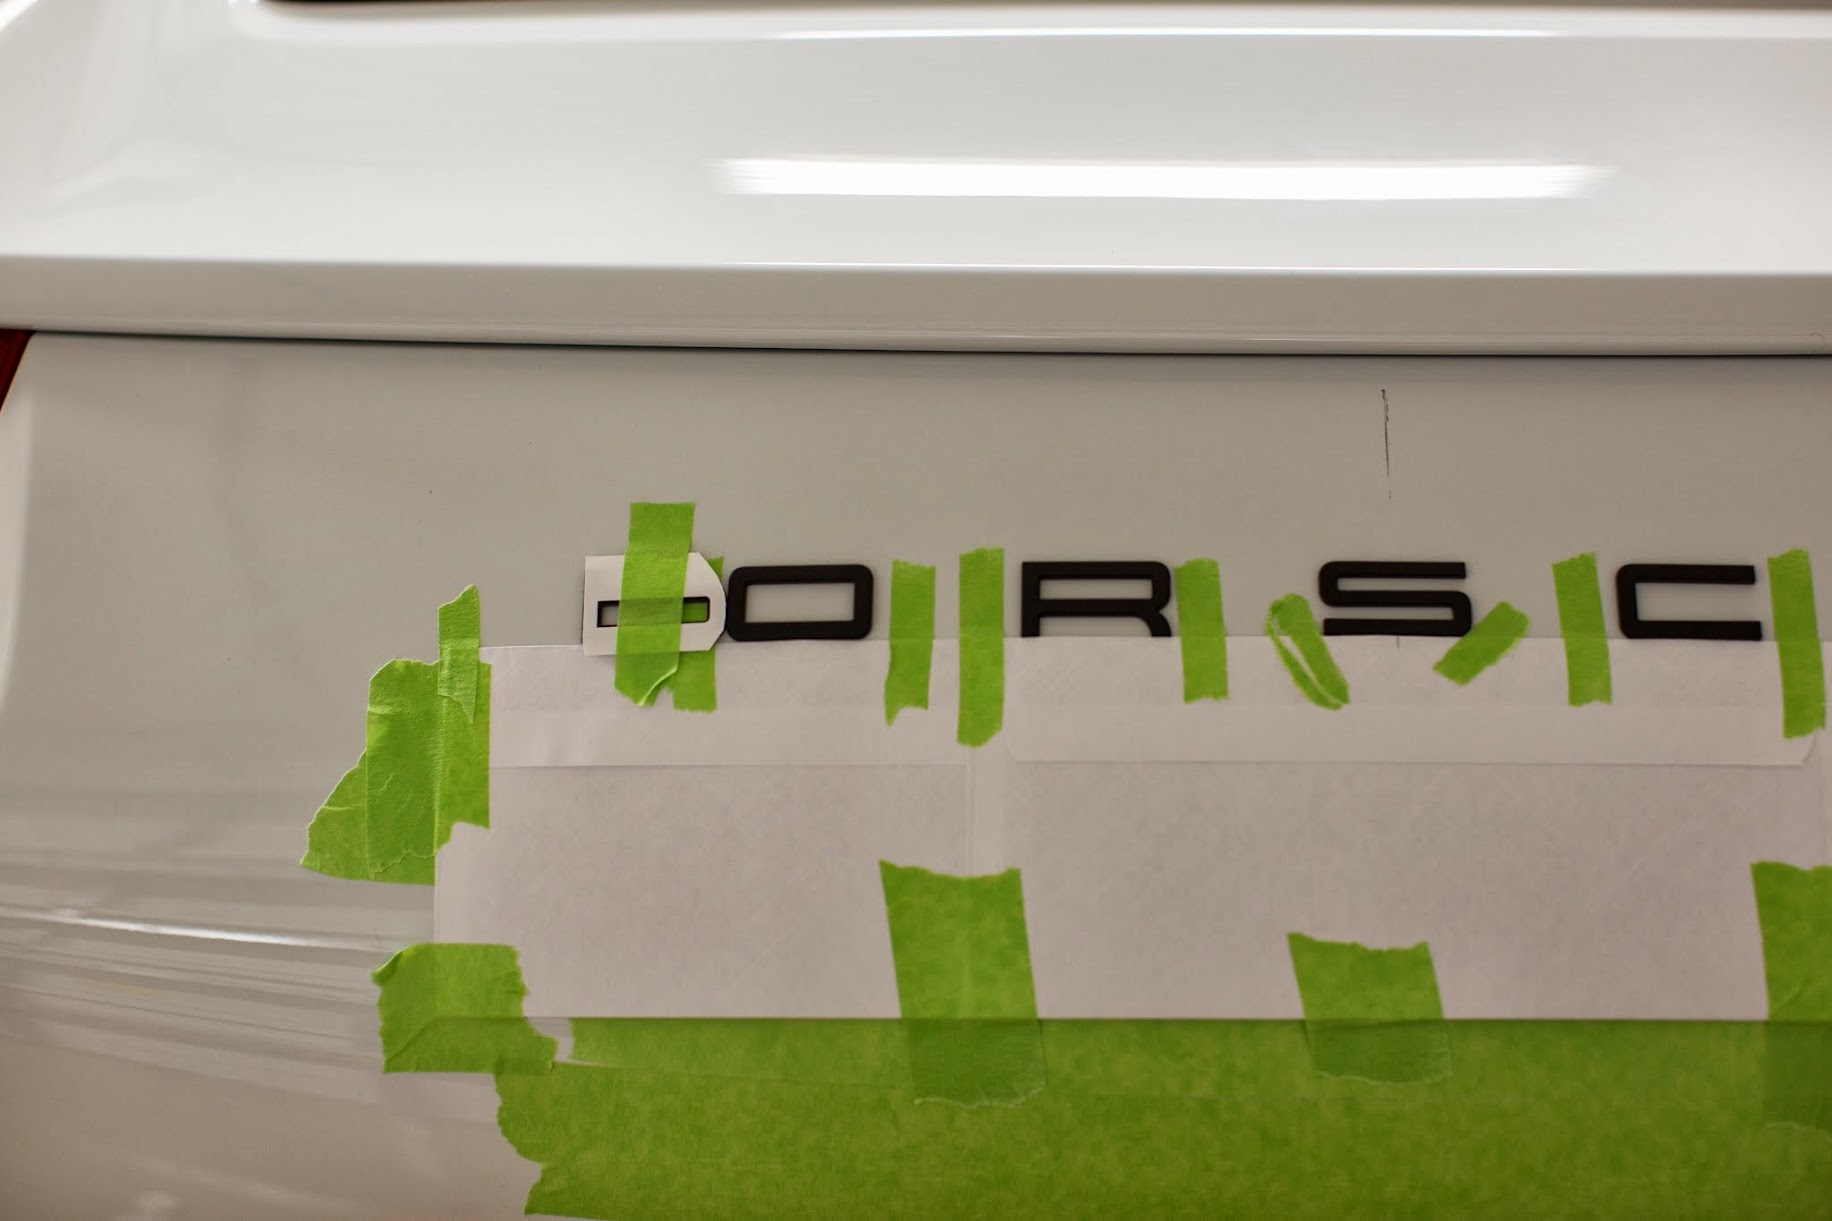
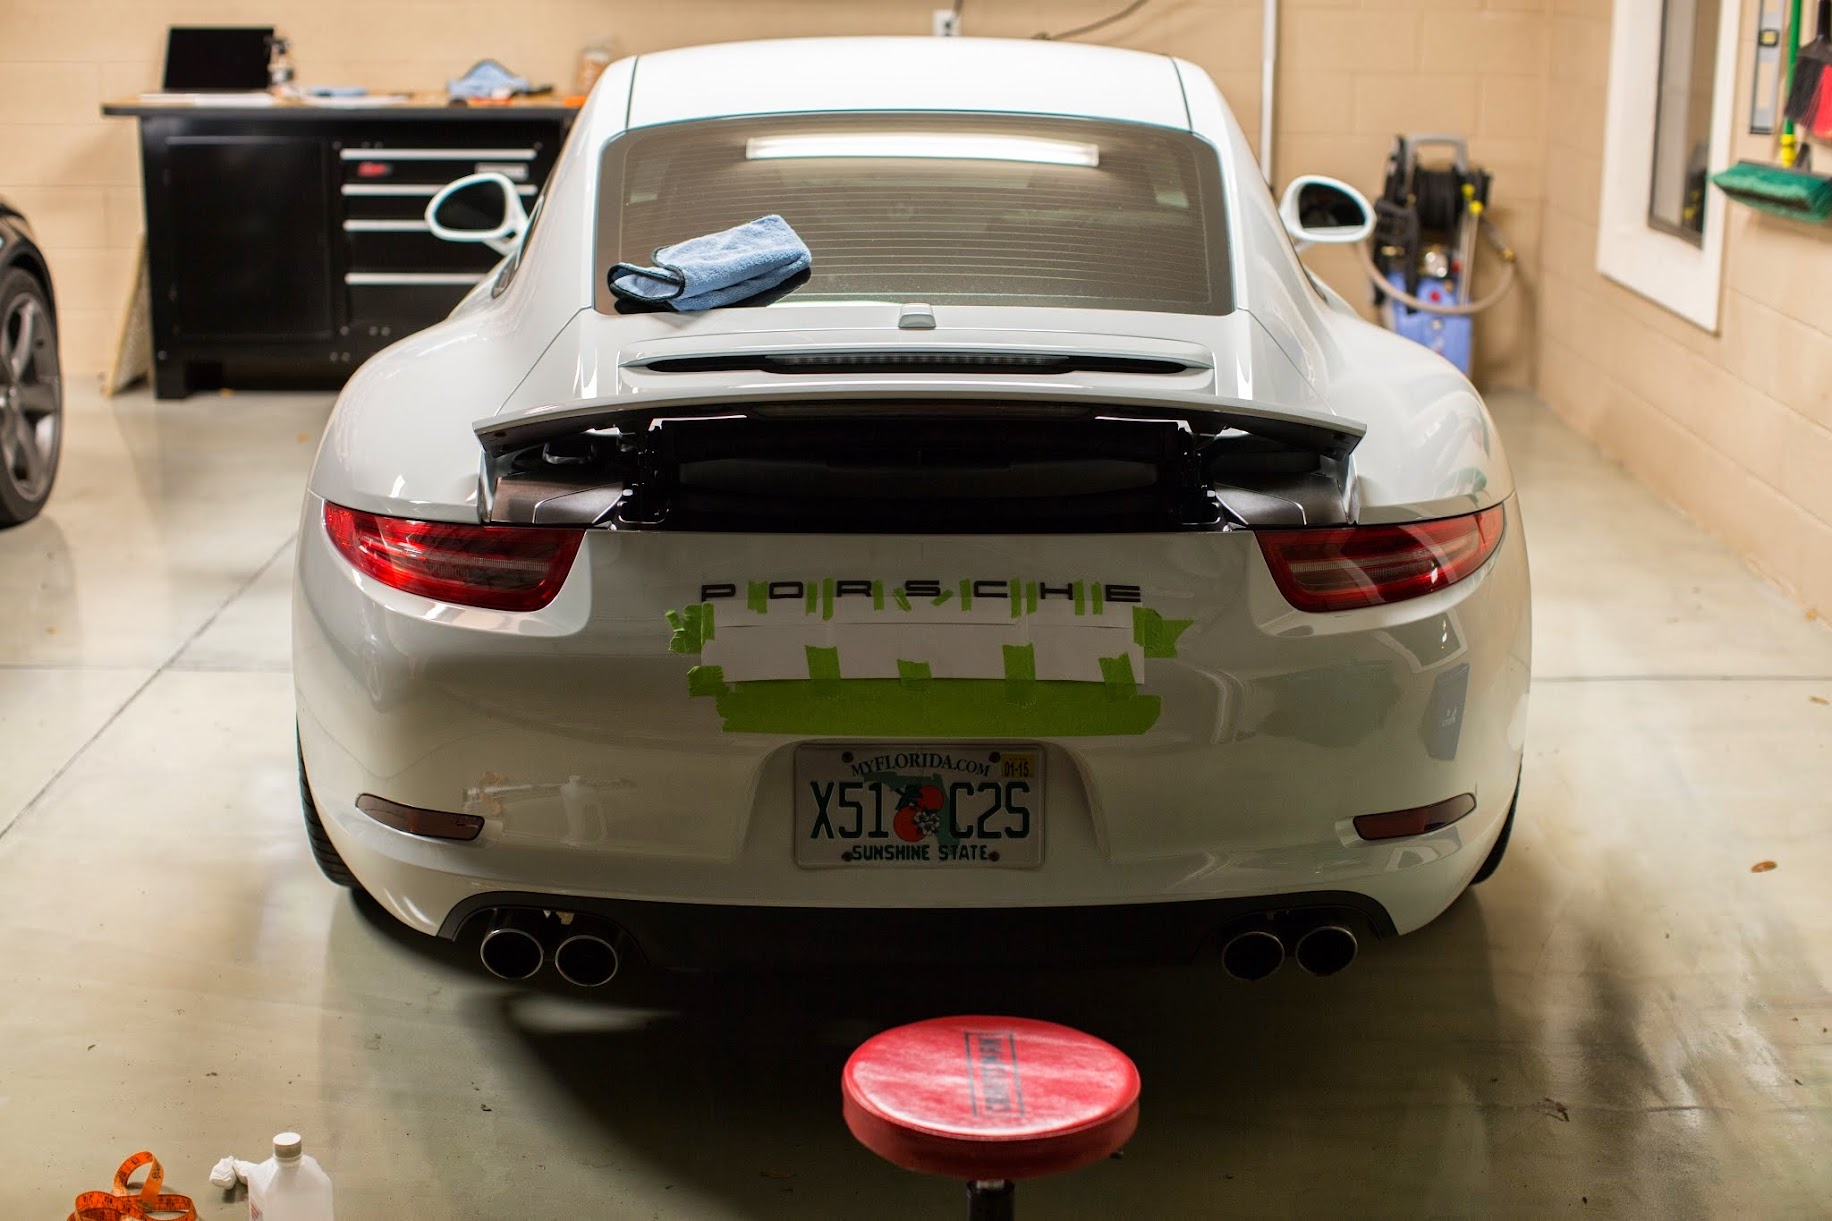


And the result is a curved looking badge. Obviously I did it wrong, and laying the envelopes on the curved bumper makes a curved line. Despite being schooled in engineering, the concept eludes me.


As you can see in the photos, it appears that the "S" is off to the right when referring to the Sat. Radio antenna. I'm not sure what's up with that. The "P" and "E" are equidistant from the lights.


Conclusions:
It it super hard to measure and align on a curved surface with no square reference points. I'm going to leave it on for a while to make sure I want a badge back there.
After all this, I still don't know how to do it correctly. I think the better way to do it would have been to lay out the letters properly spaced and aligned to a straight line on a flat table. Then run a piece of tape across the completed emblem. I thought it would be easy to run a few pieces of tape across the bumper to find the proper spot to layout the letters. I was wrong. Also, I installed to too low on the bumper.
The guys at Cars and Coffee today didn't think it looked bad. I'll take some more shots in the sun in the next few days.
If I decide to keep a badge, I'm going to find a shop with a template. I washed the car today after a day with it on. I hated using a towel to get in the cracks. I ended up having to go to my bathroom cabinet to break out the q-tips to clean it so I would be able to sleep tonight. This is why I hate badges. I think the simplest fix is to get the Tech Art wing.
I decided to test out a badge again after seeing kmatt's post with his satin black Sport Technos.
https://rennlist.com/forums/991/7228...rt-techno.html
I wanted it to look like this but in black lettering.
I ordered up the badge from Suncoast.
I got my tools ready.
After much consternation, I settled on using some envelopes as a straight edge. I also found what I thought to be the center-line. I used a wax pencil to make a mark. I lined up the center line of the envelopes with the center of the car. Then I measured from the left and right corners of the envelopes and to the top of the bumper to make sure they were equidistant.
I test fit all of the letters. The vertical lines are taped just to keep the letters from falling under the envelopes.
I prepped the surface with some IPA.
I used someone's suggestion that the "O" could be used to set the spacing.
And the result is a curved looking badge. Obviously I did it wrong, and laying the envelopes on the curved bumper makes a curved line. Despite being schooled in engineering, the concept eludes me.
As you can see in the photos, it appears that the "S" is off to the right when referring to the Sat. Radio antenna. I'm not sure what's up with that. The "P" and "E" are equidistant from the lights.
Conclusions:
It it super hard to measure and align on a curved surface with no square reference points. I'm going to leave it on for a while to make sure I want a badge back there.
After all this, I still don't know how to do it correctly. I think the better way to do it would have been to lay out the letters properly spaced and aligned to a straight line on a flat table. Then run a piece of tape across the completed emblem. I thought it would be easy to run a few pieces of tape across the bumper to find the proper spot to layout the letters. I was wrong. Also, I installed to too low on the bumper.
The guys at Cars and Coffee today didn't think it looked bad. I'll take some more shots in the sun in the next few days.
If I decide to keep a badge, I'm going to find a shop with a template. I washed the car today after a day with it on. I hated using a towel to get in the cracks. I ended up having to go to my bathroom cabinet to break out the q-tips to clean it so I would be able to sleep tonight. This is why I hate badges. I think the simplest fix is to get the Tech Art wing.