When you click on links to various merchants on this site and make a purchase, this can result in this site earning a commission. Affiliate programs and affiliations include, but are not limited to, the eBay Partner Network.
Hi Everyone,
I wanted to make this post to condense the 32 pages from the "DIY Oil Change on 992 GT3" thread into a single how-to from my own experience.
Thanks to @GrantG for starting the original thread where most of this information was found.
Information and accuracy provided as-is.
Parts:
1 of each of the following available from your local Porsche dealer or you can buy a kit from Suncoast.
• Oil Filter: 0PB-115-351
• Oil Pan Plug Crush Washer: PAF-013-844
• Oil Pan Plug: PAF-911-559
• Oil Tank Plug: 9GT-115-647-B
(There are 2 versions of the oil tank plug. Early cars use the part here and newer cars 2023+ will have a plastic plug.)
4-5 Quarts Mobil 1 ESP X3 Full Synthetic Engine Oil 0W-40 (The bottle that came with the car from Germany does NOT have the X3 wording but I believe it is the same oil) This is the only Porsche approved oil for the 992 GT3 at the time of writing.
Verify the label on the back has the Porsche C40 approval. Autozone Part # 124798 SKU # 1177215
20% coupon codes are common
Tools Used:
• 3/8" Drive Flex-Head TechAngle Torque Wrench (Sanp-On): ATECH2FR125B
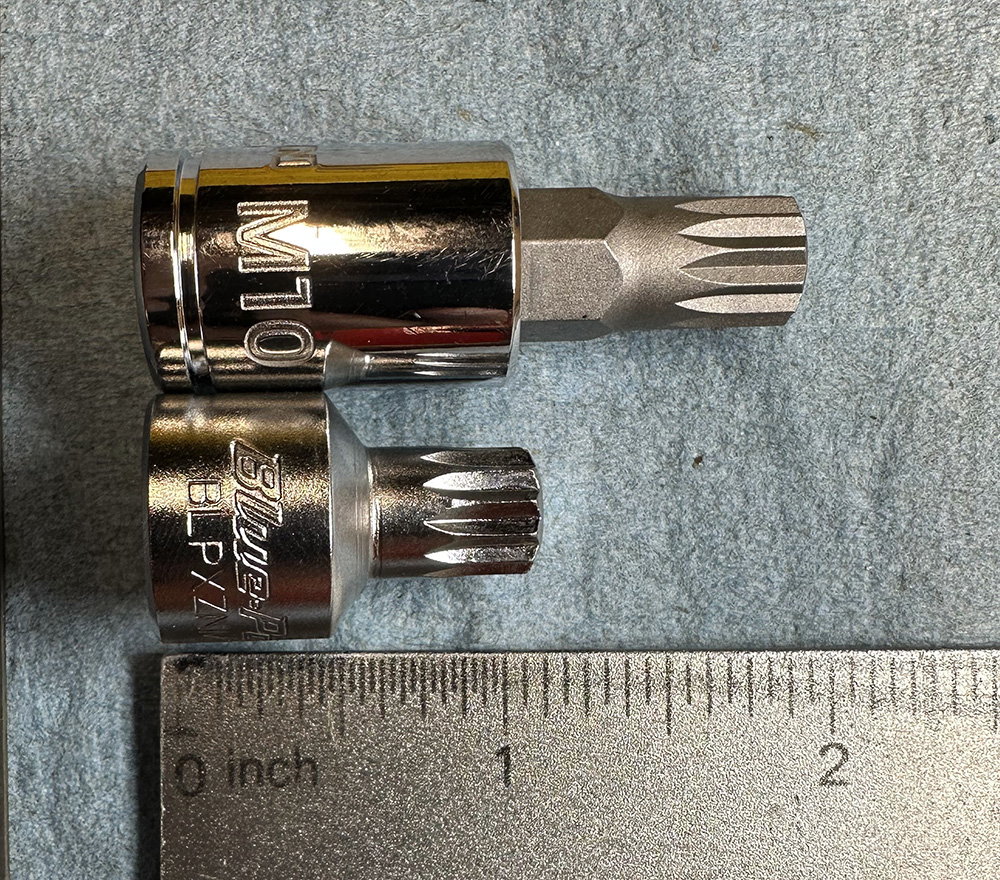
• 3/8" Drive Metric 10 mm Triple Square XZN Stubby Socket Driver (Blue-Point): BLPXZNM3810
• Oil Filter Wrench: Suncoast Part # SKU991GT3OFR
• T30 Torx Bit
• M6 Hex Bit
Step 1 – Raise the Car / Rear Diffuser
I used 2 small ramps to lift the rear of the car higher. The ramp was too low to access 3 bolts needed to remove the rear diffuser. I jacked up the driver side rear corner and supported the wheel with wooden blocks for safety.
There are 5 x T30 bolts that secure the rear diffuser to the body (circled in red below).
Firstly, I removed the 3 bolts from the front and then loosened the 2 at the rear (through the two small circle cutouts in the diffuser). Once the 2 rear bolts are loosened, the entire diffuser should be able to slide back and off the car.
Once the rear diffuser has been removed, the car was lowered back onto the ramps and then the front was raised (jack on each side) to level the car. If you have 4 ramps then this step may not be necessary.
You do not need much room under the car to do the oil change.
.
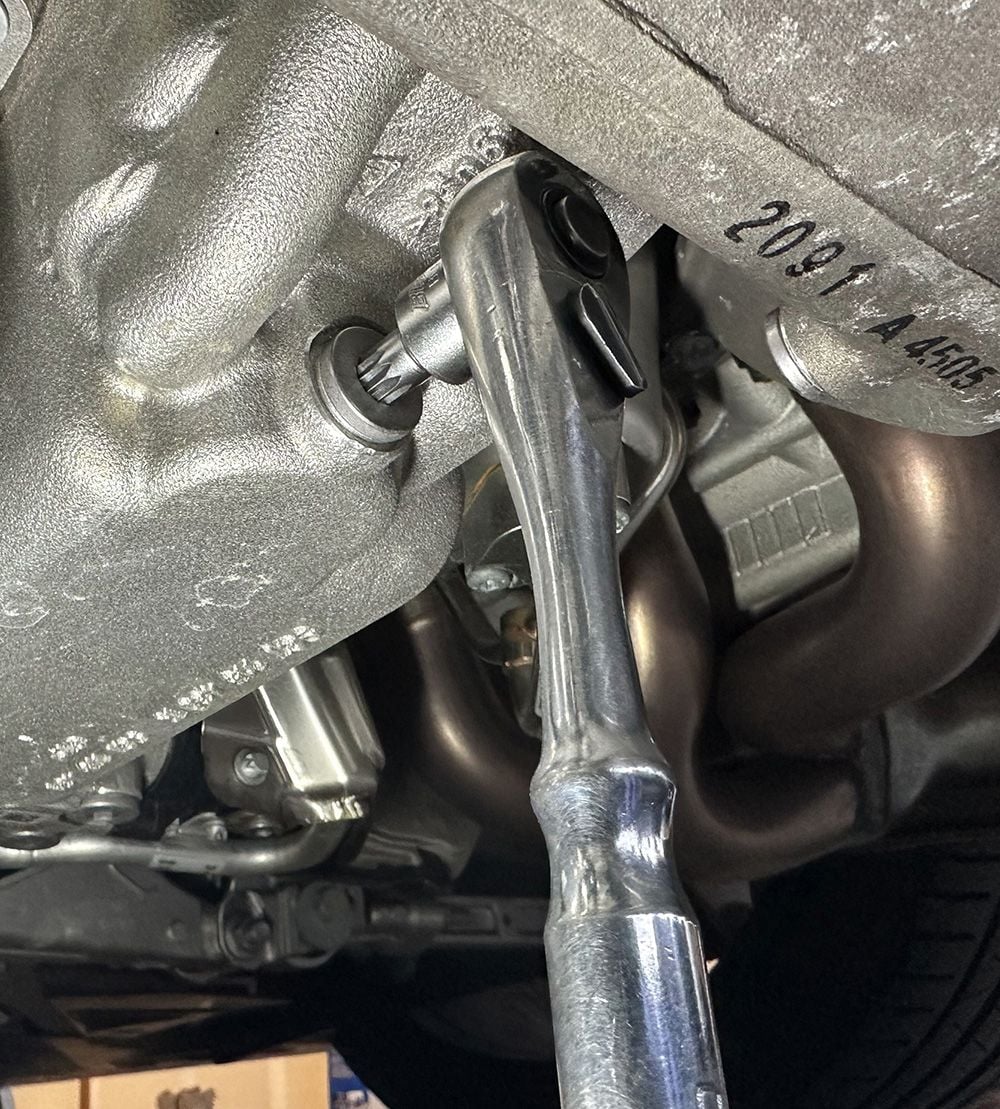
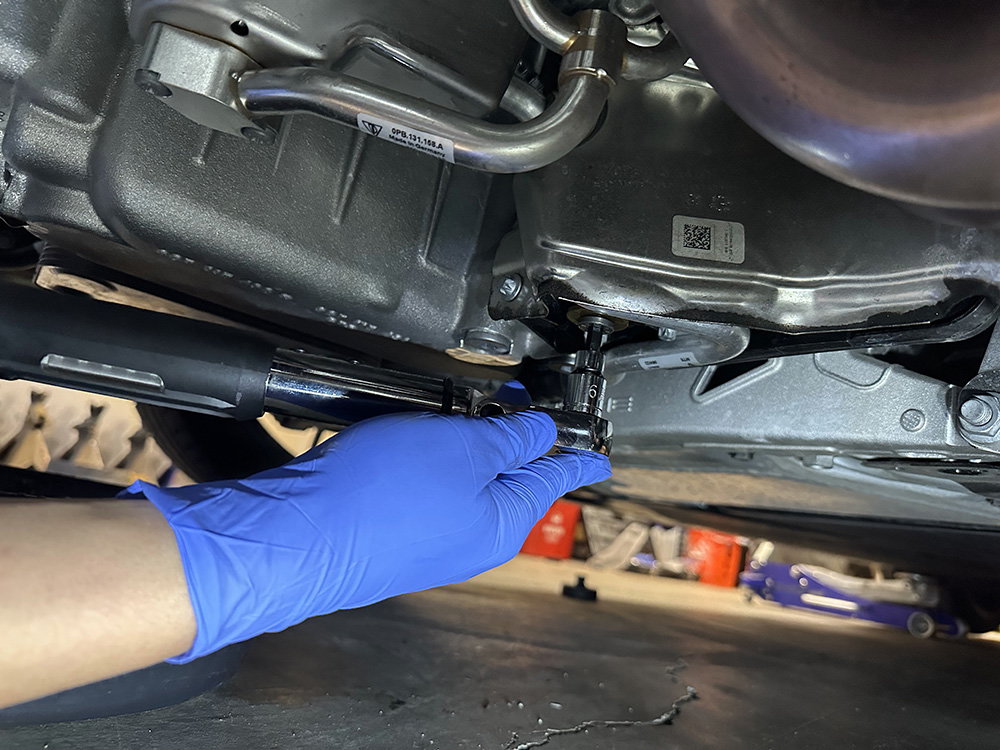
Step 2 – Oil Pan
Normally I would remove the oil filter first but, on this occasion, I was only flushing the oil so this step has been omitted.
The oil pan bolt is a M10 Triple Square XZN. I have confirmed this by using a Tekton & Blue-Point socket. A regular socket will be too long to fit in the space available. You will need to use a stubby version of the socket like the one I used.
I was able to drain 2 quarts from this location and left this slowly dripping while proceeding with the next step.
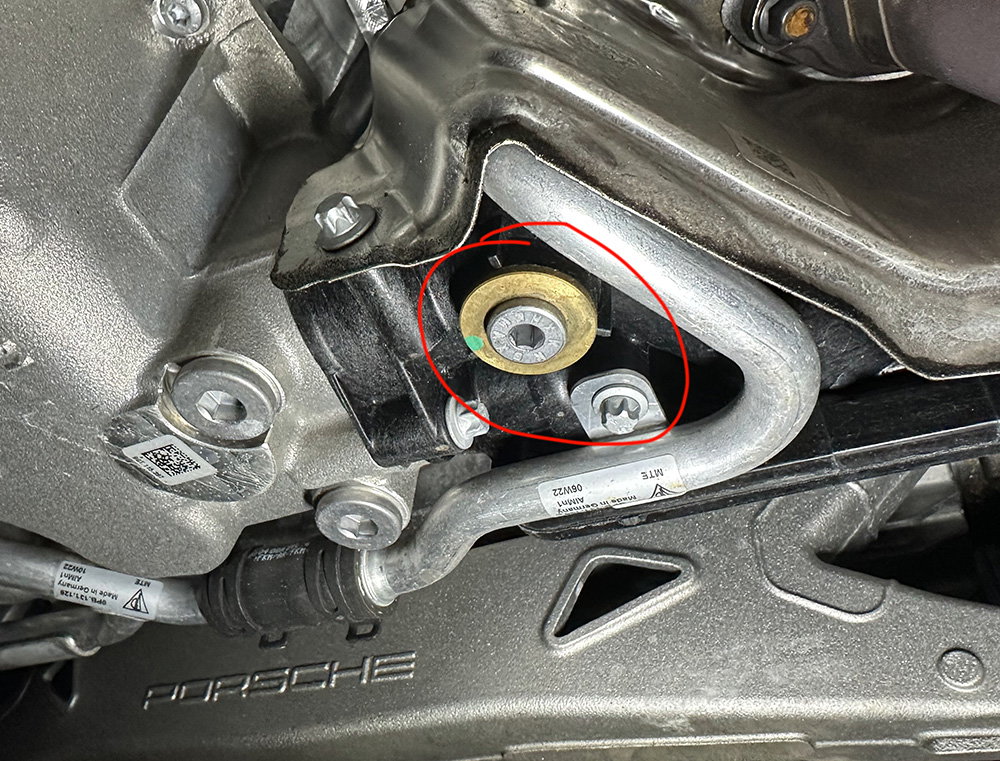
Step 3 – Oil Tank
There are 2 versions of the oil tank plug. Early production cars have a carbon fiber tank with a brass insert that the drain plug goes into. Later cars, 2023+ have a plastic tank with a plastic drain plug.
Please read the following Porsche Technical Service Bulletin (Sept 1, 2022) before proceeding (original pdf attached below)
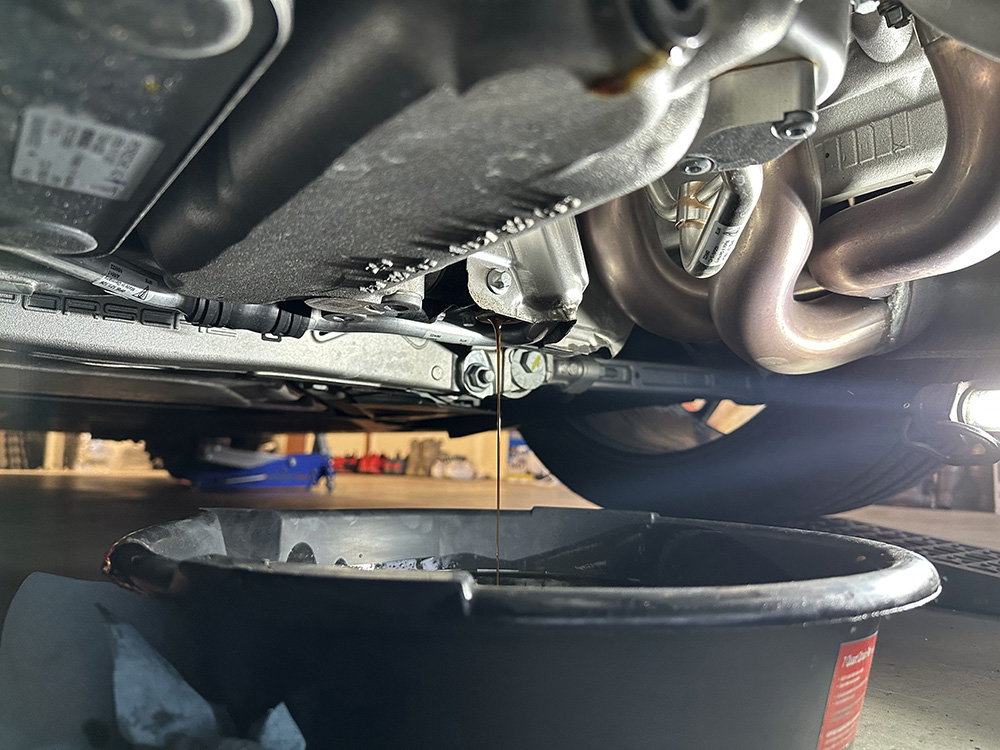
I removed this bolt (M6 Hex) after the car had been sitting for about 1.5 hours (car was at full operating temperature on a warm day prior to parking). The oil was warm but not hot.
From this location I was able to drain an additional 2 quarts. Total drained was just under 4 quarts.
Step 4 – Reinstall
Install new oil filter and torque 20 Nm (15 ft-lb).
• Partially prime filter with new oil and lightly lubricate the rubber O-ring
Install new drain plug into the oil tank and torque 20 Nm (15 ft-lb).
• Visually confirm the rubber O-ring is on the drain plug
Install new drain plug and crush washer into the oil pan and torque 31 Nm (23 ft-lb).
• Flat side of crush washer faces the oil pan
Use brake clean to remove up any oil residue.
Fill 3.5 quarts of oil and and start the car. Check for leaks.
Bring car to operating temperature and check the oil level.
You want the oil level to be at the 3/4 mark.
Reinstall rear diffuser – It is easier to slide the rear onto the 2 bolts first to support the weight of the diffuser.
Check oil level after car reaches operating temperature.
All in all, with a helping hand, this should take less than 60 minutes.
Questions, comments and any other suggestions are most welcome!
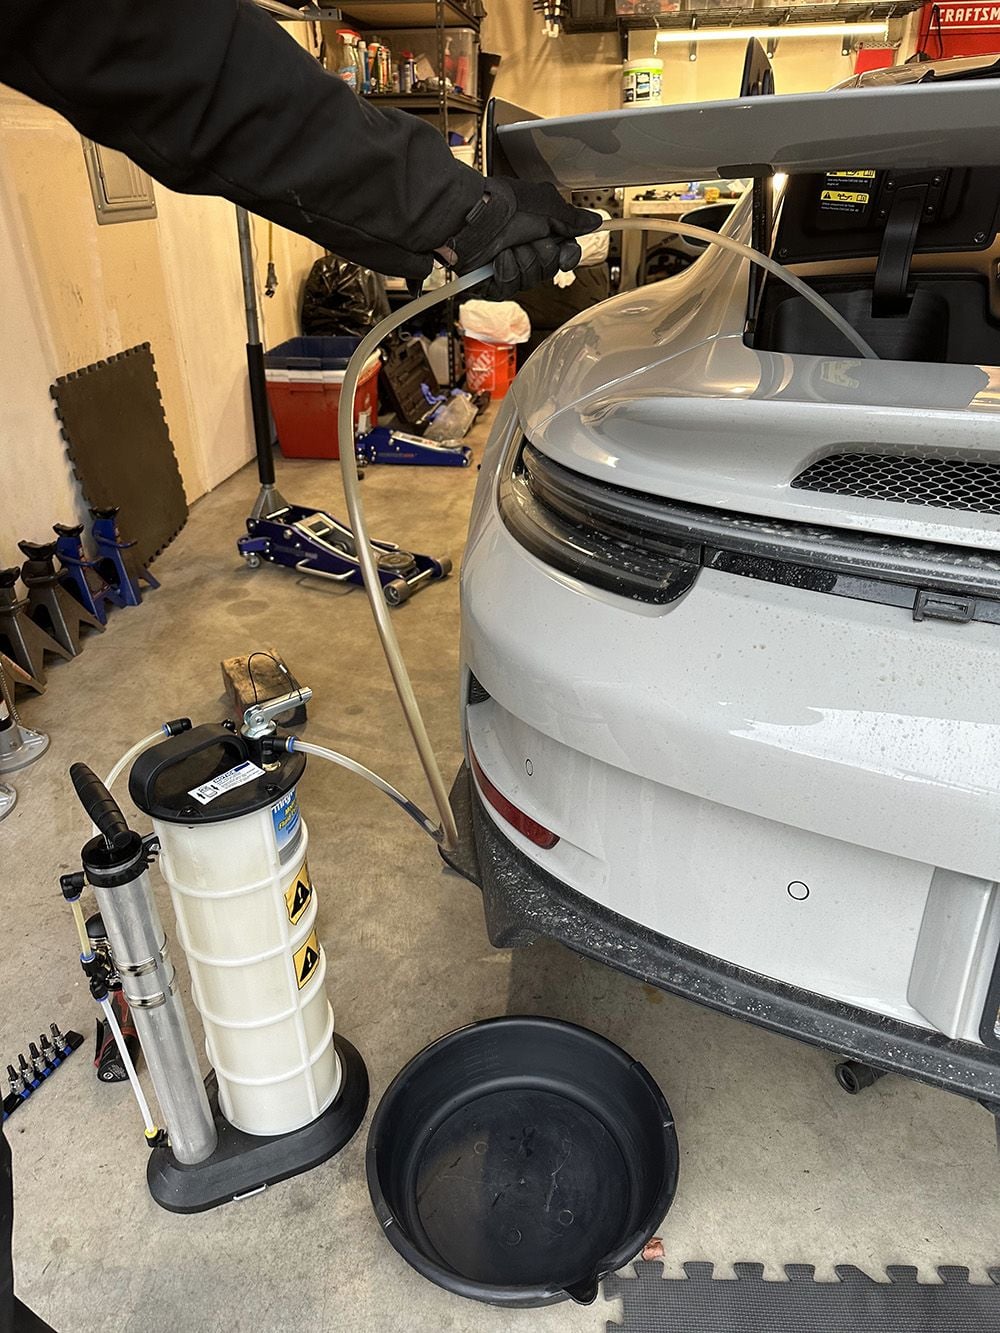
In case anyone was curious if a fluid extractor would work.... it did not (for me anyways). Both hoses (small and large diameter) felt like they were getting caught on a rubber hose.
I was only able to feed ~12 inches before it bottomed out and I did not feel comfortable pushing it any further. No oil was removed this way.

 09-27-2023, 03:40 AM