When you click on links to various merchants on this site and make a purchase, this can result in this site earning a commission. Affiliate programs and affiliations include, but are not limited to, the eBay Partner Network.
Timing Chain gasket without removing engine - Need some help lowering engine
It’s that time of year again. Car is in the garage waiting for spring or at least once the salt is off the streets. For now, I might as well dive into her and get some work done. First order of business is the Timing Chain gasket without removing the entire engine, let’s hope. It has been leaking since I got the car 2 years ago, not a big leak but big enough. I have the time and really wanted to get to know the car more, so what a better way than getting my hands dirty. Here is a link to what I got into last year.
Tool time was much easier this time around. Over the summer I treated myself to a BendPak mid-rise lift. Life just got so much easier. I still want to recess it into the ground, but that is a summer project.
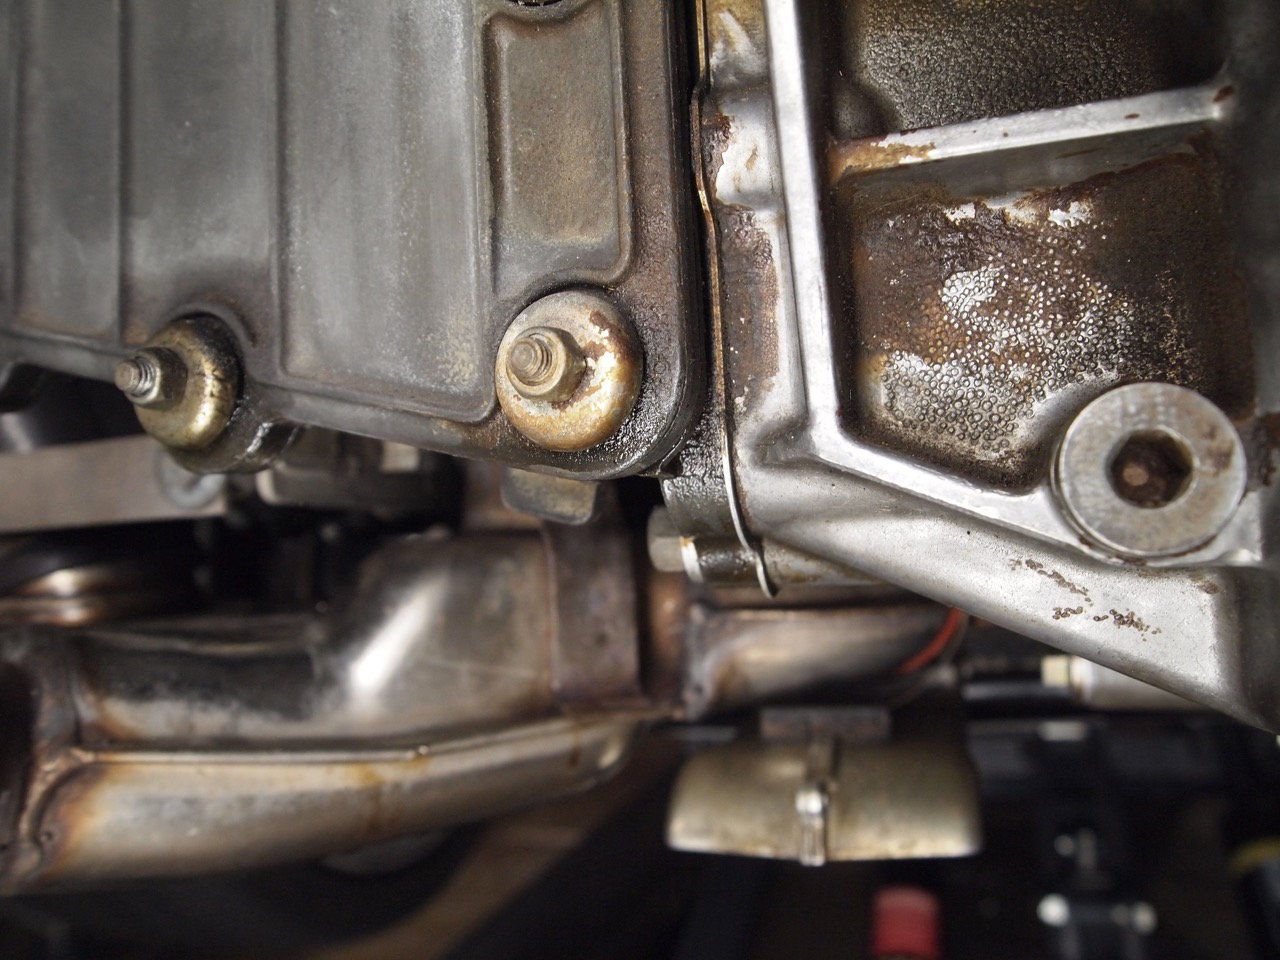
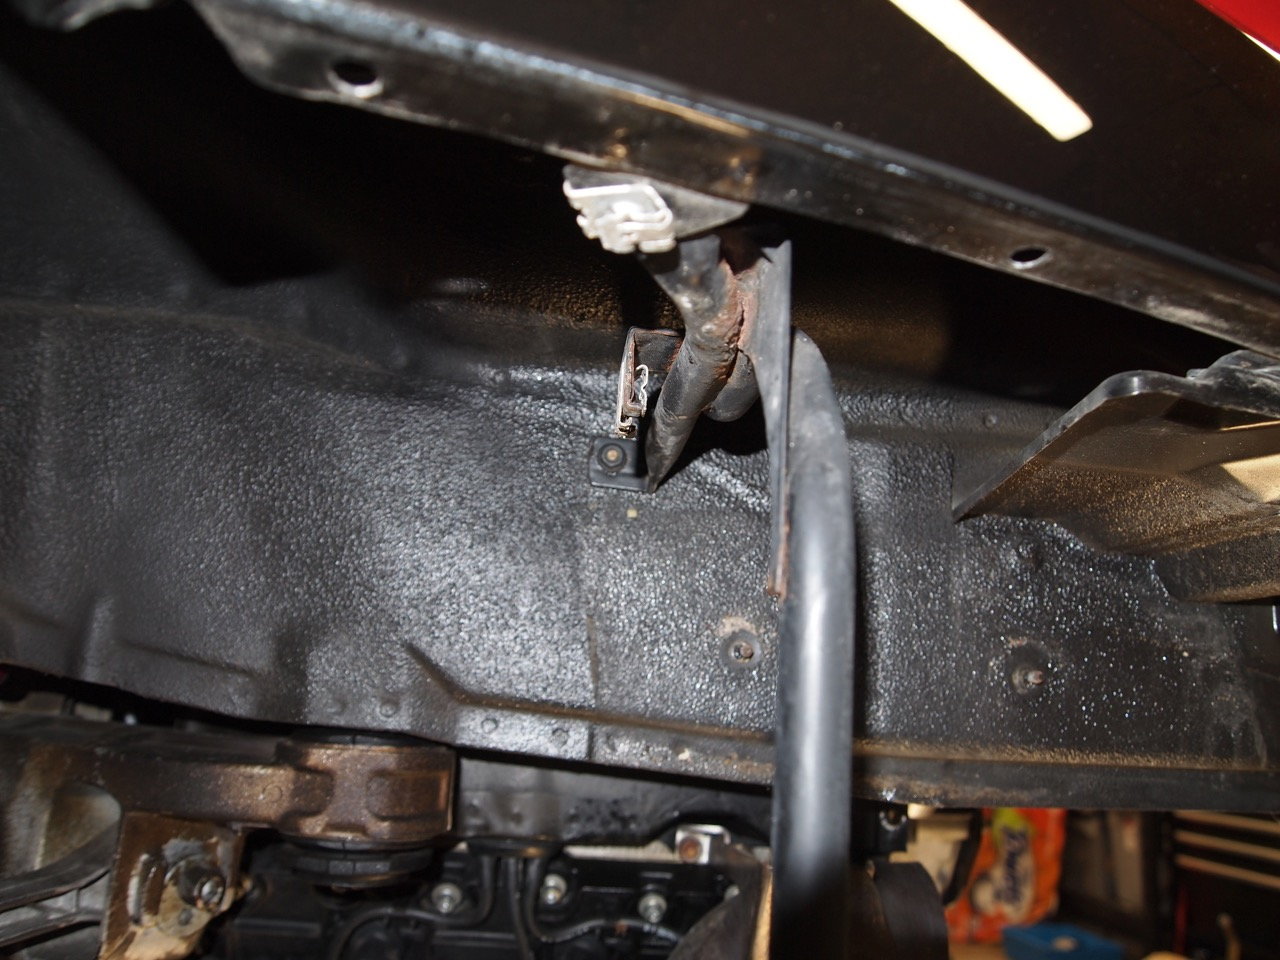
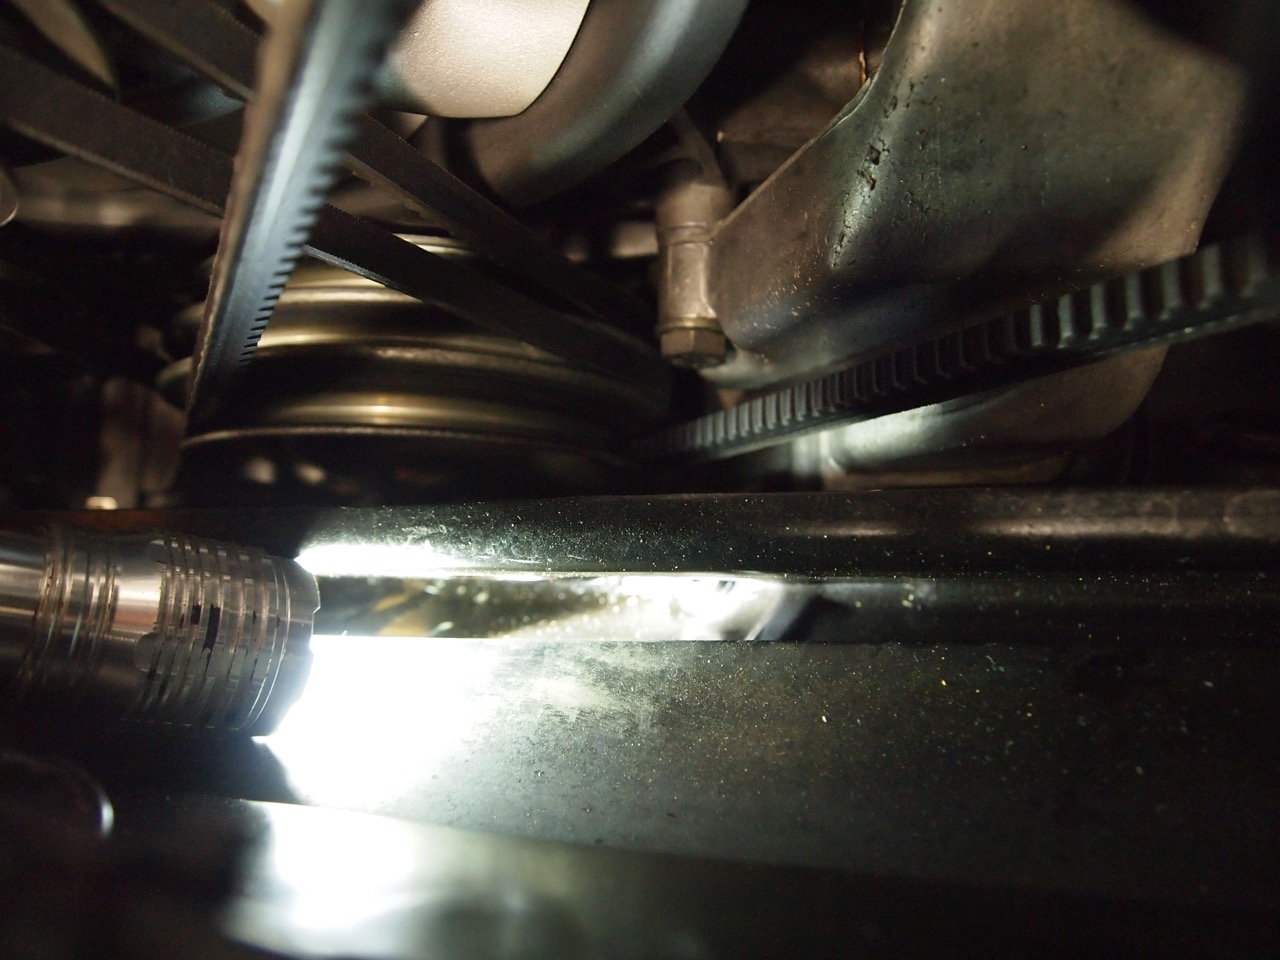
Here are a few pictures of the leak. The driver side was definitely worse.
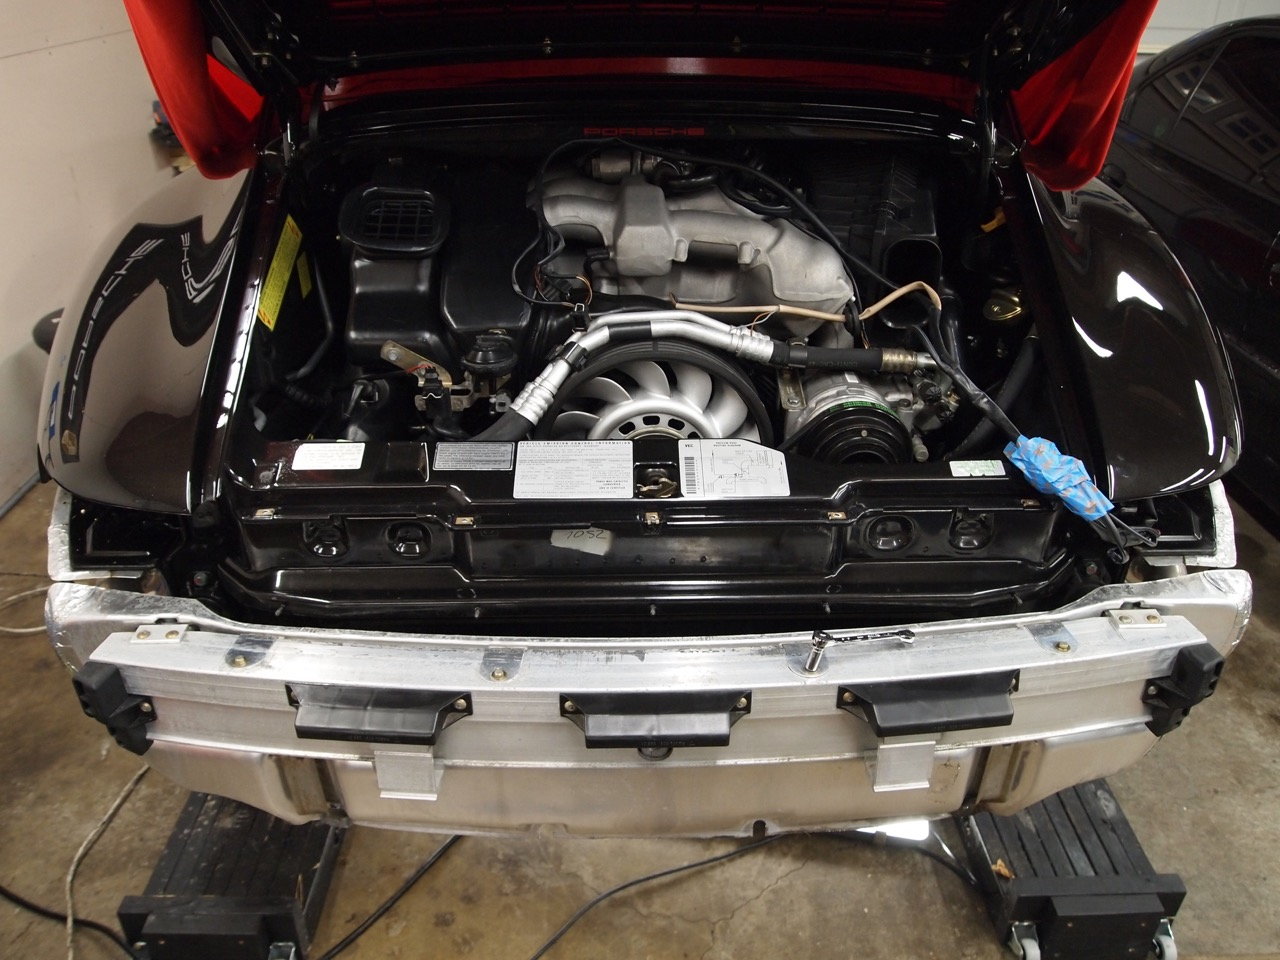
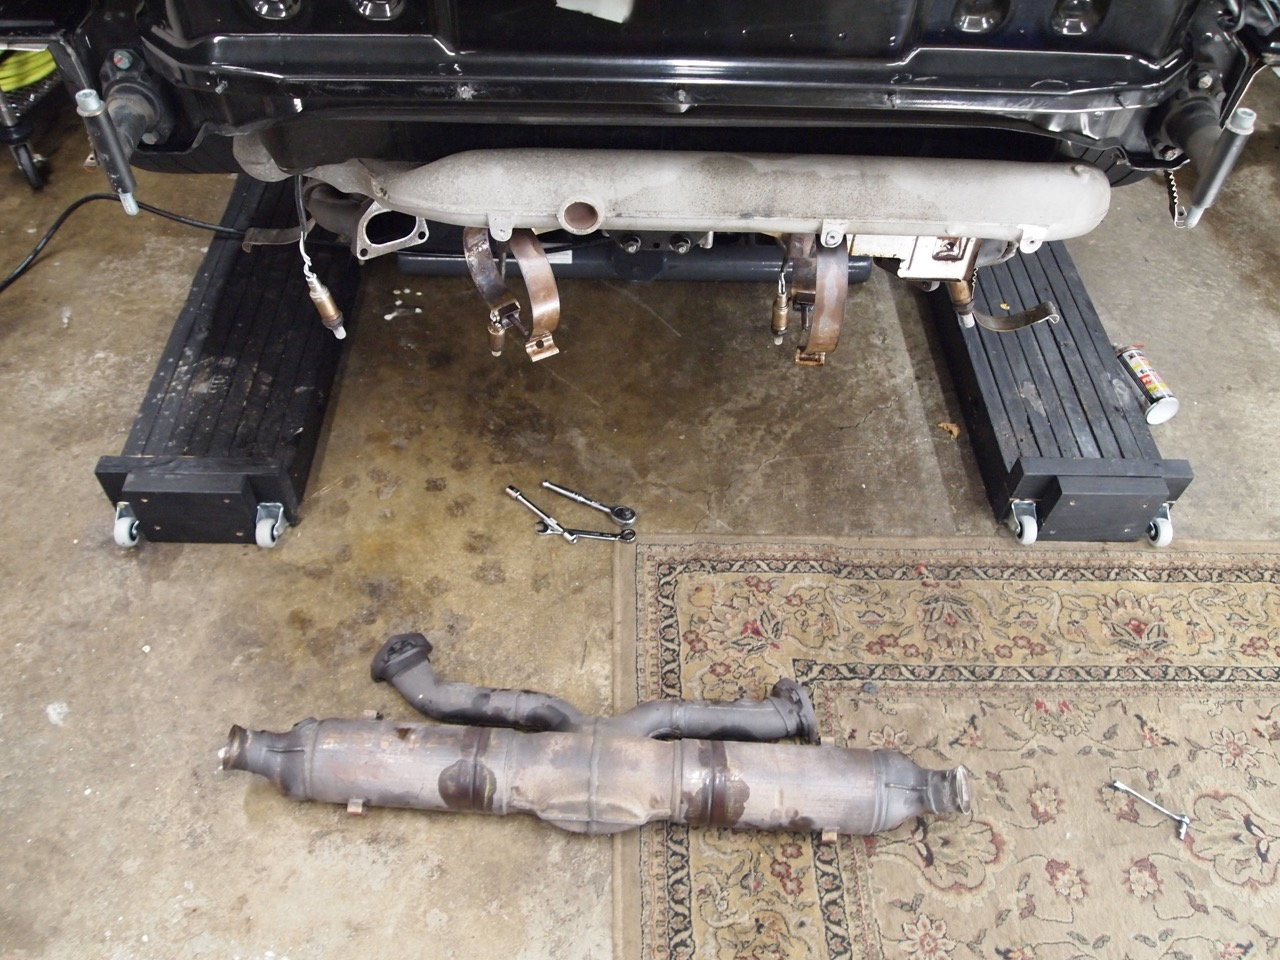
To get to the TCG without actually removing the engine, you pretty much have to take off everything from the rear of the car. I took my time, took lots of pictures and labeled all of the nuts and bolts. That way I will remember what goes where, “Like I know what I am doing…LOL”
Next remove the collar nuts holding the top heatshield in place. Here is a picture with the right and left nut off.
Remove the 4 tapping screws on the top of the support brace that holds the heatshield. I believe it’s a 8mm.
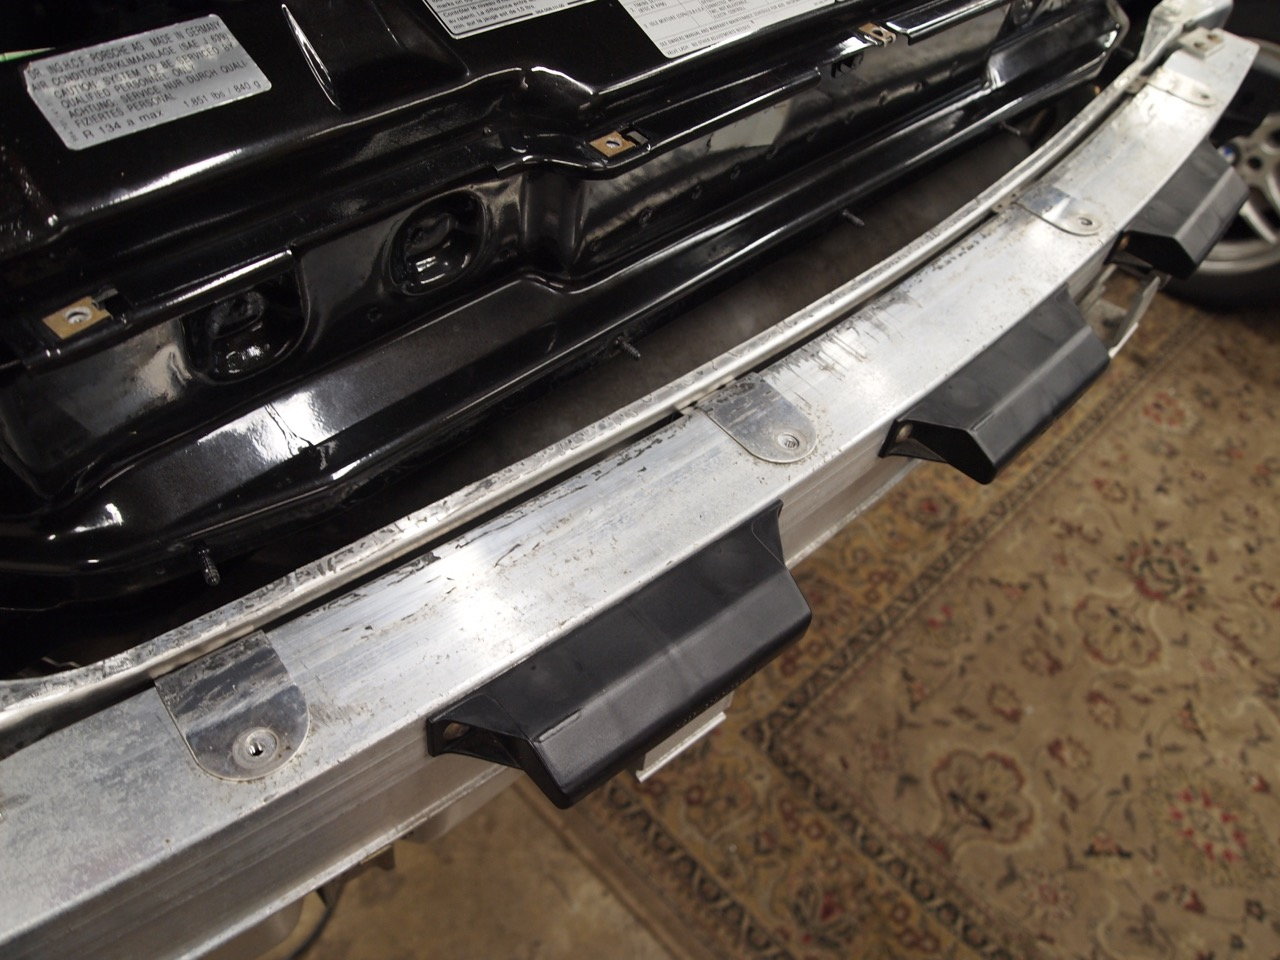
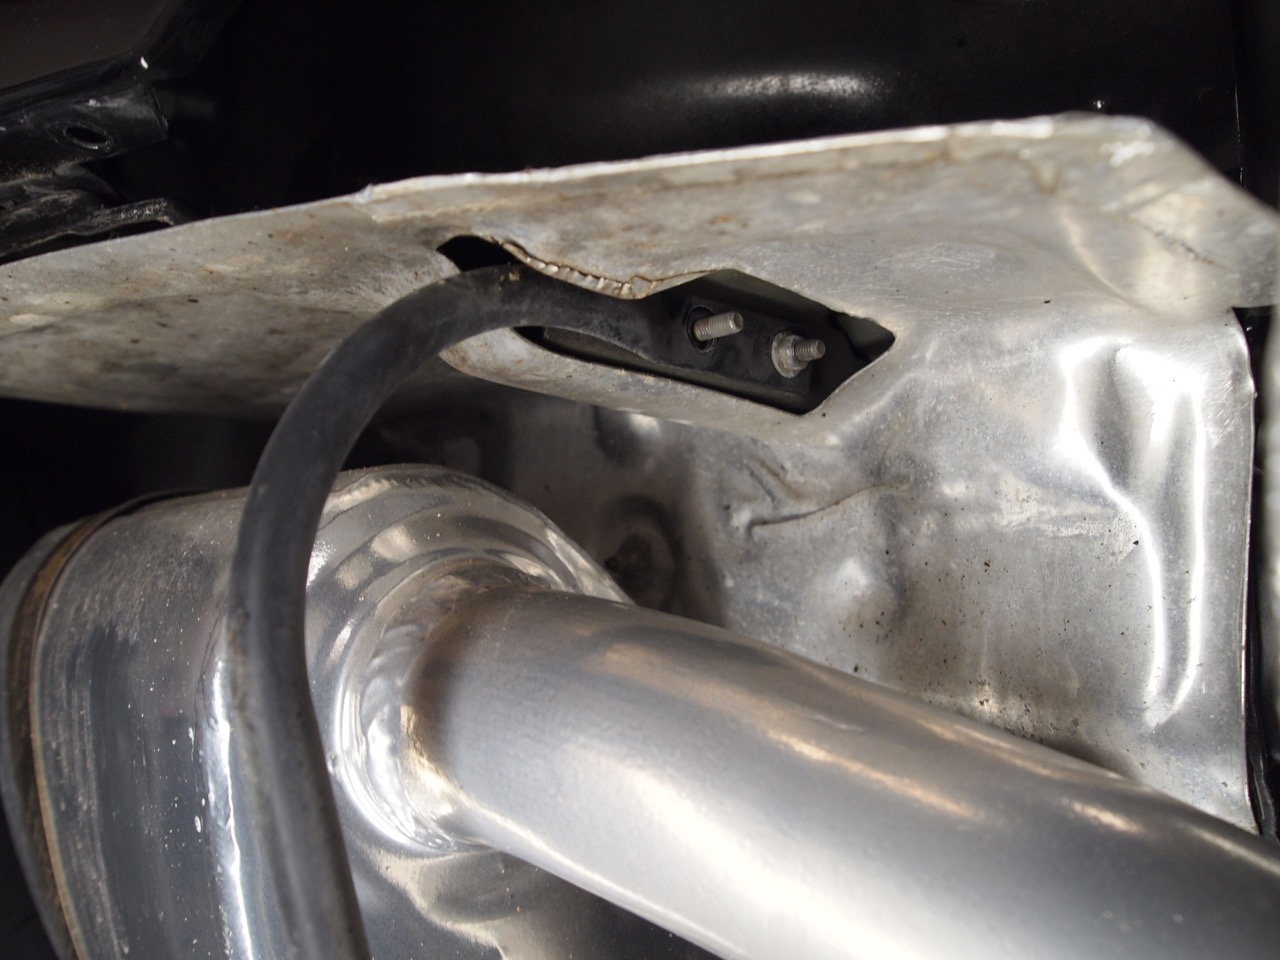
Push the heat shield toward the car and you will have access to the 2 bolts holding the bumper brace in place.
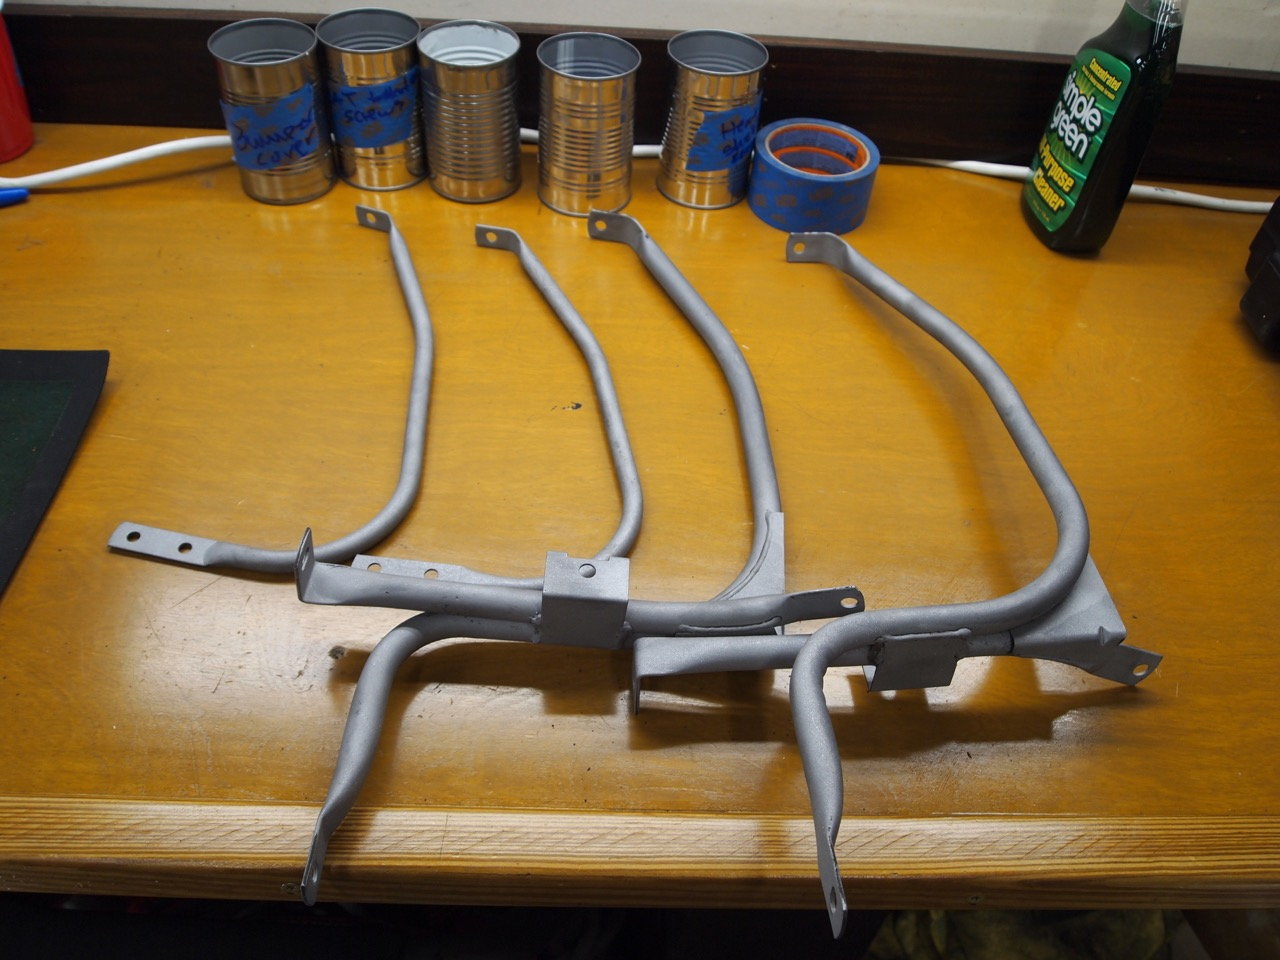
I also remove the bumper brackets as they were starting to rust. I am going to get those cerakoted while I am at it. More pictures later of the progress
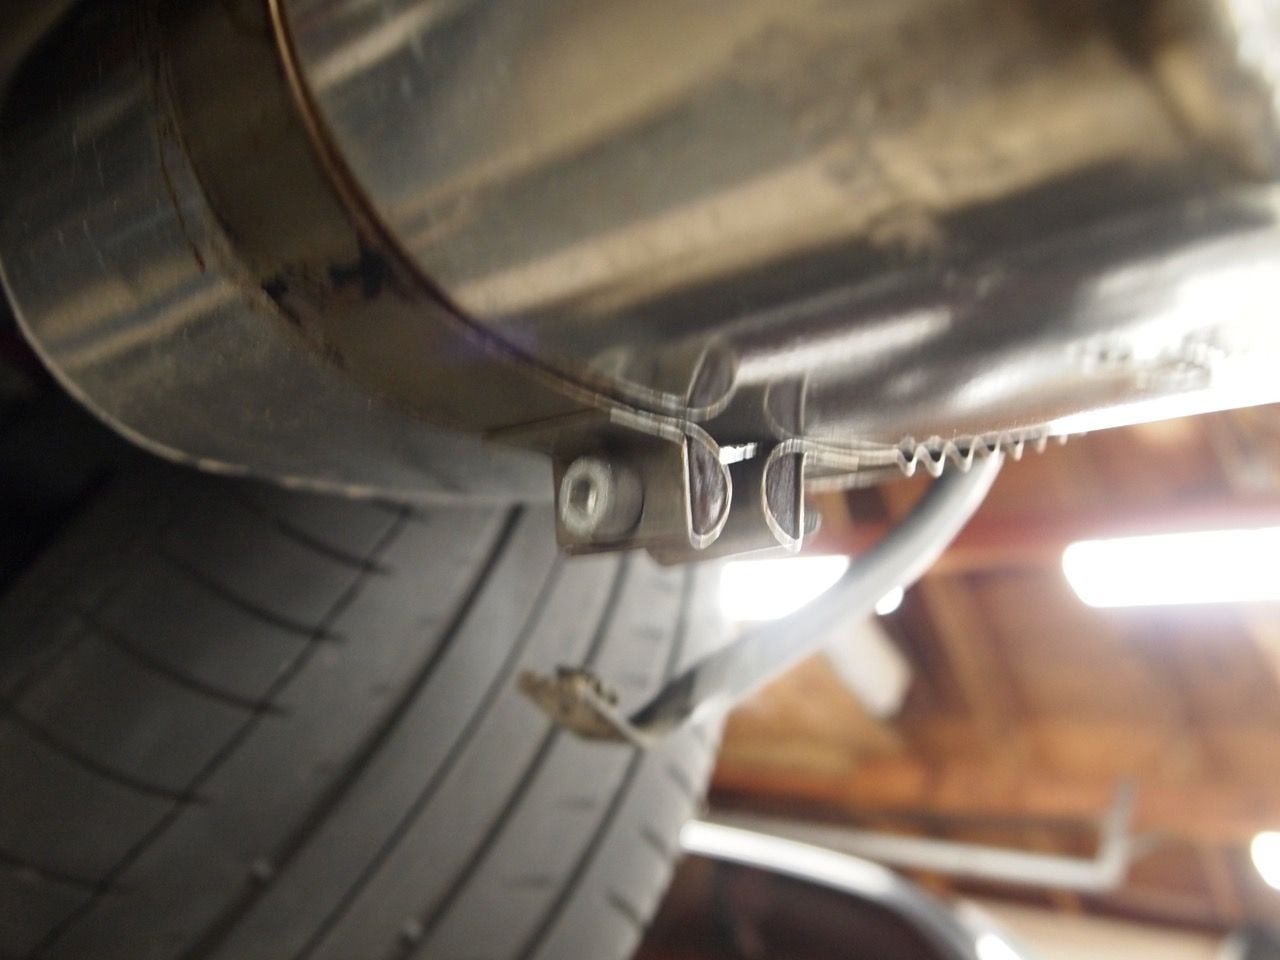
Remove the sealing clip to the muffler, the strap connected to the cat and the and the 3 bolts connecting the cat to heat exchange
Next remove the heat protection plate covering the cat and the Heat distribution pipe
Remove the one screw holding the rear heat protection plate to the cat. The entire plate will come off once you take the cat out.
Now remove the2 O2 and 2 temperature sensors using a 22-mm wrench.
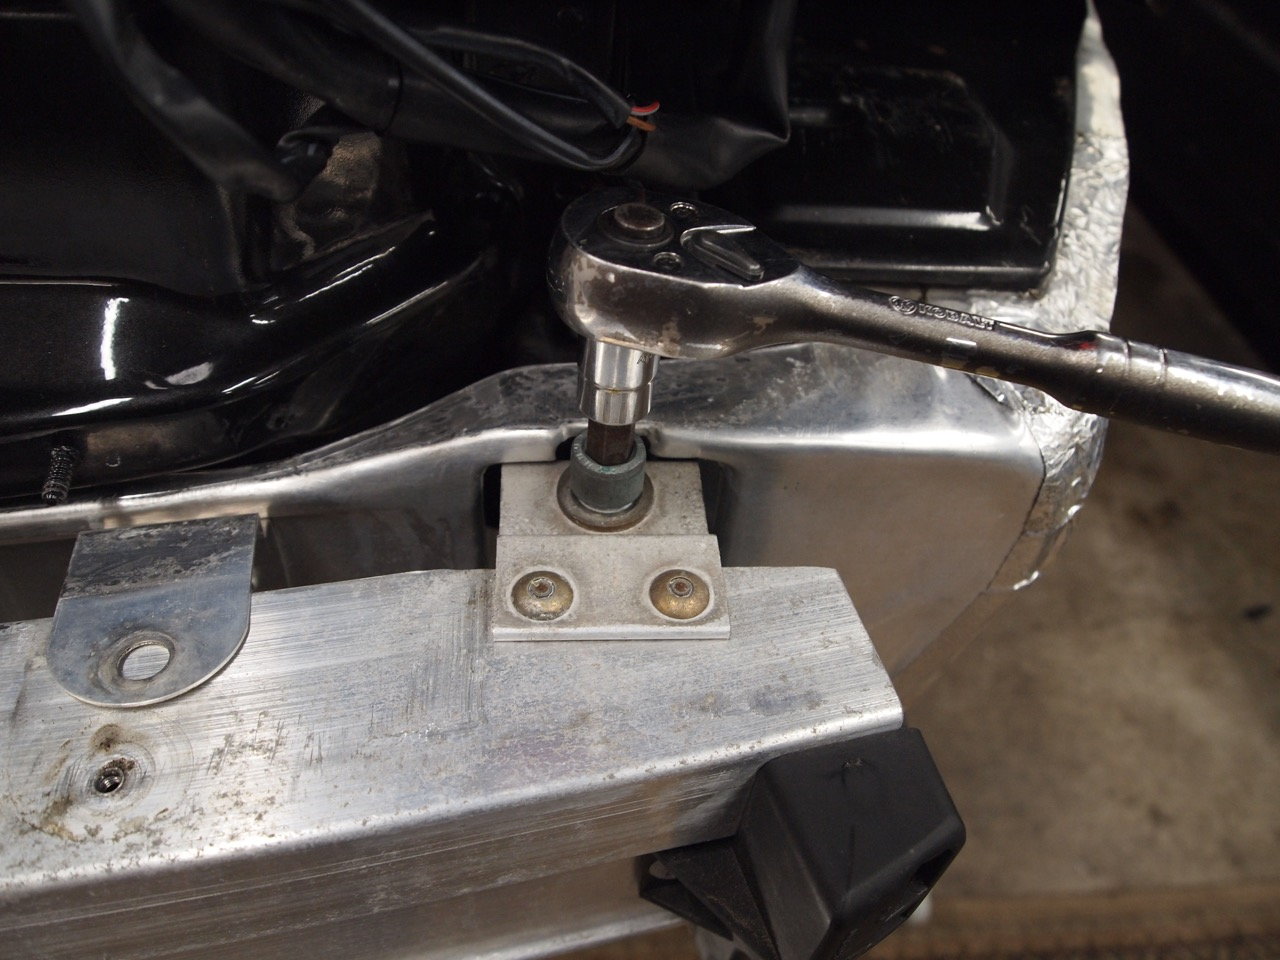
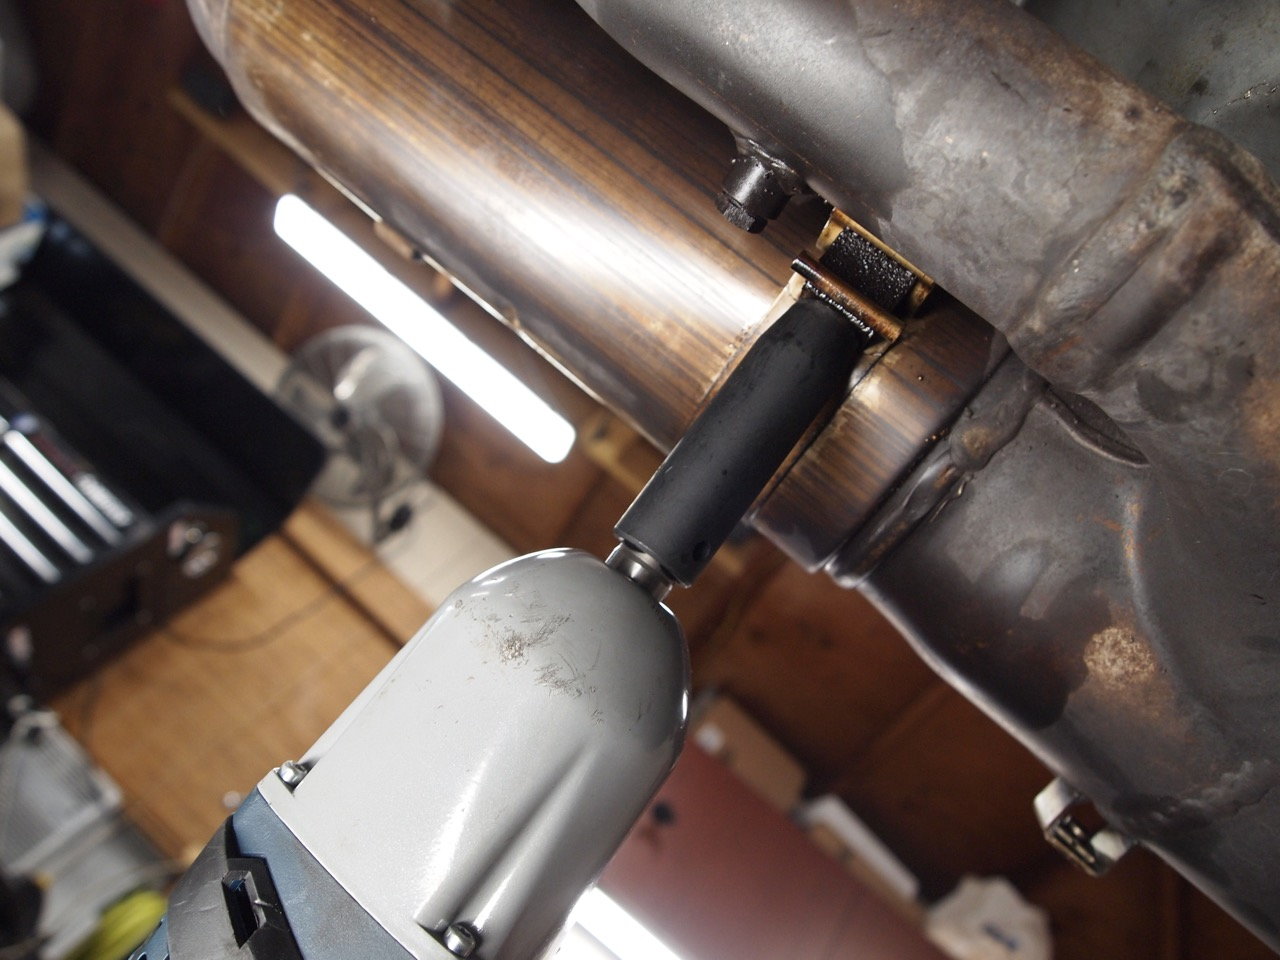
You are now ready to drop the cat restraining strap. I put a little PB blaster on it and took the torque wrench to it. Came off no problem.
Remove the 2 bolts holding the Cat bracket in place.
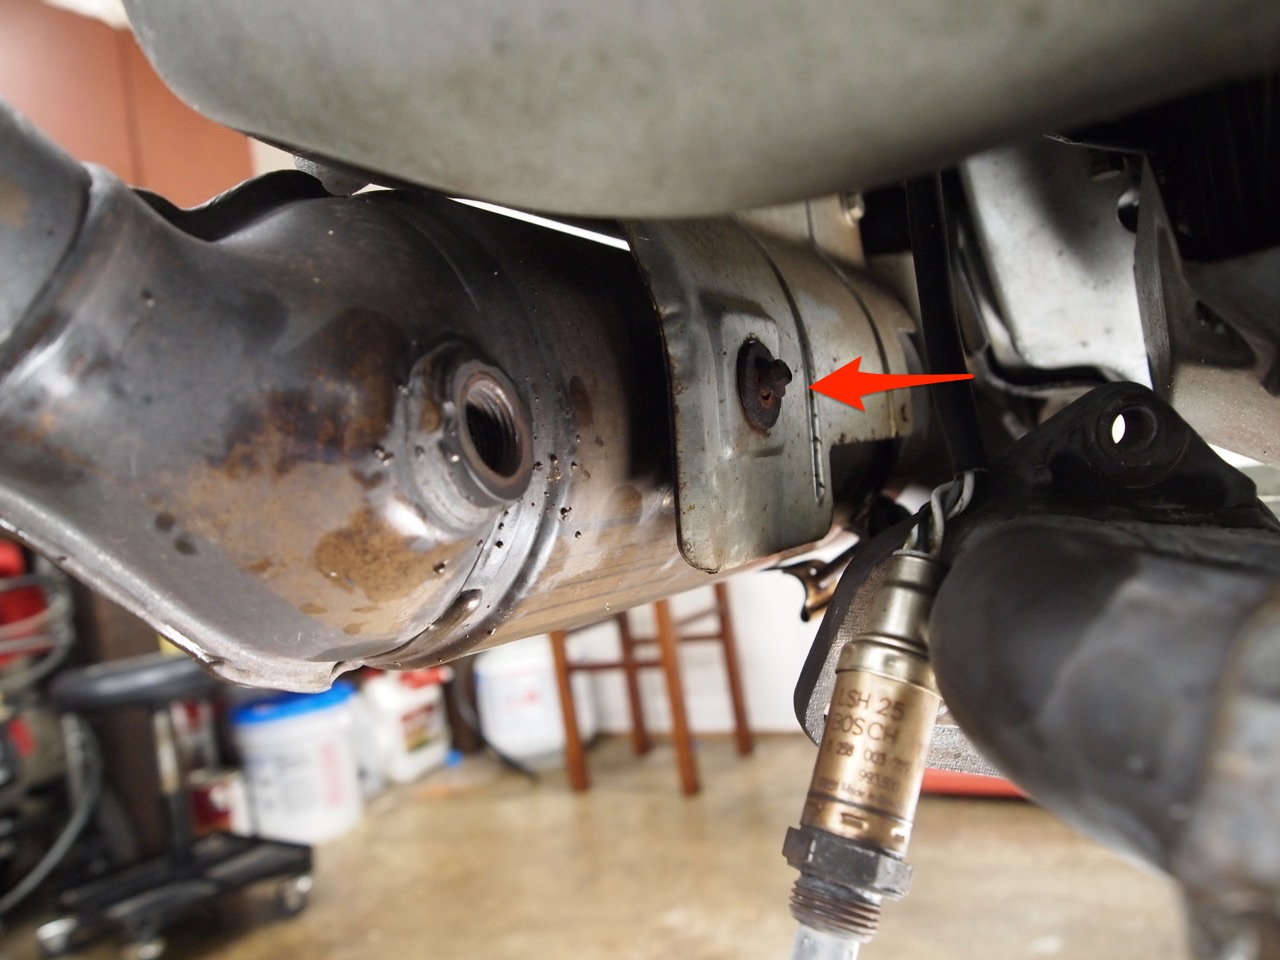
Next you are ready to remove the heat distribution box. It is held in place by 6 bolts. 2 of them you have to get to from the engine compartment. They are right in the front of the fan connecting the heat box to the front engine pan. Here is a bad picture of where those 2 bolts sit. Also make sure to disconnect the hose from the heat exchange to the box.
Once the box is off, you can now remove the front side of the engine pan. It is held in place with 8 bolts. 6 of them you removed when removing the heat distributor box. The other 3 are located on each side and one insight the engine compartment right next to the distributor motor.
Now that the pan cover is gone. You have great access to the left side cover. You can remove it without any problem.
Now here is where I left off and could use some advice. I believe the next steps will be for me to remove the AC compressor from the bracket and remove the AC bracket itself. What’s next? If I am not mistaken, I will need to drop the engine a little bit to remove the engine carrier bracket of the motor mounts? Any help how to do this, would be much appreciated. My plan is to do it next week and have some help from some PCA members.
Also, I really want to replace my Transmission mount. How much work is that considering I am lowering the engine a bit. Will I have enough room to replace the trans mount. Any suggestion on that would also be great. That’s it for now, more updates as I go along.
Congrats on tackling this !! The tough part is those timing boxes leak in several places and once you fix some, then another will get you....
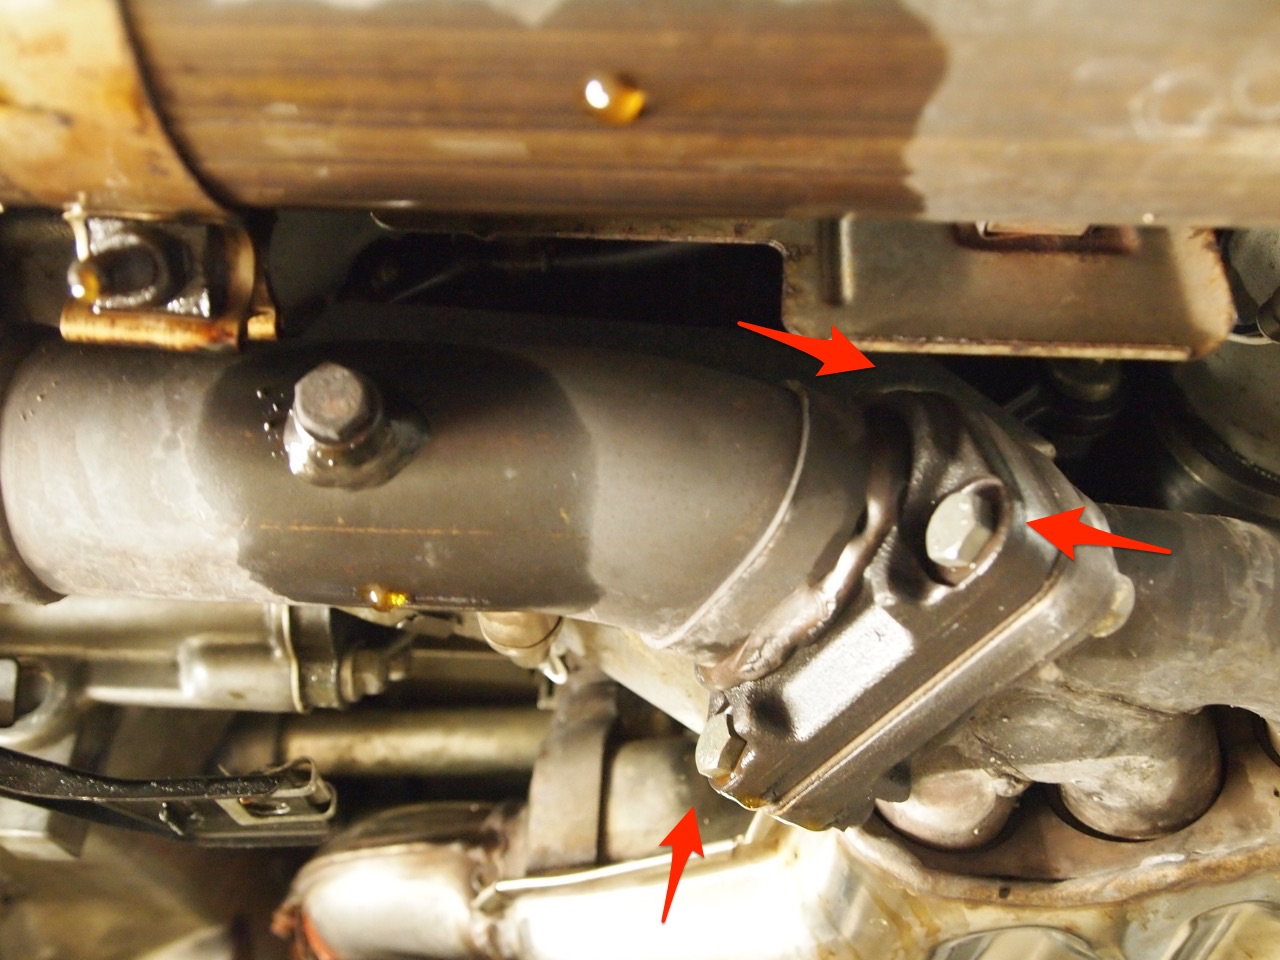
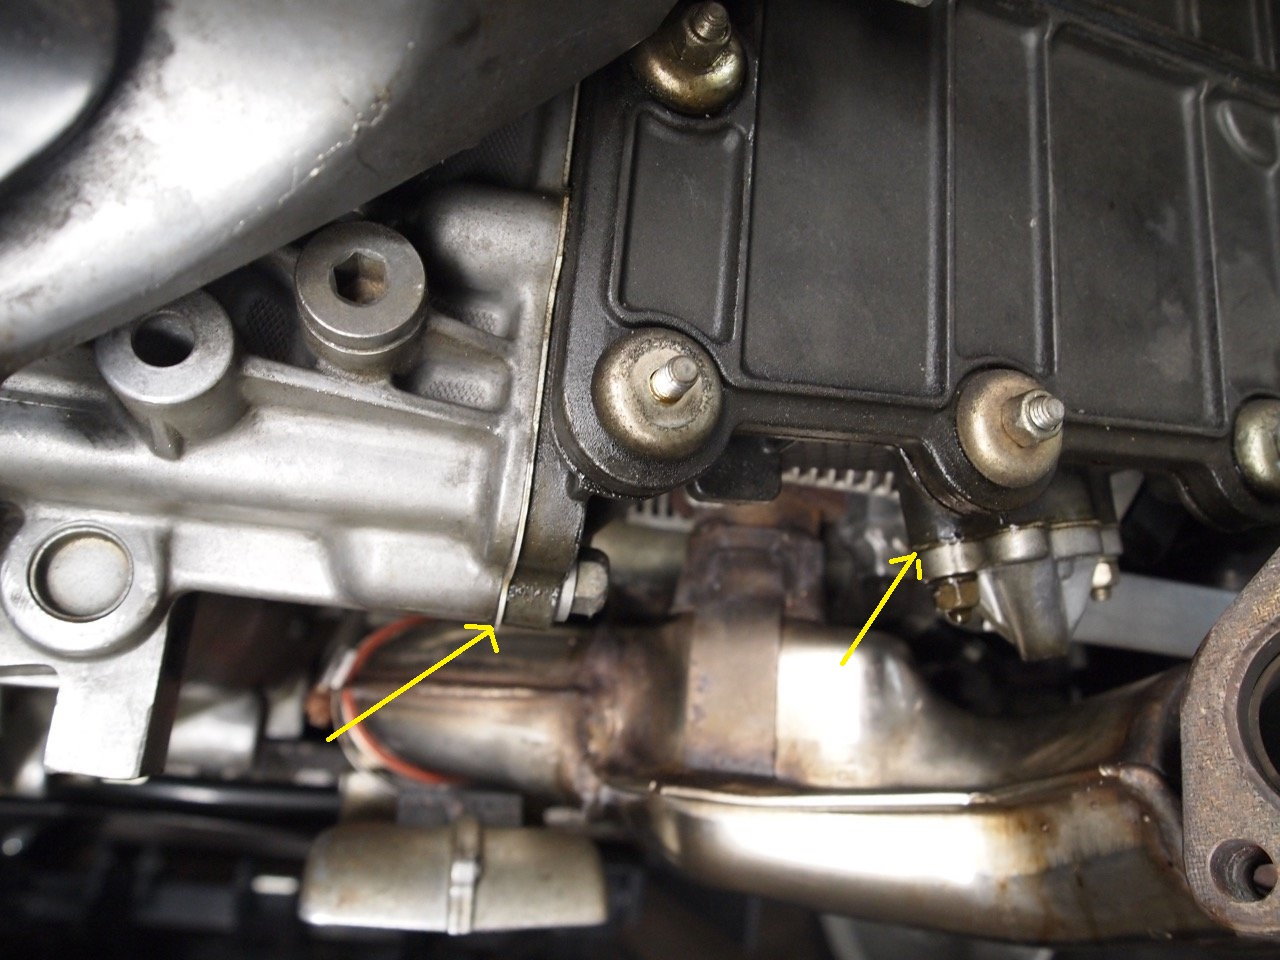
The covers leak, and then the gasket where the tensioner is leaks, and then they will also leak at the gasket where the box mates with the case (both marked in yellow). Then, they also leak on the back side where the cams enter.
You can of course deal with these one at a time, and then wait. To really make for a long-term solution, you have to pull the timing boxes and replace all those gaskets. Then you have to re-time the cams. Some have done all that while the engine is in the car, but it gets to be difficult.
Ricardo documented a lot of the process on the 964 here.
Thanks for taking the time and trouble to take pics and do this write-up. Anyone with a Persian rug in their garage has got to be a class act!
I take that as a compliment. That rug was either going to trash or in my garage.
You can of course deal with these one at a time, and then wait. To really make for a long-term solution, you have to pull the timing boxes and replace all those gaskets. Then you have to re-time the cams. Some have done all that while the engine is in the car, but it gets to be difficult.
I was worried about the gasket connecting to the crankcase, for now, the timing chain gasket will have to do, I am hoping the others only show the oil from the gasket and arent actually leaking
This might be obvious but worth mentioning... I have done this exact work on my 964 as well... but the circular profile rubber seals for these and for the valve covers don't need much torque to be most effective. 7 ft/lbs is sufficient for a seal. That's just wrist tight with a wrench. A lot of guys have over done it in the past, leading to issues later.
I see some issues on my new-to-me 993 like this so I am grateful for the photos.. thx!
Thanks,Tom. I do have a torque wrench that supports as low as 7 ft/lbs. I use it when I did my valve covers last year. My biggest concern is the chain case gasket that is connected to the crankcase. If that one is leaking, which is hard to tell, I would have to do a lot more what which I really don't want to get into with the engine in the car.
I bought MolyKote 111 as was going to put this stuff on the gasket side that is not rounded that fits into the cover. Is Curil- T a better product?
+1 for using Curril T. This is a non-hardening sealant. Use your finger to smear a film coat of the Curill on both sides of the garket. And, do pay attention to torque. Over torque the nuts and you can warp the covers. 7 ft-lbs, is the correct number.
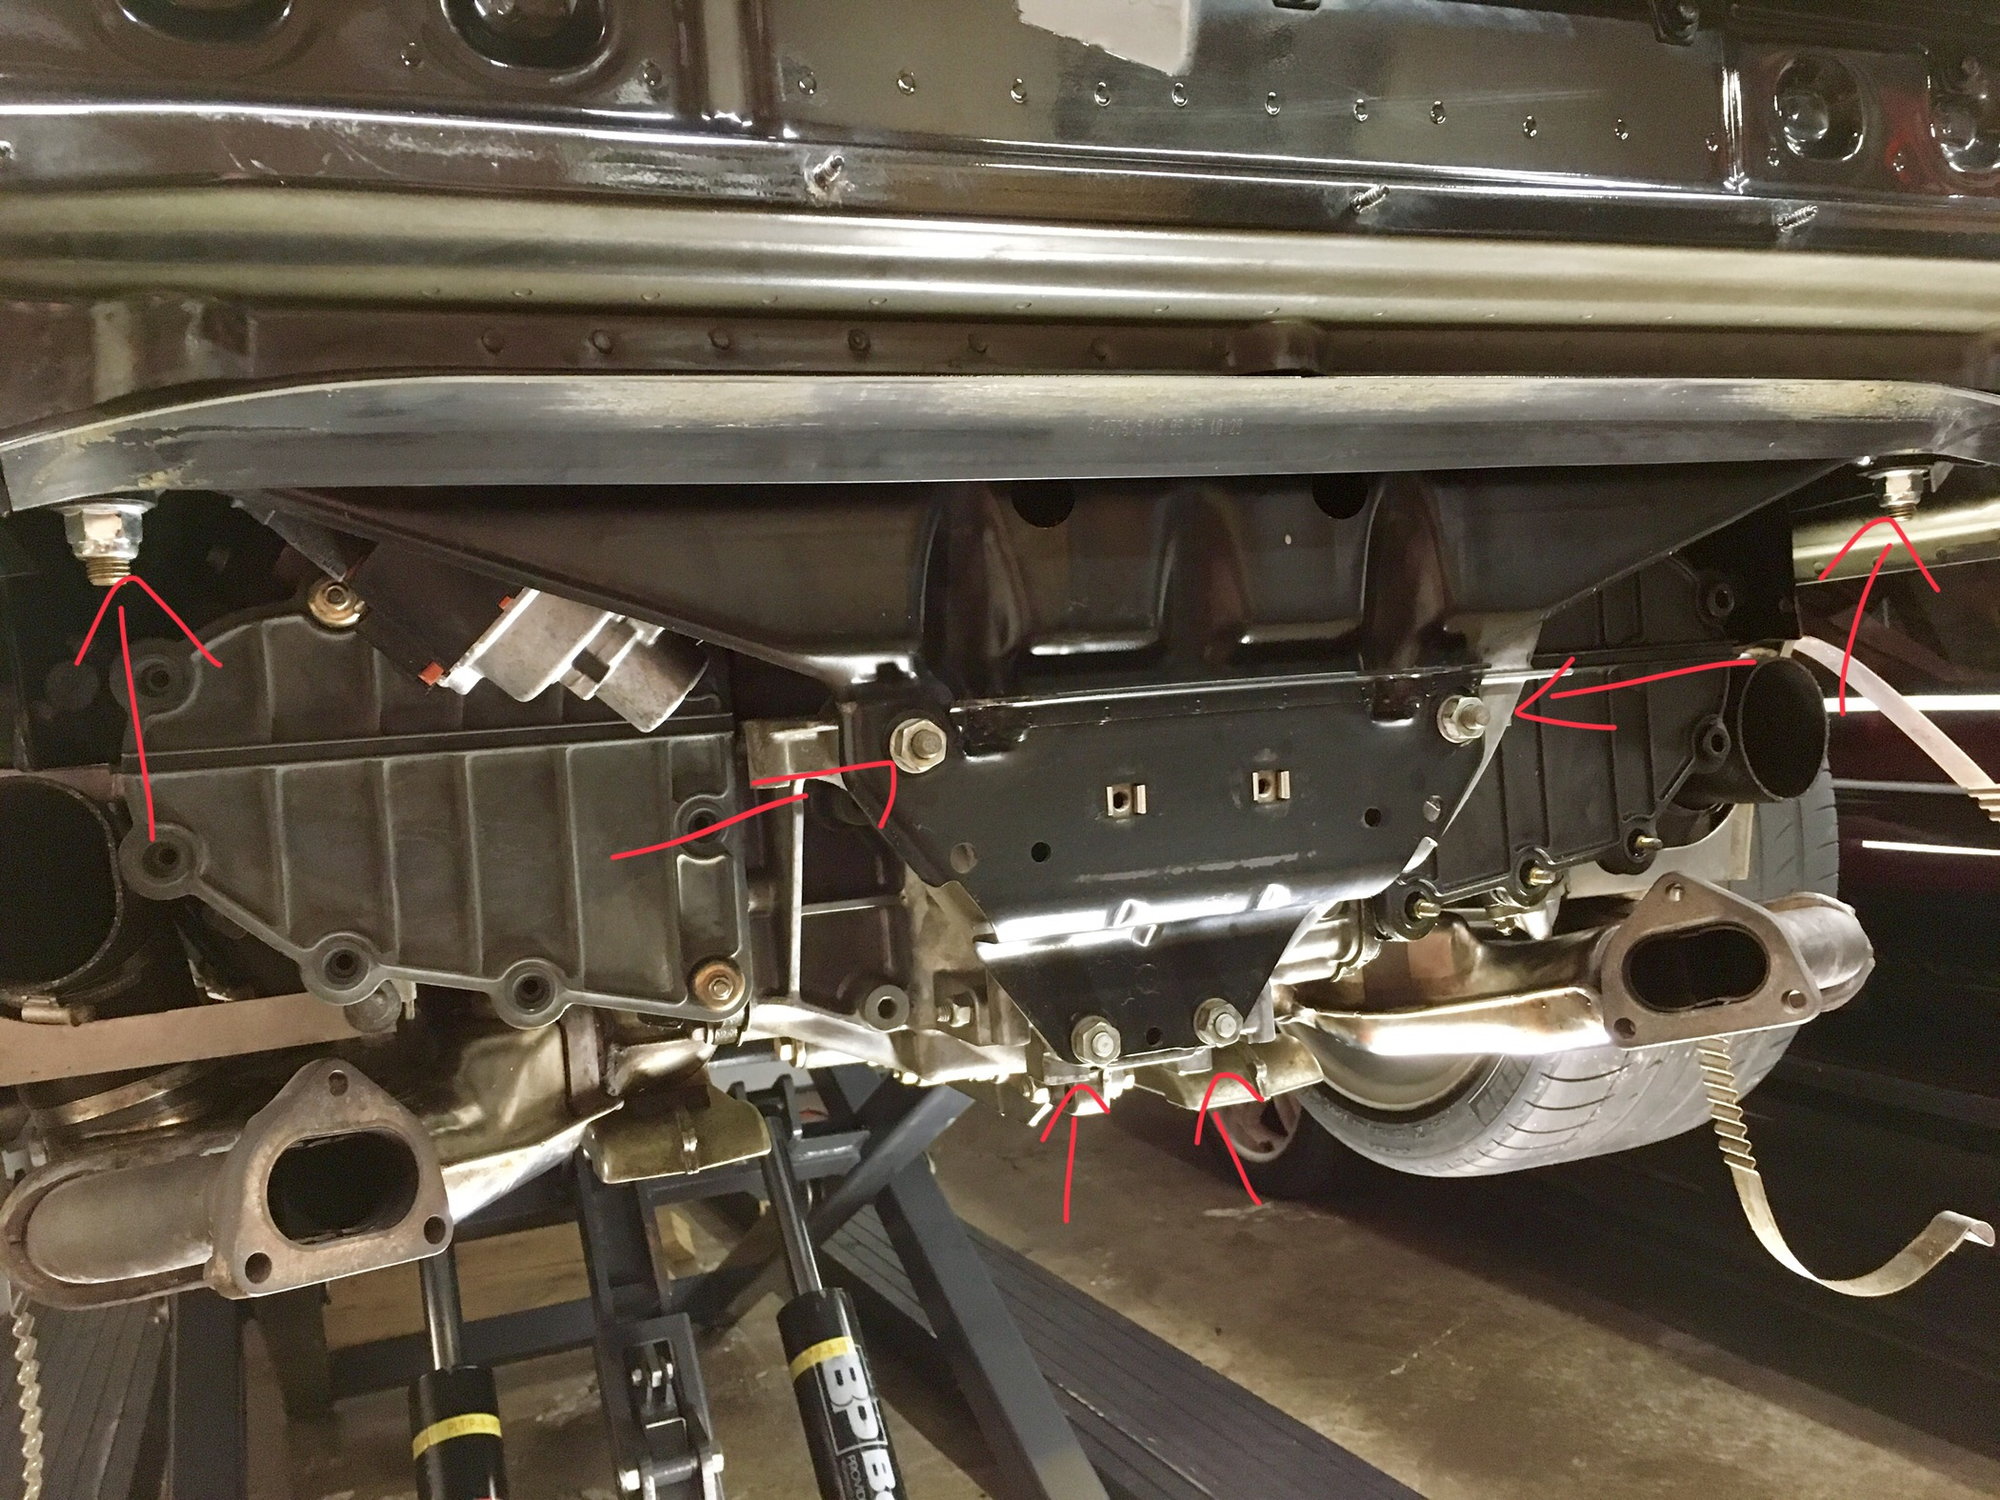
I am going to be doing some more work this weekend. Before I get started, I had a few more questions. To get to the right side TCG cover I believe I will now need to first remove the AC Compressor from the bracket and move it to the side. What’s next, support the engine and remove the motor mounts nuts as seen here and the 4 nuts holding that v shaped eningine bracket?
I assume I will also need to losen these bolts supporting the transmission. BTW, does that give me enough to room to potentially do the transmission mount?
What else should I consider. Or once I remove that engine mount bracket, will have enough to room to remove the AC bracket to clear my access. Do I even need to lose the Trans bracket? I was thinking while I am in there, I might be able to do the transmission mount, or will that require more disasemnbly to lower the trans enough to get to the mount. I would think I would also need a special tool to push out the mount. Really would like to take care of the trans mount as well. I do feel a slight notchy shift when going down hill or accelerating quick and the trans moves. Figure I might tackel that as well, what are your thoughts.
Going from memory here...
- remove the AC compressor from mount and secure it.
- support engine at the case seam with floor jack and put some upward pressure but don’t lift the car off your Benpak
- remove engine mount nuts x 2
- place Escos or any flat top stands to support engine under heat exchangers
- slowly lower engine onto the stands, approximately an inch or so
- remove engine carrier
- remove crank pulley
- remove AC bracket
- now you’ll have access to the right cover
No need to loosen TRAN mount.
Awesome thanks P-daddy. I will give this a try. So the crank pulley does have to come off, the bracket won’t slide off without?
Originally Posted by Churchill
I've never heard of MolyKote 111 being used on an air-cooled engine. Where did you hear this suggested?
Curil T is ideal for rubber gaskets, as opposed to an anaerobic hardening sealant like Loctite 574.
I don't think MolyKote is even a sealant. There's an "ultimate sealant thread" in the Pelican engine rebuilding forum that has guidance from guys who build engines for a living.

 01-29-2018, 08:47 PM