When you click on links to various merchants on this site and make a purchase, this can result in this site earning a commission. Affiliate programs and affiliations include, but are not limited to, the eBay Partner Network.
Outstanding Gert! And +993 points for taking the time to photograph and show your progress in this thread. Many thanks and good luck with the rest.
i was making a lot of pictures to make a photo album when the car is finished.
I figured I could post them online too, its fun getting people involved.
Today I started making a tool to fasten the 41mm hex nut on the primary shaft at 250Nm torque....
When I first saw this I thought "Cool homemade clawfoot!". Then thought "Wait, doesn't that affect the torque reading?" Turns out it does: the readings are only correct when the wrench is at 90 degrees to the clawfoot, as Gert is demonstrating in the picture. At all other angle you have to apply a correction. Here's how: Torque wrenches and clawfoots.
When I first saw this I thought "Cool homemade clawfoot!". Then thought "Wait, doesn't that affect the torque reading?" Turns out it does: the readings are only correct when the wrench is at 90 degrees to the clawfoot, as Gert is demonstrating in the picture. At all other angle you have to apply a correction. Here's how: Torque wrenches and clawfoots.
Impressive job!
Good observation!!
If you use these tools with a torque wrench at 90 degrees, the arm will stay at the same length and the correct torque is applied.
if you put the torquewrench In the 180 degree position, the arm becomes longer and you will put a higher torque on the bolt then your wrench indicates, and you risk to overtorque your bolt or nut.
Porsche made a long tube with a 41mm socket at the end to fasten this nut.
the reason I made it different is because with the long tube I was not able to clamp the shaft, then I would need the Porsche tool to lock the shaft on the splines on the other end.
My solution was easier to make, and then I could block the shaft on a part with no splines where it passes the differential.
Hi Gert. Only just now catching up with your great thread. Really liking you car, especially the red interior. I am based in Dordrecht, if you ever want to catch up with another, semi-local, 993 Carrera to compare or just kick tires let me know (Covid allowing). I even share front bumper and wheels with yours .
Hi Gert. Only just now catching up with your great thread. Really liking you car, especially the red interior. I am based in Dordrecht, if you ever want to catch up with another, semi-local, 993 Carrera to compare or just kick tires let me know (Covid allowing). I even share front bumper and wheels with yours .
Hi, nice to know there are some rennlisters in the neighborhood.
It would be nice to meet one day, when the Porsche is finished or on a local Porsche meeting.
Are there local porsche meetings?
We are all aplha males here, do you have a more specific name ?
regards Gert
Right now the car is in the next step of the rebuild process.
The first step was to get the car running, registered and a valid MOT, so I could drive it for a while and make a inventory of defects and costs.
The second step was to get all technical system and functions working again.
Now we completed the previous steps, and I have a idea what the costs are of replacing worn parts i decided to proceed to step 3.
The third step is to replace and rebuild those technical items.
- Gearbox,
- replace LWF for DMF ( I hate the engine stalls and rattling noise from the gearbox)
- suspension
The fourth step will be bodywork, but first step 3 have to be completed.
you don�t want to work for a long period on a freshly painted car. This can only result in scratches and damage.
To continue step 3:
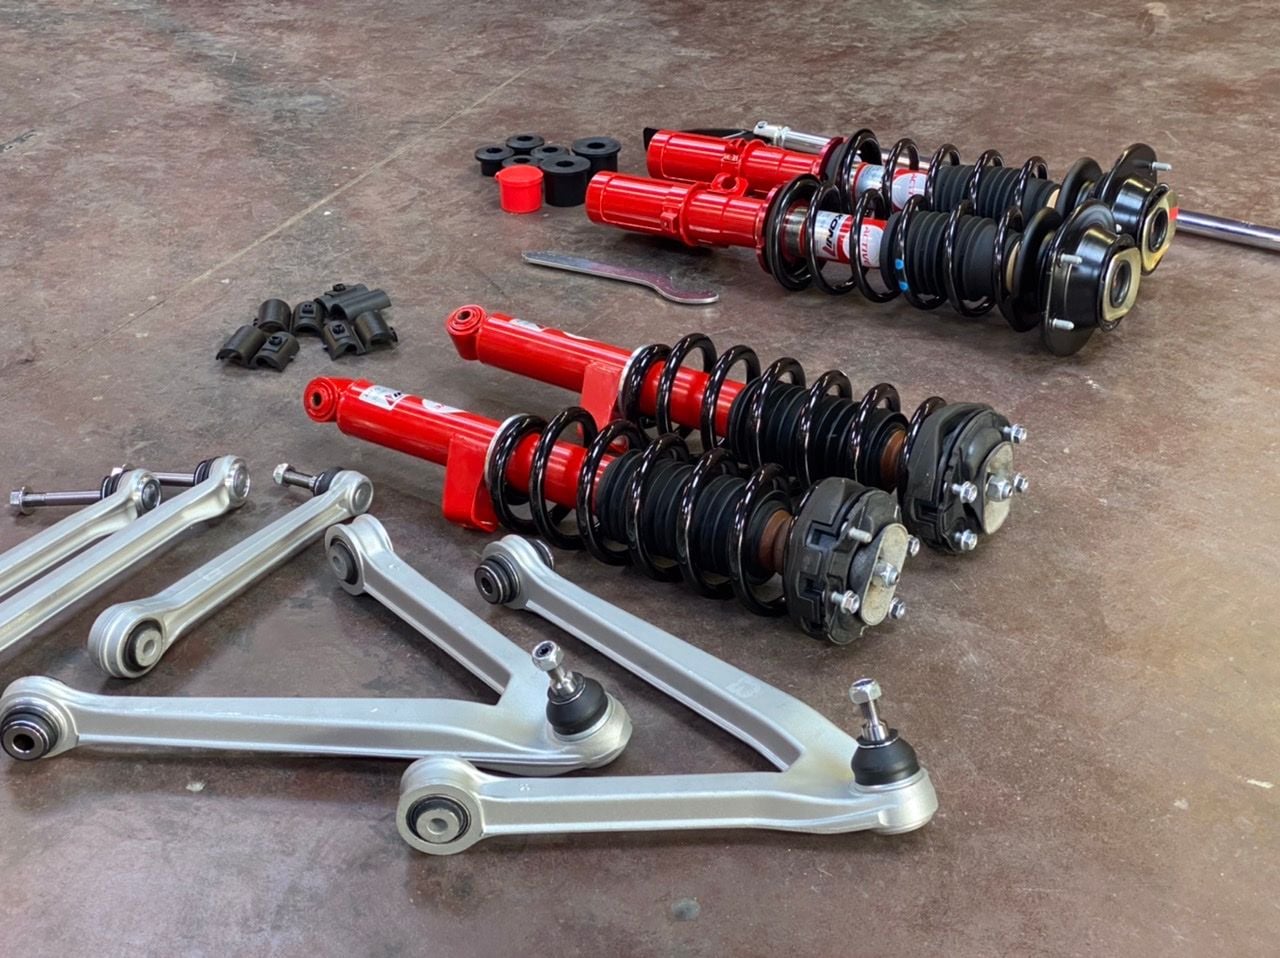
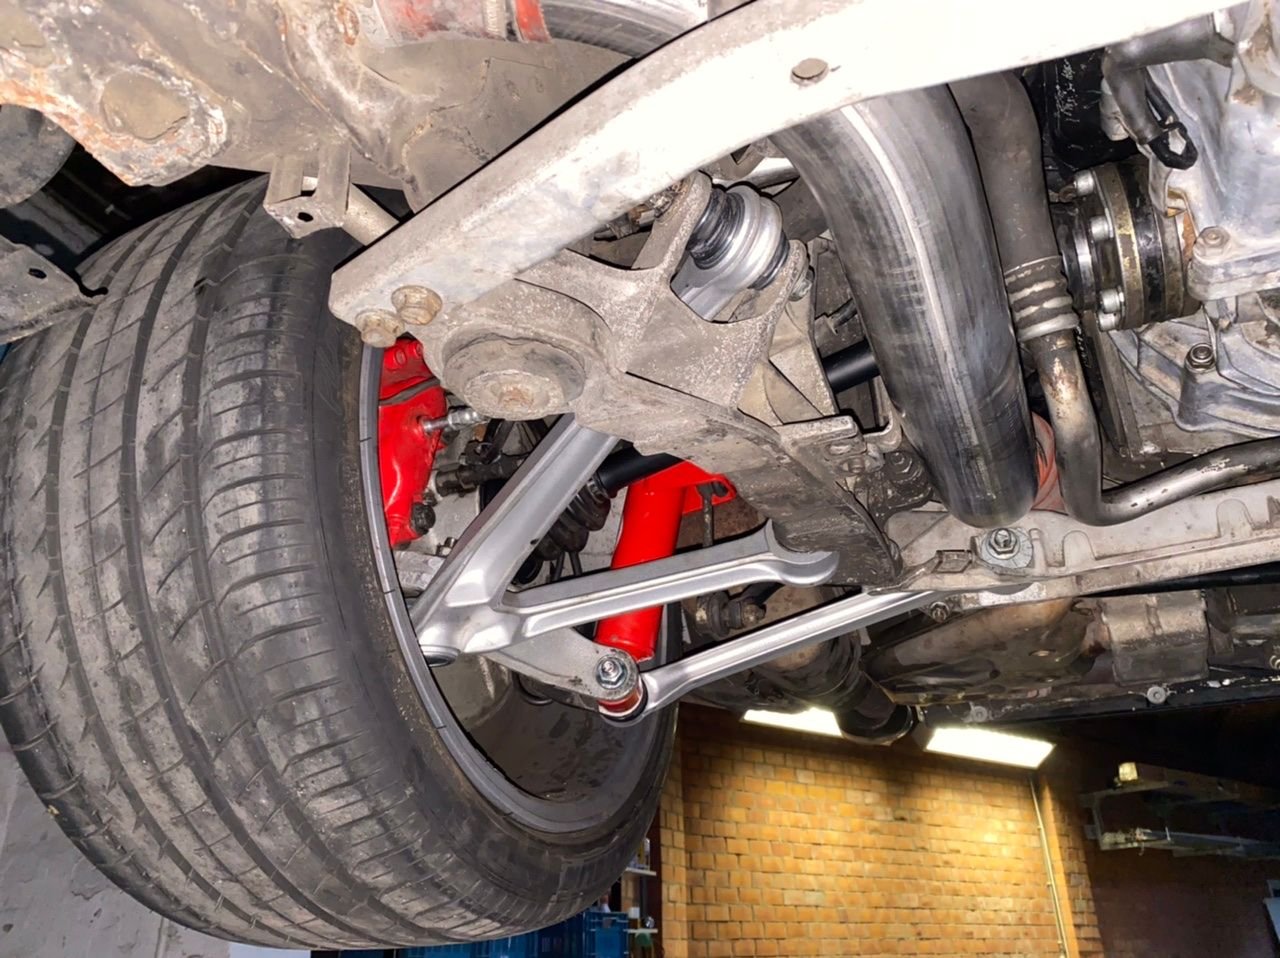
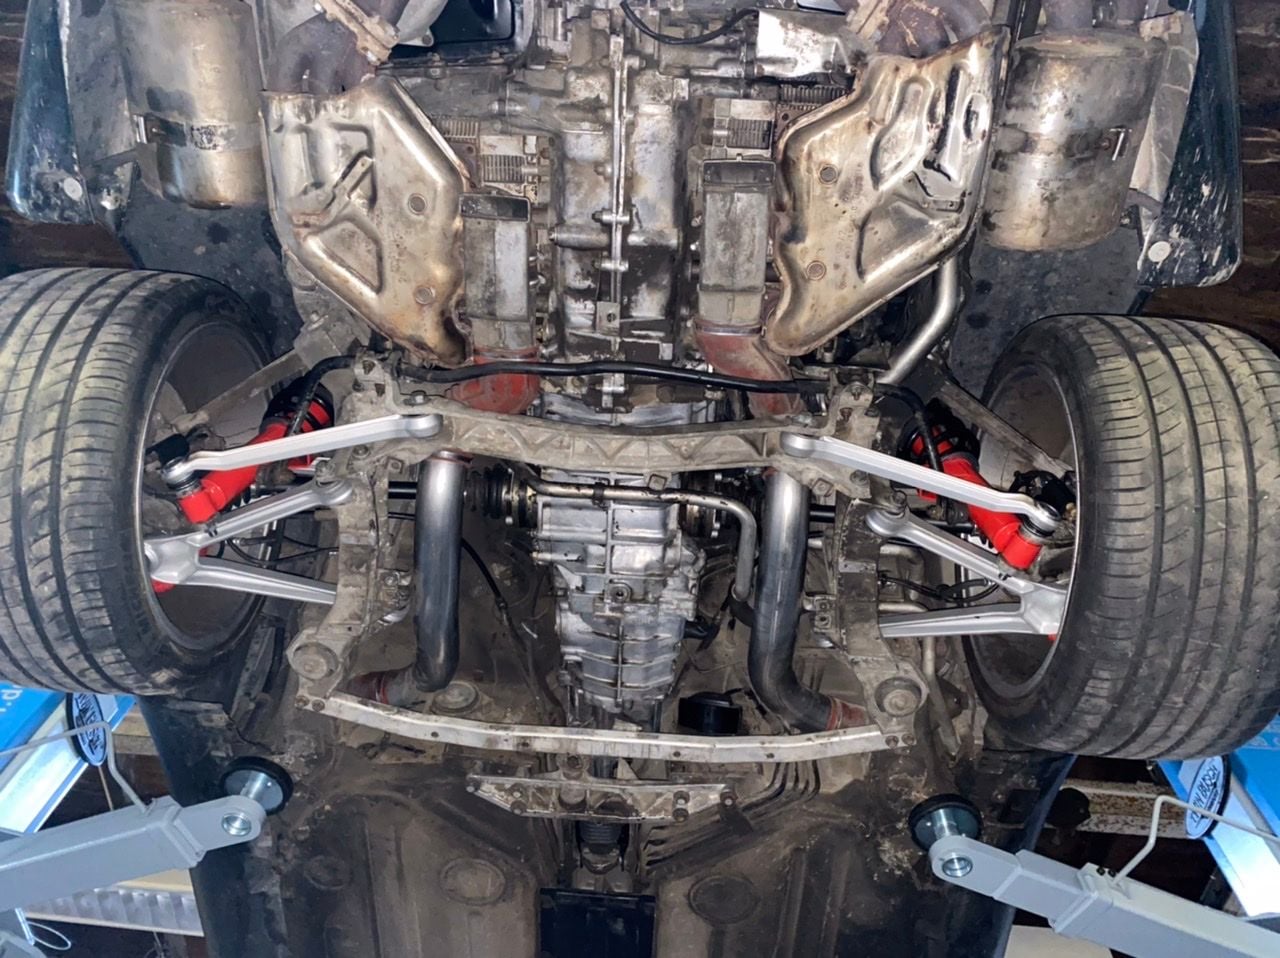
The gearbox is back in the car, it took a while longer because I have rebuild the suspension at the same time.
the parts:
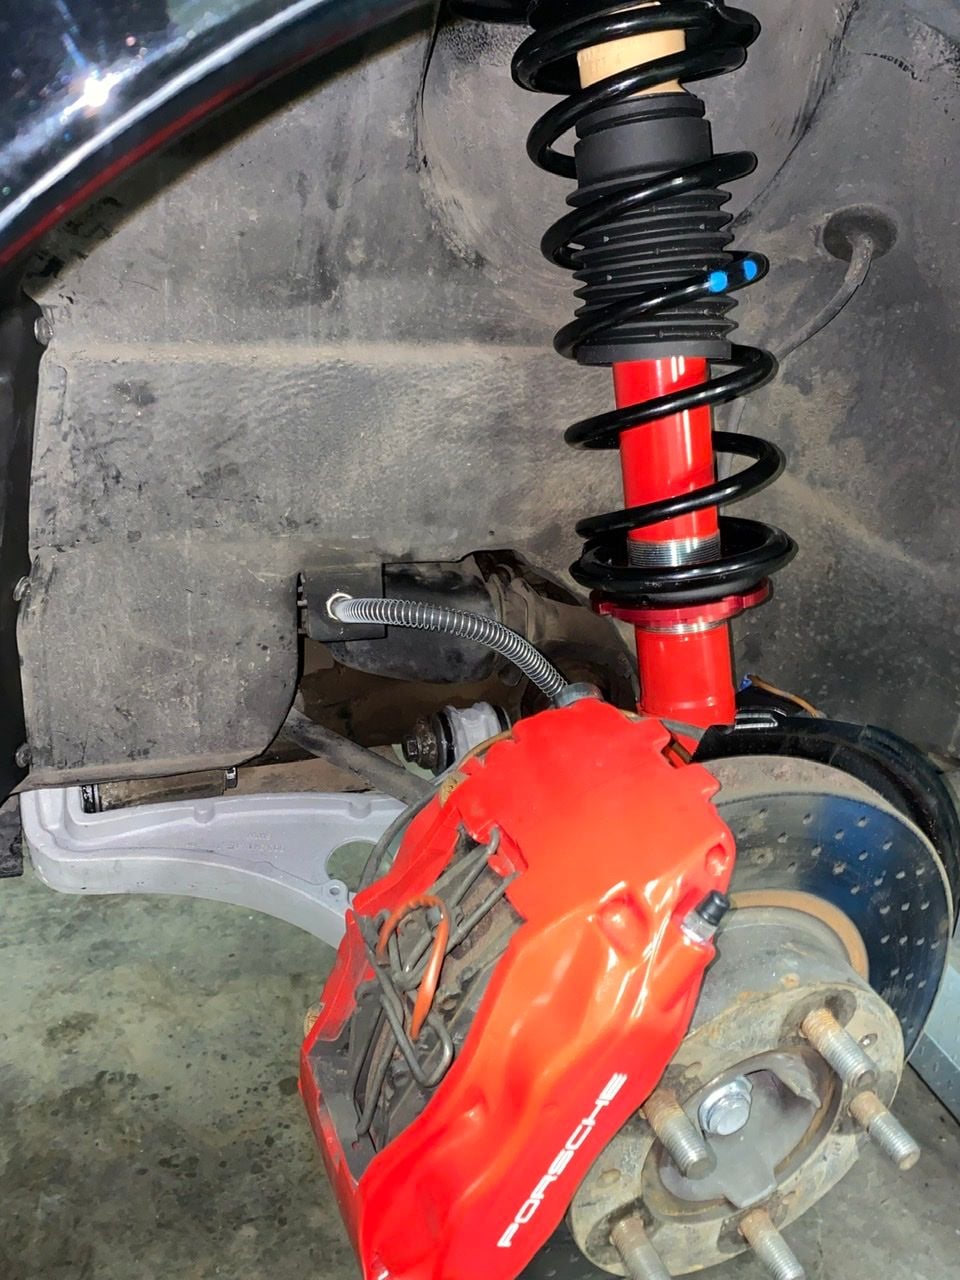
After reading many threats and blogs about the character of the different brands, my choice is the Koni Active shocks and M033 springs.
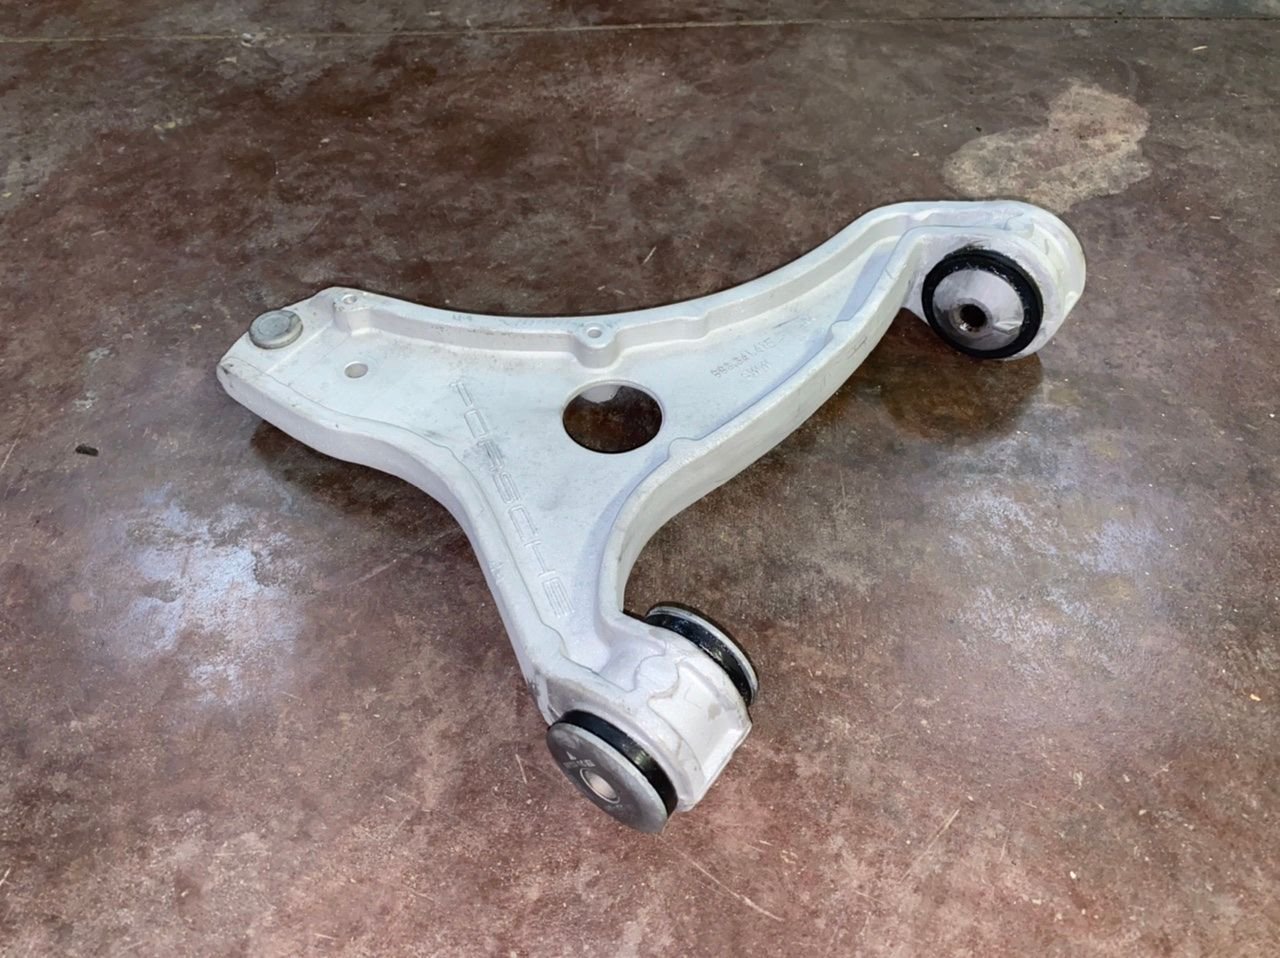
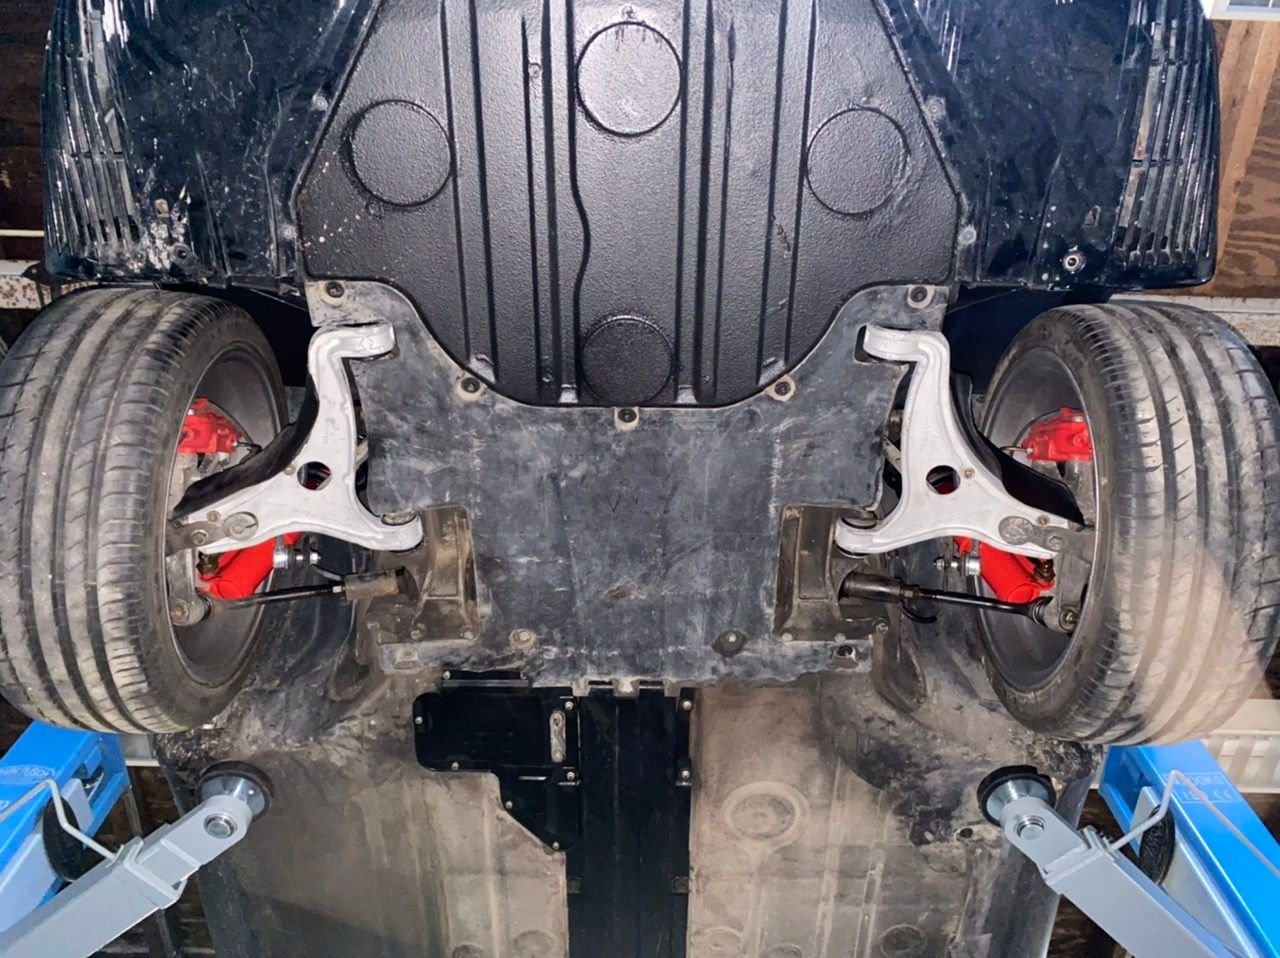
All arms with play of a damaged seal are replaced And the front A-arm bushings too.
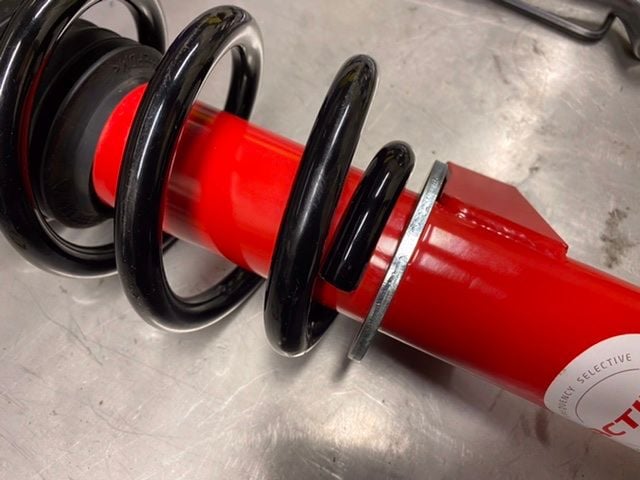
I actually ran in a small problem with floating springs in the rear.
the M033 springs are 7mm too short for the Koni Active shocks in the rear.
Actually this is a problem in Europe, in Belgium and the Netherlands it is not allowed for the spring to stop touching its touchingsurfaces while the car is lifted.
I did not wanted to shim this space as this would result in a higher ride height.
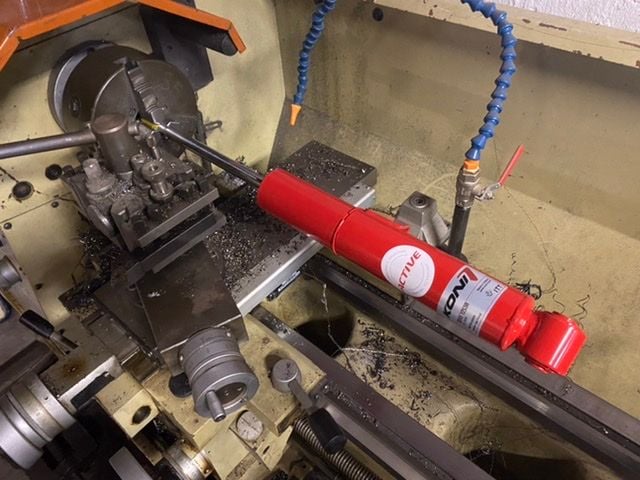
The only right solution is to make the shocks shorter.
So I used my lathe to cut 7 mm from the edge where the piston is seated in the springtop.
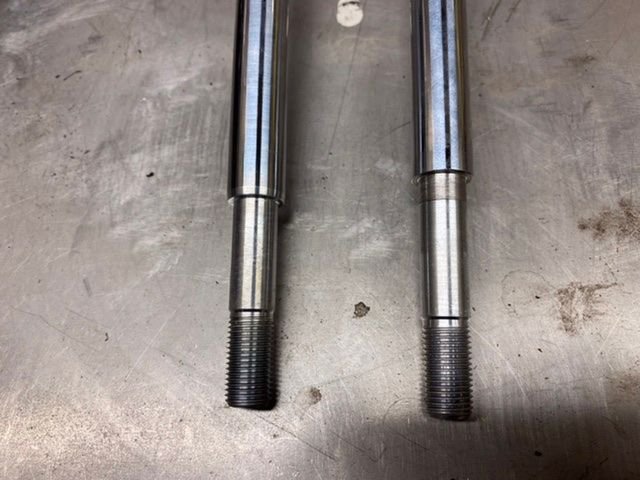
here you see the difference, the stock Koni shock at the left and the modified at the right.
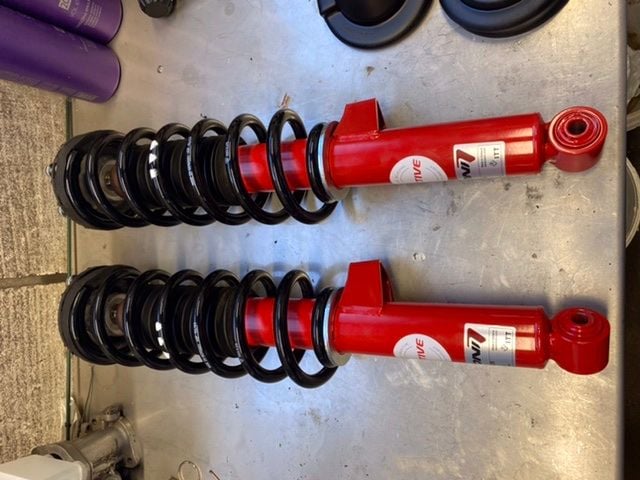
after modification af the other shock too, and assembly this is the result: no floating springs.
i did need a 7mm bushing at the top because the threats where not long enough without it for the nut to lock the springtop.
I went to the Porsche centre nearby to set the alignment correct.
But they told me there oldest mechanic who did all the classic Porsches is retired since last year.
So they advised to go to the alignmentshop just across the street, the Porsche centre brings all there classic Porsches also to this shop.
So i went there and it is good that i have brought my own kinematic gauge, because the shop did not have it.
So i actually helped the guy with the settings of the rear axle and the Kinematic-toe.
Im verry happy with the results.
We get all the values perfectly within specs.
Driving is a dream now.
The gearbox and the handling is great now!
The Koni active shocks are a bit more stiff then the old monroe’s, so i did not replaced those too soon.
Im happy with the decision to go for more comfort, the Koni’s are stiff enough for my likening.
I had M033's installed in my 993 (now sold) and they fit fine with Koni FSD's.
Thanks.
It's been a long way, and it's really time consuming (that's the hardest part for me)
Now i need to drive it for a while and spend more time with my business, so i get new energy and a bit of money to go on
Last night i drove it for more then an hour.
The M033/Koni's are perfect for me, not to soft, not to harsh..... I love it.
Ride height is lower then ROW M033 though, i guess its why i had the floating spring issue.
I measured Front 139,3mm and Rear 123,5mm just after fitting the springs, after a few months when the springs settle it could get even lower.
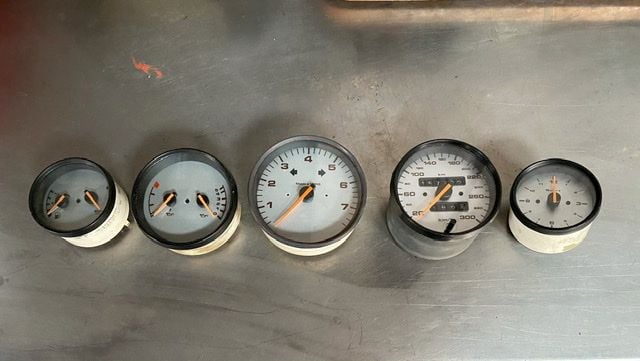
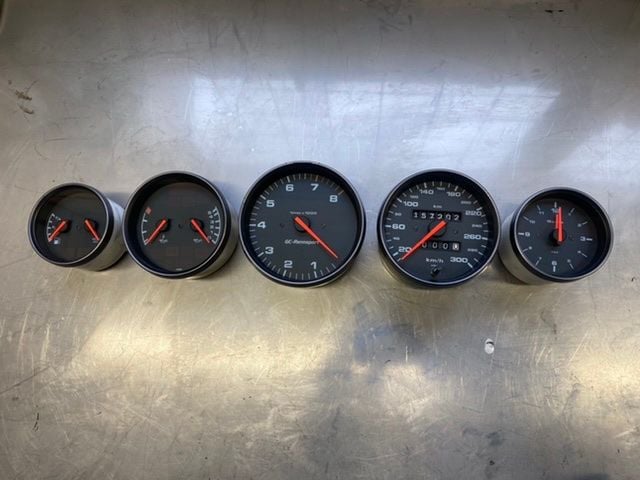
Today I finally finished what I call �a lot of work for a few gauges�.
My gauges had the dial-face changed to silver by a former owner. The dials where not genuine Porsche. i did not like the appearance and the warninglights are hard to see in daylight.
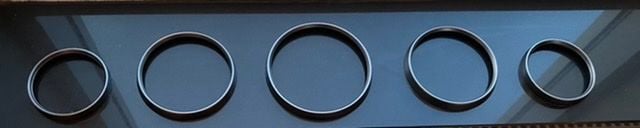
Most bezel rings where already damaged at the back by the PO, so I purchased new bezel rings and sprayed them �Carrera S� stone grey.
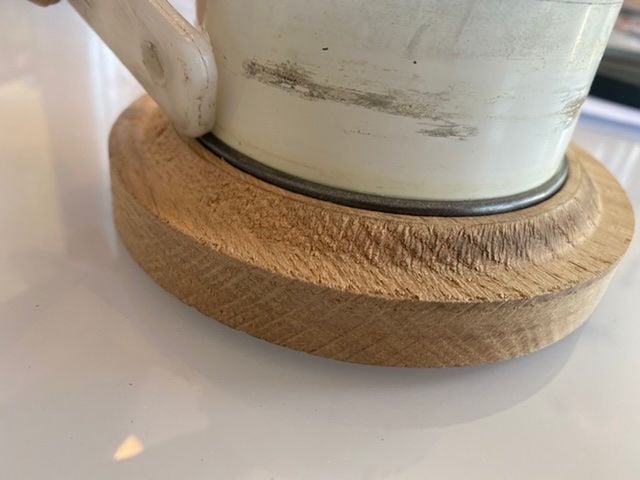
I know it is not visible, but I want a clean crimp at the back. To do this i made 3 wooden templates to support the ring when i crimp the bezel rings.
�Back in Black� gauges (i�m a big AC/DC fan)
the pointers are sprayed in orange/red and finished with UV resistant lacquer.
I used a nylon tool to evenly crimp the back of the bezel until its snug and free of wrinks.
Im happy with the crimp
I replaced the acrylic glass of the speedo to a glass one, now all gauges have a glass screen.
all light bulbs are changed with new osram bulbs 1,5W and 1,1W.
And i found a extra rev counter second hand, so i could have the genuine rev counter and one with a modified dial.
Some pictures from today.
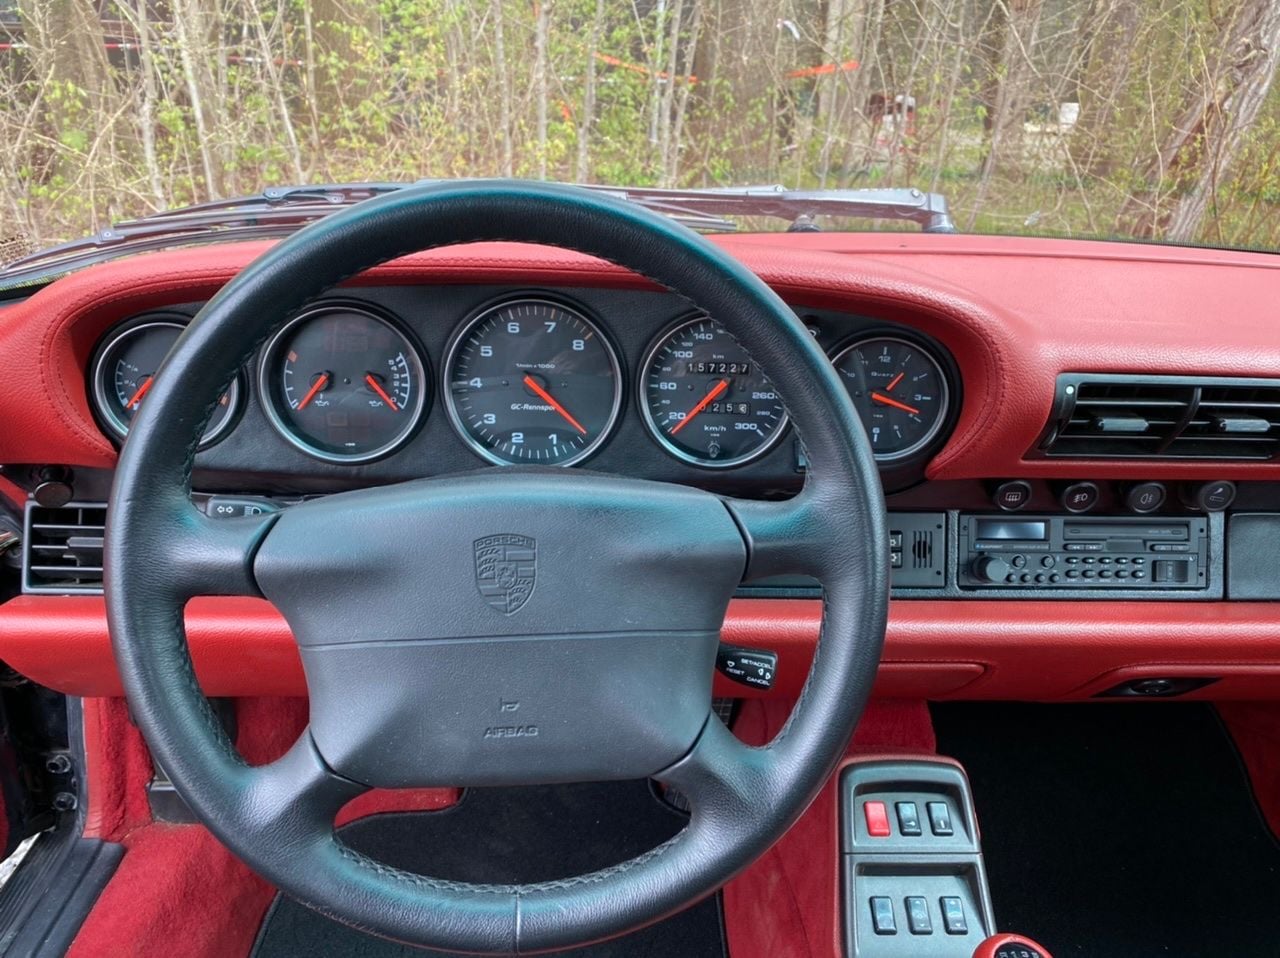
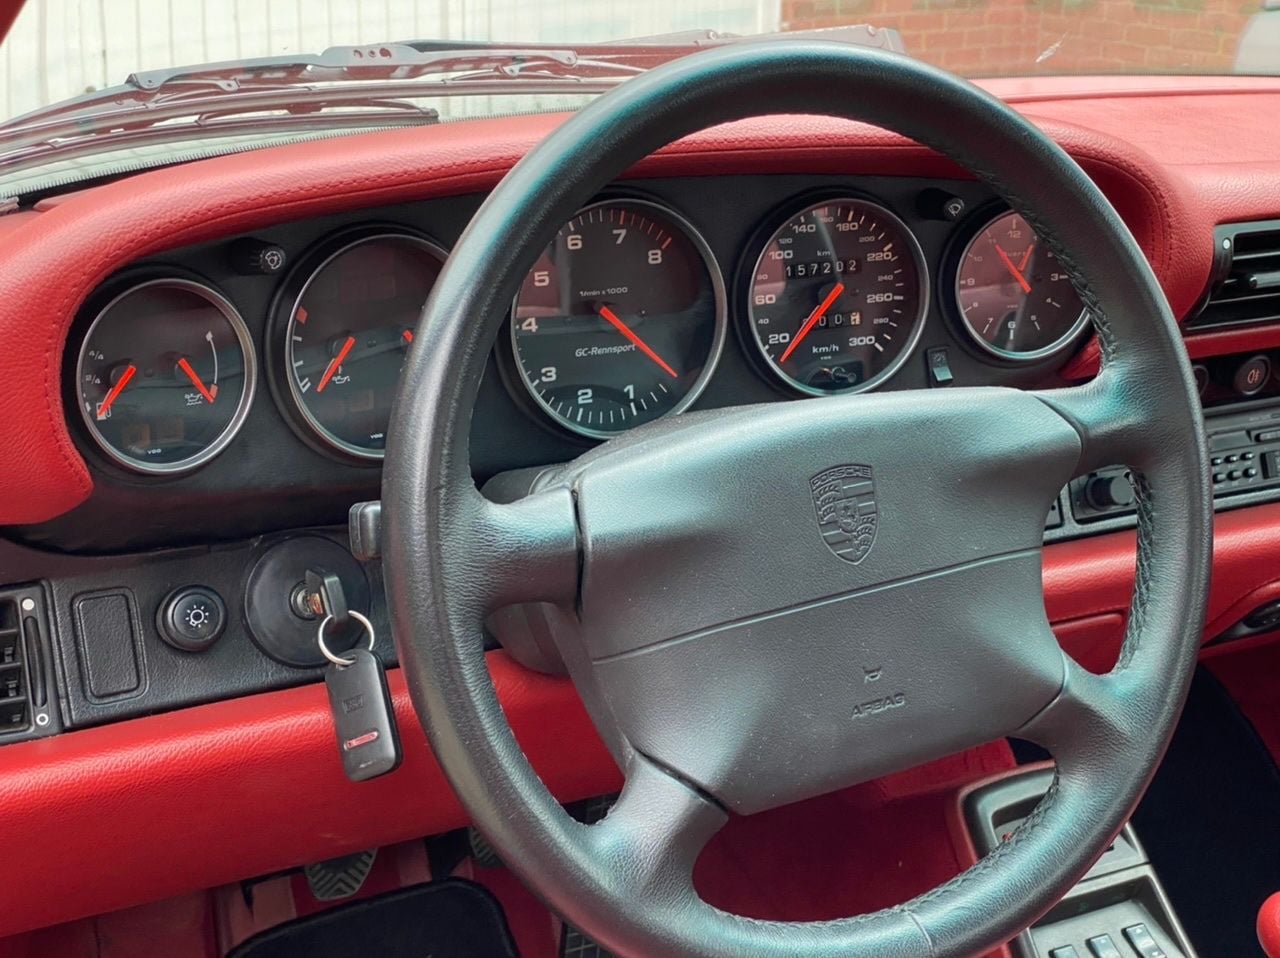
gauges look great and I also upgraded to the Blaupunkt Bremen DAB+ Radio.
I love it, but i still have some work on the DAB antenne. The signal is very poor.

 01-03-2021, 01:28 PM


 .
.