When you click on links to various merchants on this site and make a purchase, this can result in this site earning a commission. Affiliate programs and affiliations include, but are not limited to, the eBay Partner Network.
Replacing the Shifter Guide Tube Ball Cup Bushings
i recently had my shifter fail on me in the middle of traffic after work. i tried to shift back into neutral during stop and go traffic, but suddenly heard a noise and felt the shifter go loose on me. i was able to engage what felt to be the bottom row of gears. sure enough i managed to roll using 2nd, 4th, and 6th. instead of frying my clutch and straining the engine, i got off on the next exit and waited for traffic to die down before i attempted to drive home.
success!
surprisingly, i could not find much information on the 993 threads regarding this. after posting my troubles (see:Shifter Stabilizer Rod woes) and after gathering some information from garth and AOW, i went to work trying to figure out my options.
1.) buy the replacement parts: angular joint: 928-424-005-01-M100 (~$80); guide tube: OEM-964442401131(C2) or OEM-964442401101(C4) ~$80-~$90
- these are new pieces which already have the ball cup bushings installed
2.) reuse your existing parts and order replacement ball cup bushings (x2): 928-116-145-03-M100 (~$30)
going the cheaper route, i ordered up the bushings
the ball cup bushings are actually listed as: "Clutch Lever Ball Cup Bushing, 928" as these were originally for the 928, but will fit the 993 "angular joint." the "guide tubes" are carried over from the 964 and are specific to C2 vs C4.
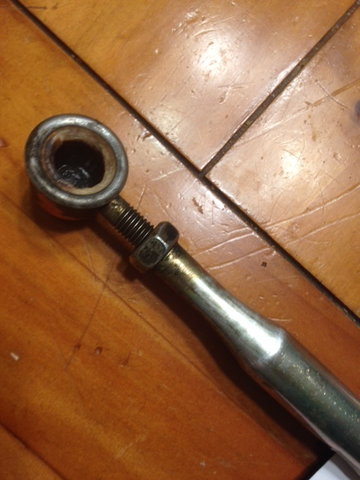
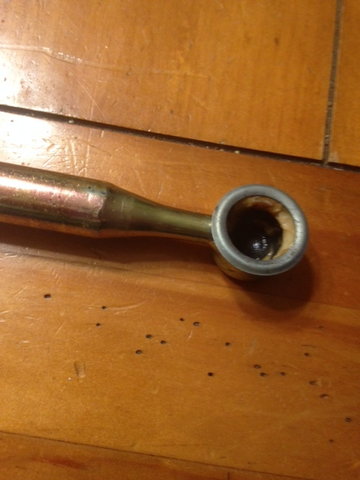
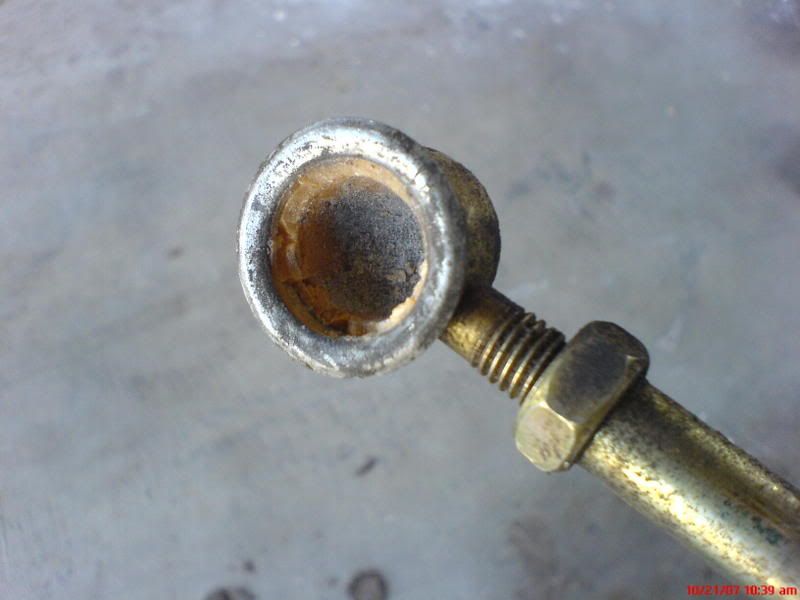
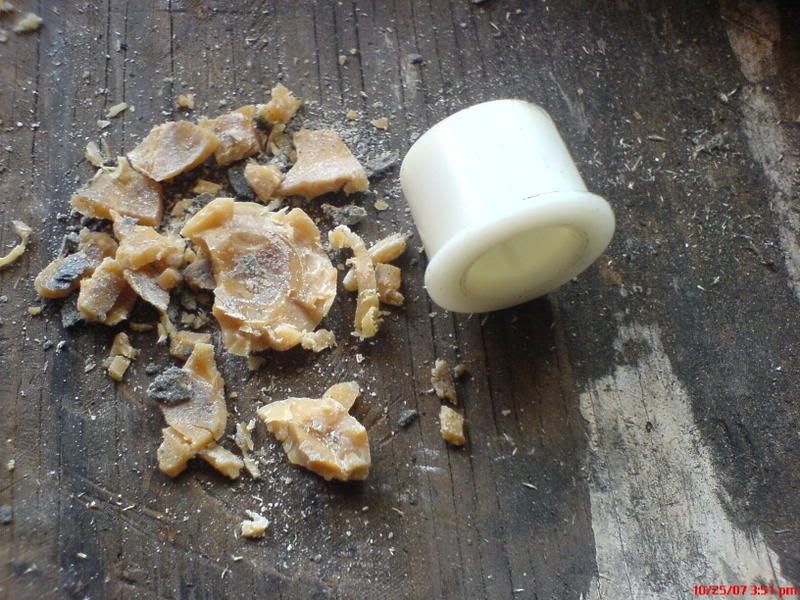
here's a shot of my rotted out bushings:
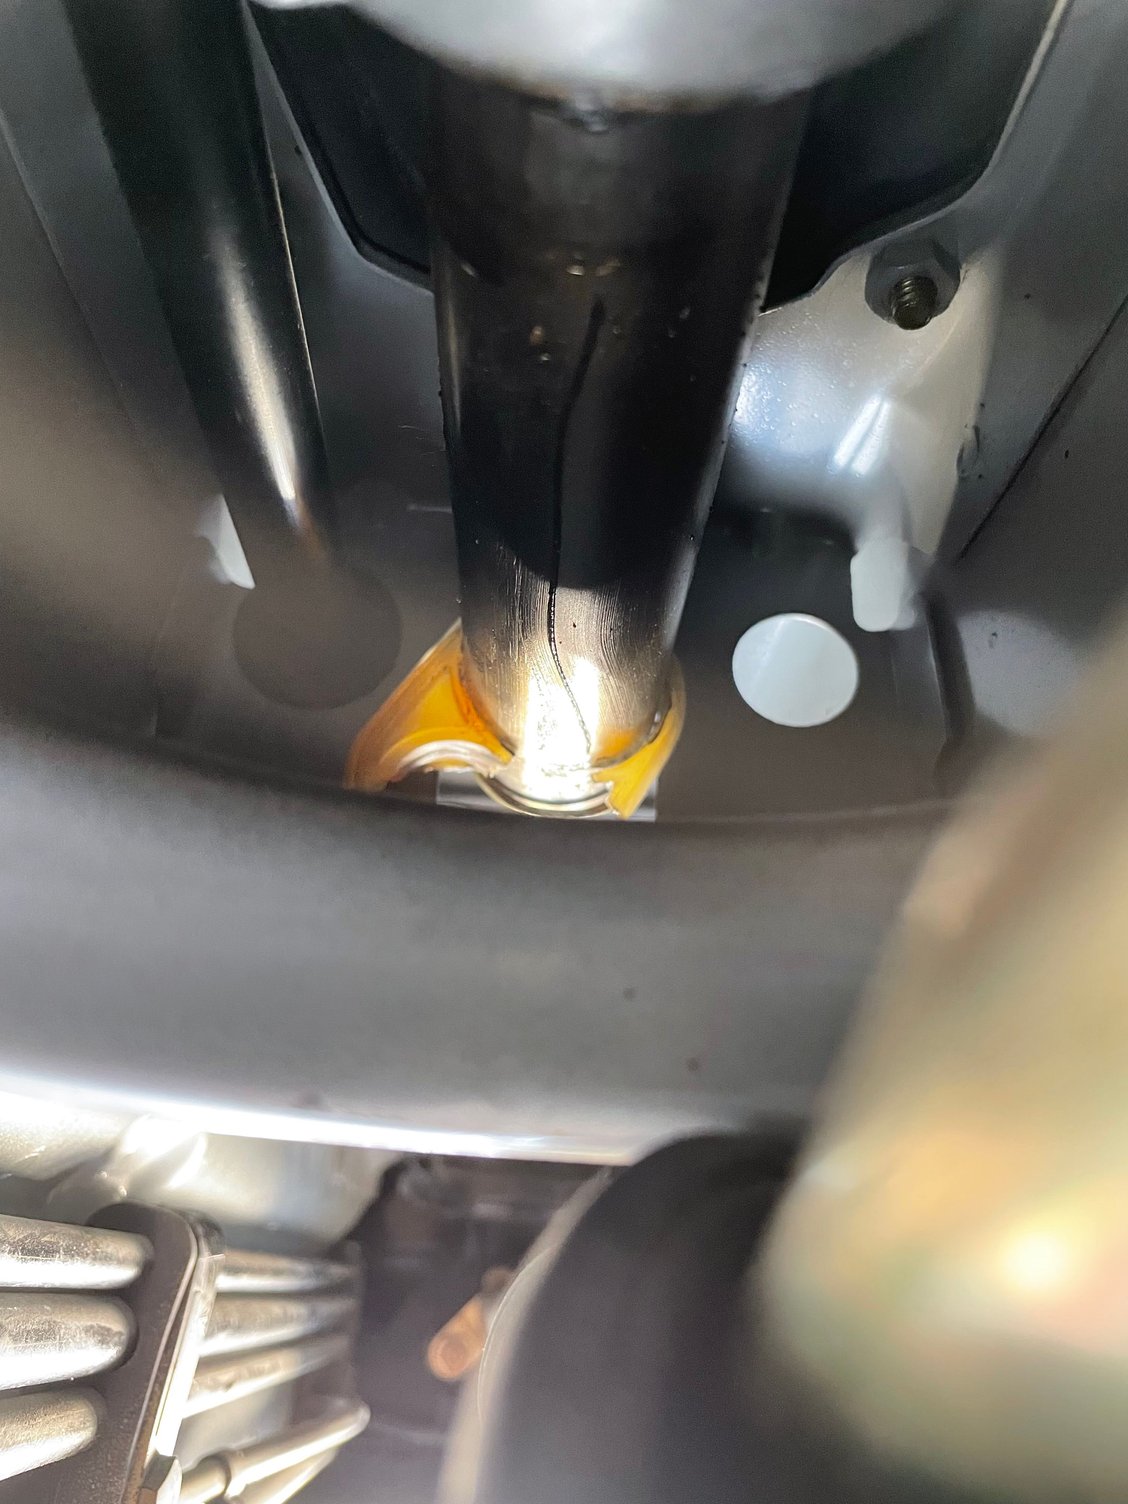
you'll have to jack the car up on four jack stands and remove the plastic coverings (transmission and steering covers) the center undercarriage cover, then the rubber boot to access the shifter mechanism.
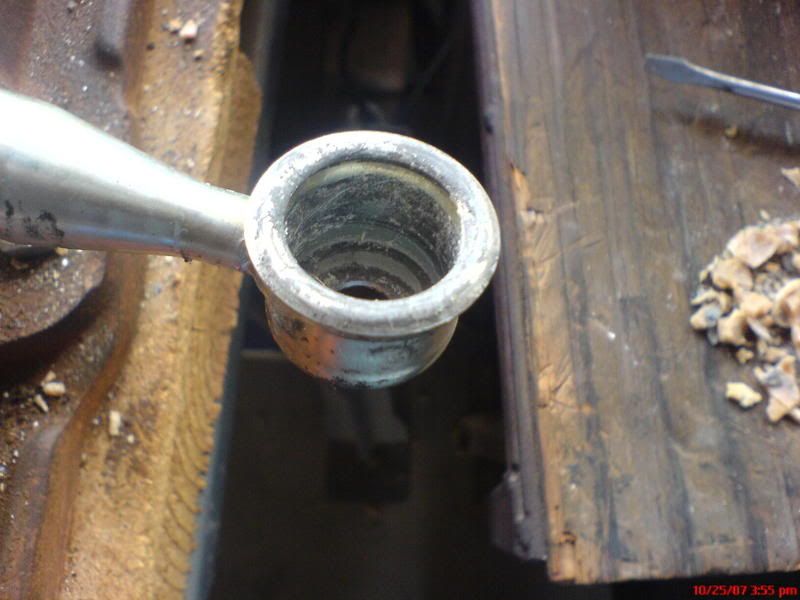
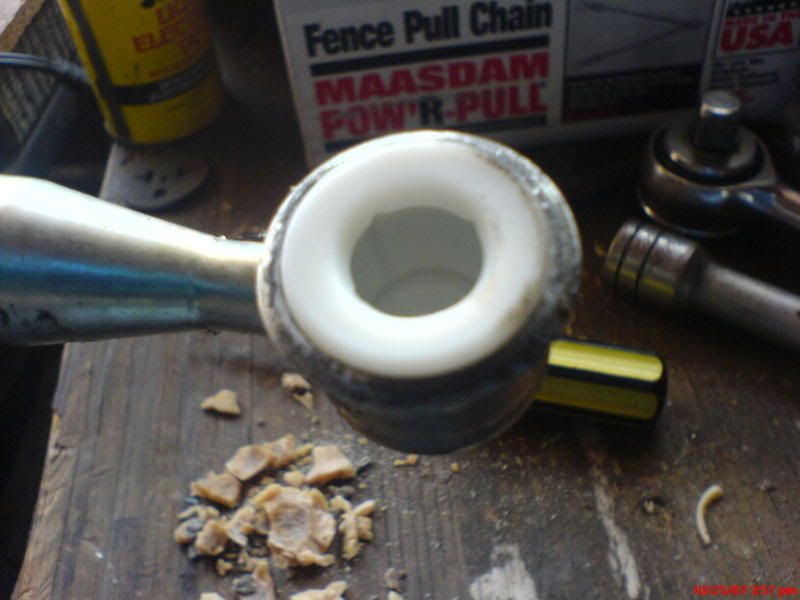
if you want to remove this guide tube (it doesn't take much effort if they are rotted like mine) you will have to use a tie rod end tool. i went ahead and gutted out the old bushings (they literally felt and appeared to be the consistancy of candle wax!):
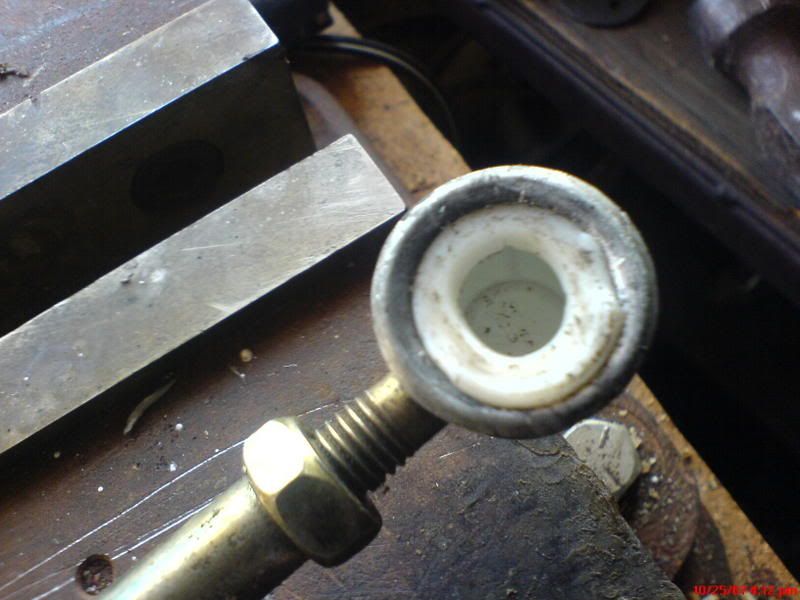
i used a vise to press in the new bushings.
after they are pressed in, you will have to use a small flat head to fold the lip of the bushing under the rim of the metal carrier cup. this will ensure the bushing fits correctly.
use a floor jack or c-clamp (if you can manage) to press the ends back on the ball ends. don't forget to replace the guide tube through the rubber boot before you press the shifter end back on (ask me how i know).
the new bushings create a very snug fit. there is zero slop and my shifting has improved greatly. it was well worth the effort if you feel the original pieces still have slop in the way they fit.
Nice write-up. This issue is probably lurking under many a 993 these days.
I was unaware that the insert was available by itself, so I ordered a new ball end for the front end of the rod. Surprisingly, the new ball end fit snugly, yet still allowed for some up and down motion. I doubt this can be detected while driving, but I found it strange that the fit was somewhat imprecise.
I did this at the same time that I installed the RS shift rod. That made a very nice improvement!
Good info! An even better solution is to get the Weltmeister short shift kit, which comes with spherical rod ends to replace the bushings entirely. I wish I knew that a couple years ago...
The shift lever on my 1996 993 went completely loose after I pulled the car out of the garage and onto the driveway. After doing some research on this Forum I found this thread! Wow, exactly my problem. I dropping the transmission tunnel cover, I also had to drop the front bottom shield that covers the front axles and steering rack assembly. I found that the guide tube bushing had rotted and the guide tube had dropped from the the gear shifter. The front angular joint bushing was still intact, but pulled down and off of the ball very easily. The 928 part number is still good. There are a number of sources for the "cup." The dealer wants $40 and four days for delivery, ECS Tuning has them for around $12, but two weeks out for delivery, free shipping over $50 and Pelican has them for $17 each, free shipping over $50. I couldn't find any local source here in San Diego. I am checking one more local source, if I can't find them local, I will order from Pelican, provided that they can ship them today. To be continued.....
1996 993 Cab, black on black on black
113,000 miles
If only upgrading to the golden rod but not the short shift kit, will doing so solve this problem?
No, the golden rod replaces the rod connection to the transmission. I did the same 928 part swap since my car is awd, If my car was 2wd, i'd go all in on the FD solution for both.
If only upgrading to the golden rod but not the short shift kit, will doing so solve this problem?
Like rlme36 said -- nope. The SSK replaces the ball/cup with a helm joint. A more positive connection. Golden rod is the natural add on though -- the combo gives a precise and solid action to the gear shift.
Quick update, Carlsbad Porsche had the OEM cups for $17 each, available within one day. (compared to Porsche San Diego, $40 each and closer to a week for delivery.
Got the cups and got them installed last night. I tried pressing them in with a vise and a socket that was slightly smaller than the outside edge of the cup, no luck. I used a flat-head screwdriver as suggested earlier in this thread, careful not to damage the cup itself. With a little encouragement the cups slid neatly into place.
I put some grease on the ball and cup when replacing them in the car. I ended up using a 5-inch c-clamp to press the cup onto the end of the gear shift and on to the front ball mount. (as mentioned, but sure to place the insert the guide tube through the rubber boot before you try to install it on the gear shift ball). There is a lip on the gear shift that you can use to place the jaw of the c-clamp, I had to push the gear shift all the way forward as the transmission linkage will block access to place the c-clamp. The gear shift install took about 5 minutes, I don't have a lift so it was a little awkward laying on my back and trying to keep the c-clamp in position. The front mount was much easier as there is a solid flat surface to place one jaw of the c-clamp.
I replace the bottom covers and took the 993 out for a victory lap. (I have a Milwaukee M-12 Fuel battery operated ratchet, it was a huge time saver in removing and replacing the bottom cover nuts and bolts) As mentioned by others, the shifting seemed a bit tighter and more precise.
(you do not have to take any of the interior parts of the center console off to do this repair, everything is done from under the car. I pulled the center console thinking that there was an access port on top of the center tunnel like earlier models of the 911, there isn't one. On the plus side, I found a penny a nickle and a quarter under the center console.......)
A huge thank you to those that started and contributed to this thread and found the 928 cup insert fix. As our cars age, parts like the cup inserts will rot and fail. Thankfully, mine failed in the driveway. I you have replace yours yet, I would put this on the 24-year maintenance list!
This was a great help to me. Thanks to all who contributed.
A couple notes to add, when pulling the rod out of the rubber boot, I used WD40 to lube it first so it expanded and slipped out. I was worried about damaging a potentially thirty-year old, possibly stiff boot getting the cup end thru. After cleaning up the metal sockets of old cup material and any corrosion, I also lubed the new cups and used a C-clamp to press them home. In trying to convince the cup to go that last ⅛" down where the lip can then go into the groove inside the metal socket, I also tried to press them further but they wouldnt cooperate. I was afraid Id destroy the lip in the process. I came back in scratching my head and hunted until I found this thread, read it and it worked. But I would add, I used a lubricant to eliminate any drag going the rest of the way in as well as lubing the lip, and I used three small, thin edge screwdrivers the way you would use tire tools to work around the rim to seat the lip into the groove. Be patient. The cups initially seemed stiff as if to break if forced, however after lubrication and massaging with screwdrivers I found them to actually be flexible. I lubricated the rubber boot that the rod had to then go back into, and turned the end inside out so I was pushing the rod into a convex cone and then once thru pulled it back correct side out. I used a medium C-clamp (with a large enough clamping surfaces) to gently squeeze the ball into the respective cup.
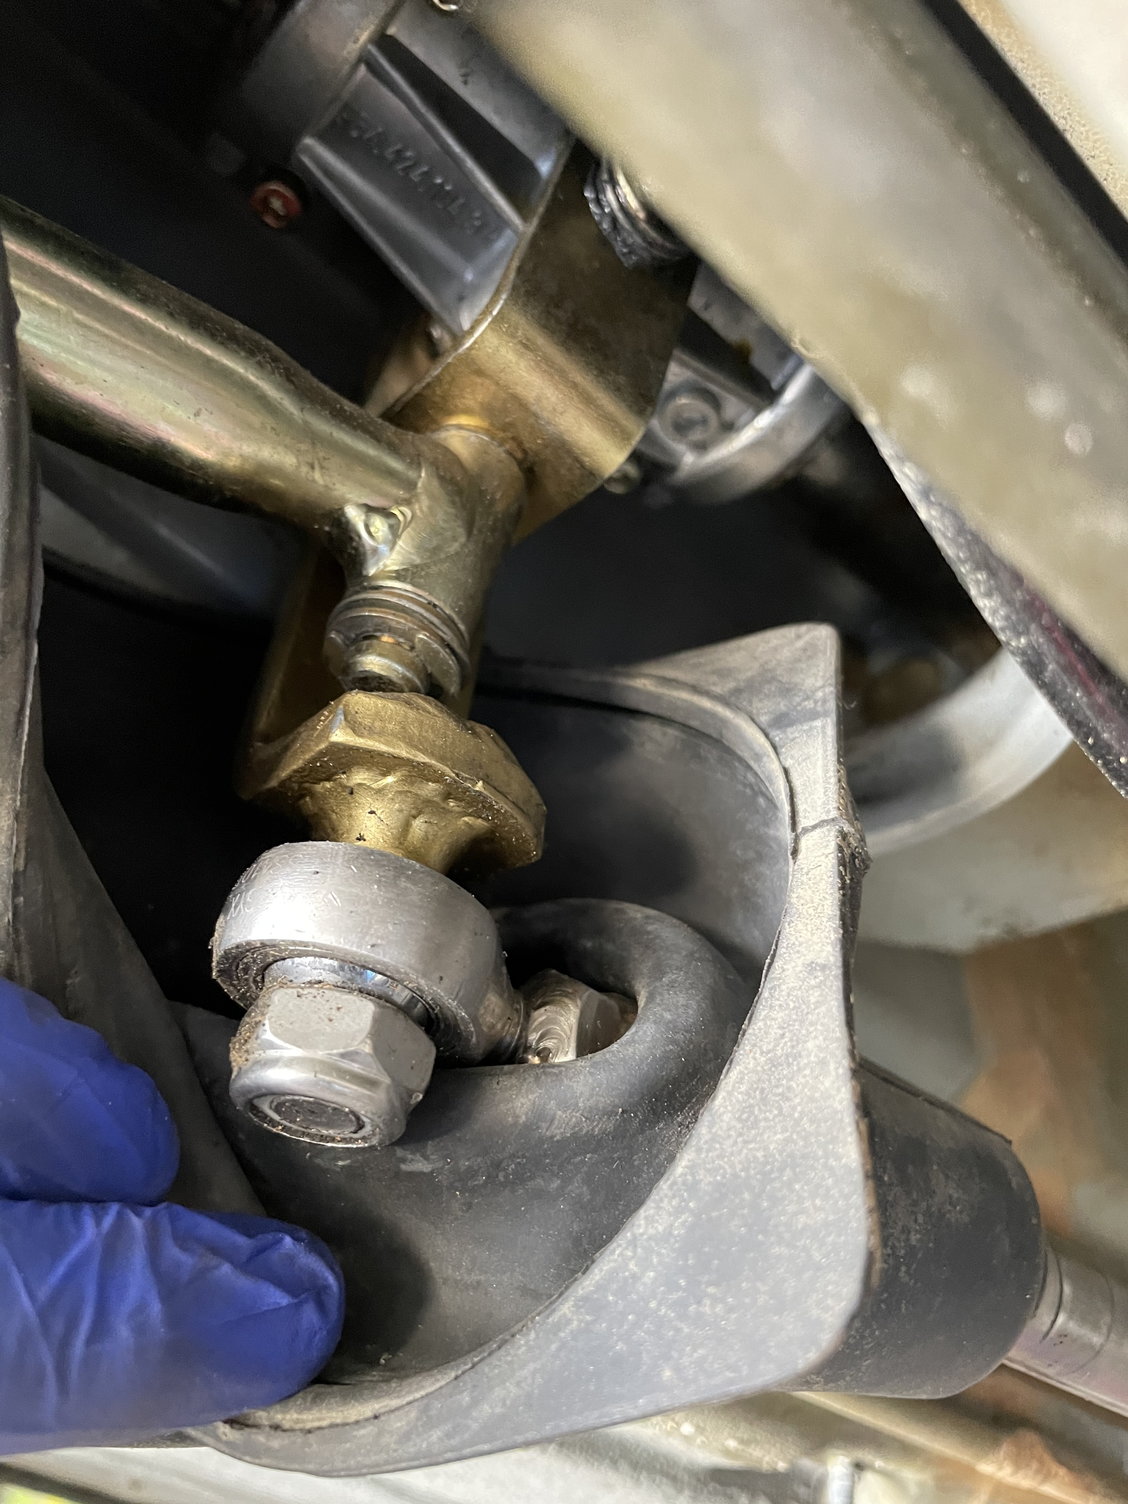
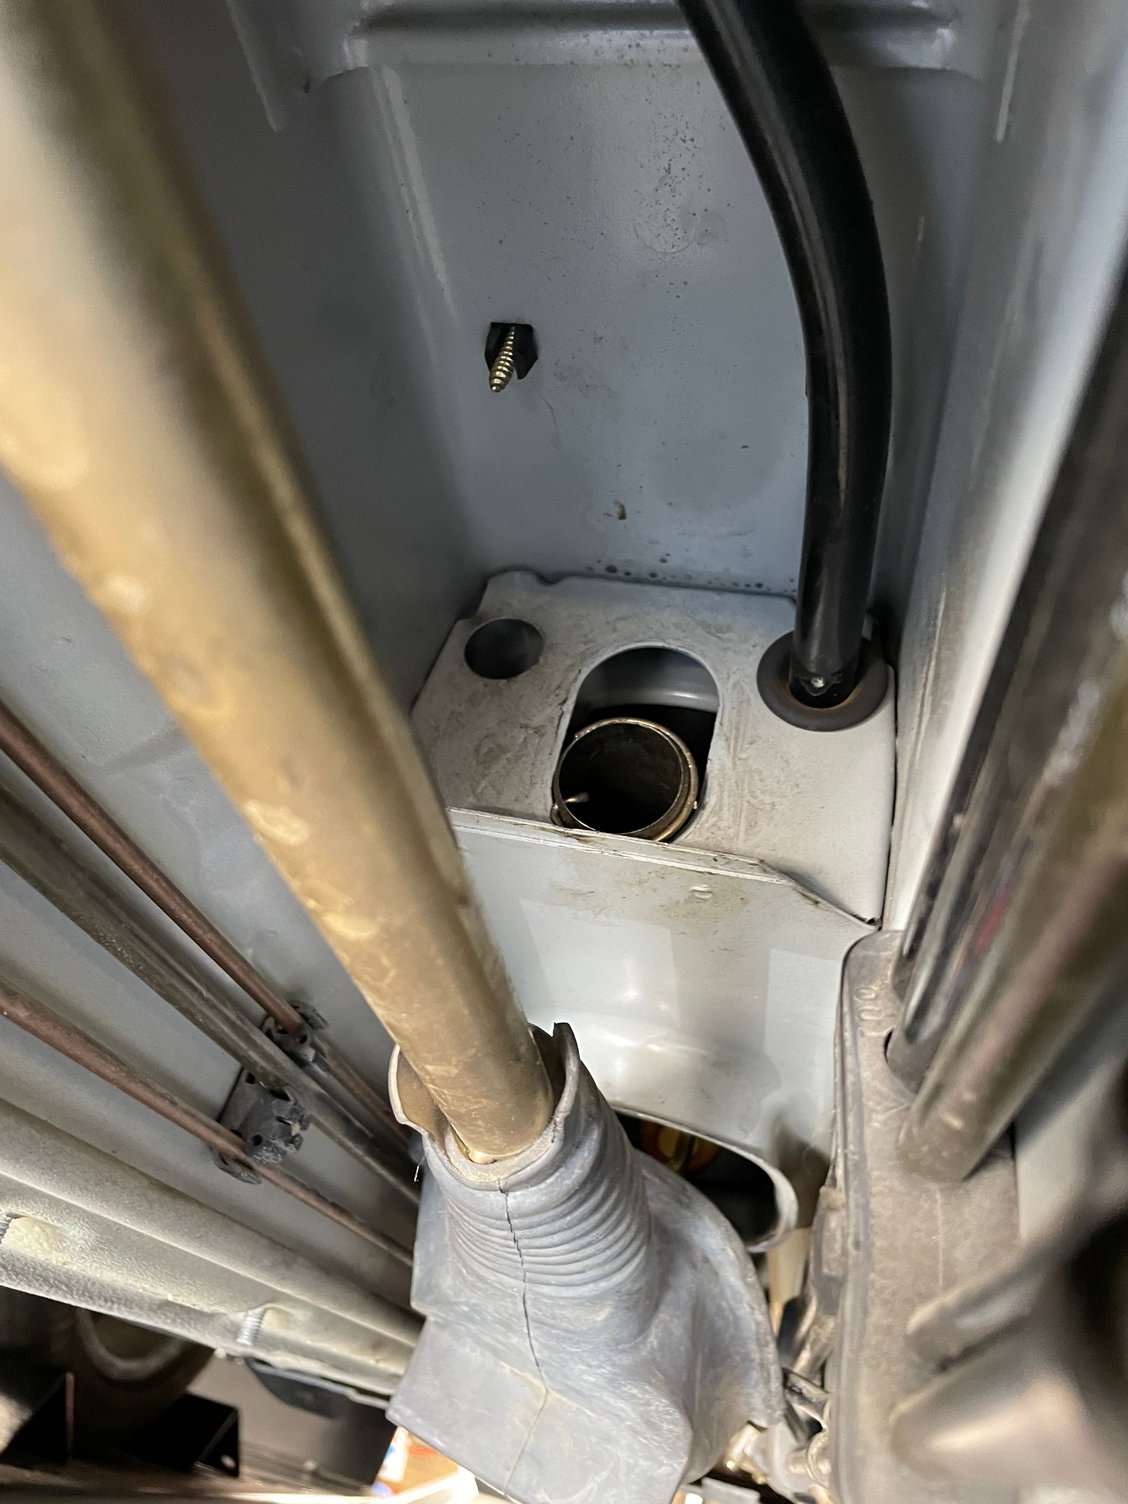
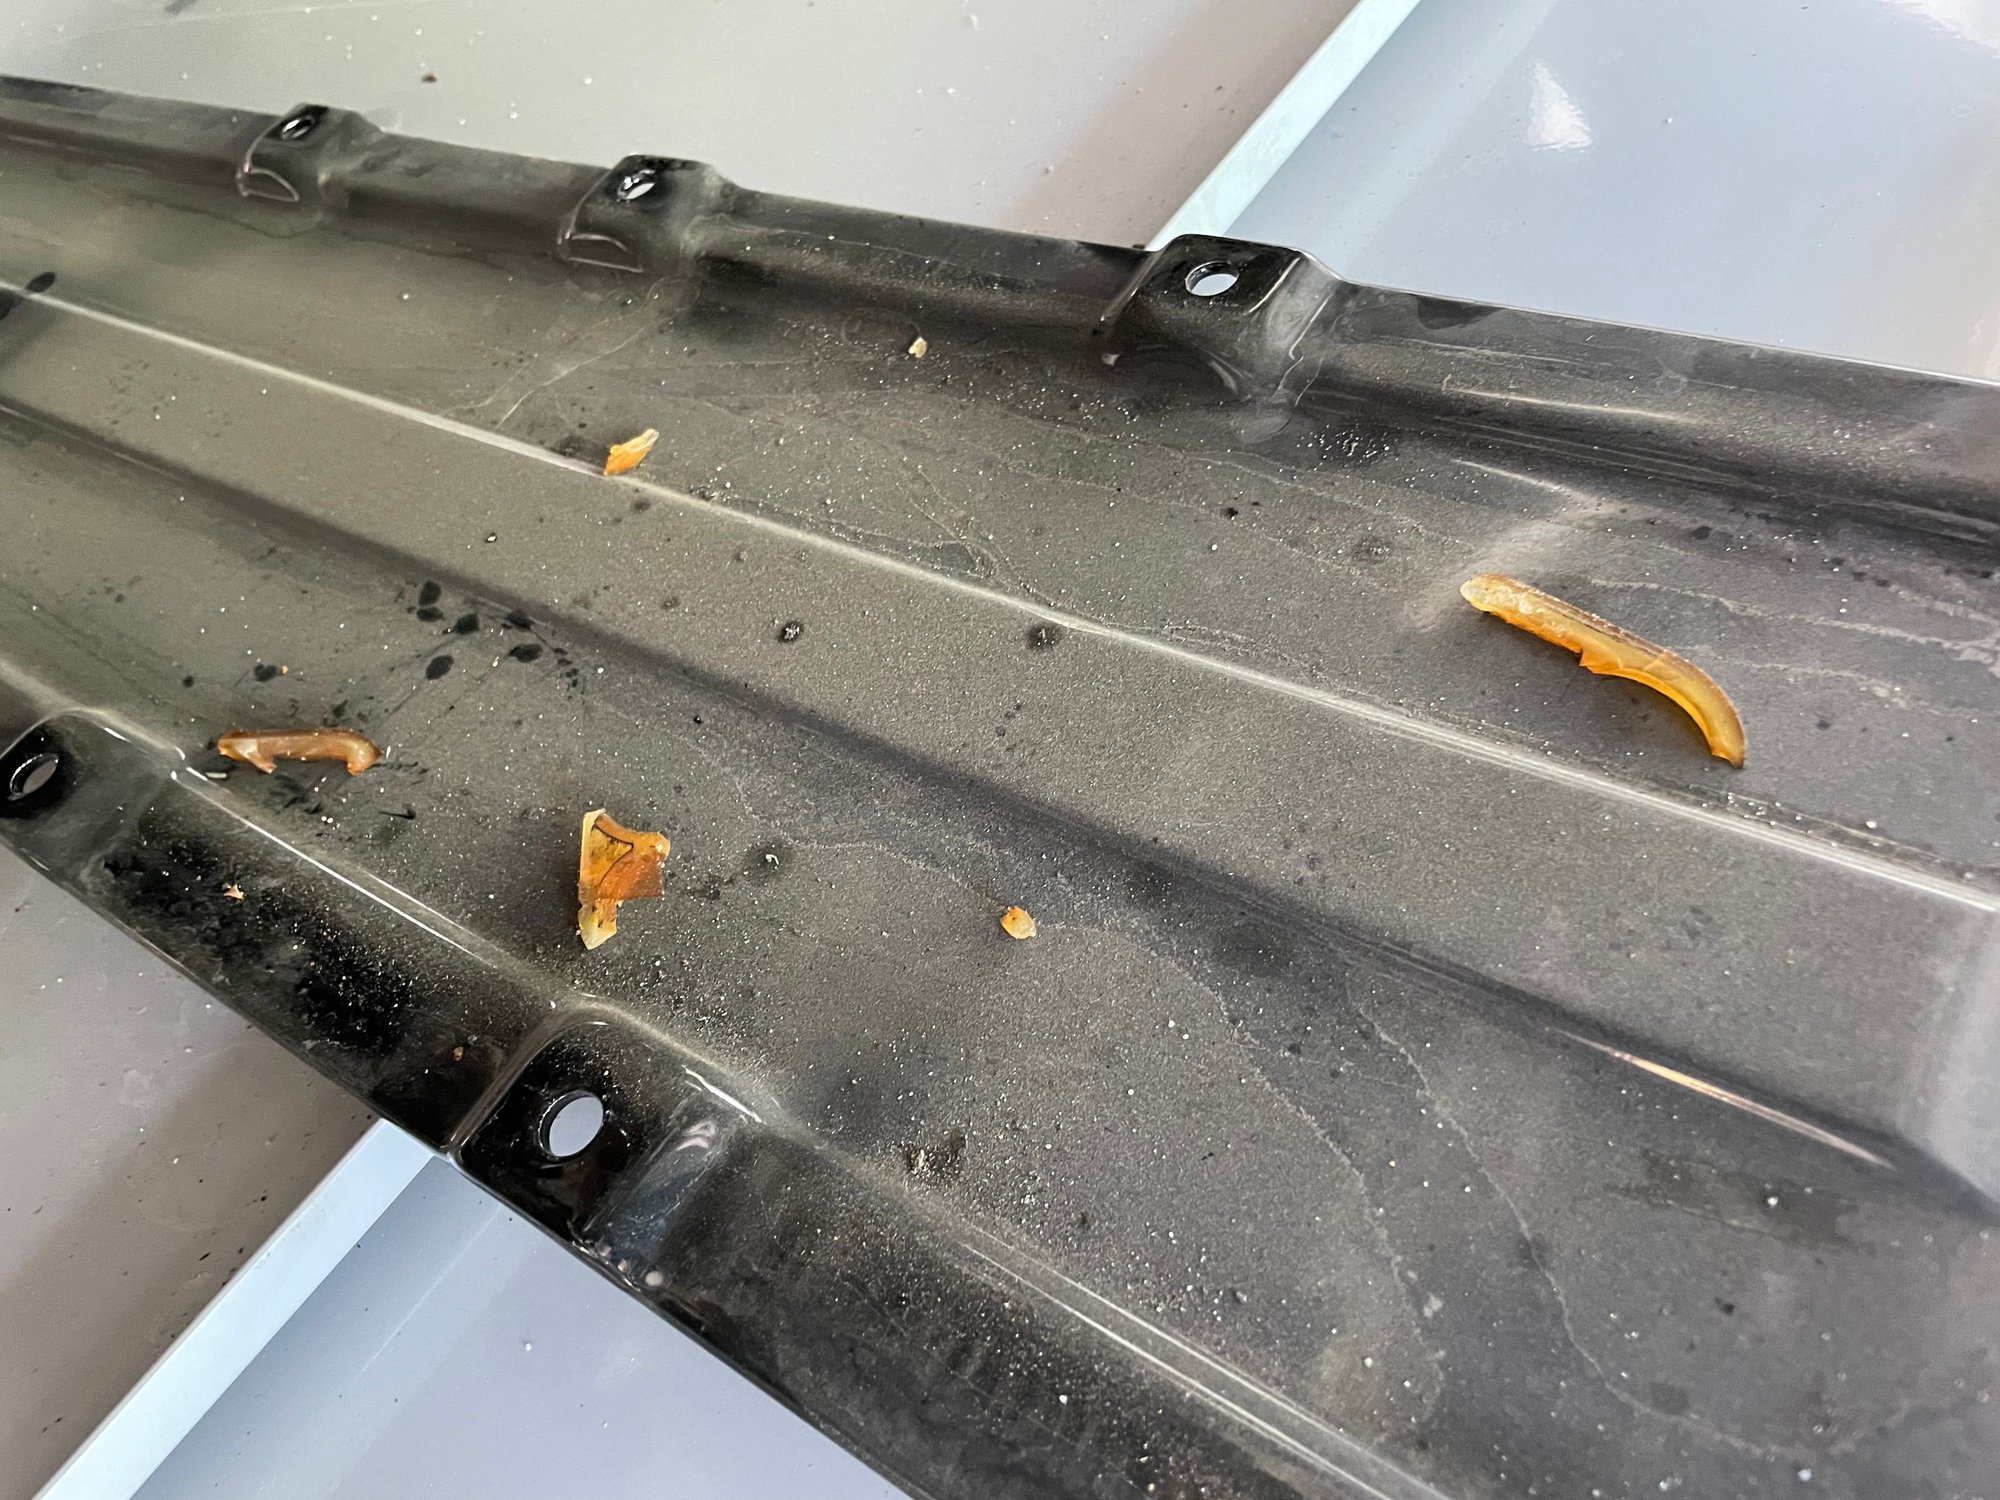
I thought this would be my problem but once I removed the shift tube I found a different problem. My 1997 993 does not have the push-on connections but rather has a bolt. Maybe this was a mid-cycle 993 update? Never the less my problem is the rear shift tube grommet is disintegrated. I just ordered the replacement grommets (replacing front and rear even though front looks ok now) and new retaining clips. The grommets #26 on the diagram are part number 964-424-028-00. The Circlip is #28 on the diagram and is part number 999-178-007-01. Hopefully it wont be a difficult install. See attached pics of my shift rod connectors, the disintegrated/ absent grommet anf the remaining good grommet. Has anyone else done this repair that can give some helpful hints? Bolt on instead of push on Bolt on instead of push on Rear Grommet disintegrated Rear Grommet disintegrated Grommet disintegrated Grommet disintegrated From inside Remaining good fromt grommet Debris from grommet
I just made this repair yesterday. I was out Christmas shopping 2 weeks ago and the shifter disconnected. Expensive tow.
I bought 2 ball cup bushings from PP. Only the front stabilizing bushing gave way. It was very brittle. I replaced the ball from the back connection on the shift lever also. It was clearly very yellow and brittle, soon for the same fate. I recommend you change both as long as you are down there. The parts are inexpensive.
Clean all of the old plastic from the cups.
I used lithium grease to help persuade the bushing into the holder. Make sure it is fully in and the edge is under the lip of the cup. I also found a C-clamp helpful in getting the edge of the plastic bushing fully in the grove under the lip.
Again the C-clamp was a handy way of pushing the ball back into the new bushing secured in the stabilizing arm.

 10-27-2007, 02:56 PM


 .
.