Finished GT3 Seat Installation - Summary
 02-04-2010, 11:38 PM
#1
Drifting
Thread Starter
Hi - I finally finished the installation of my Euro GT3 seats in my 993 C4S today and wanted to share my experience.
The installation is not "difficult" with the right hardware, patience and a good tool set. However, it took a while until I got it finished without machine shop. There are plenty of good postings about this installation in particular from Bill Verburg that helped me a lot and set the right expectation of installation time. Viper Bob was very beneficial when it came to the bill of material. Thanks to all too that replied to my postings.
https://rennlist.com/forums/993-foru...n-a-993-a.html
Any application of my experience in this posting is at your own risk. Wrong installation of seats and harnesses can lead to death. Please follow all manuals that come with the specific parts very carefully!
Because I installed a Schroth Profi II 6pt harness and use the car for DEs I needed to go with the Brey Krause Hardware to get enough head room. I am 5' 10''. I already installed a DAS rollbar a couple of weeks ago.
Bill of Material (Main Items):
2 996 Euro GT3 bucket seats
Brey Krause Brackets R-9078, R-7079
2 Brey Krause Sub bars R-9030
2 Recaro Sliders 0.70.9NT ("No Tabs")
1 BK R-9003 outside seat belt mount kit
1 BK R-9004 tunnel side seat belt mount kit
8 M8x20 hex head bolt class 10.9 (to mount seats to brackets)
12 M8x20 hex head bolt class 10.9, nuts and washers (to mount brackets to sliders)
8 M8x20 allen bolt class 12.9 and washers (to mount sliders to chassis)
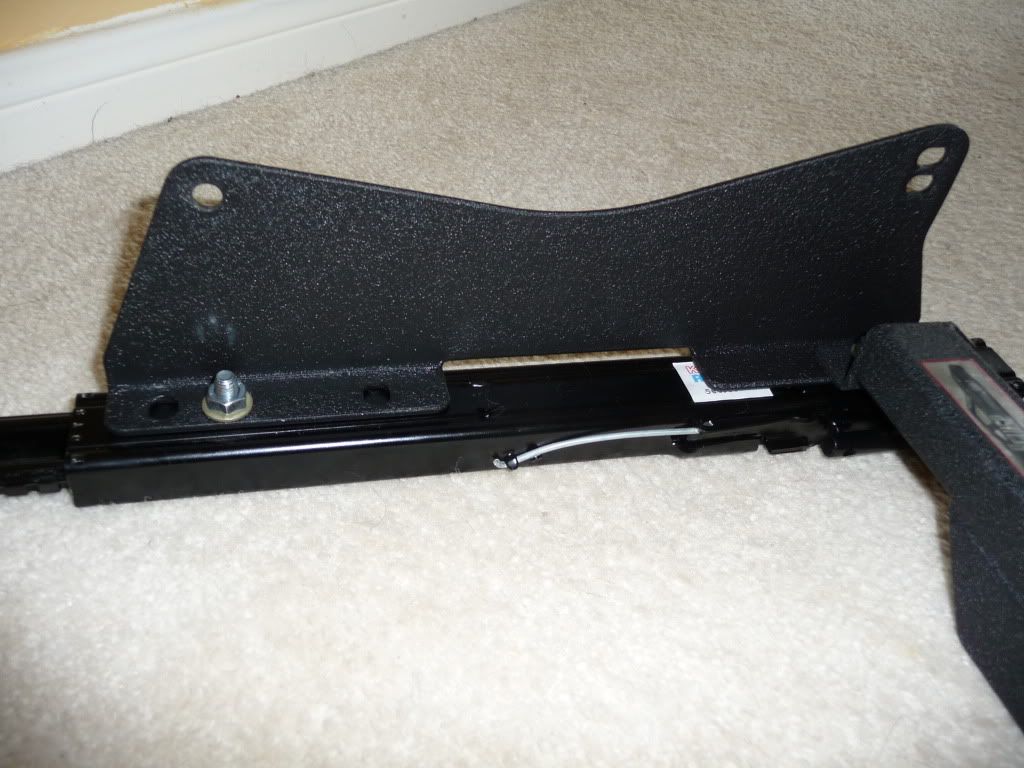
Preparation of silders
The Recaro sliders are very solid and I preferred them over Sparco based on forum and Viper Bob recommendation. The only problem is that they needed some grinding on 2 out of 3 holes to lineup with the 3 holes of the bracket.
The next two picture show the holes:
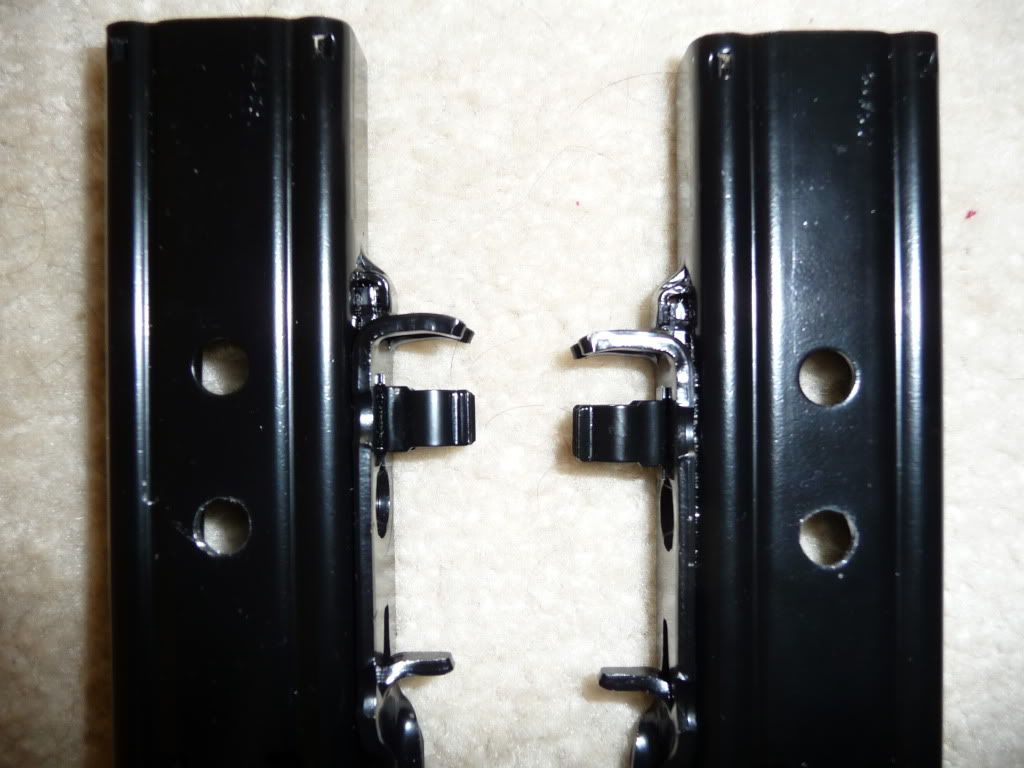
I used a Dremel and with some patience I was done after about 4 hours with all the test fitting.
Test Fitting
This is something that I remember very well from Bill's post. You cannot test fit often enough before going into the confined space of the car. It will help you to understand how it all fits together. Please follow the sequence that Bill posted.
Here are some pictures:
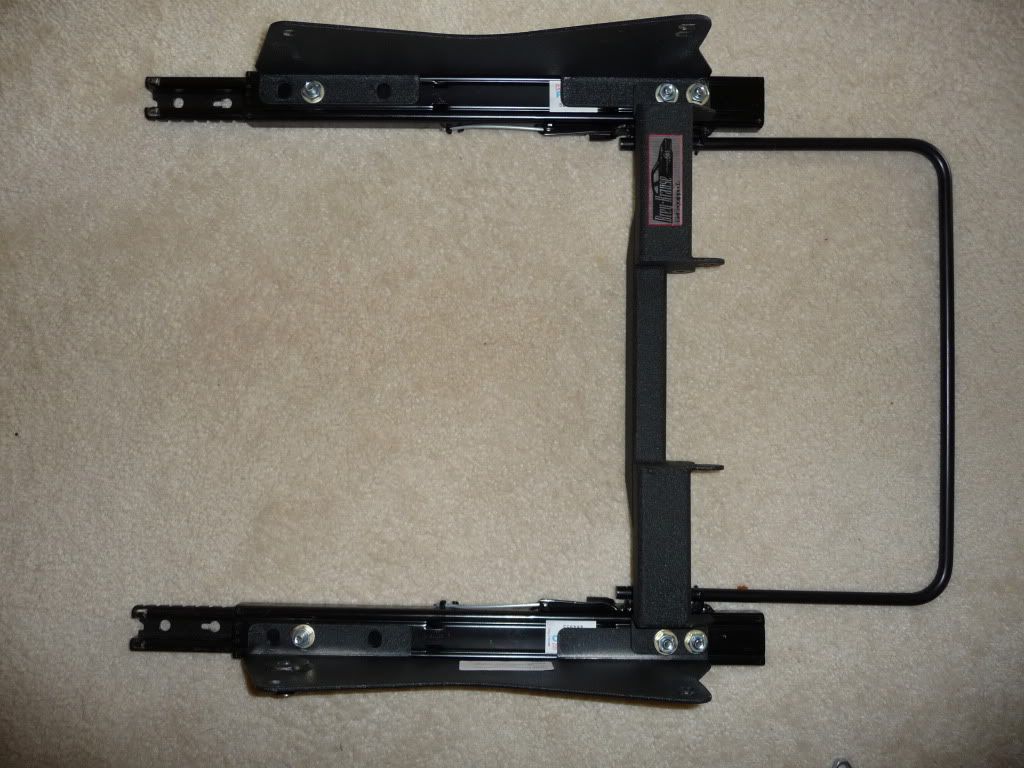
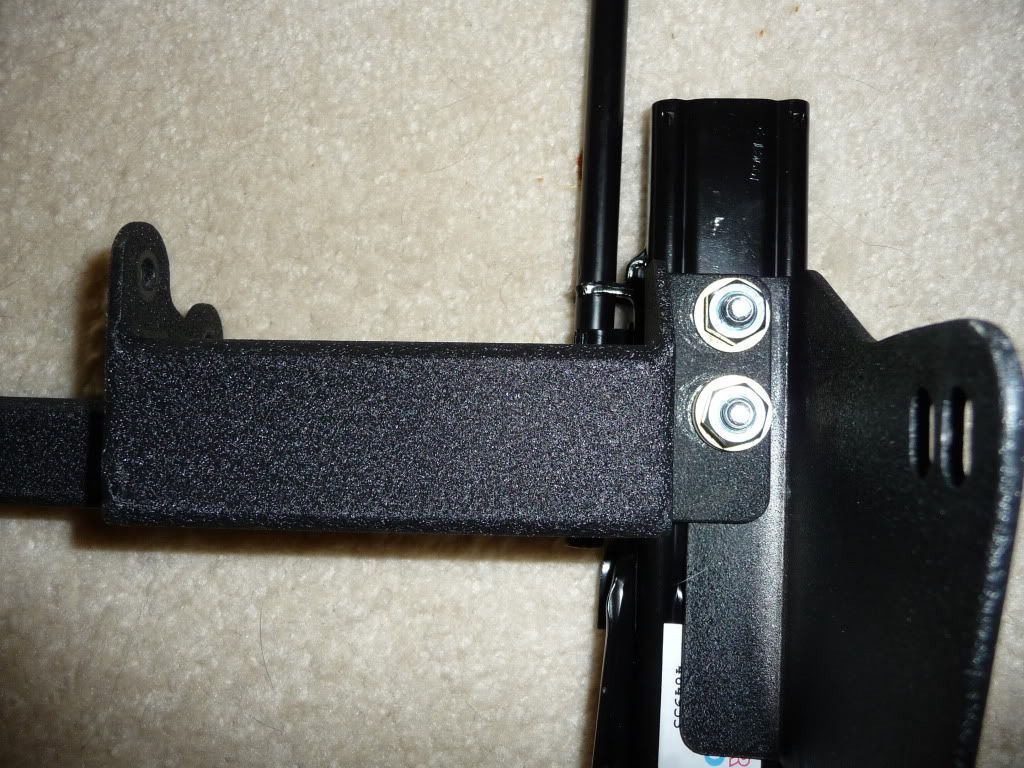
When everything fits make sure that the last assembly is fairly "loose". This makes alignment of the sliders to the chassis much easier. The space in the car is tight and the seats do not fold! Final tightening will be in the car. Make sure that you use Loctite threat lock on your final assembly. There is only one exception. You need to tighten the seat belt buckle and the BK tunnel mount to final torque because this bolt will not be accessible with the seat in the car.
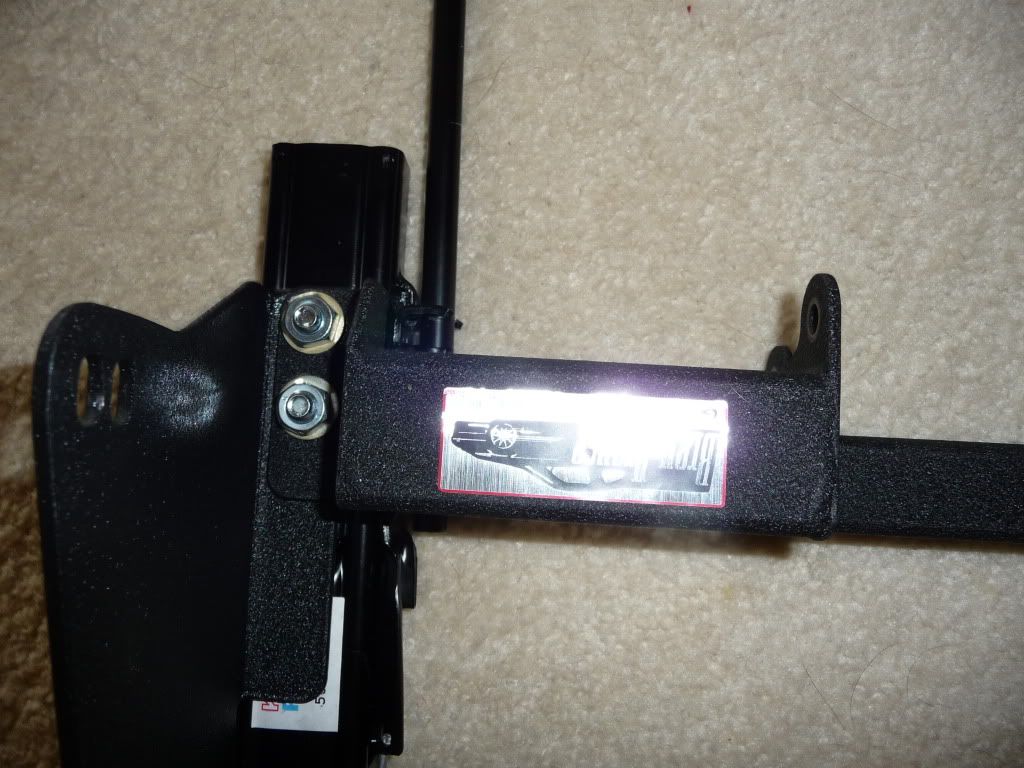
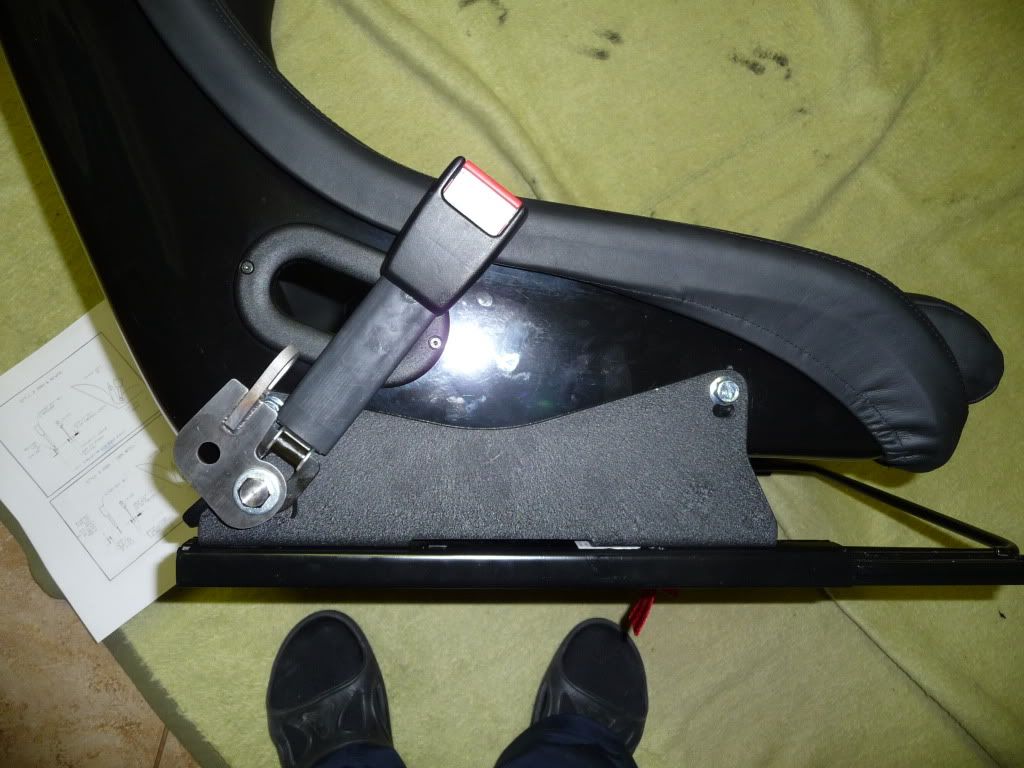
Mounting the sub belts
The Profi II sub belts are fixed to the lock. They lock does not fit through the opening. There fore I installed the sub belts per Schroth instructions.
Here are pictures of the final assemble before I continued in the car
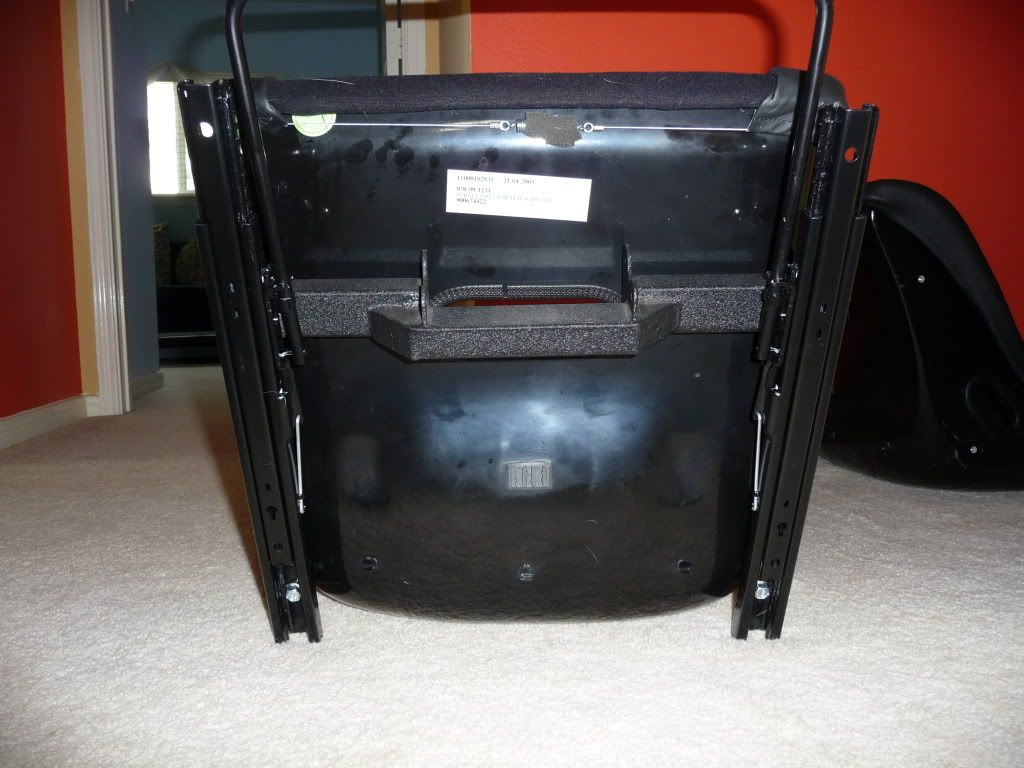
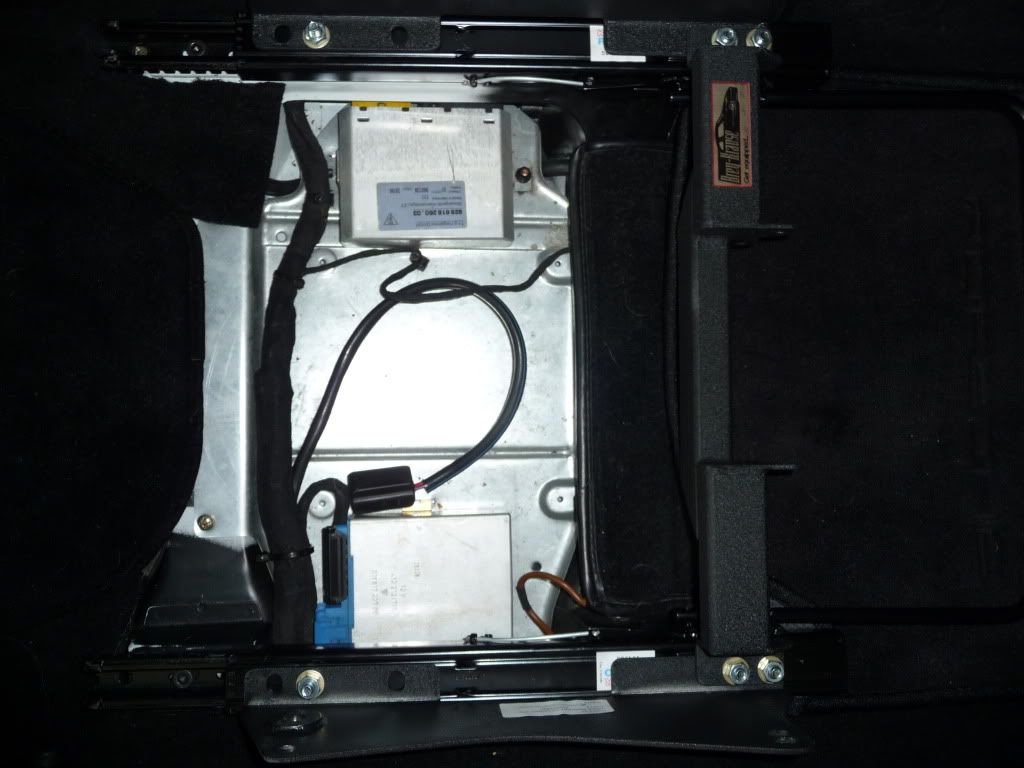
Mounting the seats in the car
There are several procedures on RL on how to get out the stock seats. This is how it looks with seats out and brackets test fitted:
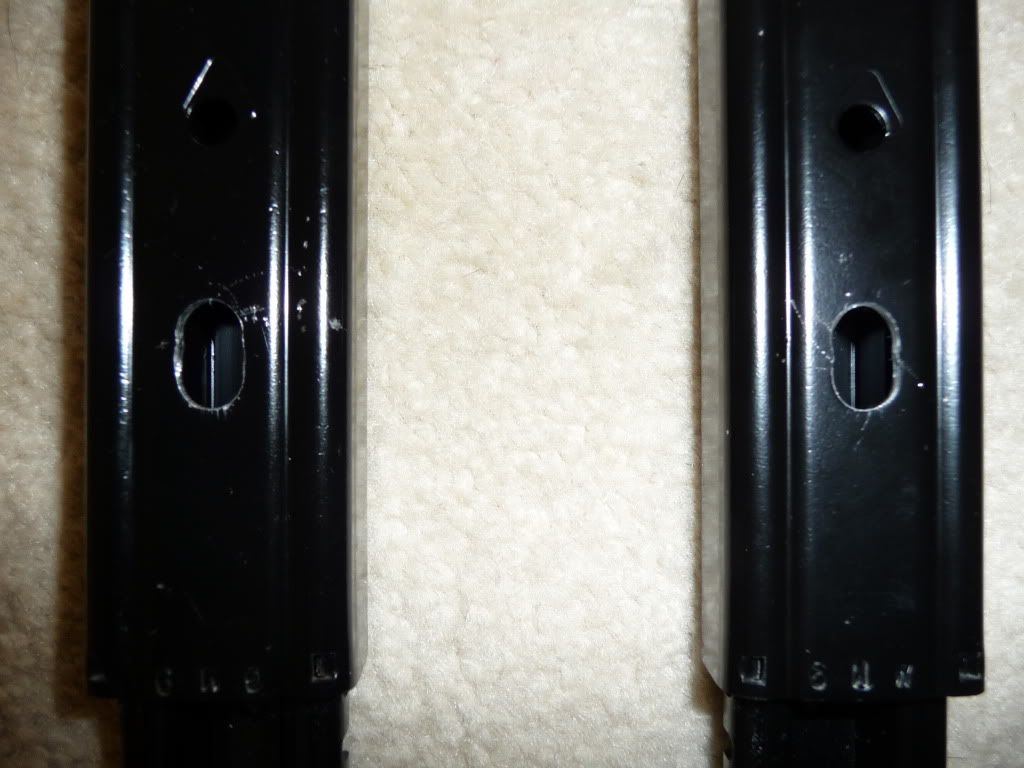
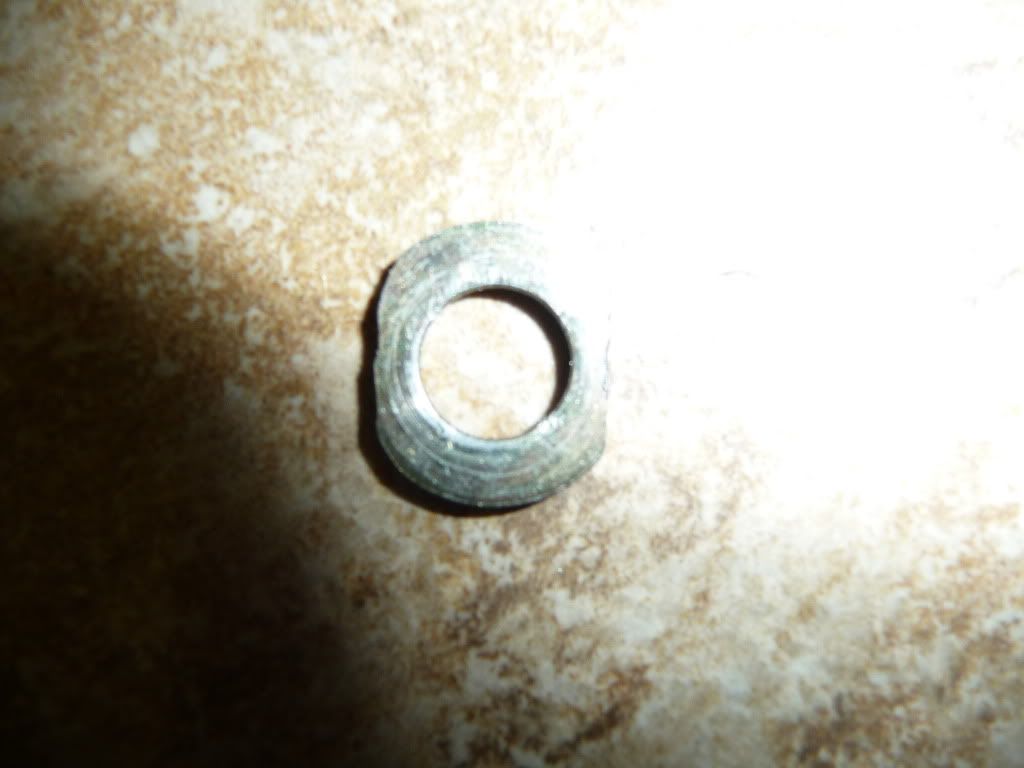
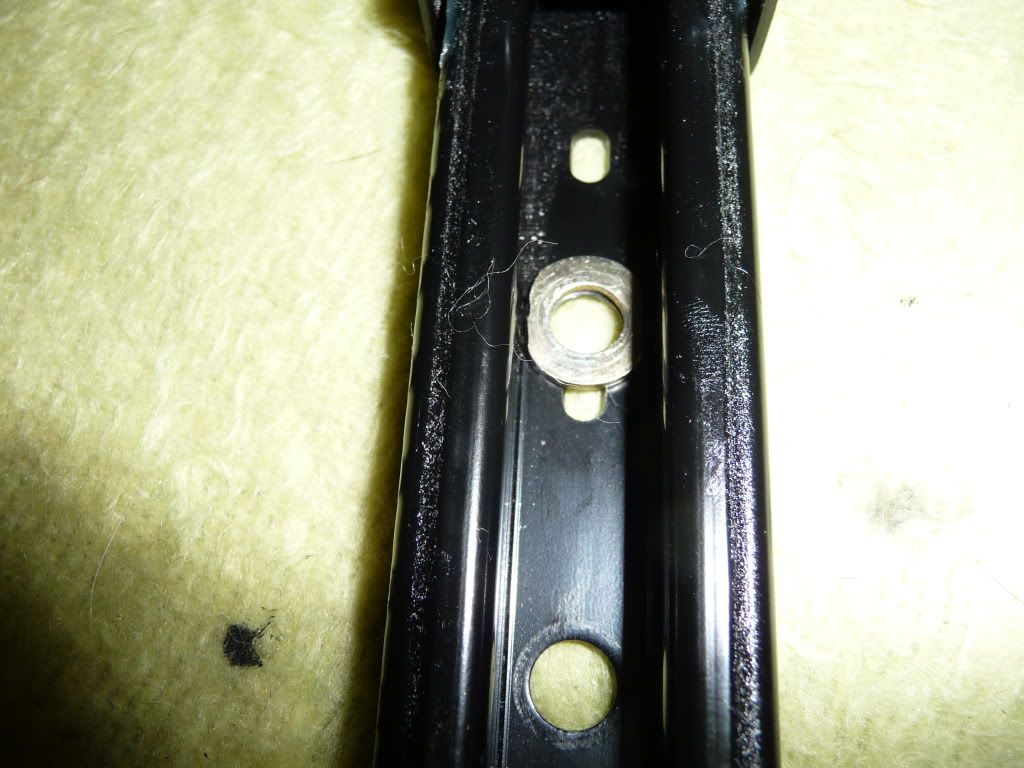
I had one issue with the washers that I used for mounting the slider to the chassis. The Recaro sliders are narrower than the stock sliders. I needed to grind the washers with a Dremel again to make them fit. Here is are pictures:
I started with the driver side and followed the same steps on the passenger side. I secured the cable loose that have been connected to the stock seats with zip ties. I took the seat into the car and before I mounted it to the chassis, I routed the stock seat belt through the outside opening of the seat and mounted it together with the BK Outside seat belt mount to final torque. I wanted to take advantage of being able to push the seat out of my way for easy access to the mounting point. Sorry, but I did not make a picture of this step.
Here is the sequence of how I mounted the seat to the chassis:
1. rear tunnel side
2. rear door side
3. front tunnel side
4. front door side
When you do it, you will understand why. The tunnel rear side is very hard to access and you want to have this first without major alignment, pulling, pushing etc.
The Recaro slider fits perfectly into the factory chassis openings. When you are done with this, tighten all bolts. With the right wrenches, every bolt is accessible. Just be patient and bend your body / arms / hands.
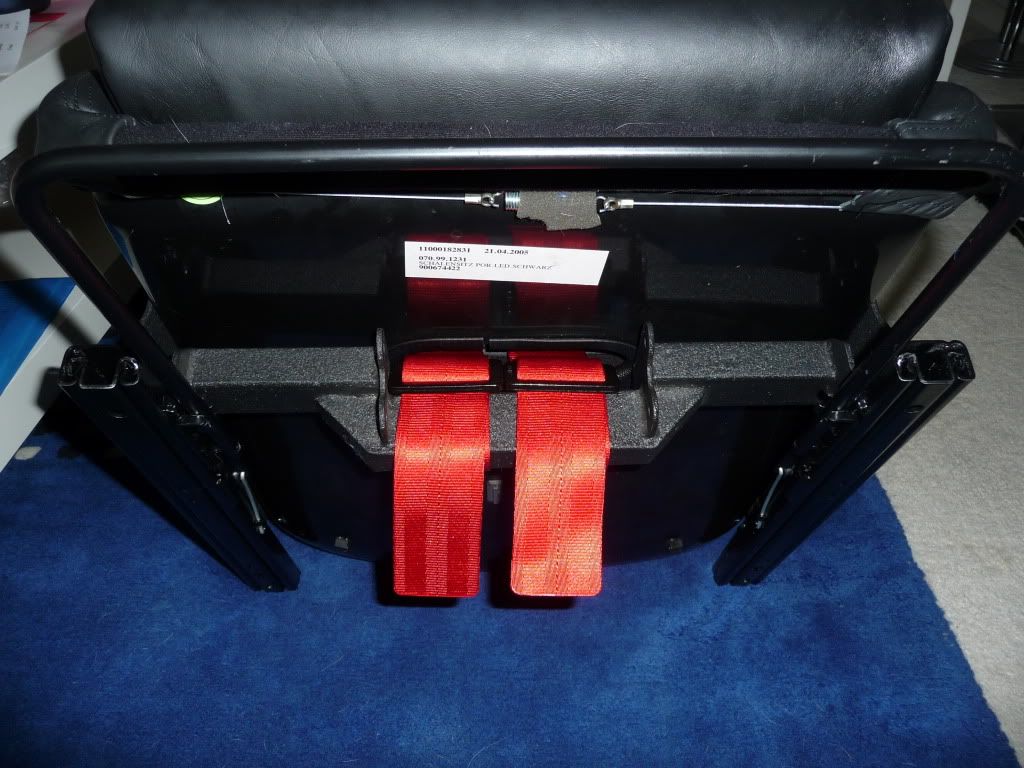
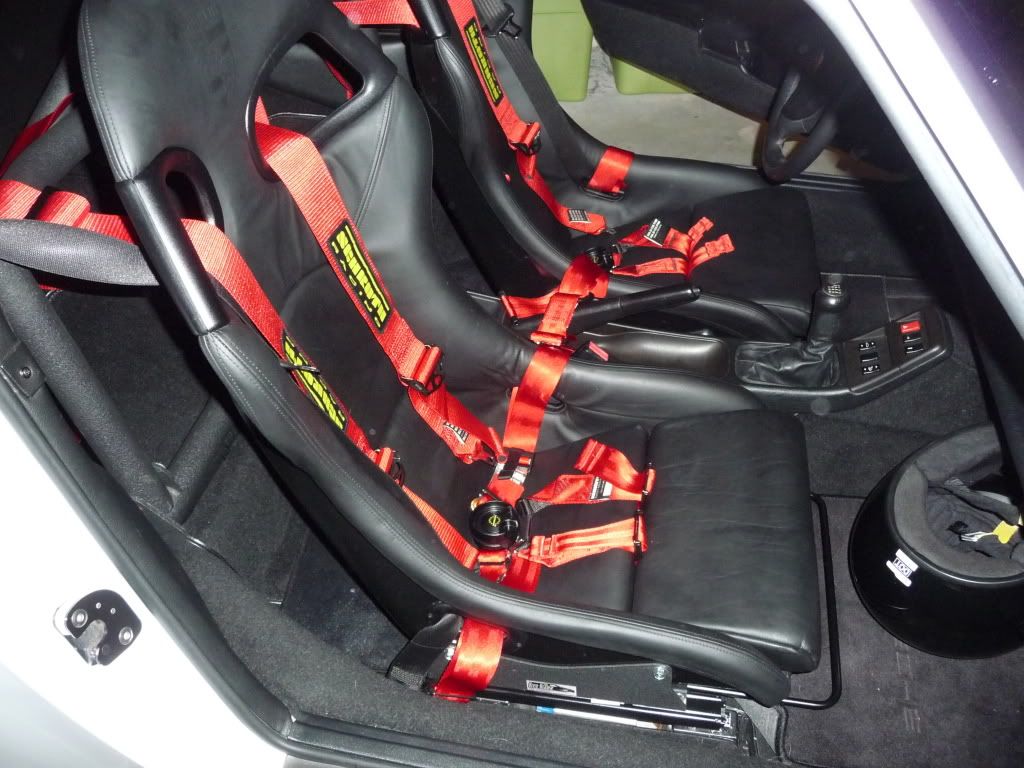
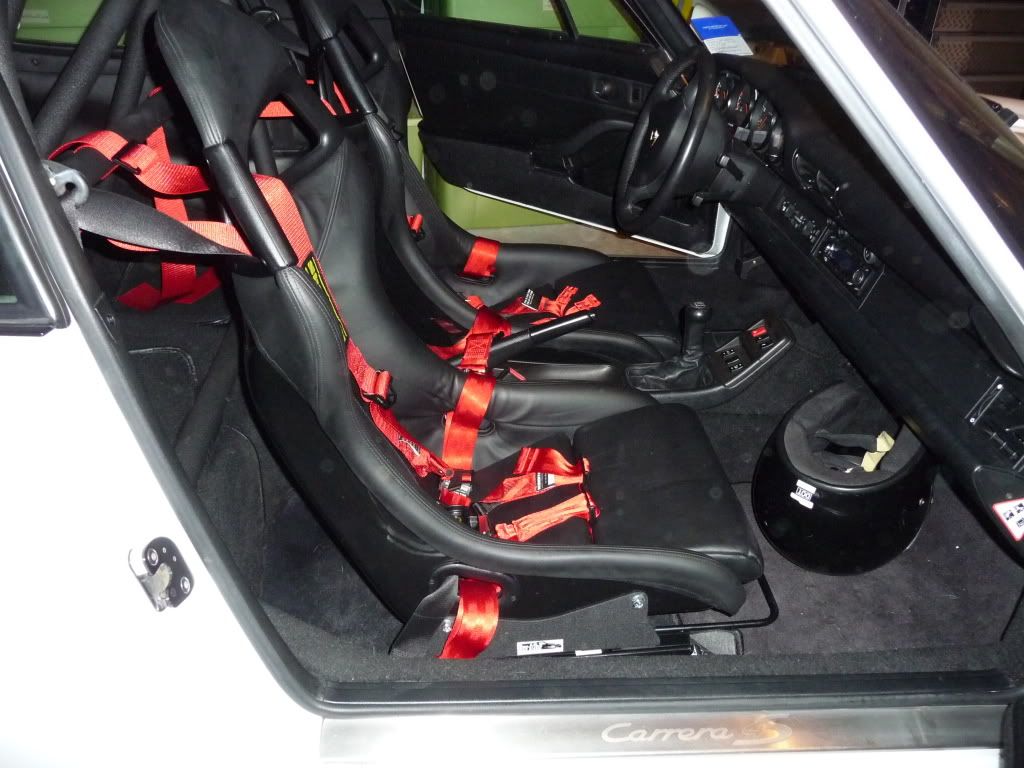
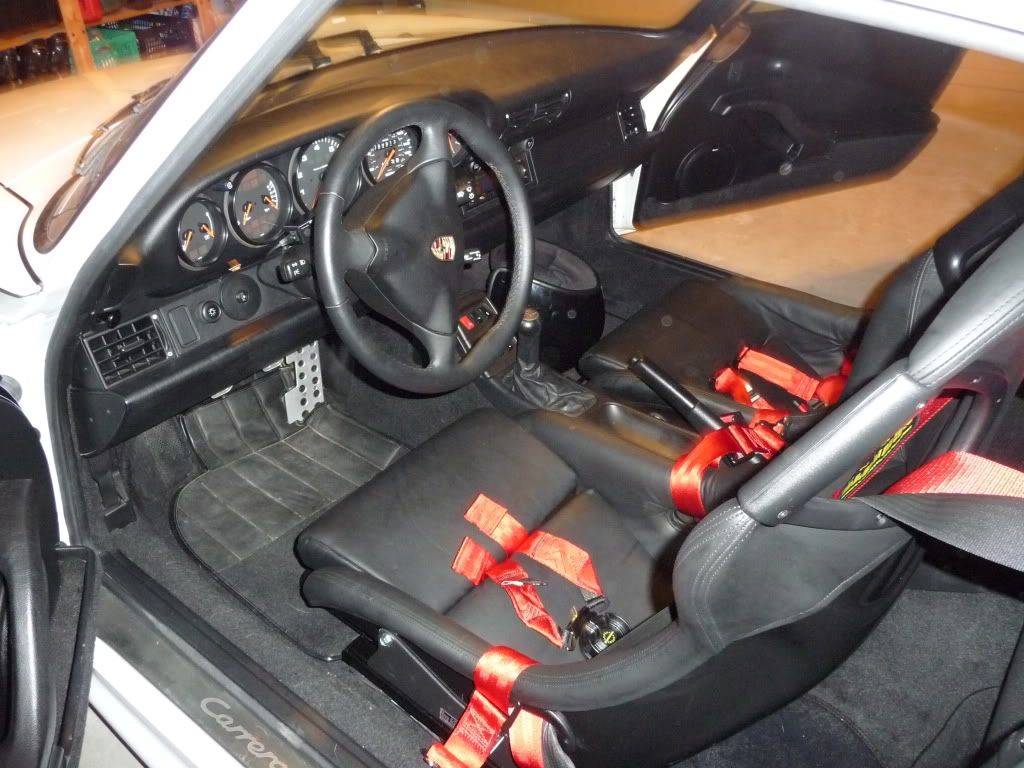
Final Result
I wrapped the shoulder belts per Schroth instructions around the roll bar and clicked in the lap belts to finalize the project. Here are some pictures and after I hit the send button for this posting, I will open a bottle of beer:


The installation is not "difficult" with the right hardware, patience and a good tool set. However, it took a while until I got it finished without machine shop. There are plenty of good postings about this installation in particular from Bill Verburg that helped me a lot and set the right expectation of installation time. Viper Bob was very beneficial when it came to the bill of material. Thanks to all too that replied to my postings.
https://rennlist.com/forums/993-foru...n-a-993-a.html
Any application of my experience in this posting is at your own risk. Wrong installation of seats and harnesses can lead to death. Please follow all manuals that come with the specific parts very carefully!
Because I installed a Schroth Profi II 6pt harness and use the car for DEs I needed to go with the Brey Krause Hardware to get enough head room. I am 5' 10''. I already installed a DAS rollbar a couple of weeks ago.
Bill of Material (Main Items):
2 996 Euro GT3 bucket seats
Brey Krause Brackets R-9078, R-7079
2 Brey Krause Sub bars R-9030
2 Recaro Sliders 0.70.9NT ("No Tabs")
1 BK R-9003 outside seat belt mount kit
1 BK R-9004 tunnel side seat belt mount kit
8 M8x20 hex head bolt class 10.9 (to mount seats to brackets)
12 M8x20 hex head bolt class 10.9, nuts and washers (to mount brackets to sliders)
8 M8x20 allen bolt class 12.9 and washers (to mount sliders to chassis)
Preparation of silders
The Recaro sliders are very solid and I preferred them over Sparco based on forum and Viper Bob recommendation. The only problem is that they needed some grinding on 2 out of 3 holes to lineup with the 3 holes of the bracket.
The next two picture show the holes:
I used a Dremel and with some patience I was done after about 4 hours with all the test fitting.
Test Fitting
This is something that I remember very well from Bill's post. You cannot test fit often enough before going into the confined space of the car. It will help you to understand how it all fits together. Please follow the sequence that Bill posted.
Here are some pictures:
When everything fits make sure that the last assembly is fairly "loose". This makes alignment of the sliders to the chassis much easier. The space in the car is tight and the seats do not fold! Final tightening will be in the car. Make sure that you use Loctite threat lock on your final assembly. There is only one exception. You need to tighten the seat belt buckle and the BK tunnel mount to final torque because this bolt will not be accessible with the seat in the car.
Mounting the sub belts
The Profi II sub belts are fixed to the lock. They lock does not fit through the opening. There fore I installed the sub belts per Schroth instructions.
Here are pictures of the final assemble before I continued in the car
Mounting the seats in the car
There are several procedures on RL on how to get out the stock seats. This is how it looks with seats out and brackets test fitted:
I had one issue with the washers that I used for mounting the slider to the chassis. The Recaro sliders are narrower than the stock sliders. I needed to grind the washers with a Dremel again to make them fit. Here is are pictures:
I started with the driver side and followed the same steps on the passenger side. I secured the cable loose that have been connected to the stock seats with zip ties. I took the seat into the car and before I mounted it to the chassis, I routed the stock seat belt through the outside opening of the seat and mounted it together with the BK Outside seat belt mount to final torque. I wanted to take advantage of being able to push the seat out of my way for easy access to the mounting point. Sorry, but I did not make a picture of this step.
Here is the sequence of how I mounted the seat to the chassis:
1. rear tunnel side
2. rear door side
3. front tunnel side
4. front door side
When you do it, you will understand why. The tunnel rear side is very hard to access and you want to have this first without major alignment, pulling, pushing etc.
The Recaro slider fits perfectly into the factory chassis openings. When you are done with this, tighten all bolts. With the right wrenches, every bolt is accessible. Just be patient and bend your body / arms / hands.
Final Result
I wrapped the shoulder belts per Schroth instructions around the roll bar and clicked in the lap belts to finalize the project. Here are some pictures and after I hit the send button for this posting, I will open a bottle of beer:
Last edited by e9stibi; 02-16-2010 at 03:18 PM.

 02-05-2010, 07:55 AM
#7
Three Wheelin'
Join Date: May 2004
Location: SH, NJ
Posts: 1,317
Likes: 0
Received 0 Likes
on
0 Posts
Wow.. very nice job... thanks for posting.
Whats next? RS door cards with red door pulls to match the seatbelts... ?
By the way, is this footwear save to wear during the install?
Whats next? RS door cards with red door pulls to match the seatbelts... ?
By the way, is this footwear save to wear during the install?
Trending Topics
 )
)
 02-05-2010, 09:57 AM
#12
Race Car
You would be surprised how comfortable fixed back seats are, I have done numerous trips of 8hr + in full race seats without issue....
02-05-2010, 11:04 AM
#14
Seared
Rennlist Member
Rennlist Member