Another TPC Supercharger Install project thread :)
 03-25-2014, 09:07 AM
#61
Racer
Join Date: Dec 2010
Location: Wilmington, NC
Posts: 266
Likes: 0
Received 0 Likes
on
0 Posts
I did mine with engine in. Not too bad. There is a guy over on the 964 board that did his at same time with engine in. It would be easier with engine out if you needed to have it out for other reasons.
Here is the shroud cover that is needed.
Also since I have not seen how to connect the 964 fan, will try a 12v bilge fan to have air circulating through exchangers.
Here is the shroud cover that is needed.
Also since I have not seen how to connect the 964 fan, will try a 12v bilge fan to have air circulating through exchangers.
 03-25-2014, 11:21 AM
#62
Burning Brakes
Thread Starter
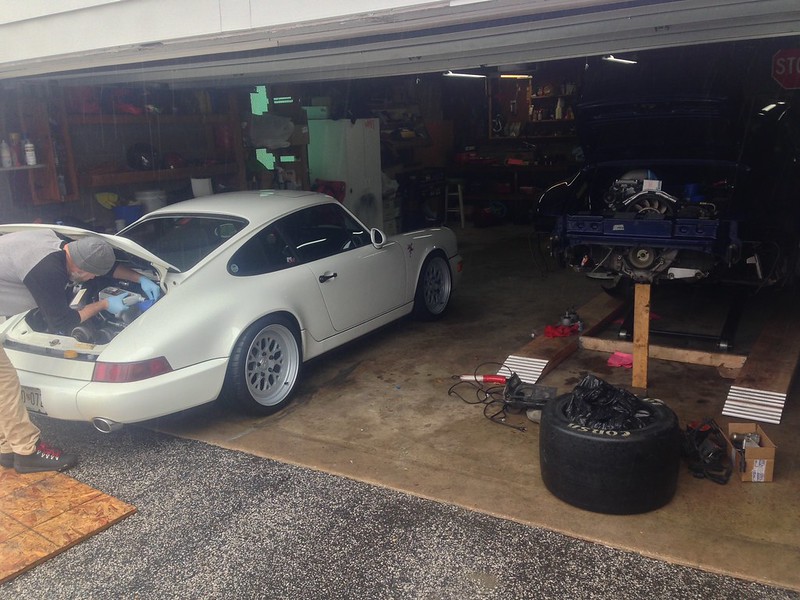
 I just didn't feel like yanking the whole thing. Having this scissor lift makes this job significantly easier than without. It hasn't really presented itself to be more difficult to work on in the car.
03-25-2014, 11:25 AM
I just didn't feel like yanking the whole thing. Having this scissor lift makes this job significantly easier than without. It hasn't really presented itself to be more difficult to work on in the car.
03-25-2014, 11:25 AM
#63
Burning Brakes
Thread Starter
03-25-2014, 11:27 AM
#64
I did mine with engine in. Not too bad. There is a guy over on the 964 board that did his at same time with engine in. It would be easier with engine out if you needed to have it out for other reasons.
Here is the shroud cover that is needed.
Also since I have not seen how to connect the 964 fan, will try a 12v bilge fan to have air circulating through exchangers.
Here is the shroud cover that is needed.
Also since I have not seen how to connect the 964 fan, will try a 12v bilge fan to have air circulating through exchangers.
Also, that bilge fan, how much cfm can it move?
I am also looking for better/more elegant solution to what I currently have.
03-26-2014, 01:14 AM
#66
03-26-2014, 02:02 AM
#67
Nordschleife Master
Well done.
03-31-2014, 03:12 AM
#70
Burning Brakes
Thread Starter
From what I've been told, a puller is not necessary for the 993 pulley? Just the holder tool(s) (993 tool needed to remove the stock crank pulley and 964 tool needed to install the TPC pulley)... Will see soon
03-31-2014, 10:32 AM
#71
You would probably need a pulley. That pulley is usually on there pretty good. If you use a 3 jaw to pull it out, pad the figer of the jaw. You don't want to damage/bend the edges of the pulley.
04-02-2014, 09:10 AM
#72
Burning Brakes
Thread Starter
Fwiw, swapped the crank pulley and did not need a puller for the 993 pulley removal. After I broke loose the crank bolt, the pulley literally wiggled off with no force necessary. The new TPC billet pulley for the supercharger belt w/ AC groove went on painlessly and I'm just waiting til I get some red loctite and a torque wrench capable of reading over 100lbs to re-torque the bolt.
No new pics really but I'll be making some headway this week
No new pics really but I'll be making some headway this week
04-03-2014, 03:25 AM
#73
Burning Brakes
Thread Starter
Today I got a LOT done that had been put off for too long.
The 2 most stubborn bolts this whole projects were the 2 allen cap head bolts tucked way down between the rear engine tin and the carrier which mount the rear aluminum heat transfer tube. After a torch and some easy-out sockets, they grudgingly came out.
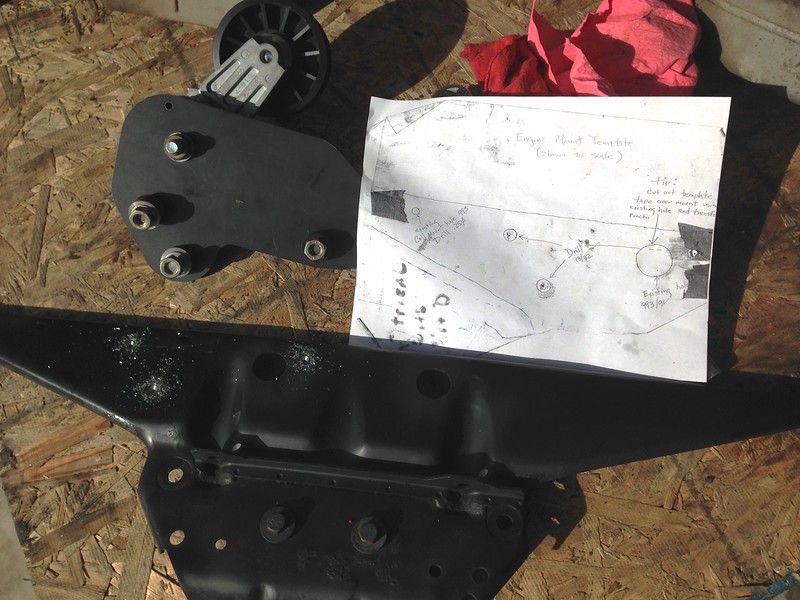
I rolled down to TPC yesterday to grab a carrier template to drill the holes for the tensioner plate. Tom had a guy search in storage boxes of paperwork for it and they found one tattered and torn template, made a photo copy of it for me and it worked perfectly. I plan to make a proper scale PDF to pass on to the next guys who need a template Harris (I think? Mike L's son... I'm terrible with names) was super friendly and gave me a little tour of the bolt-on turbo kit they were fabbing up on a new Boxster 981. Man, that really is a sexy MR2... Thanks dudes!
ANYWAY... got home with the template and some red loctite from the parts store and decided to spend a few hours making progress.
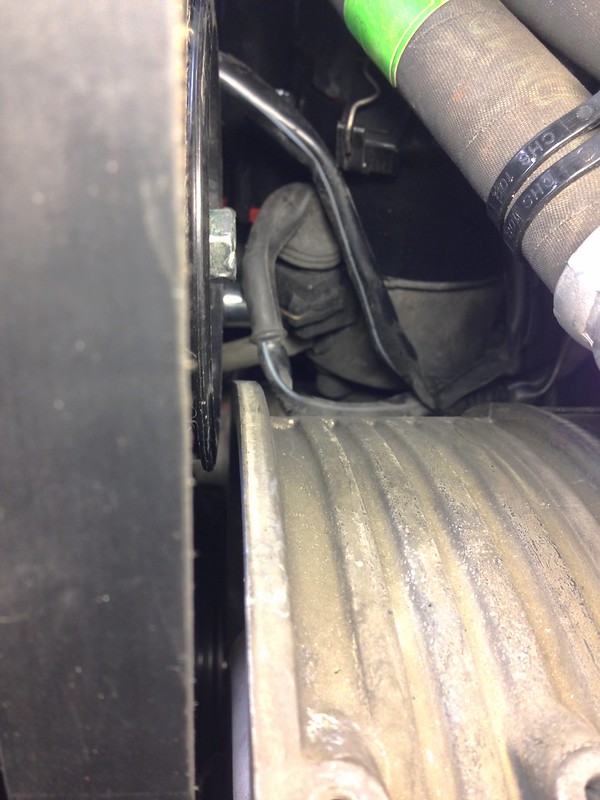
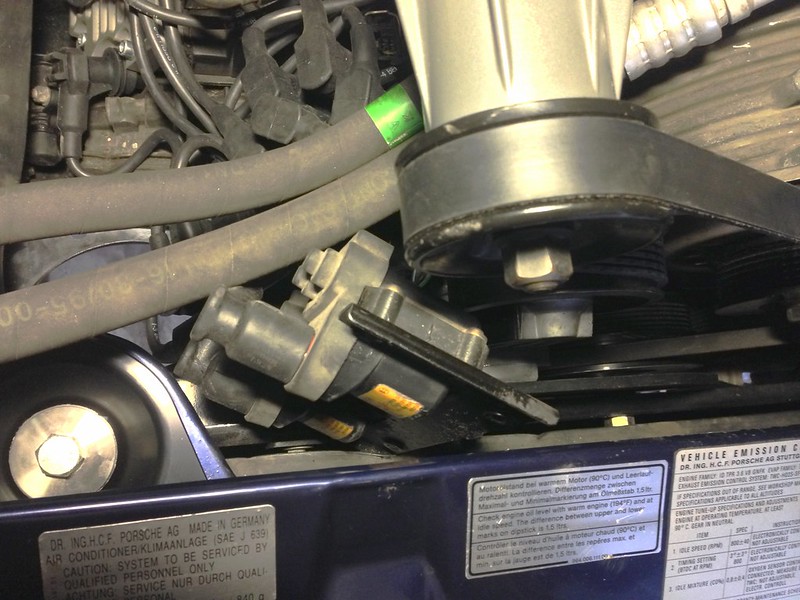
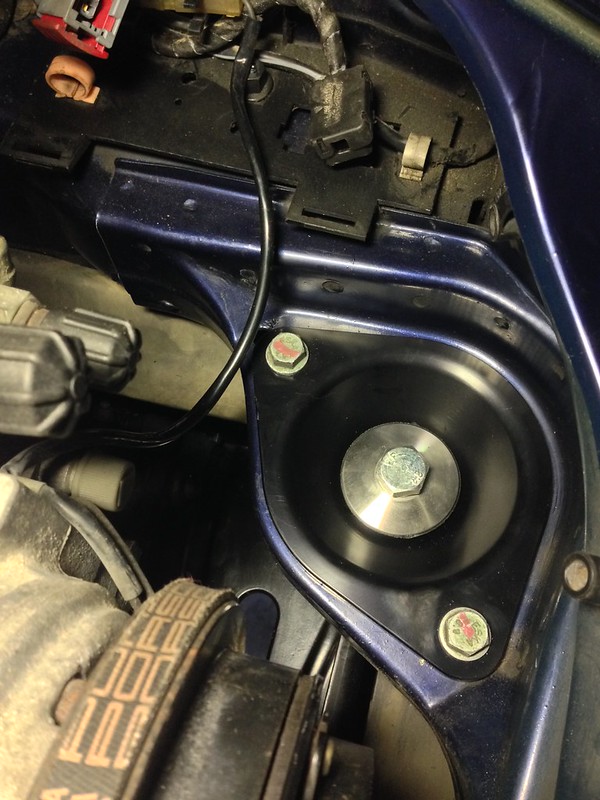
Slapped on the TPC crank pulley, held it with a 964 tool I borrowed, torqued to a little over 125 ft.lbs., routed some belts, drilled the carrier, bolted the tensioner assembly up along with the coil bracket, threw the rear tin back on with some leftover misc porsche bolts/nuts from other jobs, slapped the carrier back up, popped the SC belt on (BTW, all the guys who say the pulley lines up correctly only when it's loaded with the belt... you're spot on. That thing looked WAY off until I loaded the belt on, then it flexed into perfect alignment. I have about 4mm clearance from the fan housing and the belt is perfectly straight and flat), wired the coils, installed my Wevo SS mounts and called it a night
Tomorrow will be exhaust system install... I may hook up the battery and crank the car over a few rotations first just to check the belt doesnt roll off anywhere. I'd hate to get the exhaust all done and rear bumper back up, just to have to yank it all back off, LOL.
Not thinking it all the way thru, I mounted the IC radiator up in the pass front chamber near the oil cooler radiator (as typically done) but I routed the intercooler lines back to the engine compartment along the passenger side near the oil lines. I was second guessing this decision simply due to the excessive heat given off by those oil lines... but I've decided to stay with it as-is. Because, I decided to route the 2 smaller oil resevoir breather tubes back to the rear pass fender well behind the tail lamp into a serviceable breather/catch can, and use those 2 hose provisions into the engine compartment for the coolant lines for the IC radiator. Honestly, if the intercooler isnt working well, I'll reroute them down the other side. Til then, I'll just deal.
I also made a rubber/fiber gasket for the 95 throttle body to the SC inlet pipe and mocked up the throttle cable and checked throttle operation was proper. My custom 88pin ECU from Juha G's buddy isnt gonna be here for a while so I'm just gonna run the TPC piggyback stuff from Unichip.
Ed (Cosmos99) topping off his oil and going for his maiden voyage on his new Fifteen52 wheels & Pilot Super Sports
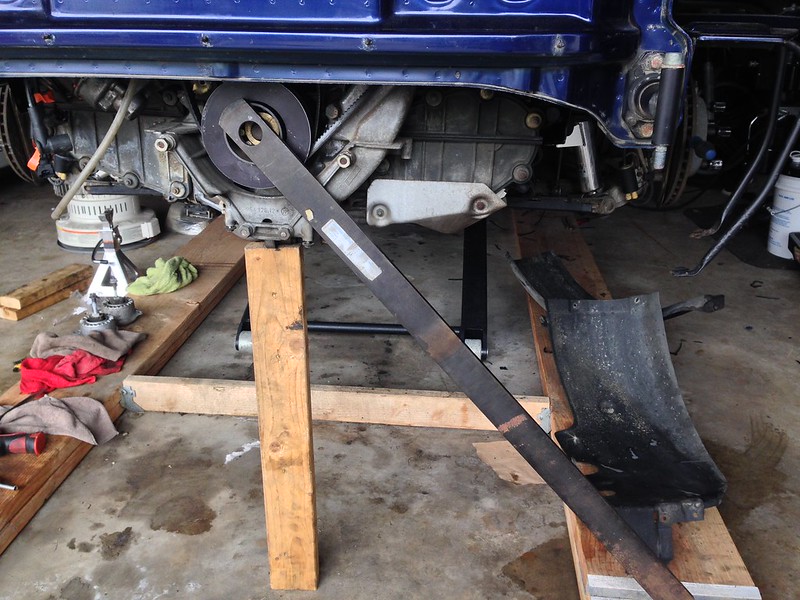
Battle Axes. 993 tool to remove stock pulley... 964 tool to hold while torquing TPC pulley.

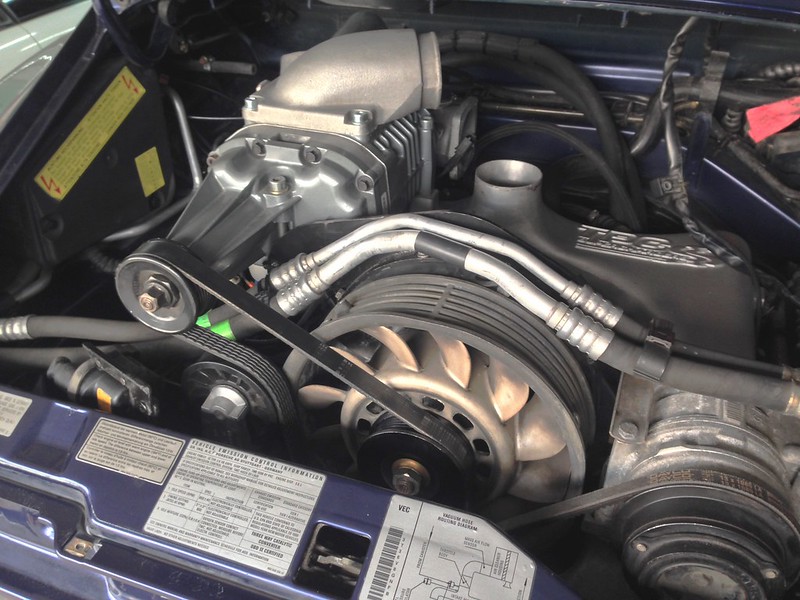
Eh... 3mm or so. Plenty!
puzzle pieces all nicely together...
wevo's
The 2 most stubborn bolts this whole projects were the 2 allen cap head bolts tucked way down between the rear engine tin and the carrier which mount the rear aluminum heat transfer tube. After a torch and some easy-out sockets, they grudgingly came out.
I rolled down to TPC yesterday to grab a carrier template to drill the holes for the tensioner plate. Tom had a guy search in storage boxes of paperwork for it and they found one tattered and torn template, made a photo copy of it for me and it worked perfectly. I plan to make a proper scale PDF to pass on to the next guys who need a template
Harris (I think? Mike L's son... I'm terrible with names) was super friendly and gave me a little tour of the bolt-on turbo kit they were fabbing up on a new Boxster 981. Man, that really is a sexy MR2... Thanks dudes!ANYWAY... got home with the template and some red loctite from the parts store and decided to spend a few hours making progress.
Slapped on the TPC crank pulley, held it with a 964 tool I borrowed, torqued to a little over 125 ft.lbs., routed some belts, drilled the carrier, bolted the tensioner assembly up along with the coil bracket, threw the rear tin back on with some leftover misc porsche bolts/nuts from other jobs, slapped the carrier back up, popped the SC belt on (BTW, all the guys who say the pulley lines up correctly only when it's loaded with the belt... you're spot on. That thing looked WAY off until I loaded the belt on, then it flexed into perfect alignment. I have about 4mm clearance from the fan housing and the belt is perfectly straight and flat), wired the coils, installed my Wevo SS mounts and called it a night
Tomorrow will be exhaust system install... I may hook up the battery and crank the car over a few rotations first just to check the belt doesnt roll off anywhere. I'd hate to get the exhaust all done and rear bumper back up, just to have to yank it all back off, LOL.
Not thinking it all the way thru, I mounted the IC radiator up in the pass front chamber near the oil cooler radiator (as typically done) but I routed the intercooler lines back to the engine compartment along the passenger side near the oil lines. I was second guessing this decision simply due to the excessive heat given off by those oil lines... but I've decided to stay with it as-is. Because, I decided to route the 2 smaller oil resevoir breather tubes back to the rear pass fender well behind the tail lamp into a serviceable breather/catch can, and use those 2 hose provisions into the engine compartment for the coolant lines for the IC radiator. Honestly, if the intercooler isnt working well, I'll reroute them down the other side. Til then, I'll just deal.
I also made a rubber/fiber gasket for the 95 throttle body to the SC inlet pipe and mocked up the throttle cable and checked throttle operation was proper. My custom 88pin ECU from Juha G's buddy isnt gonna be here for a while so I'm just gonna run the TPC piggyback stuff from Unichip.
Ed (Cosmos99) topping off his oil and going for his maiden voyage on his new Fifteen52 wheels & Pilot Super Sports
Battle Axes. 993 tool to remove stock pulley... 964 tool to hold while torquing TPC pulley.
Eh... 3mm or so. Plenty!
puzzle pieces all nicely together...
wevo's
04-03-2014, 07:14 AM
#74
Racer
Join Date: Dec 2010
Location: Wilmington, NC
Posts: 266
Likes: 0
Received 0 Likes
on
0 Posts
Nice work! It looks like you are making good progress. Btw did you reinforce your engine carrier for running the Wevo's? I had added the Rennline reinforcement brace on mine. It made it more difficult to mount the pulley correctly. Also what a bear to pull it back to put on the belt. Took me a while to figure a method that seemed safe to put the belt on.