When you click on links to various merchants on this site and make a purchase, this can result in this site earning a commission. Affiliate programs and affiliations include, but are not limited to, the eBay Partner Network.
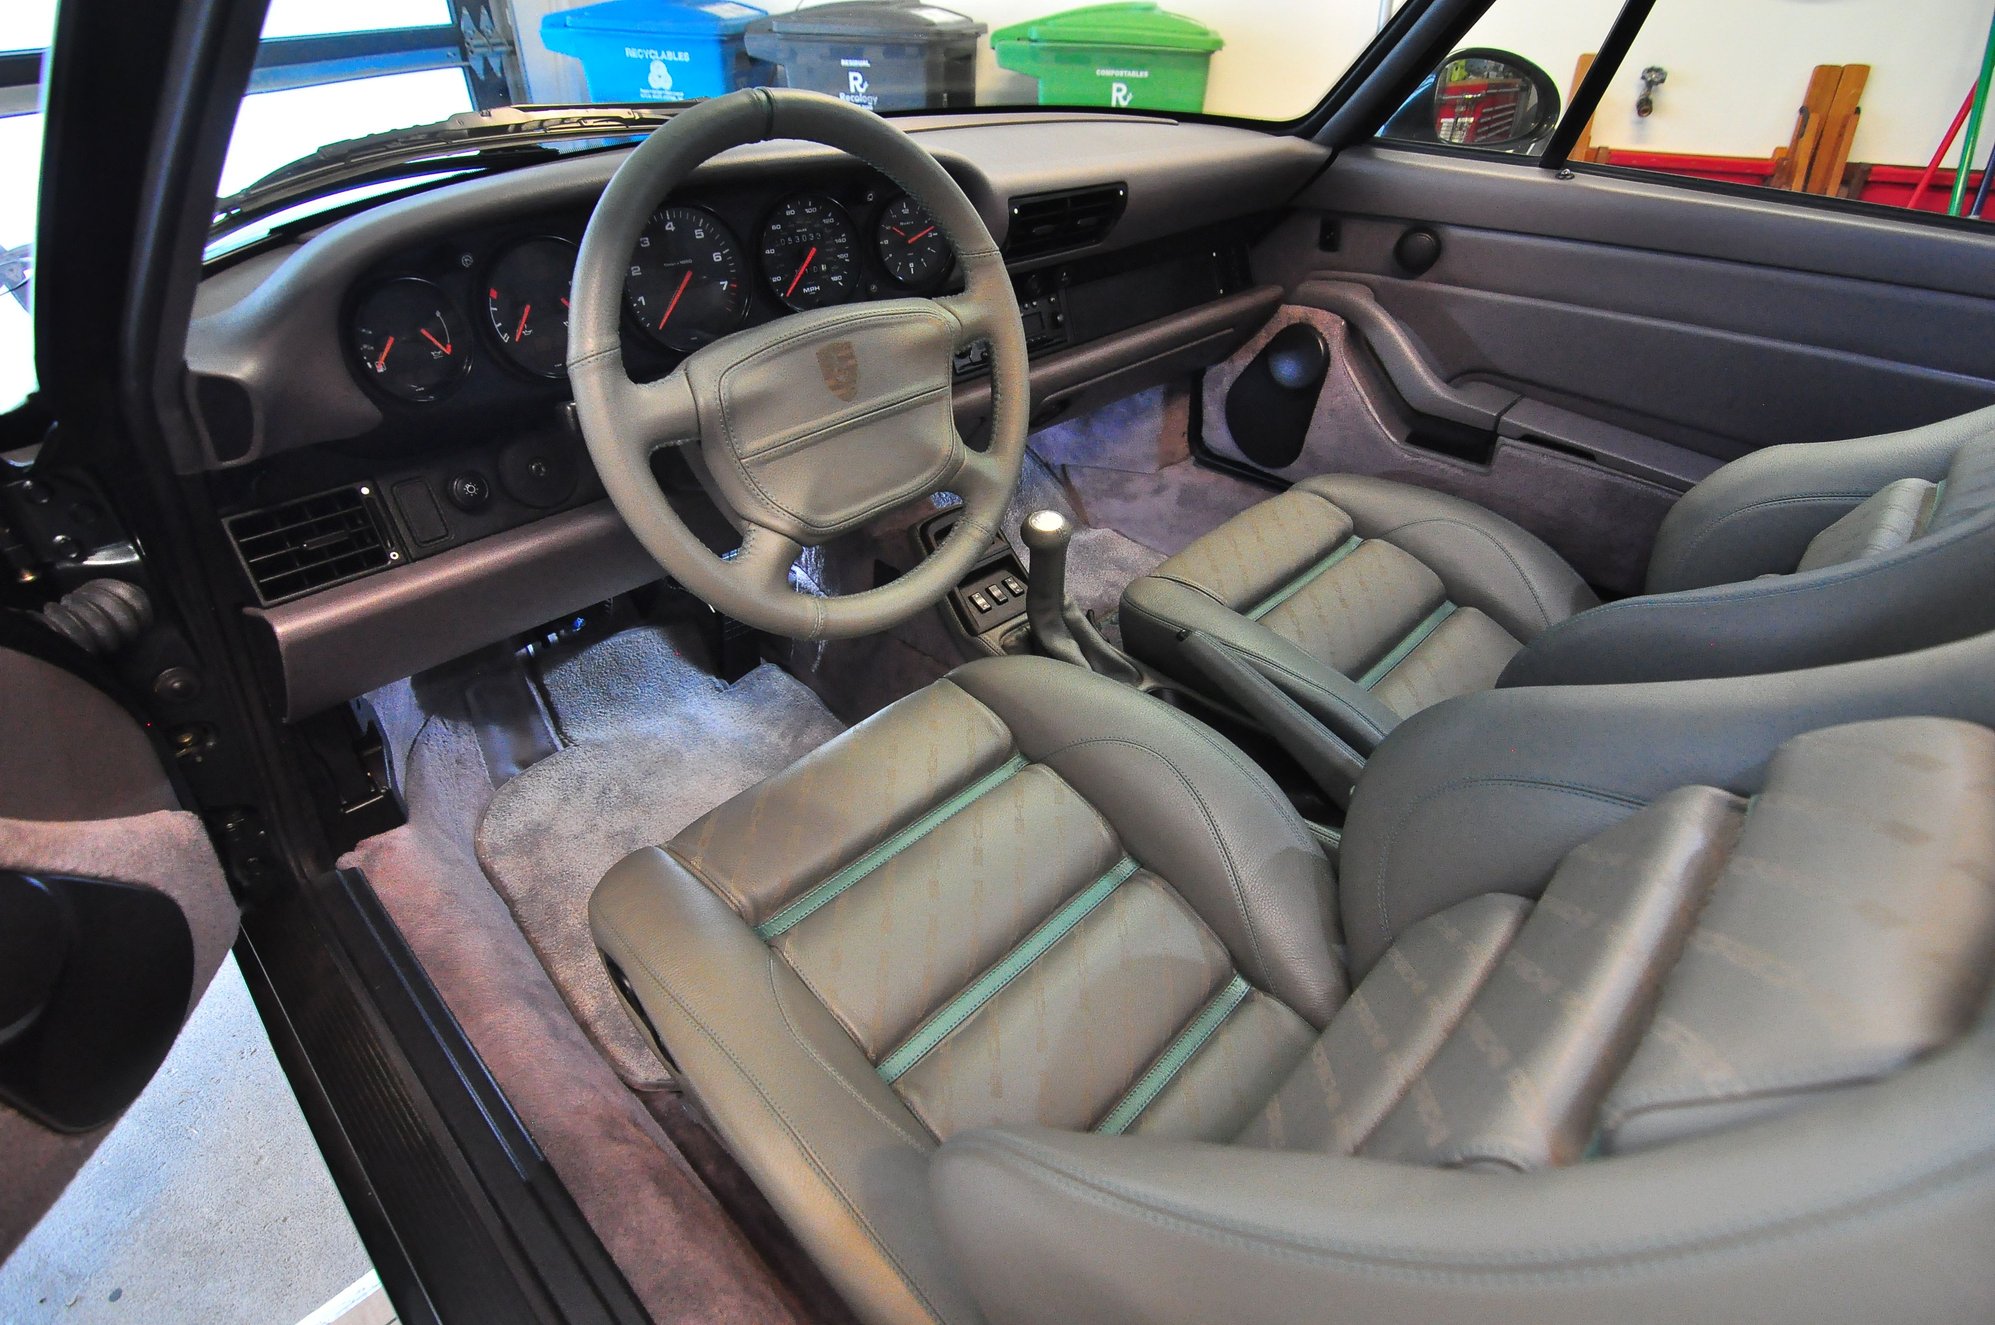
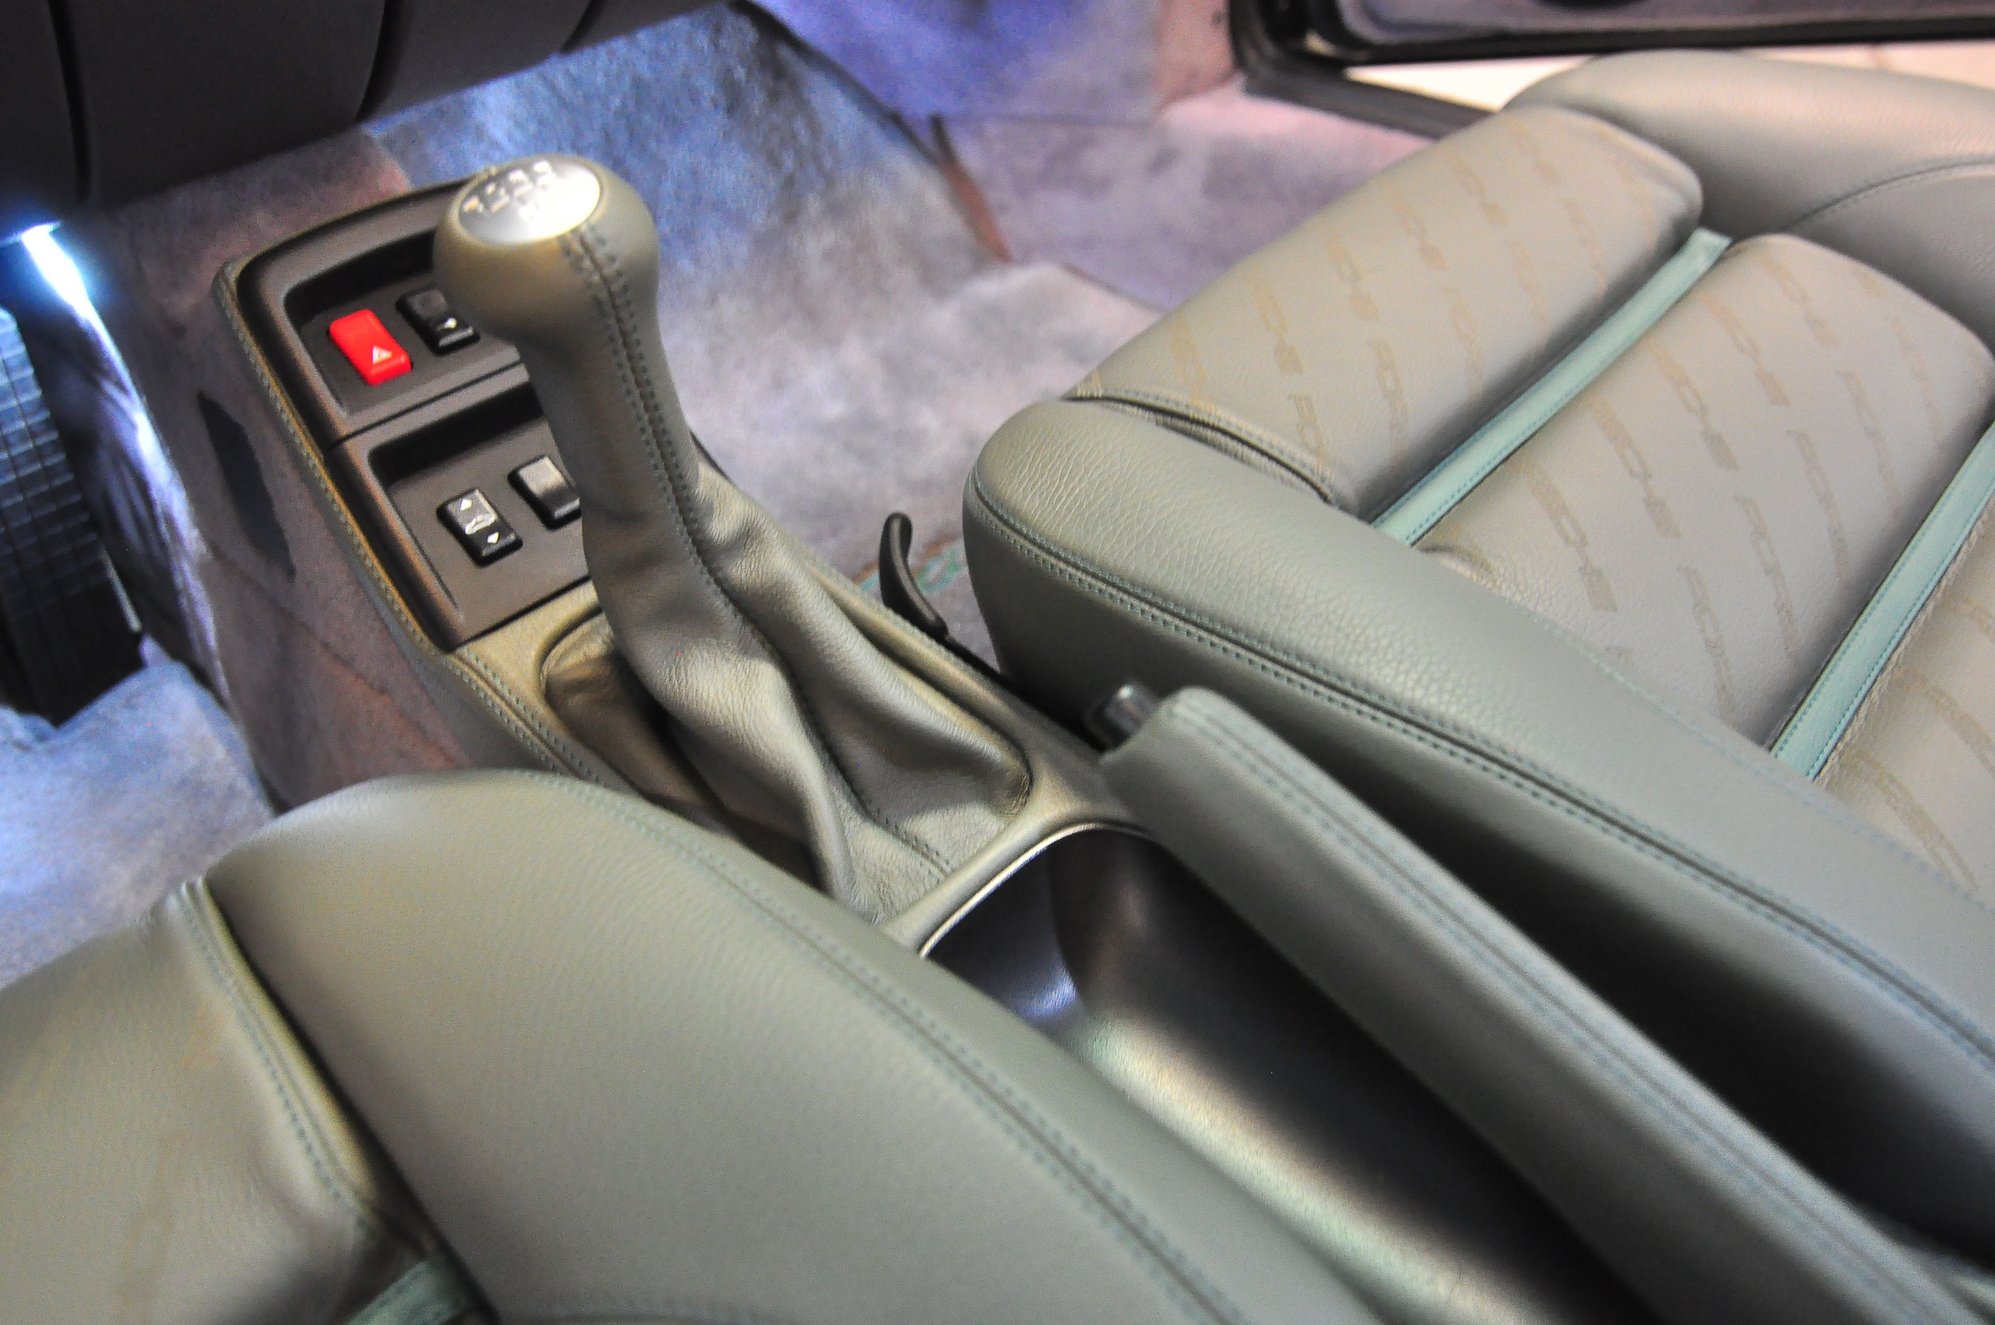
Hi gang, thanks for the feedback and compliments. I got all the seats, steering wheel, gearshift, handbrake, and center console installed. The loosk and feel has exceeded my expectations and a lot of the credit for the early 90s / 928 imspired visual design should go to Paul Champagne.
I will recover the doors, dash, etc. at a later date when time permits. In the meantime, in my enthusiasm, I am sha ing these pictures here. PS - thank you rennlist for the advice is using so much caution in dealing with the seat bolts.
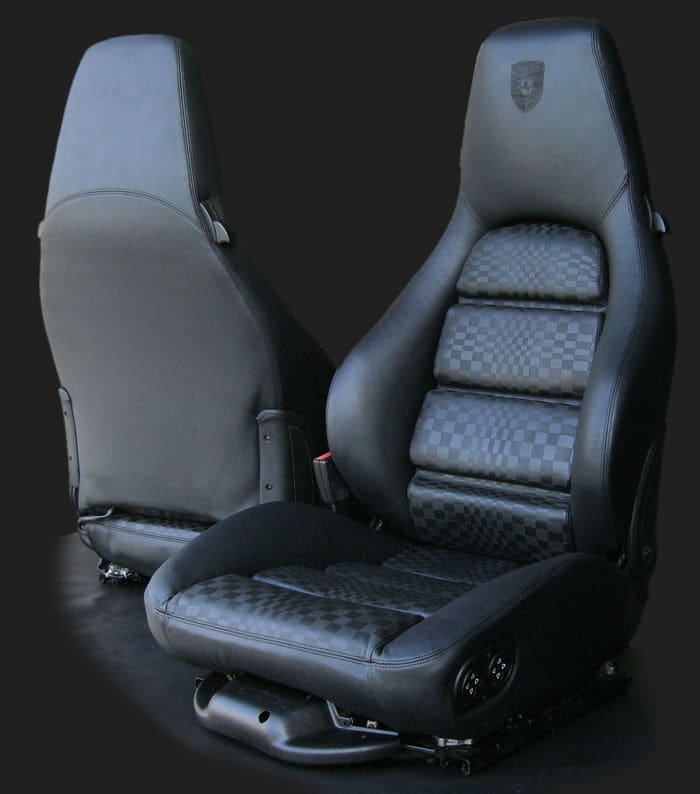
Thank you for the pictures. I'm seriously considering seat (only) reupholstery for my grey interior 996, and considered 928-style cushioning in place of the…(IMO) pedestrian style seats that came standard.
For my own vehicle, I've decided that the PorshePorschePorsche material is a bridge too far: Although, had I kept my 928, I'd probably do it.
Thought about restrained quilted panels, or even laser-etched Pascha pattern, carried out so nicely in Paul Champagne's web example below.
'Restrained Quilted', however is akin to 'modest miniskirt': a contradiction in terms.
In a perfect world, I'd redo my seats in 'Singer Weave' graphite gray, to match.
Of course, in a perfect world, I'd have a Singer.
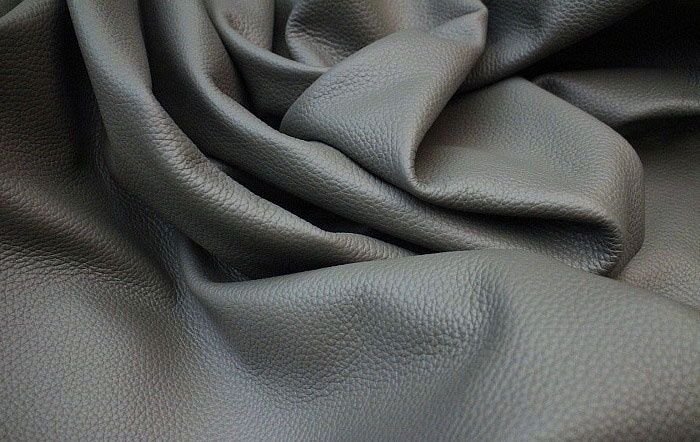
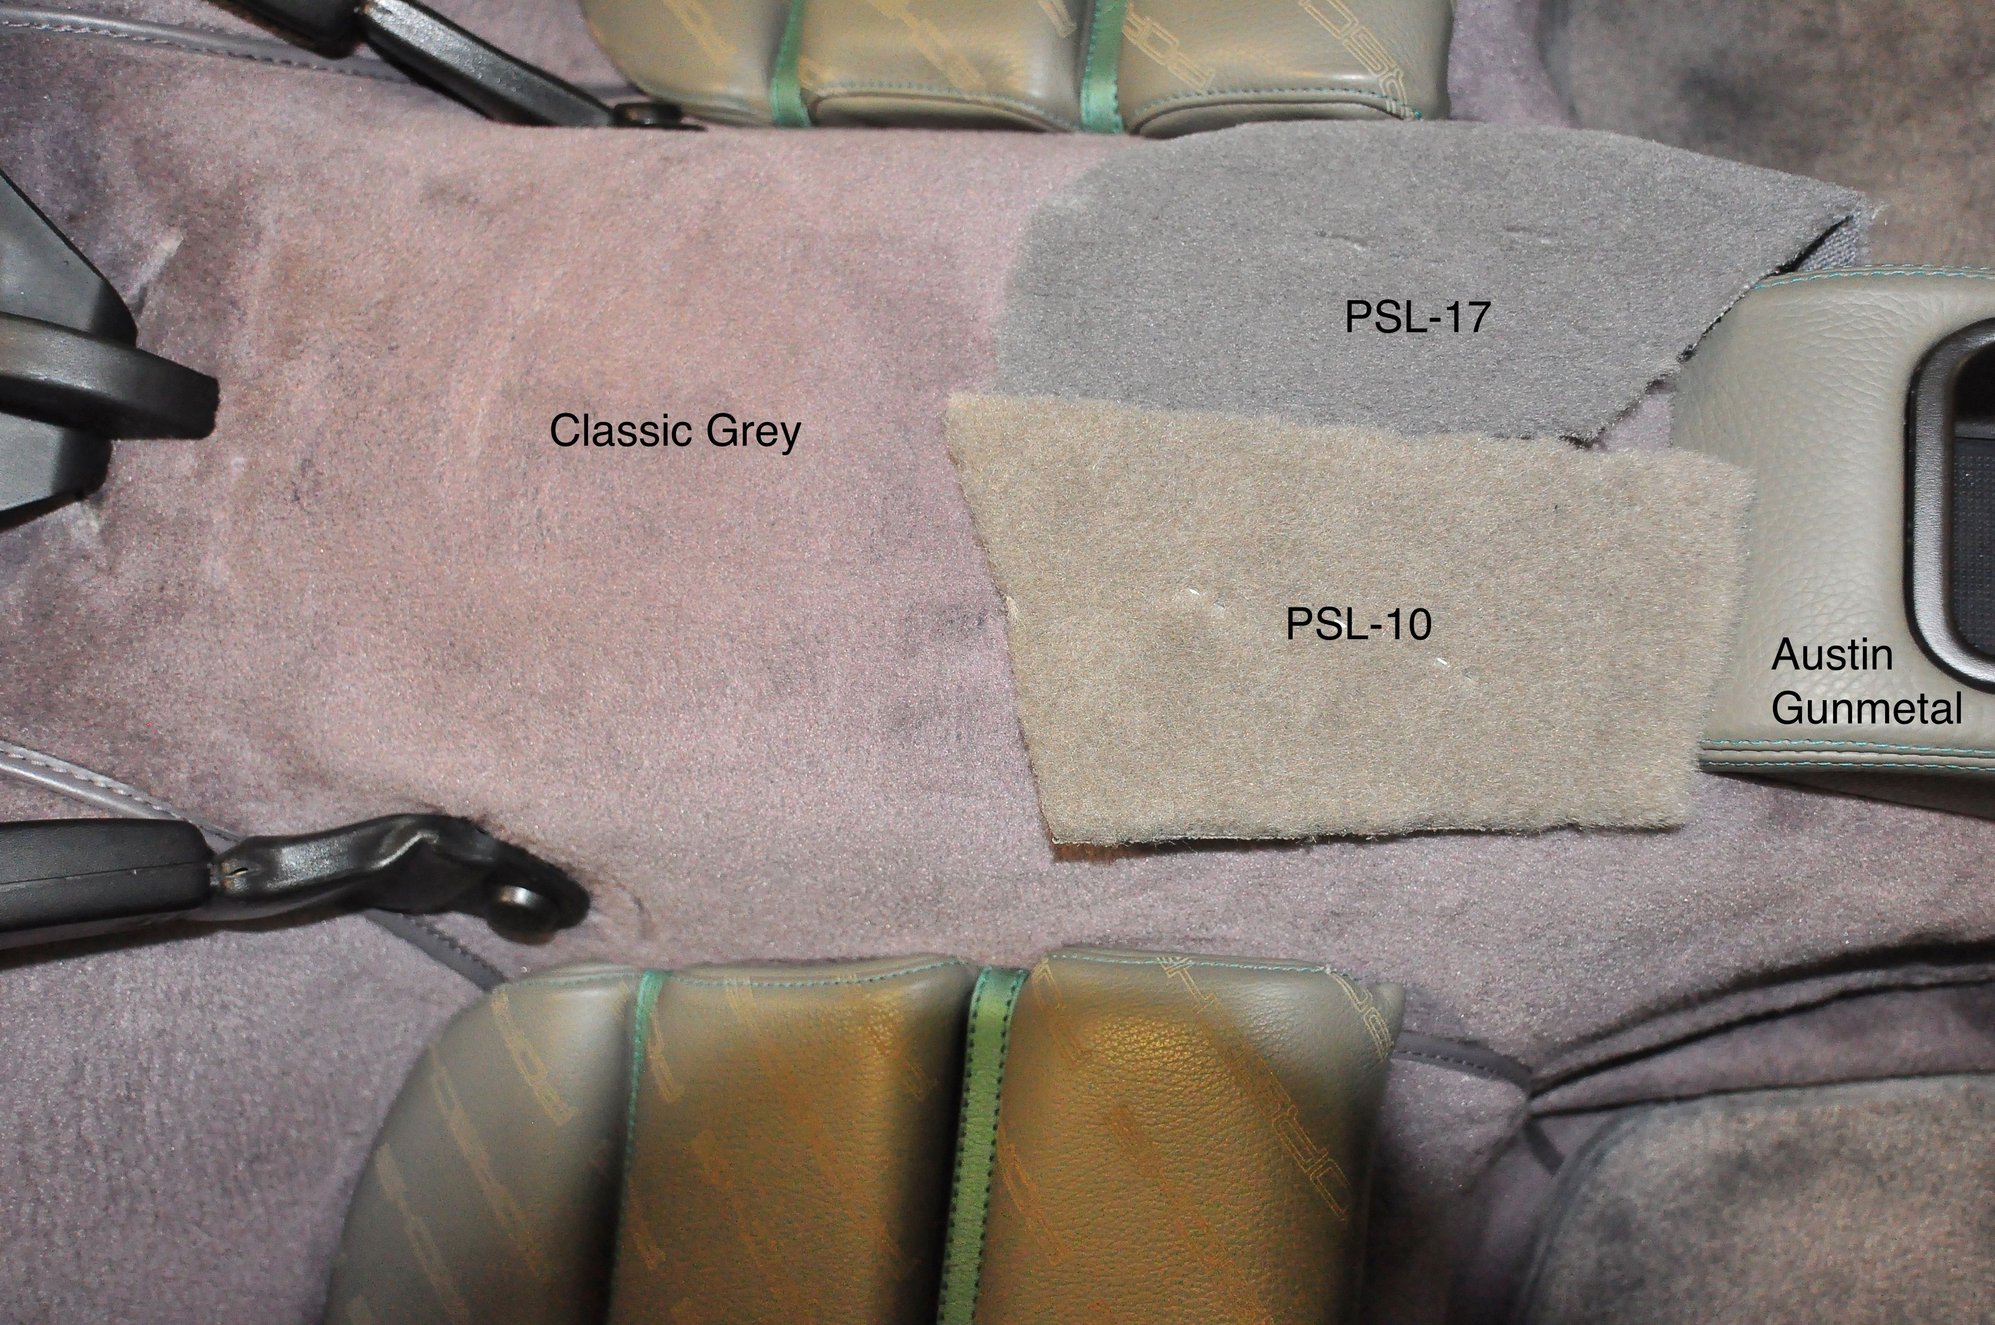
I had the seats re-done by Paul Champagne in a very luxurious, very thick and soft leather - "Austin Gunmetal Grey" -
I thought the grey was warmer and was a much better complement to Aventurine Green than Classic Grey -- especially since Austin Gunmetal has a slight tinge of green in it. Classic Grey, especially the carpet, has all kind of blue/purple in it that I thought was not a complement to Av Green. Anyways, after I installed the seats in the car, I realized that the seats clashed with the Classic Grey vinyl and carpet. I had anticipated that this might happen ----
So I decided to replace the carpet and everything else - upper dash/lower dash, door cards, etc. I had been psychologically steeling myself since last year against the laborious process of carpet/complete interior replacement. I have always wanted an all leather interior. So I got some pieces out of various wrecked cars (so that I could keep my pristine vinyl classic grey parts) and asked Rob Budd @ Classic 9 to recover them.
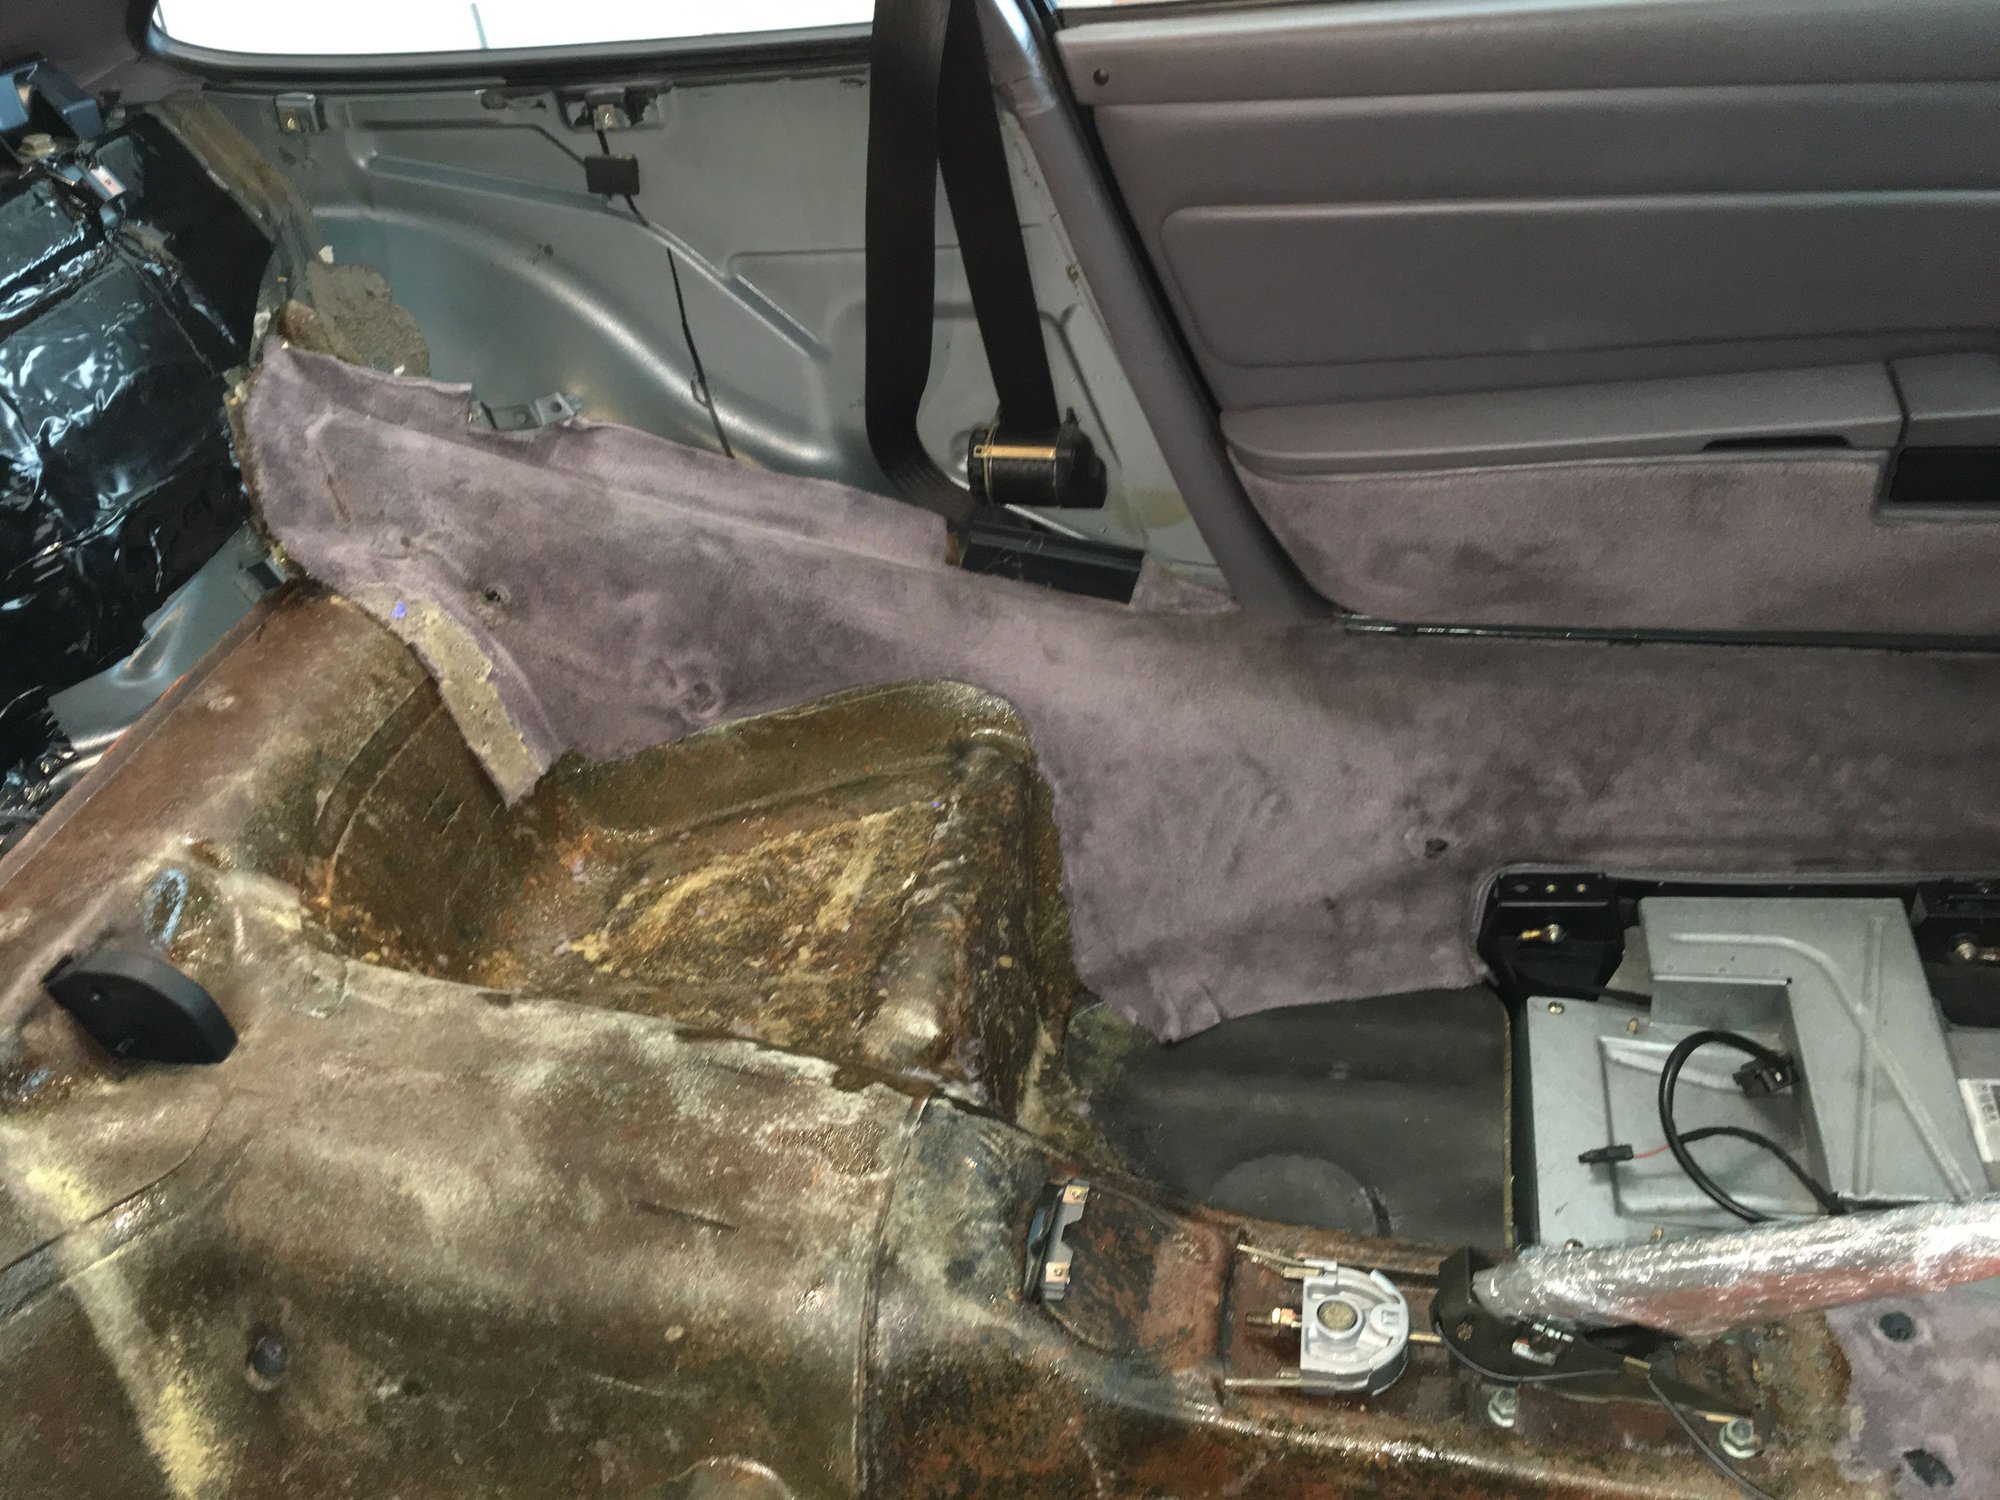
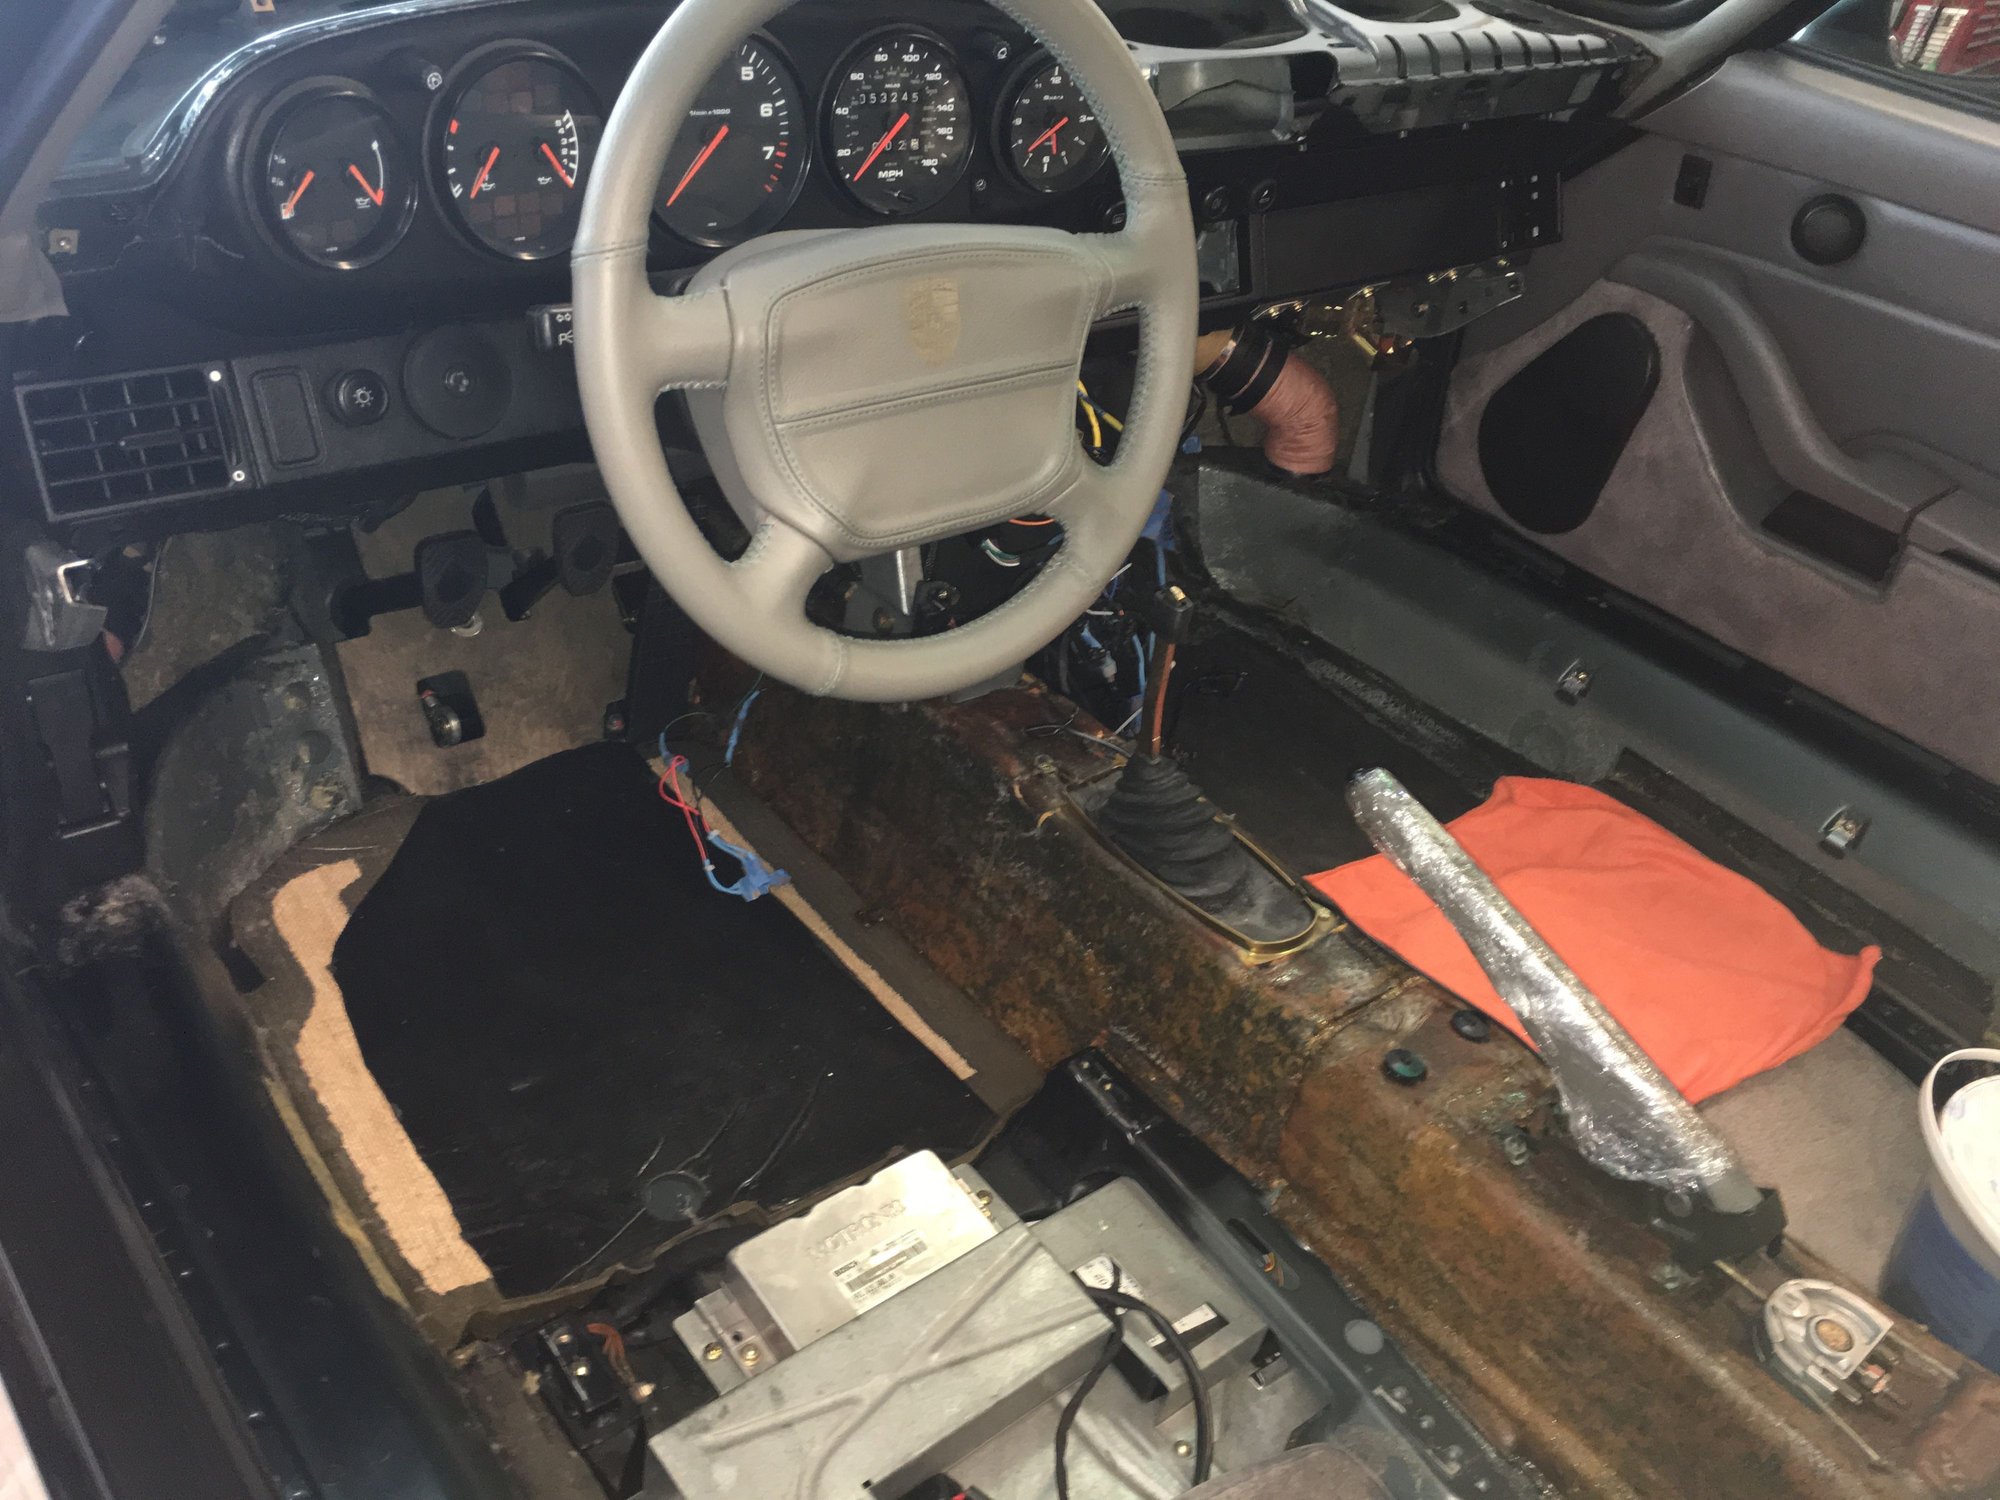
The first step was to strip out all the carpet in the car. That was a pain --- the glue is ferociously strong. One has to be super careful as well about dumping solvent all over the place too if one plans to keep the carpet padding underneath -- which I wanted to keep. I didn't want to install new carpet on top of solvent soaked carpet padding ---- this is not an issue for those who rip everything out to install RS carpets --- and I read a lot of RS carpet installation threads.
Another way to deal with the glue is to go hack away at it, little by little, with a utility knife. That only worked with modest success --- the glue fouls the utility blade in about 5 seconds. Ultimately I ended up cutting some of the existing carpet up --- it was impossible for me to take out all the carpets in one piece to use as a template. Or, perhaps I just wasn't patient enough. Interior stripping took me three weekends of work ---- there are threads that talk about complete carpet/interior strip/replacement being a 2 weekend job --- I don't know what universe those guys are on but clearly those guys have many more hands than me --- I can't work that fast.
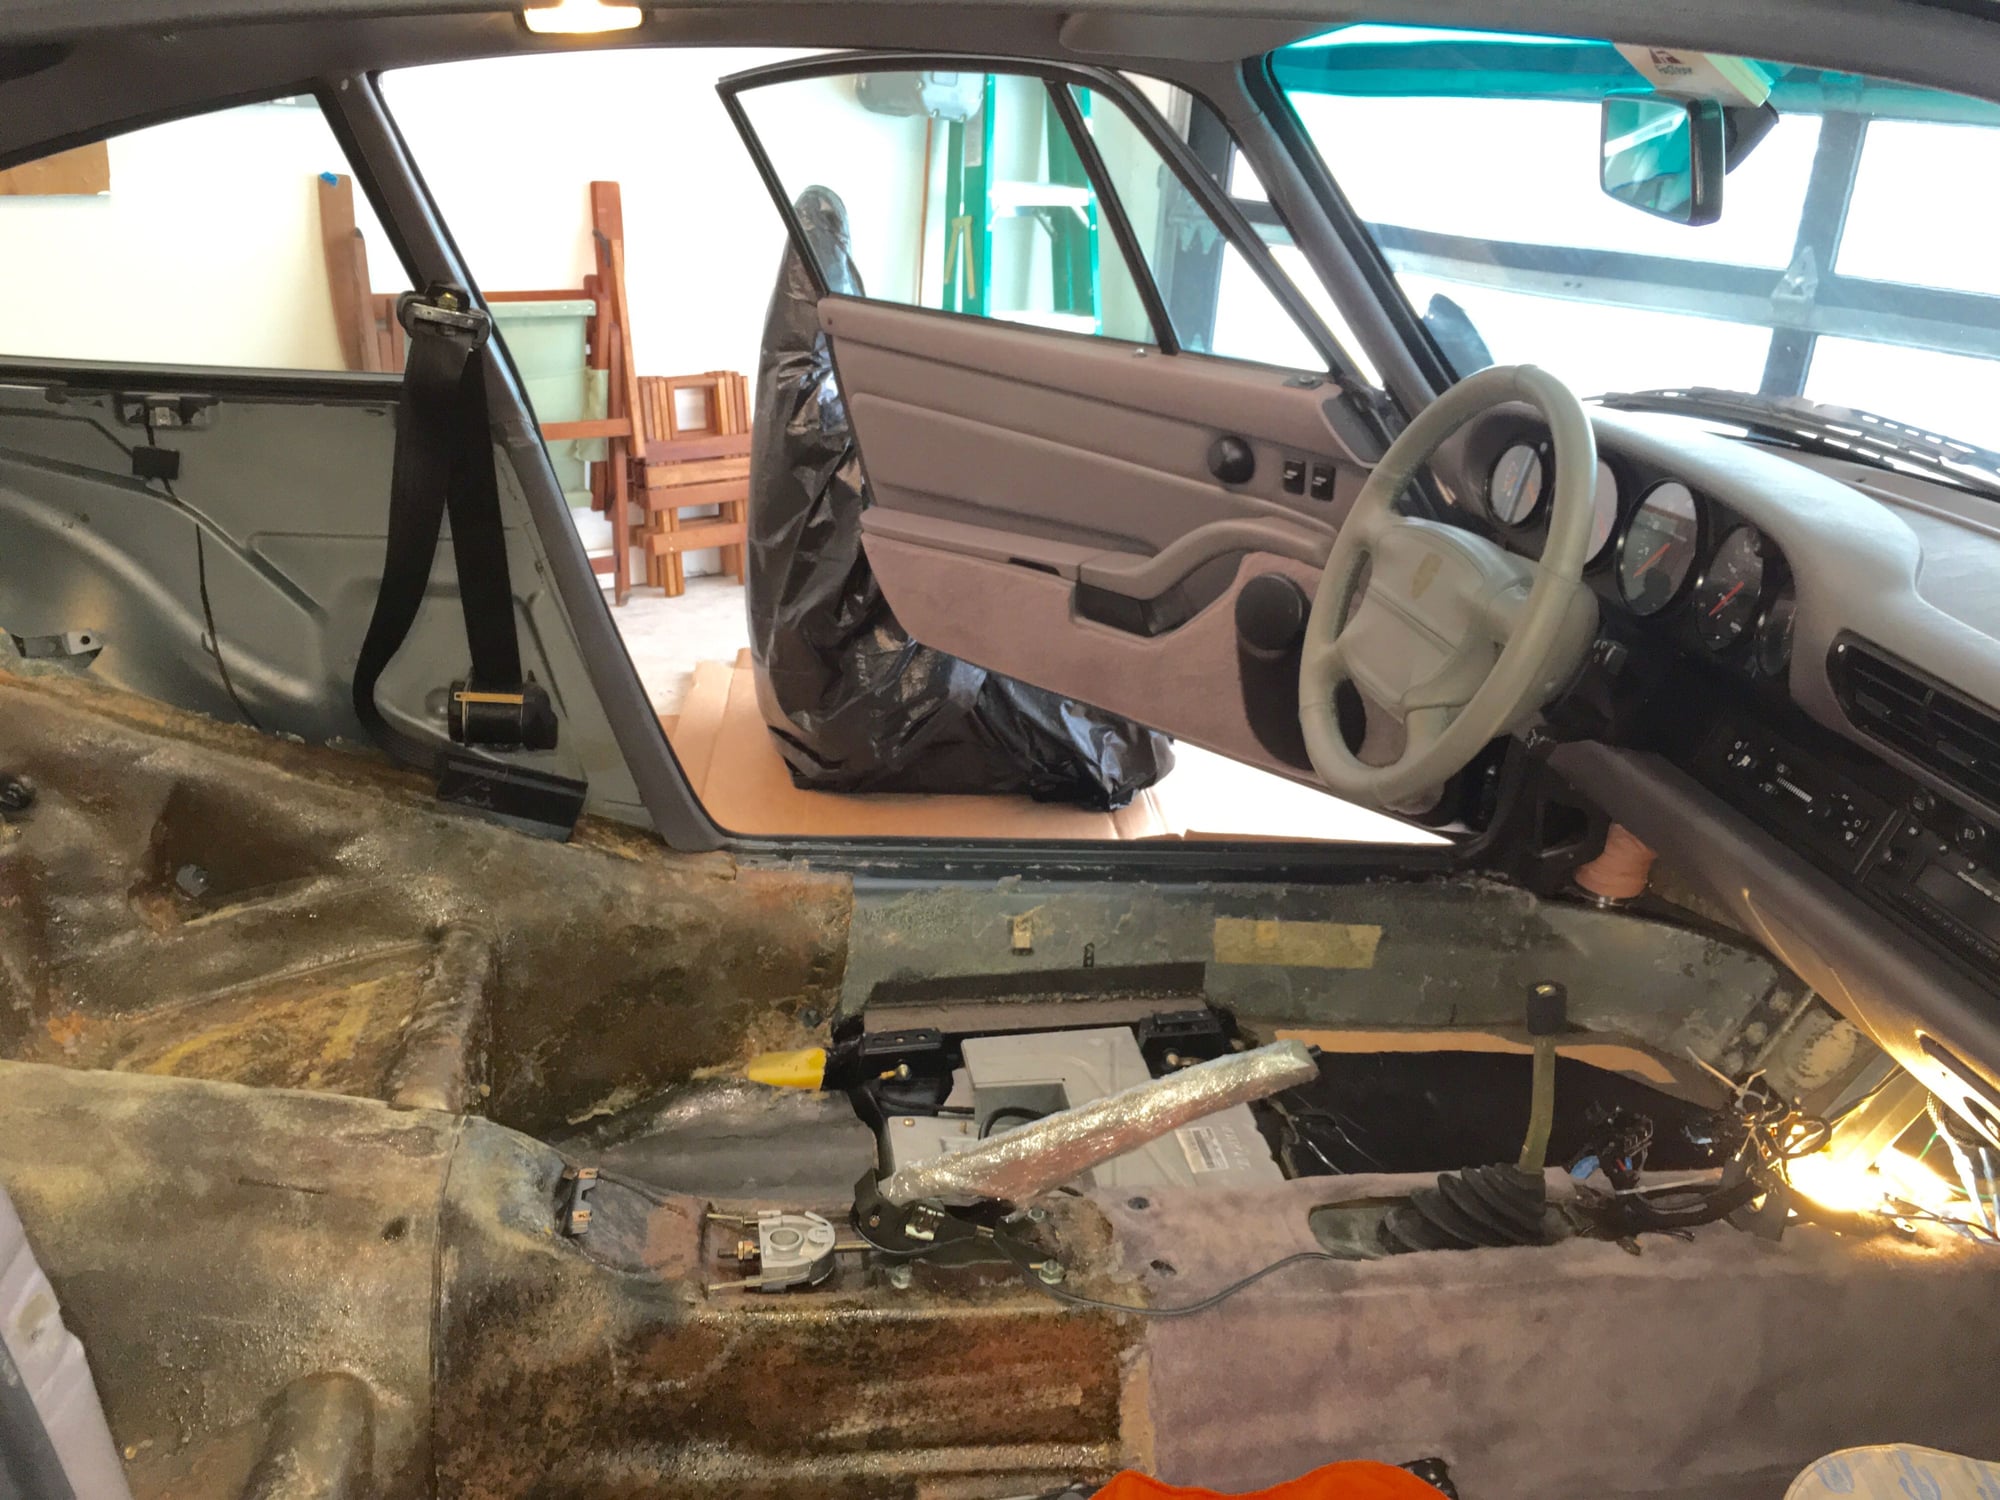
I work very slowly, putting all hardware in labelled plastic bags and taking copious photos as I go -
While everything was out of the car, I had the A-pillars and B-pillars professionally dyed in-situ to match the Austin Gunmetal Grey --- I couldn't figure out a way to remove the B-pillar pieces from the car, and I was not confident in my ability to glue new leather to the A and B pillars myself.
For those local to San Francisco, I like to avail myself of the service of Leifur Magnusson - he has always done excellent work for me in the past and I have pointed several folks on rennlist his way --- even one Rennlister from Texas, who has sent him pieces via package deliver to re-dye.
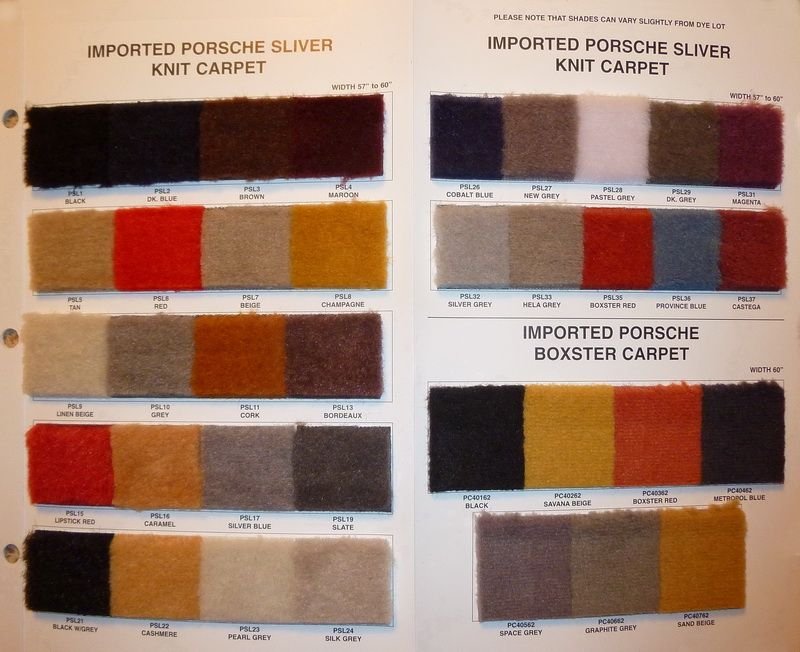
The carpet that I used is is color PSL-10 "Grey" Silverknit --- I got it from Rob Budd @ Classic 9.
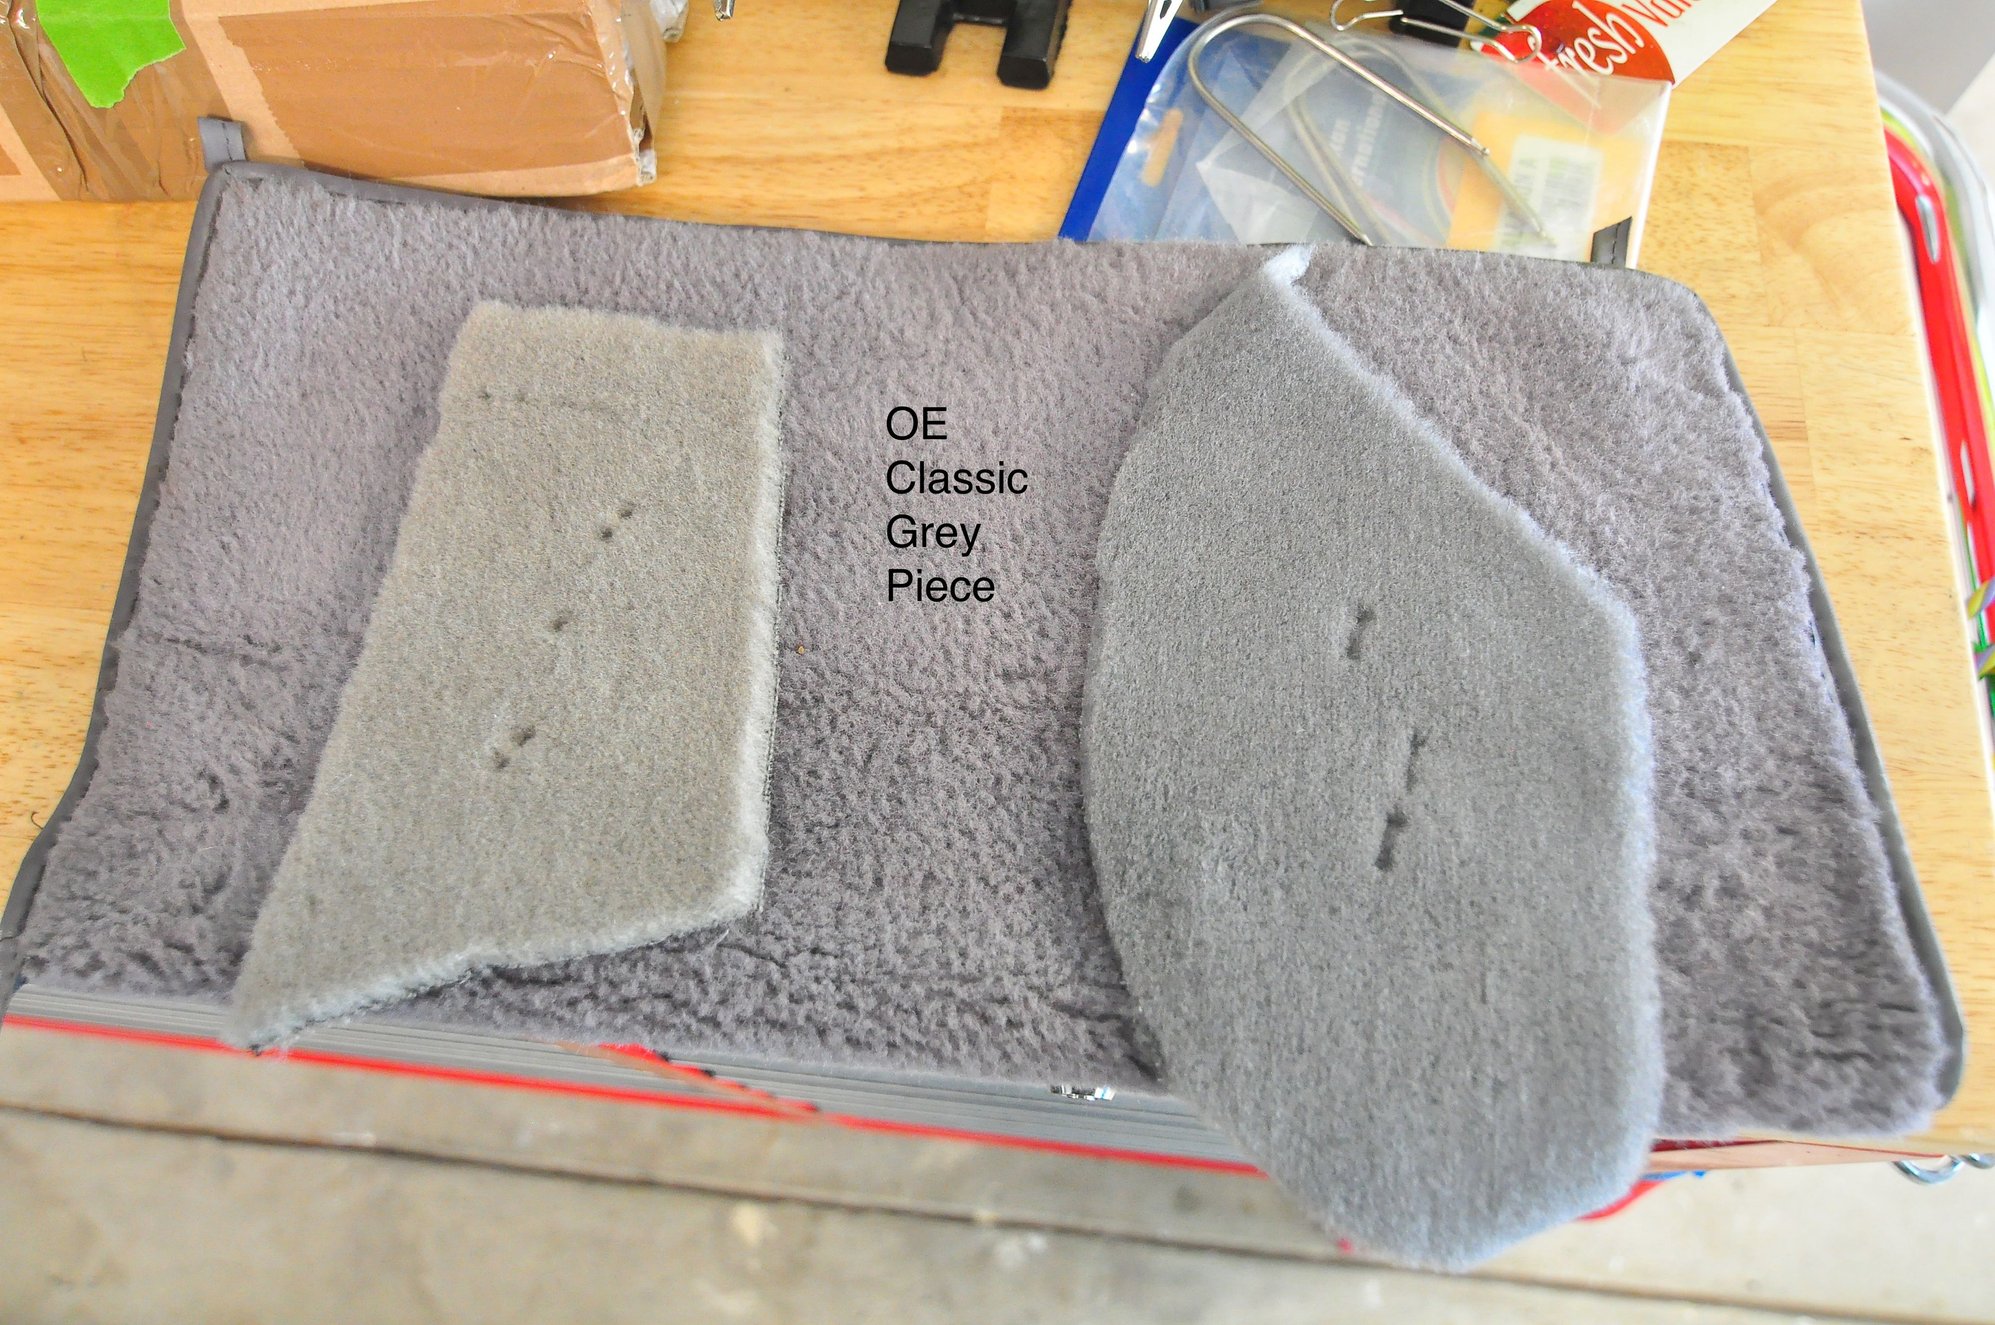
Laying out all the pieces of carpet, I noted that the carpet patterns are slightly different from the 993 OE carpet. The biggest differences are:
- The OE sides of the car are one piece from the front footwell sides all the way to the rear of the car. Classic 9's pieces are two-pieces --- the front and rear are separate. Actually I think this is perhaps quite clever as it is easier to install --- or perhaps I should reword that and say that it allows the amateur (myself) a little more latitude.
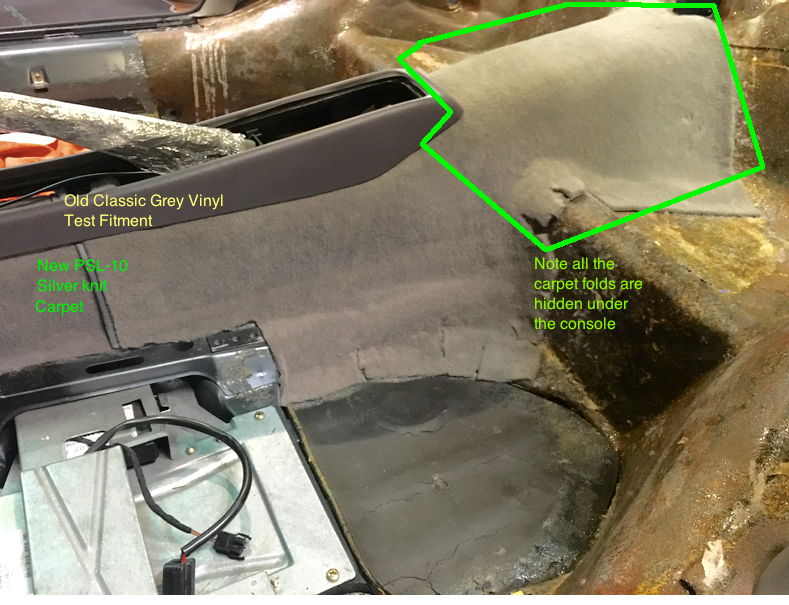
- The OE rear of the car --- the transmission hump - is one piece. Classic 9's pieces for the rear of the car have a "collar" that goes around the hinge point of the rear seat backs --- similar (but not exactly the same) as the 964. Again I think this allows a little more latitude for the amateur.
One thing I realized about Silverknit is that it tolerates a lot of stretching, which is critical for shaping the carpet to the compound curves inside the interior.
I sure am glad I stuck with the Silverknit material! I had considered using other carpet (Mercedes carpet) but in retrospect, Silverknit is really amateur friendly.
Rob Budd mentions that there are two ways to shape the carpet to compound curves --- either steam or brute force. Brute force is riskier. I used brute force (even though I have a steamer!) because I did not have the foresight to ask Rob about how to shape carpet to compound curves until AFTER I installed all the carpet. Hopefully this helps someone in the future.
Rob told me that he recommends two kinds of glue -
- 3M 77 on areas you may want to take off in the future
- 3M 80 or 90 on areas around the gas pedal and areas that you won’t take off anytime soon.
I used 77 everywhere on the premise that I can always re-glue something in the future if it comes loose, but if I screwed something up big time with 80/90 on the first try, I wouldn't have a second chance at it.
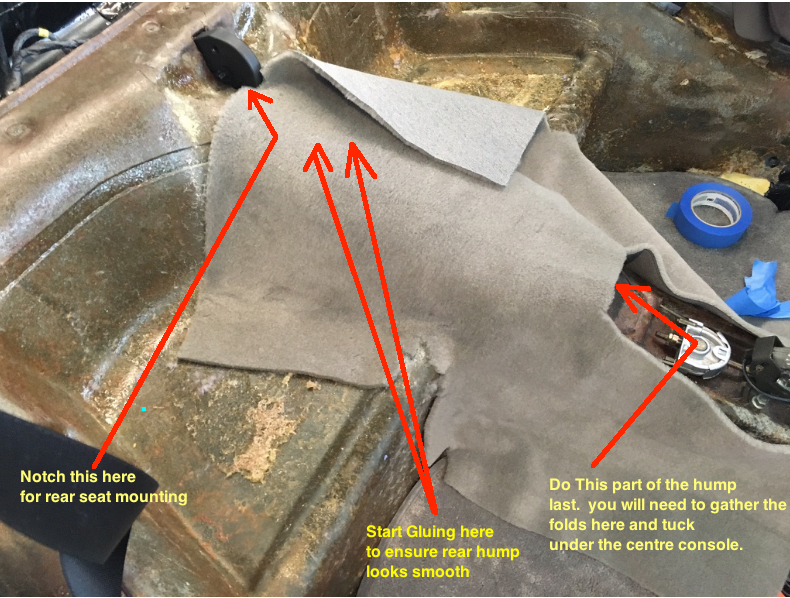
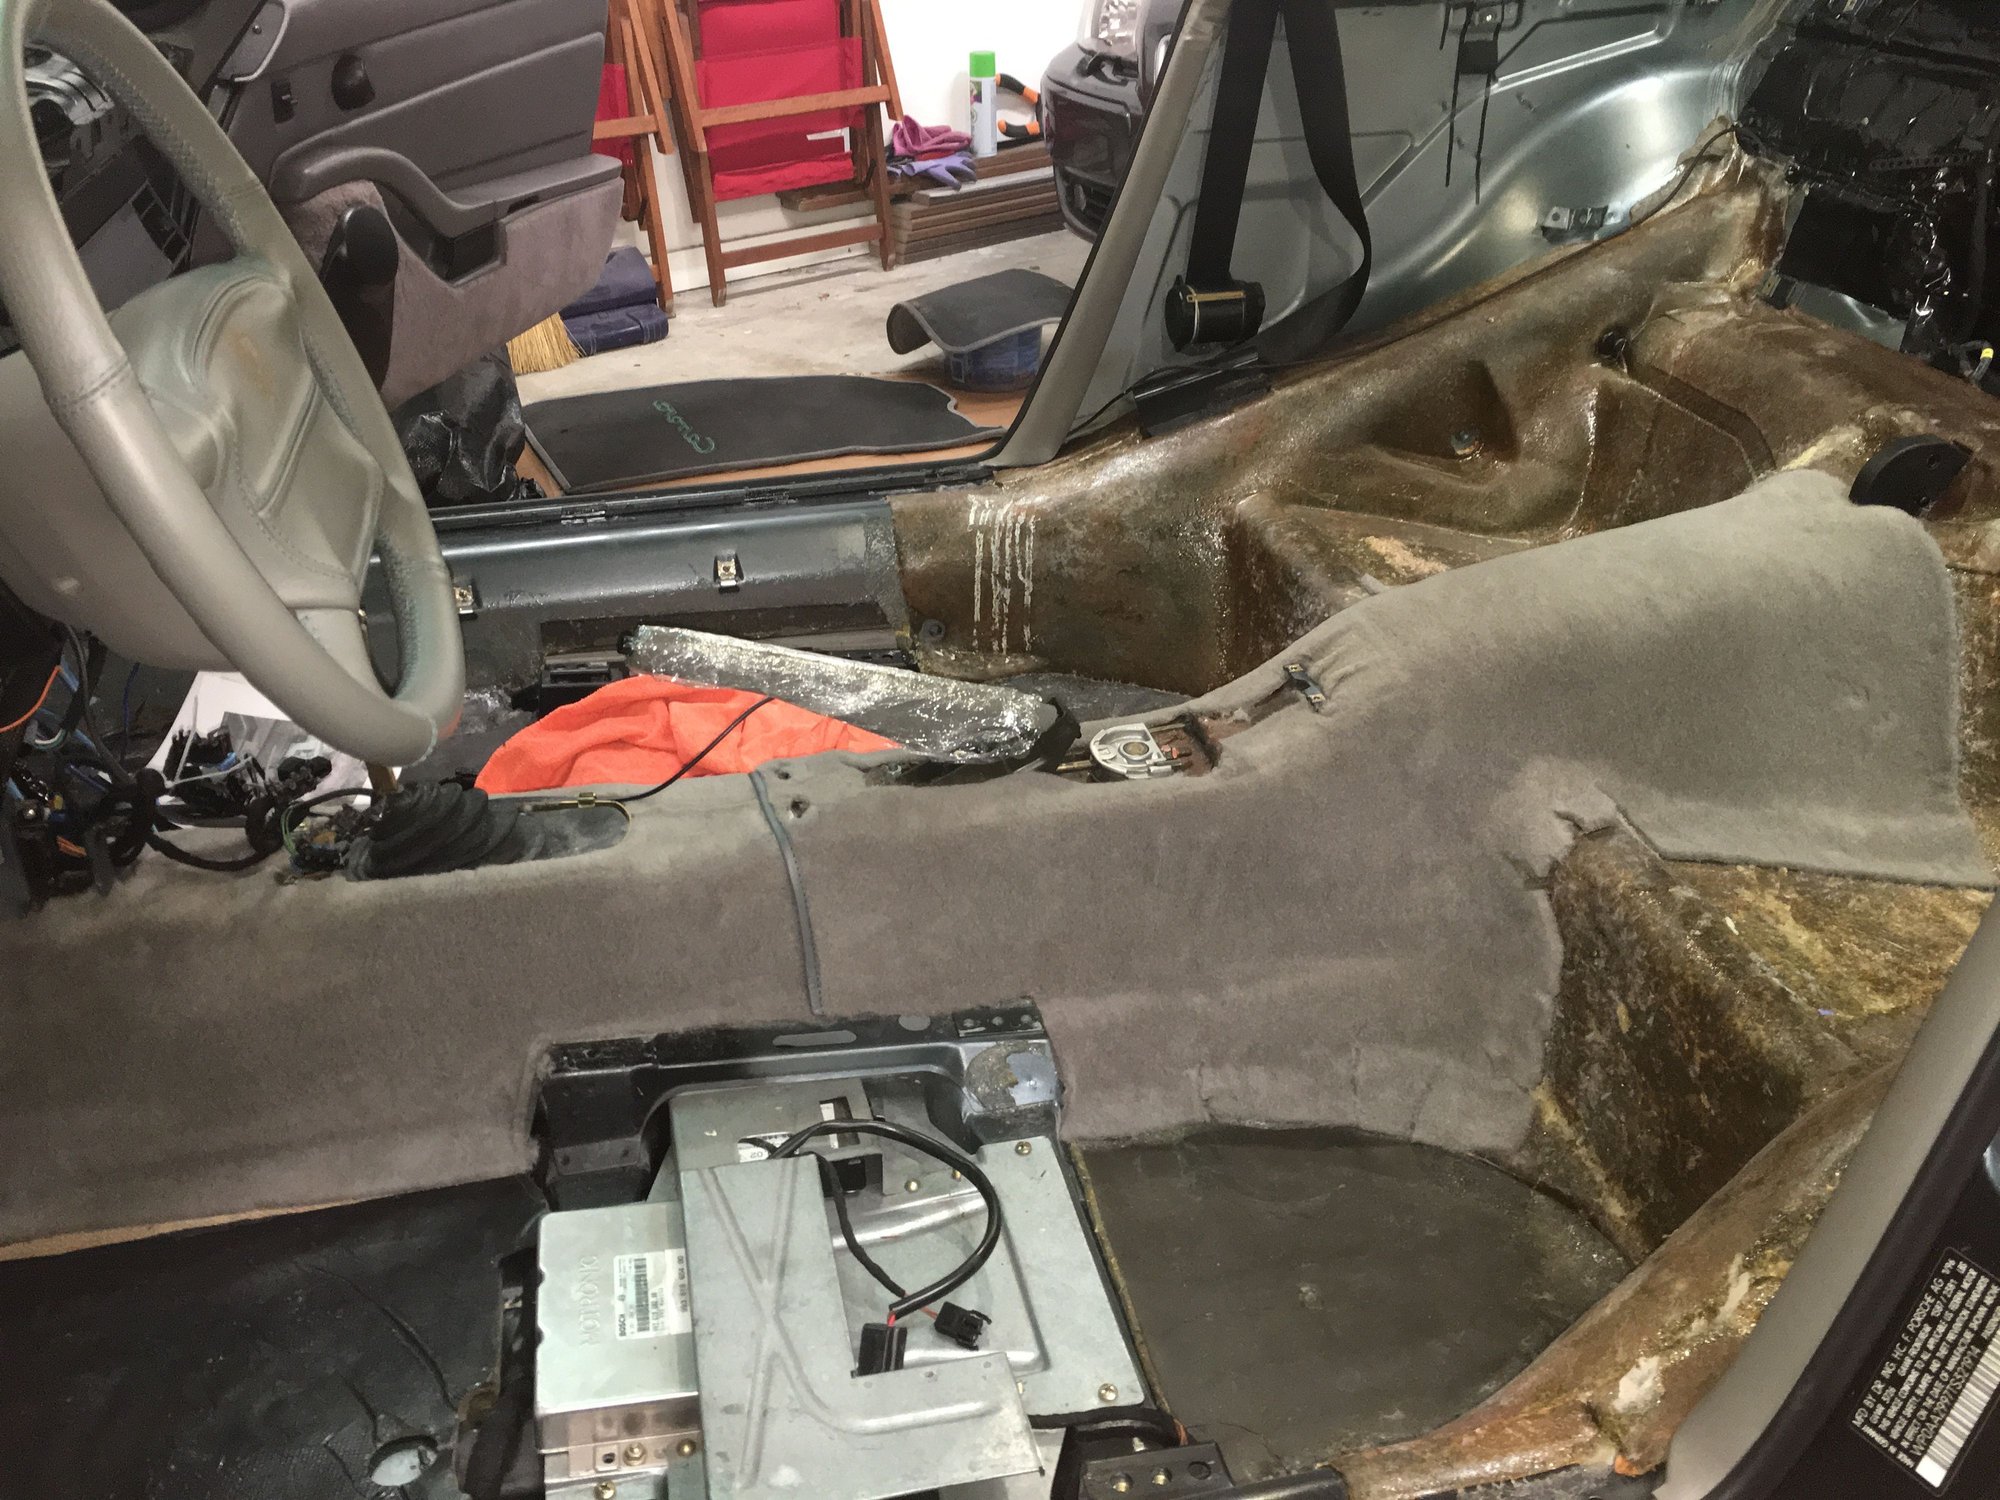
Anyways, I decided to start the carpet process with the rear transmission hump - I took some notes along the way, learning how to deal with stretching / gluing as I went. For me the carpet was super nerve wracking --- you are never really sure if you can get the carpet smoothly over a compound curve until you glue everything down.
After installing the rear transmission hump carpet, I went on and installed the carpet over the central tunnel. This was straightforward --- no compound curves to deal with at all.
The lesson I learned here though was to forget about trying to install the thing as one piece and wrestle the openings over the brake handle, stick shift, etc. Just cut the carpet in half lengthwise and install.
Also ---- I started from the rear of the central tunnel and went forward. As a consequence, my "accelerator foot vinyl protector" is a tiny bit out of whack. The next time I do this (which would be never) I would start from the front and work back, so that the vinyl protector is a little more straight --
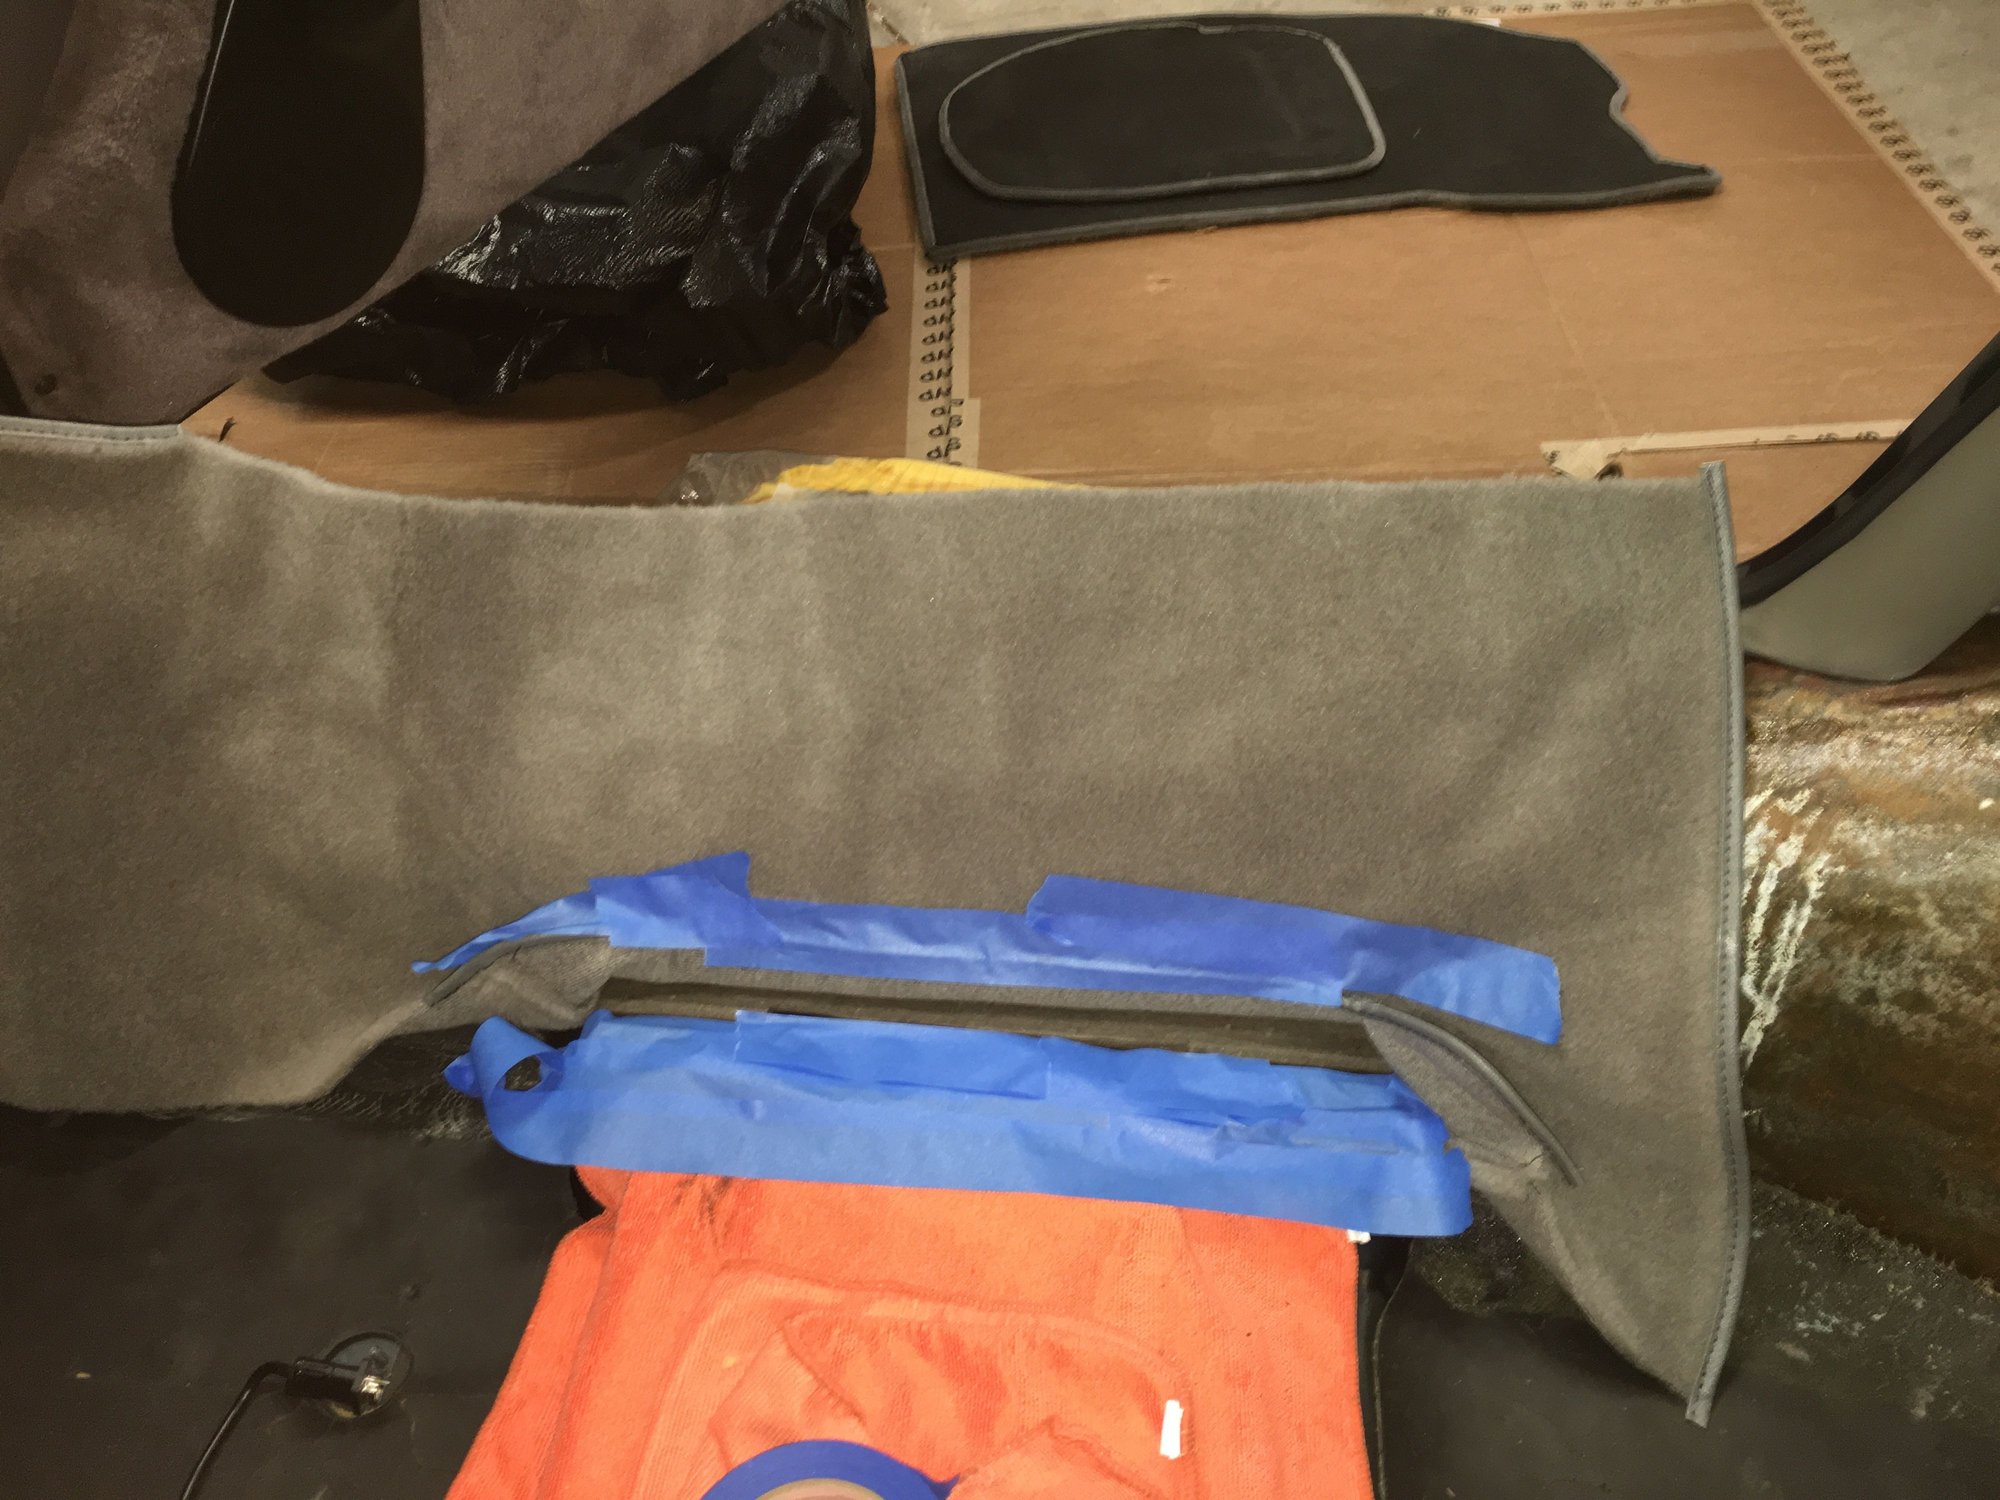
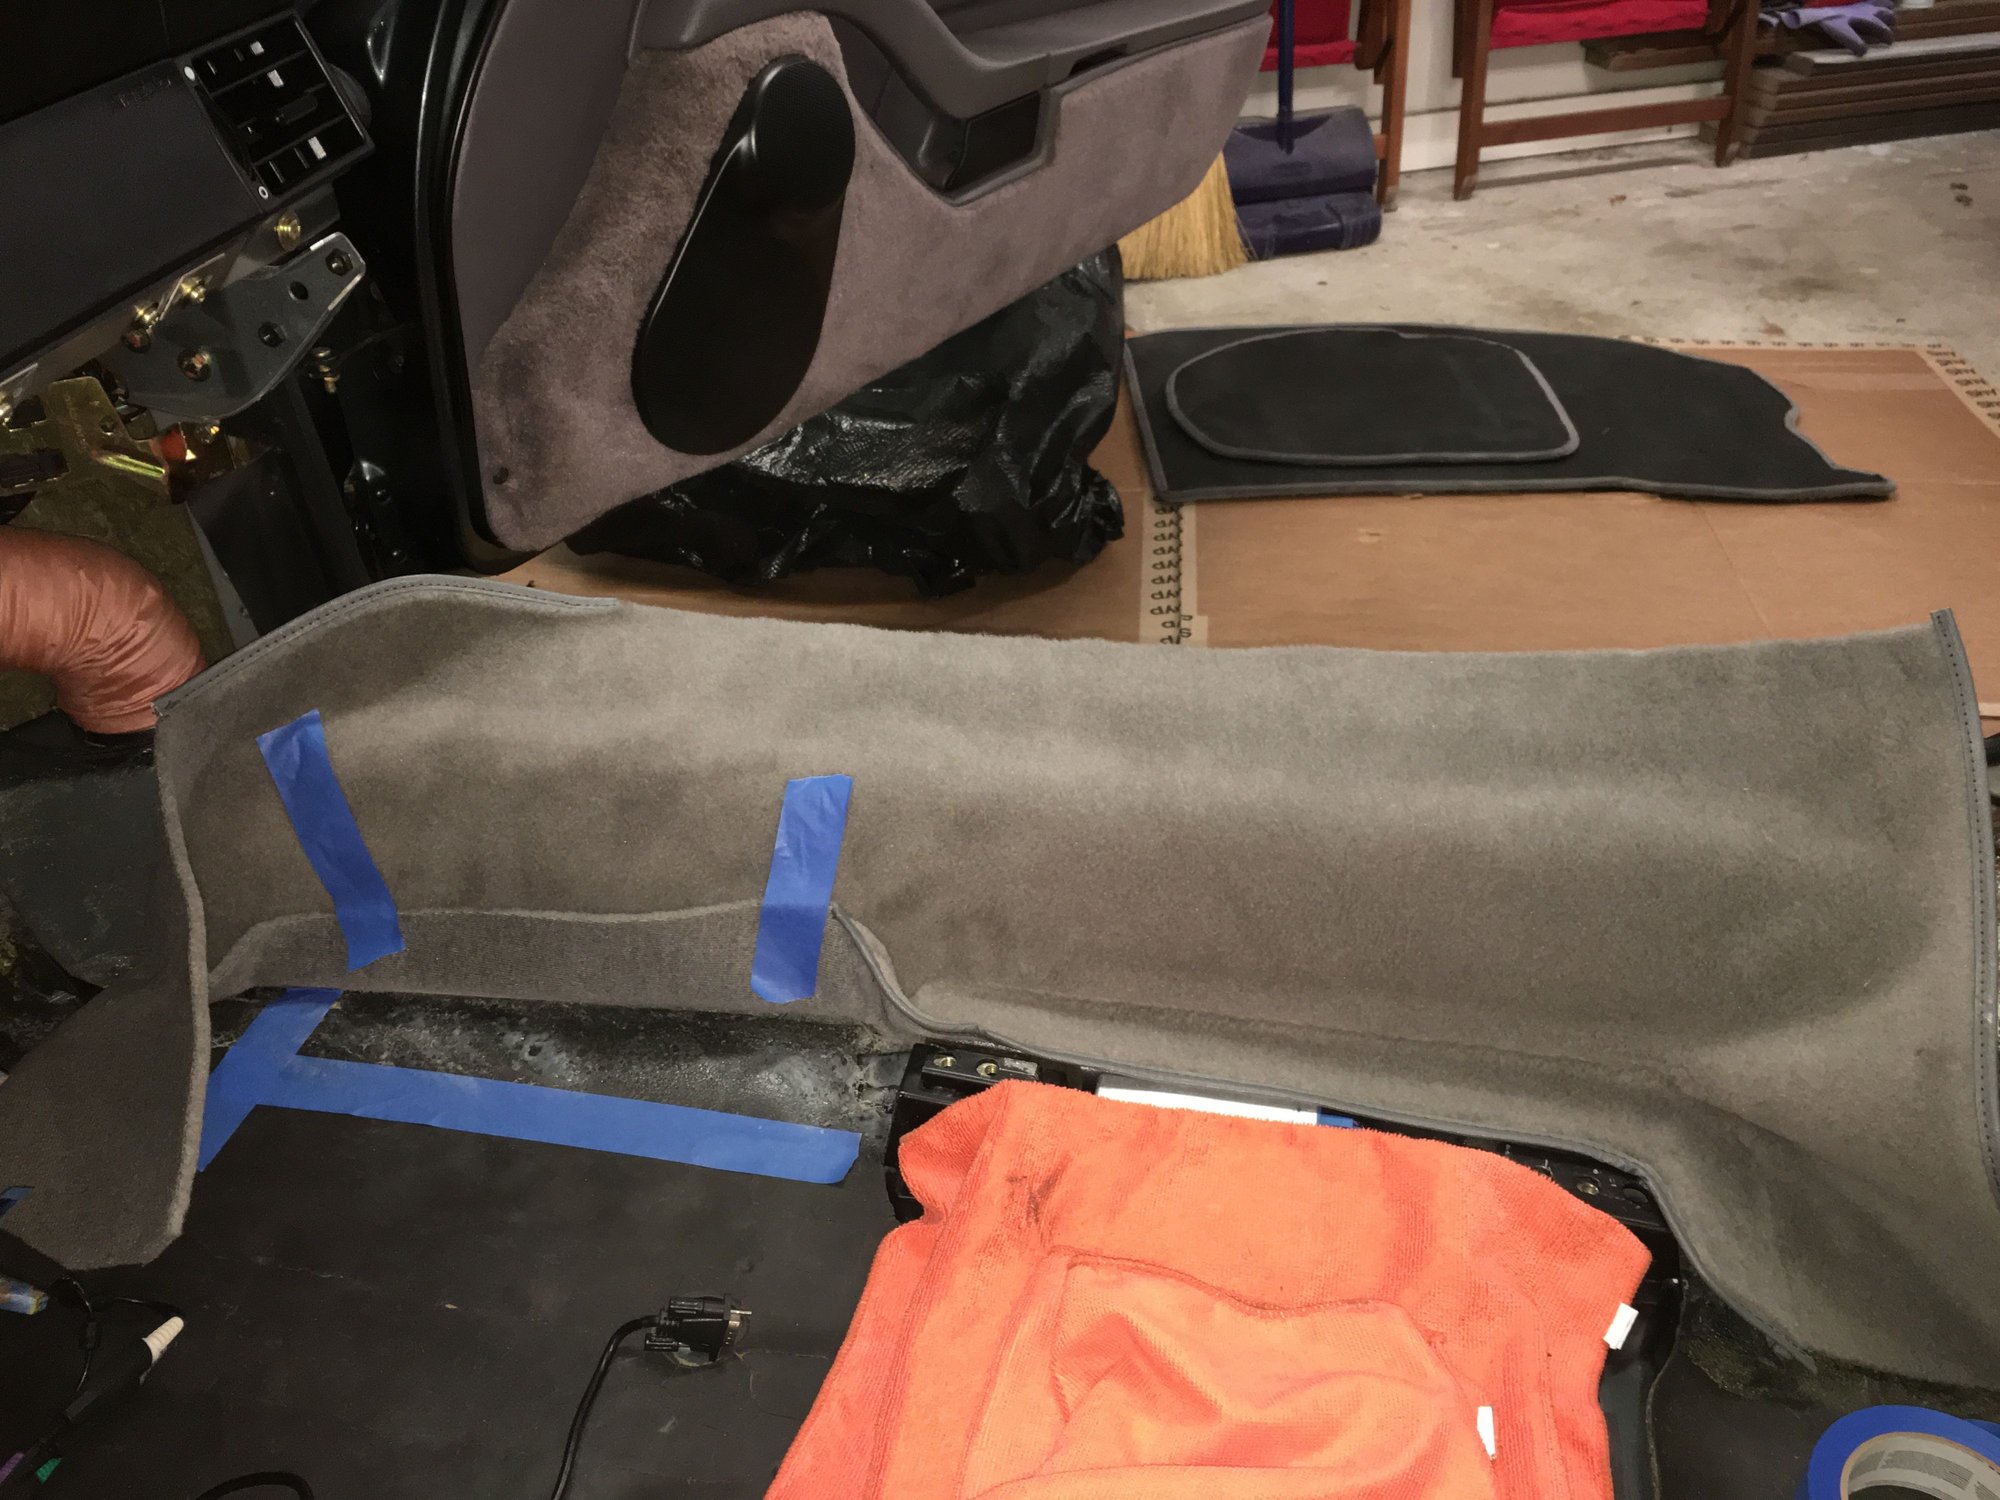
Next I started along the sides of the car. The carpet set for the sides of the car came in two pieces for each side - front and back. The front piece overlaps on top of the rear piece because the trailing edge of the front piece has a finished edge.
I was, however, reluctant to start with the rear piece and go on to the front piece because the rear has more compound curves --- I wanted more practice first before tackling the rear. So I installed the front pieces first, being careful not to glue down the rear 5 inches until after I installed the rear pieces.
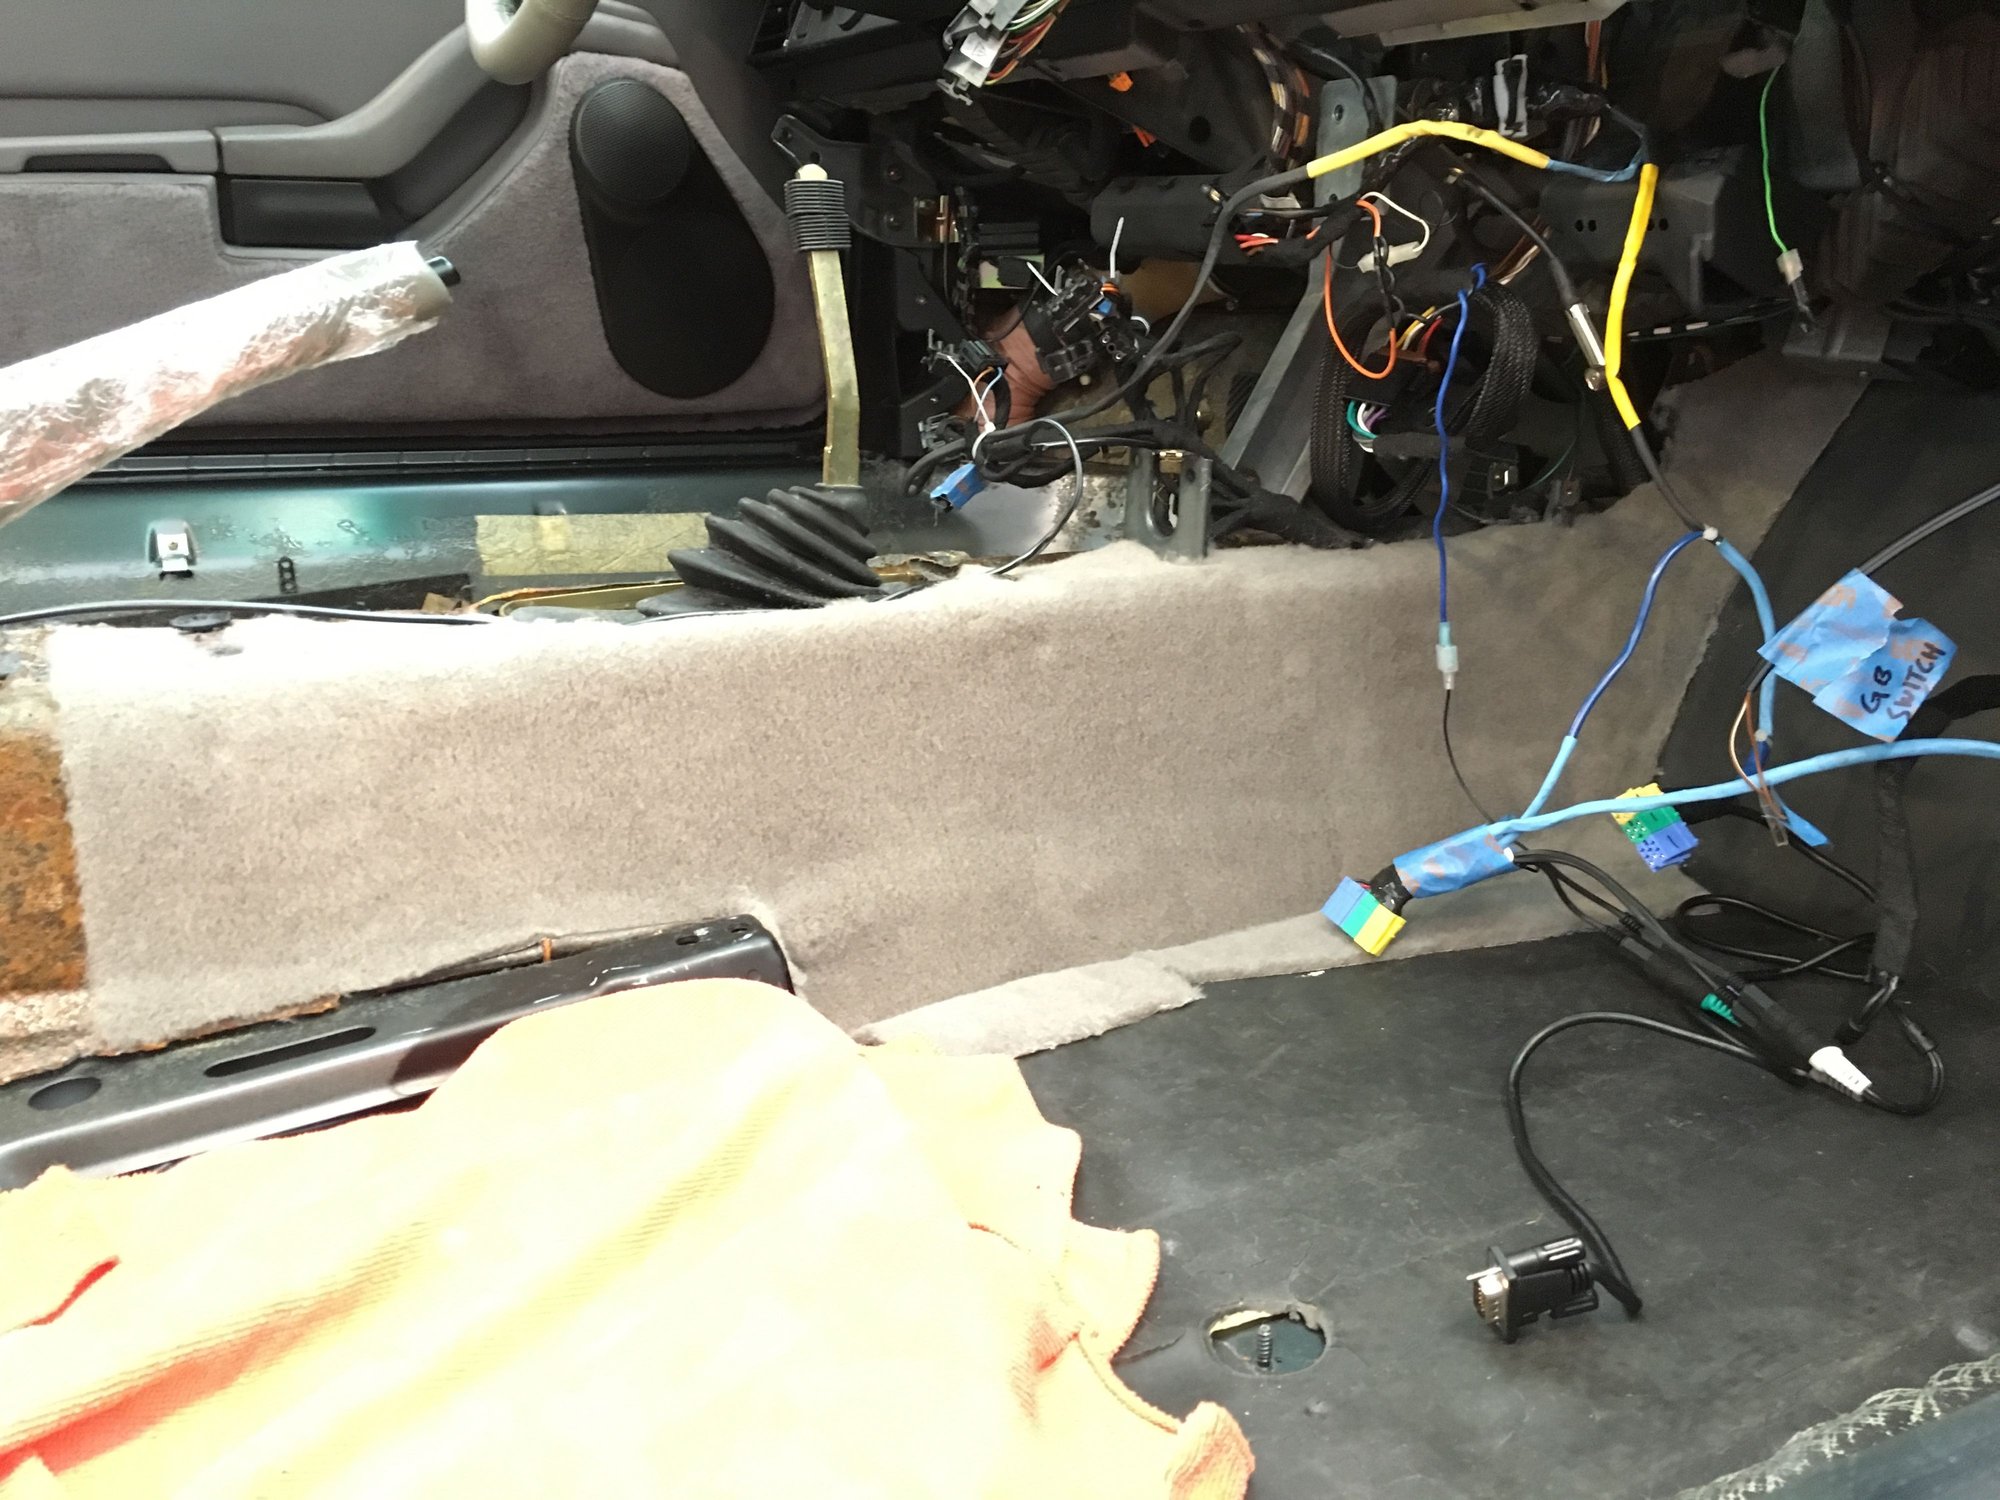
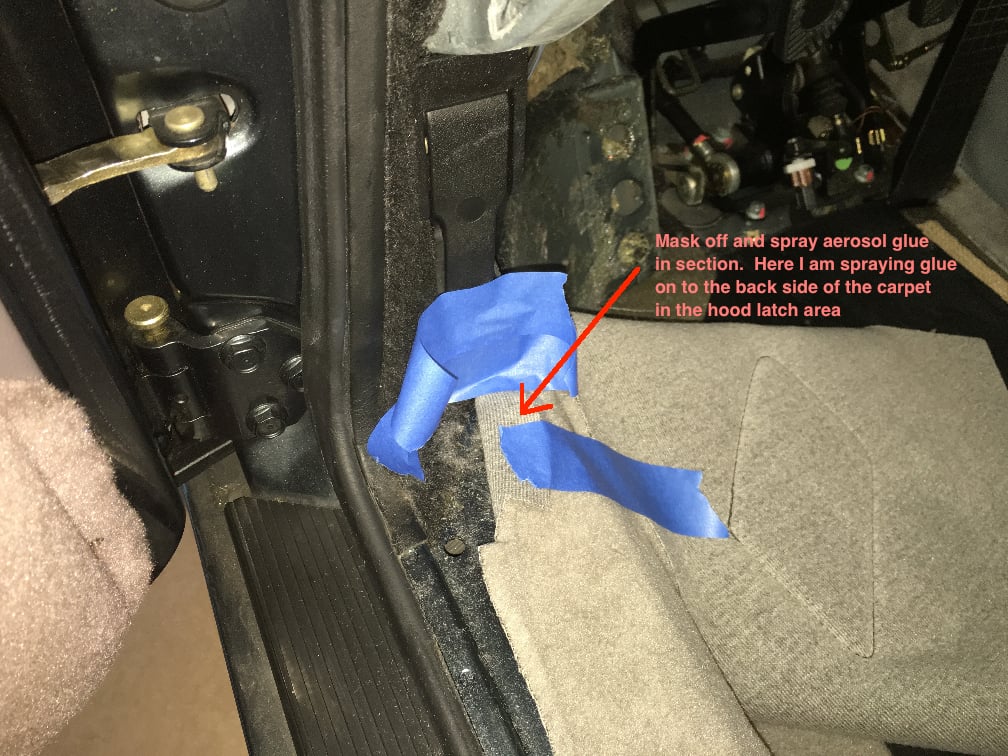
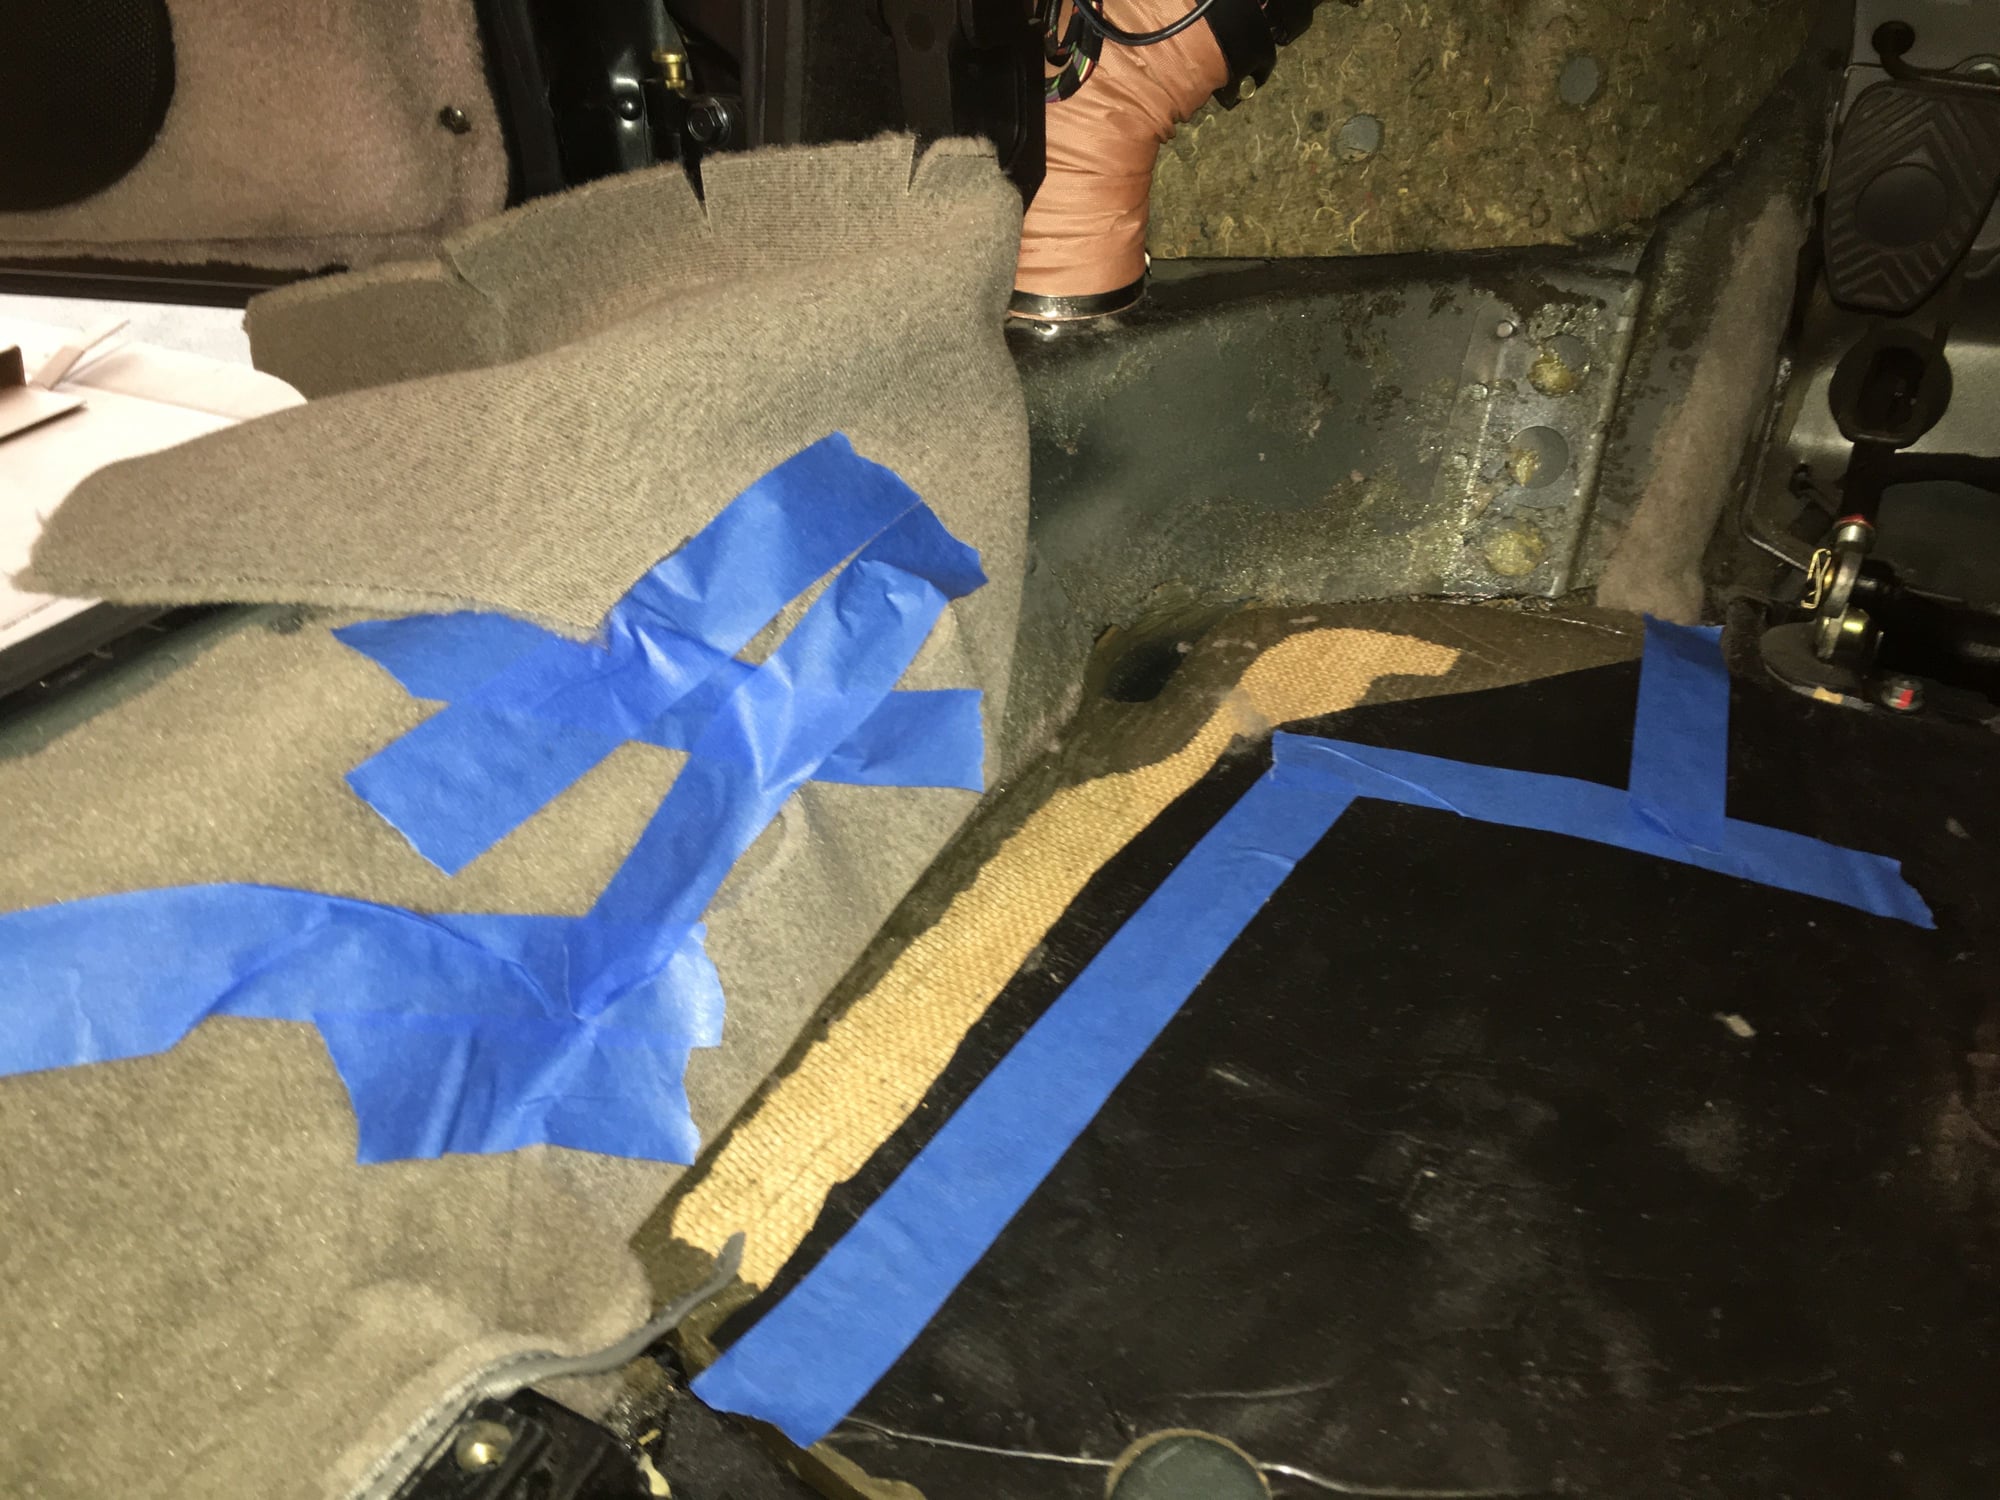
In the pictures you can see that I am methodically gluing the front pieces down little by little, using blue masking tape to control where the glue gets sprayed on to. After I glued the front pieces down, I trimmed the parts over the door sill. The wire that you see along the door sill is the wire for my rear fog lights.
ABOVE - I started by gluing down the section that brackets the seat mounting provisions, because the finished edge of the carpet frames the seat mounting --- no way to trim this!
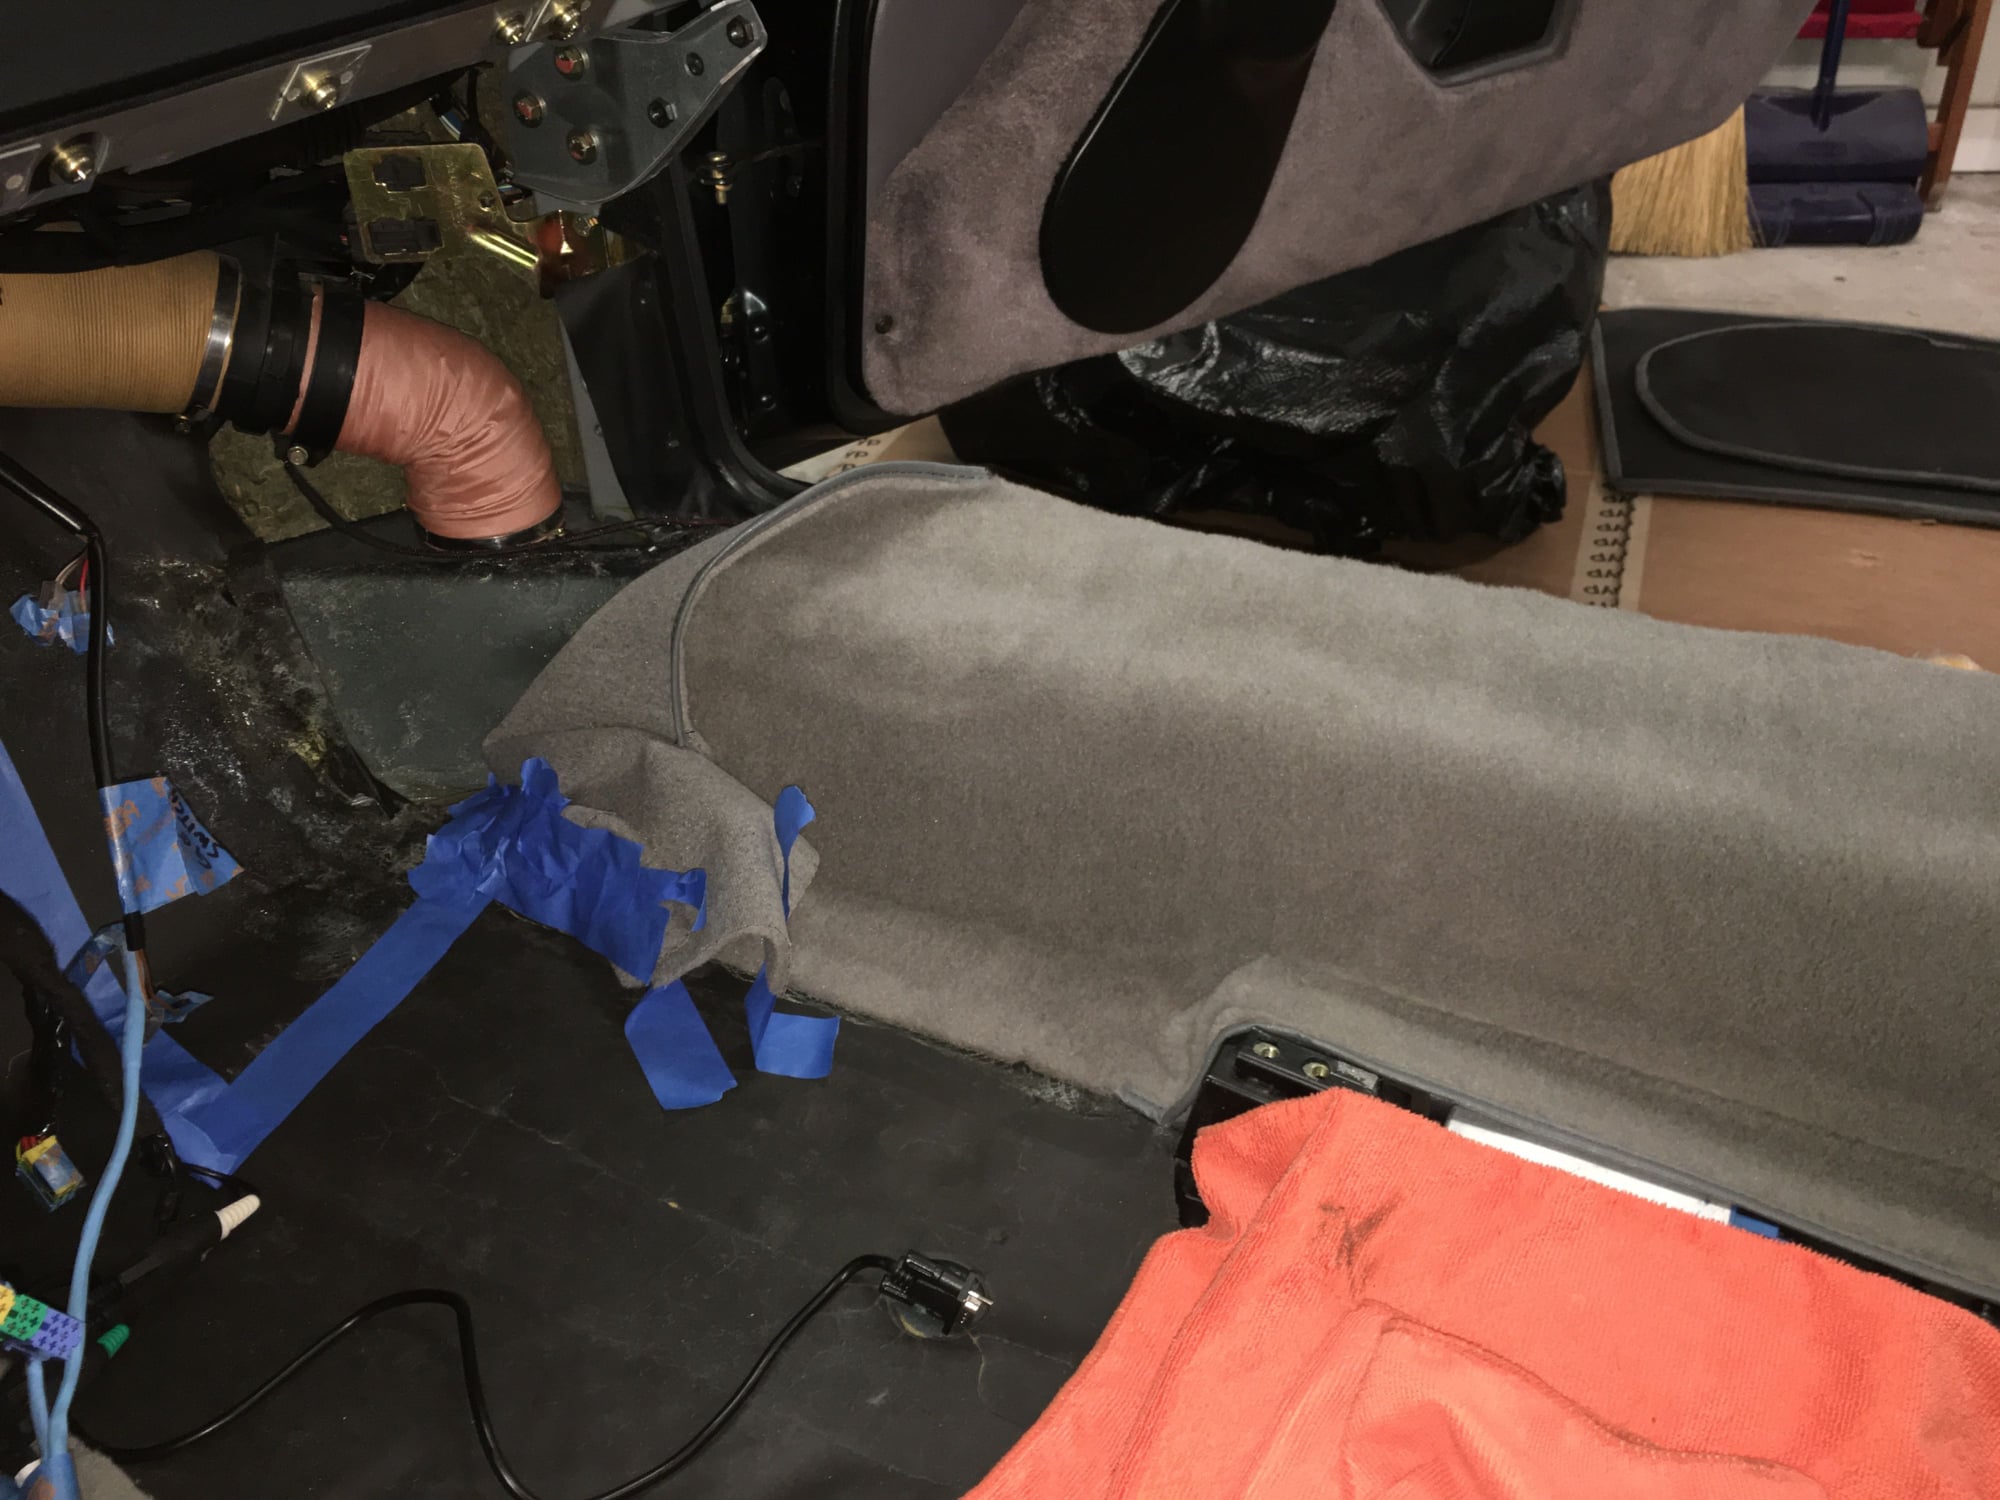
ABOVE - then I moved forward --- you can see the glue (the white stuff) I have sprayed here.
ABOVE - moving more forward.
ABOVE --- looking pretty good. All the OE glue removal I performed on the door sills has paid off --- the carpet looks very even --- here it is doubly important because there is no carpet pad under the carpet on the door sills.
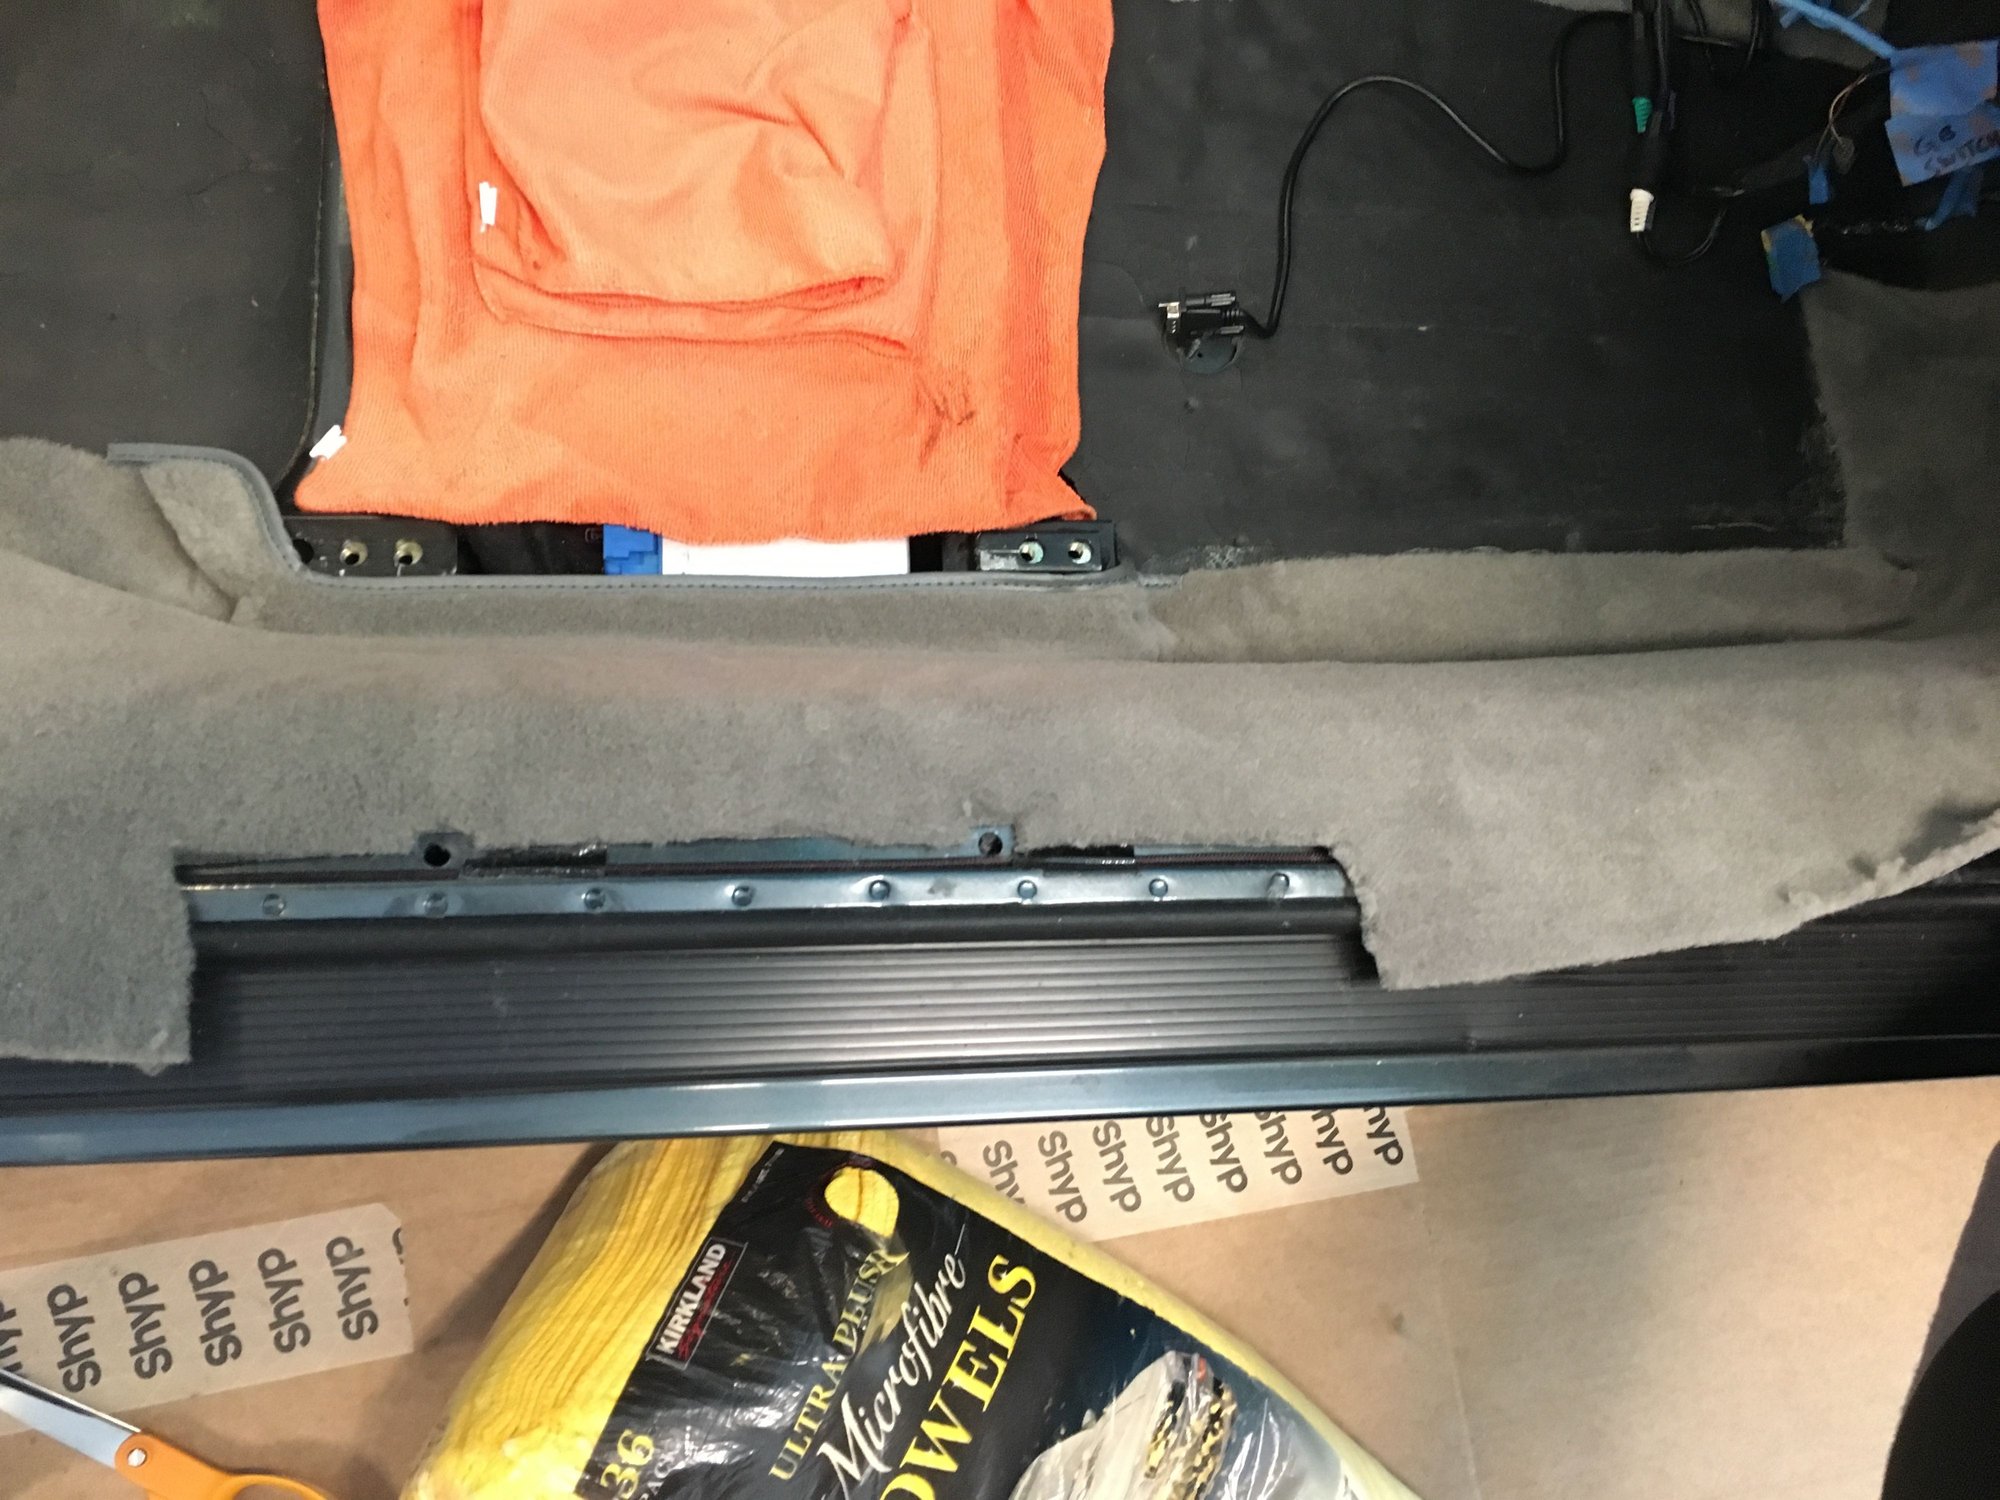
ABOVE - I am trimming the carpet to fit the door sills
ABOVE - More trimming and gluing.
ABOVE - Passenger's side all done (except for the rear 5 inches which will overlap the rear carpet)
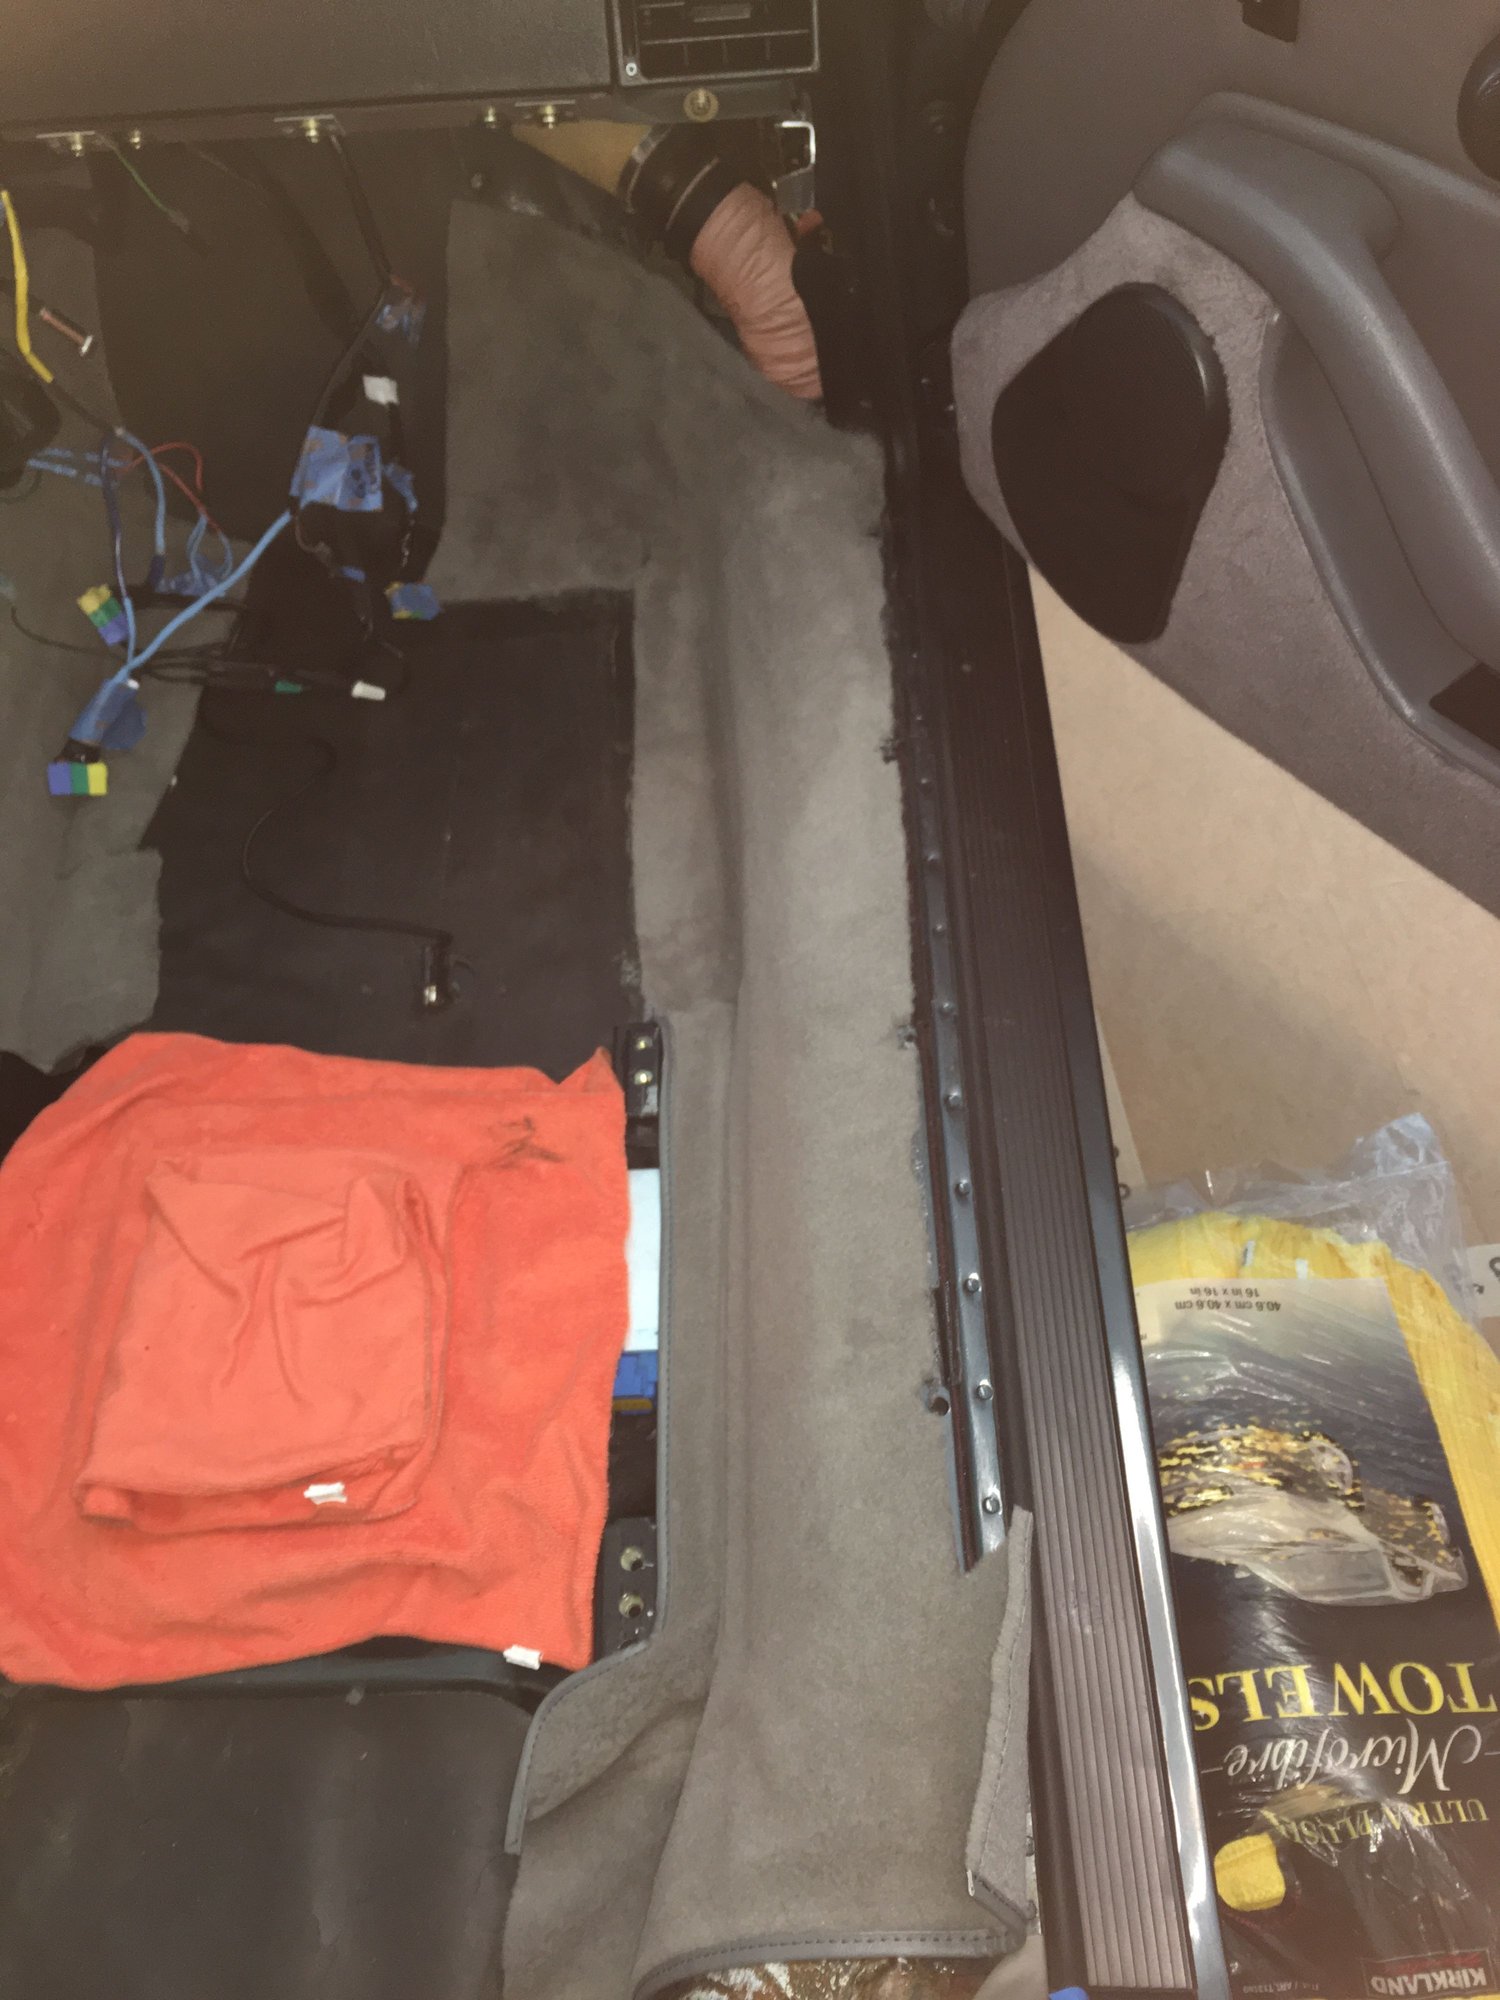
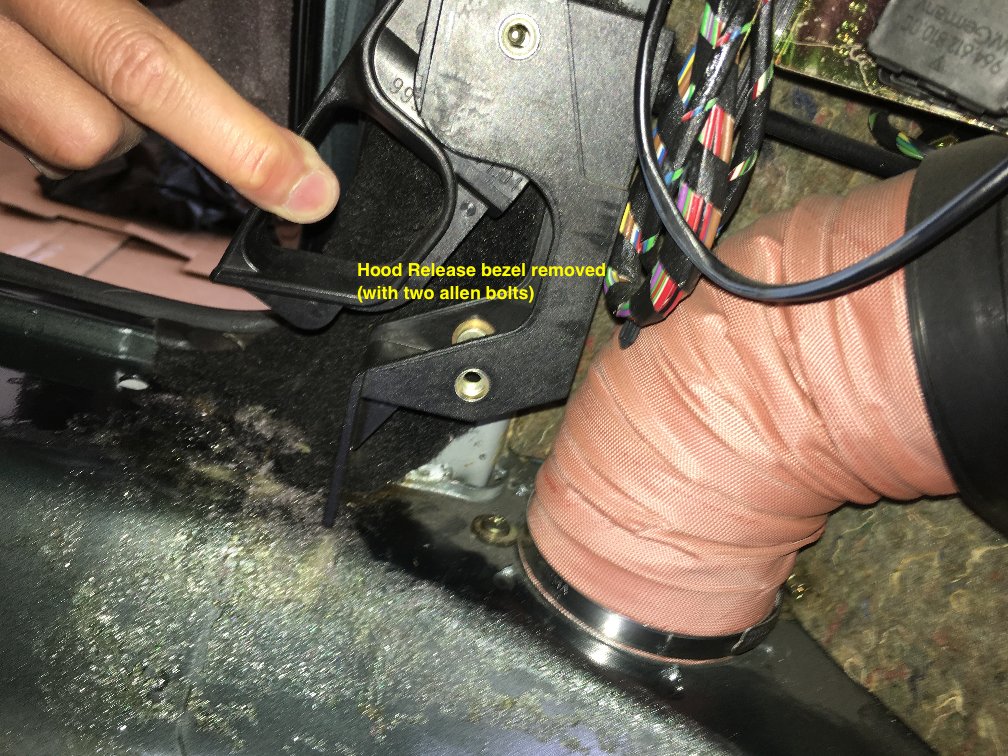
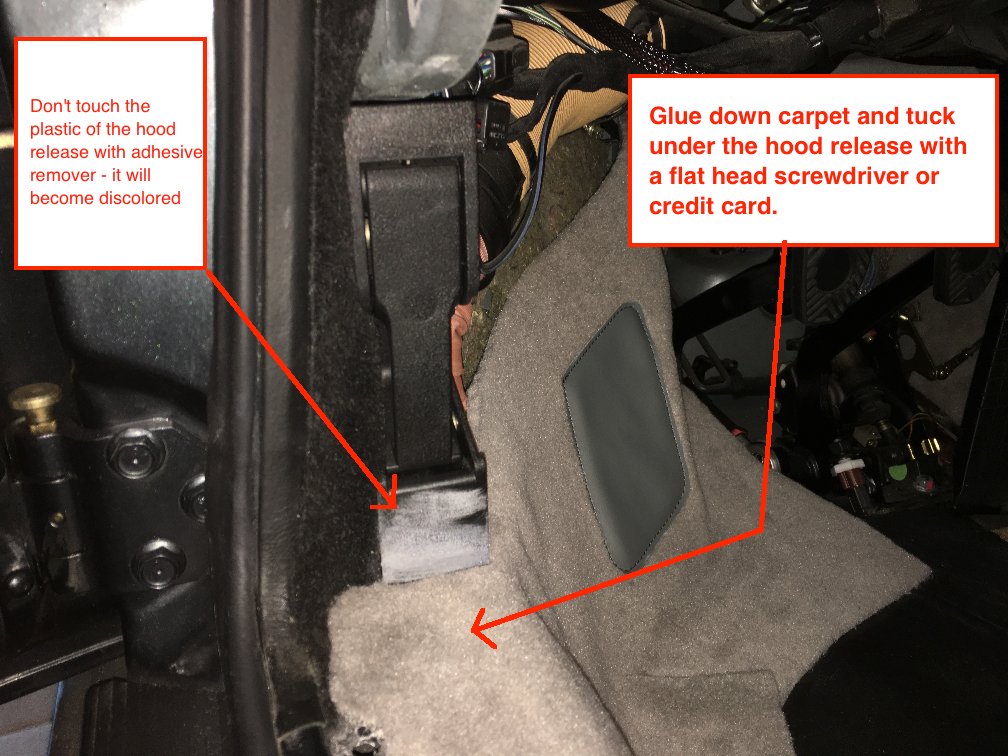
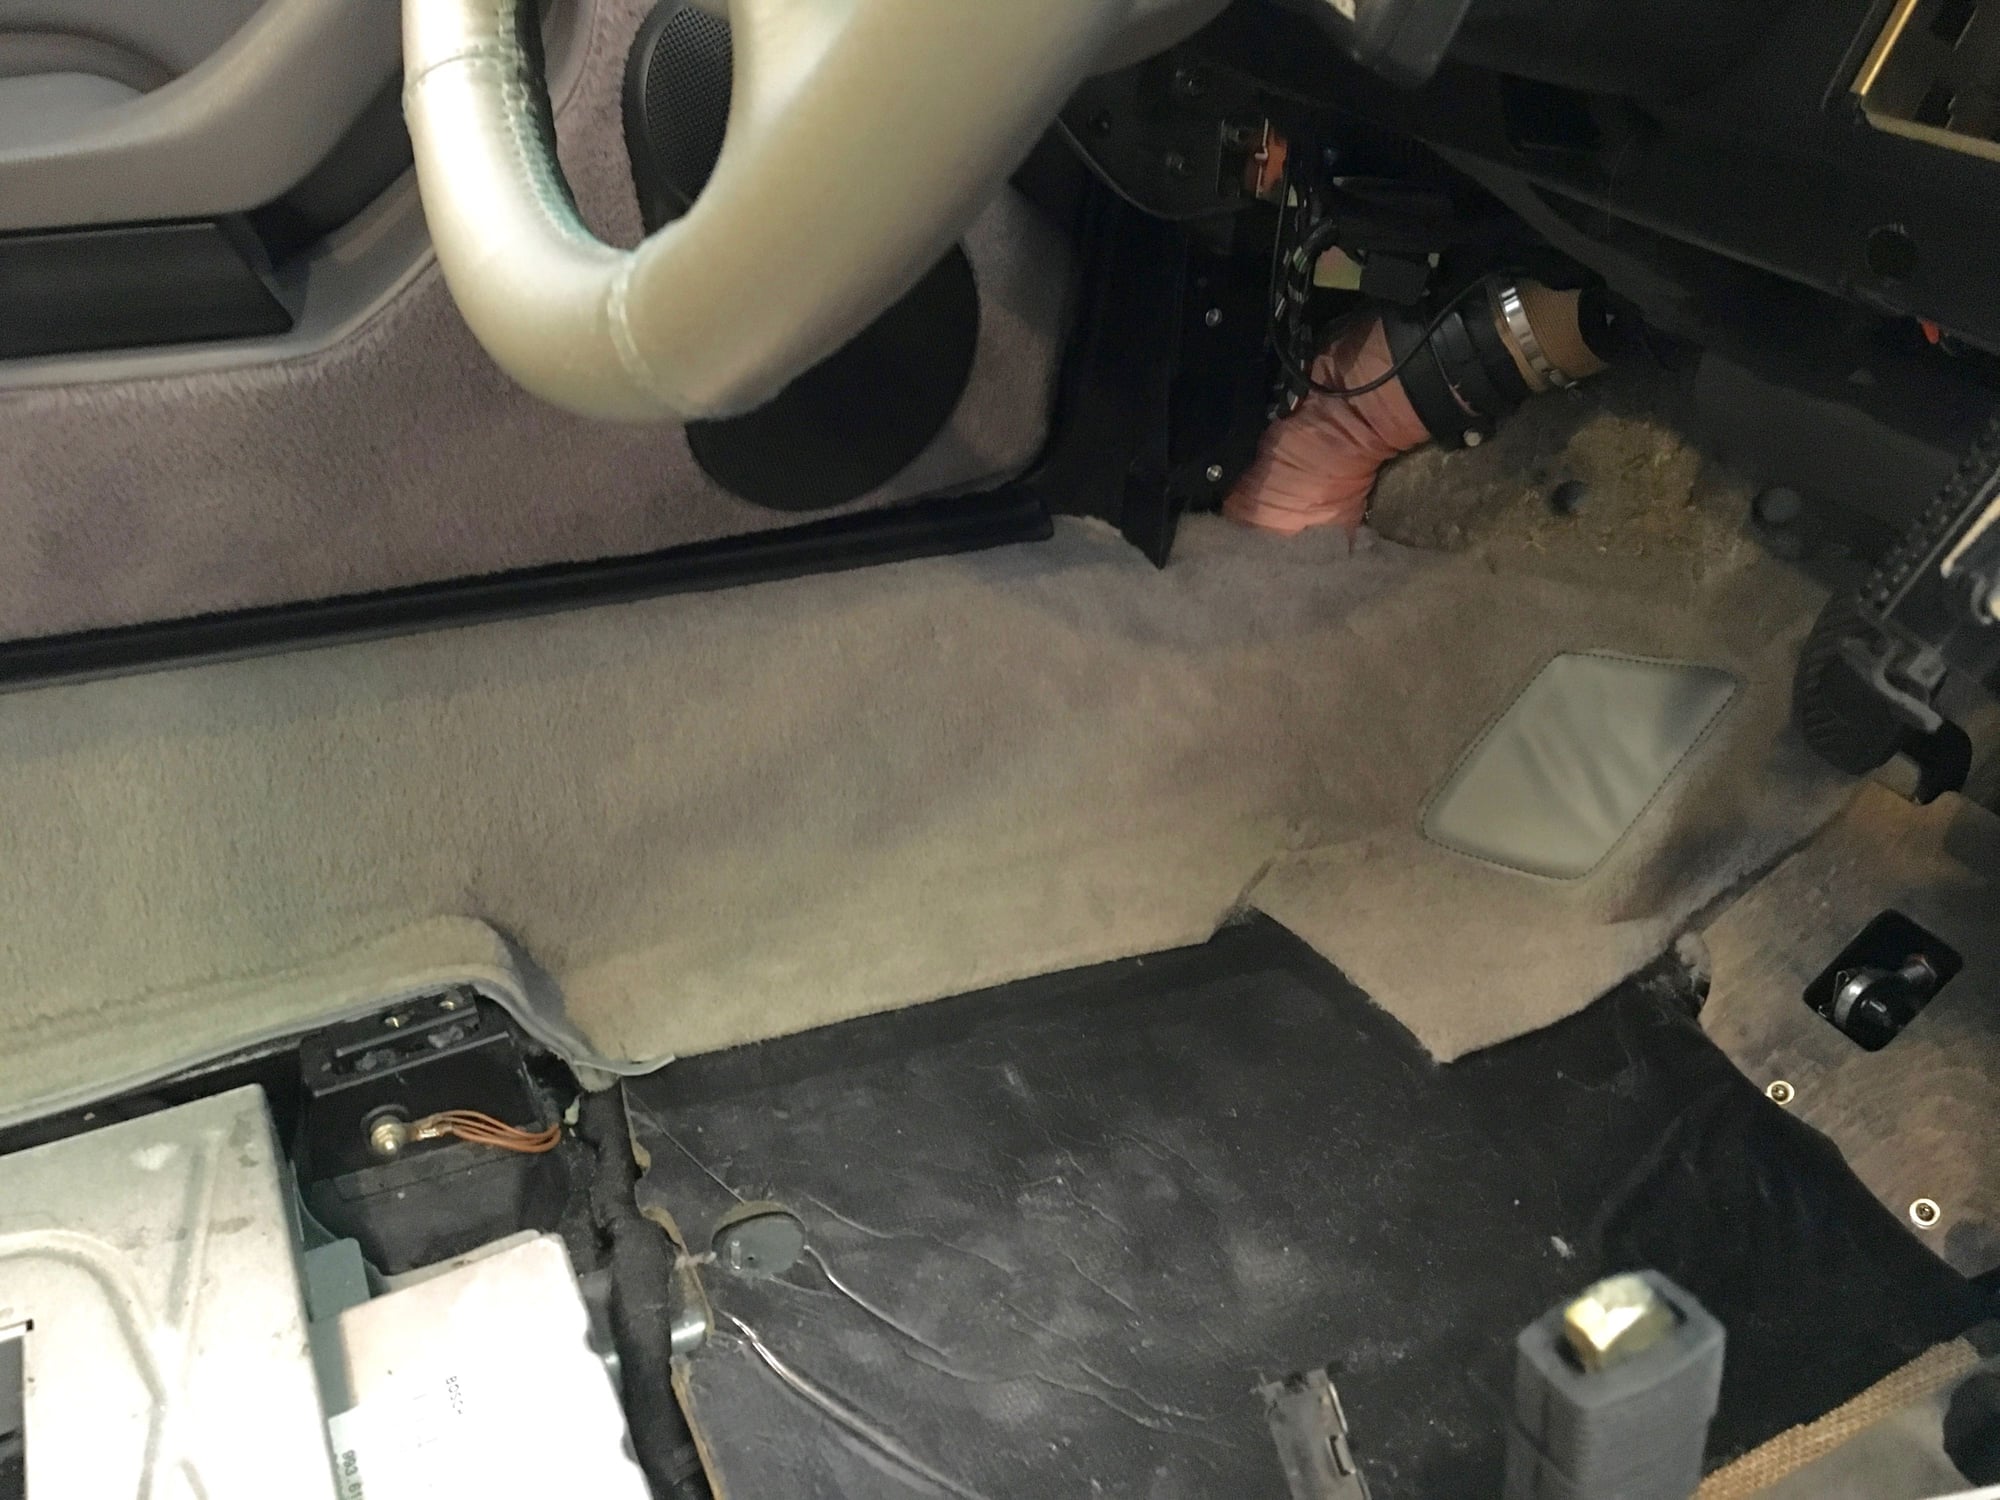
Here is something I learned while installing the carpet on the Driver's side --- you don't actually need to take the entire frunk release mechanism out of the car to install the carpet. As long as you take the bezel off the mechanism, you can tuck the carpet underneath!
Just be careful - DO NOT TOUCH THE PLASTIC OF THE FRUNK RELEASE WITH ANY KIND OF SOLVENT!
Anyways the same technique for me applied to the driver's side as it did for the passenger's side --- start with the finished border that frames the seat rails.
To each his own, of course, but those seats do not fit the 993 interior or exterior design. The 993 interior is full of curves -- the door pulls, the lower dash, the center console, the speaker pods, the shape of the seats and especially the center inserts of the seats, which have curved stitching. Everything works together as sleek and curved, like the design of the 993 exterior. Of course, the interior materials are shabby -- just plastic and vinyl -- but the design itself is attractive. And now, surrounded by all those curves, you've put in seats that are square and chunky. They just don't work together.
To each his own, of course, but those seats do not fit the 993 interior or exterior design. The 993 interior is full of curves -- the door pulls, the lower dash, the center console, the speaker pods, the shape of the seats and especially the center inserts of the seats, which have curved stitching. Everything works together as sleek and curved, like the design of the 993 exterior. Of course, the interior materials are shabby -- just plastic and vinyl -- but the design itself is attractive. And now, surrounded by all those curves, you've put in seats that are square and chunky. They just don't work together.
Appreciate your view. Hopefully you can derive some entertainment value from this thread, if only to see what challenges I had to solve for in the actual mechanics of carpet gluing and fitting interior pieces which had leather applied to them ---- this is actually a big deal on vinyl cars because the leather has a material thickness much greater than the vinyl so everything changes! All the tolerances change, and even little things like the door handles need to be adjusted because otherwise with thicker interior fittings, too much preload is placed on the door handle mechanism!
If we take an expanded view and look at the progression of the SC, 964, 993, I think one will find that the interiors are always full of curves and lines. The 993 ends up being much more linear on the inside than you might think.
Check out the 993 vs 964 pictures below.
Porsche used very linear seat inserts for decades before they moved to a softly curving seat insert in the 993.
Every since 70s, the door panels have been super linear. the upper door piece is linear. The panel the tweeter sits on is linear. The insert is linear. And then the map pockets are linear. Then the lower dash itself is linear. With the 993 Porsche added one curve on the door panel though, which is the actual handle one uses to pull the car.
I think about these things when grinding through daily work-day traffic. :-)
You have a lot more energy than I do! Bravo! Makes me want to take my shoes off before I get in my car so the carpet will last forever!
FWIW good choice with the color change on the carpet.
You have a lot more energy than I do! Bravo! Makes me want to take my shoes off before I get in my car so the carpet will last forever!
FWIW good choice with the color change on the carpet.
Thanks guys! Foolhardy is more like it. :-)
Some further progress. However I find everything is always 2 steps forward and 1 step back. Looks like I chewed up some wire taking out the lower dash and now my 9PDT switch that switches between the Yatour and the CDC changer doesn't work. Sigh.
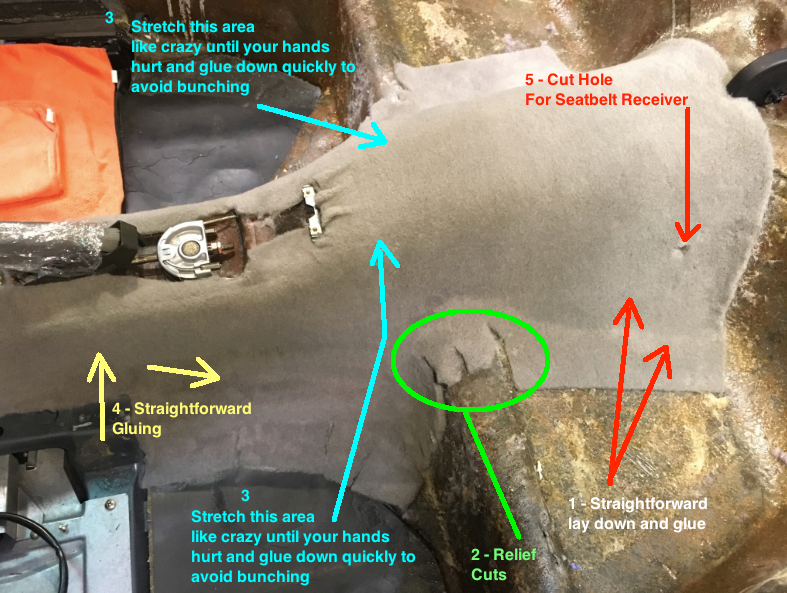
Well, the carpet is looking nice, if I might say so myself. The sides of the rear are little tricky with the concave bits where the seat belts bolt into the body shell. I had to glue that section twice --- the second time with stronger 3M Super 90 (instead of my regular Super 77).
I lay the rear cushions on the rear area just to test for color match --- it is close.
The door panels in these pictures are still the original classic grey.

 04-10-2016, 02:42 PM