When you click on links to various merchants on this site and make a purchase, this can result in this site earning a commission. Affiliate programs and affiliations include, but are not limited to, the eBay Partner Network.
If your window does not stay lowered when your door is open, chances are that a switch within the door latch has gone out. This is a detailed procedure to change the door latch.
Difficulty: 3/5
Time: 1hr-1.5hr
Tools used: (If you don’t have the following, the links are to Amazon)
8mm XZN Bit Socket (I used VIM Tools Triple Square/XZN bit sockets. They are the OEM for MAC’s triple square sockets are very high quality for a fraction of the price)
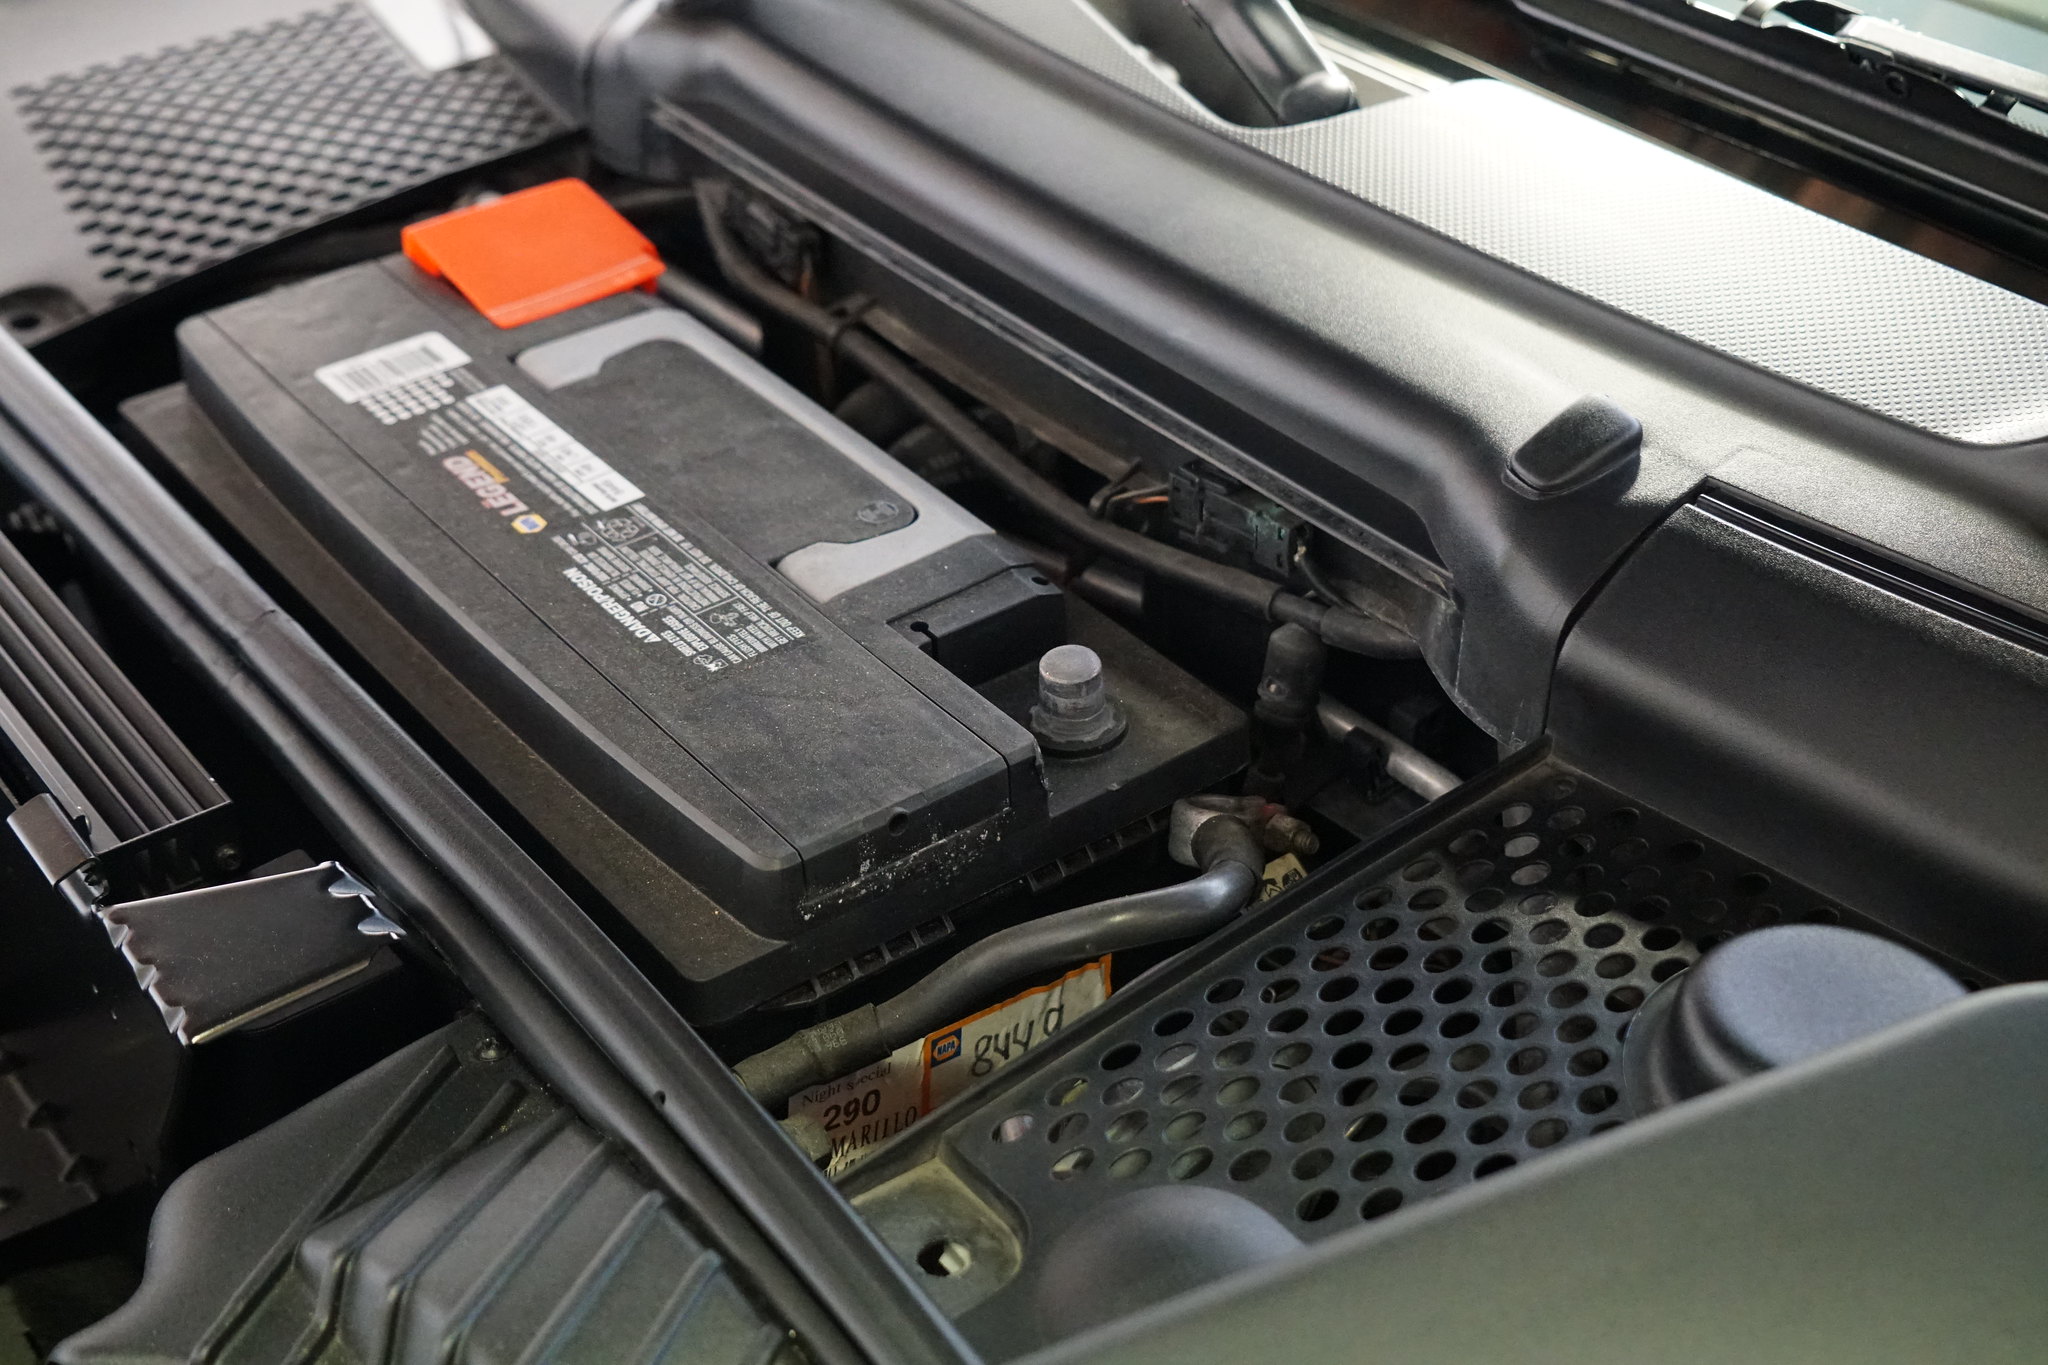
1. Disconnect Battery. This isn’t super necessary, but we will be disconnecting several electrical connectors. (Better safe than sorry!) You will need a 10mm socket for this.
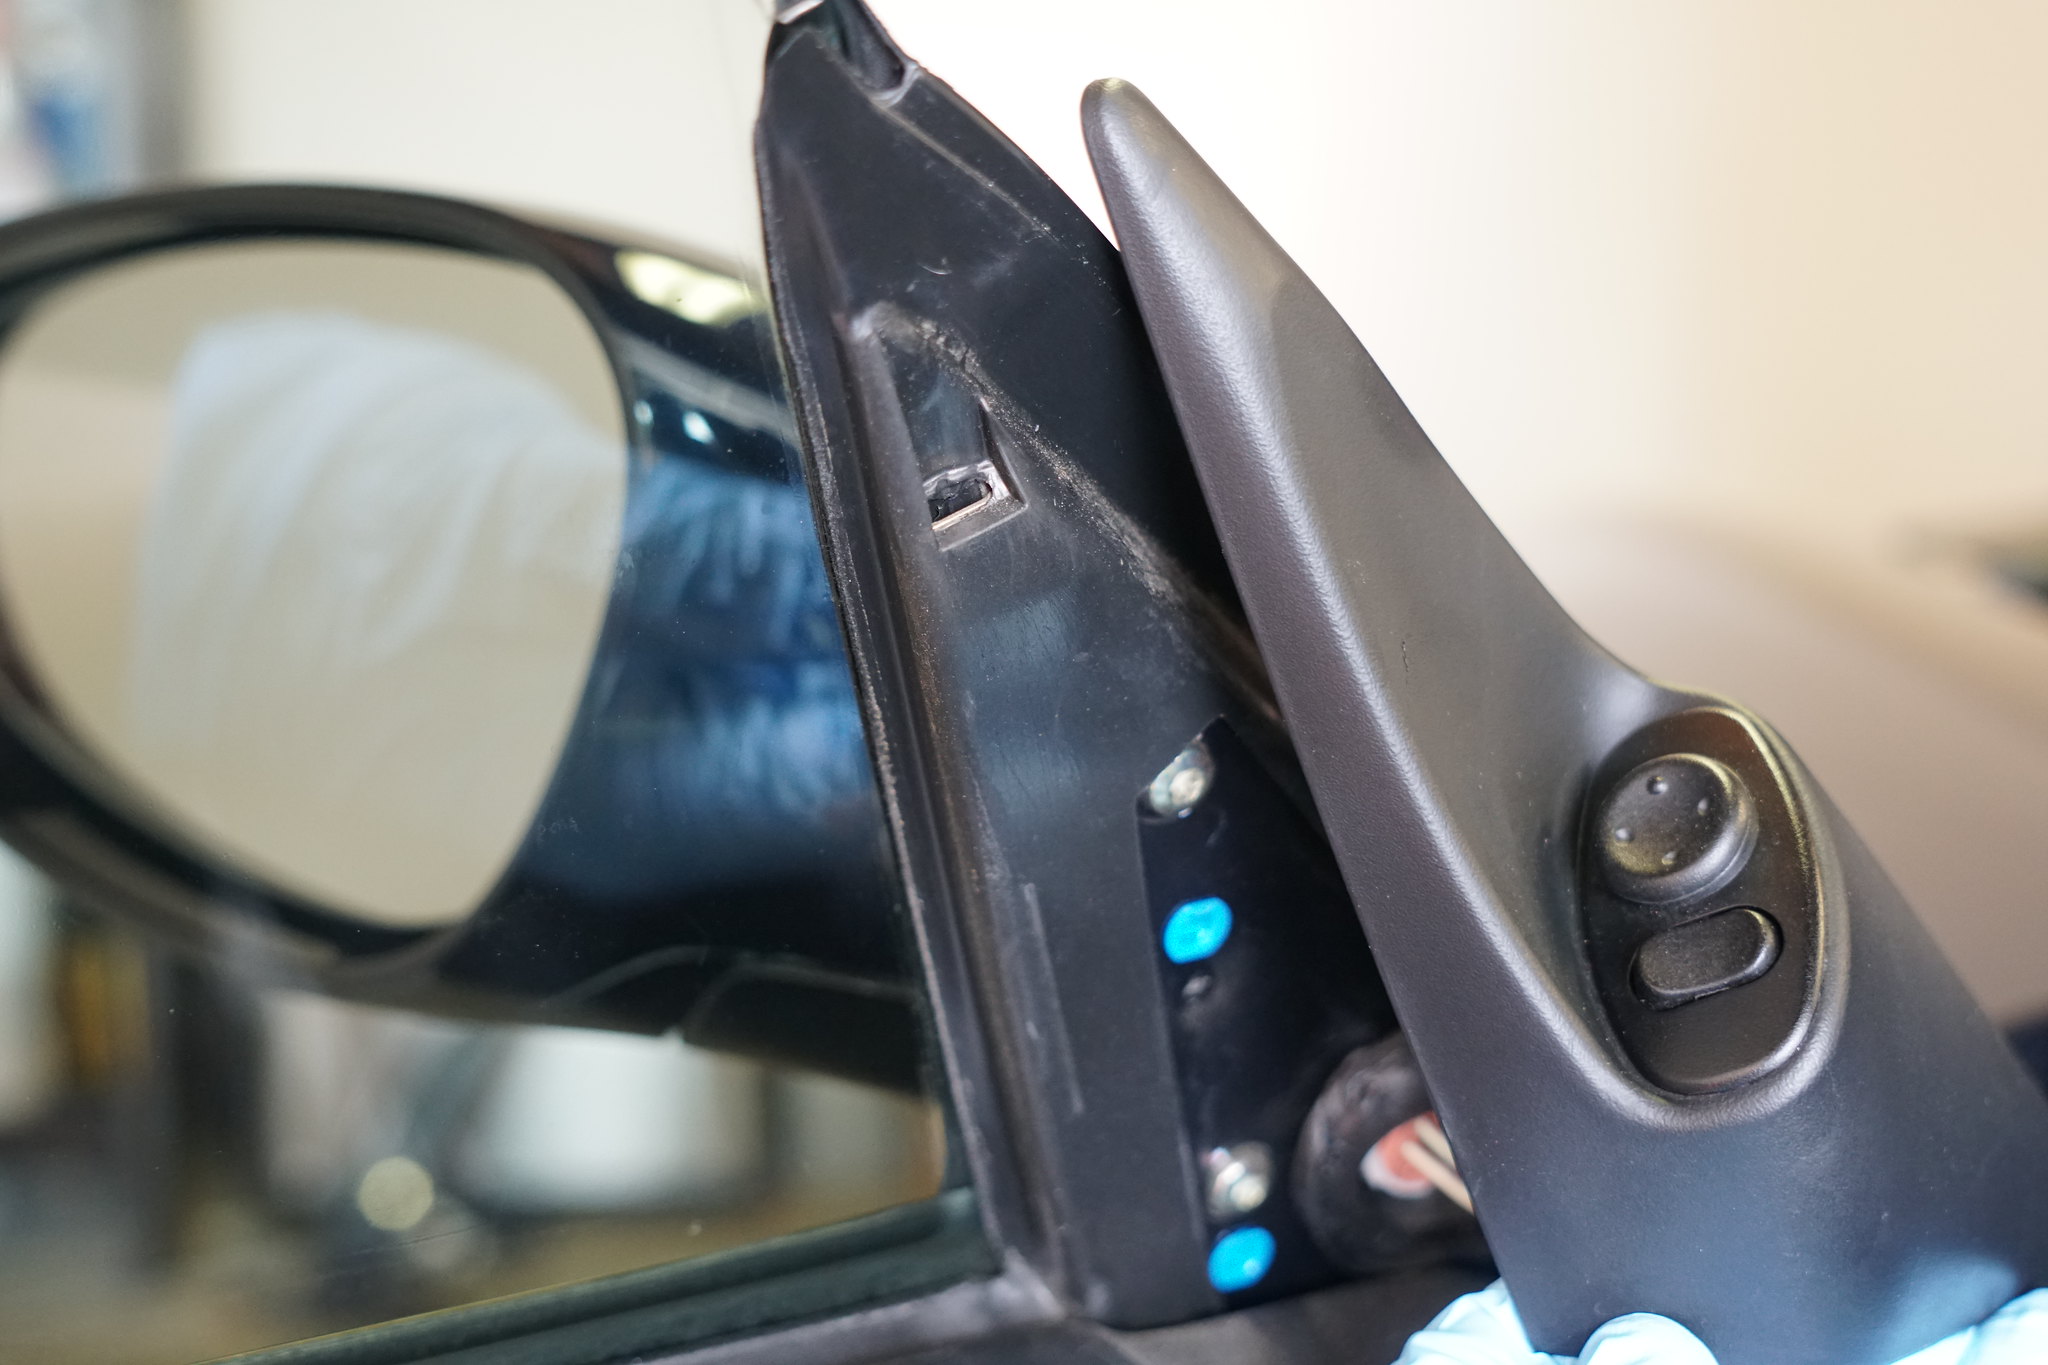
2. Remove interior mirror trim with a plastic panel tool. You will want to pry outwards on the bottom, then push up.
If you are removing the driver side, you will have to remove an electrical connector. You don’t have to do this, but I didn’t want the piece dangling and possibly getting scratched. Just note you have to lift two somewhat hidden prongs before trying to unplug the connector.
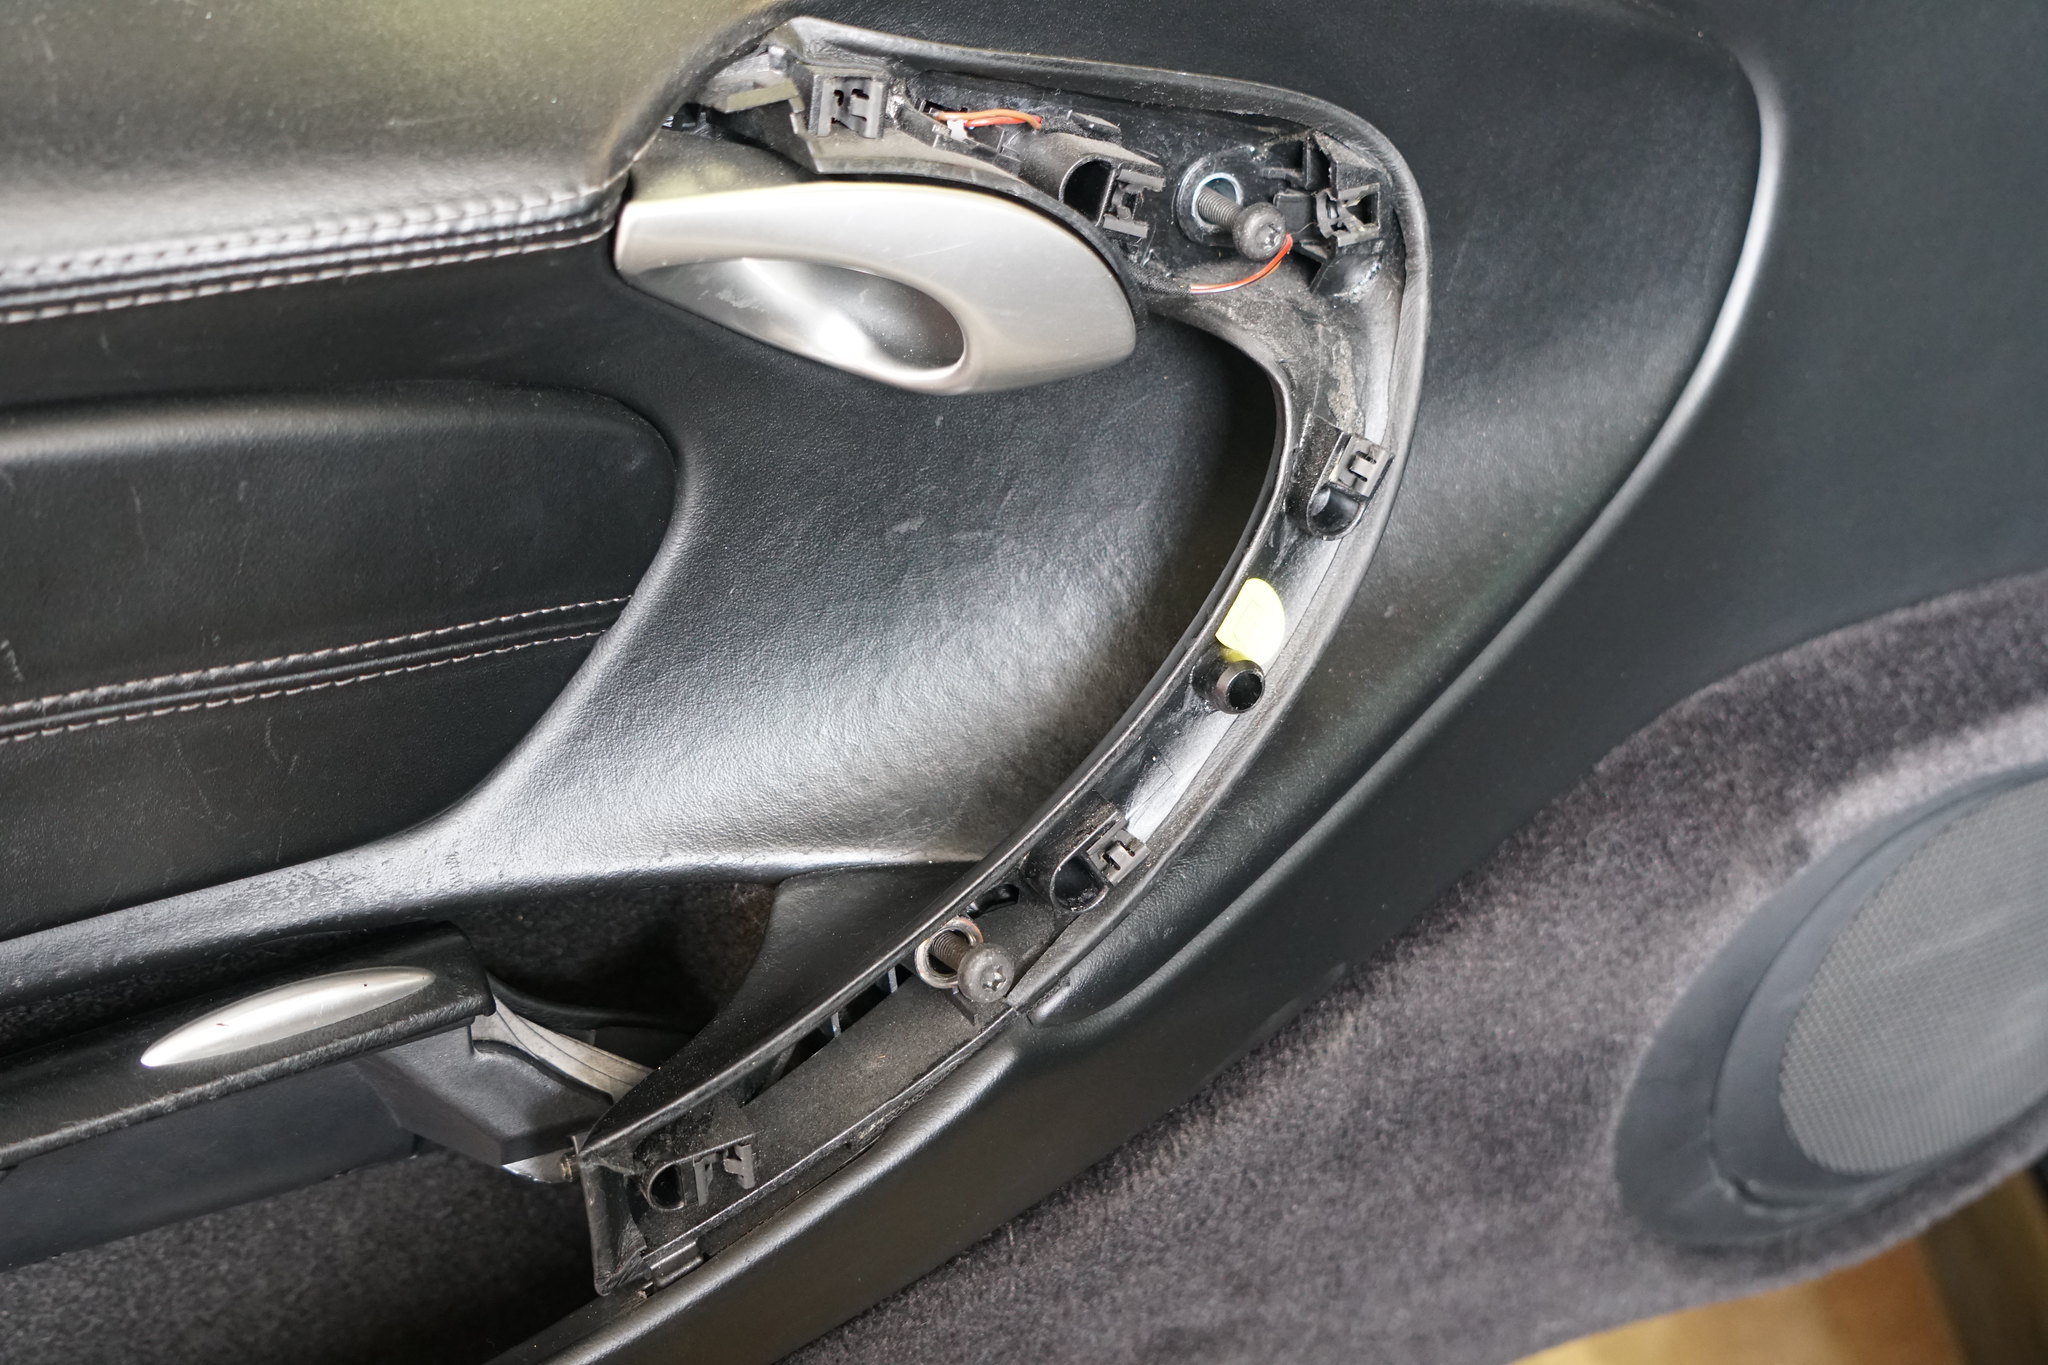
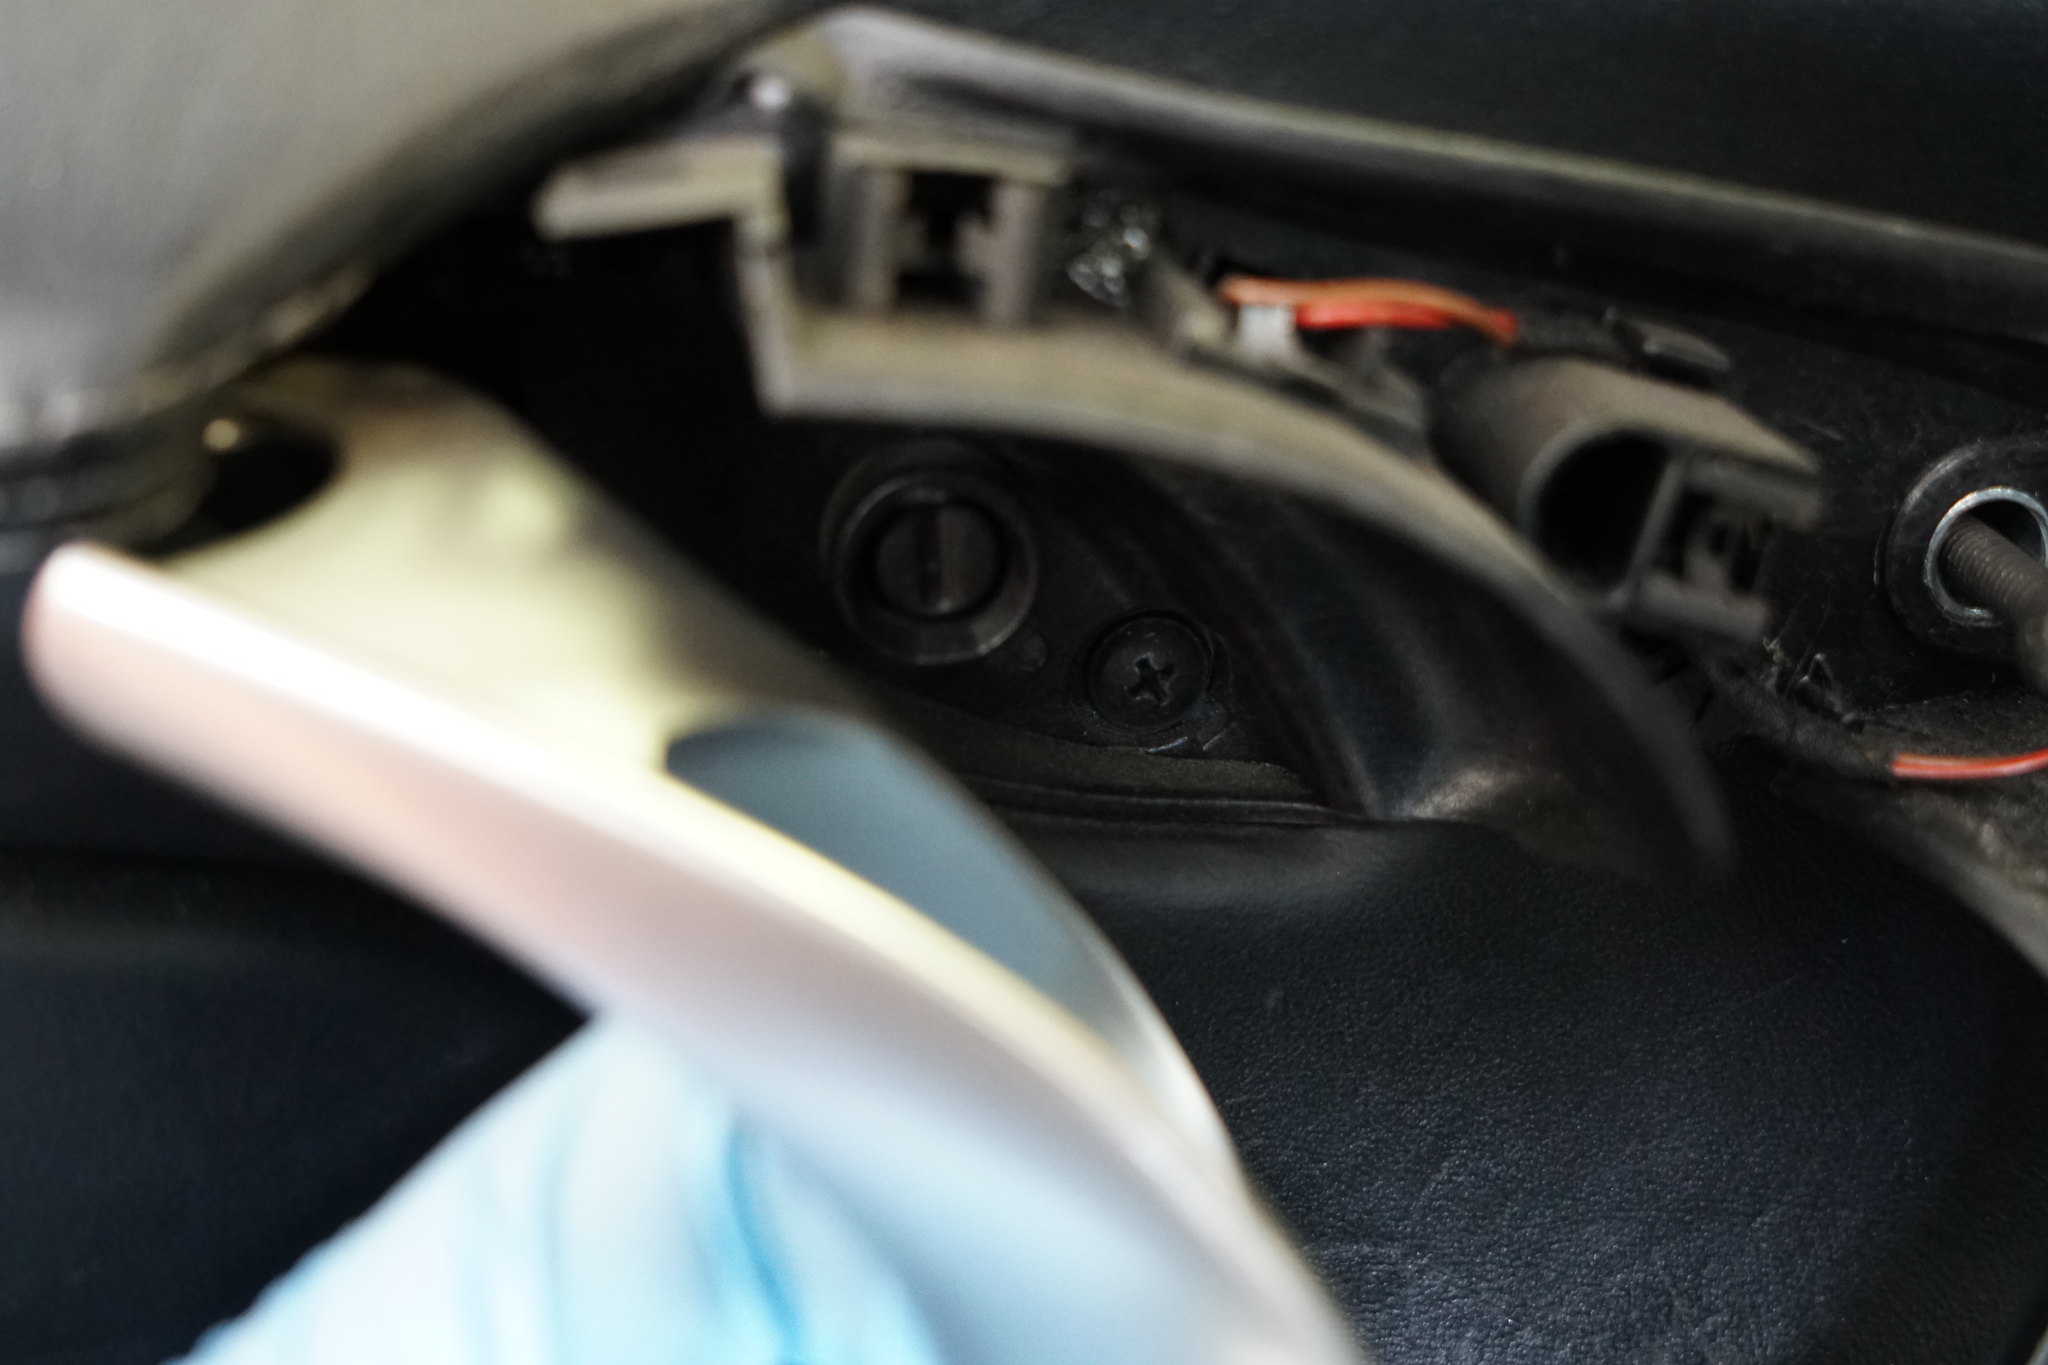
3. Remove door handle trim with a plastic panel tool. You will want to pry off the trim piece. You can see in the picture below that there are 5 clips holding this piece on. You will then need a T30 torx bit to remove the two screws.
Just note that the screws are different lengths. The longer screw goes into the bottom hole.
4. Remove screw behind door pull. You will need a #2 Phillips screw driving for this.
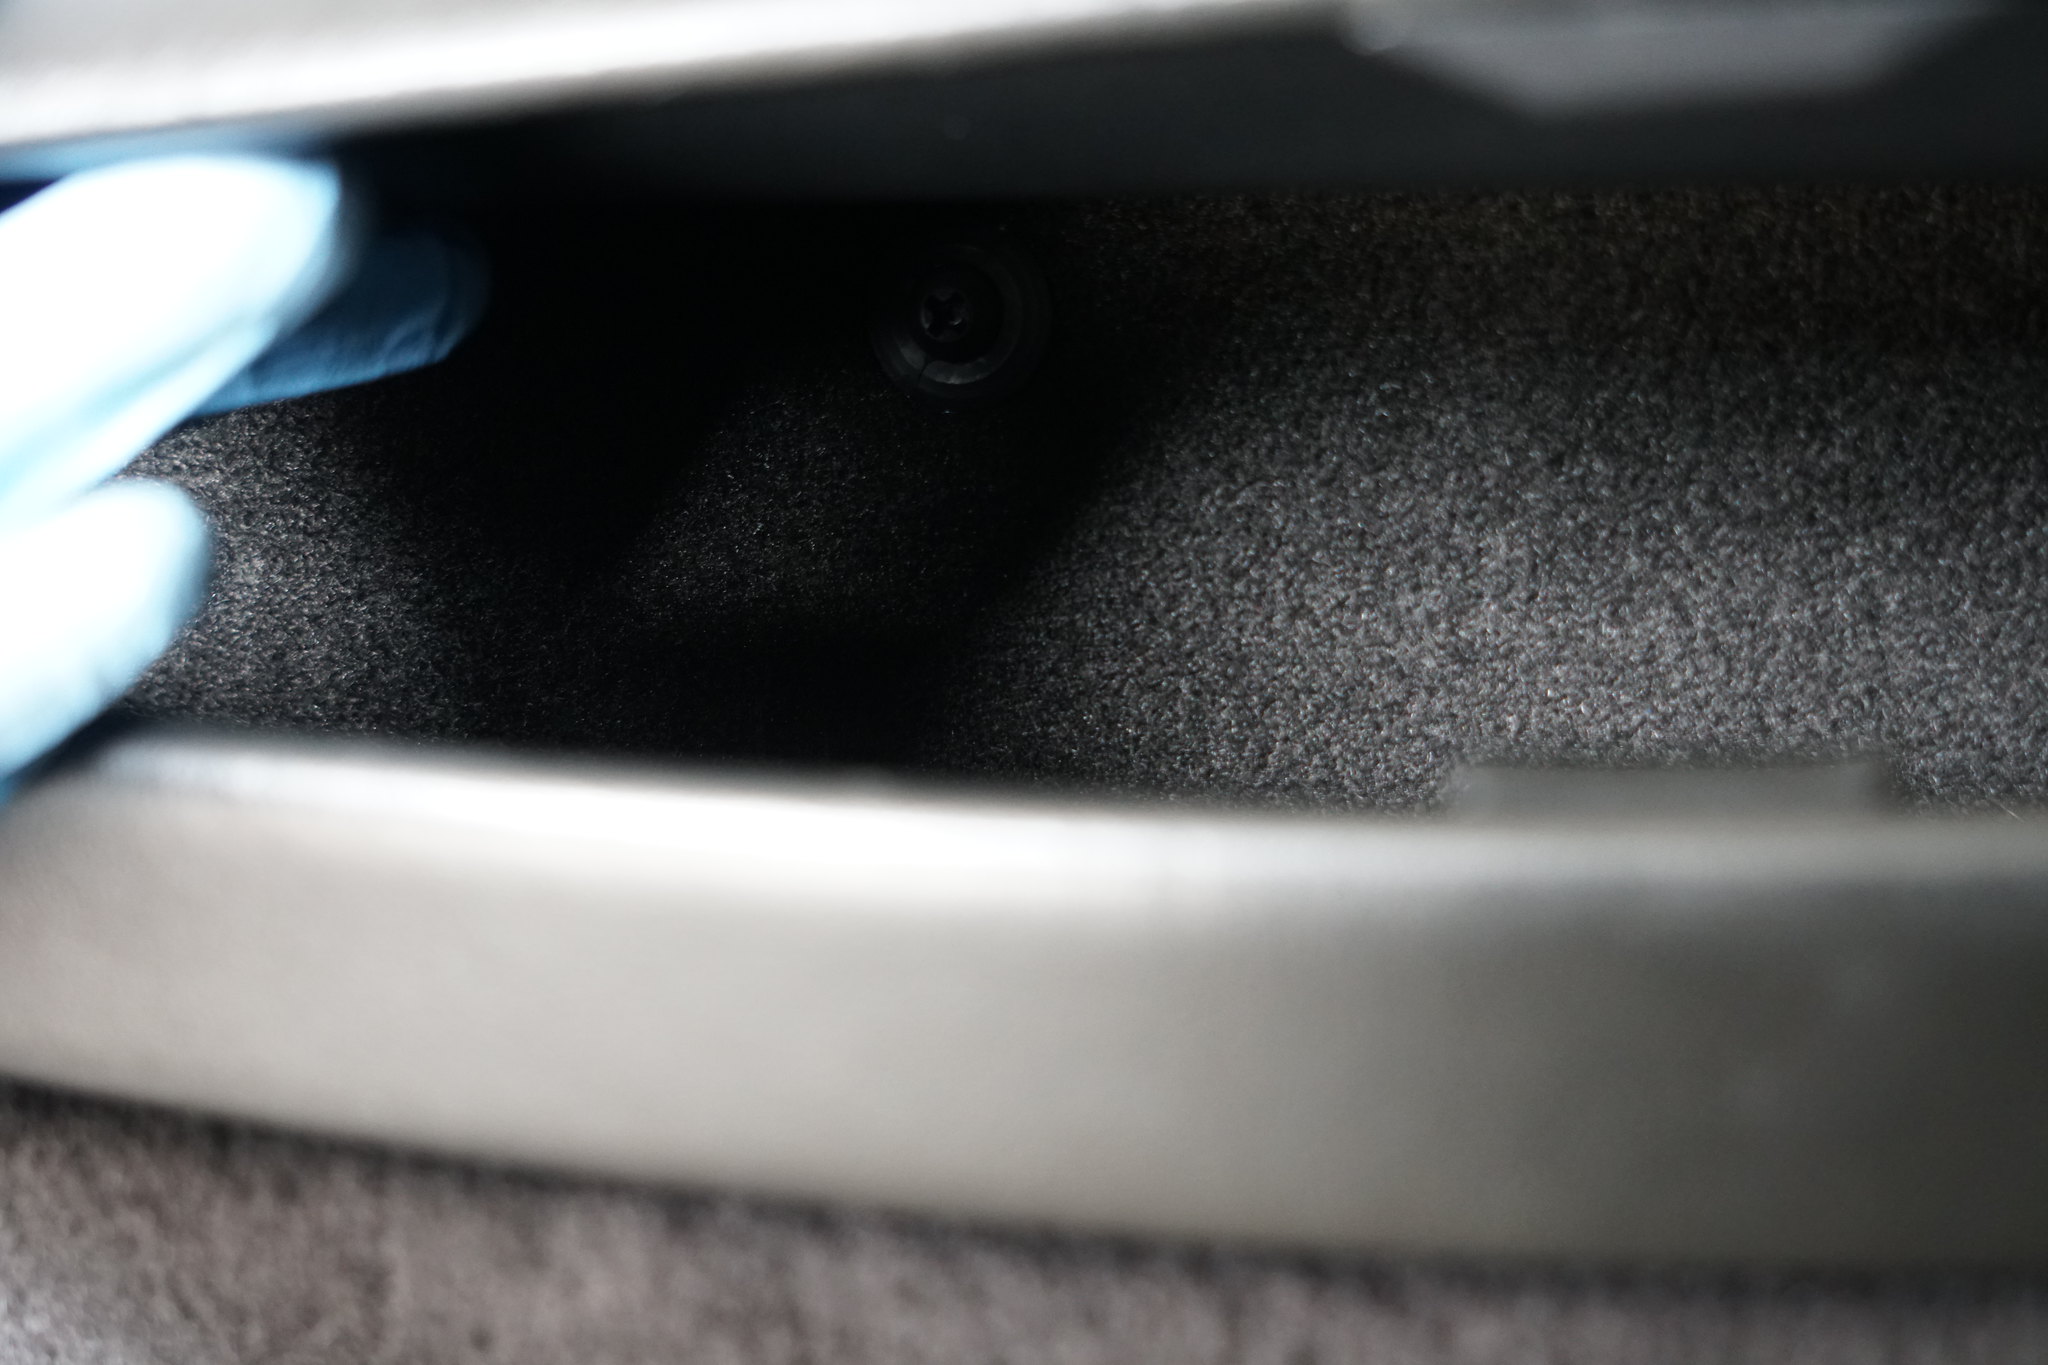
5. Loosen, but do not remove the screw inside storage compartment. You will need a #2 Philips screw driver for this. This screw is inside of an expanding plastic rivet/clip.
6. Remove courtesy light with a plastic panel pry bar.
7. The only thing left holding the door in at this point are clips. You will need to pry from the bottom; I prefer to start with the rear most bottom corner and work my way around the bottom and then move upwards. When all clips are removed, push up on the door panel to remove the top U channel from door seal. You need to be careful as the door cable and two cables will still be attached to the other side of the door panel.
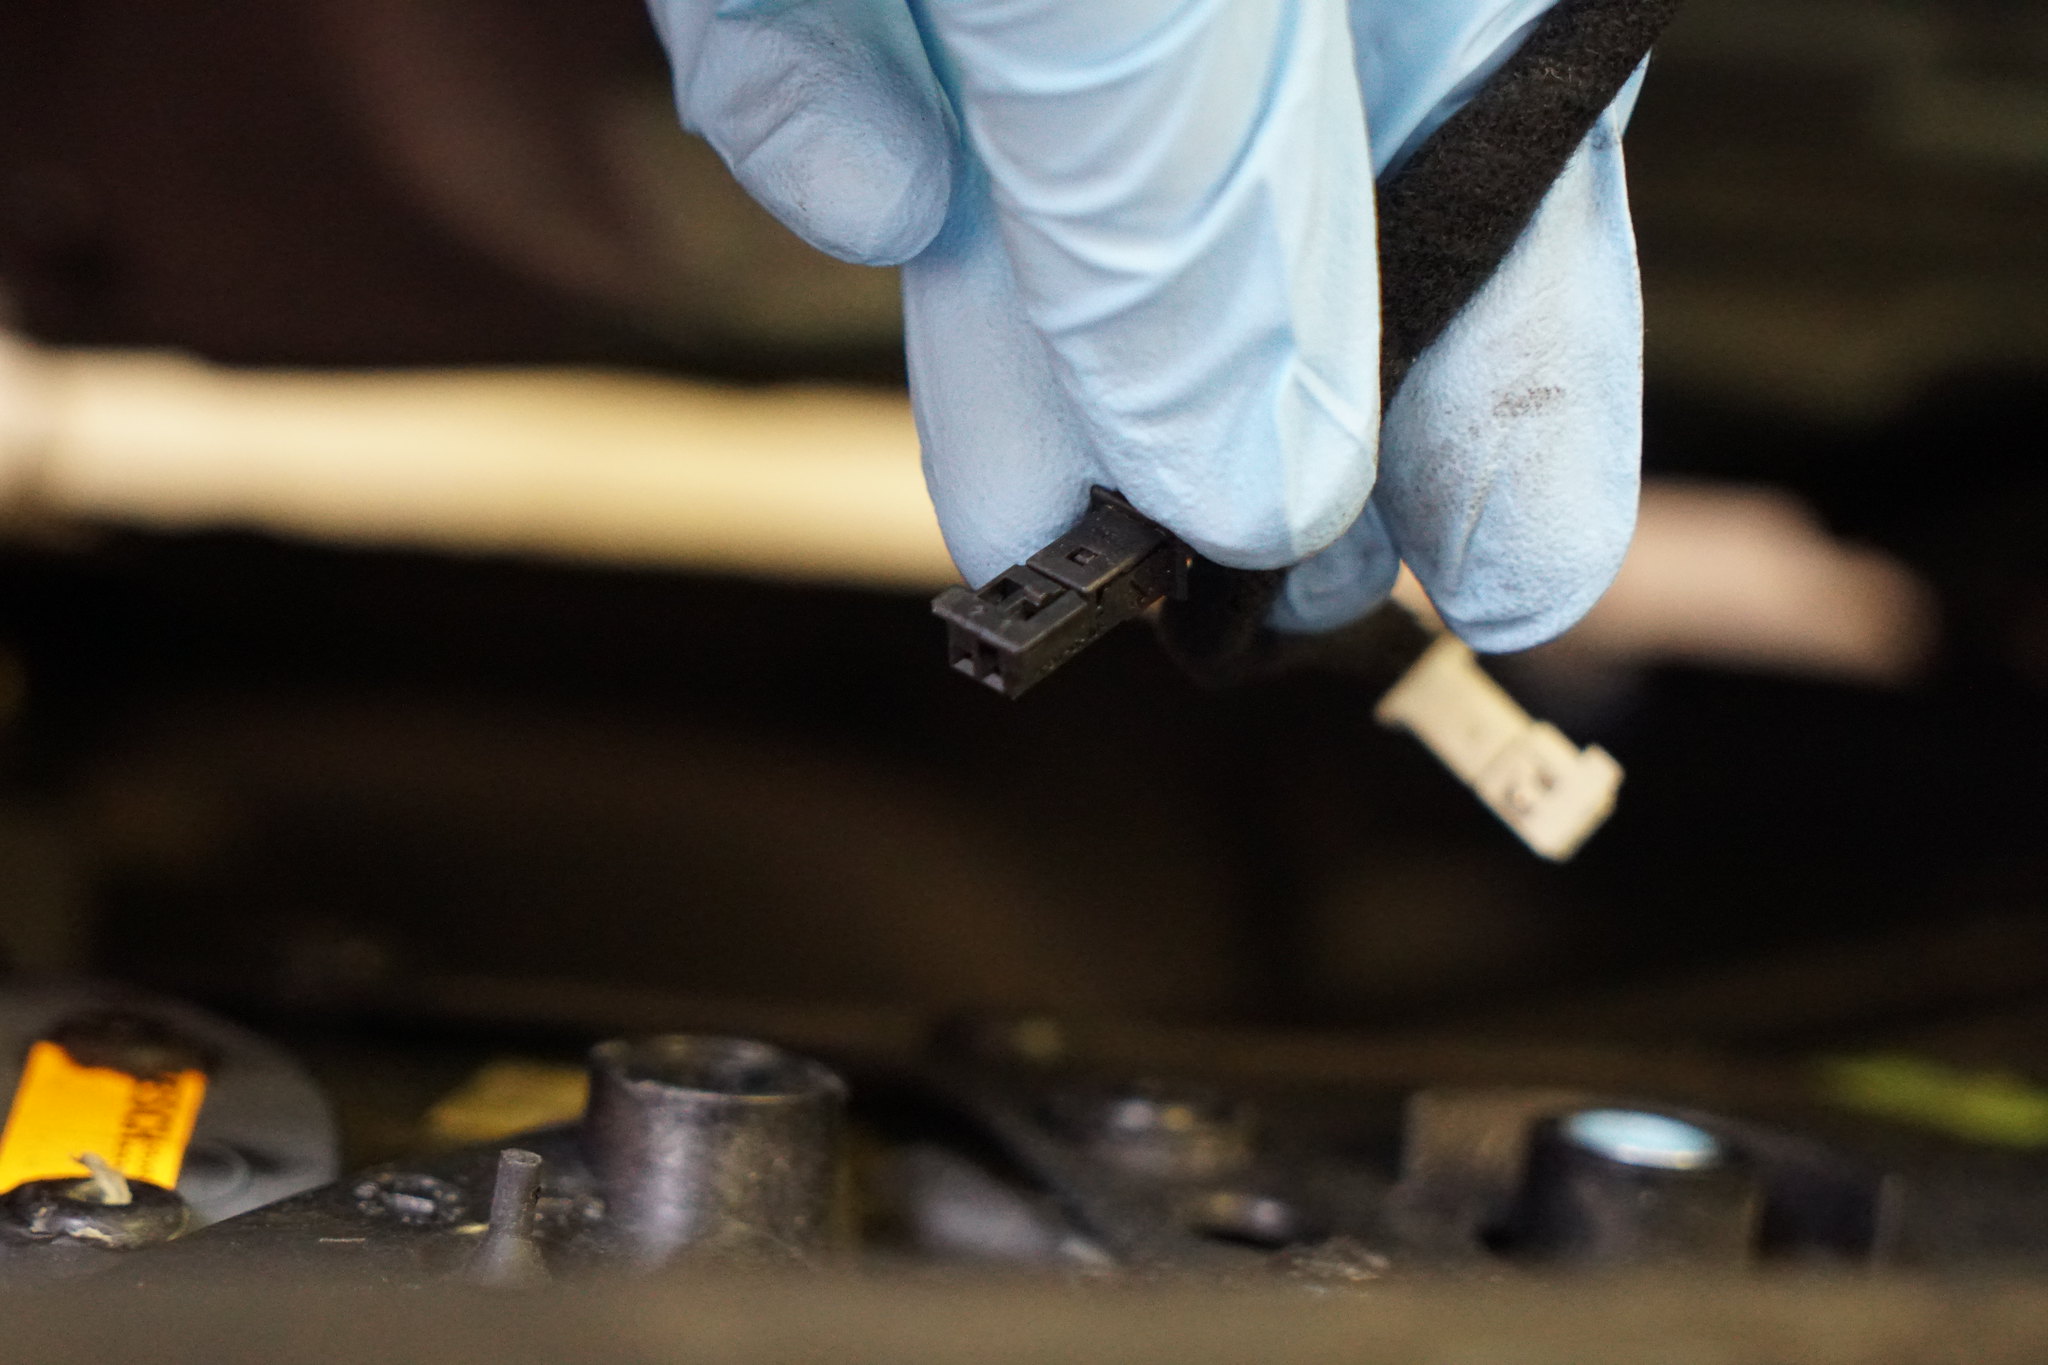
Remove two electrical plugs.
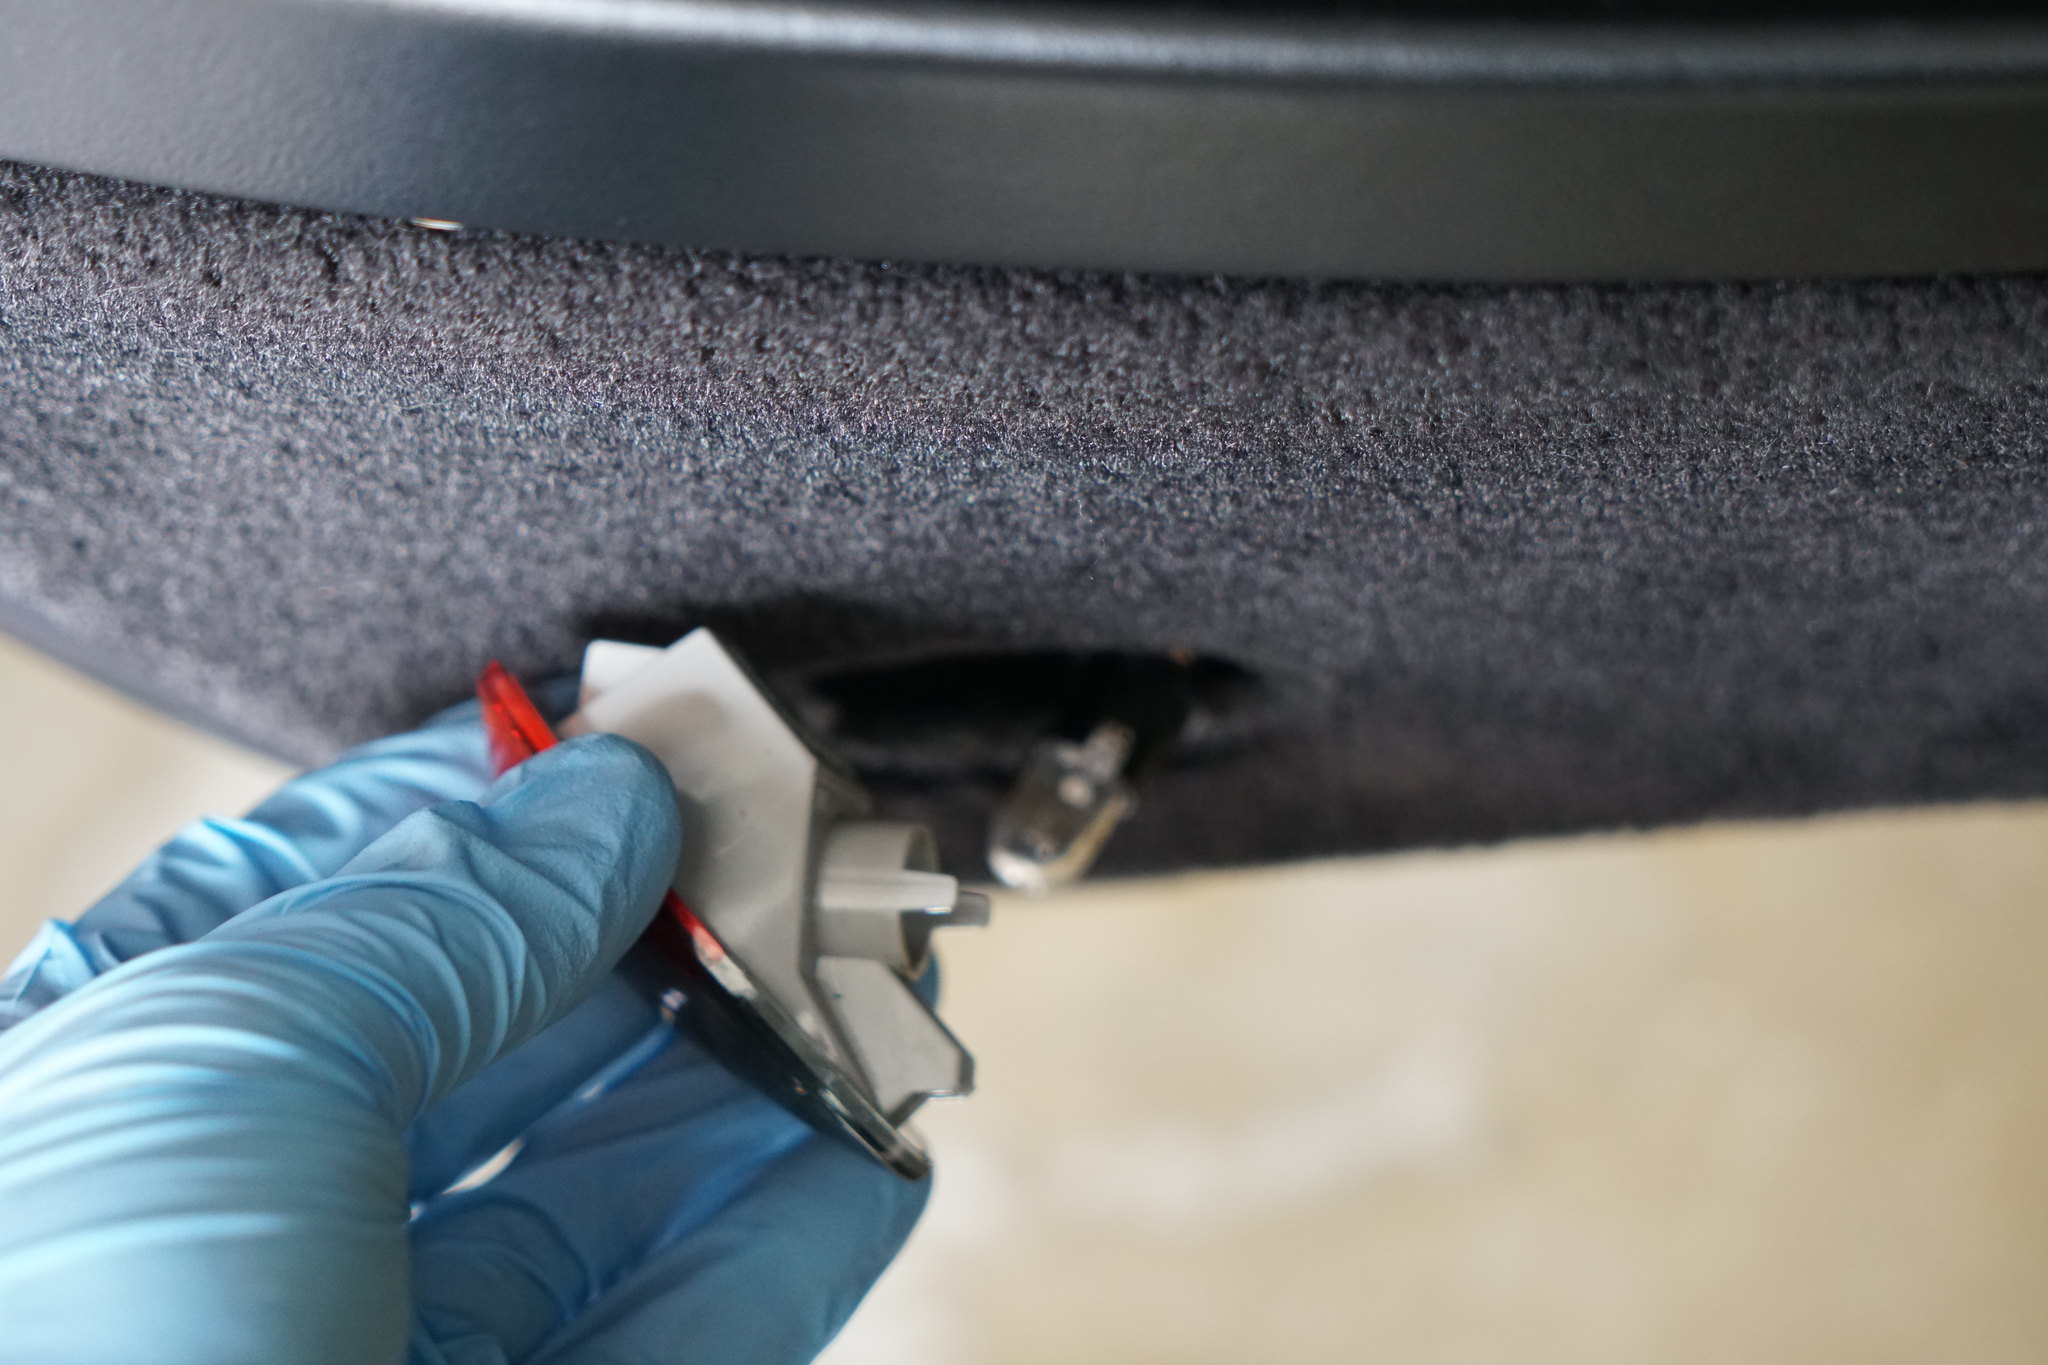
8. Remove the door handle cable. (Apologies for the blurry photo) You will need to slide the white clip away from the end of the cable. Then release the cable end from the door handle. You will be able to remove the door panel completely after this.
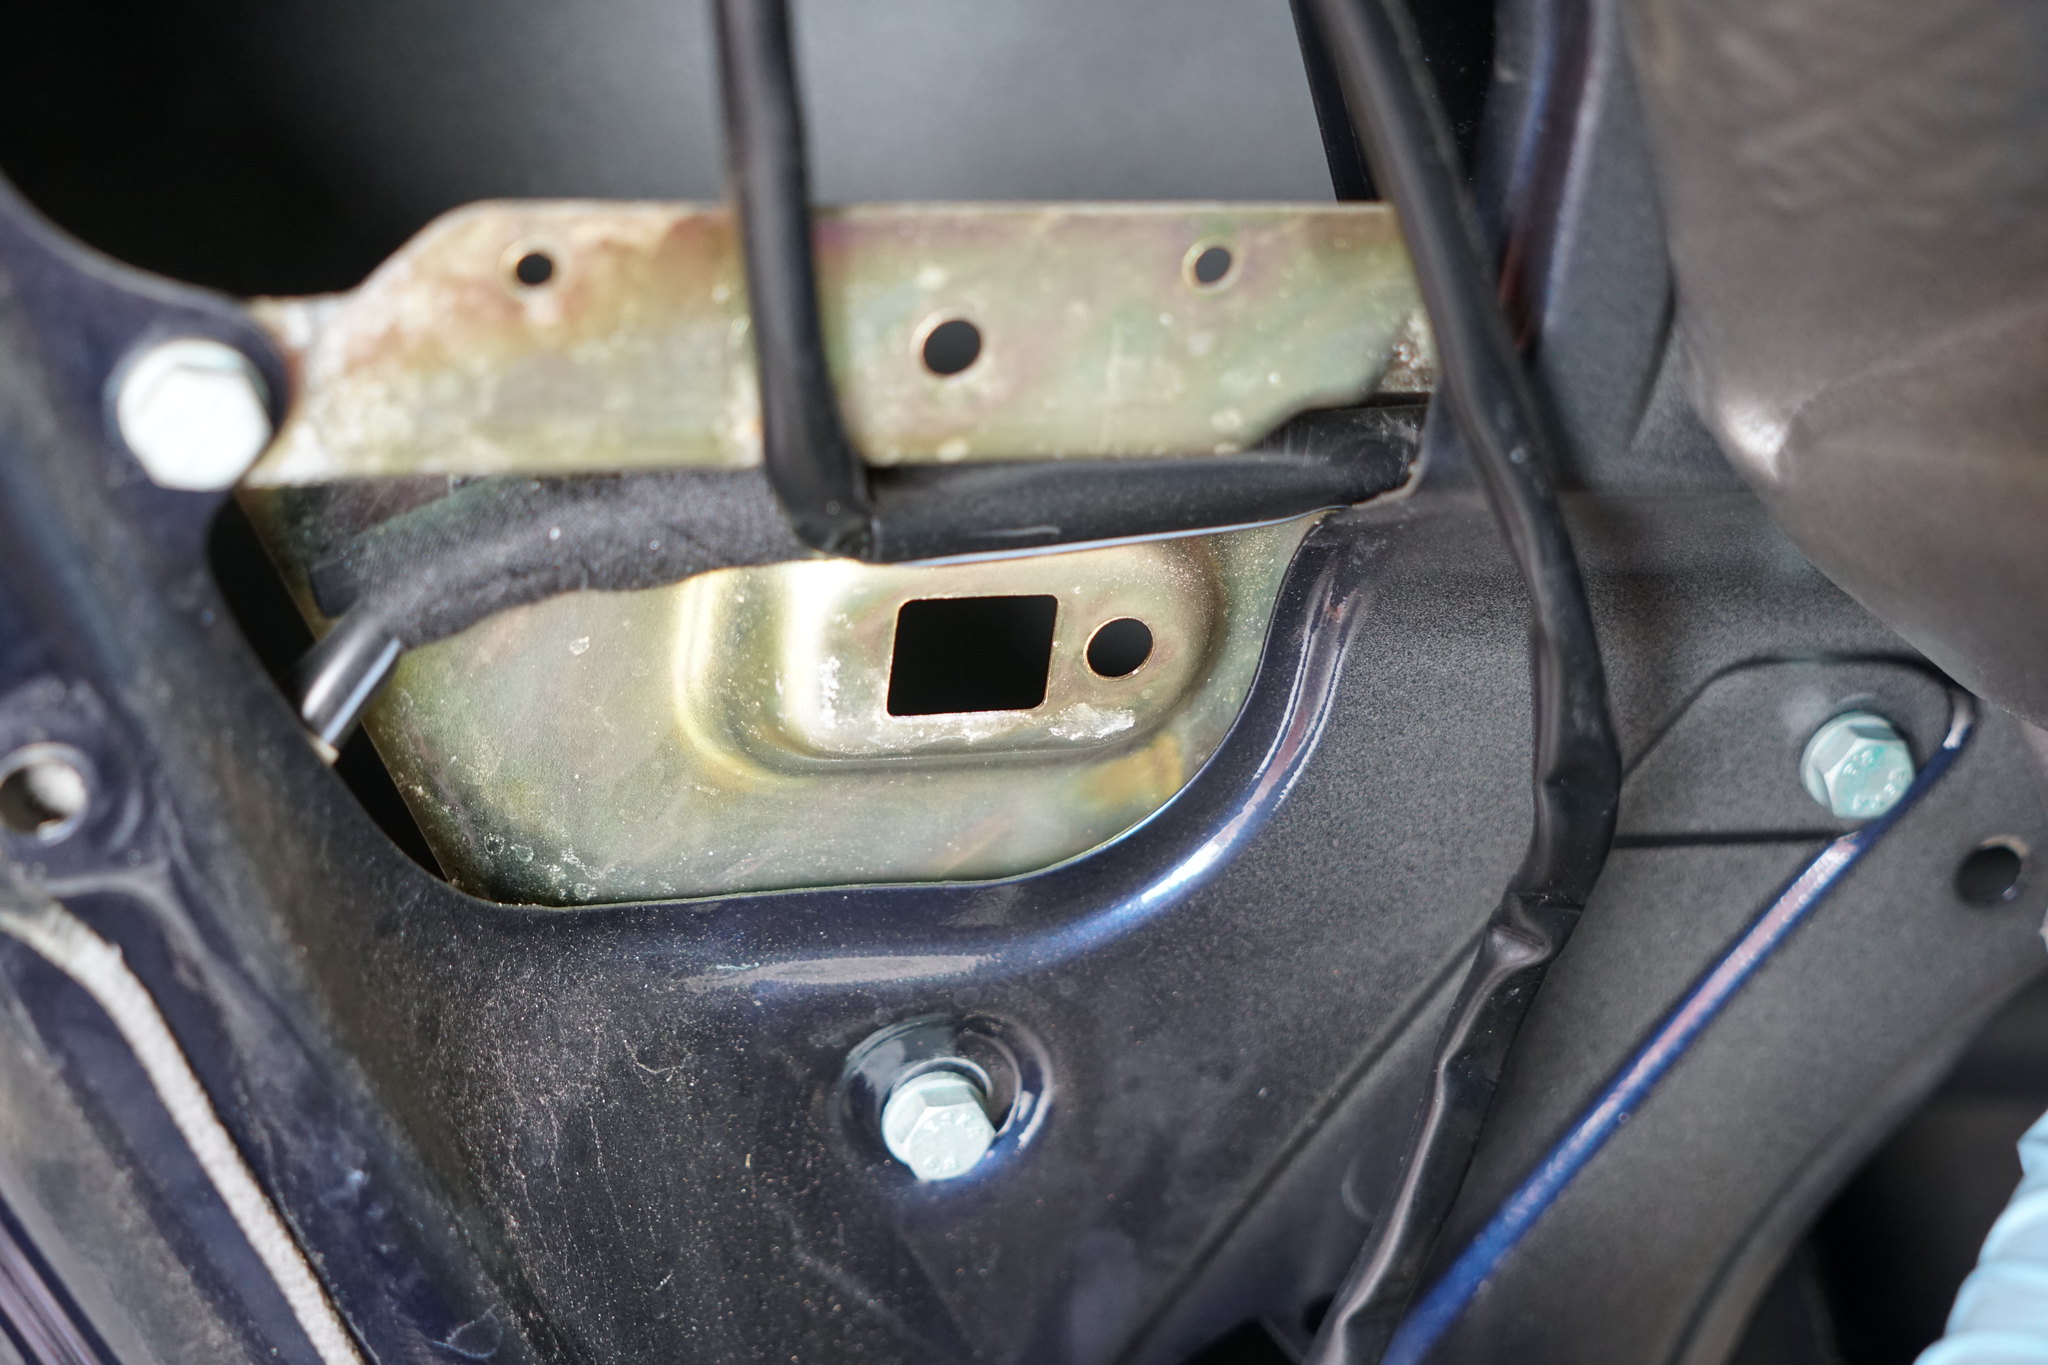
9. You will now need to remove four screws with a 10mm socket. Three are obvious, but the fourth screw is the bottom corner of the air bag bracket (this screw has blue locktite and will require a little more effort removing)
10. After the screws are removed, you’ll notice the sheet metal piece is still hanging in place. You will need to remove this wire loom clip before completely removing the part.
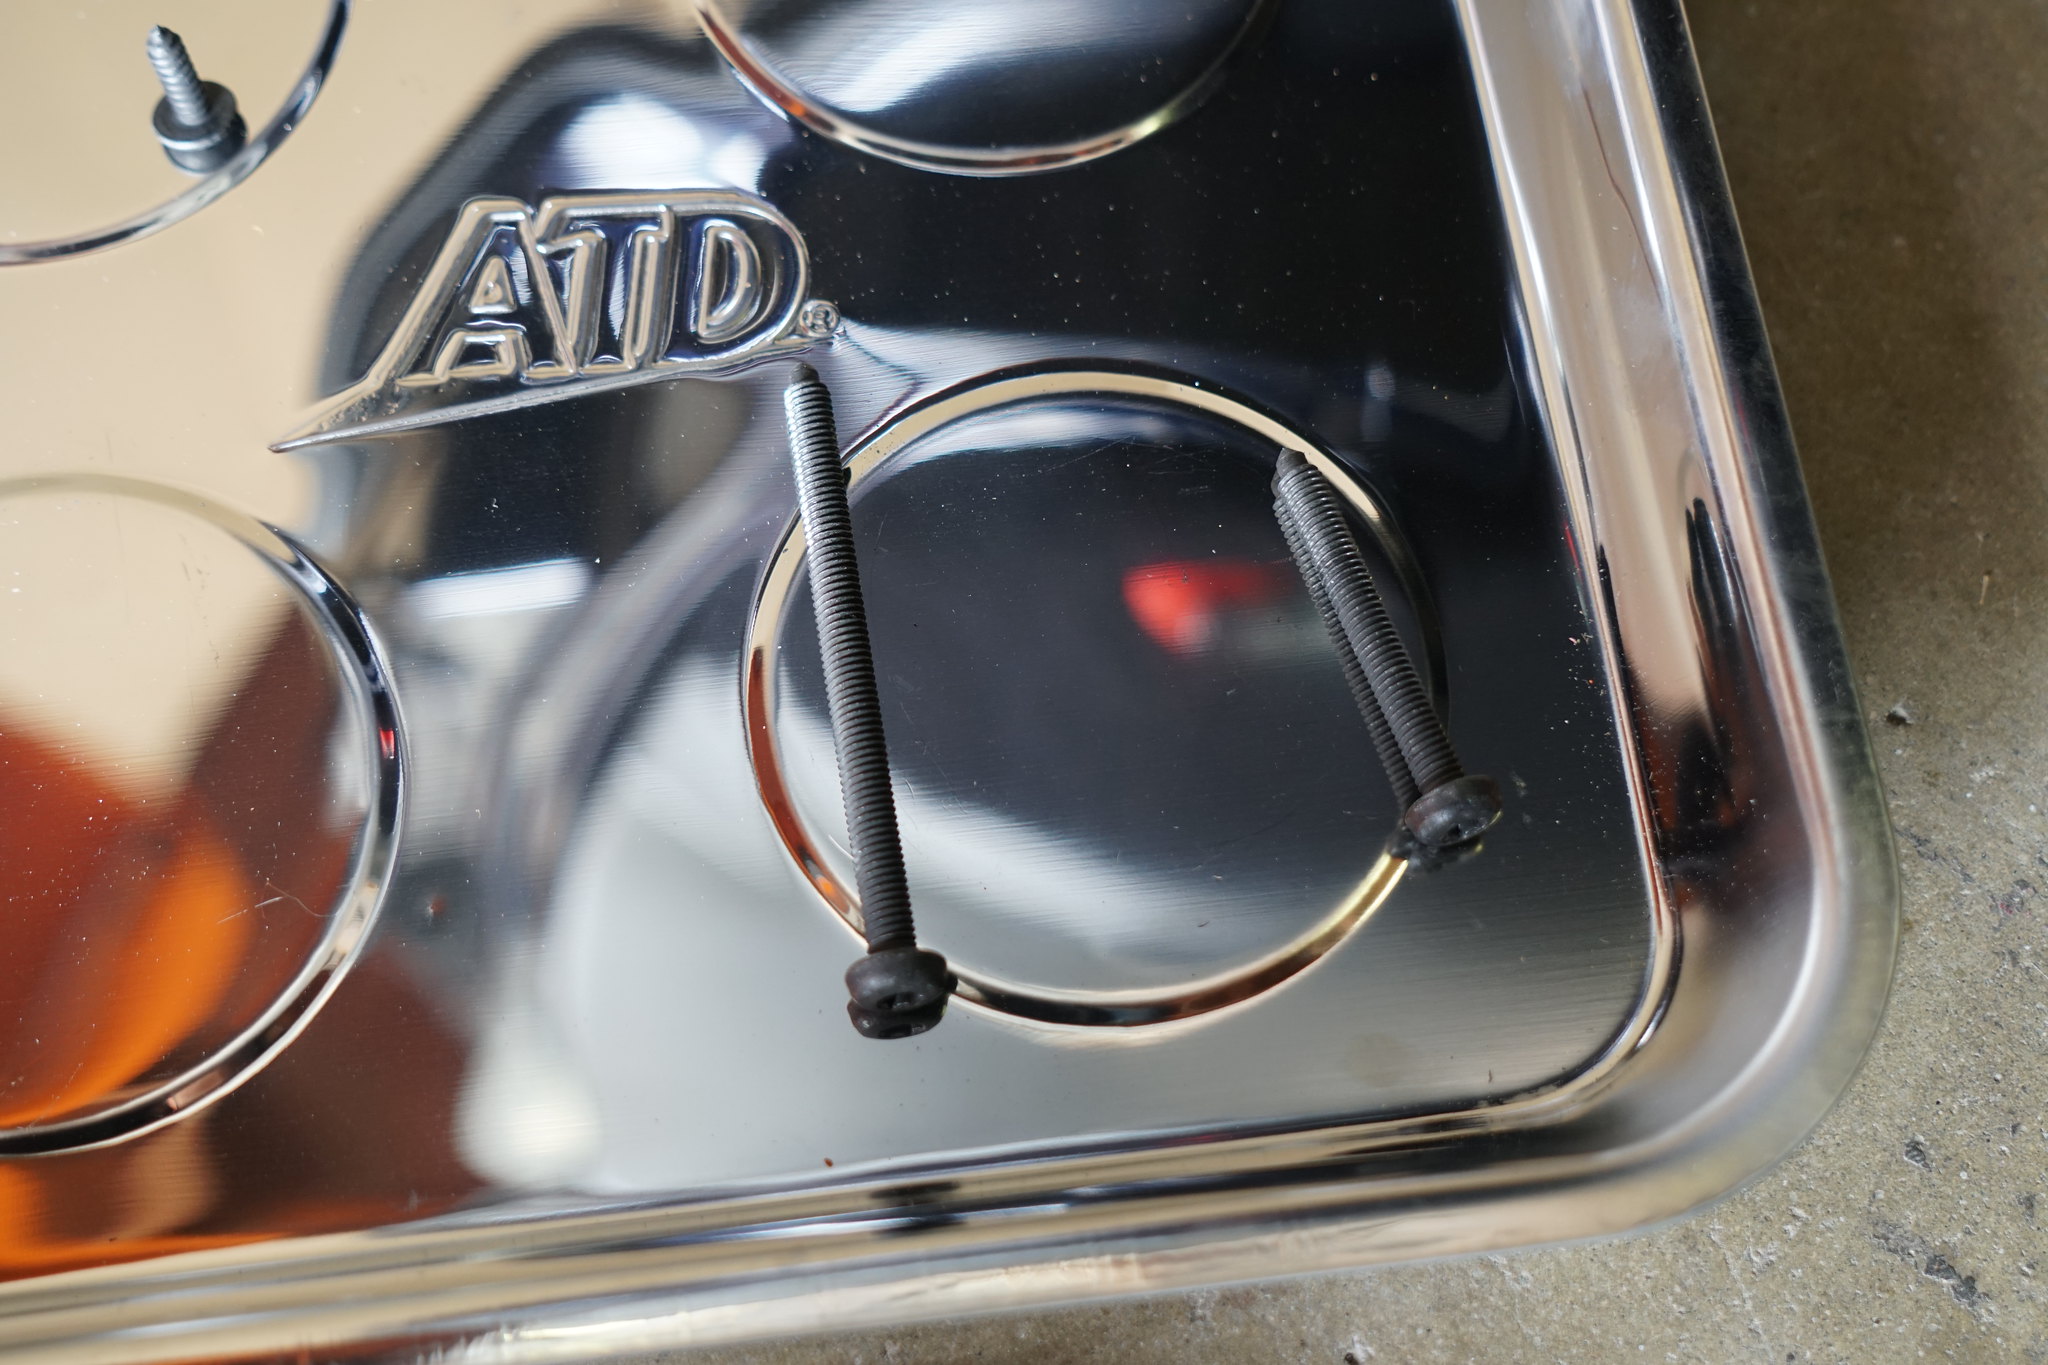
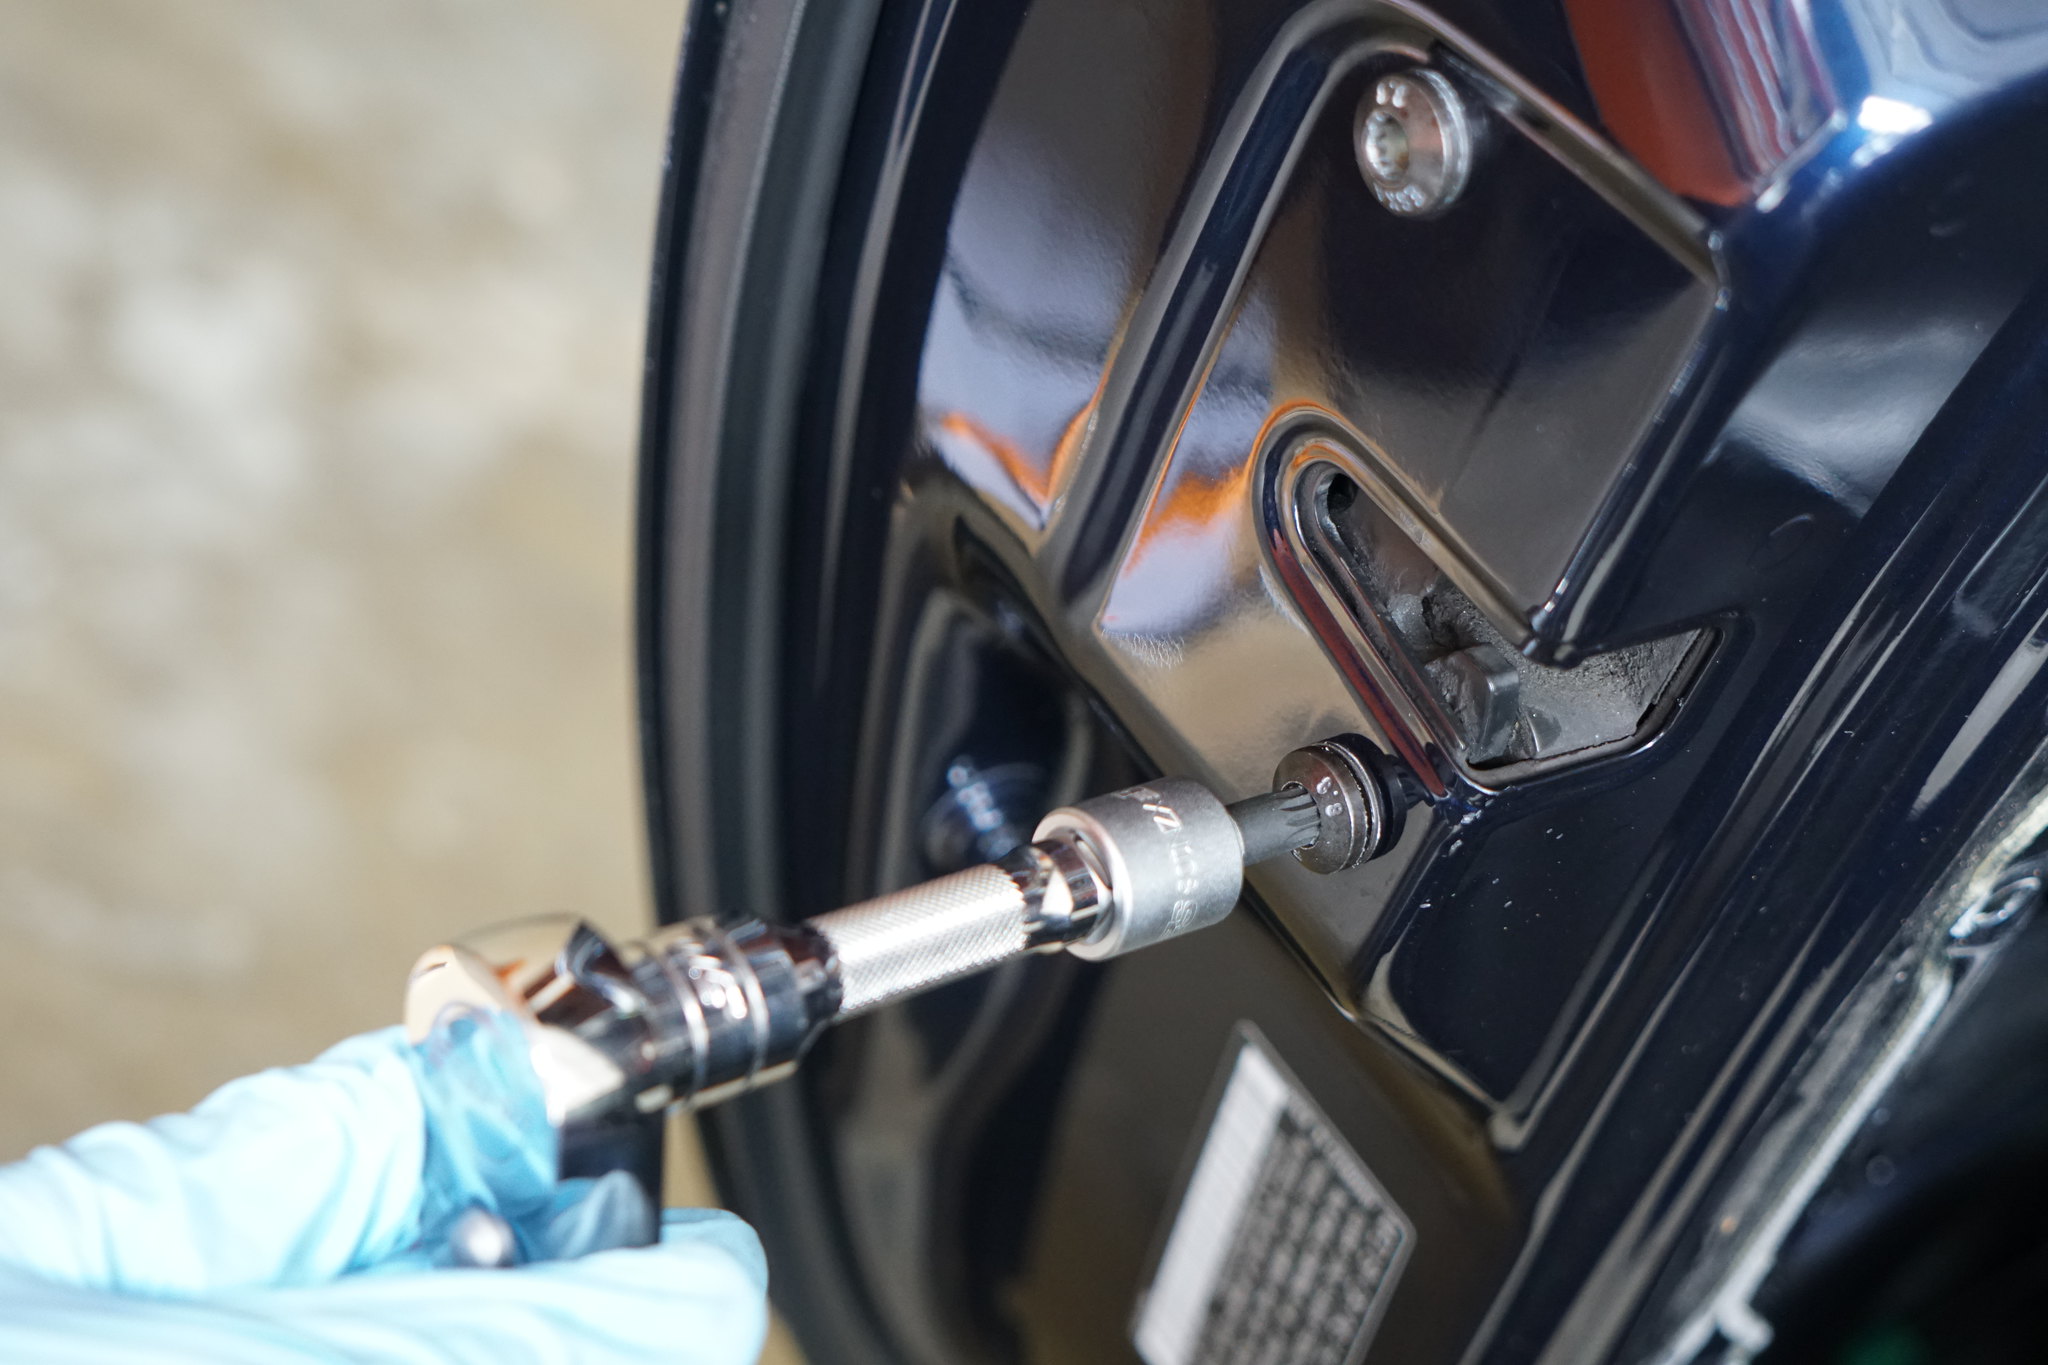
11. Remove the door latch screws using an 8mm XZN (aka triple square) bit socket. Do not attempt to use a Torx bit, as you may strip this screw. These screws aren't torqued very high, but do have blue locktite.
Before proceeding, I highly recommend throwing this light inside the door to see what you’re doing. The magnetic base sticks to the topside of the door.
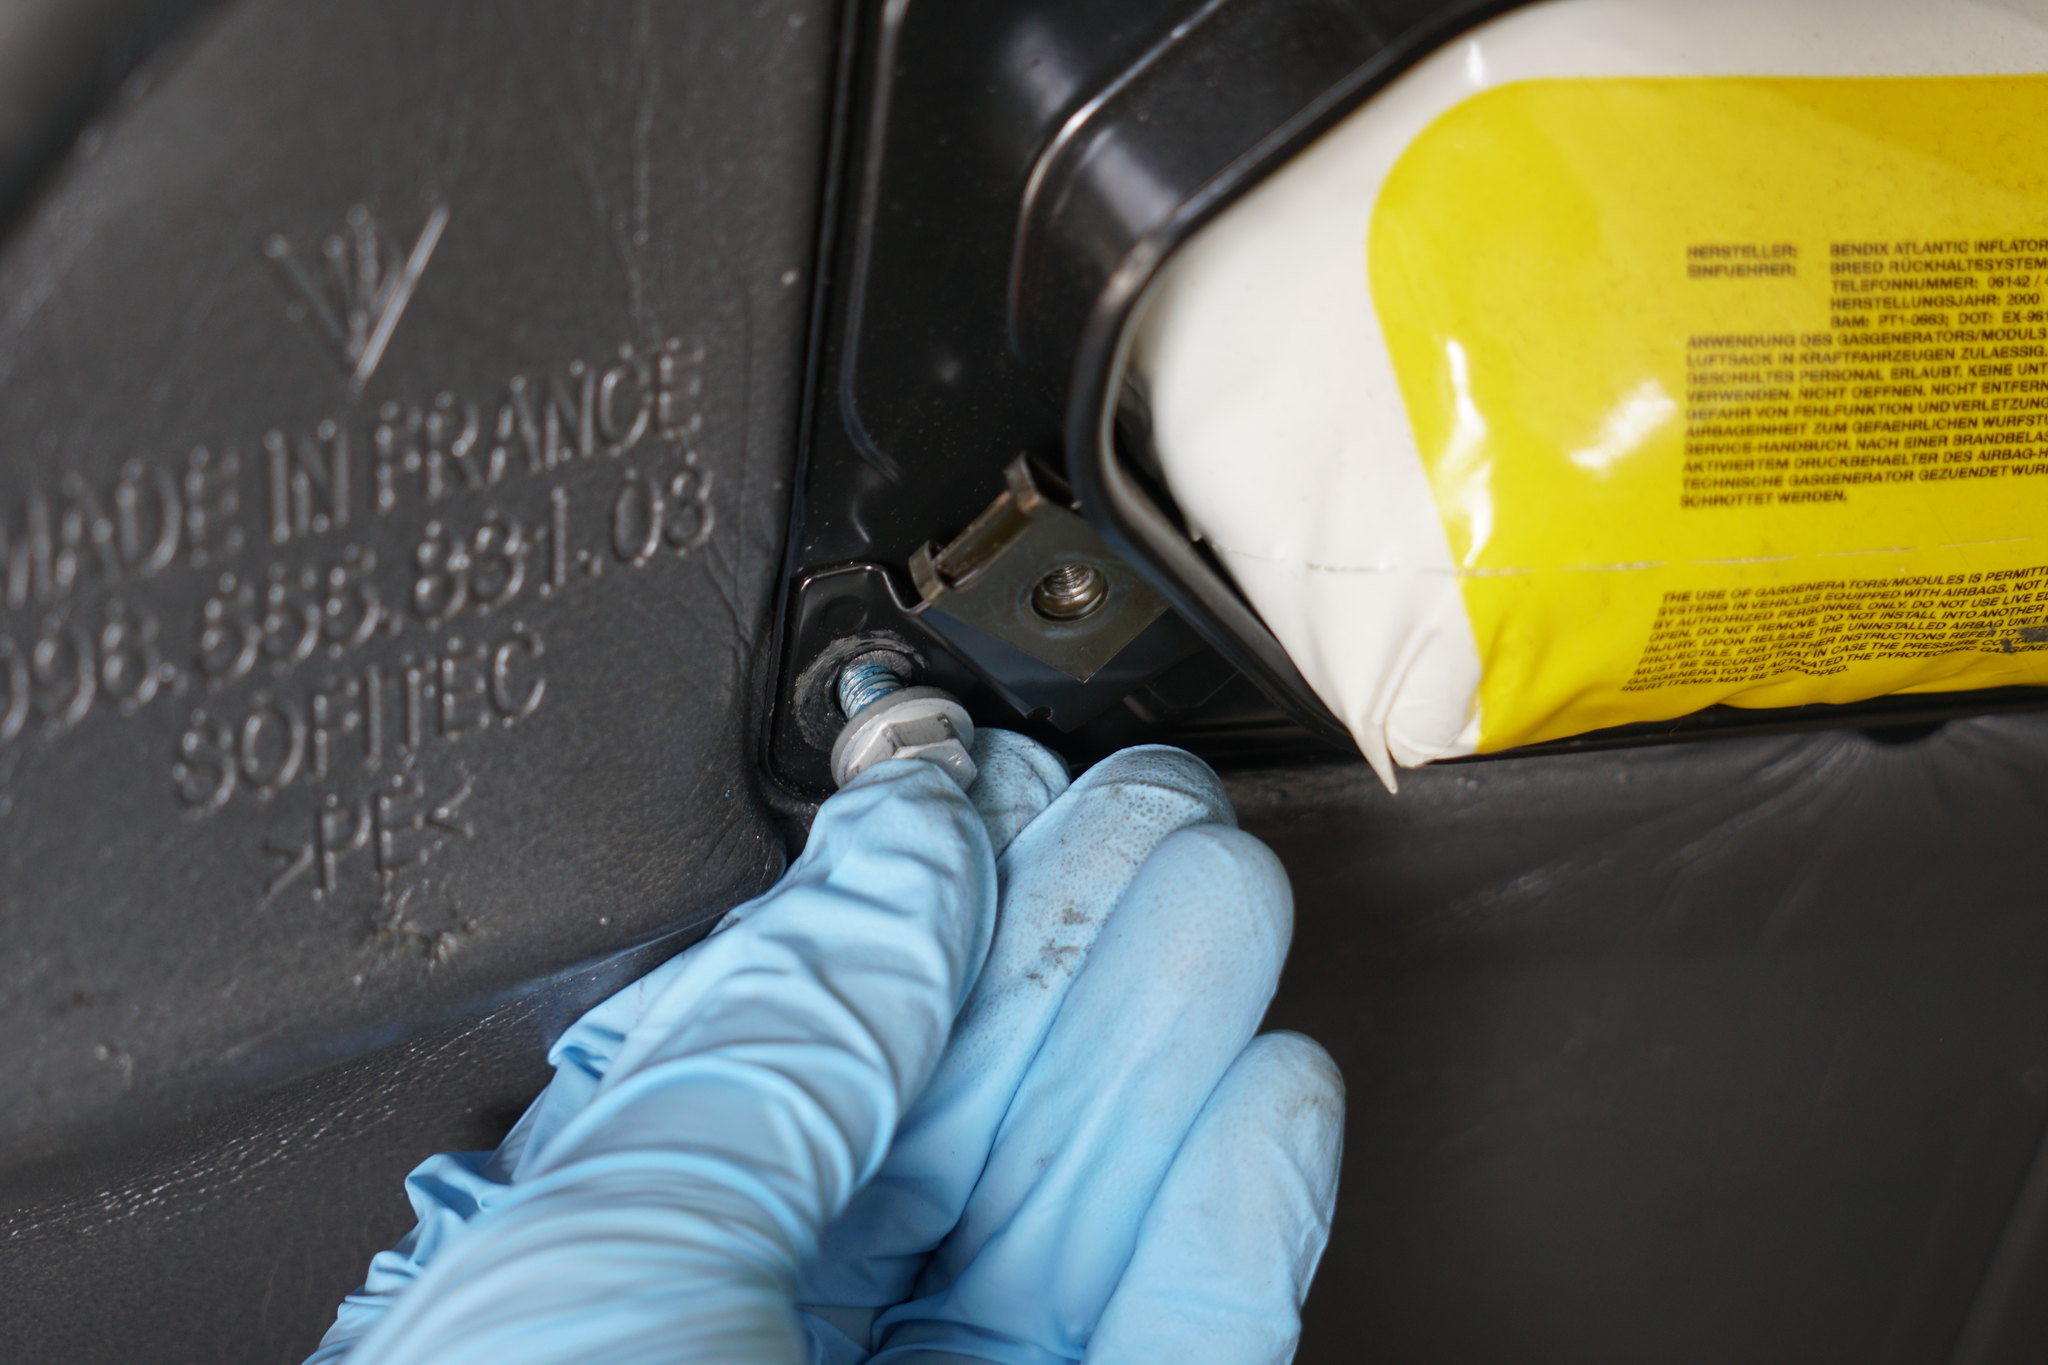
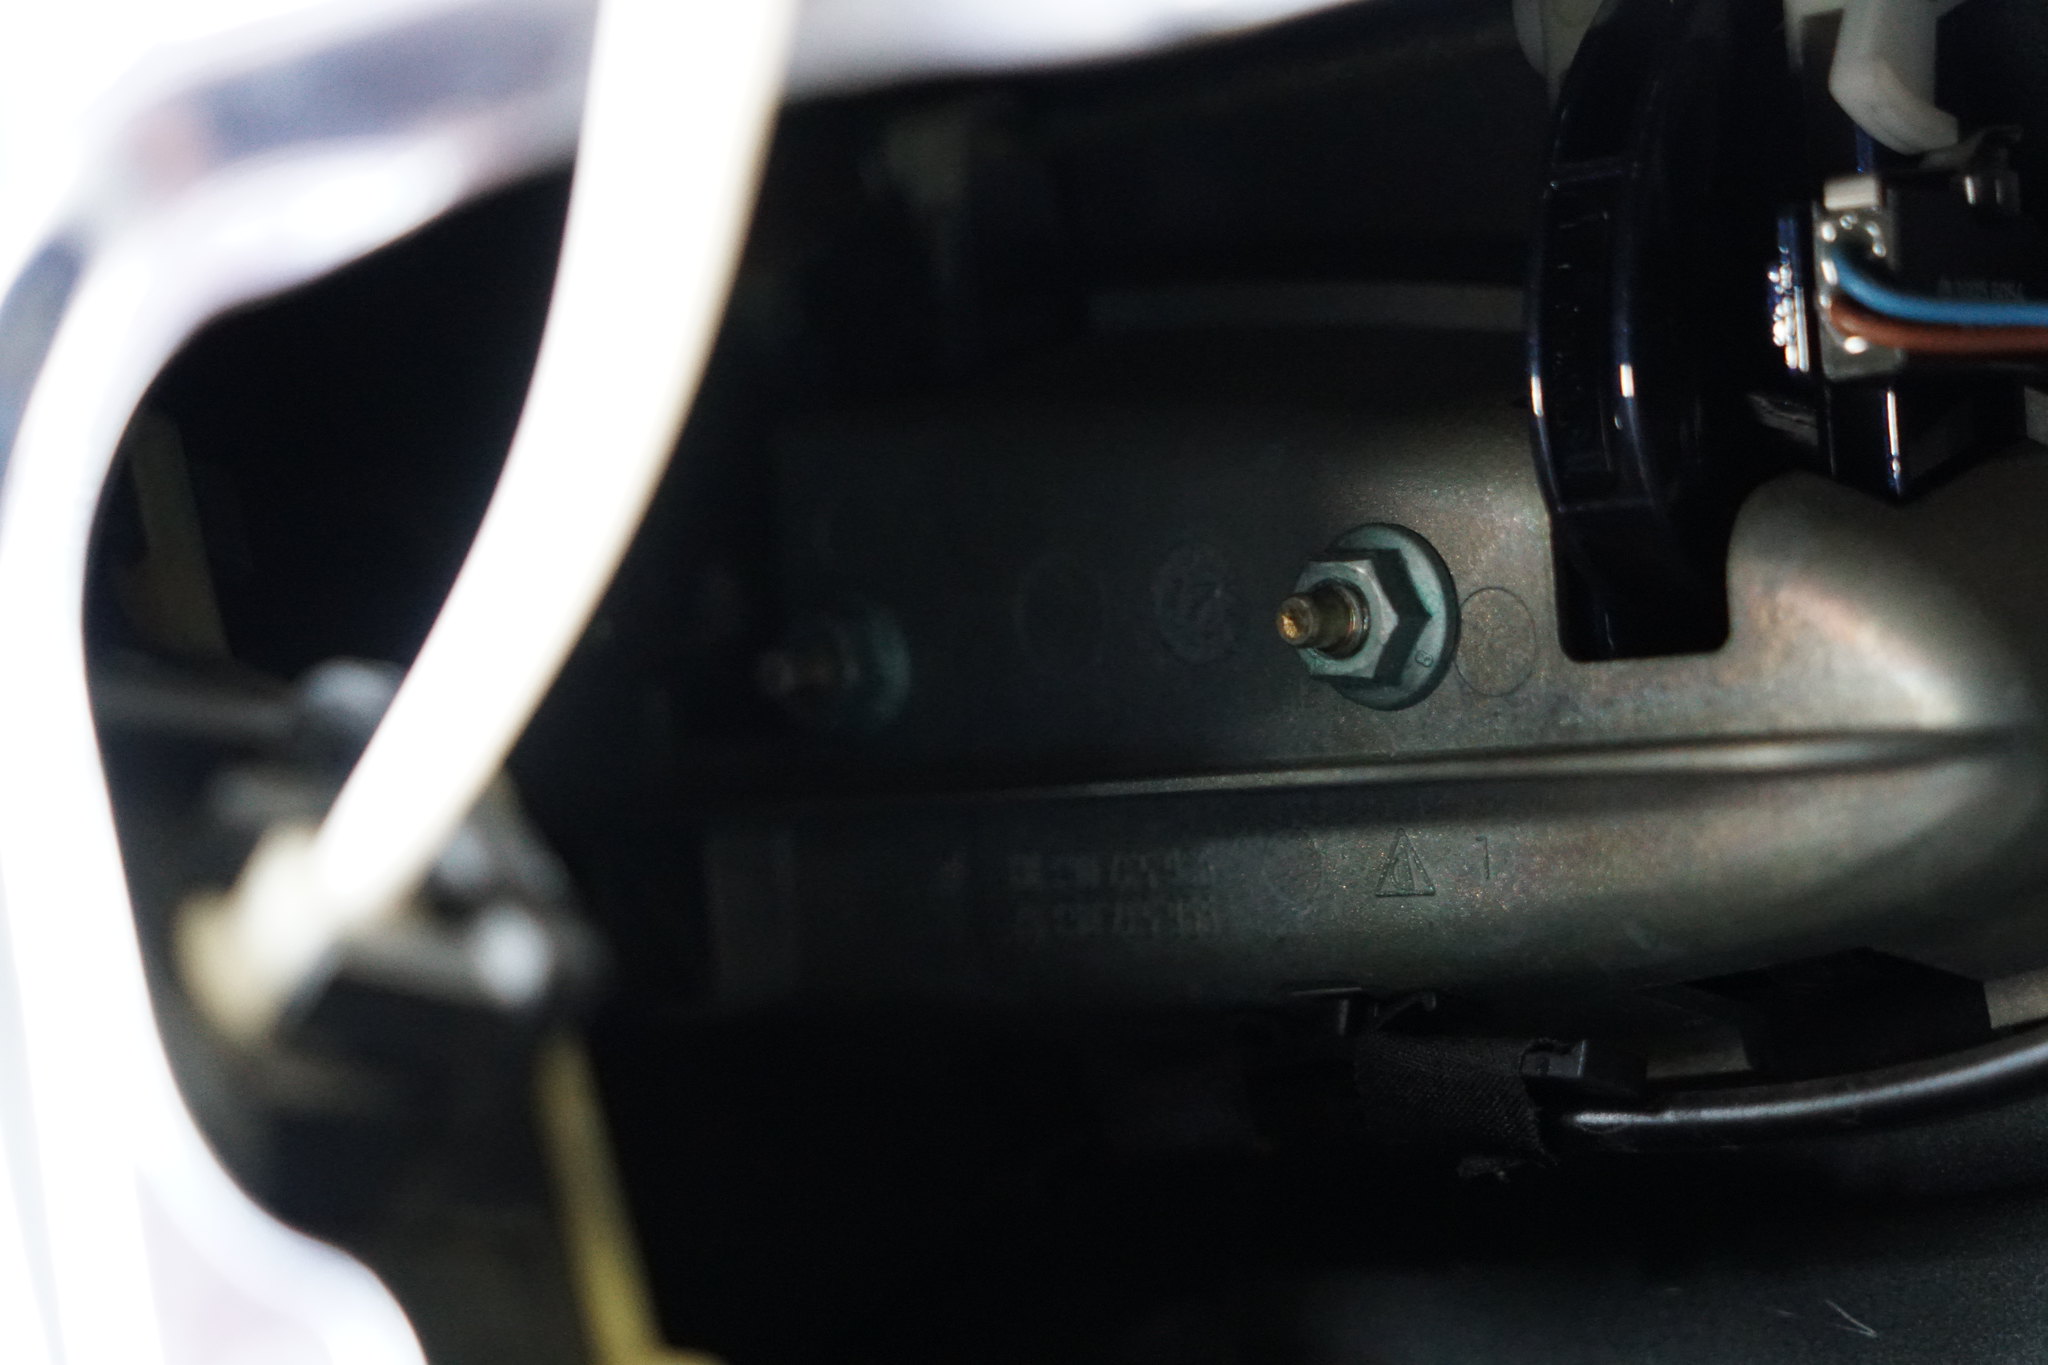
12. You will need to remove two screws, using a swivel 10mm attached to an extension. Alternatively, you could use a ratcheting combination wrench, but I found the first way to be better.
It’s almost like it was designed to be done this way!
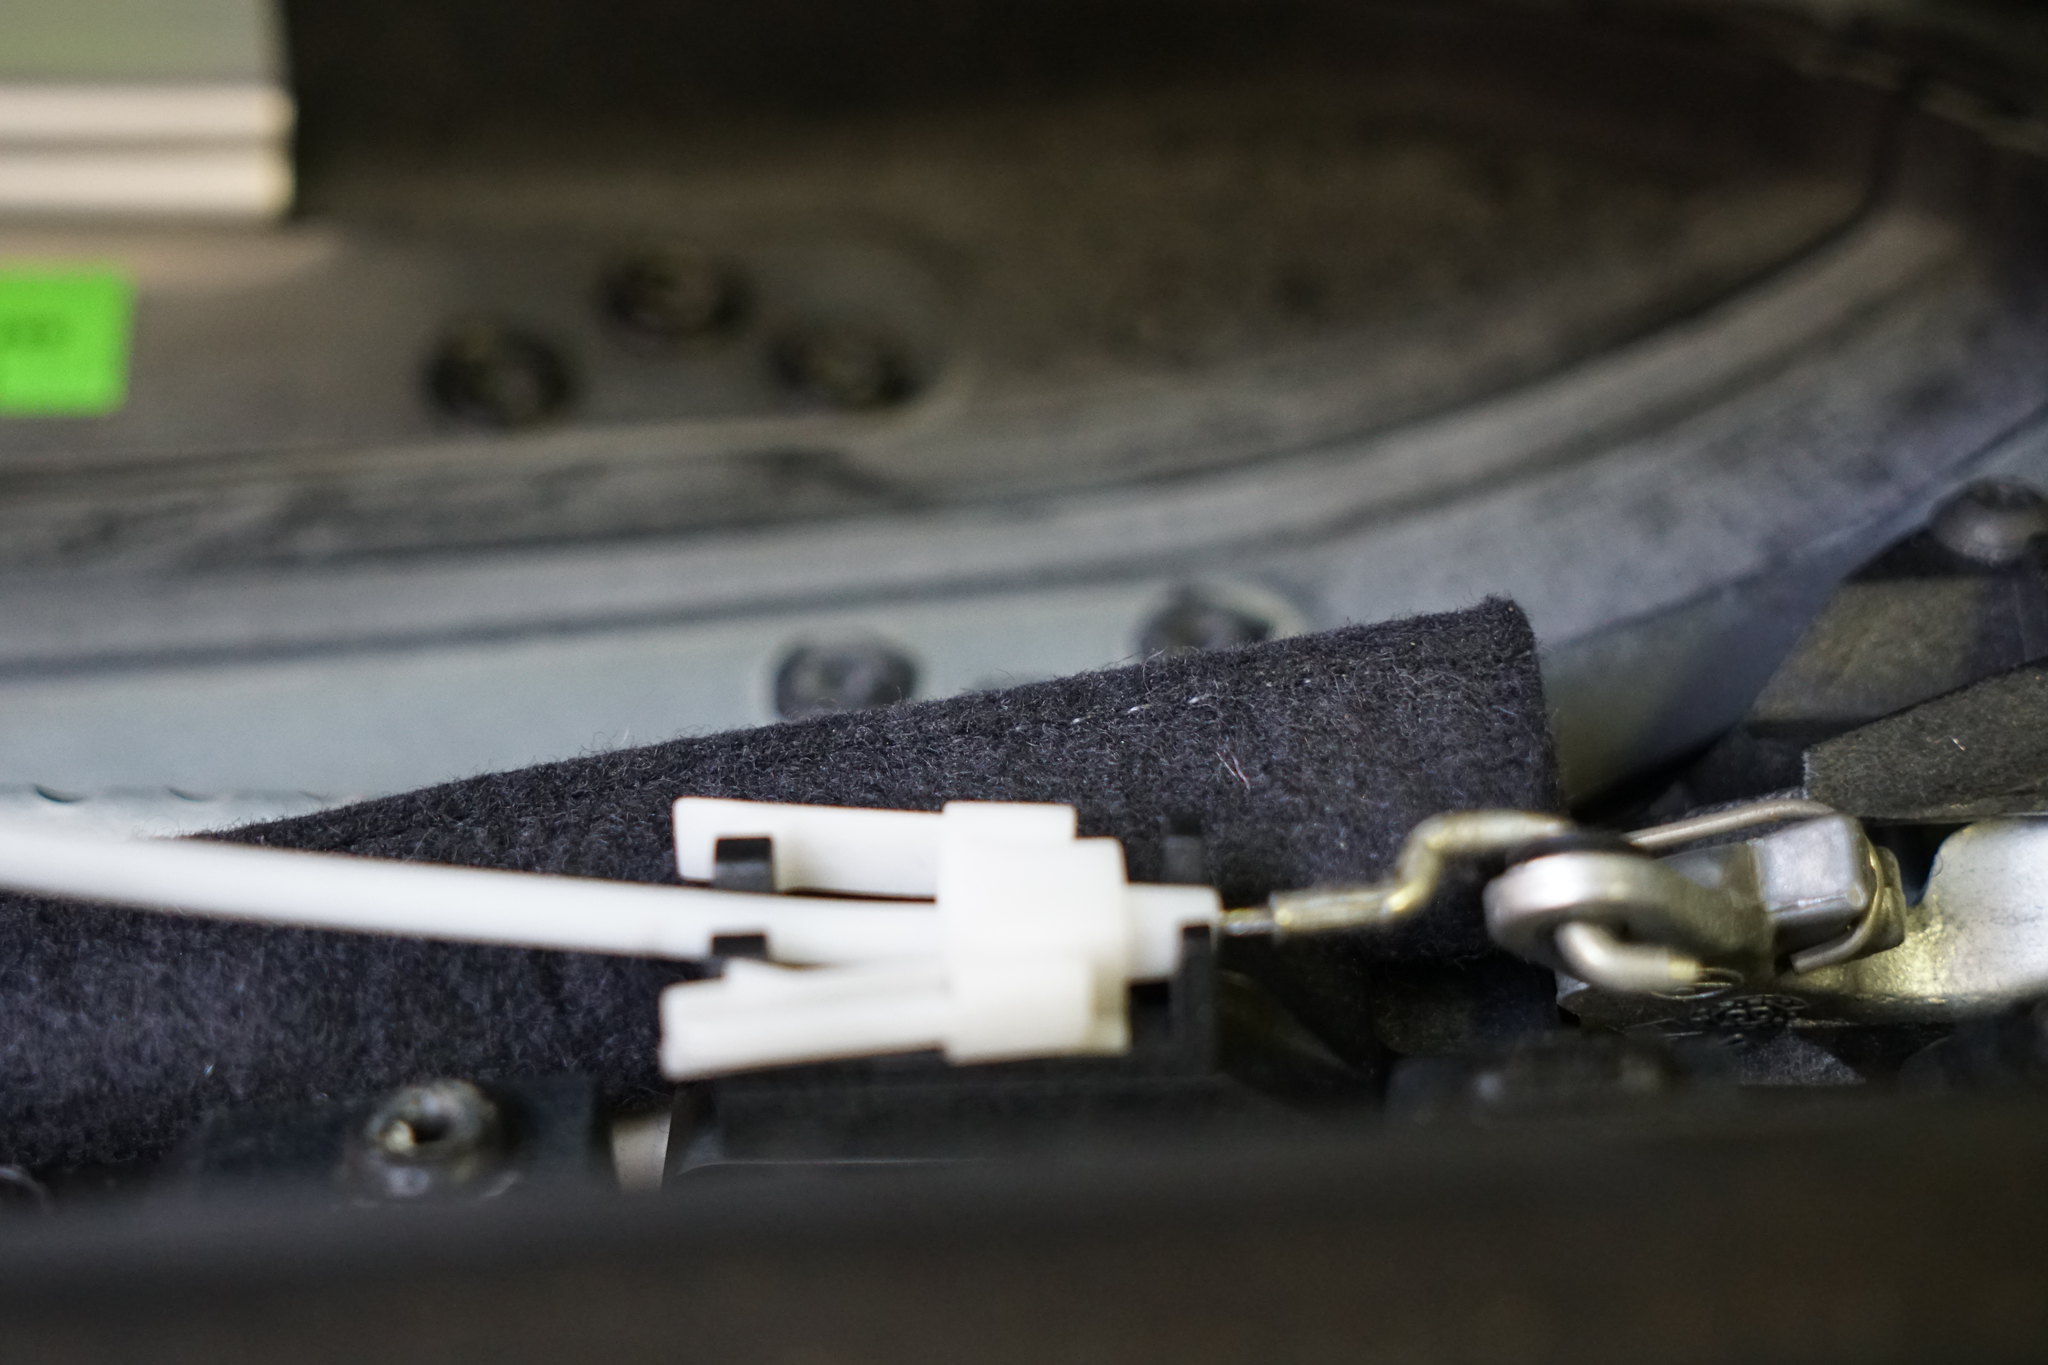
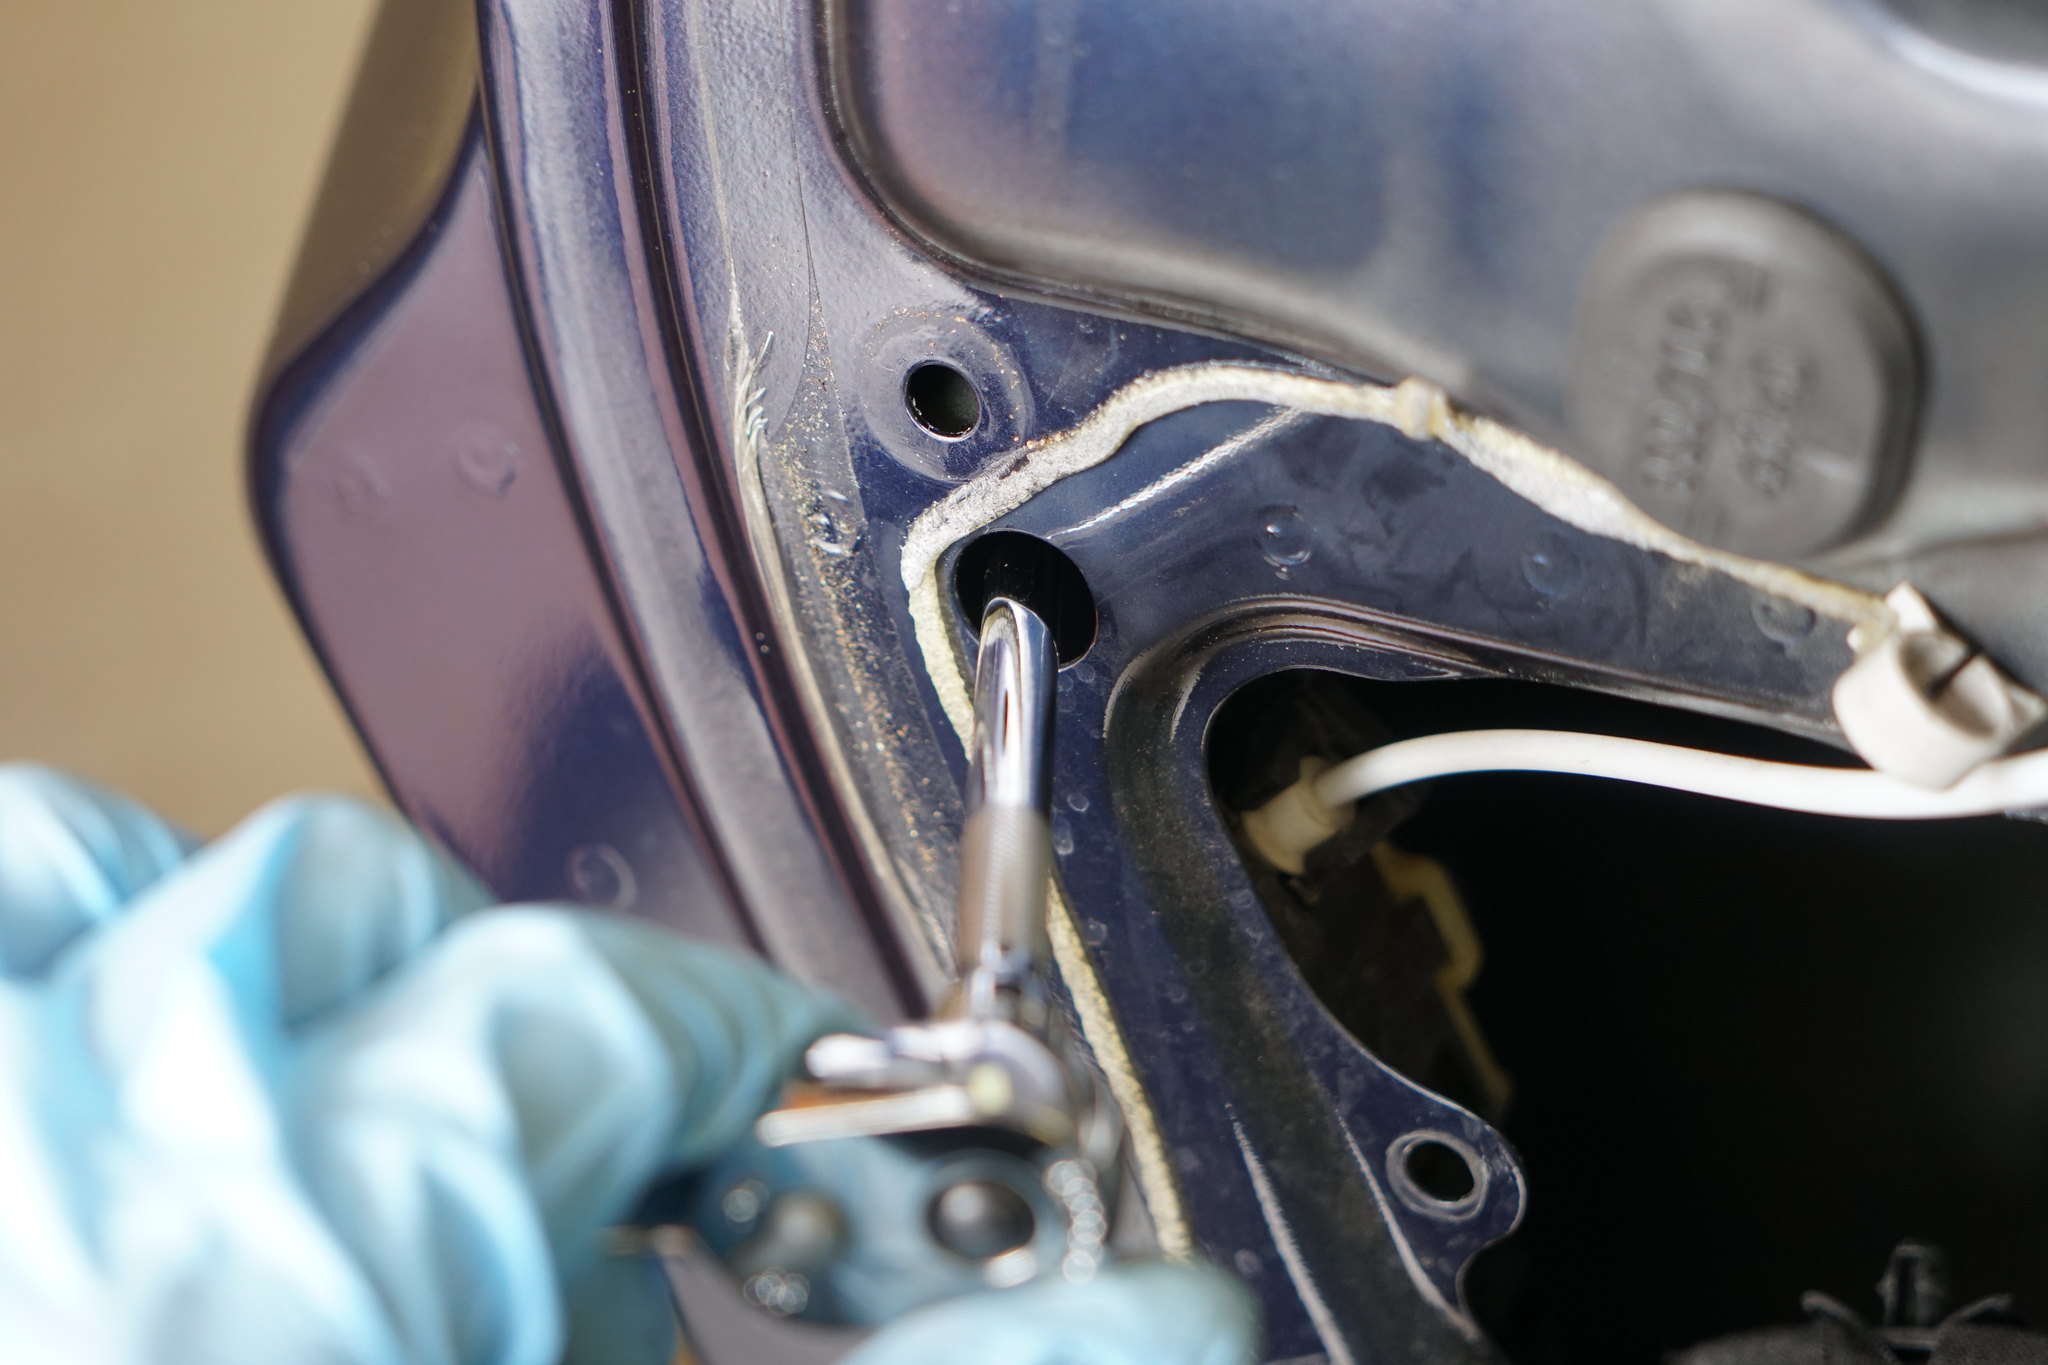
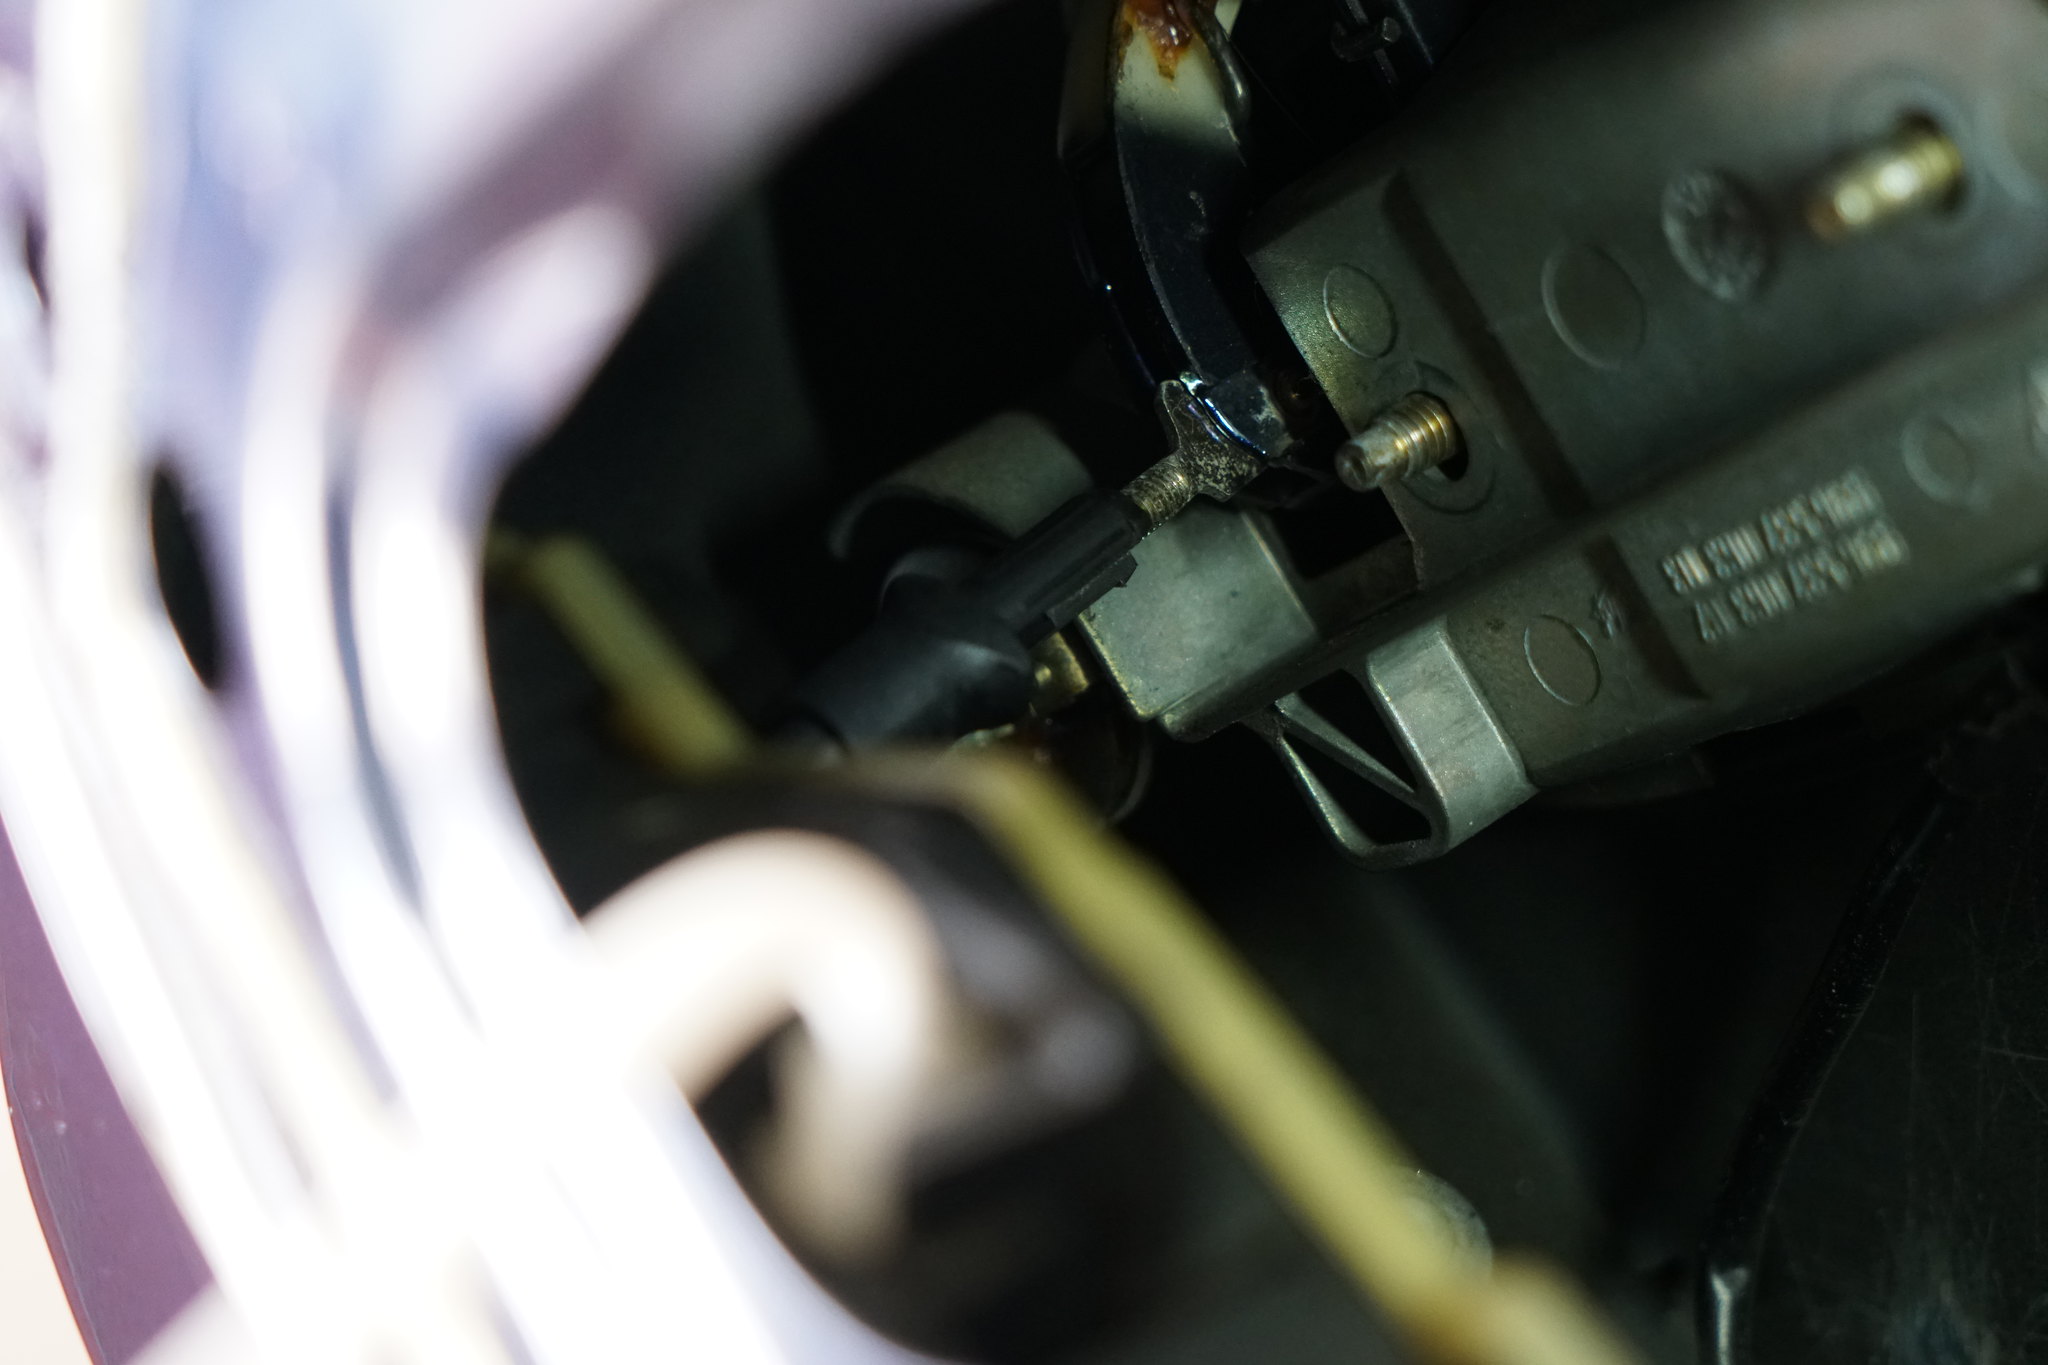
13. You will now want to release the exterior handle from the door latch. To do this will need to pull back on a plastic sleeve. After you have pulled the sleeve back, you can separate the two by pushing upwards on it.
Here is before the sleeve is pulled back
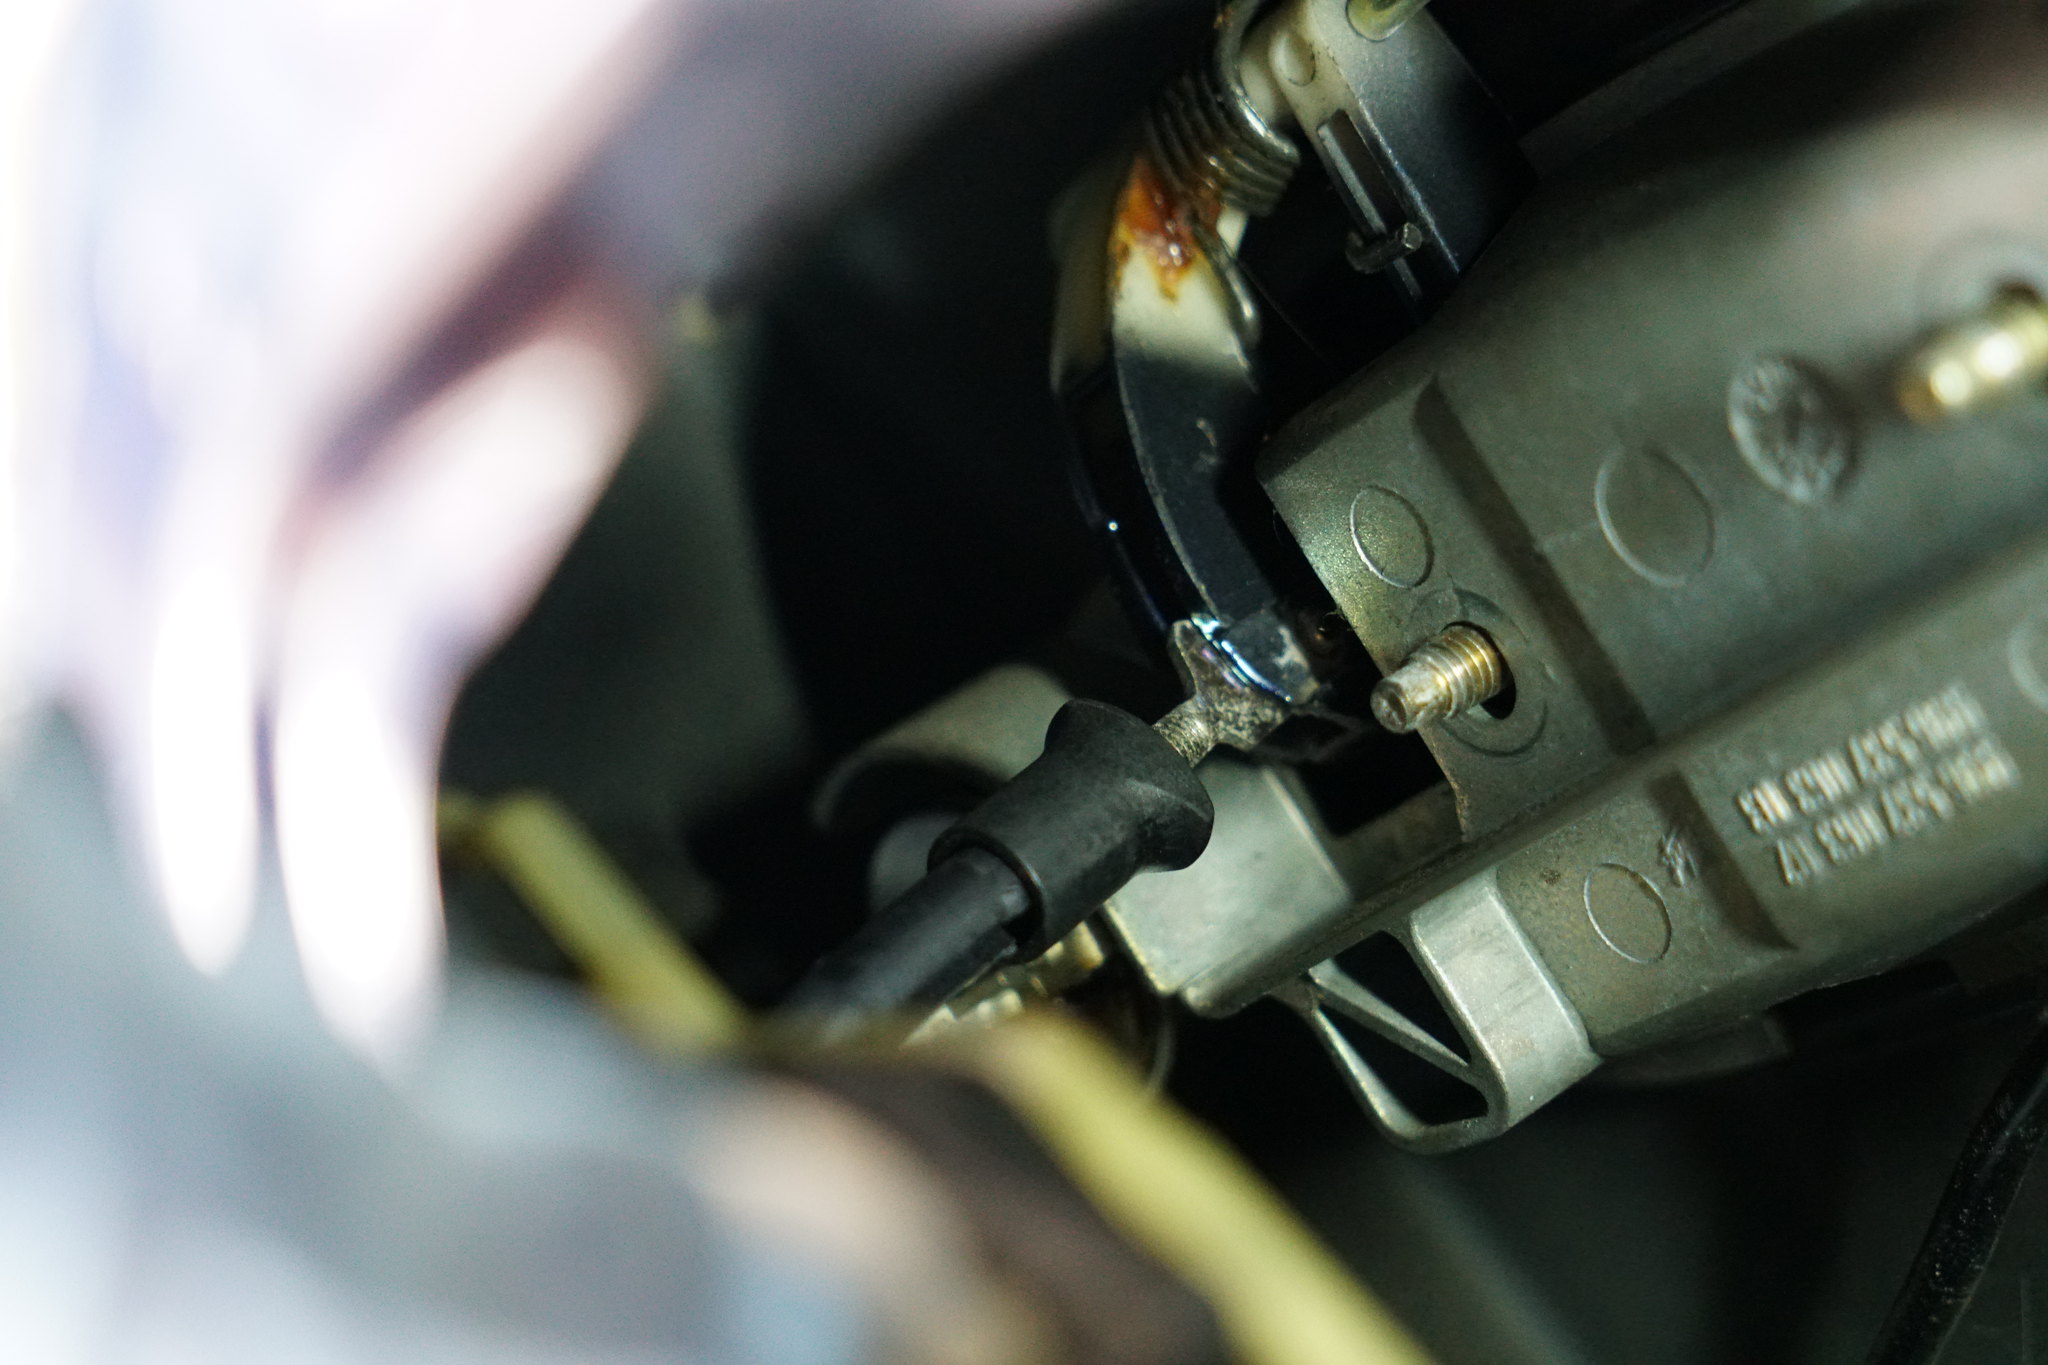
Here is the sleeve after is pulled back. You will see the bottom of the plastic tube has a slot. Push upwards from the bottom, and the door latch will release.
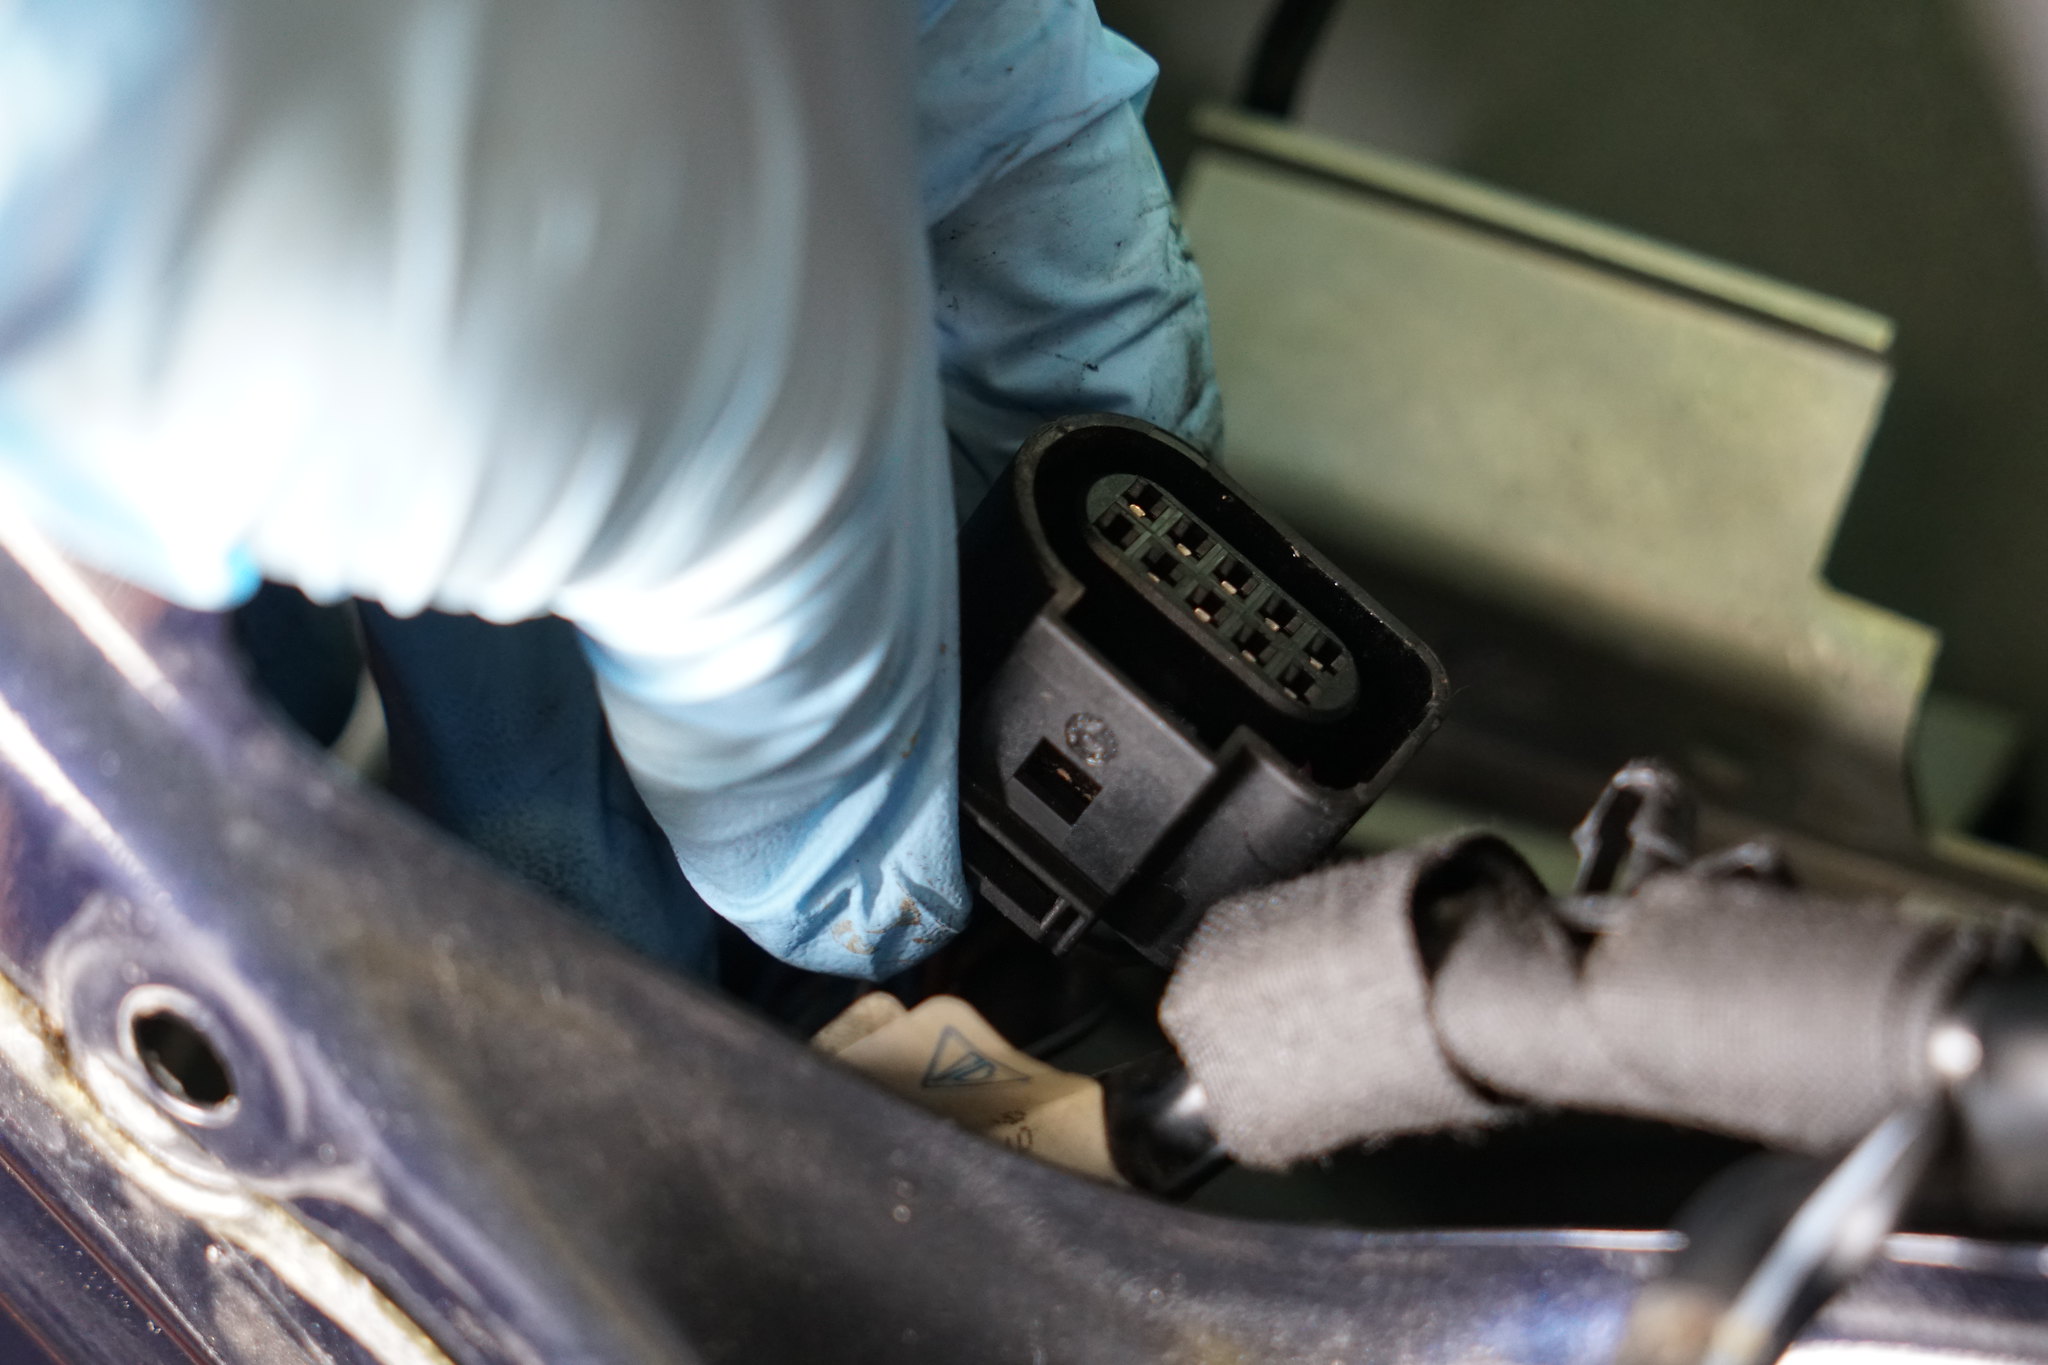
14. Remove the electrical connector from the bottom of the door latch.
15. The only thing holding the door latch in at this point is a shaft that locks/unlocks the door latch. You can wiggle the door latch out, but just know the cast aluminum piece holding in the door handle will come out with the door latch. Here you can see the shaft that connects the key mechanism to the door latch.
Various door latches from the VAG family will work. The cables can easily be swapped over if you are on a tight budget or parts availability is an issue. I don't recommend this route - the used one I purchased failed in a way that prevented the internal lock mechanism from disengaging. YMMV.
16. For reassembly, you’ll want to start by reattaching the cast aluminum piece that goes behind the door handle. Do not tighten down, just have it snug, as being able to wiggle it around will make installing the door latch easier. You will need to get the shaft to line up.
17. After the door latch is in position, and the shaft from the key lock is inserted, snug, but do not tighten, the two 8mm XZN screws. After the door latch is position and snugly in place, reattach the connector between the exterior door handle and the door latch.
18. You can now reverse the disassembly steps from this point.
Last edited by sweet victory; 11-11-2021 at 01:44 AM.
Thank you for taking the time to document, write and post this procedure. I just did this today on my 2004 and the steps were spot on! Three callouts to anyone doing this job:
Use a new, sharp razor blade to cut the glue bead behind the door liner. An old, dull one will waste your time and put your liner at risk.
Use a heat gun on low (and in gentle sweeping motions) to reheat the glue a little when putting the liner back in place. Be careful not to cook the liner.
On my 2004, I did not have the screw inside the storage compartment.
Small stuff compared to the info in this post. Thanks for saving me time and money on this job!
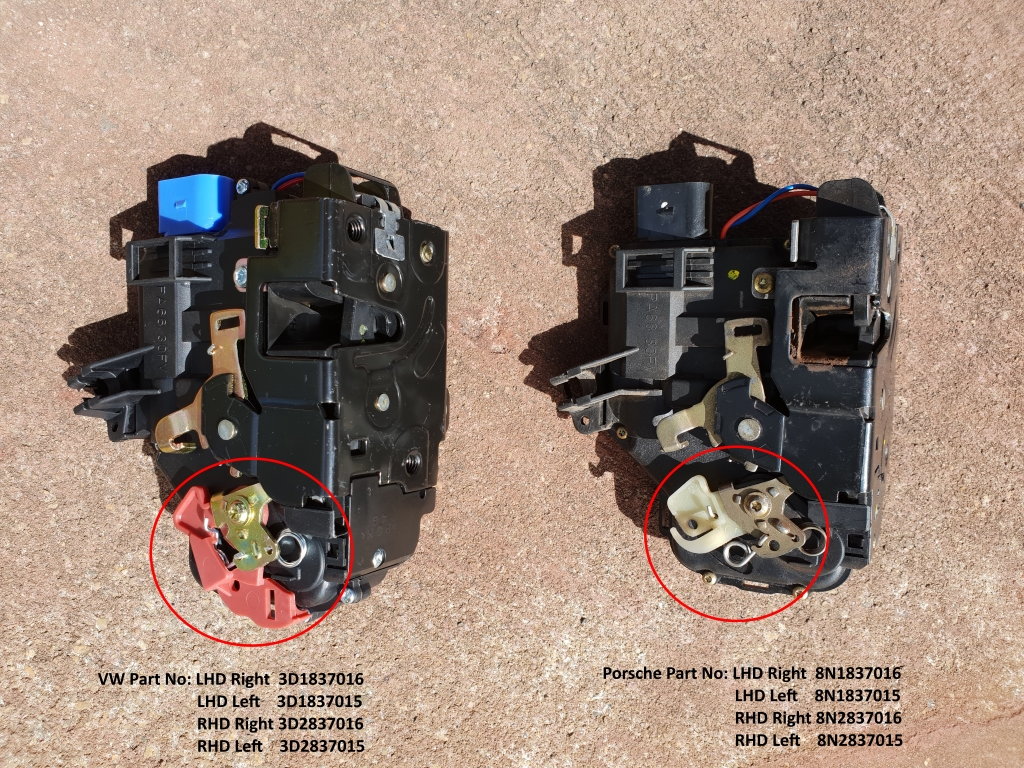
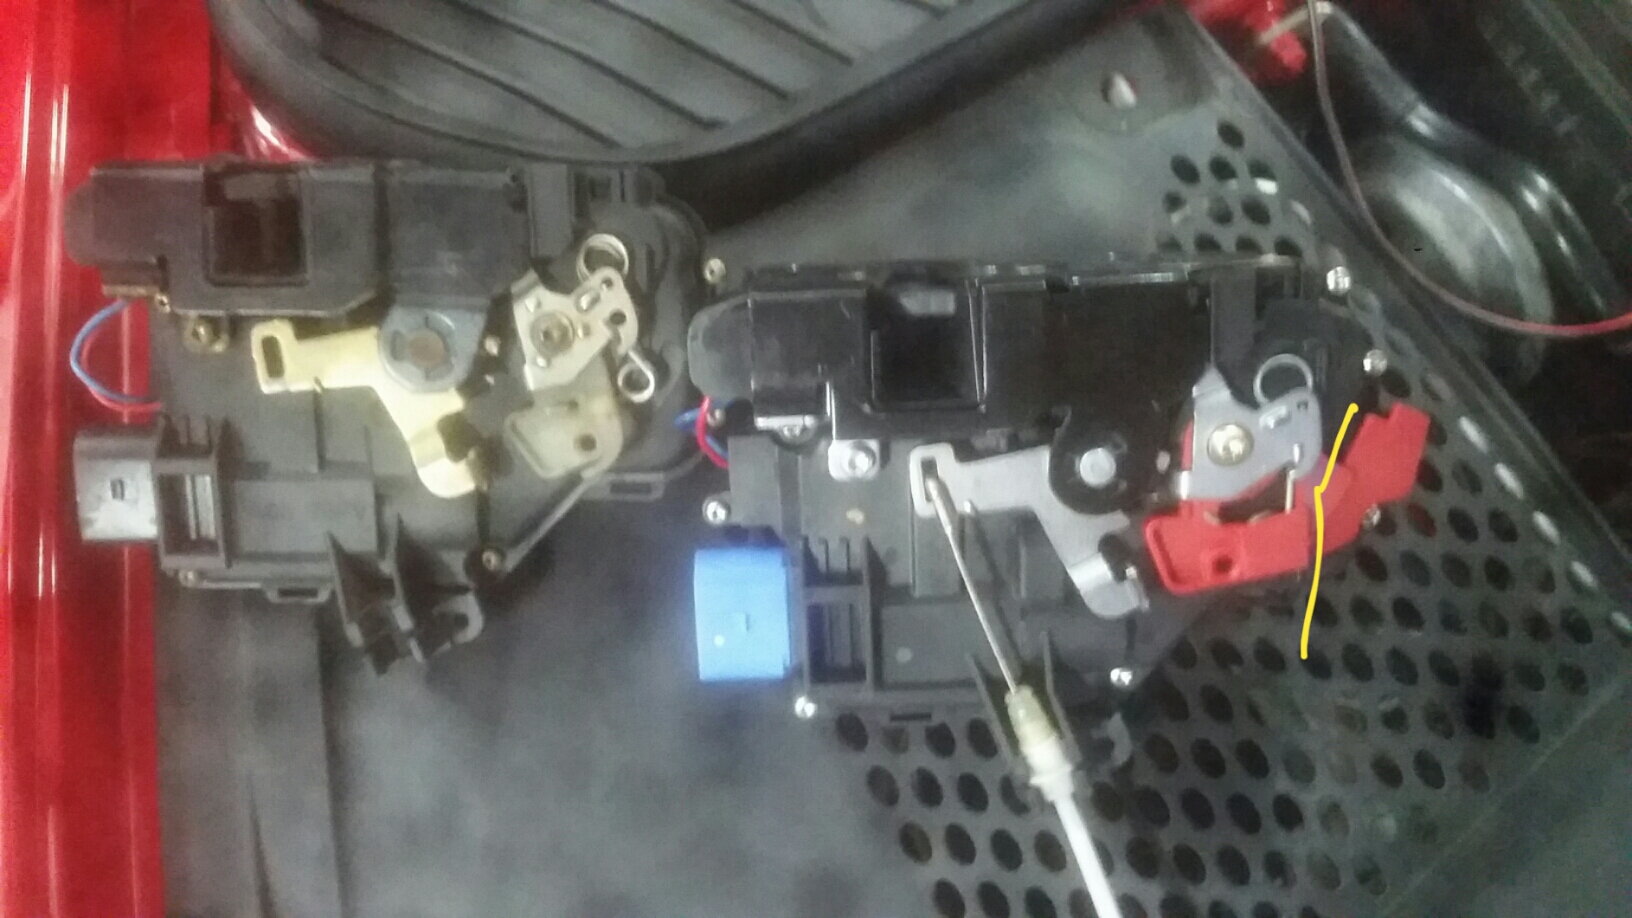
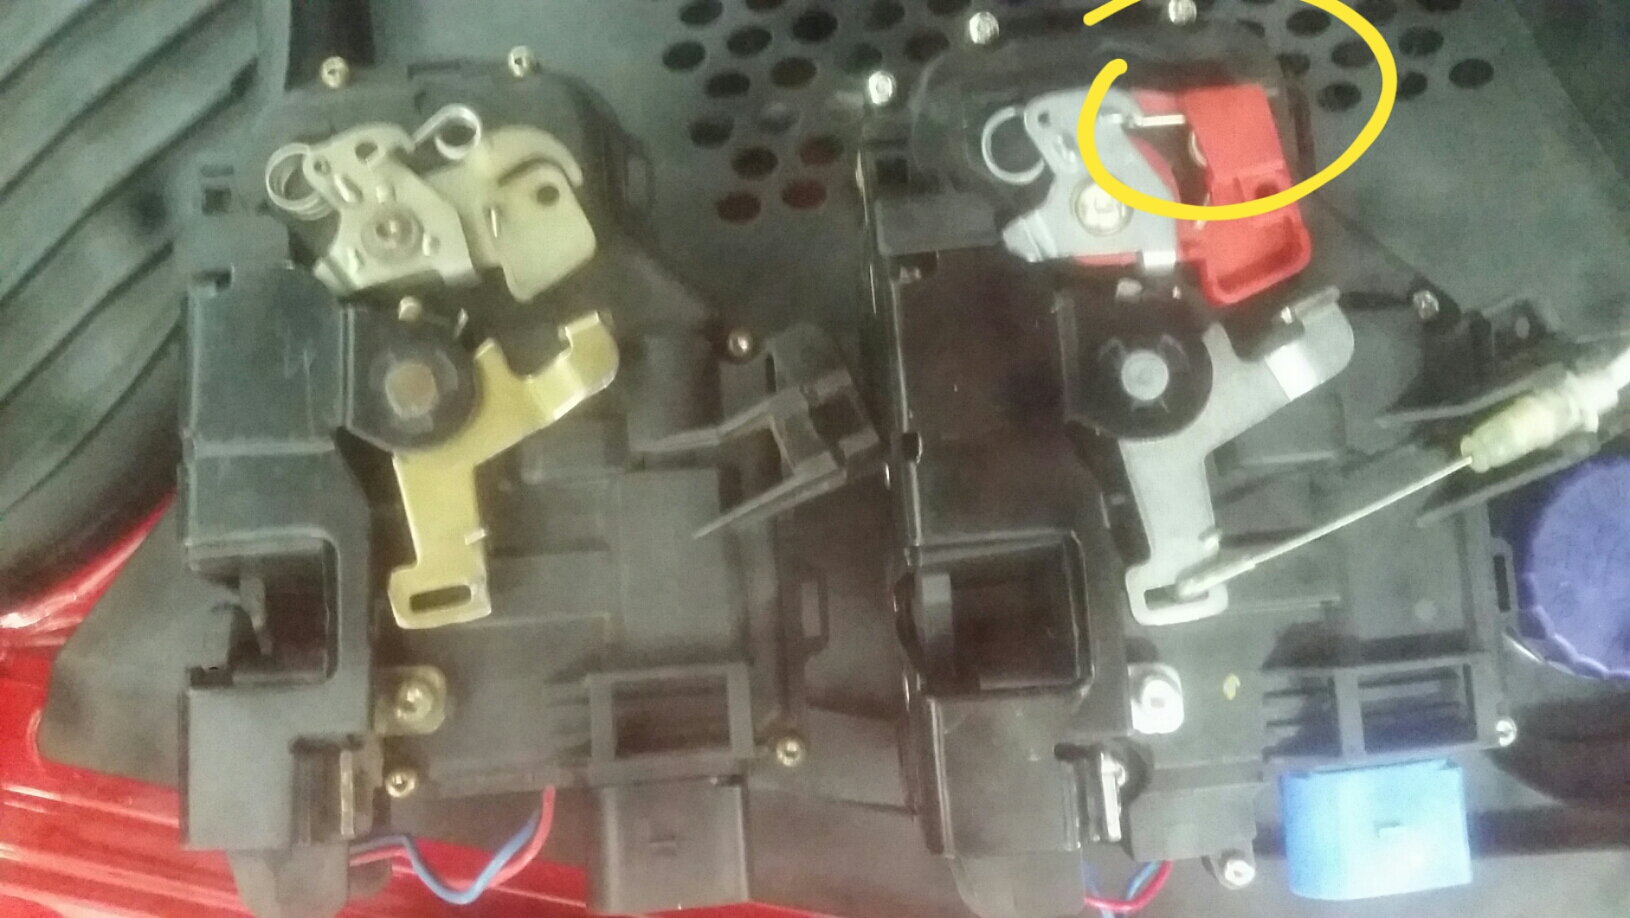
Excellent instructions. One more piece of information... You can substitute a (much cheaper) VW unit for the genuine Porsche unit by simply swapping the circled piece from the Porsche unit to the VW unit. They are otherwise identical.
I got VW P/N 3D-837-015-AB for VW Golf VI Variant, VW Golf 5 Plus, Jetta 3, VW Caddy 3, Skoda Octavia 2 etc. cheap off ebay to use its microswitch to replace the worn one on my lock.
After comparing the two I decided to try and fit it, which worked after cutting off part of the red plastic lever along the yellow line, see pictures.
It's an alternative to the above suggested swapping clock spring loaded levers and such. Cut line in yellow to make a vw door lock (right) work in a 996 (and 986). Original lock on the left.
Door lock works perfectly again in all its different ways of locking and unlocking.
That's a great idea. What was the cost of the VW part?
Paid 1� for the part and 4.50� p&p.
I put that bid in a couple of hours before ending as not to forget and was the only bidder as it turned out.
Check out using the P/N to see what is generally charged for the lock.
Thanks to OP for a great write up! Looks like I'm about to embark on this one - replacing drivers door latch mechanism. Symptoms - increasingly difficult to get drivers door unlocked and handle engaged to open door. When car is sitting in the hot sun (almost everyday), go to parking lot and unlock door with key. Pull handle and nothing. Sometimes two pulls will open door. Yesterday, unlock and pull, pull, pull, pull...nada. Lock again, remove key, and unlock again. Nada. Enter car from passenger side and pull on interior handle. Nope, door won't open. Leave passenger door open, returned to drivers side, locked and unlocked again and pulled the handle, door opens. Since I have to do this sometimes 4-5 times a day, going to take no chances and suck it up for an OE replacement door latch mechanism. Worked for 21 years, so I figure another 21 years and we are good to go.
Want to add - if I don't lock the door the door handle works every single time opening and closing the door. So it has something to do with locking the car and it not releasing afterward. And I have lubed the latch mechanism with white lithium grease. Any other brilliant ideas to consider?
At the time of writing the guide, I used a replacement latch from a vehicle with 50k miles. I had the exact same issues after ~3 months and the issue got progressively worse. I diagnosed the issue to the internal lock/unlock mechanism internal to the latch assembly. Replace the latch mechanism before it fails permanently. The day I went to replace the latch, I accidentally locked the door due to muscle memory and it took a good 30 minutes of pulling to get the door unlocked.
Okay, as a final follow-up to this DIY I have this to say: I replaced the drivers side door latch mechanism over the weekend. To the OP who rated this a 1.5/5 job, I have to totally disagree. This is an extremely tricky job. You will be working one handed and in the blind for the most part. Getting the door latch in is one thing, but the most difficult part is getting the cast aluminum backing plate in while lining up the lock pin and at the same time re-inserting the door handle with the hinges from outside. This was like trying to figure out a chinese jigsaw puzzle with one hand while your eyes are closed. There is no way to see what is going on, or how things are lining up way back up in the door. It is all done by feel and guessing. I got so frustrated I had to walk away at least five times and take a break. I was sweating my a$$ off and almost thought this was going to have to go to the dealer because I can't figure out how to do it....that is how close it was. And that is very unusual for me.
As I stated in another thread, I replaced my drivers side latch mechanism with a OE Porsche door latch (R8N1837015C) because the last one has worked for 21 years. Yes, I paid the Porsche tax but it is worth it for this part. After doing this job I never want to do this again. It started getting wonky locking and unlocking, sometimes taking several attempts to unlock and engage the door handle. It ended when I unlocked and pulled the door handle and it did nothing over and over. I would have to enter passenger side and attempt to unlock from inside the car. It got to the point where I could not get the door open from outside or inside. Not good.
This write up with the pictures is spot on. Many thanks to the OP for the detailed instructions and pictures. I took many pictures as well but I don't feel it would really add anything to post them up.
One of the things I would add, I found it very helpful when reinserting the door handle from the exterior side of the door, tape the threaded rod that goes from the door handle to the latch to the hinge. That thing got in the way so many times reinserting the door handle and trying to get it to line up with the cast aluminum backing plate. You cannot remove it because once everything is in place you will never be able to reattach it. Those of you who have done this know what I'm talking about..it flops around and makes it nearly impossible to get the door handle assembly back in.
And finally, the door latch is truly an electro-mechanical mechanism. It does not work without power. Playing with it on the bench, locking and unlocking, I'm telling you it does not lock or unlock simply by turning the lock cylinder pin. I always thought that the key would operate even if the car was dead (no power). I am telling you for certain the door latch mechanism will not physically lock or unlock without power.
A picture of the lock cylinder pin and door handle hinge pin that you need to line up when reinstalling....all in the blind
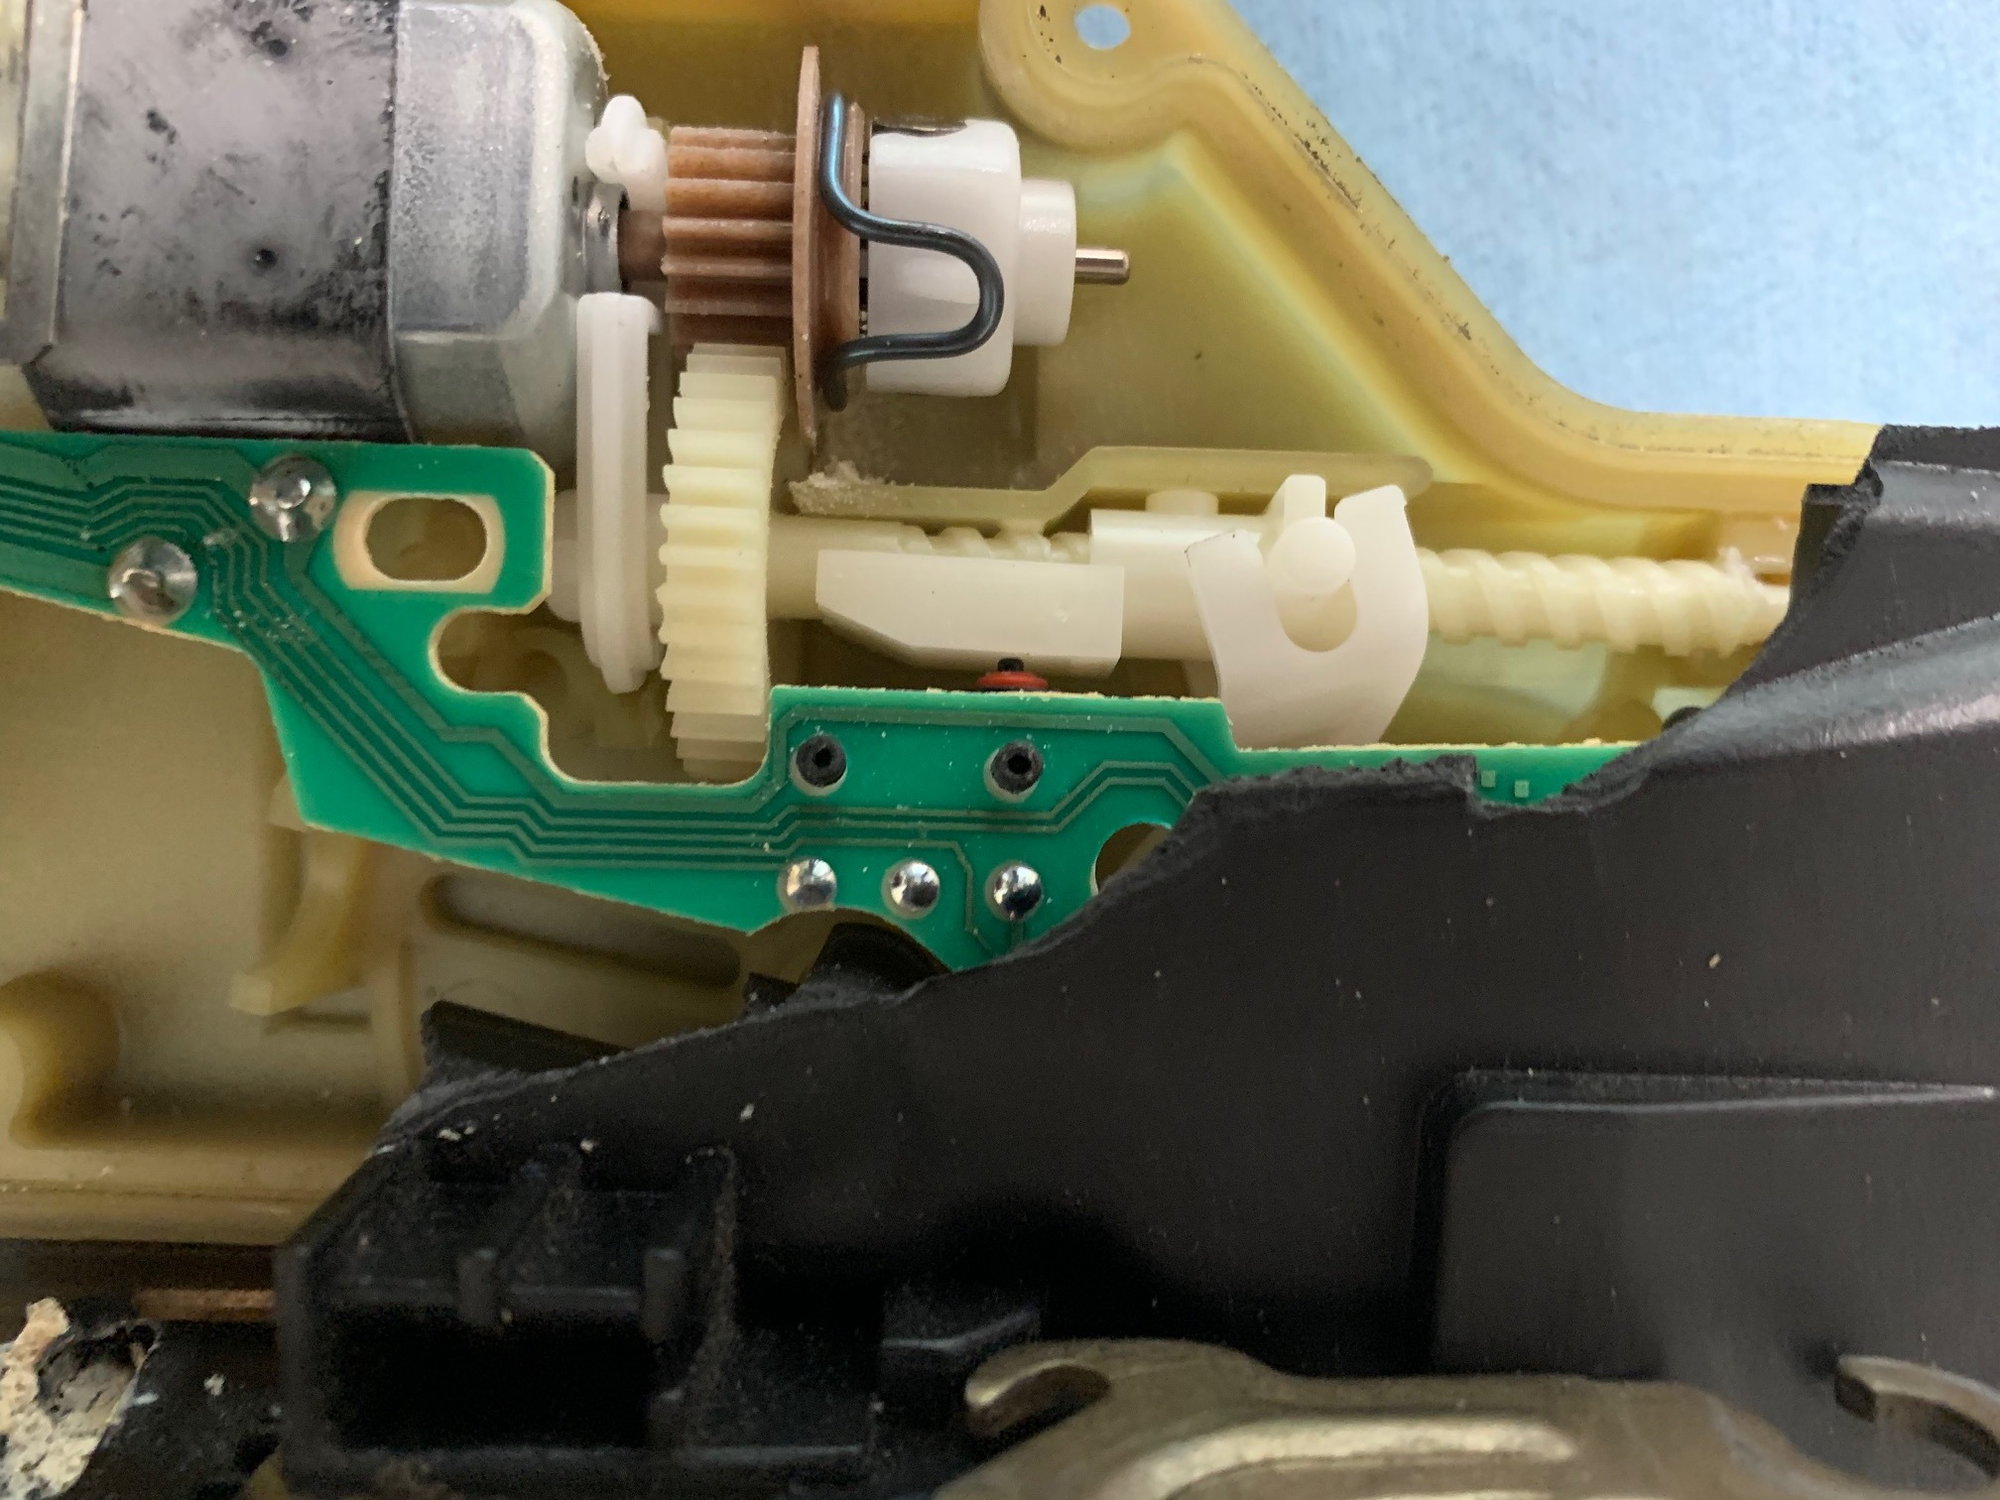
I think I will also add that I had both old and new door latch mechanisms on the kitchen table and I spent probably close to an hour comparing them. I could discern no physical differences or obvious problems, so the failure must be internal. I may keep the old one and open it up to see what is inside.
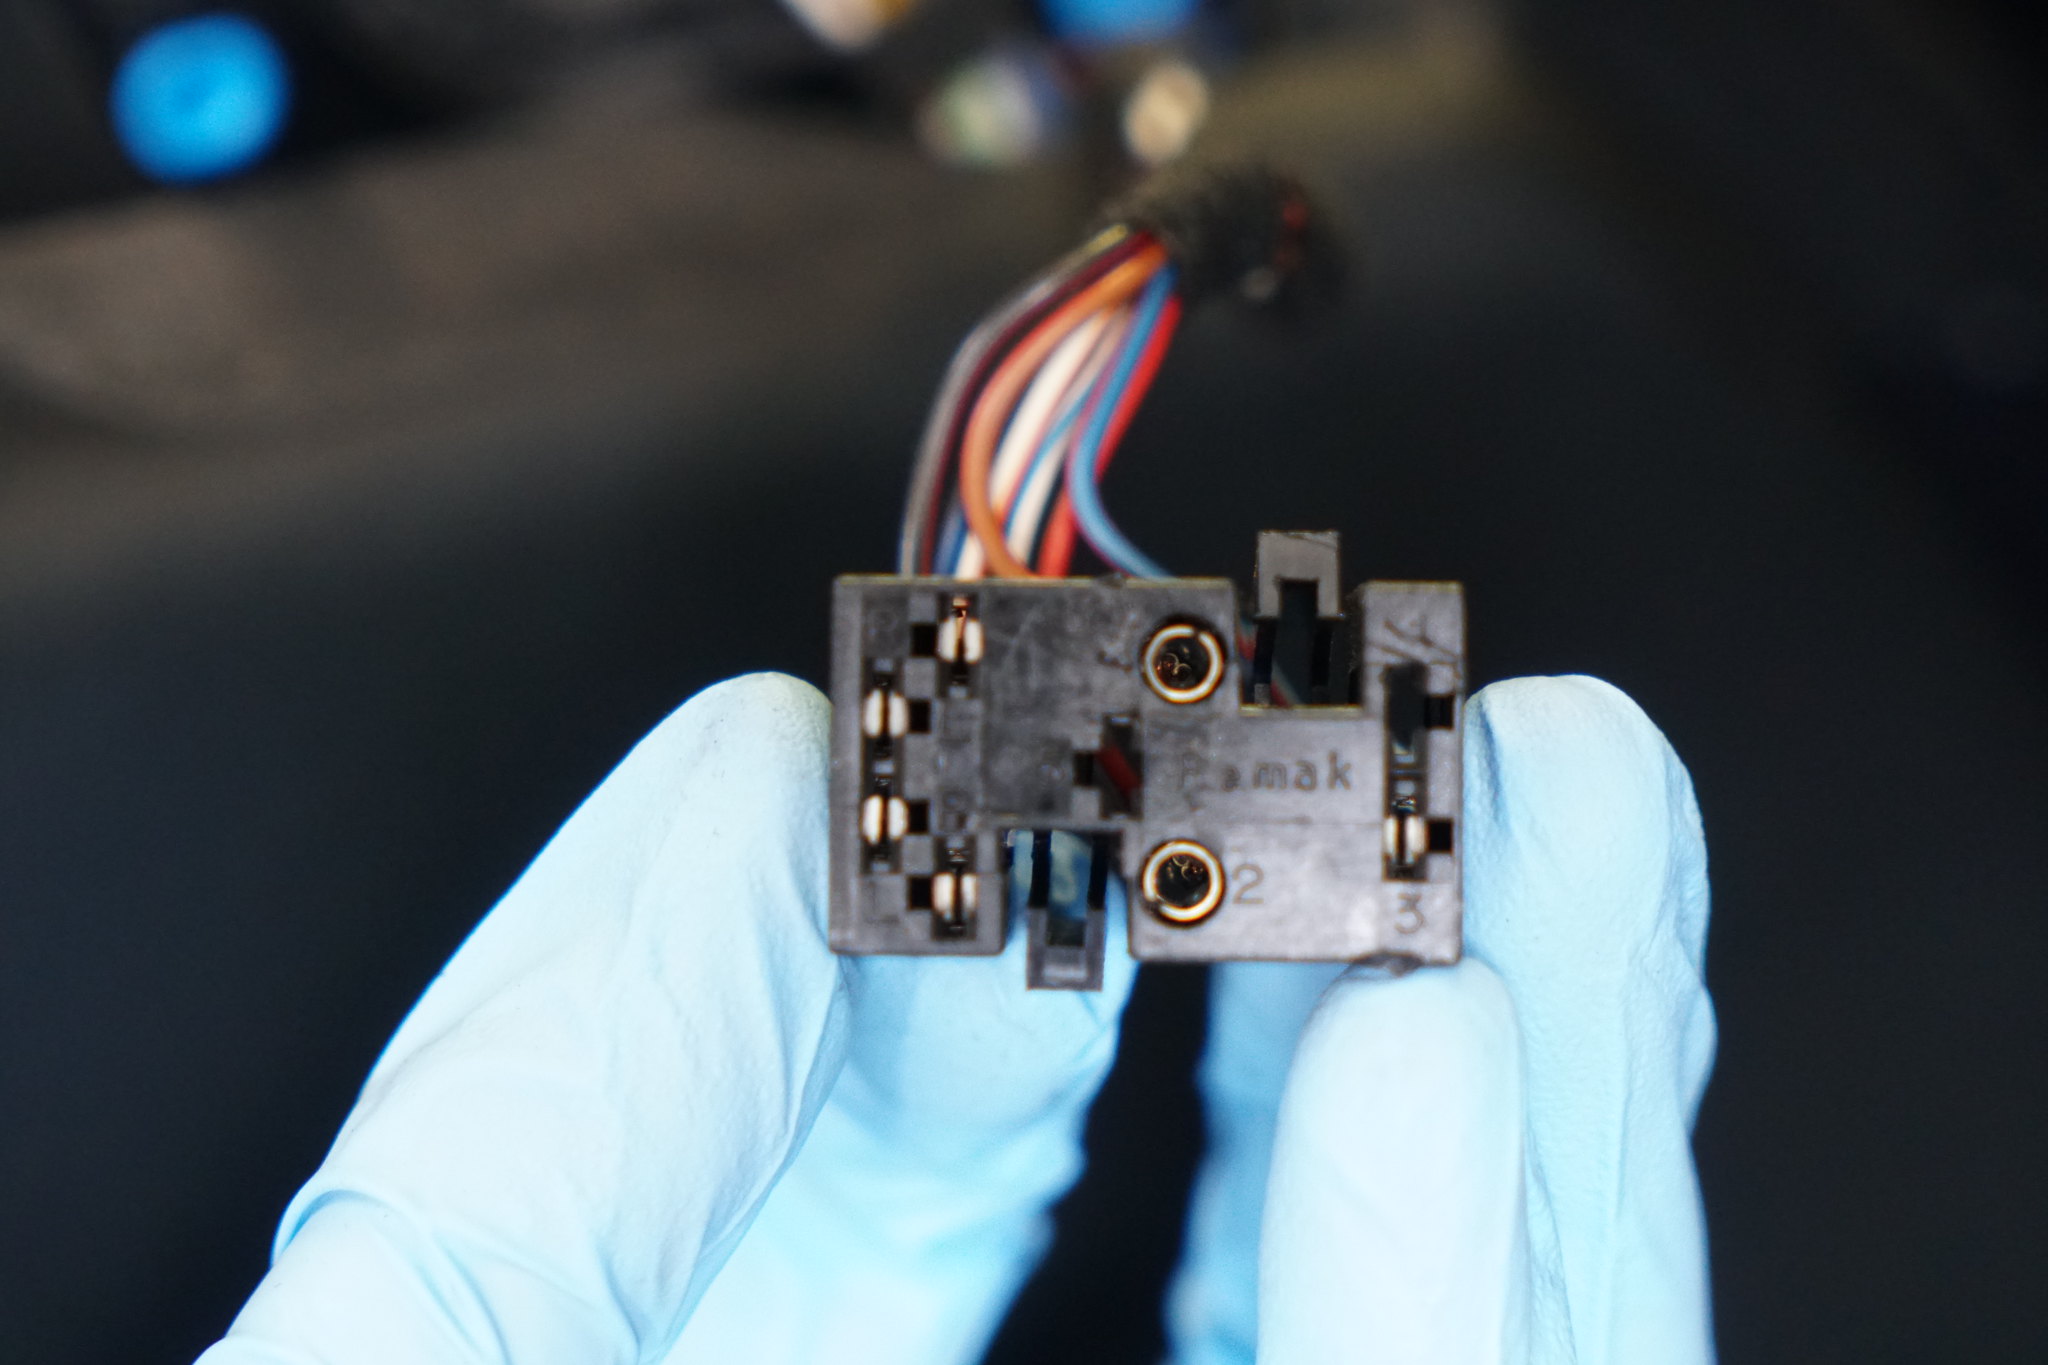
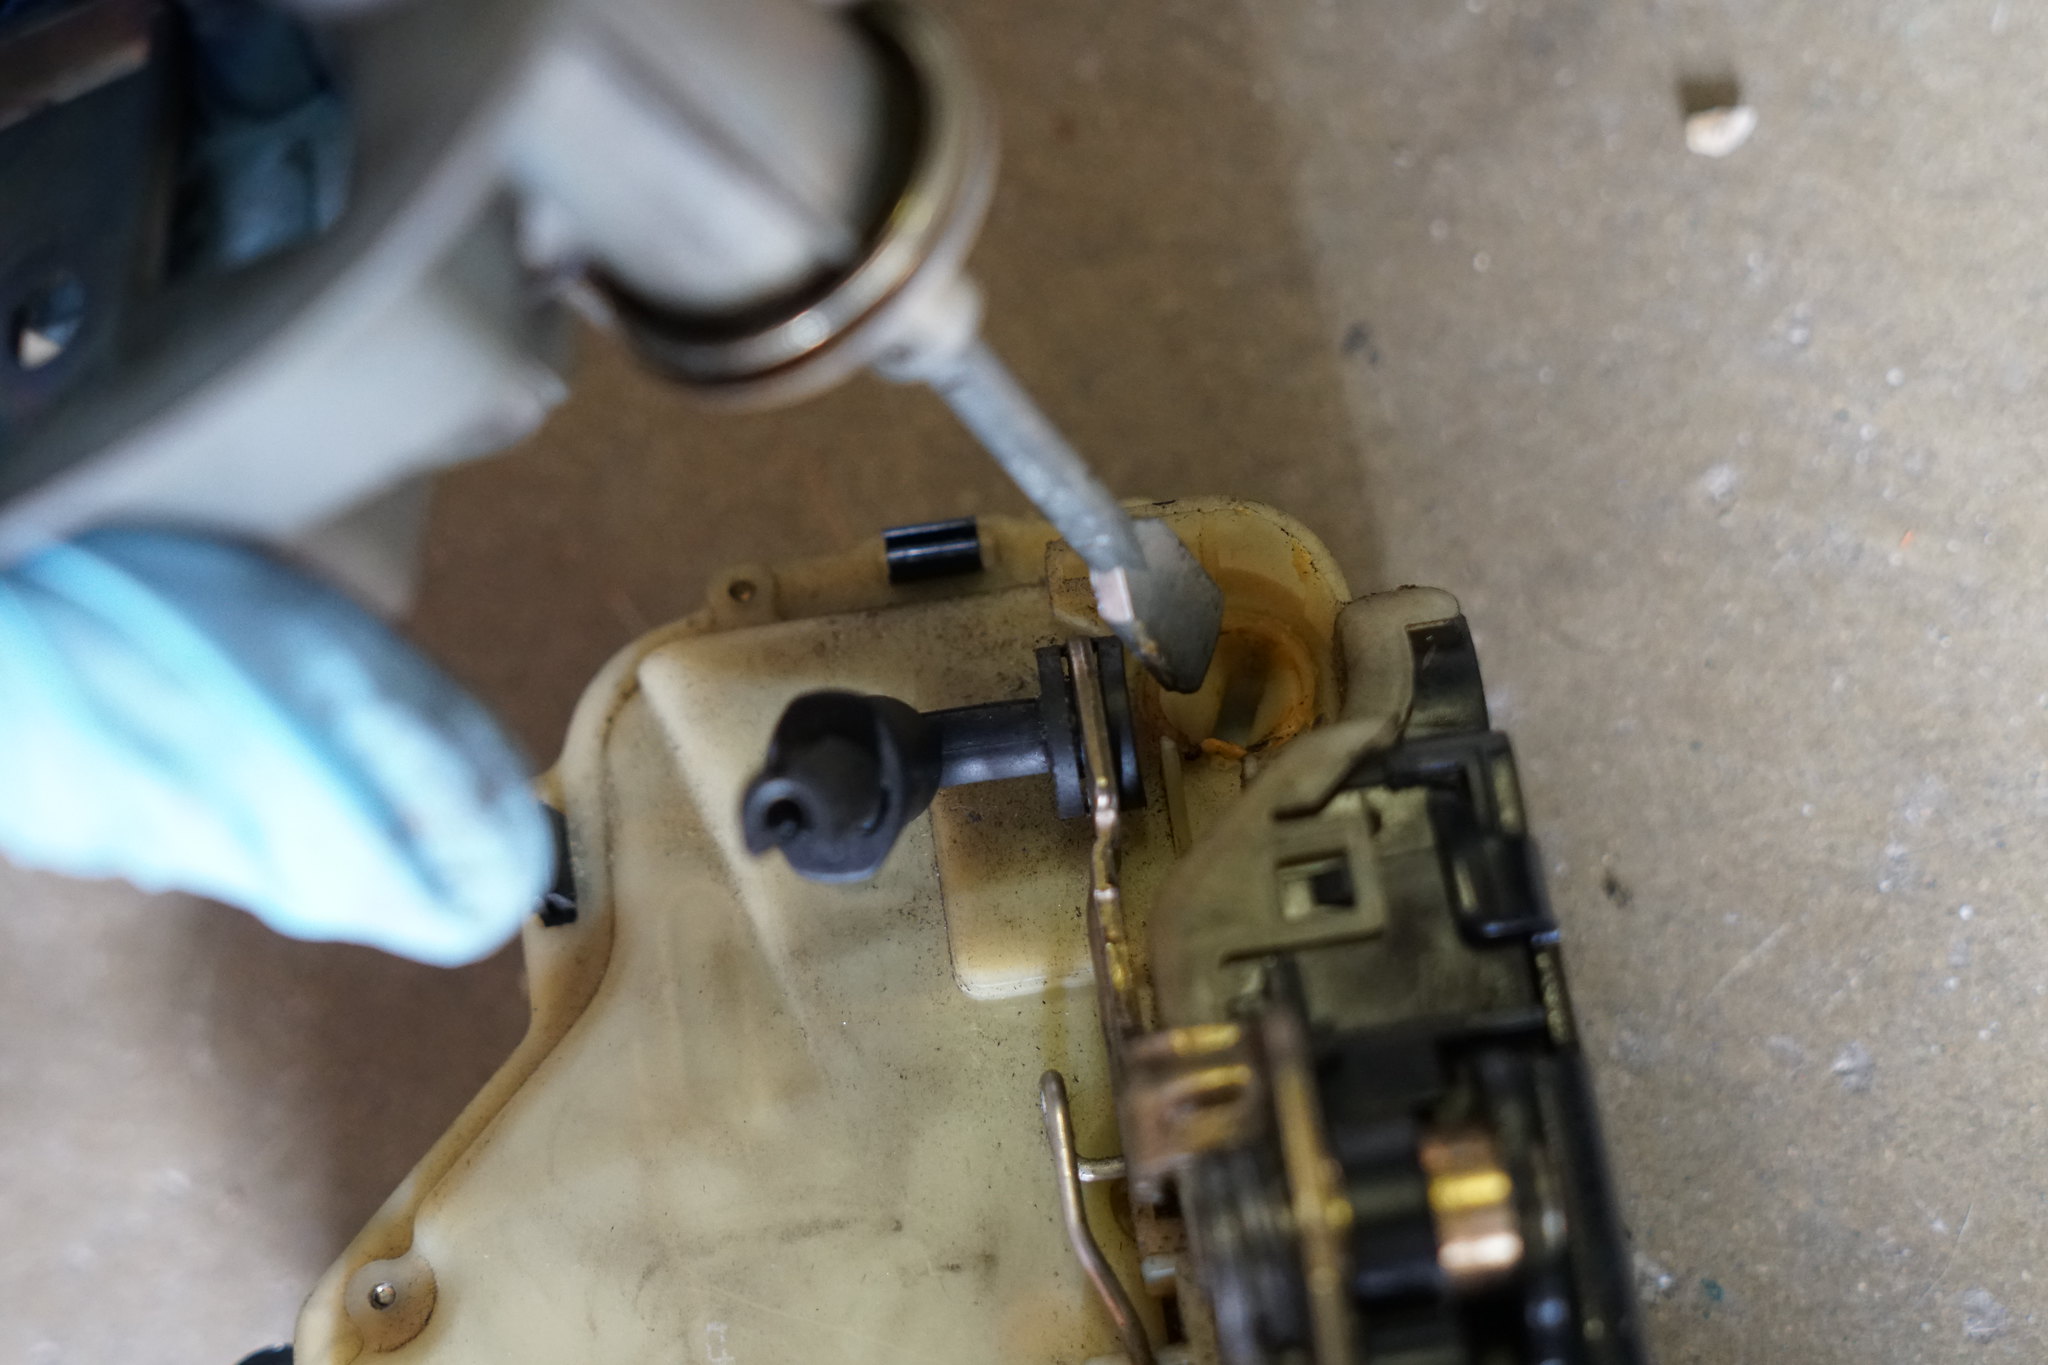
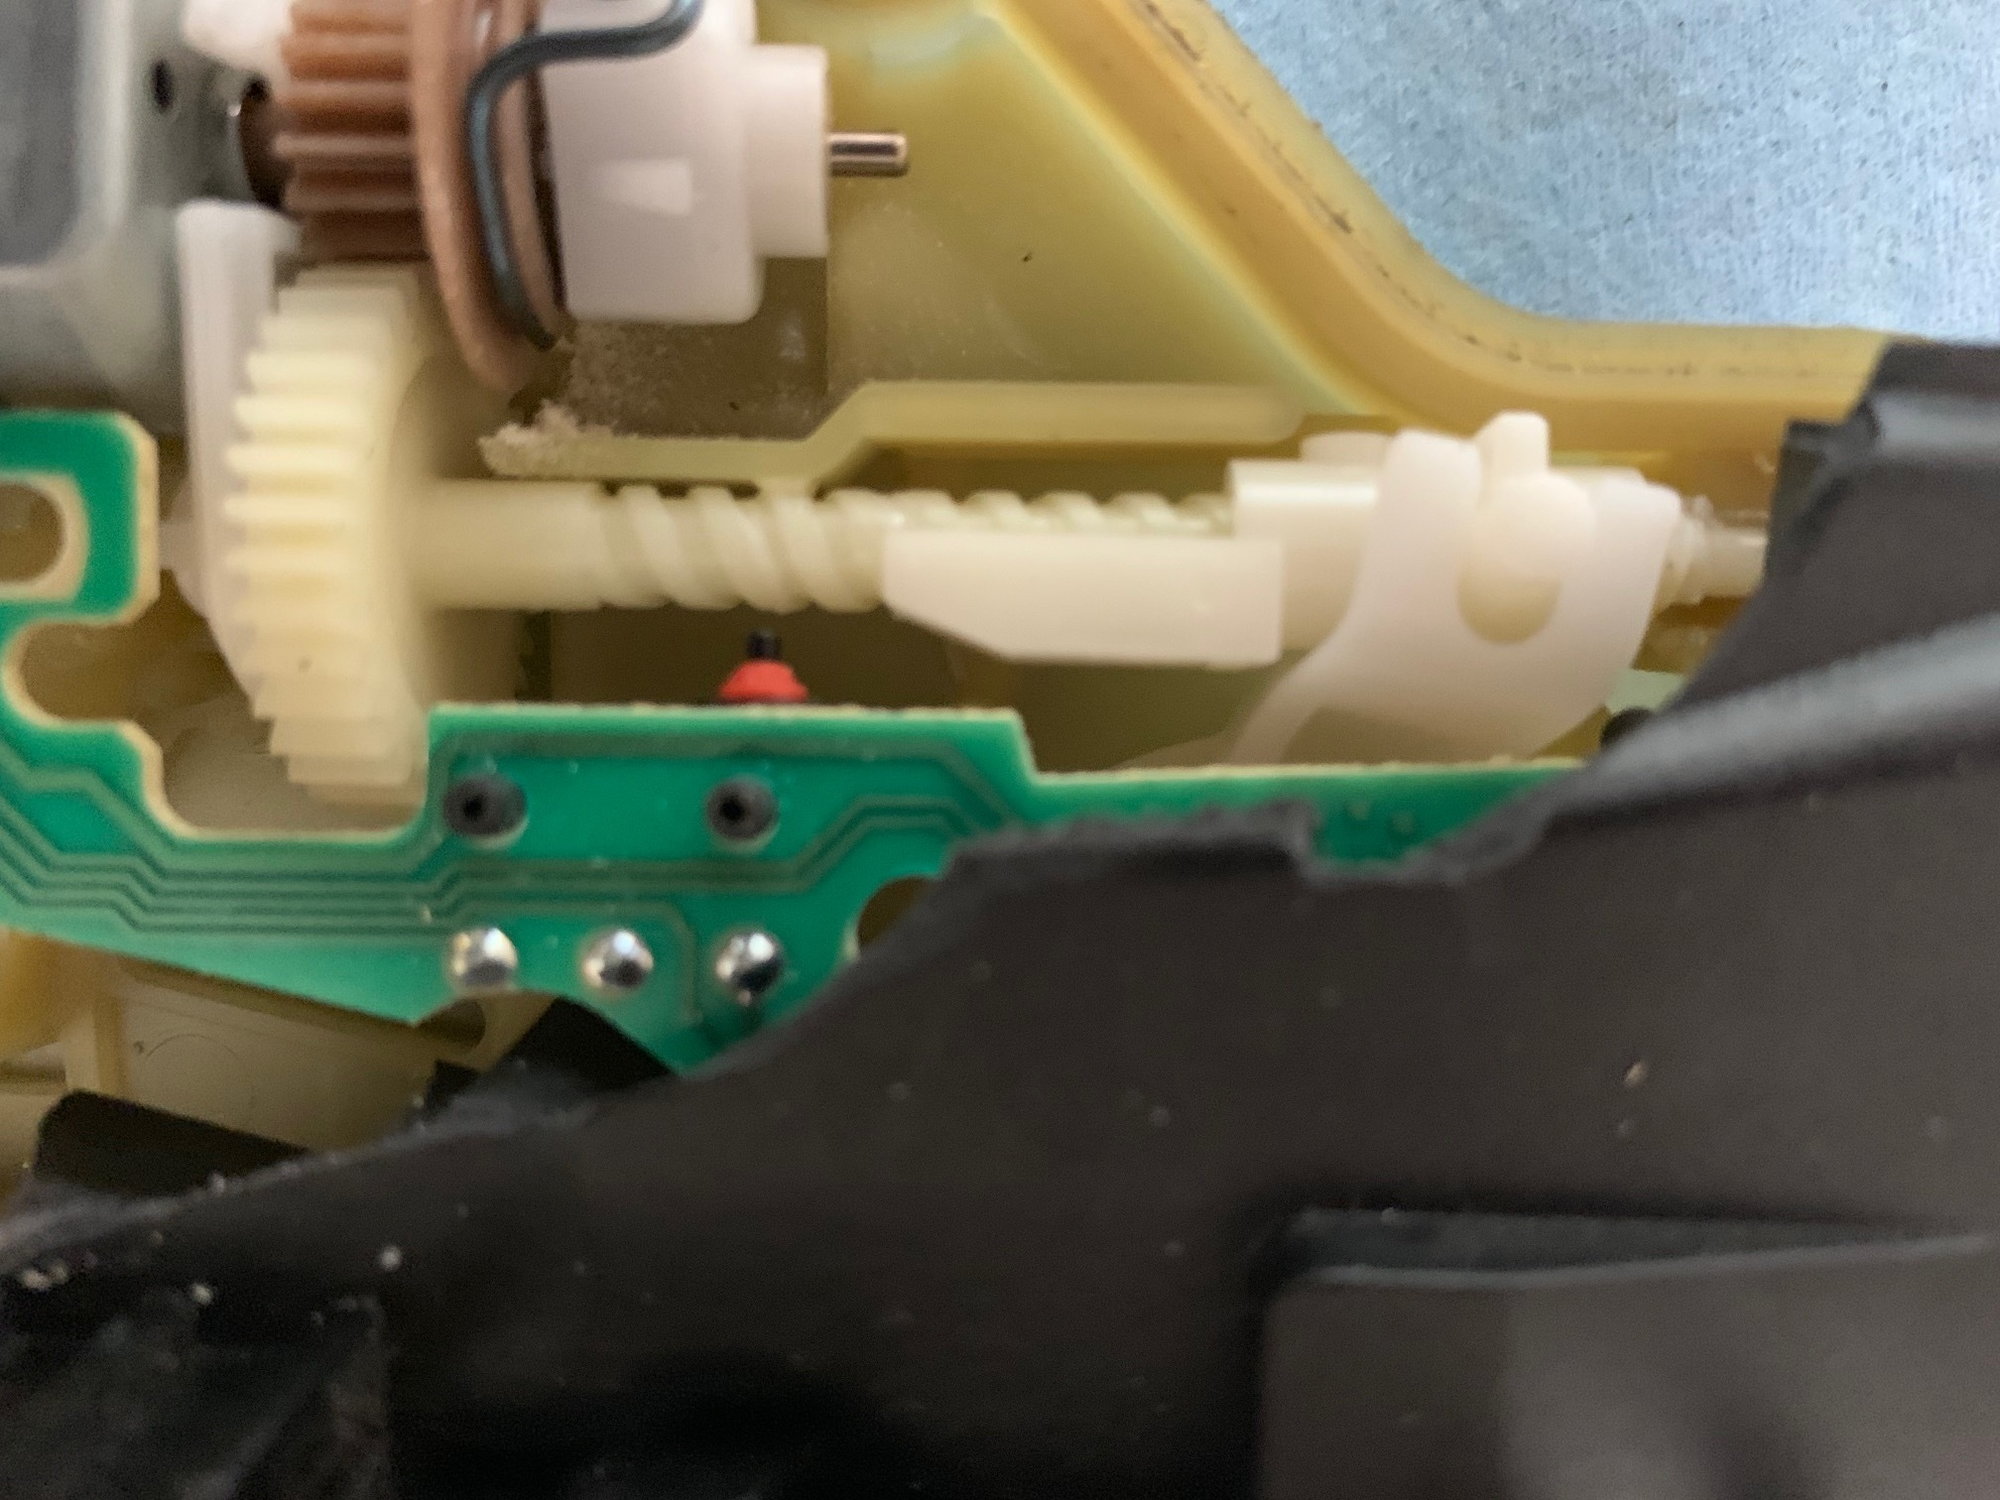
Now here is where it gets interesting. By inserting a screwdriver in the slot where the door lock cylinder turns back and forth, the movement causes the slider piece on the worm screw gear to move up and down. As the slider moves up and down, a part of the slider either opens or closes the microswitch on the circuit board (the little orange looking thing). See open and closed positions. Just wanted to say, all movement from the white part where the door lock cylinder pin acts only as a fulcrum point (the fork piece on the slider) to move the slider up and down the worm gear.
 04-08-2018, 12:18 AM