When you click on links to various merchants on this site and make a purchase, this can result in this site earning a commission. Affiliate programs and affiliations include, but are not limited to, the eBay Partner Network.
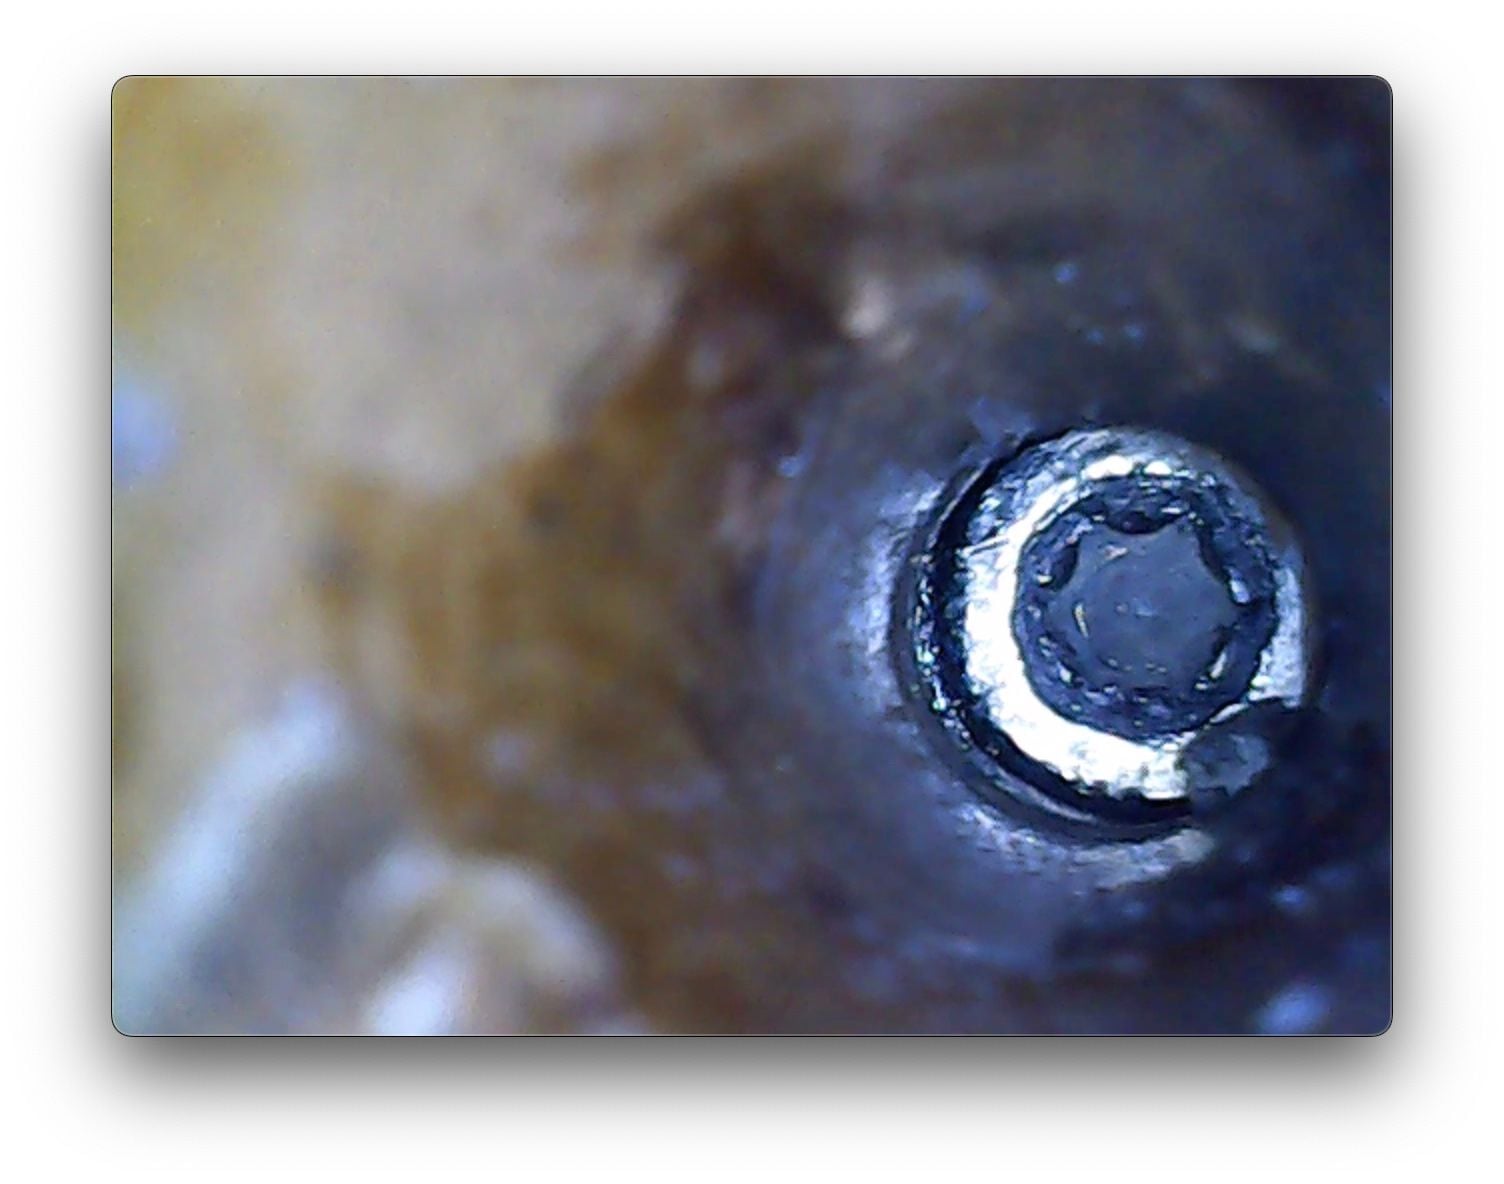
My 996 has had an inoperable horn since I purchased it several years ago. It's an occasional driver, so I've basically ignored it until recently when I decided to fix it. The issue is common, and likely one most people on this forum have experienced, with an easy fix. I ordered some parts and got ready to do the work. Using a deep T30 bit, I was able to loosen one screw with no issue. The other one, however, not so much. I feels like perhaps some previous work partially stripped the screw, and I likely exacerbated it, but either way, here I am. It should be noted that the screws do not back all the way out. The screw in question is very loose...the air bag unit is close to coming off. Anyone have any good ideas for getting another turn or two from this? The depth of the hole is about 1 1/2", but it is very narrow, even a bit holder extension is too thick. I've tried a screwdriver to try and get a bite and a turn, but the blade width seems to match a T30 diameter, and the next size up is too wide. Lastly, the screw head doesn't line up with the hole exactly (likely because it is so loose). Putting force on the bag unit does realign it, but I only mention because it makes alignment a bit blind.
My current thought is to put a dab of superglue on the end of the T30 bit, and attach it to the head, and hope that gives enough grip to get the remaining turn needed for removal.
Any other ideas? And if I need to drive to a shop, is there any danger in re-connecting the battery and driving the car with the bag unit so loose?
There are several different sets shown. The challenge is going to be getting one of the long narrow drivers that fits into the T-30 and will go into the hole.
I don't think super glue would help much. First I would try "covering" the bit to make it a smidge wider and go from there. And JB weld could work but would have to be perfect.
I don't think super glue would help much. First I would try "covering" the bit to make it a smidge wider and go from there. And JB weld could work but would have to be perfect.
If I understand you correctly, yes, I tried a large rubber band on the end of the bit...bit it didnt get me anywhere. I could try a glob of rubber cement, I suppose. Pretty harmless. Let it dry on the bit and give that a go, again hoping for just a bit of bite.
There are several different sets shown. The challenge is going to be getting one of the long narrow drivers that fits into the T-30 and will go into the hole.
Sorry to hear about your trouble with stripped screw... my biggest fear as well each time I DIY a job... I have seen people recommend "TankBond liquid grip" when the screw head has not completely gone yet; your screw head might still be OK for this product; It could be a good alternative for less than $6 on Amazon, maybe... Good luck! Cheers,
May want to try a long-shaft SAE Alen key with the bit just a tad bigger that the metric hole. I have successfully used this technique on stripped holes.
Unless your buying REAL expensive torx bits, the first thing most of them need is the face dressed so the leading edges can bite into the bottom of the torx hole in the screw head.
I use a fine stone on my grinder and gently dress the end while turning it. You want to just take the convex tip off the bit.
I have also used JB weld, mix a small amount, dip the bit in it and stick it in the screw and let cure..
If this fails you'll be at the next level, use a dremel cutoff wheel to put a slot in the head and use a flat screwdriver..
Then plan c is drill the head off, remove the airbag and try a collet style extractor..
Thanks. The aforementioned bits arrived, and the easy outs have proven useless so far. The triple square at least bites, but didn't seem to make progress. Of course the small ratchet I was using broke, and the longer/bigger ratchet just doesn't fit in the space. However, I coated the original T30 bit head with several layers of rubber cement. Apply, let dry, repeat. It gave it a bit of grip and it *feels* like I am closer. The bag is definitely more loose. I like the JB weld idea...along the lines of my superglue idea above. Which is stronger??
Don't know if this helps .........magnetize the 4 square bit . I remember the screw being semi captive to the wheel.Turning the screw while pulling on the airbag cover should do it .If the screw turns the cover will come off .The magnetization keeps the bit engaged with the screw while turning .
I had a version of this happen...except the PO had broken the torx bit off in the bolt..I tried everything I possibly could and wound up giving up. Everything even included a long carbide bit to "remove the fastener" In the end I wound up needing a new steering wheel....
Sending you positive vibes for an eventual removal!
The air bag is not yet free, but I do feel ther his slight progress. The bag is very loose, but I cannot get the unit to come free. Interior of the head is pretty well stripped now. Contemplating next moves. It is loose enough that there is movement in the alignment of the hole and the head. Enough movement that more work seems inexact, and, thinking about the JB Weld option...what if I "miss" and end up gluing something that should otherwise be free moving.
Taking my time and am open to ongoing feedback here.
 02-20-2023, 01:31 PM