Simple 3-step complete coolant drain (updated w/ refill procedure + water pump tips)
 01-25-2013, 02:14 PM
#1
Nordschleife Master
Thread Starter
Hi guys,
Just want to share with you I've found a simple way to drain all the 6 gal coolant out. I've looked at other DIYs and even the factory procedures but they all involve disconnecting coolant hoses that are under the car, which requires removing the underside panels. I'm too lazy so I studied the coolant diagrams and came up with a much simpler way.
The total capacity is ~6 gal and you will drain ALL of it if you follow the steps below. Real simple.
1) Remove the coolant reservoir cap and open the coolant drain plug at the bottom of the engine (SOP) and out come ~2.5 gal - all the coolant trapped in the engine block. Now put back and tighten the drain plug to seal the system.
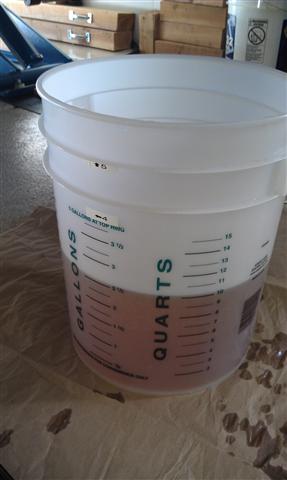
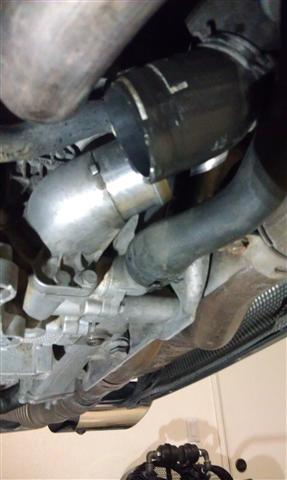
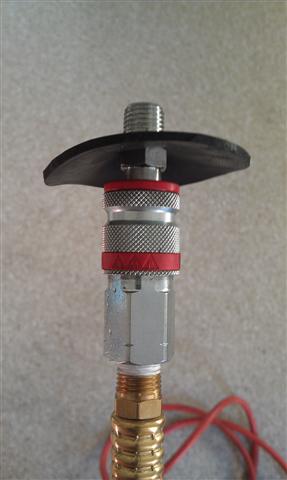
2) Put a 5gal bucket under the big hose connected to the thermostat. This hose is the coolant return hose from the radiators in the front. Disconnect the hose and out come ~0.5 gal. Now this is the fun part. Introduce compressed air to the coolant reservoir neck (a few PSI will do. DO NOT EXCEED 10PSI. I used a simple rubber gasket to seal it). Be prepared, 2.5gal will gush out with force from the big hose - Congrats, you just drained all the coolant trapped in the front radiators! Basically the air goes into the radiators via the vent hoses and forces the water out from the big return hose.
3) After steps 1 and 2, you've already drained 5.5gal (>90%) so you can stop here if you're lazy. For the perfectionists, of course we need to track down that remaning 0.5gal. Where the heck is it????
You guessed it.....it's trapped in the heater core!! There's no valve. Forget about turning ON the heat when draining, etc. The coolant just recirculates the heater core whenever the engine is running. Now go disconnect the heater core coolant supply line from the engine and remove the two bolts holding the hard metal line so you can tilt down the hose like below. Remove the drain plug again and introduce compressed air at the hose side. 0.5gal will gush out from the drain plug and from the metal flange where the hose is connected to. Note this is the ONLY way to drain the heater core because the IN/OUT hoses connected to the heater core are at the top of the core. You can disconnect hoses all day long. Without force, the coolant will just sit at the core.
Now go reconnect the two hoses and tighten the drain plug and you're done
So in summary, the engine holds 2.5gal, the radiators and hoses under the car hold 3gal, and the heater core holds 0.5gal. There's your 6gal
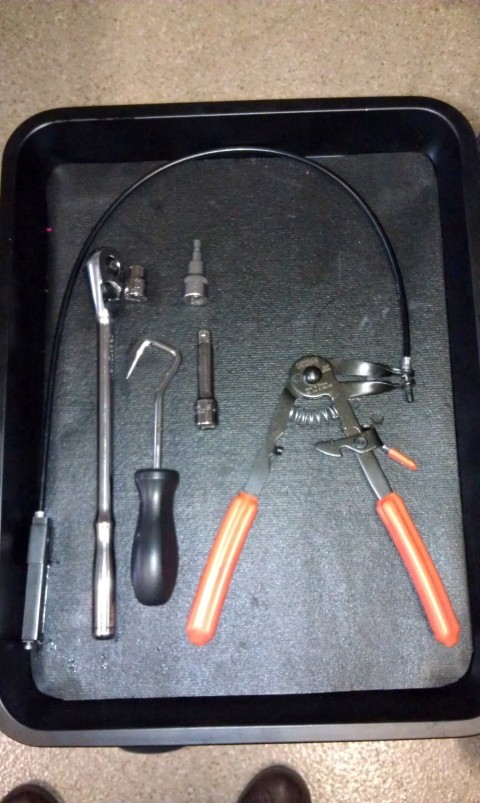
I used the cable operated hose clamp tool and a pick to break the surface between the hose and the metal part. Took me at most 5 minutes to disconnect each hose, if that. i think with practice, you can finish the above within 1/2hr. Note you need the uview vacuum tool to refill now that you've replaced all the coolant with air.
Check out post#15 for refill procedures and some tips on water pump replacement.
Just want to share with you I've found a simple way to drain all the 6 gal coolant out. I've looked at other DIYs and even the factory procedures but they all involve disconnecting coolant hoses that are under the car, which requires removing the underside panels. I'm too lazy so I studied the coolant diagrams and came up with a much simpler way.
The total capacity is ~6 gal and you will drain ALL of it if you follow the steps below. Real simple.
1) Remove the coolant reservoir cap and open the coolant drain plug at the bottom of the engine (SOP) and out come ~2.5 gal - all the coolant trapped in the engine block. Now put back and tighten the drain plug to seal the system.
2) Put a 5gal bucket under the big hose connected to the thermostat. This hose is the coolant return hose from the radiators in the front. Disconnect the hose and out come ~0.5 gal. Now this is the fun part. Introduce compressed air to the coolant reservoir neck (a few PSI will do. DO NOT EXCEED 10PSI. I used a simple rubber gasket to seal it). Be prepared, 2.5gal will gush out with force from the big hose - Congrats, you just drained all the coolant trapped in the front radiators! Basically the air goes into the radiators via the vent hoses and forces the water out from the big return hose.
3) After steps 1 and 2, you've already drained 5.5gal (>90%) so you can stop here if you're lazy. For the perfectionists, of course we need to track down that remaning 0.5gal. Where the heck is it????
You guessed it.....it's trapped in the heater core!! There's no valve. Forget about turning ON the heat when draining, etc. The coolant just recirculates the heater core whenever the engine is running. Now go disconnect the heater core coolant supply line from the engine and remove the two bolts holding the hard metal line so you can tilt down the hose like below. Remove the drain plug again and introduce compressed air at the hose side. 0.5gal will gush out from the drain plug and from the metal flange where the hose is connected to. Note this is the ONLY way to drain the heater core because the IN/OUT hoses connected to the heater core are at the top of the core. You can disconnect hoses all day long. Without force, the coolant will just sit at the core.
Now go reconnect the two hoses and tighten the drain plug and you're done
So in summary, the engine holds 2.5gal, the radiators and hoses under the car hold 3gal, and the heater core holds 0.5gal. There's your 6gal
I used the cable operated hose clamp tool and a pick to break the surface between the hose and the metal part. Took me at most 5 minutes to disconnect each hose, if that. i think with practice, you can finish the above within 1/2hr. Note you need the uview vacuum tool to refill now that you've replaced all the coolant with air.
Check out post#15 for refill procedures and some tips on water pump replacement.
Last edited by Ahsai; 01-27-2013 at 04:47 AM. Reason: Added refill procedure in post #15


 01-25-2013, 04:27 PM
#6
Nordschleife Master
Thread Starter
Thanks, guys!
@Krazy - thanks for the positive comments and not being offended. I always enjoy your DIY posts. I saw your coolant post on renntech but my ramps on my mid-rise lift are blocking the underside panels so I was forced to improvise...Btw, keep up with your great DIY posts
@Viper - I'll replace the water pump and refill the system this wkend. I'll take some photos and add them to this thread.

Trending Topics
01-26-2013, 08:43 AM
#9
BTW, about the coolant type to use, I see plan to buy from sunset... is there anything we can use from the advancedautoparts and the like ?
I see they are mostly blue and yellow at the local part store and it seems to be pink/red in our porsche...
I see they are mostly blue and yellow at the local part store and it seems to be pink/red in our porsche...
01-26-2013, 11:53 AM
#10
RL Community Team
Rennlist Member
Rennlist Member
Outstanding write up!
Thanks for this. I was actually looking for a similar solution yesterday and you beat me to it!
Cheers,
TomF
Thanks for this. I was actually looking for a similar solution yesterday and you beat me to it!
Cheers,
TomF
Last edited by TomF; 01-26-2013 at 12:21 PM.
01-26-2013, 03:06 PM
#11
Nordschleife Master
Thread Starter
Thanks, Tom. Let us know if you find an easier way.
01-26-2013, 03:26 PM
#12
very cool, thanks for sharing... One thing I dont understand, that Porsche thinks that these 911 dont coolant flush... the dealer told me they dont do flushes as regular maintenance.
01-26-2013, 03:47 PM
#13
BTW, about the coolant type to use, I see plan to buy from sunset... is there anything we can use from the advancedautoparts and the like ?
Last edited by KrazyK; 11-20-2014 at 06:25 PM.
01-26-2013, 04:15 PM
#14
Nordschleife Master
Thread Starter
Originally Posted by redridge:10174471
very cool, thanks for sharing... One thing I dont understand, that Porsche thinks that these 911 dont coolant flush... the dealer told me they dont do flushes as regular maintenance.
Once I asked a service advisor if I should replace the coolant sometimes. He said, no worries, you're gonna need a new coolant tank down the road anway. Sure enough, my tank leaked not long after and needed replacement.
01-27-2013, 04:44 AM
#15
Nordschleife Master
Thread Starter
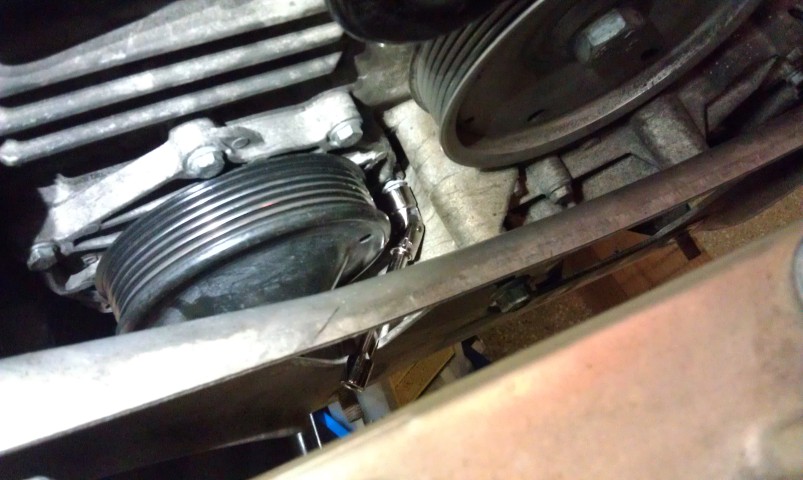
So I replaced the water pump and the thermostat and refilled the system. All buttoned up and tested. Everything seems fine. The impellers are fine but the bearing has some noise. Originally I just wanted to replace it as a preventive maintenance. Turned out I caught a soon-to-fail part. So quite happy about that.
The refill procedure was quite straightforward.
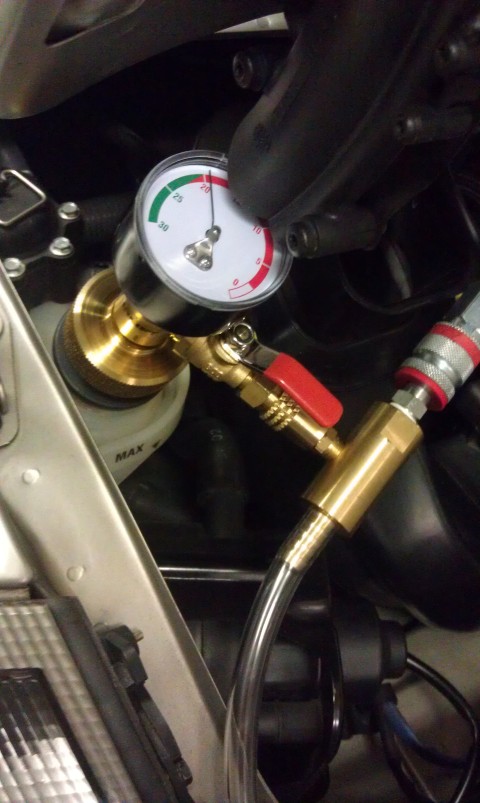
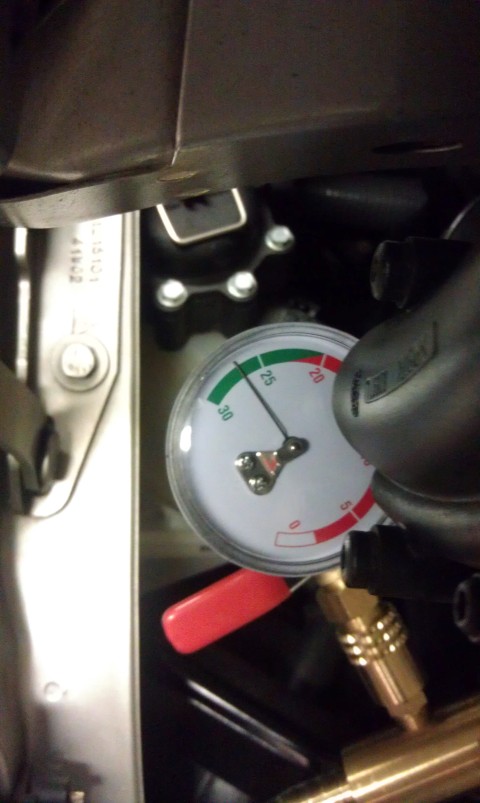
1) Vacuum the system down to ~27 PSIG shown by the gauage
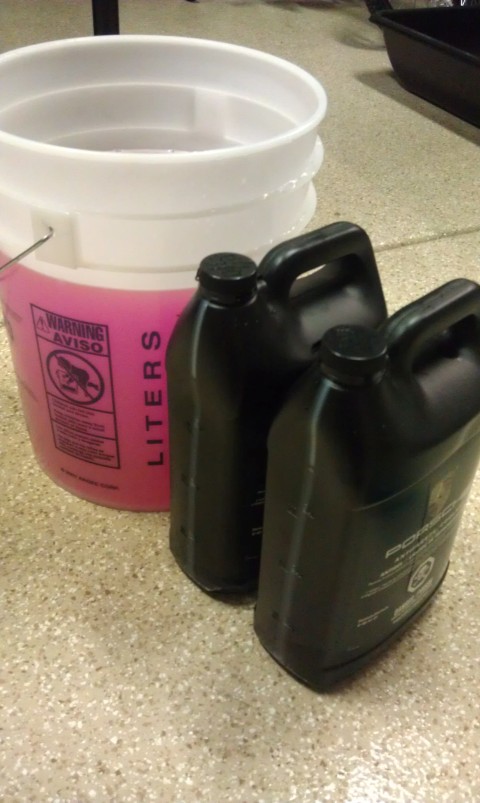
2) Mix the coolant - 4 gal mixed in the bucket and 2 more gals ready in bottles
3) Check if the vacuum holds
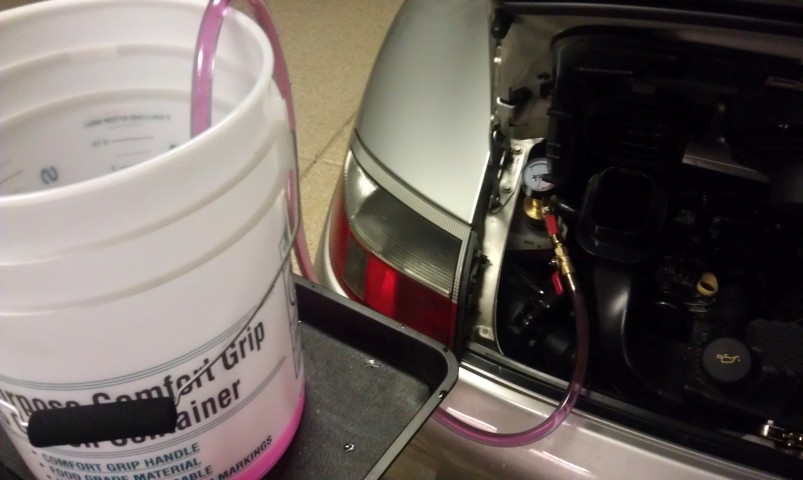
4) Prime the uview coolant filler tube. Submerge it in coolant and then connect it to the head unit. I placed the bucket a little higher than the reservior neck. I had to hold down the pickup hose so it stays at the bottom since it tends to rise up by itself. Never let the hose suck in air during refill.
5) Pour the 2 gal bottles mid-way. Almost all 6 gal went in (1.5L left so will see if I have some air in the system).
For the notorious water pump bolt, I used a 1/4" drive 10mm deep socket to break it loose. Then I used a 1/4" swival 10mm socket + a 3" extension to unscrew it completely by fingers. No need to attach it to any ratchet.
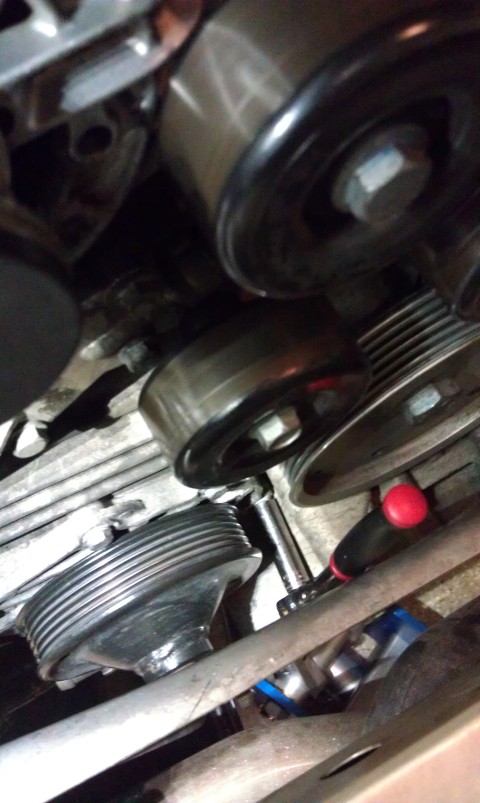
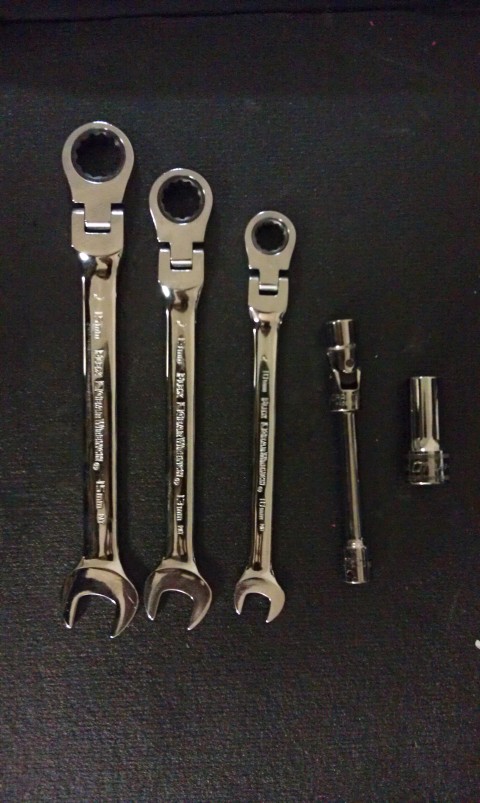
I found the gearwrench ratchet wrenches very useful for the engine bracket bolts. Also, I was able to use a Snapon 3/8" drive semi-deep 10mm socket 3/8" drive + an in-lb torque wrench to torque down all 7 water pump bolts.
The refill procedure was quite straightforward.
1) Vacuum the system down to ~27 PSIG shown by the gauage
2) Mix the coolant - 4 gal mixed in the bucket and 2 more gals ready in bottles
3) Check if the vacuum holds
4) Prime the uview coolant filler tube. Submerge it in coolant and then connect it to the head unit. I placed the bucket a little higher than the reservior neck. I had to hold down the pickup hose so it stays at the bottom since it tends to rise up by itself. Never let the hose suck in air during refill.
5) Pour the 2 gal bottles mid-way. Almost all 6 gal went in (1.5L left so will see if I have some air in the system).
For the notorious water pump bolt, I used a 1/4" drive 10mm deep socket to break it loose. Then I used a 1/4" swival 10mm socket + a 3" extension to unscrew it completely by fingers. No need to attach it to any ratchet.
I found the gearwrench ratchet wrenches very useful for the engine bracket bolts. Also, I was able to use a Snapon 3/8" drive semi-deep 10mm socket 3/8" drive + an in-lb torque wrench to torque down all 7 water pump bolts.

