When you click on links to various merchants on this site and make a purchase, this can result in this site earning a commission. Affiliate programs and affiliations include, but are not limited to, the eBay Partner Network.
Inspired by other's issues getting the front trunk open using the Porsche-described method of using the battery terminal at the fuse block..... and Wayne's great exploration on options, I created my own, quick-fix DIY. What is different about my DIY than Wayn'es? I used his work and figured that this work can be done without removing a bunch of stuff. Two screws... that is it. Wayne's link with others below.
Wayne, can you please add your pictures to this thread? We need your pic of the latch showing that lower cable hole. (Wayne's work was buried in other threads.)
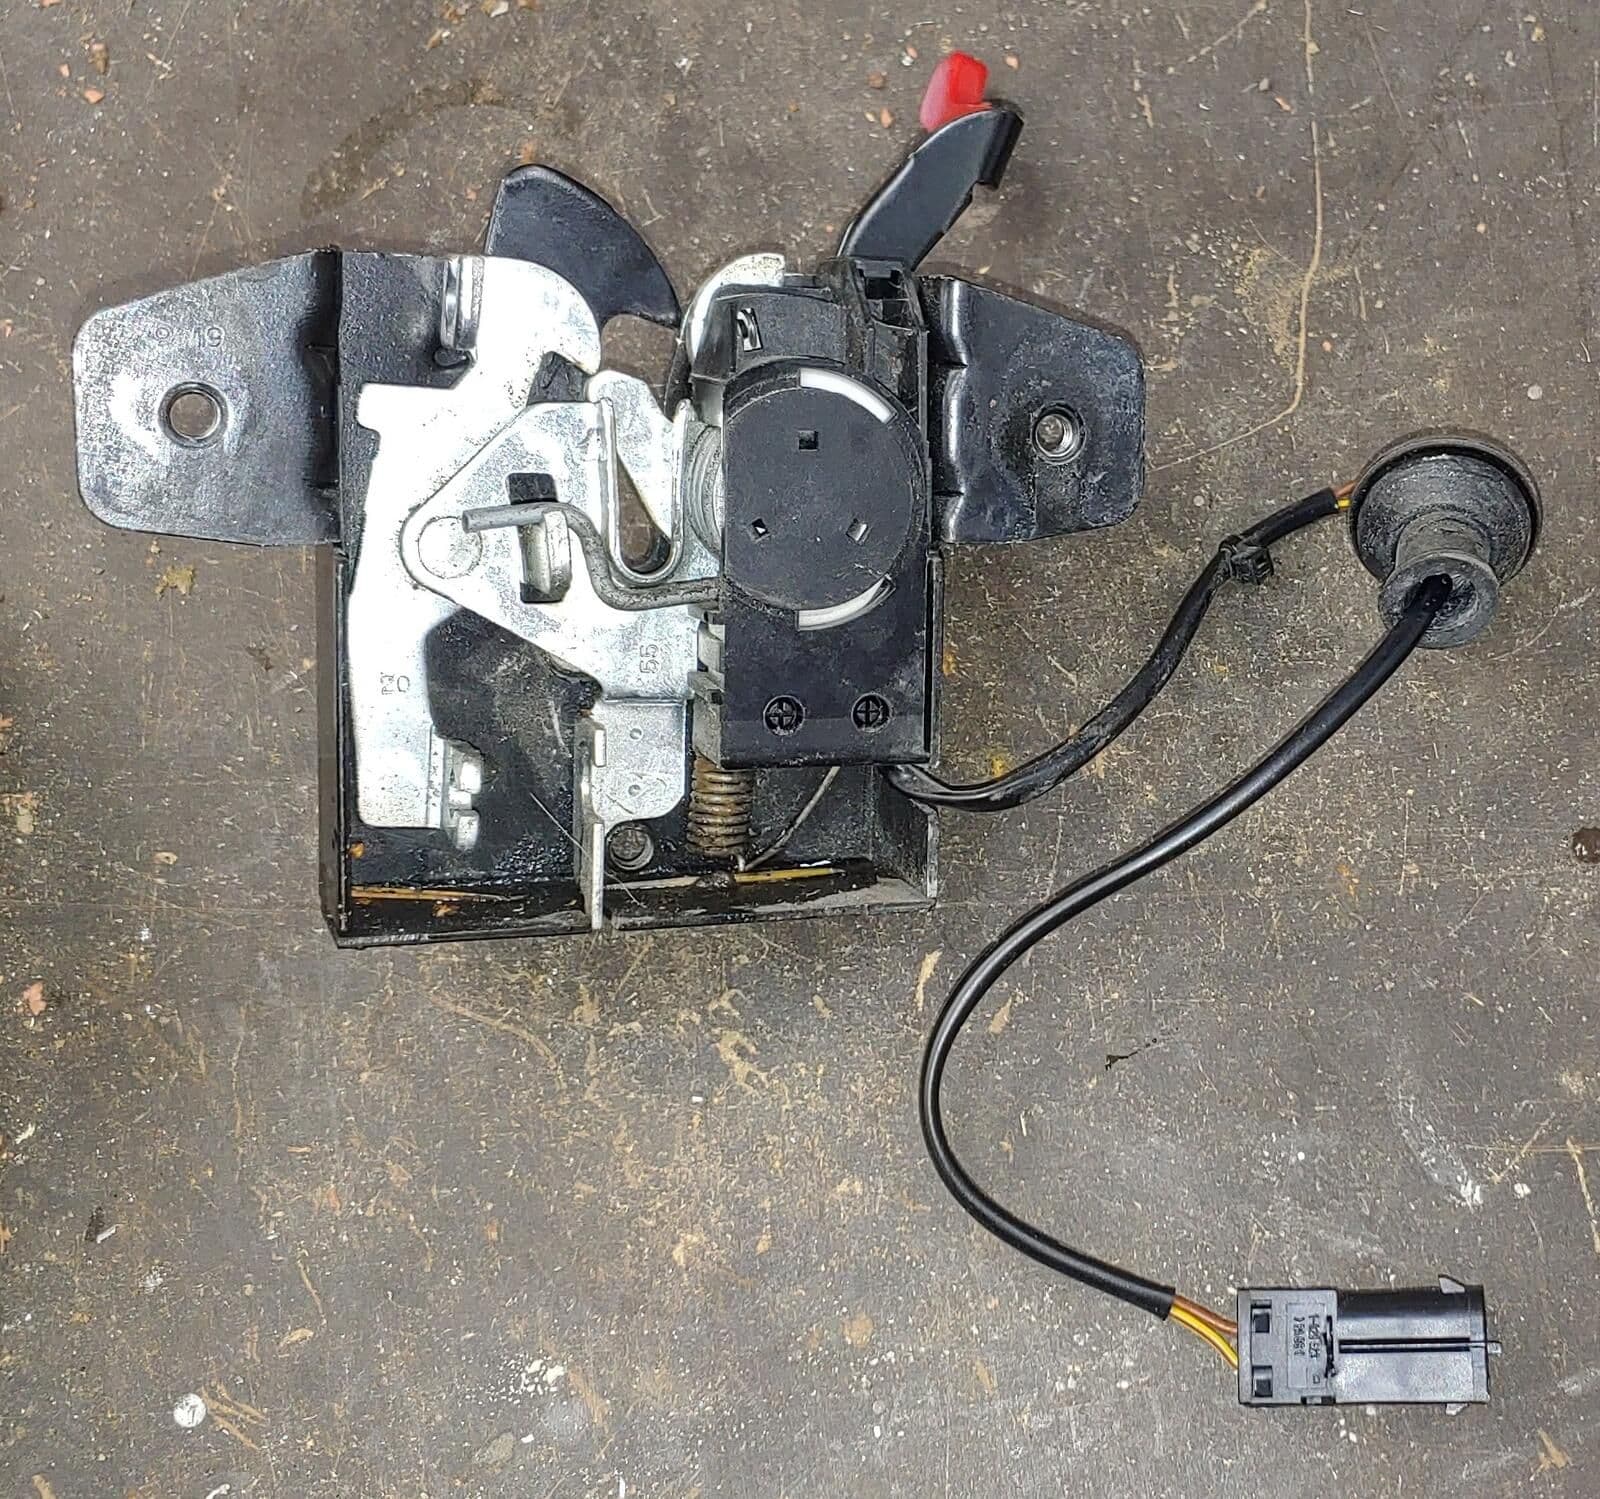
Issue: Porsche's emergency cable release for the front trunk latch is... um... truly a last-ditch solution to getting the front trunk open.... apparently, using it will break the cable sheath of the regular cable... really odd design. As Wayne discovered, the latch has an unused emergency cable hookup hole ready for use.
Summary: Connect a wire to the this unused hookup in the latch and route it to the side marker lights on the right (passenger) side of the car. Easy. Very easy. You only need to remove the two screws that hold the latch on... no removal of any cables or interior carpeting. Total time: maybe one hour.
Steps:
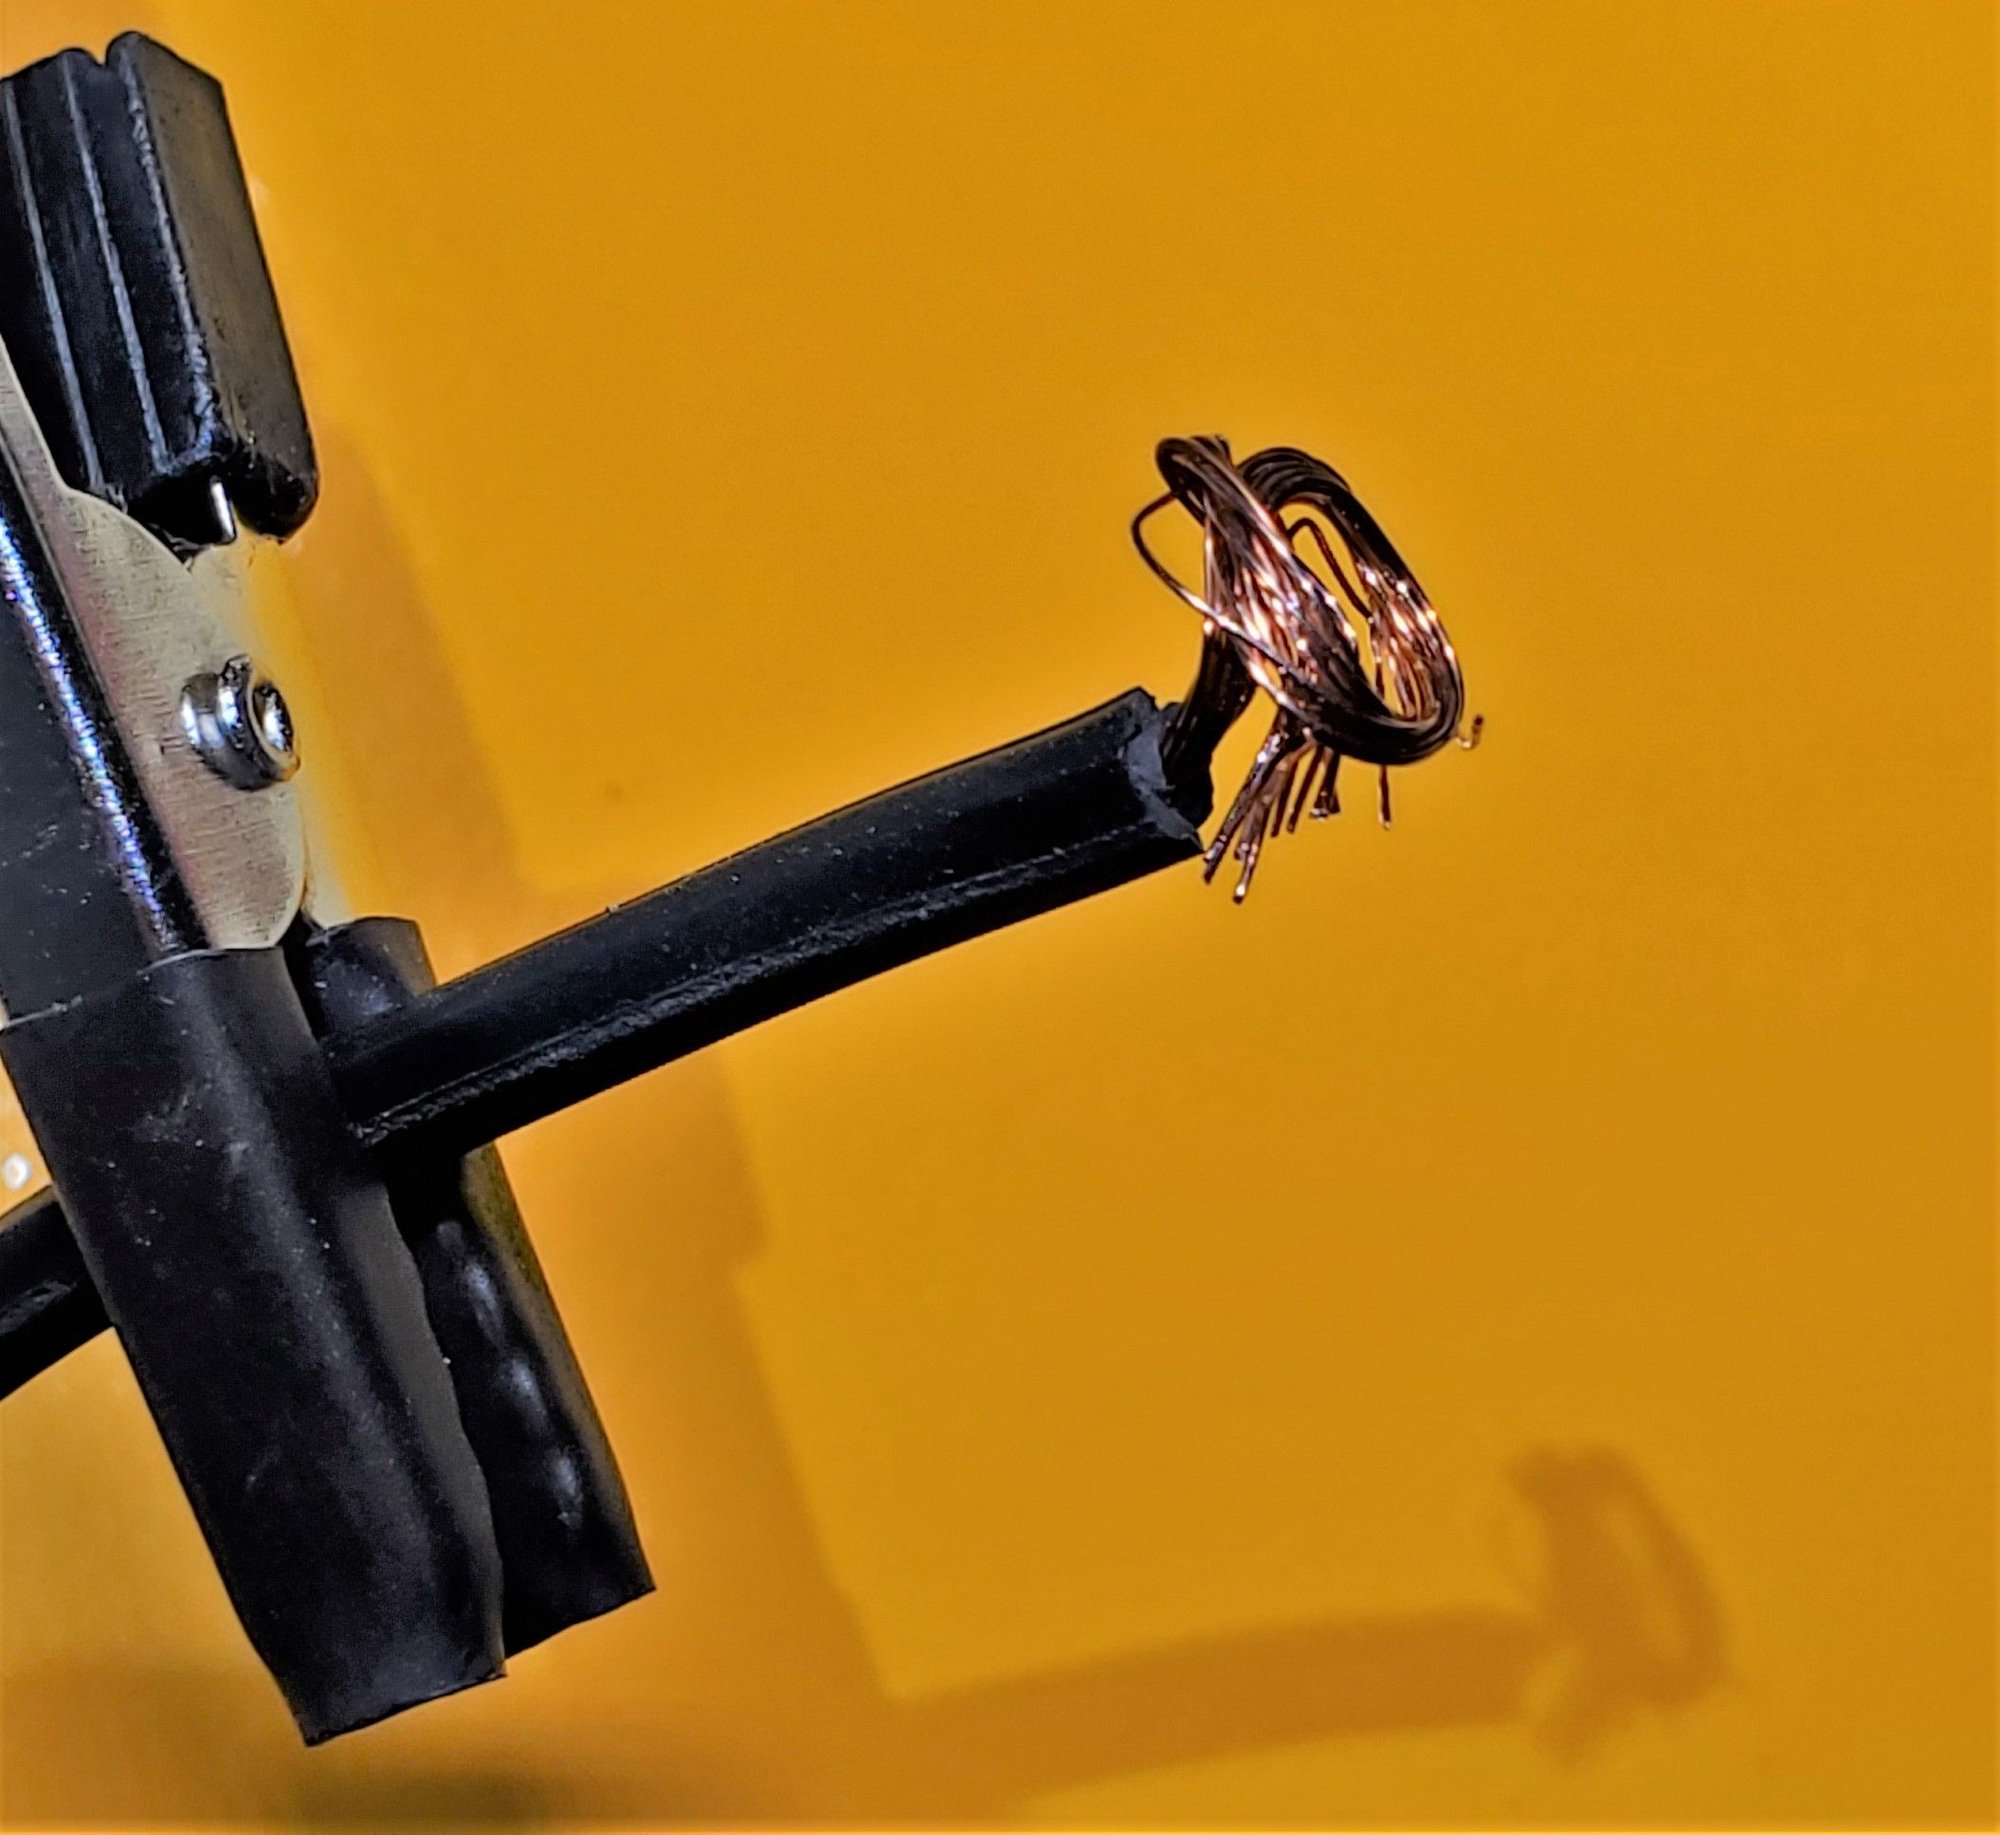
Get a wire... I used typical, thick lamp cord or speaker wire. This was too thick so I separated the conductors and used just one side... split and unzip about 6 feet of it.
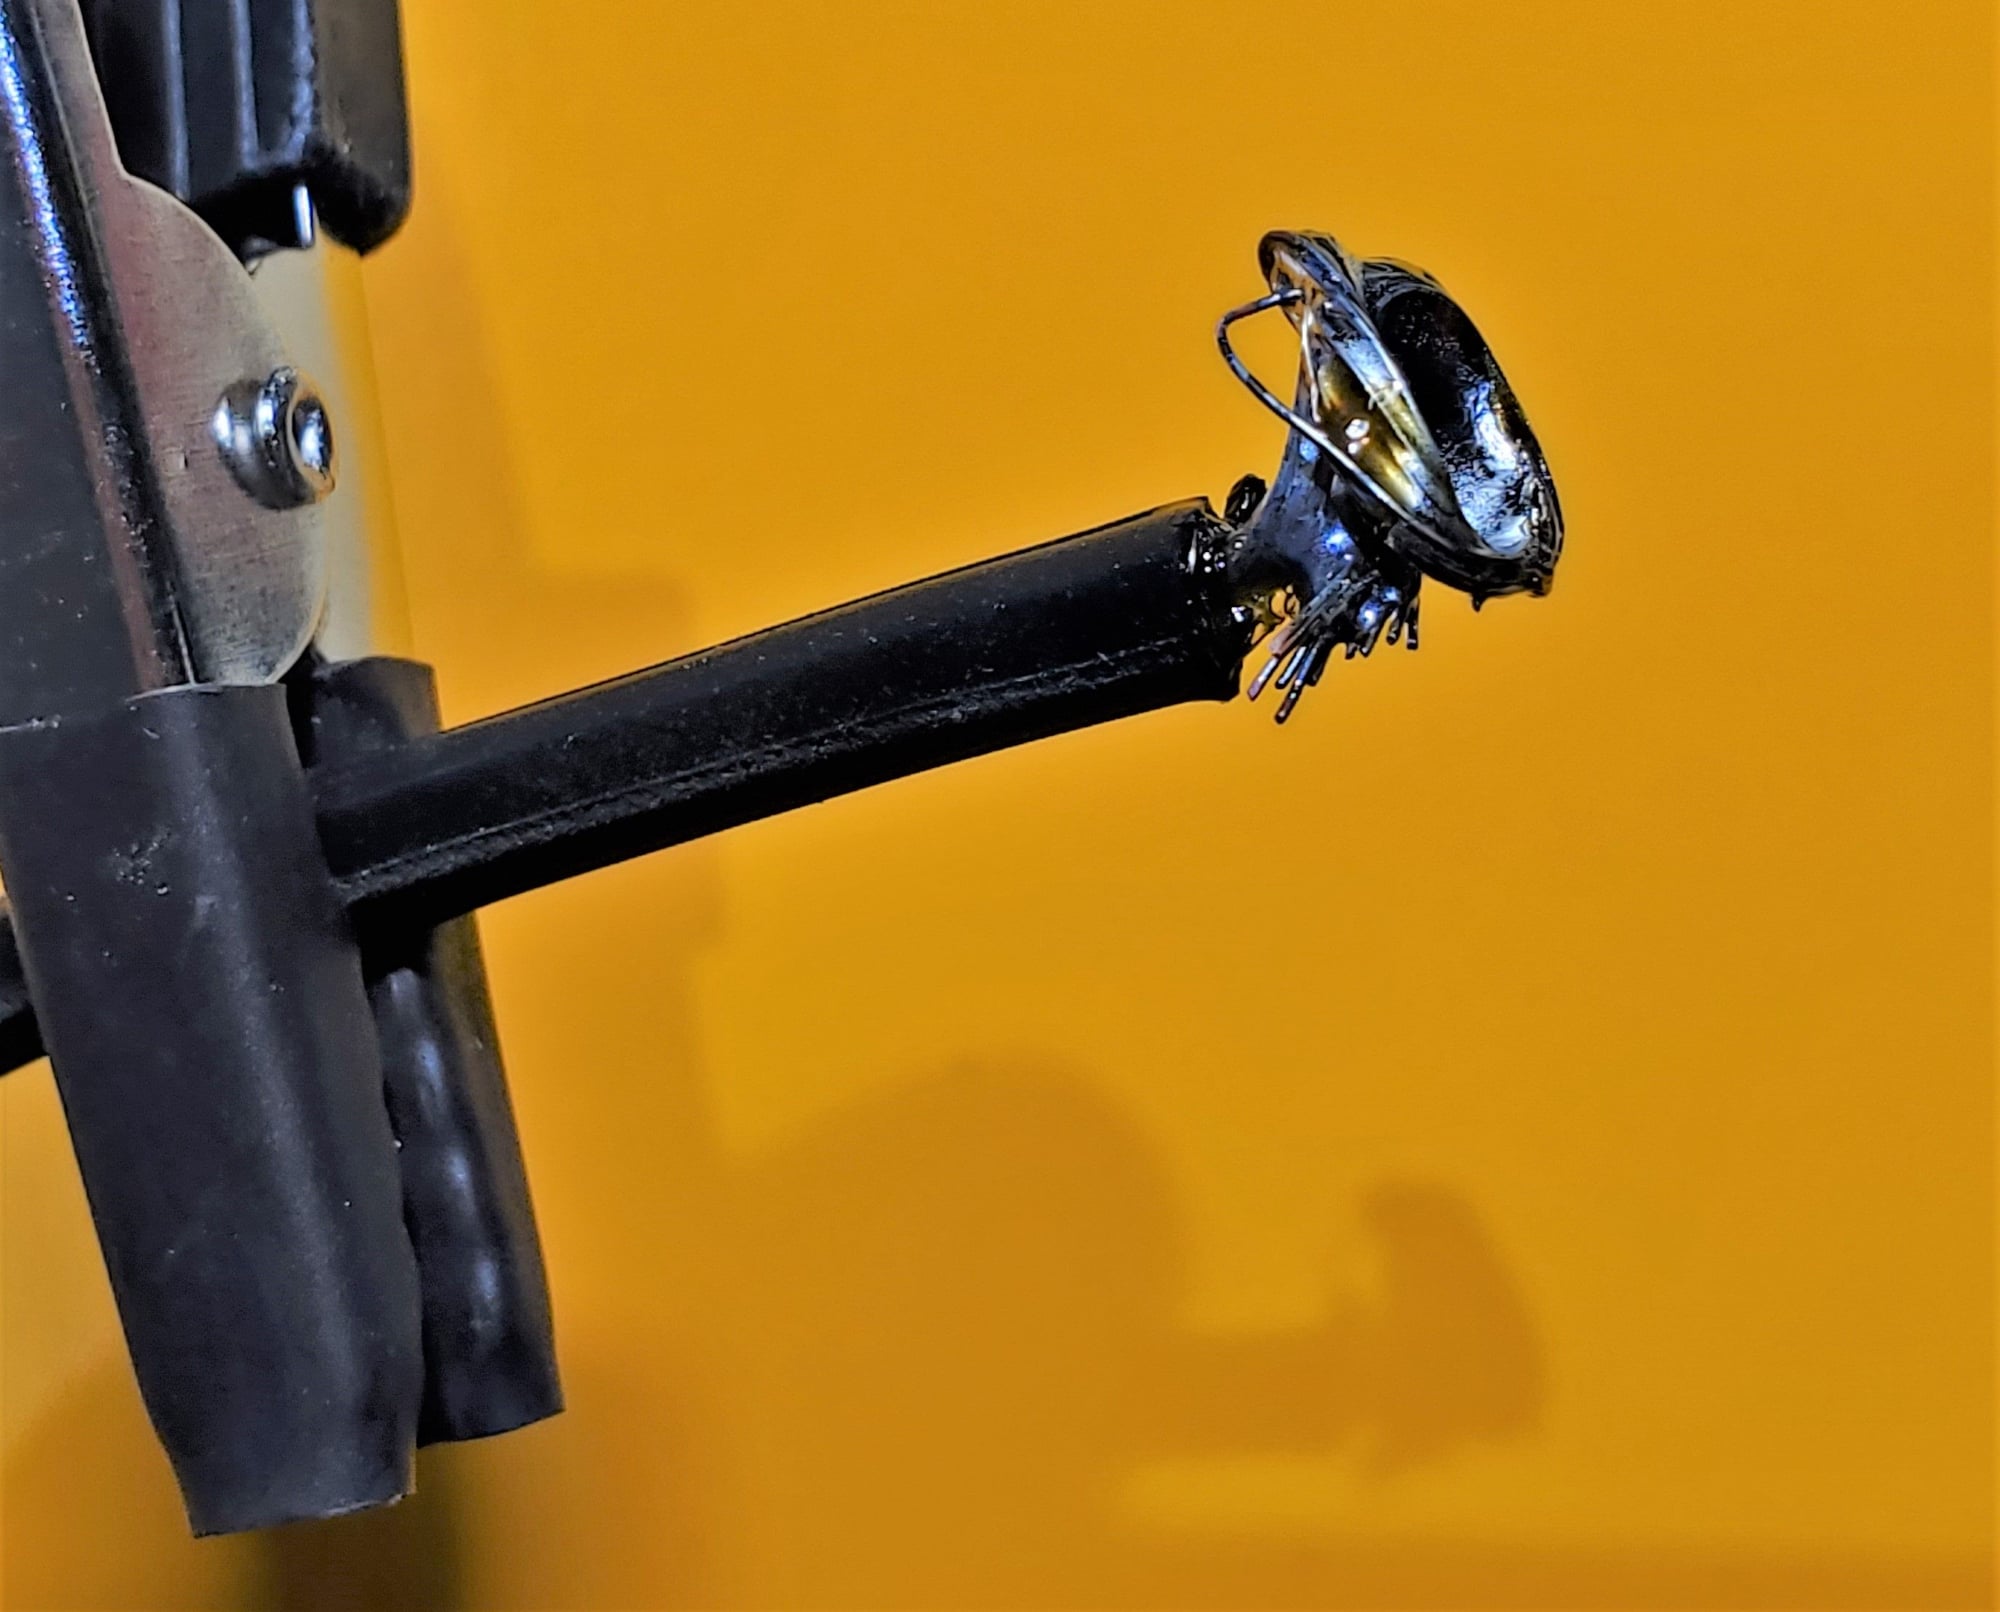
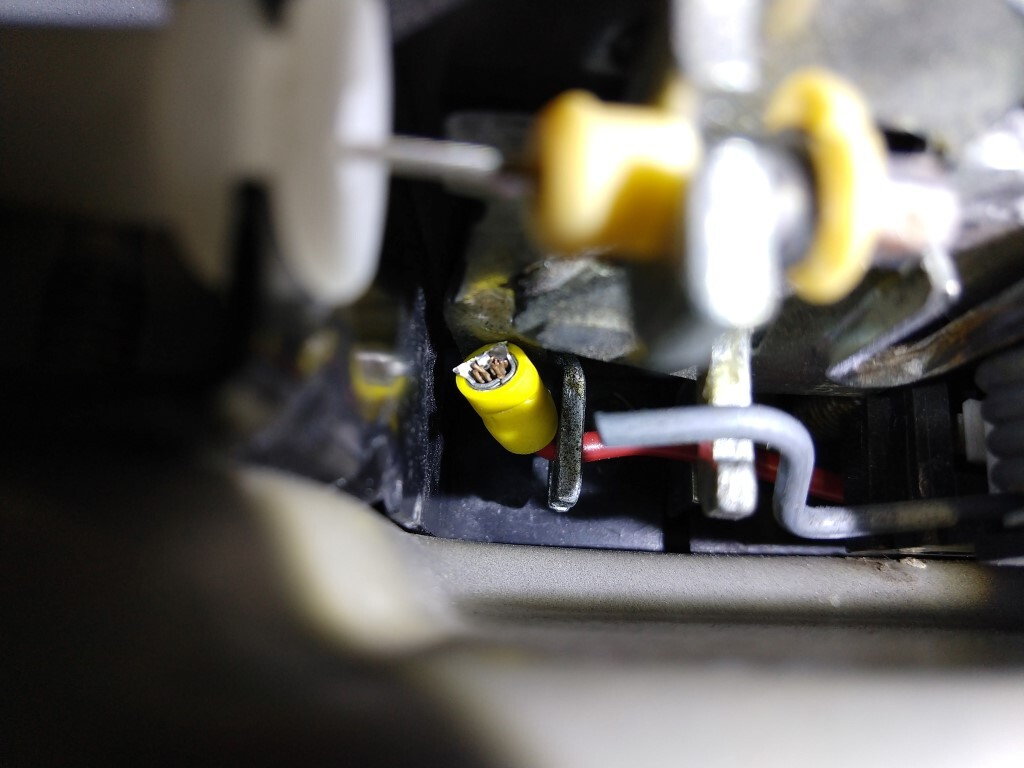
Strip back about 5" of insulation, then loosely ball-up the copper, then melt a ton of solder onto the ball. This will make a great end-stop for the wire.
Remove the plastic trim around the latch... it is just velcroed down.. it will pop up. On my car, the entire "U" of trim came off... the front piece and two side pieces.. no issues, just remove it all.
Separate the interior carpet/shell from behind the latch.. use a screw driver or trim removal tool to pry it out. Don't worry if you accidentally pull up the rubber seal.. it just pushes right back down.
Take a picture of the unit as it is assembled... for a record... just in case you may need it.
With a Sharpie, draw a circle around the bolt heads to allow you to reposition them when you replace them. This latch is adjustable so it will move around. Do NOT try and remove the nuts on the latch, they are welded on.
Pull the silver guard up an off.
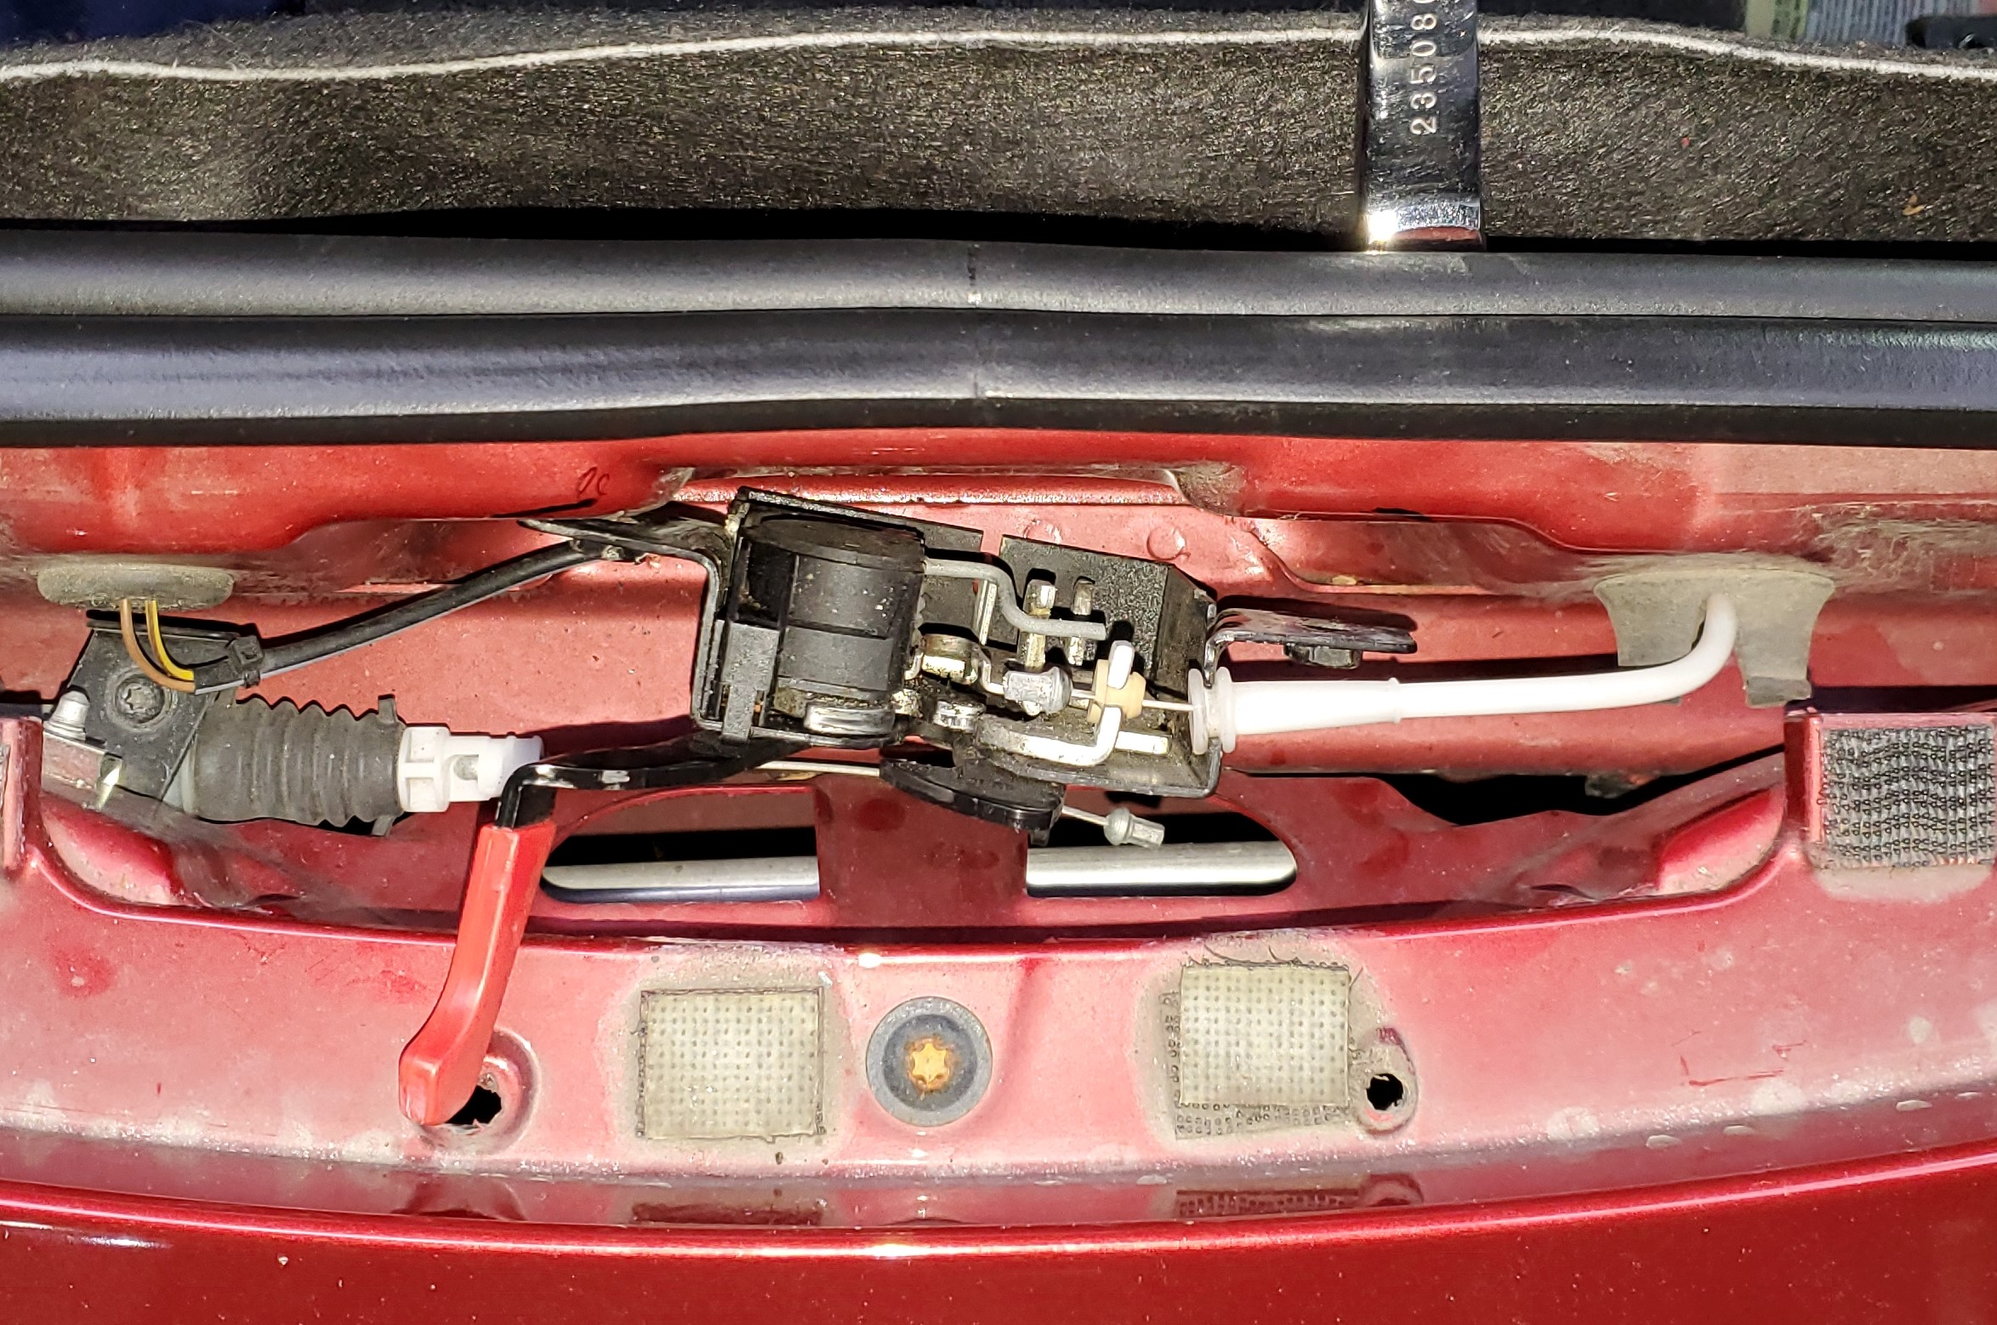
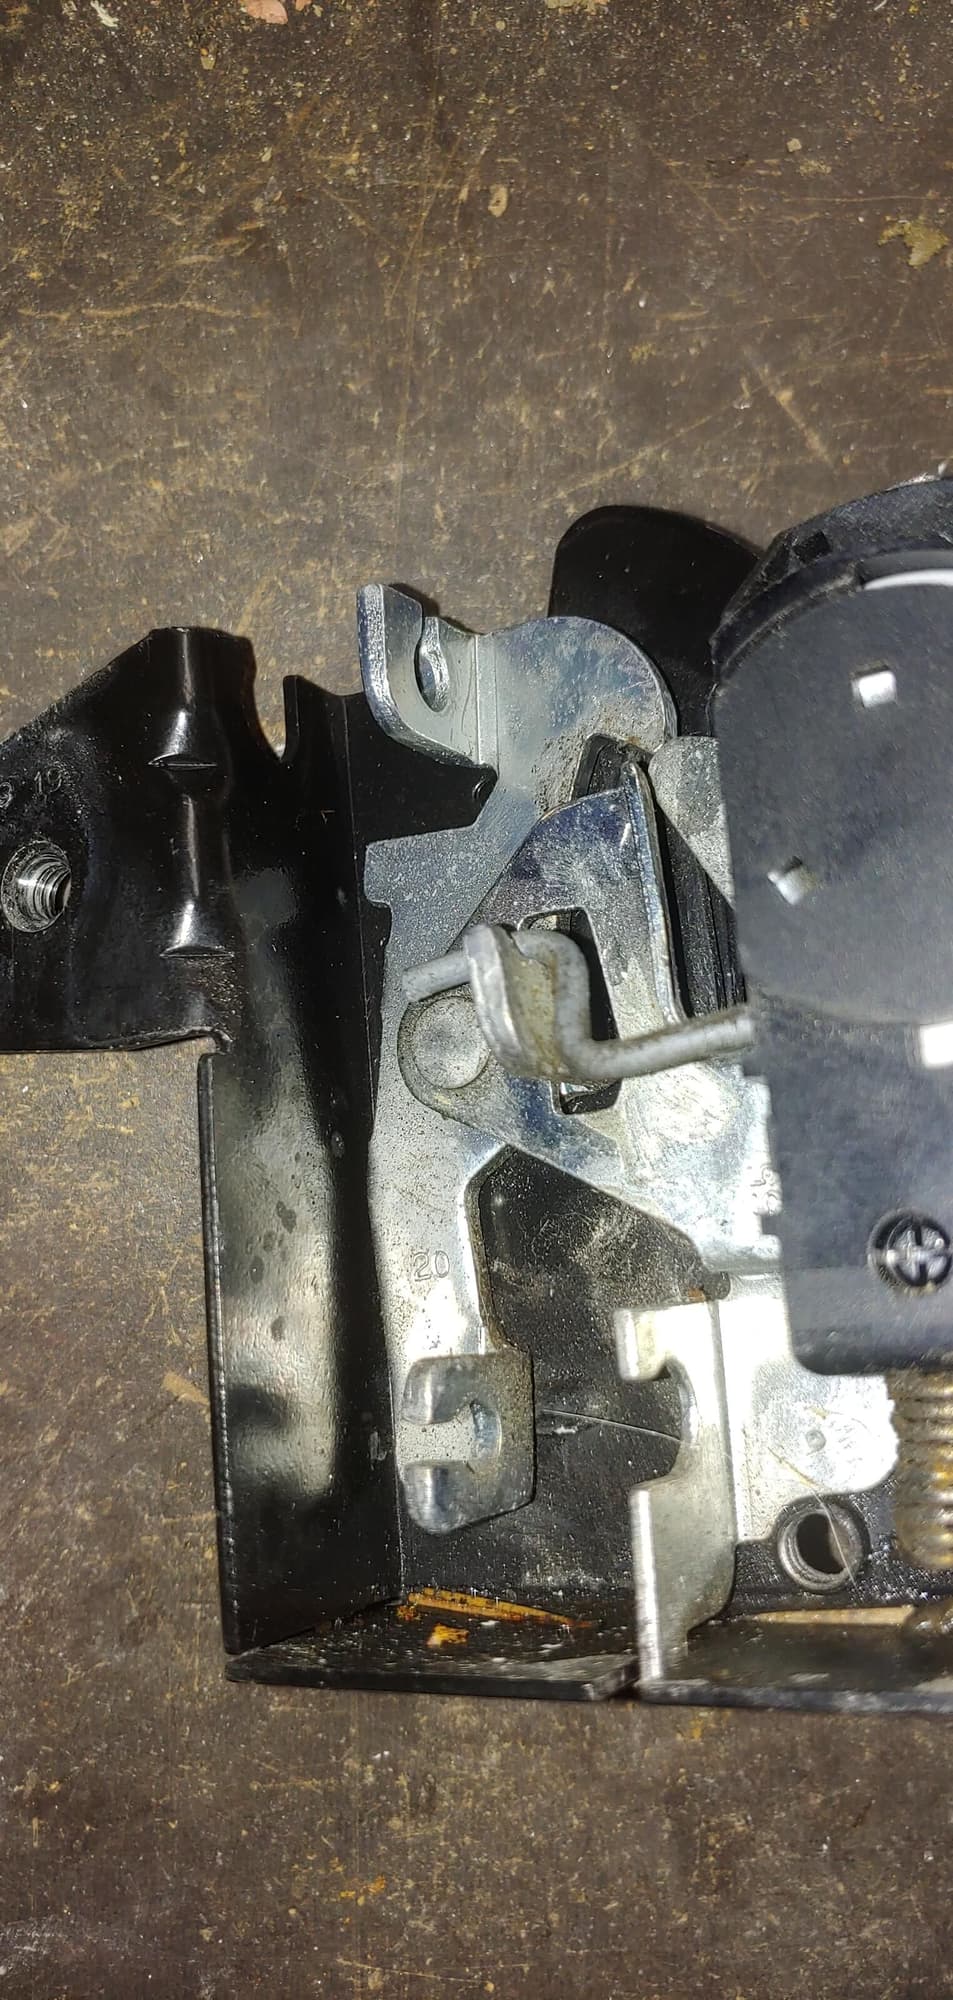
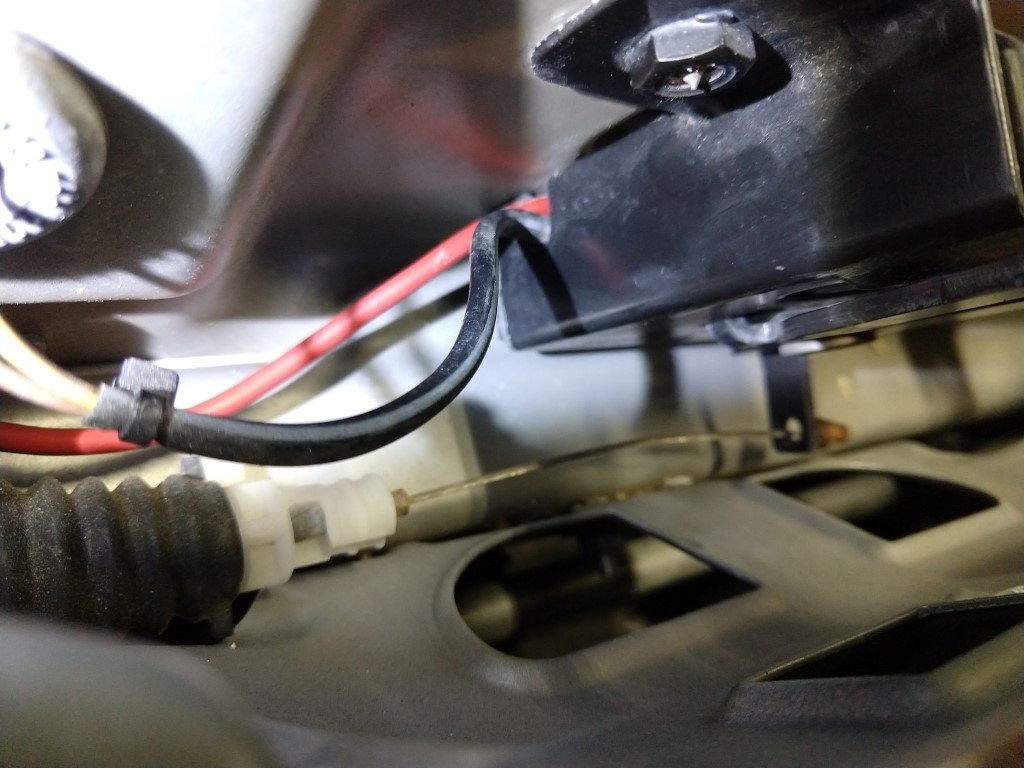
Gently pull the latch away from its mount and you will see you can access the lower latch mechanism for installing your cable. No need to remove anything else.
Note: The white cable sheath is slotted into the top of the latch... mine then popped out. When you snap it back in, you must put latch BETWEEN the sheath ridges.
Remove the side light marker... this procedure is in your manual but is goofy and a poor description. First, turn your steering wheel to the left (turn left) to give more access in the wheel well. Pop the little cap.. then stick a thin screwdriver in there... start wedging it around while pulling the back of the marker towards you.. it will pop.
From the marker hole, insert a coat hanger... it will go straight to the corner of the trunk opening. Super easy.
Press the wire into the latch slot.
Route the wire under the various obstacles to the corner... attache your wire to the coat hangar with some tape... pull it through.
Wrap the end of your wire around the electrical wire behind the light... just one wrap.. to prevent it falling down into the fender.
Test by latching the latch with a screwdriver... do not close the hood. Pull the cable... wow... ooooo.... ahhh......
Lubricate the latch
Use a hot glue gun to re-seat any velcro that pulled up.
Reassemble everything.
Drink Pilsner Urquell
Don't sweat this all too much... such as how solid the cable end is etc.... remember, it only has to work once... and the odds of even needing this is what...close to zero. If I should have a battery failure, I am not sure what I would do. I keep jumper cables in the frunk... hmmm.... I guess if whoever is helping me with a battery and jumpers, I will just follow Porsche's recommendation via the fuse box because.. well it will entertain me and I am fascinated that others have such problems with this standard procedure. We will see.
Peace
Bruce in Philly
New cable not installed, this pic just after screw and silver shield removal. Just to show there is plenty of room to get down in there.
Last edited by Bruce In Philly; 04-18-2021 at 11:14 AM.
Bad news on the pictures. I've been deleting phone photos to make space. I just got a new phone with more space but the frunk cable pictures are history. The links you provided should be fine. And it's not complicated.
Note ... It would appear that Porsche engineers put security first regarding remote mechanical opening of the frunk and motor lids. But it also appears that they designed in easy work arounds. Why else would the frunk latch be double ended? And the convenient escape hole for the add on cable to exit into the fender well? Or the hole directly under the motor lid latch with extra rear bumper hole for the cable to route to behind the license plate? It's like they wanted us to find these solutions although they couldn't publish them.
Then again, if they had just routed cables to next to the driver's seat ...
Wayne's pictures below..... note, you do not have to remove this latch, it all can be done in situ. Wayne was going off on a discovery mission... deep into the dark black forest of Germany.
Last edited by Bruce In Philly; 04-18-2021 at 02:24 PM.
Bad news on the pictures. I've been deleting phone photos to make space. I just got a new phone with more space but the frunk cable pictures are history. The links you provided should be fine. And it's not complicated.
Note ... It would appear that Porsche engineers put security first regarding remote mechanical opening of the frunk and motor lids. But it also appears that they designed in easy work arounds. Why else would the frunk latch be double ended? And the convenient escape hole for the add on cable to exit into the fender well? Or the hole directly under the motor lid latch with extra rear bumper hole for the cable to route to behind the license plate? It's like they wanted us to find these solutions although they couldn't publish them.
Then again, if they had just routed cables to next to the driver's seat ...
I agree... although what if you had an accident and could not open the door? I am not sure Porsche thought all of this through this way, but clearly they knew the emergency cable would break the sheath. That is obvious. So someone signed off on that implying there was some discussion.
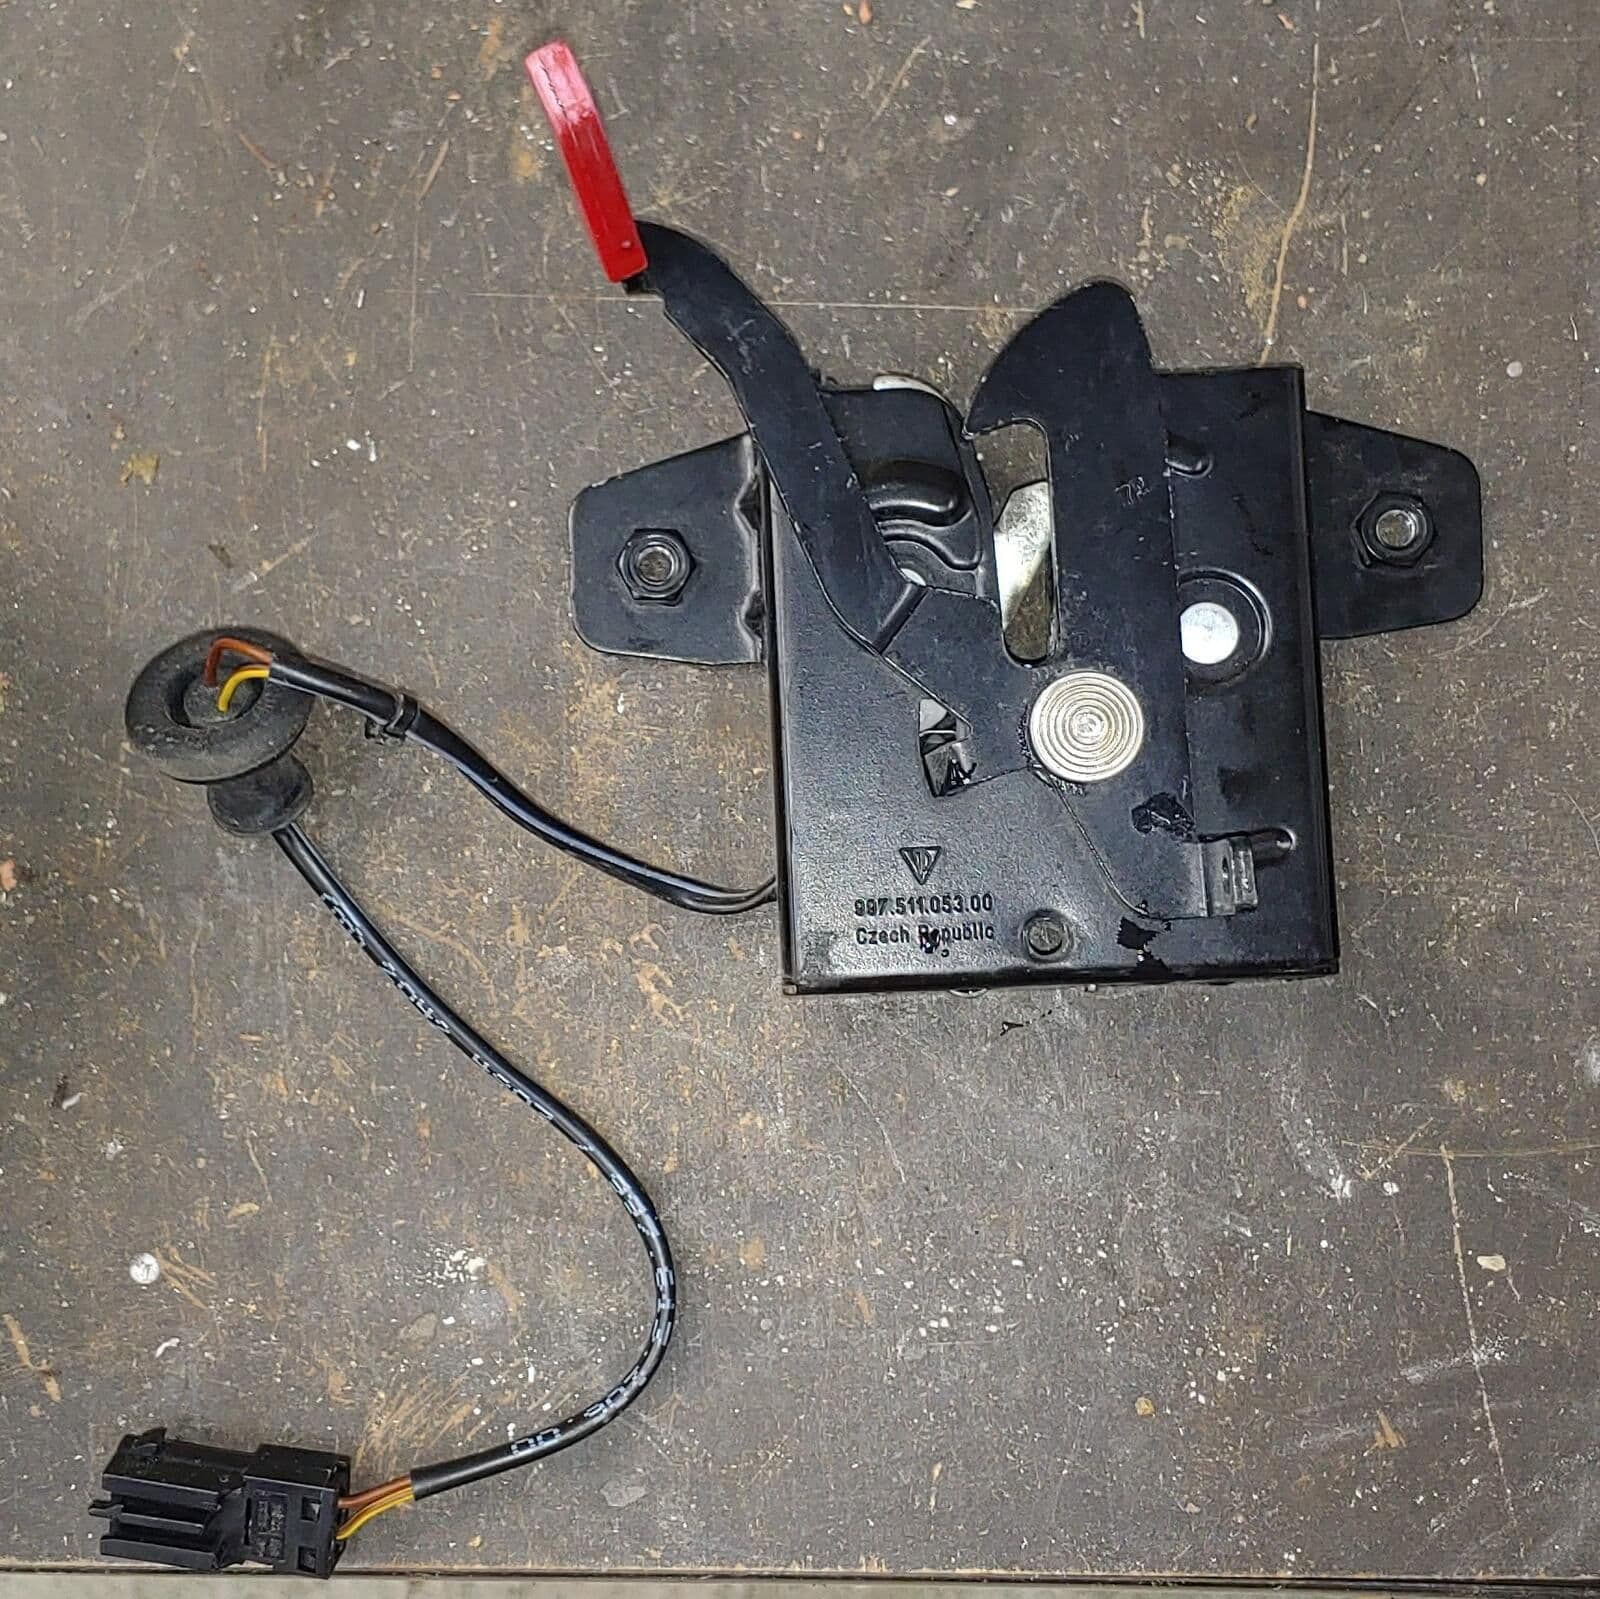
So, what is part number 17? How the hell does this thing work... and why? It flips that secondary latch... the one you have to do by hand every time you open the hood.
The parts Katalog calls this: "Throttle Control Element Emergency Operation" ... it looks like an electronically controlled solenoid.
Part 17 operates via the internal handle in case you get trapped inside the frunk. This handle is not shown in the diagram but is the red handle at the front corner of the frunk chamber. This allows full release of the frunk for escape.
Last edited by Wayne Smith; 04-18-2021 at 03:04 PM.
I wonder if a 2 wire flylead from the wheel well, directly connected to the latch solenoid would be simpler?
Professionally made & installed blah blah.
Dead battery? access the secret lead/plug, use a 12v power source, pop the frunk, go from there.
Power source? mini lipo 12v power pack, from the gas station/auto store/passing Macgyver
Ready for onslaught.
Clever.... but... all the plugs/electrical to this stuff has hoods so you would need to cut or tap. Then, you would need a battery.... of course you would have one... but I dunno... for this type of last chance entry, I kinda like good old mechanical stuff.
Shortly after finding the mechanical solution I had to help a delivery person open the trunk on her Honda Accord. Why? Because the solenoid failed.
Fortunately Honda supplied a tool on the key fob to allow a cover to be removed to expose a cable that could be pulled as a mechanical over ride. There was nothing immediately obvious about this but at least it was there ... I really did not like the idea of tearing her rear seat out ... She had several other deliveries to do.
An electrical bypass is still only a partial solution that ignores the elephant in the room.
This was a quick and easy solution to an ongoing shortfall of the 997. Thanks for the writeup. It took about a half hour to do. I used a crimp on the wire to form a loop instead of forming the ball with solder. I wrapped in tape so it does not snag. Marking with a sharpie is critical.
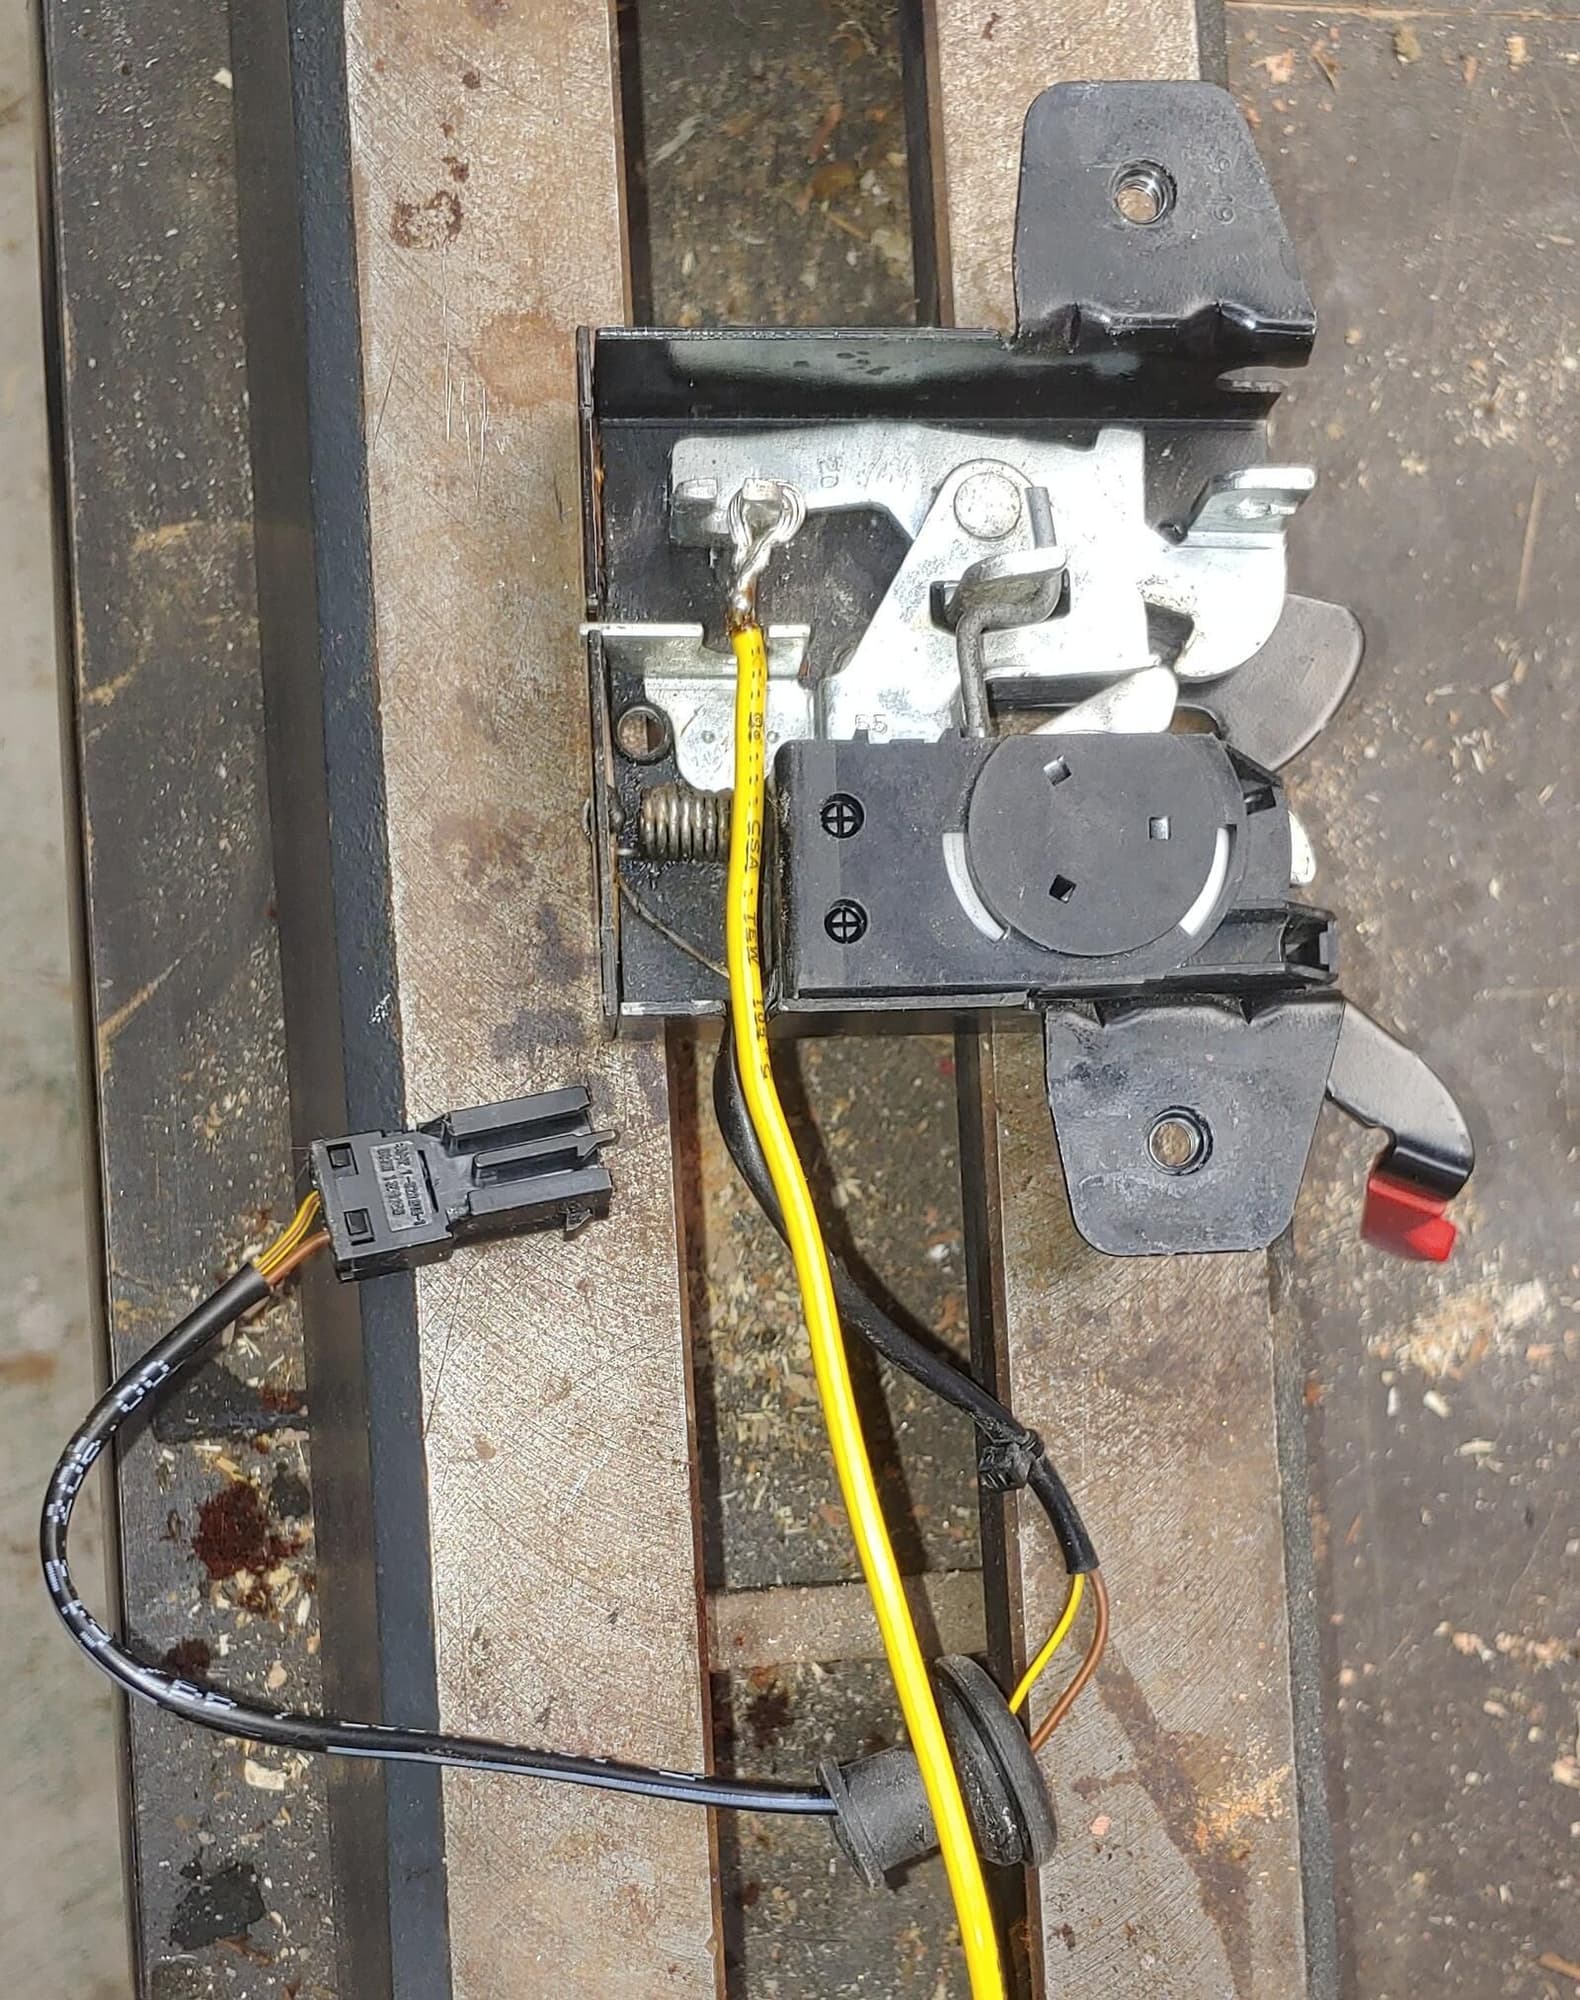
Inspired by Bruce and Wayne, I just completed this mod on my 997.1 with a short length of red 8 AWG wire I had in my collection of odds and ends from previous projects. This is a must do mod and provides peace of mind knowing there's one less catastrophe waiting to happen.
Instead of soldering a ball onto the wire end that connects to the hood latch I snipped off the end of a spade connector and crimped it onto the wire. Here is the wire end fitted into slot at base of release lever:
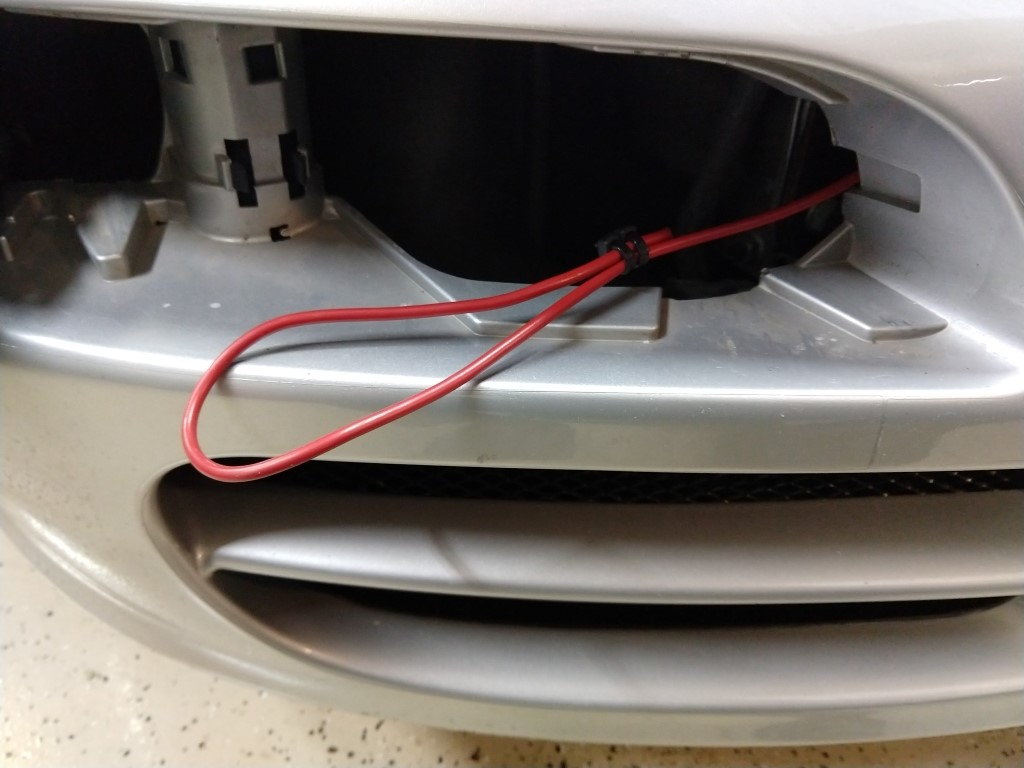
From there it was simple to route the wire to the passenger side parking/fog light opening.
After the wire was routed I added a loop to make it easier to grab. Takes only a slight tug to release the hood latch.
Part 17 operates via the internal handle in case you get trapped inside the frunk.
I can barely fit in these cars with my height much less the frunk. I guess this is a result of the same government safety regulations that require it on regular rear trunk cars.
I guess this would be helpful for the limited number of kids that still like to play "hide-and-seek"?
I can barely fit in these cars with my height much less the frunk. I guess this is a result of the same government safety regulations that require it on regular rear trunk cars.
I guess this would be helpful for the limited number of kids that still like to play "hide-and-seek"?
Yeah. If I was stuck in there could I turn around to find and reach that latch in the dark?!?!?!
Yes, the latch was removed. As mentioned in the earlier posts above you need to first use a sharpie marker to trace around the bolt heads that secure the latch to the forward frunk wall. This is to make sure latch is in its original position when you re-install. You can then remove the two 10mm bolts but do not disconnect the actuator cables. There’s a thin metal plate positioned between the frunk wall and the latch that can be lifted out as you loosen the bolts. From there just lift the latch up and you will see the slot where the wire end goes.

 04-18-2021, 10:16 AM