
DIY 997.1 Gear Oil Change
 05-20-2013, 03:08 AM
#1
Drifting
Thread Starter
Background and Goals
My '08 C2S currently has 58.5K miles and 4.5+ yrs on the clock. Lately I'm finding it a bit more difficult to shift into 1st so I decided to try changing out the gear oil and flushing my clutch fluid. This write-up will focus on the steps required to replace the gear oil.
DIY Level
I consider this DIY project a level 2-3 out of 10. It's a simple task requiring only a few steps to perform properly. Here are some instructions and pics which may help others.
Time
1-2 hrs... This should have been an hour project but it took me an extra hour to locate a 24mm socket in 3/8" drive and the second panel was somewhat challenging to remove due to the wide contact pad of my Jack Point jack stands.
Tools Required:
- 24mm socket
- T25 torx bit
- torque wrench (30 ft-lbs capable)
- 1/4" and 3/8" socket wrenches
- 10mm socket
- various socket wrench extensions
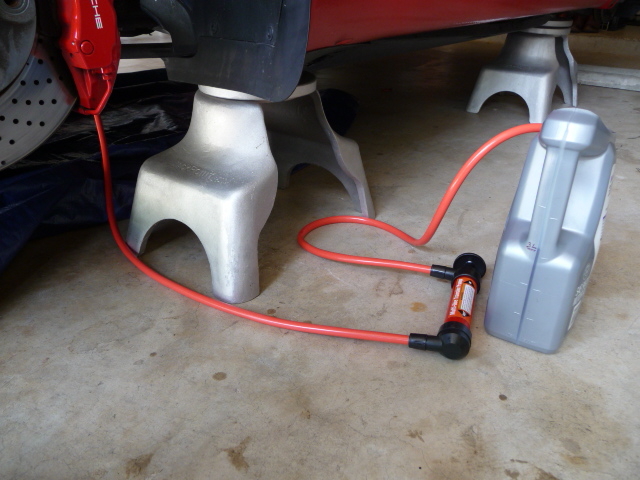
- fluid transfer pump
- brake cleaner
- latex gloves
- drain pan
- tarp... I placed the drain pan on top of the tarp JIC to catch any accidental spillage. Gear oil has a foul odor so I did not want any of it getting on the floor of my garage.

Parts:
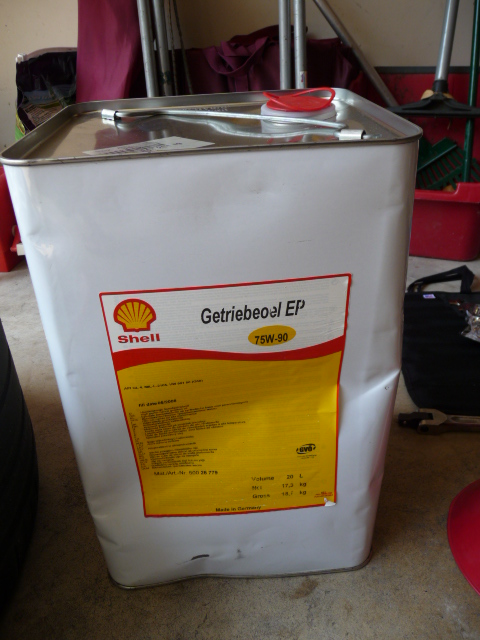
- 3 liters of Shell Manual Transmission Fluid 75W - 90... available from the p-dealer. Note the pic below is a 20 liter container. 1 liter is typical but my p-dealer did not have any on hand so they gave me a deal on the volume purchase.
Specifications
- 30 ft-lbs torque for the drain and fill plugs/bolts
Instructions
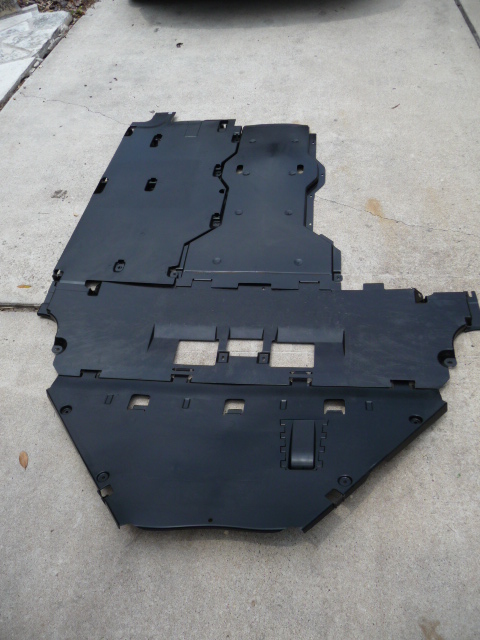
Warm up the car. I went on a spirited drive and noted how it shifts as a baseline. Jack the car up on all four corners and ensure that the car is level. After 20 minutes of using a floor fan to cool off the exhaust system I could comfortable shimmy under the car. Remove the 1st and 2nd plastic under panels from the rear of the car using the T25 torx bit and 10mm sockets. It seemed viable to just remove the 1st plastic under panel, however, I did not feel that I could properly get a torque wrench in there with the limited space so I removed the 2nd panel as well.
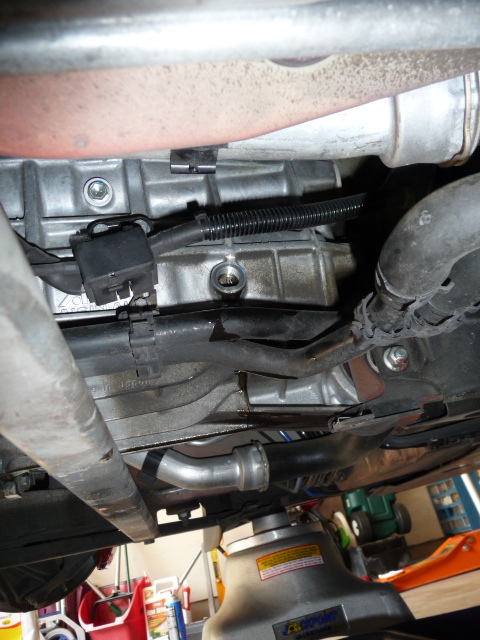
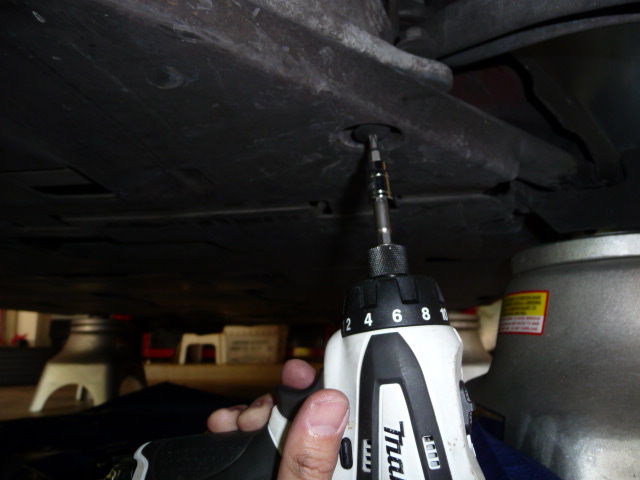
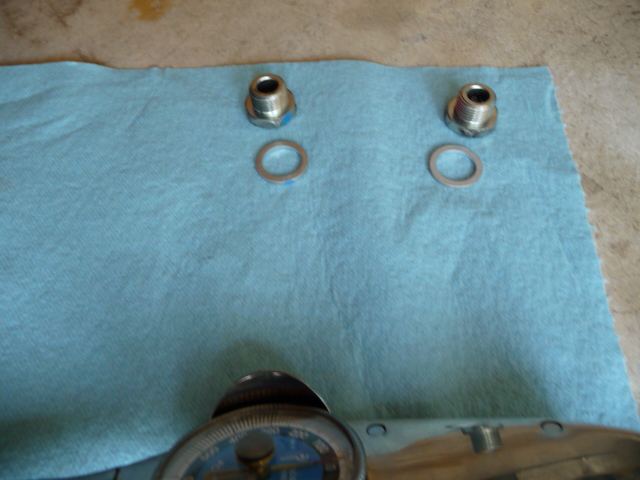
Use the 24mm socket to open the drain plug and allow the gear oil to drain completely... I allowed it to drain for an hour just to be safe. Note that both the drain and fill plugs should have a crush washer behind it. Over that hour time I took the opportunity to clean the various under panels(removing the 3rd section as well) and the car's under carriage. Be careful when draining the gear oil as it may still be hot depending on how long you allowed it to cool off.

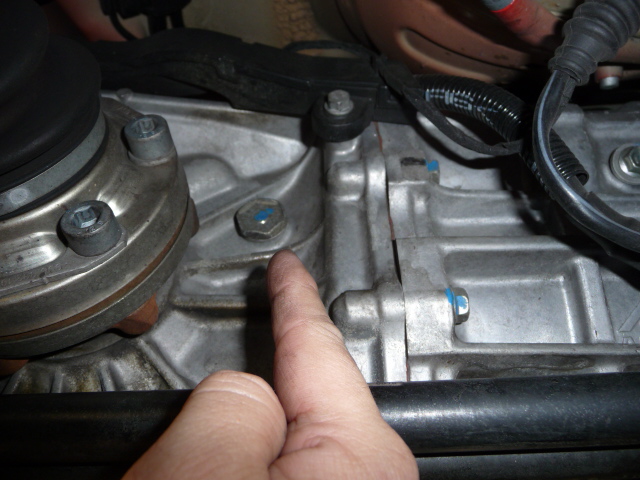
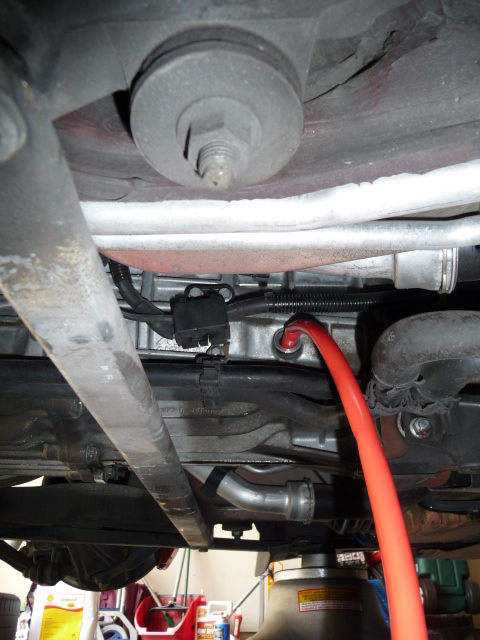
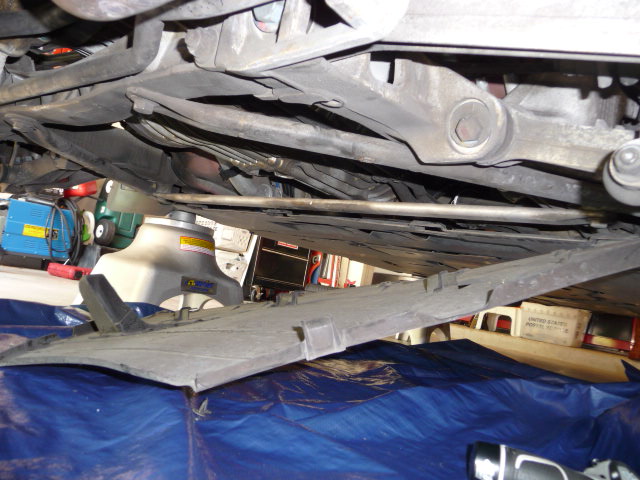
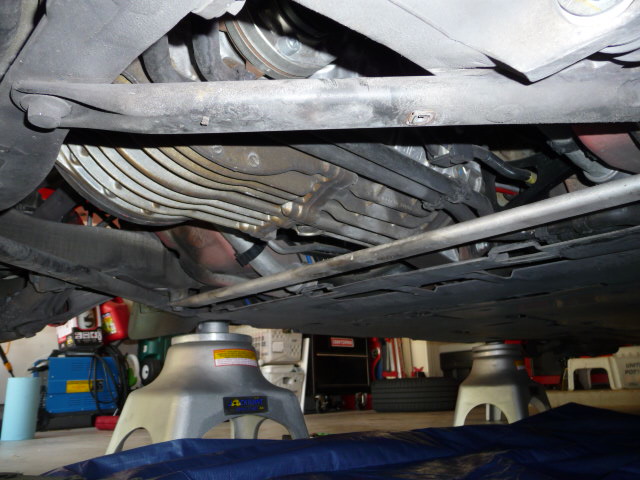
I also opened/removed the fill hole plug to expedite the draining process. Note that there are three 24mm bolts on the transmission. The one facing the ground is the drain plug. And the other two plugs facing the passenger side of the vehicle... the correct fill plug is towards the front of the car and a bit lower than the plug towards the rear of the tranny. You don't want to over fill the tranny so make sure you ID the proper fill plug. Hint.. besides the above note the lower plug towards the front will only allow ~2.9 liters of gear oil into the tranny before it starts to leak our gear oil. If you try to fill using the rear most plug it will likely allow for 5 liters which is detrimental towards the gear box. I used an old 5 liter oil container which was cleaned out to hold my measured 3 liters of gear oil.
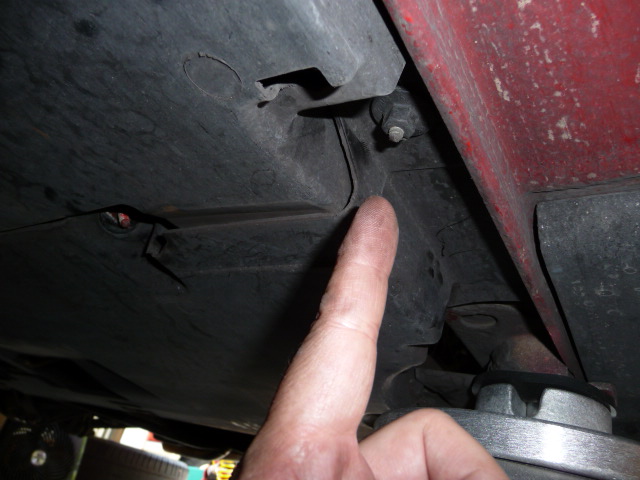
This is the fill hole plug.
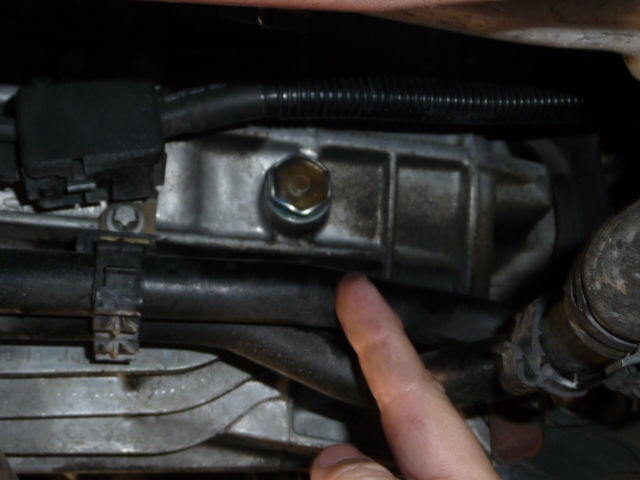
Do not open this one.
Clean out the surrounding area around the drain plug hole, thread in the plug/bolt, and torque it to 30 ft-lbs.
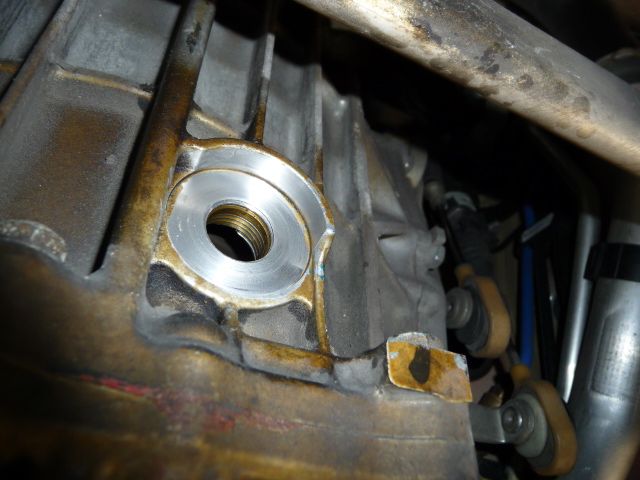
Use the fluid transfer pump to siphon the gear oil into the fill hole. When completed a little bit of gear oil should drip out to the proper level. This is why it's important that the car is level. Once it stops dripping out of the fill hole install the plug/bolt back in and torque it to 30 ft-lbs. I sprayed brake cleaner over the general area to remove any excess gear oil to remove as much of the stench as possible. In addition, I hit it with some P-21S and a scrub brush. Re-install the under panels and you should be set.
Side notes:
- while waiting for things to cool down I decided to dress up the under panels and under carriage a bit.
- I also had to find a 24mm socket in 3/8" drive as most all 24 inch sockets are 1/2" drive. The socket allowed me to torque it properly using my lower torque value 600 in-lbs 3/8" drive torque wrench. My 1/2" drive torque wrench starts at 30 ft-lbs so not ideal for getting an accurate torque value.
My '08 C2S currently has 58.5K miles and 4.5+ yrs on the clock. Lately I'm finding it a bit more difficult to shift into 1st so I decided to try changing out the gear oil and flushing my clutch fluid. This write-up will focus on the steps required to replace the gear oil.
DIY Level
I consider this DIY project a level 2-3 out of 10. It's a simple task requiring only a few steps to perform properly. Here are some instructions and pics which may help others.
Time
1-2 hrs... This should have been an hour project but it took me an extra hour to locate a 24mm socket in 3/8" drive and the second panel was somewhat challenging to remove due to the wide contact pad of my Jack Point jack stands.
Tools Required:
- 24mm socket
- T25 torx bit
- torque wrench (30 ft-lbs capable)
- 1/4" and 3/8" socket wrenches
- 10mm socket
- various socket wrench extensions
- fluid transfer pump
- brake cleaner
- latex gloves
- drain pan
- tarp... I placed the drain pan on top of the tarp JIC to catch any accidental spillage. Gear oil has a foul odor so I did not want any of it getting on the floor of my garage.
Parts:
- 3 liters of Shell Manual Transmission Fluid 75W - 90... available from the p-dealer. Note the pic below is a 20 liter container. 1 liter is typical but my p-dealer did not have any on hand so they gave me a deal on the volume purchase.
Specifications
- 30 ft-lbs torque for the drain and fill plugs/bolts
Instructions
Warm up the car. I went on a spirited drive and noted how it shifts as a baseline. Jack the car up on all four corners and ensure that the car is level. After 20 minutes of using a floor fan to cool off the exhaust system I could comfortable shimmy under the car. Remove the 1st and 2nd plastic under panels from the rear of the car using the T25 torx bit and 10mm sockets. It seemed viable to just remove the 1st plastic under panel, however, I did not feel that I could properly get a torque wrench in there with the limited space so I removed the 2nd panel as well.
Use the 24mm socket to open the drain plug and allow the gear oil to drain completely... I allowed it to drain for an hour just to be safe. Note that both the drain and fill plugs should have a crush washer behind it. Over that hour time I took the opportunity to clean the various under panels(removing the 3rd section as well) and the car's under carriage. Be careful when draining the gear oil as it may still be hot depending on how long you allowed it to cool off.
I also opened/removed the fill hole plug to expedite the draining process. Note that there are three 24mm bolts on the transmission. The one facing the ground is the drain plug. And the other two plugs facing the passenger side of the vehicle... the correct fill plug is towards the front of the car and a bit lower than the plug towards the rear of the tranny. You don't want to over fill the tranny so make sure you ID the proper fill plug. Hint.. besides the above note the lower plug towards the front will only allow ~2.9 liters of gear oil into the tranny before it starts to leak our gear oil. If you try to fill using the rear most plug it will likely allow for 5 liters which is detrimental towards the gear box. I used an old 5 liter oil container which was cleaned out to hold my measured 3 liters of gear oil.
This is the fill hole plug.
Do not open this one.
Clean out the surrounding area around the drain plug hole, thread in the plug/bolt, and torque it to 30 ft-lbs.
Use the fluid transfer pump to siphon the gear oil into the fill hole. When completed a little bit of gear oil should drip out to the proper level. This is why it's important that the car is level. Once it stops dripping out of the fill hole install the plug/bolt back in and torque it to 30 ft-lbs. I sprayed brake cleaner over the general area to remove any excess gear oil to remove as much of the stench as possible. In addition, I hit it with some P-21S and a scrub brush. Re-install the under panels and you should be set.
Side notes:
- while waiting for things to cool down I decided to dress up the under panels and under carriage a bit.
- I also had to find a 24mm socket in 3/8" drive as most all 24 inch sockets are 1/2" drive. The socket allowed me to torque it properly using my lower torque value 600 in-lbs 3/8" drive torque wrench. My 1/2" drive torque wrench starts at 30 ft-lbs so not ideal for getting an accurate torque value.
Last edited by USMC_DS1; 05-20-2013 at 06:23 PM.
 05-20-2013, 03:26 AM
#2

Another very nice write up USMC..
 05-20-2013, 08:22 AM
#4
Drifting
Thread Starter
Thanks VG and Pete.
Yes... getting into 1st is now easy even if the car is moving. But I cannot attribute the smoothness to the gear oil alone as I did flush my brake and clutch fluid as well.
Yes... getting into 1st is now easy even if the car is moving. But I cannot attribute the smoothness to the gear oil alone as I did flush my brake and clutch fluid as well.
05-20-2013, 08:59 AM
#5
Nice write up! I just did this one as well.
One thing I might add is that there are at least 2 under-tray screws that must be removed before you put the car up on jack stands (especially if they are wider tipped jack stands). The tips of the stands cover up the screws when the car is in the air.
I've done this twice now (50k, 100k miles) and I've gotten better shifter gear selection improvement from this than anything else (adjusting stock shifter, Numeric shift kit, pro-actively replacing shift cables).
05-20-2013, 09:41 AM
#6
Advanced
Join Date: Sep 2011
Location: Cary, NC
Posts: 94
Likes: 0
Received 0 Likes
on
0 Posts
Agree on the write up. I also had the gear oil changed at 45K miles, but at the dealer. I think Porsche maintenance schedules are generally too long, I prefer "old fashioned" maintenance. Only one comment on the DIY, I would make sure I can open the fill plug before removing the drain plug. Would not want to drain gear oil first in case there is any problem opening the fill plug.
05-20-2013, 09:54 AM
#7
Rennlist Member
another awesome write up USMC. i did this a few months ago and WOW does that stuff stink. and haha, i used the same (or similar) pump but the stuff was so thick the tubes kept popping out of the pump from the pressure! man, what a mess i had - afterwards i literally balled everything up and trashed it.
next time i will gladly pay just to avoid the mess!
next time i will gladly pay just to avoid the mess!
Trending Topics
05-20-2013, 10:12 AM
#8
Great job USMC_DS1 !
I have found that a perfect pump for the OEM fluid in 1 liter bottles is the CRC Sta-Lube Fluid Oil Pump. It threads in perfectly to the 1 liter Porsche Transaxle oil bottles - P/N 999.917.546.00 $10 or so from Amazon.com
The capacity for the 997.2 transaxle is 2.9 liters, but I felt more comfortable having 4 liters on hand so that I was 100% certain that I have filled the level to the top and got a little back flow from the fill hole.

Rich
2009 C2S Coupe
I have found that a perfect pump for the OEM fluid in 1 liter bottles is the CRC Sta-Lube Fluid Oil Pump. It threads in perfectly to the 1 liter Porsche Transaxle oil bottles - P/N 999.917.546.00 $10 or so from Amazon.com
The capacity for the 997.2 transaxle is 2.9 liters, but I felt more comfortable having 4 liters on hand so that I was 100% certain that I have filled the level to the top and got a little back flow from the fill hole.
Rich
2009 C2S Coupe
05-20-2013, 11:26 AM
#9
Drifting
Thread Starter
Thanks all. Your instructive comments triggered a few more neurons this morning so I updated the write-up with some additional comments I remembered from the project.
BTW, here are some more pics from the project for those interested.
BTW, here are some more pics from the project for those interested.
05-20-2013, 11:29 AM
#10
USMC,
Did you consider the Red Line gear oil? I have used them on many BMWs (M3, bikes...et) and was always very pleased with their quality.
Yves
Did you consider the Red Line gear oil? I have used them on many BMWs (M3, bikes...et) and was always very pleased with their quality.
Yves
05-20-2013, 11:47 AM
#11
Drifting
Thread Starter
Yves, I also used Redline products extensively on my prior BMW's. But being that my Carrera was still under CPO I decided to go with the factory gear oil JIC. As others have pointed out the change over has really improved/smoothed out my gear shifts. If anything I'll likely change it more frequently using the factory gear oil... perhaps every year or other year moving fwd as I have so much now. If I start seriously tracking the car then it may be ideal to use an alternative. If anyone has had good results using alternative gear oil... please post with your insight. TIA
Last edited by USMC_DS1; 05-20-2013 at 12:52 PM.
05-20-2013, 01:02 PM
#14
Rennlist Member
my race shop uses redline 75w90 + 75w90NS in a 50/50 mix. i switched over a couple yrs ago and while i do remember it seeming a bit smoother on track, i dont remember it being a wow-i-cant-believe-the-difference kind of thing.
05-20-2013, 04:59 PM
#15
Rennlist Member
Awesome. Thanks for taking the time to put this down. No excuse not to do it now...