
997 Mod Part 1: Deviated Front Seat Belts
 06-30-2013, 11:22 PM
#1
Drifting
Thread Starter
Background and Goals
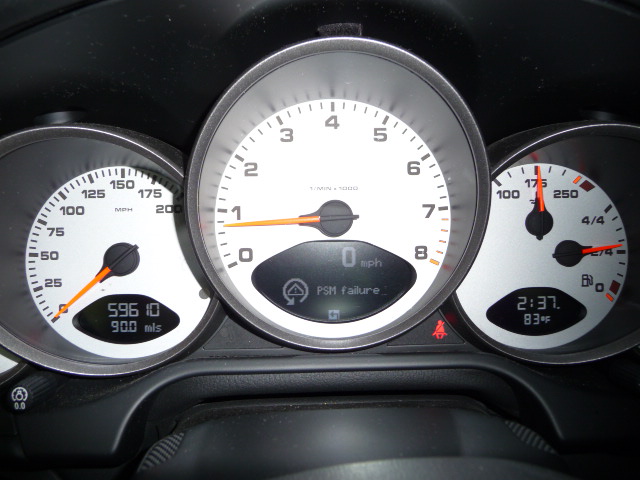
My '08 C2S currently has 59.5K miles and 4.5+ yrs on the clock. I've been doing a few bolt on performance oriented mods since ownership 2.5 yrs ago and have been meaning to do a few more asthetic mods for the interior . This write-up will focus on the steps required to replace the stock front black seat belts with deviated guards red belts.
Note: contrary to popular belief... installing deviated guards red seat belts does not add 5-10 HP although it does make the car feel faster.
DIY Level
I consider this DIY project a level 2-3 out of 10. It's a fairly simple project to undertake. Here are some instructions and pics which may help others.
Time
1.5 -2 hrs... the second side only took about 30 minutes once I figured out the 1st side.
Caution/ Achtung!
Care should be taken to avoid disconnecting the front belts while the car is powered - connected to the battery. THE CAR BATTERY MUST BE DISCONNECTED AND SPECIFICALLY THE NEGATIVE GROUND TERMINAL SHOULD BE DISCONNECTED. Unlike the rear belts the front belts have an explosive charge which may discharge should it receive an electrical or even static discharge. I opened all doors and left the frunk opened as well to avoid any unnecessary issues with accessing the frunk and/or car with no power.
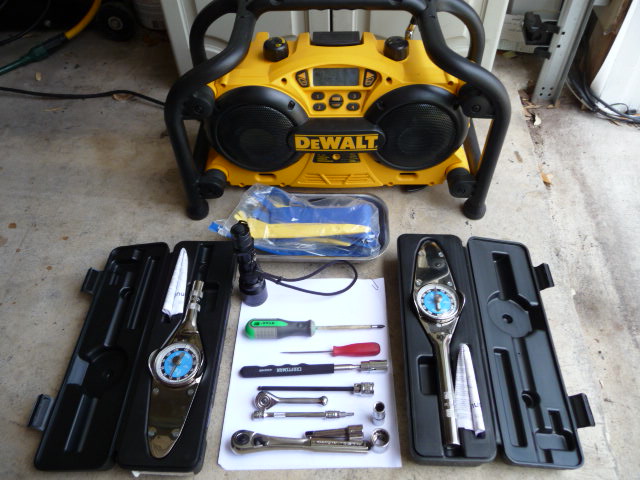
Tools Required:
- 10mm and 17mm sockets
- 6mm allen wrench or socket
- T20 torx socket
- 1/4" and 3/8" socket wrench
- torque wrenches (7.5 ft-lb and 37 ft-lb. capable)
- screw drivers… medium philips and a small flat head
- magnetic pickup tool
- interior panel/trim removal tool set
Optional Tools
- flash light
- boombox
- fan to fend off the 106*F Texas heat
Parts:
- a set of deviated seat belts. Color of your chosing: http://www.suncoastparts.com/product...ode=997S_Seats
Specifications:
- 7.5 ft-lb and 37 ft-lb
Instructions:
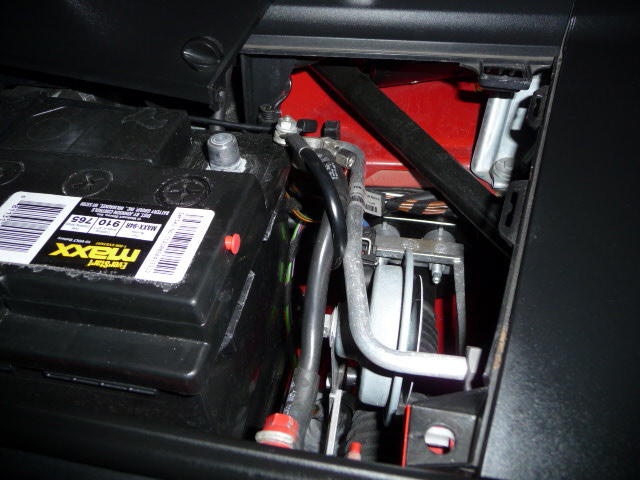
Disconnect the negative terminal from the car battery. Leave the frunk open.
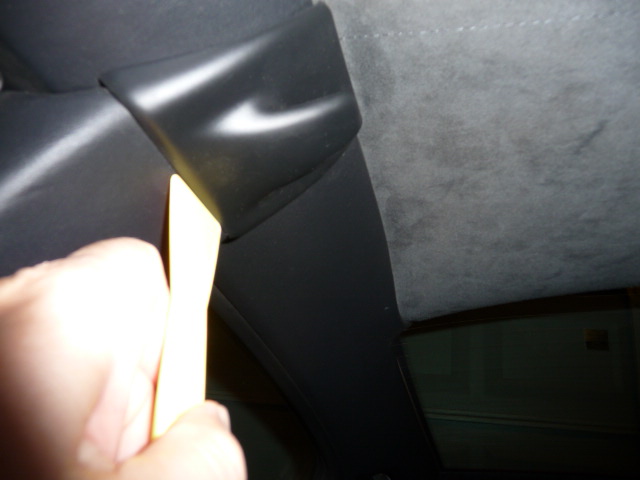
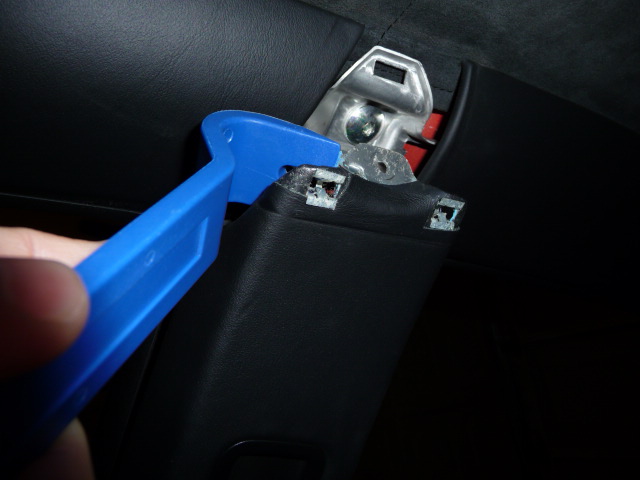
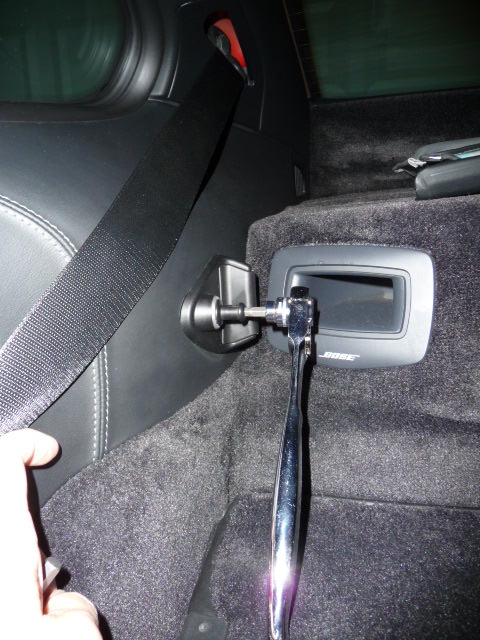
Remove the coat hook bracket using one of the interior panel removal tools. Lift from the bottom out and up.
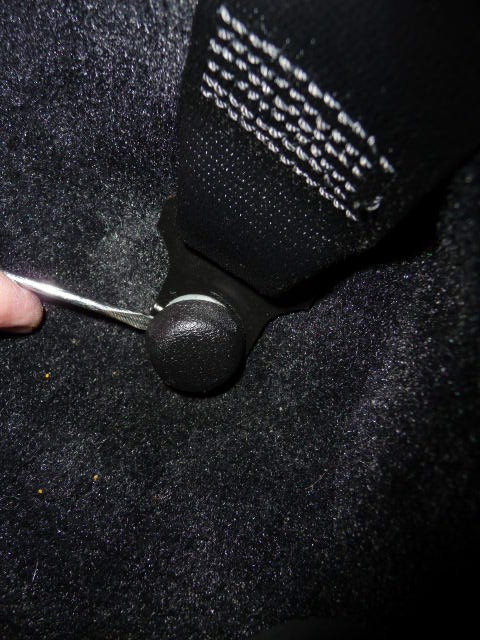
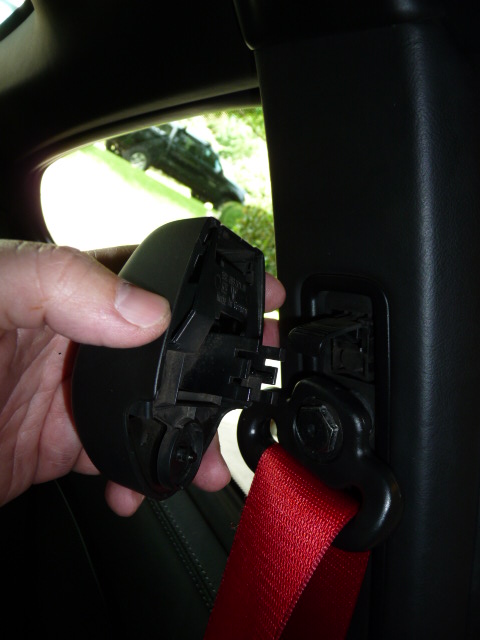
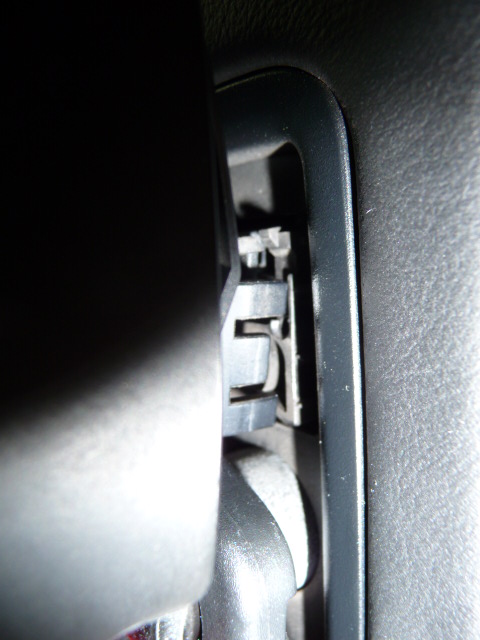
Pull the seat belt height adjuster plastic cover straight out. I placed my fingers behind it and applied force in a pulling motion away from the B pillar. I've heard that some were able to remove the unit as a whole but it came out in 3 pieces for me.
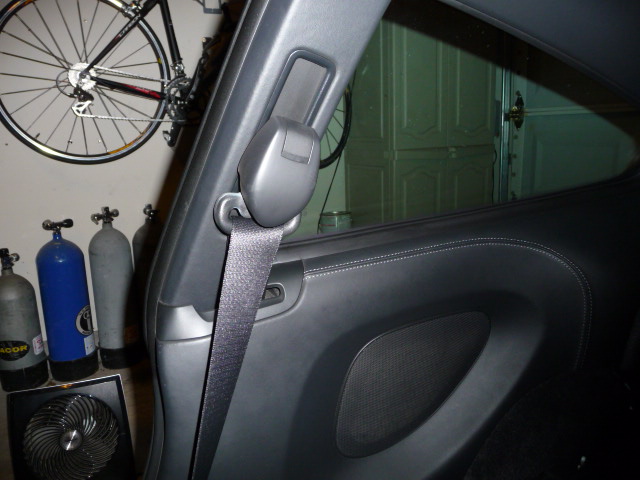
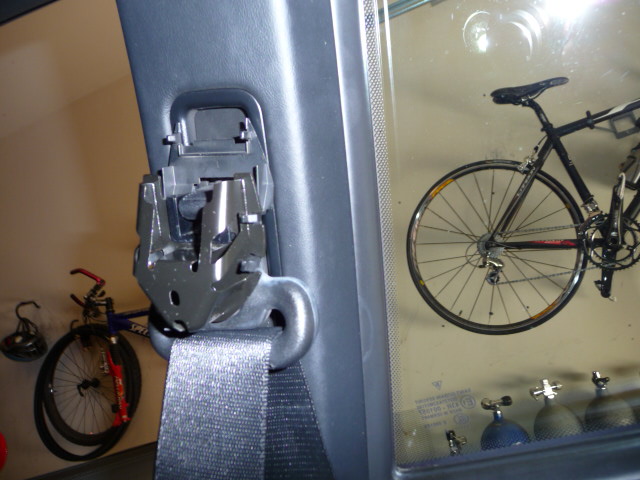
Remove the 17mm machine screw holding the seat belt guide onto the B pillar. (Use 37 ft-lb of torque when you reinstall this machine screw later). Now remove the philips screw holding B pillar trim in place then remove the B pillar trim piece by pulling it straight out
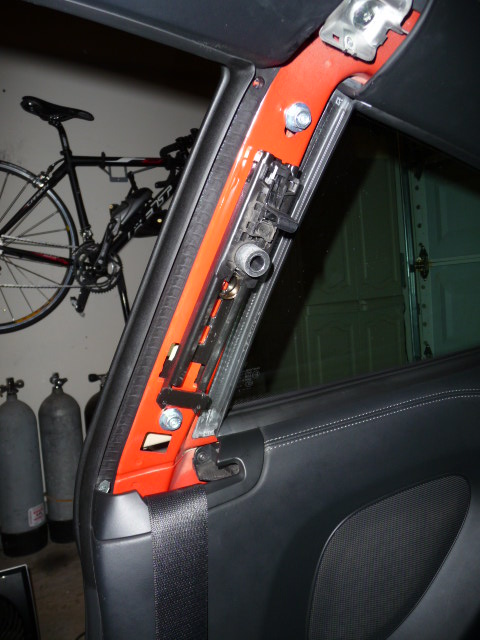
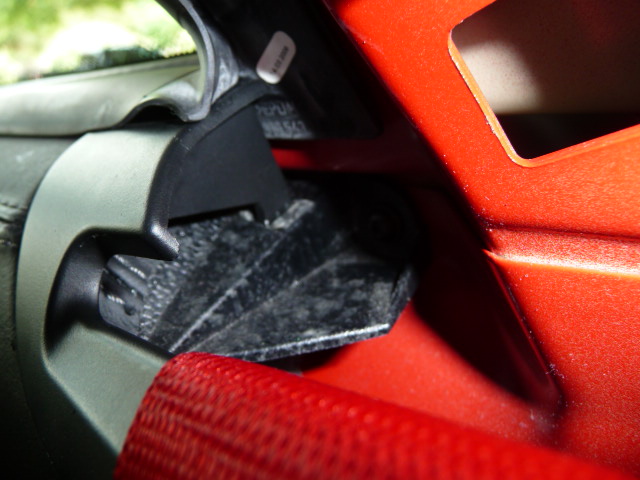
Remove the seat belt collar by pulling the rear most part of it up and the entire unit out. Note this is the driver side as I had a clearer pic of the rear tab. The rest of the pics are of the passenger side.
Remove the Philips screw holding the backseat side panel in place. Place a magnetic pickup tool next to the screw as you remove it to avoid having it fall down into the body panel.
My '08 C2S currently has 59.5K miles and 4.5+ yrs on the clock. I've been doing a few bolt on performance oriented mods since ownership 2.5 yrs ago and have been meaning to do a few more asthetic mods for the interior . This write-up will focus on the steps required to replace the stock front black seat belts with deviated guards red belts.
Note: contrary to popular belief... installing deviated guards red seat belts does not add 5-10 HP although it does make the car feel faster.
DIY Level
I consider this DIY project a level 2-3 out of 10. It's a fairly simple project to undertake. Here are some instructions and pics which may help others.
Time
1.5 -2 hrs... the second side only took about 30 minutes once I figured out the 1st side.
Caution/ Achtung!
Care should be taken to avoid disconnecting the front belts while the car is powered - connected to the battery. THE CAR BATTERY MUST BE DISCONNECTED AND SPECIFICALLY THE NEGATIVE GROUND TERMINAL SHOULD BE DISCONNECTED. Unlike the rear belts the front belts have an explosive charge which may discharge should it receive an electrical or even static discharge. I opened all doors and left the frunk opened as well to avoid any unnecessary issues with accessing the frunk and/or car with no power.
Tools Required:
- 10mm and 17mm sockets
- 6mm allen wrench or socket
- T20 torx socket
- 1/4" and 3/8" socket wrench
- torque wrenches (7.5 ft-lb and 37 ft-lb. capable)
- screw drivers… medium philips and a small flat head
- magnetic pickup tool
- interior panel/trim removal tool set
Optional Tools
- flash light
- boombox
- fan to fend off the 106*F Texas heat
Parts:
- a set of deviated seat belts. Color of your chosing: http://www.suncoastparts.com/product...ode=997S_Seats
Specifications:
- 7.5 ft-lb and 37 ft-lb
Instructions:
Disconnect the negative terminal from the car battery. Leave the frunk open.
Remove the coat hook bracket using one of the interior panel removal tools. Lift from the bottom out and up.
Pull the seat belt height adjuster plastic cover straight out. I placed my fingers behind it and applied force in a pulling motion away from the B pillar. I've heard that some were able to remove the unit as a whole but it came out in 3 pieces for me.
Remove the 17mm machine screw holding the seat belt guide onto the B pillar. (Use 37 ft-lb of torque when you reinstall this machine screw later). Now remove the philips screw holding B pillar trim in place then remove the B pillar trim piece by pulling it straight out
Remove the seat belt collar by pulling the rear most part of it up and the entire unit out. Note this is the driver side as I had a clearer pic of the rear tab. The rest of the pics are of the passenger side.
Remove the Philips screw holding the backseat side panel in place. Place a magnetic pickup tool next to the screw as you remove it to avoid having it fall down into the body panel.
Last edited by USMC_DS1; 07-01-2013 at 12:05 AM.

The following users liked this post:
irnnr (05-01-2020)
06-30-2013, 11:40 PM
#2
Drifting
Thread Starter
Remove the rear seat locking pin with a 6mm allen. (Use 37 ft-lb of torque when you reinstall this allen screw later).
Now you're ready to remove the backseat side panel. Pull the side panel towards the center of the car starting with the top section… I started with the belt collar area. You'll hear it disconnect from the various tabs holding it in place.
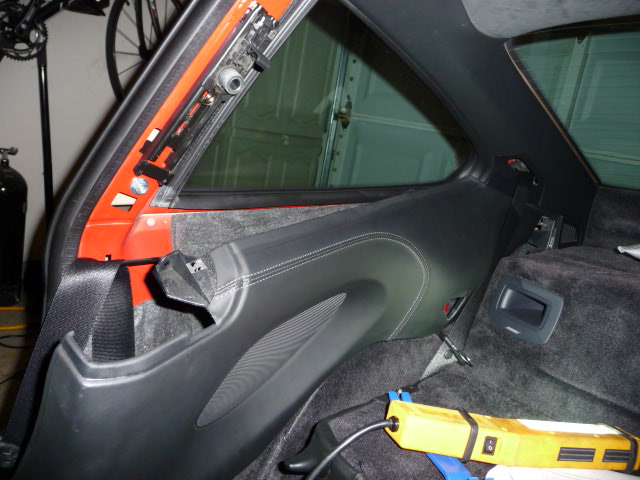
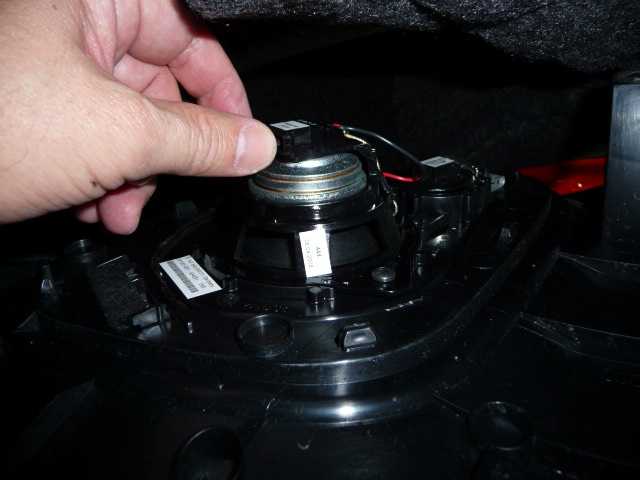
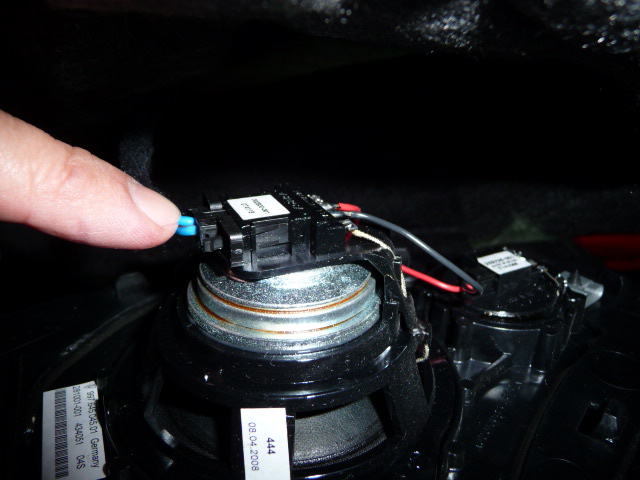
Disconnect the speaker wires from the speaker. Then move it forward towards the front of the car and out.
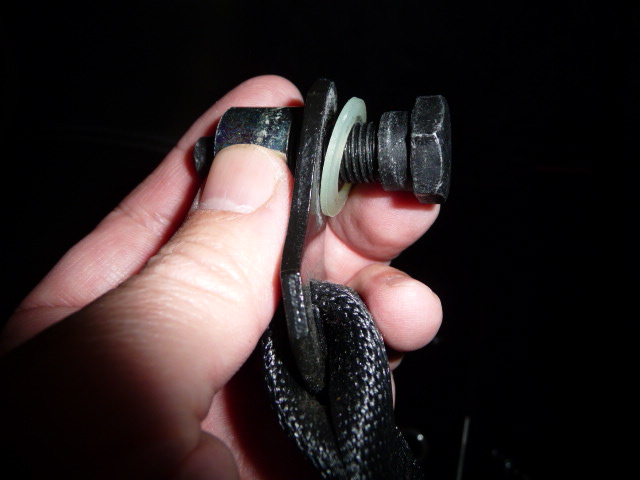
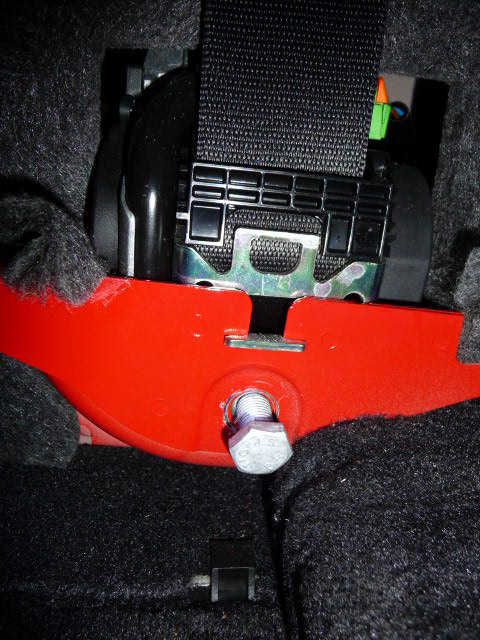
Remove the plastic cap covering the bottom seat belt machine screw with the small flat headed screw driver. Remove the 17mm machine screw itself including the sleeve and note that the sleeve is between the end seat belt bracket and the body panel. (Use 37 ft-lb of torque when you reinstall this machine screw later).
Remove a 10mm screw from the seat belt deflector bracket. I left one screw on and loosen it enough to allow me to route the new belt through it the same way the old belt was routed. (Use 7.5 ft-lb of torque when you reinstall this machine screw later).
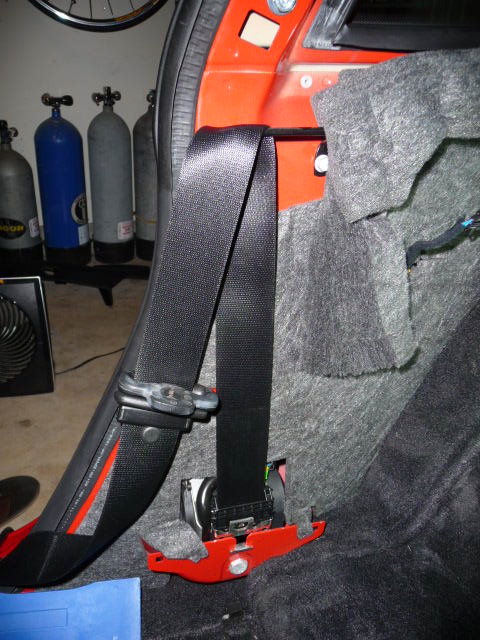
Remove the 17mm machine screw holding the seat belt tensioner mechanism. (Use 37 ft-lb of torque when you reinstall this machine screw later). Caution/ Achtung! THE CAR BATTERY MUST BE DISCONNECTED before you disconnect the electrical connection from the belt tensioner mechanism. Then remove the old belt tensioner body and belt from the car.
Execute the above process for both sides and use the reverse process to install the deviated belts.
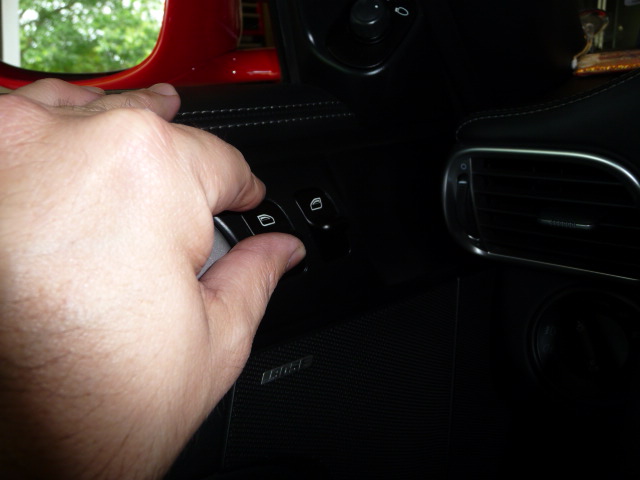
After reconnecting the negative battery you'll notice that the windows may need to be reset. Just hold the button to row it up for 10 seconds and that should recalibrate it.
I also noticed some PSM CEL's when I started up the car. These cleared after I drove 1/2 a block.
Now you're ready to remove the backseat side panel. Pull the side panel towards the center of the car starting with the top section… I started with the belt collar area. You'll hear it disconnect from the various tabs holding it in place.
Disconnect the speaker wires from the speaker. Then move it forward towards the front of the car and out.
Remove the plastic cap covering the bottom seat belt machine screw with the small flat headed screw driver. Remove the 17mm machine screw itself including the sleeve and note that the sleeve is between the end seat belt bracket and the body panel. (Use 37 ft-lb of torque when you reinstall this machine screw later).
Remove a 10mm screw from the seat belt deflector bracket. I left one screw on and loosen it enough to allow me to route the new belt through it the same way the old belt was routed. (Use 7.5 ft-lb of torque when you reinstall this machine screw later).
Remove the 17mm machine screw holding the seat belt tensioner mechanism. (Use 37 ft-lb of torque when you reinstall this machine screw later). Caution/ Achtung! THE CAR BATTERY MUST BE DISCONNECTED before you disconnect the electrical connection from the belt tensioner mechanism. Then remove the old belt tensioner body and belt from the car.
Execute the above process for both sides and use the reverse process to install the deviated belts.
After reconnecting the negative battery you'll notice that the windows may need to be reset. Just hold the button to row it up for 10 seconds and that should recalibrate it.
I also noticed some PSM CEL's when I started up the car. These cleared after I drove 1/2 a block.
Last edited by USMC_DS1; 07-01-2013 at 12:08 AM.
The following users liked this post:
maekwl (09-26-2022)
 [ATTACH]
 [/ATTACH]

The following users liked this post:
irnnr (04-02-2024)
 07-01-2013, 12:47 AM
#5
Rennlist Member
Super, looking great!!

Trending Topics
07-01-2013, 08:34 AM
#9
Rennlist Member
Looks great. And great write-up! Really thorough which is extremely valuable to the community!
My black on black car has those belts, thanks to the original owner spec'ing them on his build. They are sharp!
My black on black car has those belts, thanks to the original owner spec'ing them on his build. They are sharp!
 07-01-2013, 12:12 PM
#12
Drifting
Thread Starter
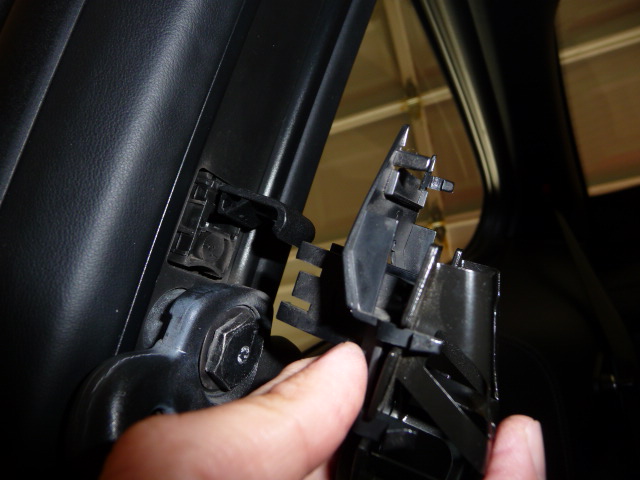
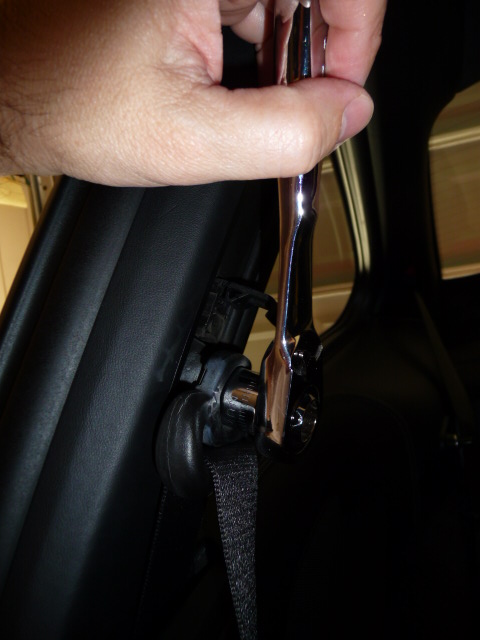
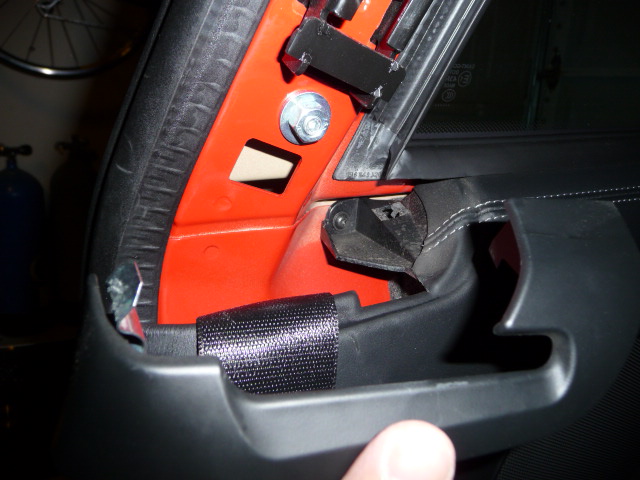
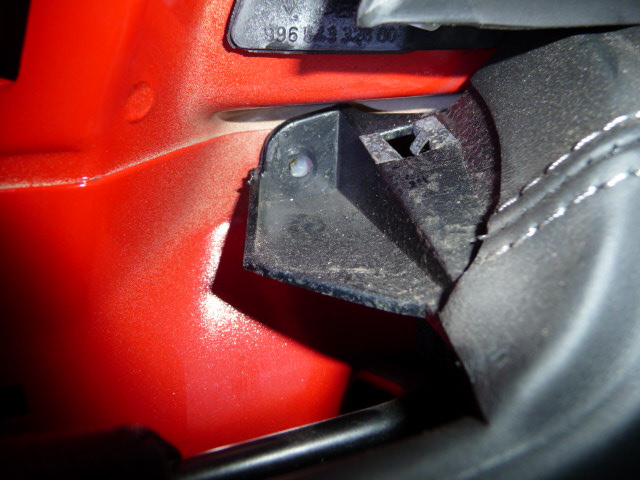
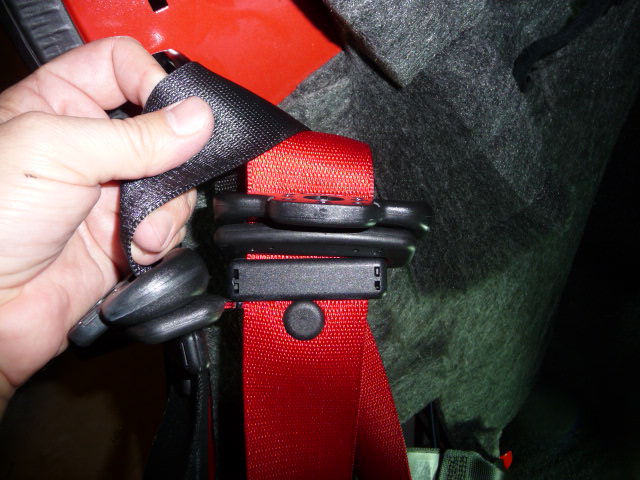
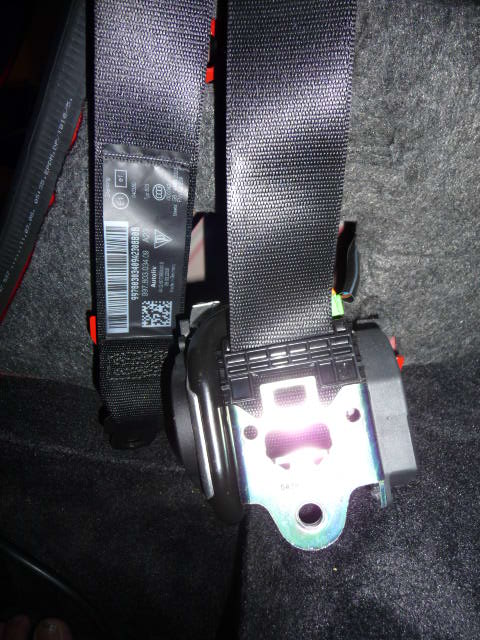
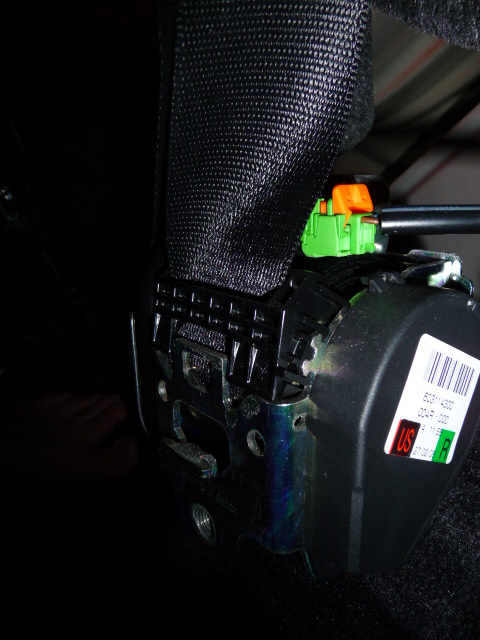
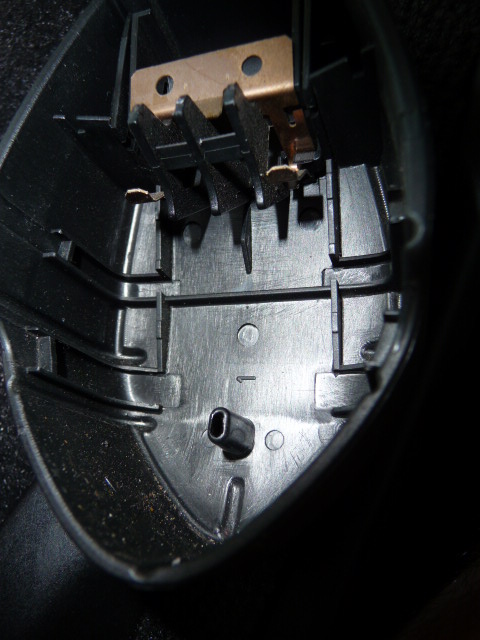
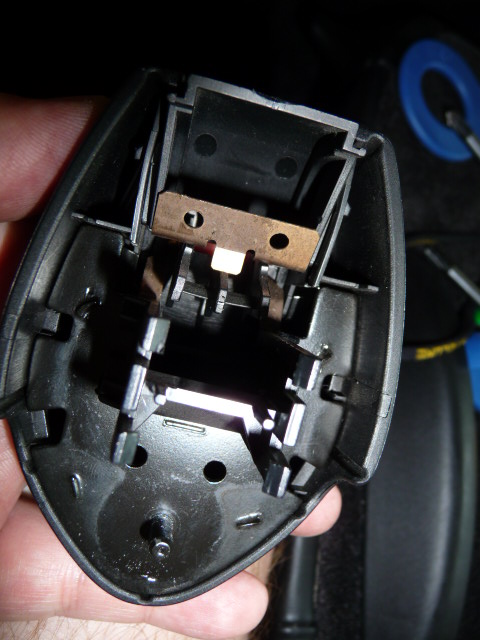
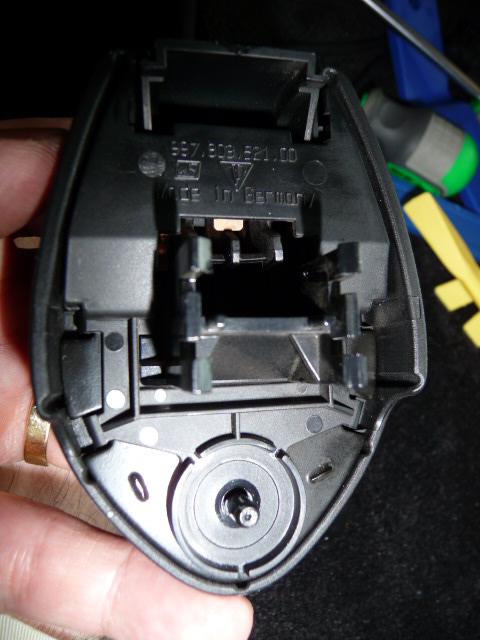
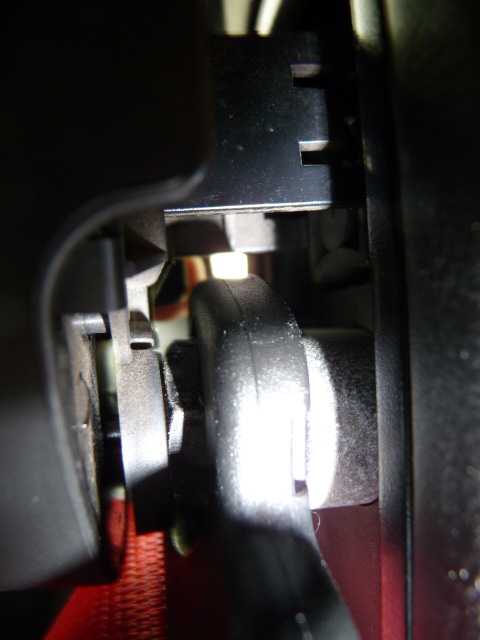
Thanks folks... I'll have to admit that removing the 1st leather panel from the rear had a certain pucker factor to it. It was satisfying to discovered how well put together the car is and how nicely it all goes back together afterwards... No need to worry about a loose part creaking down the road. Here are a few more pics of the adjustable seat belt mechanism. I spent the most amount of time contemplating how best to disassemble and reassemble this part. Much easier than I made it out to be. It basically has 3 parts to it. Just make sure that each part is aligned properly into it's keyed position and everything will snap in properly. Once the whole unit is fitted back together make sure that the circular part of the assembly is aligned to fit over the 17mm bolt when you snap it back onto the B pillar.
GL with the project Simple Green. My car already feels faster after the MOD... JK.
GL with the project Simple Green. My car already feels faster after the MOD... JK.

 Too much time cleaning stuff in the corps?
07-01-2013, 12:27 PM
Too much time cleaning stuff in the corps?
07-01-2013, 12:27 PM
#14
Drifting
Thread Starter