
My UK 2008 Cayenne GTS
 10-23-2019, 10:41 AM
#1
Instructor
Thread Starter
Hi All,
As I am a member and it looks like the forum needs a bit of waking up, I thought I would keep progress of my cars here. I have 4 Porsches as part of a small collection of cars, all of which I actively work on for fun, getting hands on is what I love to do, I still take the cars for their routine services to a specialist but for interim jobs, upgrades and replacement of consumable/worn parts, if a guy in a garage can do it then so can I, albeit, outside on a cold floor. It's nice to share the tasks I carry out, I enjoy following the progress of others who post their own accounts, sadly it seems to be something which is dying out and posting up progress on instagram just isn't the same. I like to keep a visual diary for my own references mainly but at the same time, hope this will help others to do jobs themselves or at least entertain you on these grey and wet days we have now.
At this point, I have owned the car for the best part of 8 months so forgive some time references..
With the news of my wife being pregnant (Now have a 4 month old boy), my first thought was obviously, woohoo, excuse for a new car! It didn�t take me long to decide on a Cayenne, she doesn�t like estate cars, a hatch would be too small and the boot on a saloon may prove challenging, we both fancied something high up, problem being was that most high up, non estate cars tend to be either diesels or unreliable which ruled out the 2nd inline choice of a BMW X5 4.8. A shame as I test drove one and I couldn't fault it, with it being much much much more modern inside compared to the 957 Cayenne and generally newer looking, after driving it, I couldn�t stop seeing them on the back of AA trucks, so I just kept returning to search for Cayennes. I would have loved a Macan but available car cash doesn�t stretch unless 1 of the collection goes. The Cayenne is pushing it on the size factor and I am going to have to see how the wife gets on with it while we still live in suburbia.
I had always liked the Cayenne and being in love with the Porsche brand, it made sense to add a 4th to the collection. Realising they do a GTS version which had alcantara, made a great noise and many other nice bits, it had to be one of those over the Turbo. I love naturally aspirated cars and the turbo was just a bit much for the duties required of it.
I had been looking for one since October/November 2018 and I just wasn�t finding much, they either pop up and disappear really quick or they have remained on sale for months and months for whatever reason. They also always seem to be black, as nice as it is, I really really didn�t want black as it a nightmare colour to maintain and on a car the size of a house, multiply that by 2!
To cut a long story short, I found my perfect one, albeit, more miles than I wanted but I did start to get a little desperate due to time running out, I wanted to get a car that I could get up to my standards before all of my free time is occupied with the baby.
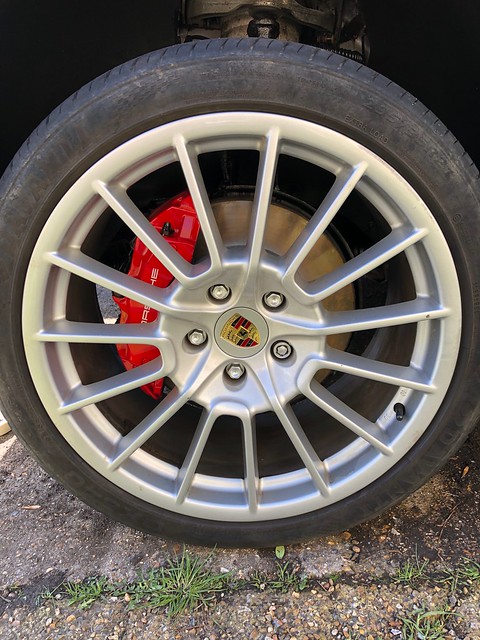
The car I found was silver, great! Silver is my favourite colour on a car, it had the wheels I was desperate for, full history and all the options I wanted and more.
I contacted the owner and a deal was done. In the time I was awaiting a good opportunity to go and get the car, I managed to locate the previous owner and spoke to him, a lovely guy who told me about his time with the car, who the 1st owner was (Manager of a football club hence every option box being ticked) and the various bits of work which was carried out on the car in his time. This was brilliant for me, I love to know everything I can find out about a car I own and to get this kind of contact and info was priceless. I was sent old pictures, info on jobs done and original brochure.
This all gave me confidence in the car and as it was 300 miles away, it helped, I normally don�t like buying cars that take longer than an hour to get to as I have had my time wasted so many times with dishonest sellers, an exception was made here.
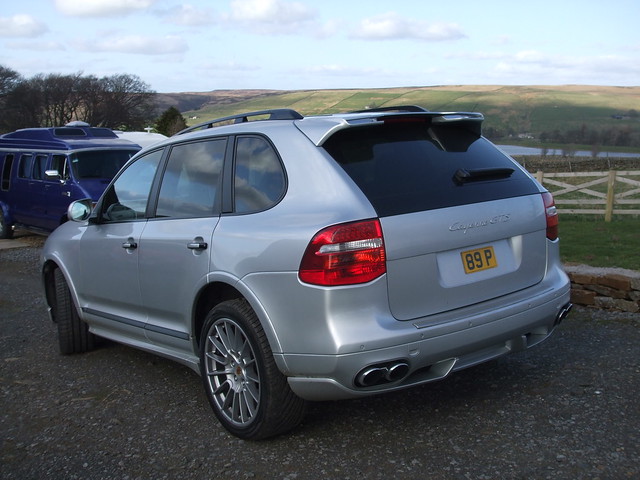
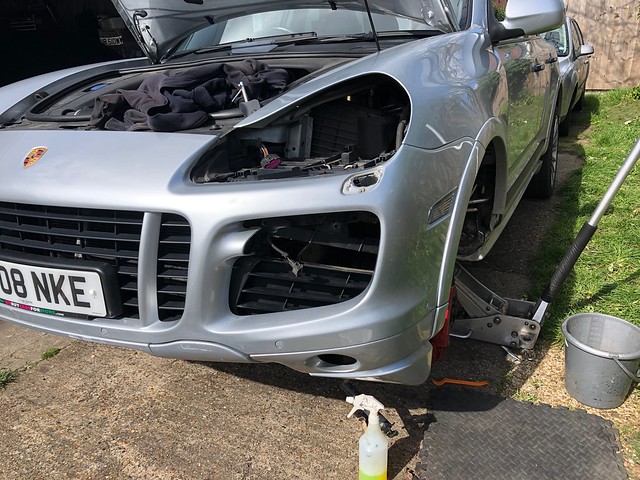
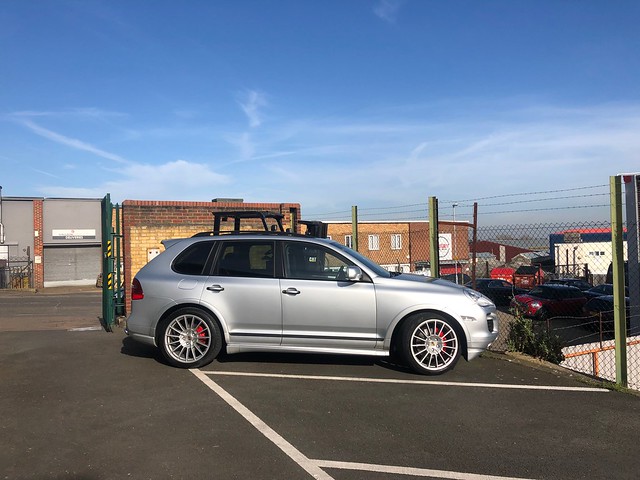
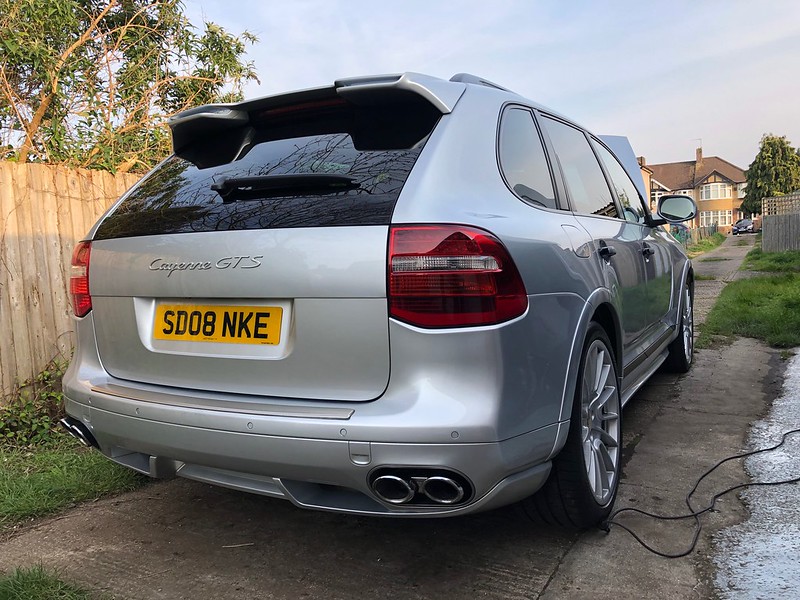
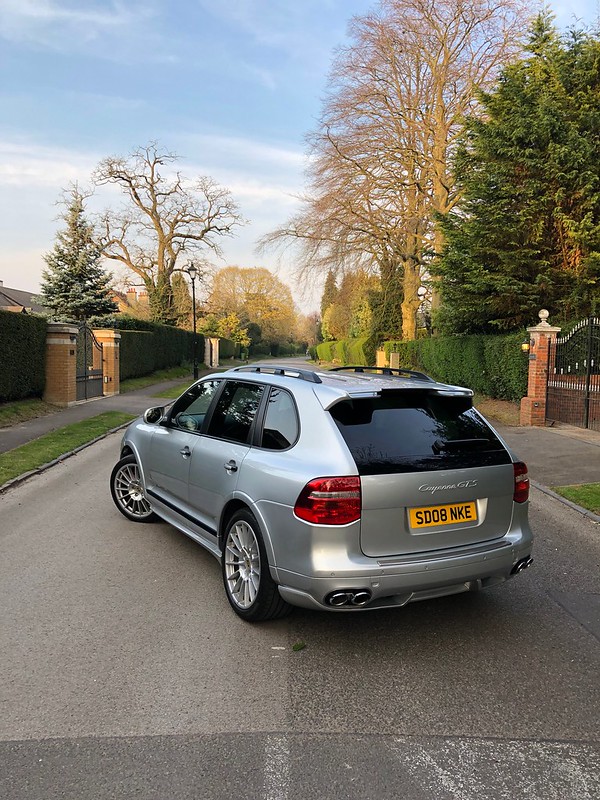
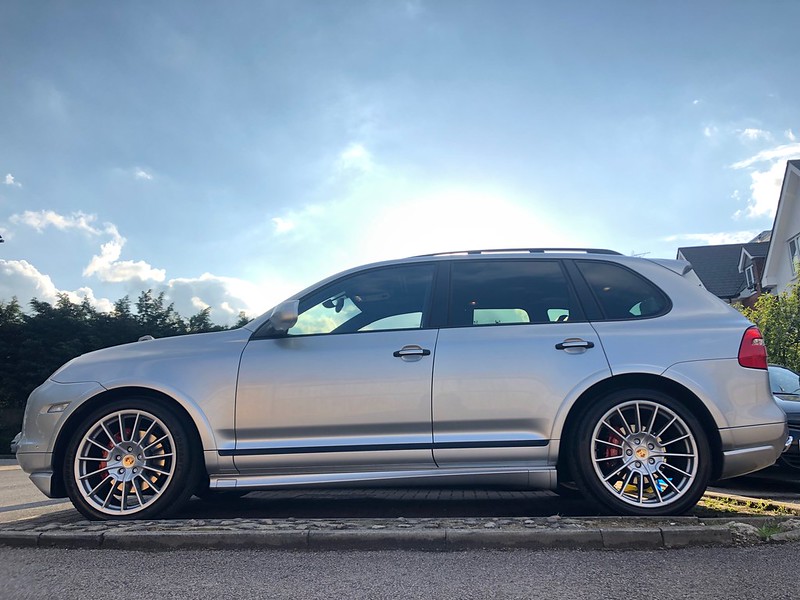
So here is the car based on some pics from the 2nd owner, I am now the 4th.

Collection day begun with an alarm at an obscene time on a Sunday and a train journey from South London to the North!
A ride to the tube to get to then get to Kings Cross�
Reading material (Can�t believe mags are �5 each now!)

Started getting dizzy up there..

Collected from the station, good look around the car and then to a pub to go through paperwork and details over a pint (I love Northerners!)


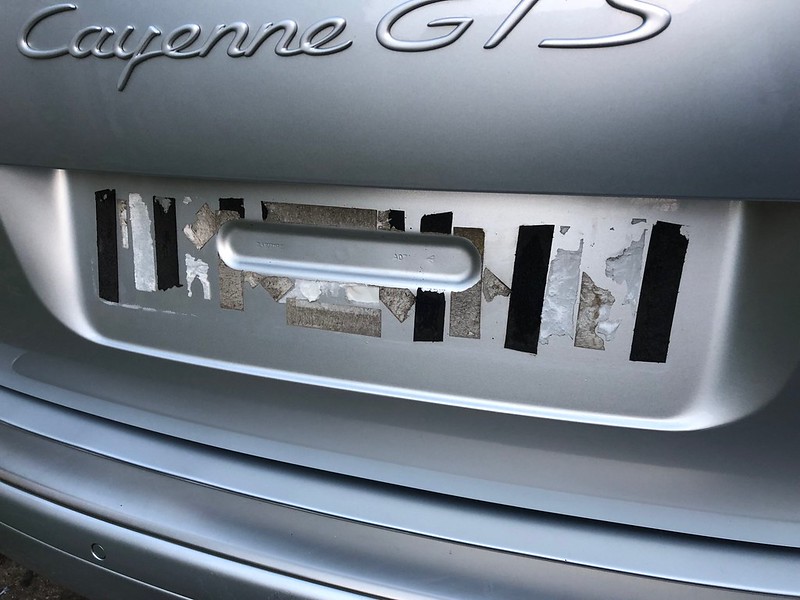
The car was generally as described, lots of paperwork, a great owner who was a copper and his wife used it mostly, it could be described as an honest used car, I love this as once I have finished with it, the results are much more noticeable. There was one thing which I wasn�t aware of and it did kind of put me off the car as I hate this kind of thing.. I was warned about the rear doors too! It is just the one door so it won�t be costly to repair and the price did reflect this in the end so not too bad, just an extra hassle to have sorted.

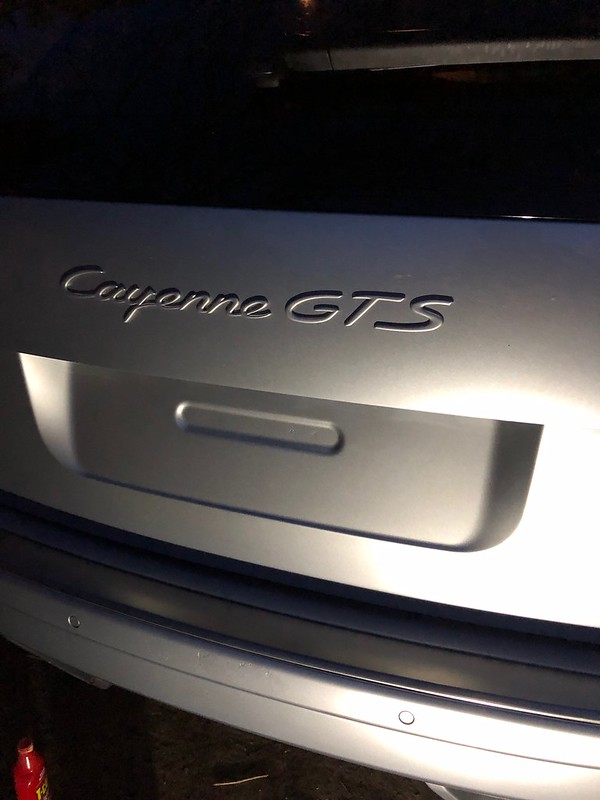
I will seal it up the best I can for now, make sure the wife is comfortable with the car and then book it in to be repaired. I will do some preventative stuff on the other side too! Assuming this rust is starting from the inside out? I was thinking to remove the door car and clean and seal with some dynax/waxoyl.
After a drink and waiting too long for the payment to go across, I was homeward bound! First fill of V power from near empty, �121!
I got home after 310 miles, 5 hours 5 minutes, 10:30pm.
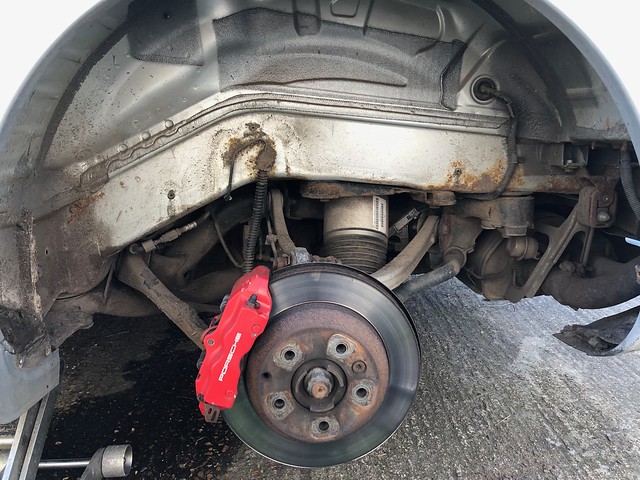
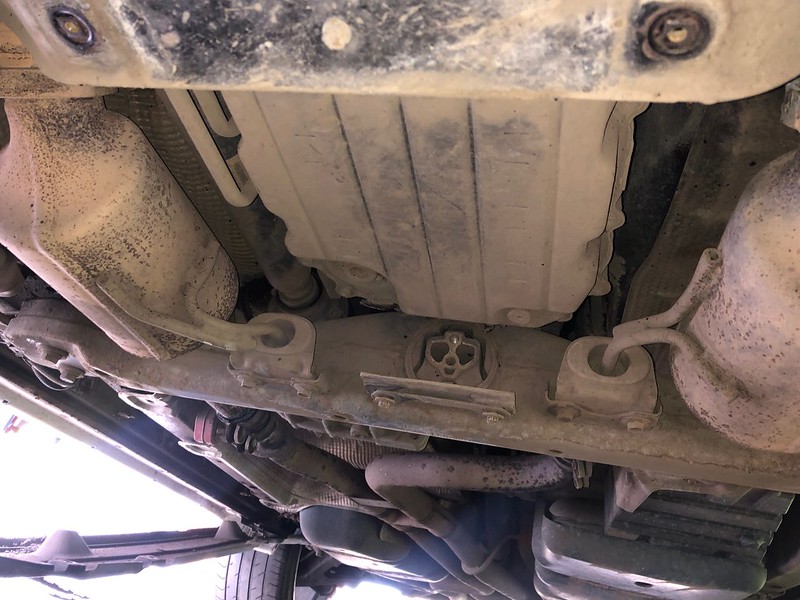
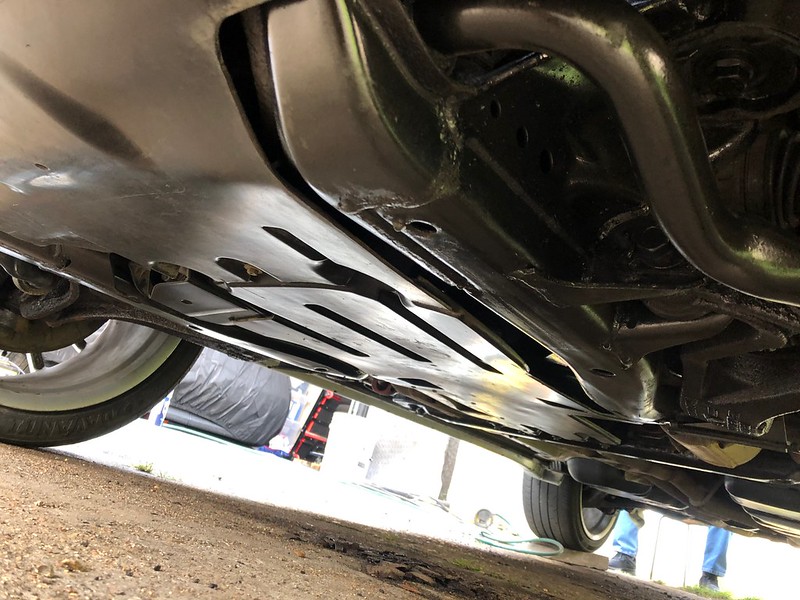
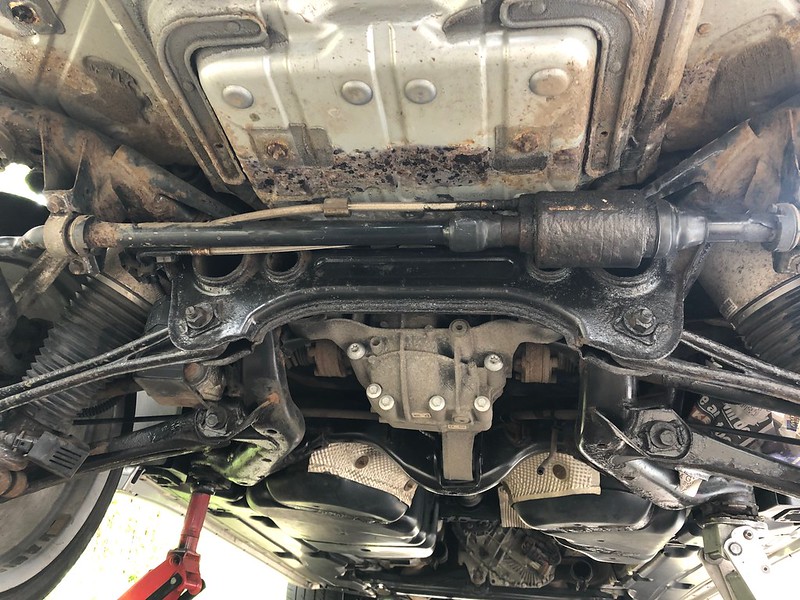
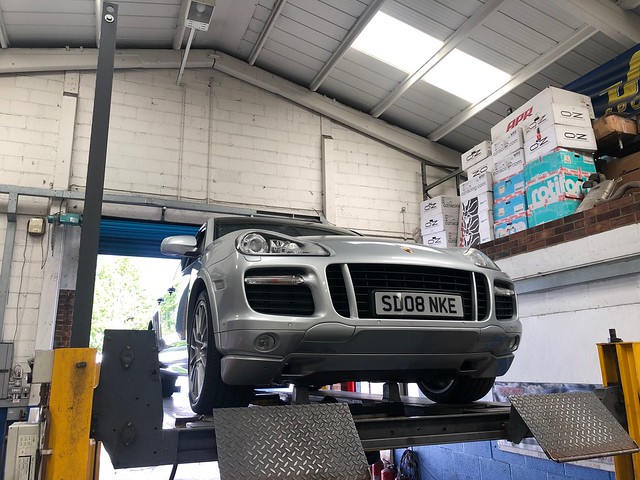
Full first day of ownership, I woke up early once again and cracked on! First job was to fully inspect the car in detail and clean the underside up, I like doing this as I get a close look at bushings and the underpinnings.
This annoyed me everytime I looked in the rear view, one of the clips was bent

Oh wow, everything is so bloody big!!
Yuck!!!
Drains blocked!

Mud removed
Stone chipped

Painted

Front indicator was fogging up so wanted to take a closer look, what a ball ache that was! Think I need to replace with a new one.

Getting there

@Demort, I had you in mind here!
After everything was crisp, cleaned and dry. Everything got a good coat.

I repeated this a further 3 times and was absolutely shattered!!! I was flat out from 8am-ish through to 7PM.
All liner bolts painted

Rears


All wheel bolts painted and new caps
The last one before finishing for the night!!

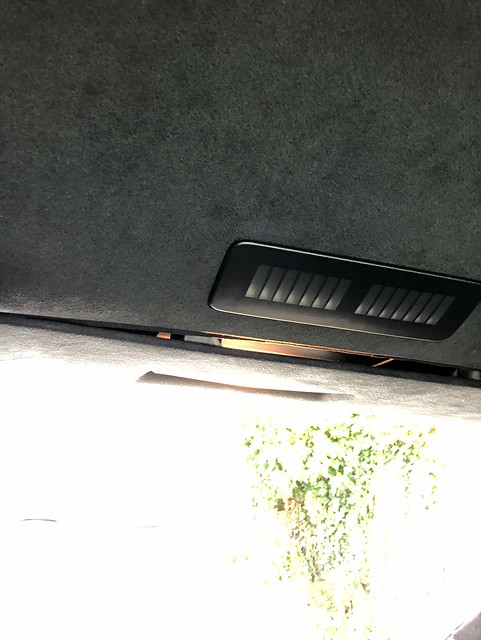
I did have some distractions along the way, I noticed the rear light had some moisture so had a quick poke. Going to revisit that but cleaned it up a bit.
2 litres worth of mud, thats just what I caught! :floor:
That's all for now, MUCH more to come!
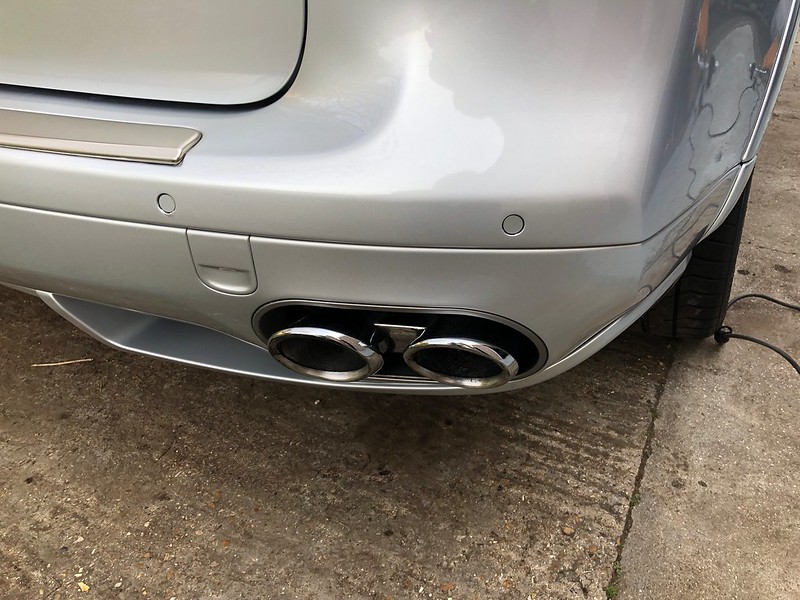
So, to finish up, no nasties found, just some surface rust which is kept at bay now. Could do with some new front brake pads in the coming months and I found that the exhaust valves are stuck open, I know most people have them permanently fixed open but I would like the feature to work, I disconnected the actuator arms but the flaps themselves are what is seized, I tried WD40 and a hammer but they're seized solid, so I plan to remove the exhaust tip and try and turn the flap itself from inside.
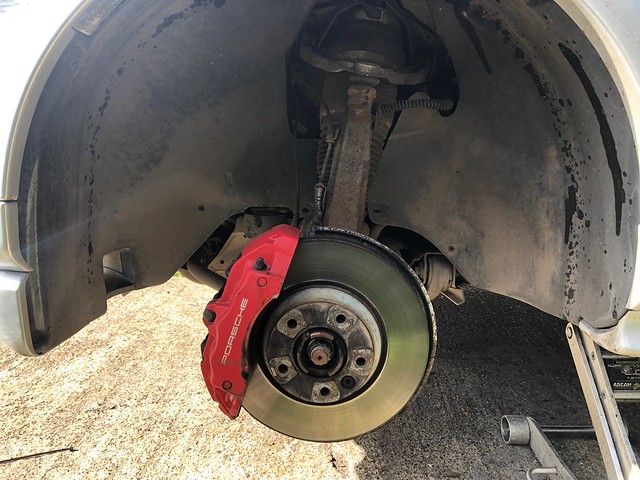
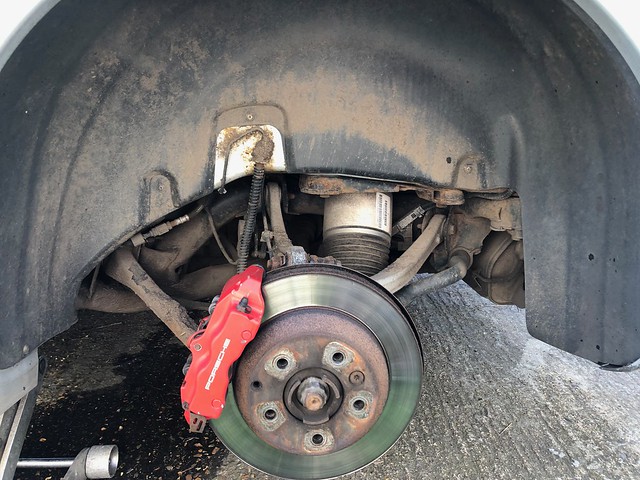
Looking better for brighter calipers and clean arches alone!

What's next, clean under trays (a bit brown) and poke under the belly of the car. Wetvac the carpets inside, I have a new pollen filter to fit, detail the engine bay and then polish the bodywork.
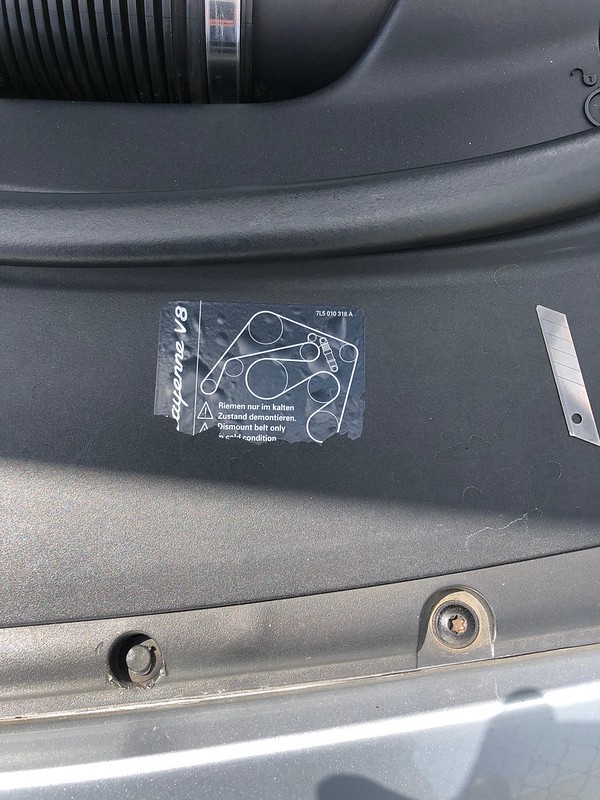
Only bits aside from front brake pads and front indicator lense I need are a pair of new tailgate spring things, it's a bit heavy and I think it needs a new belt tensioner, there is a whurring noise I can hear from inside and from the front of the engine, although it does seem louder in the car, its a whur sound which goes with the RPM of the engine, the belt could do with changing while I'm at that too. I haven't investigated this at all yet so it's an assumption, it definitely sounds belt/pulley bearing-ish! Hope so anyway..
Brilliant car, comfortable, has some poke, looks great and generally, really happy with it! I'll get some full on pics of everything as it has so many options!
Found a loose plug on front suspension leg, seems to be the acceleration sensor, push that back on properly and that should be the fix needed for the chassis system error, although that didn't reappear. I suspect I pulled the wire or plugs when painting/cleaning... Who knows..
Exhausted myself on the car this weekend, my main goal was to clear the underside, paint and protect everything and then detail the bodywork. I got it done after working flat out from 8:30am to 8pm for 2 days.
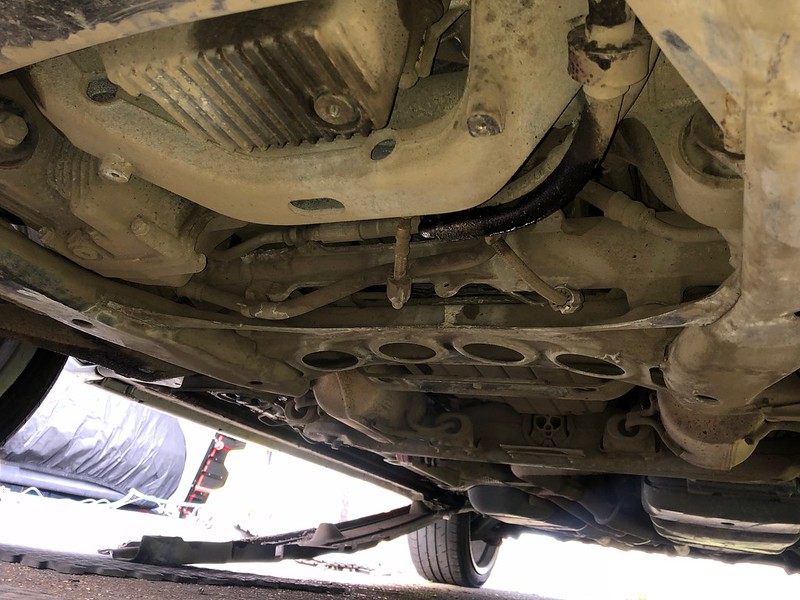
The underside just had a brown tinge to everything, just mud really, I was just going to do the bits you can see but in the end, I wanted to have a look at everything to check the condition of certain items, look for any leaks and just have a nose really.
I started from the front, removed the undertrays and was surprised to not find any engine leaks, totally dry, the mud dust really helped here actually.
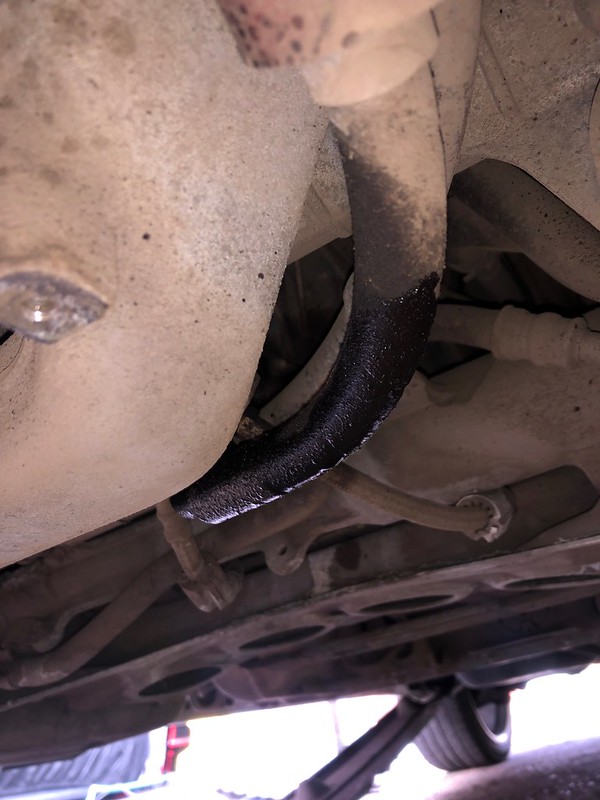
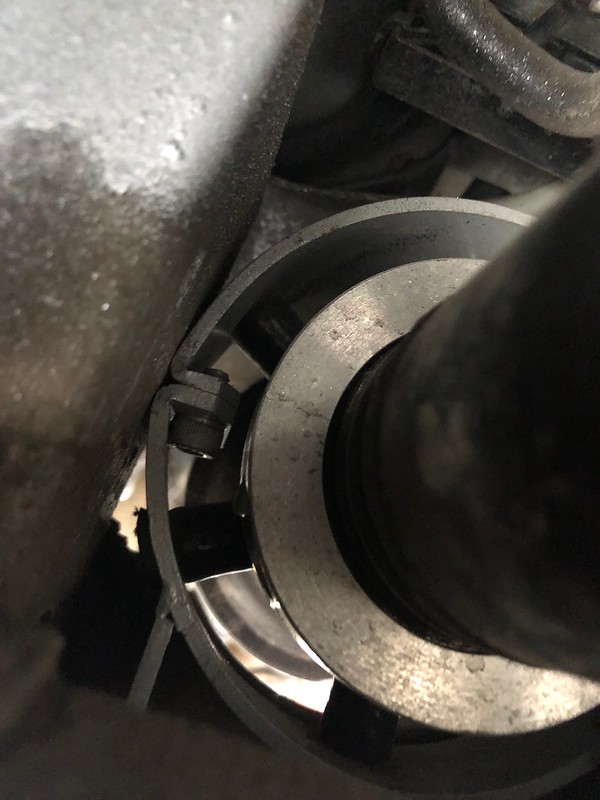
I did spot some broken rubber isolators so I've cabled tied the pipe which is normally held up by these for now until new rubbers arrive.


I suspect someone broke this when doing an oil filter change as the oil filter is blocked by this pipe.
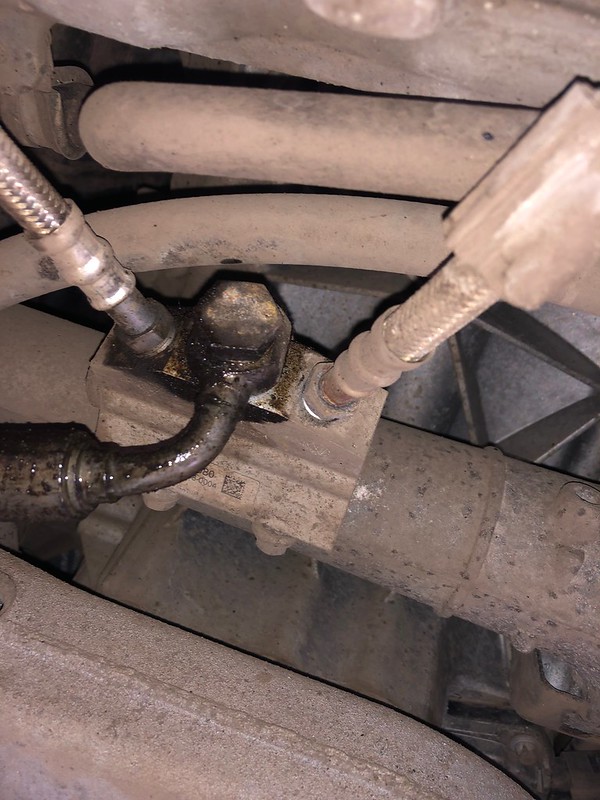
I then spotted this fresh looking leak
Found that the banjo fitting was a bit slack, I could move the pipe left and right, got a 1/4 turn on that to tighten it, so that should solve that.
Air compressor and rusty looking jacking point
Suspect looking exhaust clamp, going to be removing the exhaust soon so will sort this out then, doesn't seem to blow when you hold you hand or spray water on it so I think it is sealed but I'll be changing the bolts to stainless ones as Porsche love to use chocolate bolts on the exhaust parts!

On the whole, pretty happy with the underside condition, muddy yes but for a 94k car, there were no engine oil leaks, nothing scary rust wise, all very good. I was scared initially as this is the highest mileage car I've ever owned but aside from dirt, it's in good shape!
I got a bit too into the clean up and got slack on the pictures but I did manage one good before, during and after.

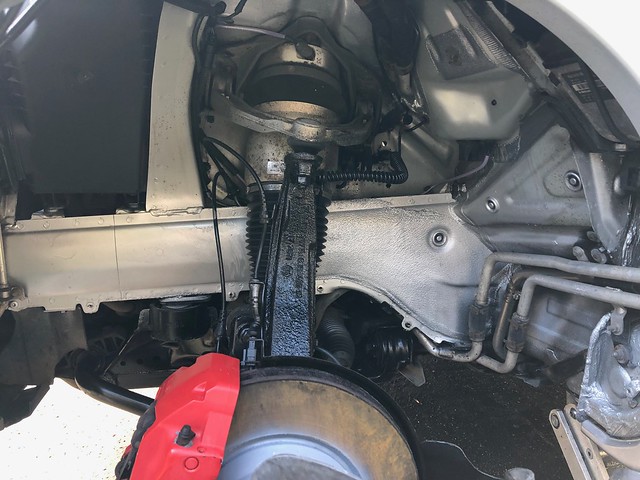
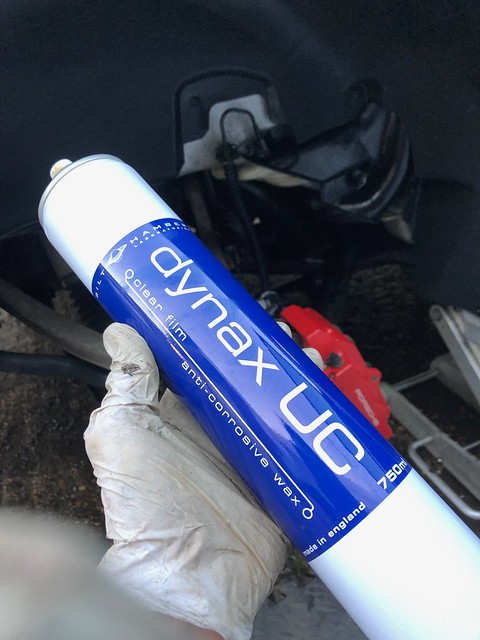
Everything from the front to the rear of the car got blasted with G101, scrubbed with a brush, wire brush on the metal work, Bilt Hamber Hydrate 80 on any rusty bits, hammerite black gloss and Bilt Hamber Dynax on pipe joins, pipes and areas of the body that could do with protection.
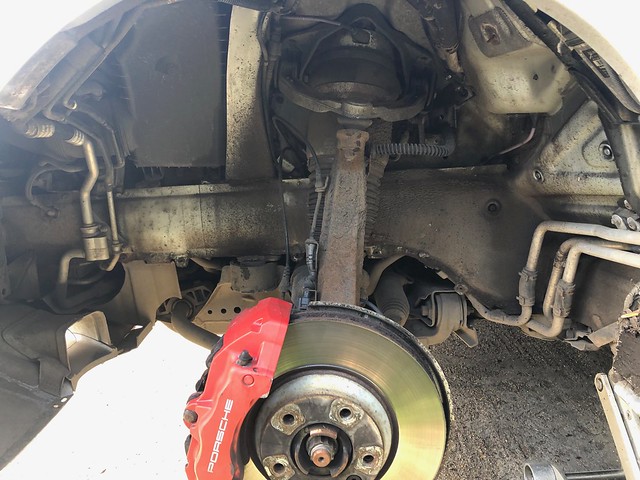
Front and rear subframes were scrubbed on the areas I could reach and painted with the above, I plan to remove the exhaust to give some better access and coat underside. I'll get some pics of all that as this area cleaned up nice, the rear diff etc were covered in mud but have come up like new now.

Few of these too
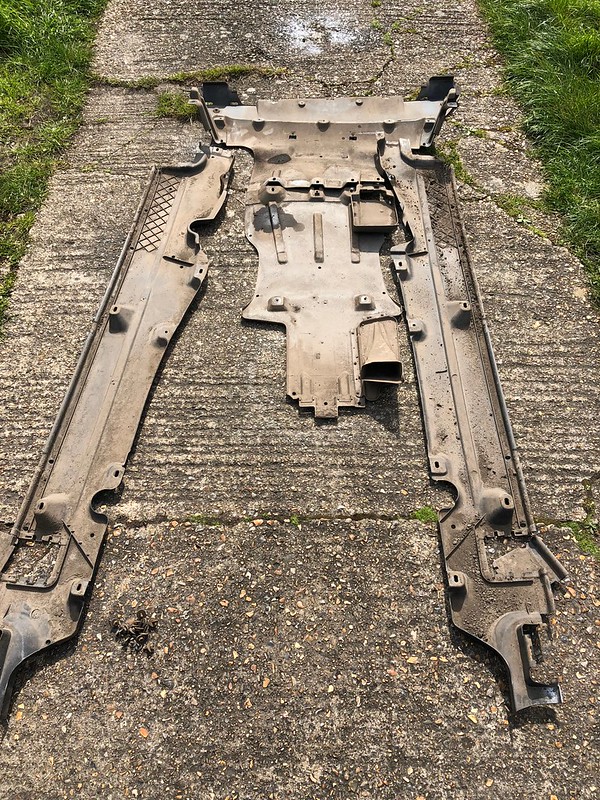
50/50 on the undertrays, cleaned both sides

Treated with Aerospace 303

On to the body, tar removed from in and out, paint needed a serious clay and machine polish.
Tar removed from inside rear doors, arch trim and lower half of car


I saw someone else mention that rust can occur from under the little black trim in the door shuts, the trim or grit gets rubbed through the paintwork. So I removed these and found some beginnings which got rust treated with Hydrate 80, painted and dynax'd.


No after shot grr but just imagine a line of wax.
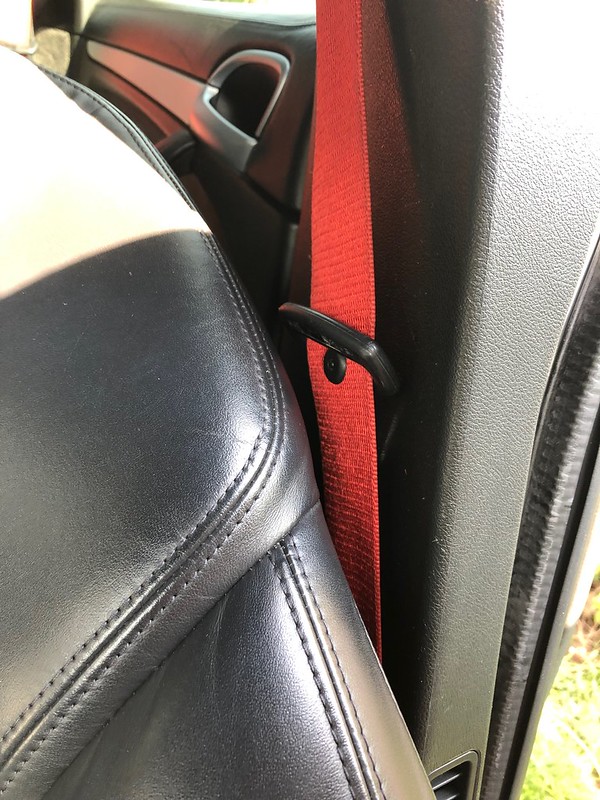
Got side-tracked and found a seat belt to be twisted and the leather of the seat had become unclipped, so I clipped that back in to tighten the leather, when I removed the belt I figured that I could clean that and then refitted it correctly.


50/50
Someone didn't tuck away this bit of wiring, so that got tucked

This got rinsed, snowfoamed, rinsed, washed, snowfoamed, clayed, rinsed.
Wow this took ages, I forget the size of the thing.
After intensively claying, I'm left with marred paintwork, so machine polishing HAS to be done. Some of that is foam..

I just stopped taking pictures as I was completely knackered, going from decorating at home to flat out on this lump, I'm typing this with a body full of aches!
The results are great and I have definitely added some years to the life of this car now.
Tailpipes were completely black up close, got a load of that off, will go at these more when I remove the exhaust
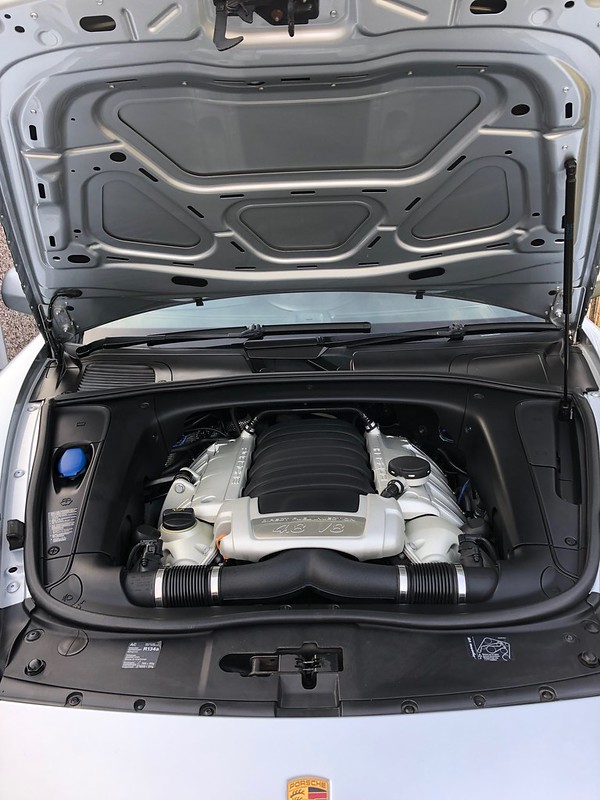
Under bonnet cleaned and engine dusted
The paintwork, after being clayed, machine polished using Meguiars micro fibre mitt and finishing compound, removed a few scratches using a 3M green pad and compound then paintwork sealed with Soft99 Fusso Coat wax, this is a long lasting wax and with the baby coming and juggling the other cars, I'm not going to have the time to keep reapplying the usual glossier less durable products, I can just keep this topped up now and then.


More to follow of course.
The most uninteresting update..
Many lazy plate swaps it seems..
Took me bloody ages with a toffee wheel and white spirit
Hoovered leaves from the bonnet hinge area and under the brake M/C but was a bit tight and dark for good pics.

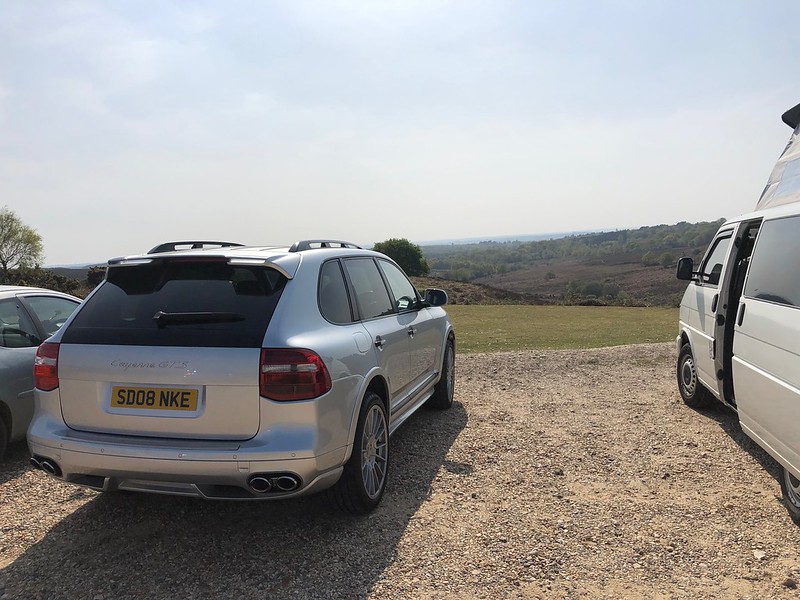
Taking this for a trip down to Sandbanks for an extended weekend getaway now
Stopped off when passing through New Forest.
New front brake pads and a Powerflex bush for the torque arm have turned up, still got a bit of meat on the pads so may delay putting them off for a bit but I'll fit the bush this week to see if it does anything, not expecting it too but it seems a few guys in the US change the torque arm due to worn bushes so I figured mine is probably worn too.

I'm actually looking to replace the front lower arms as that is loaded with 3 or 4 bushes and a ball joint, I'm sure changing them will offer some improvement. I'll give them all a proper inspection before hand however.
Just a lunchtime quickie,
Ramair panel filters. I always like a panel filter upgrade on my cars, they all have an aftermarket panel. I can't say I notice a difference in performance but I have always done this for the sake of a better induction noise, on a V8, it had to be done. Cone filters would offer the best for noise but I prefer to stick with an air box, the improvement to induction is slight, but enough to warrant the effort.
Just fitted a pair to the GTS, biggest panels I've ever seen, sadly, I haven't driven it yet but I will update shortly.
Fitting was easy enough. 20 min job while talking to someone. Getting the air box lids back on is the most tricky bit but I learnt that from when I inspected the filters a few weeks back.

I had access to the torque arm, as able to twist it quite a bit with just my hand and little effort, that's getting changed later tonight! :thumb:
I think you'll be surprised on your run! Those VR6 engines are pretty good on a motorway run! I wanted a 3.2 or 3.6 just because I'm so familiar and comfortable with the engine itself, could rebuild one in my sleep. :grin: I bet you get have over a qtr left.
Did a few bits last night, cleaned and shaved the alcantara door pulls for the front doors as they were gummed up.
Fitted the Powerflex arm bush, passenger side light up sill plate, detailed the leather with some touch ups to wear and a condition.
So, the arm bush, I was sceptical but after removing the arm, the bushing in the arm was soft, I could twist the centre, there was no wear to see but it was definitely soft.

Got it out!

In

I was sceptical of this but jesus, it definitely, without a doubt, has made a difference! The best way to describe what this has done is to say, it's like Sport mode is enabled, when it isn't!
From the moment I first pulled away, I could tell the difference, the car just pulled off, prior to the bush, I guess there was what felt like lag. Now, after driving it last night and again this morning, it's a night and day difference to the throttle. I am really really happy with this, the best thing I've done in a while. It took just over 1 hour to fit (would be far less if you had a press!), really really surprised me.
My thoughts on the air filters I had fitted earlier, definitely some extra induction noise lower down, windows down and you can hear the V8 more so. It seems like the car feels lighter, perhaps freer revving, could be a placebo but for the money, worth it.
That arm bushing though, very very happy with that, I am really surprised at the difference it has made, so much so, I didn't use sport mode last night or this morning, which I normally do to sharpen the throttle response.
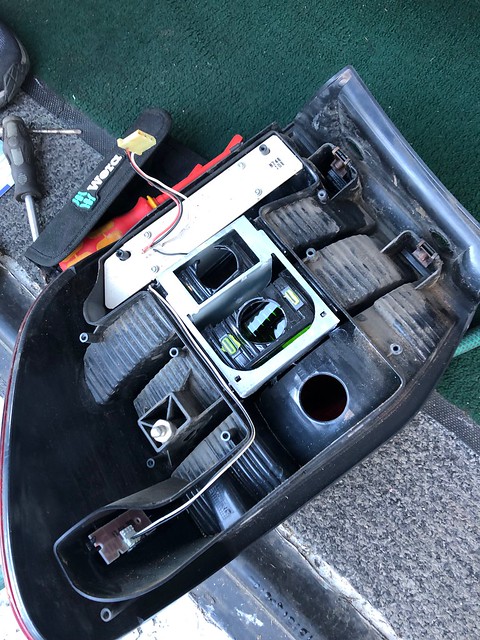
The passenger side illuminated sill had always bugged me, it looks like dirt had got inside, so I thought I'd get inside and have a look.

Sill apart

Ahh, not dirt, the EL part has started to break down..
I've managed to find something which I can replace this with, so fingers crossed it is the same size and works, to be continued!
Next jobs to be done on Saturday, removing the exhaust to free up exhaust flaps, clean the chassis above it and give the car a wash.
:bye:
Last of the dirty jobs on this for now, well, until I work out what bushes need doing, wishbones or drop links.
I wanted to drop the exhaust as I noticed some leaking from one of the clamps (turns out that was loose), the exhaust flaps were stuck and most important, change the typical Porsche chocolate exhaust bolts for stainless ones and most importantly, get better access to some areas of the floor in order to waxoyl and protect.
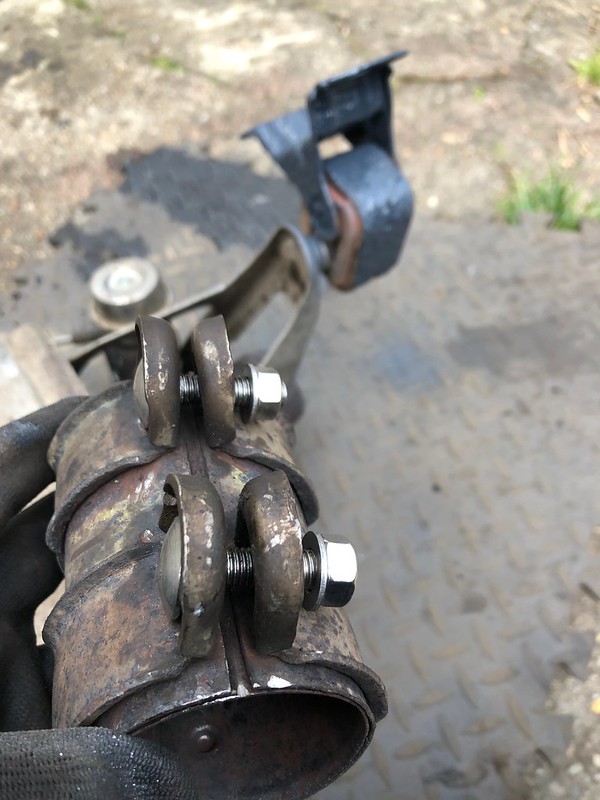
Firstly, was to remove these exhaust sleeves, one had clearer been replaced recently as the bolts weren't rusty and this was the one that was leaking, the bolts were loose, I assume some heat cycling has caused that..

This clamp, someone couldn't be arsed to replace both bolts, one came off nicely, the other required my dremel.
The job of removing the exhaust looked easy, nothing was in it's way, so in theory, should jut drop down once the mounts were undone. only 4 mounts support the rear section, no under trays or supports, so nice and easy.
Everything undone nicely, managed to get it down but the problem came when trying to pull the tailpipes from the bumper, due to the height of the car, I just couldn't get a good angle, had this been up on a ramp, I would have had no issue. So after much banging and kicking around, I had to give in and remove the rear bumper cover.
Thankfully, this took a matter of minutes, 15 perhaps and I was happy to do this as it gave me a chance to see behind the bumper.
Once this was off, the exhaust was ready to hit the ground.


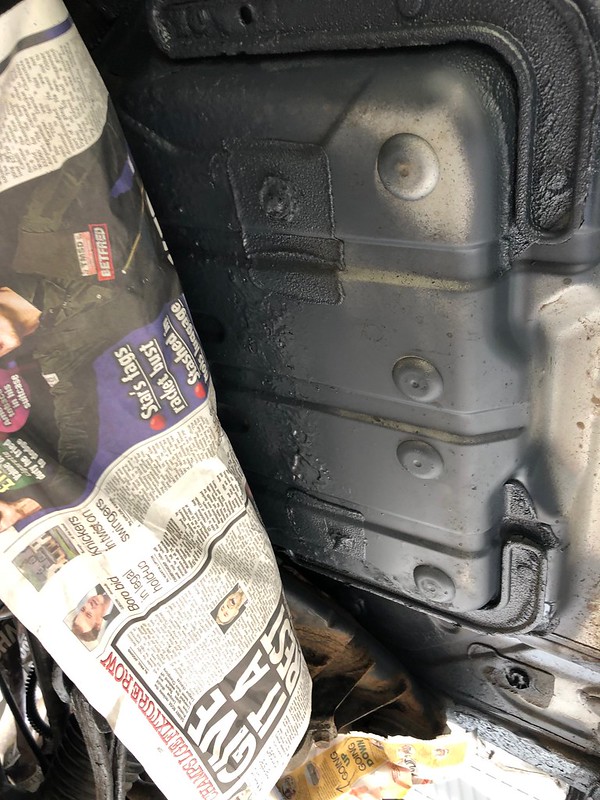
Once down, I could pull a few bits off to give full access to the underside in order for lots of wire brushing, drill with a wire wheel, all in prep for a range of products, area dependent. Stone chip, thick gloopy waxoyl, Dynax, hammerite, some silver and some lacquer. I did this first as I needed some stages to dry before being able to coat again.
No surprises, just minor stuff which wouldn't be a threat if left.


Went over most of the joins as this is where the factory sealant tend to split and let water sit.

Below, you can see the middle portion of the car is quite fresh but the back portion, muddy, surface rust on the subframes etc, so this was the area I wanted to sort out with the exhaust out of the way.
Mixture of waxoyl and stone chip
While that was all drying, I spent a few hours on the exhaust flaps, cutting off the old clamp bolts, cleaning the tips up and putting back together with stainless stuff.
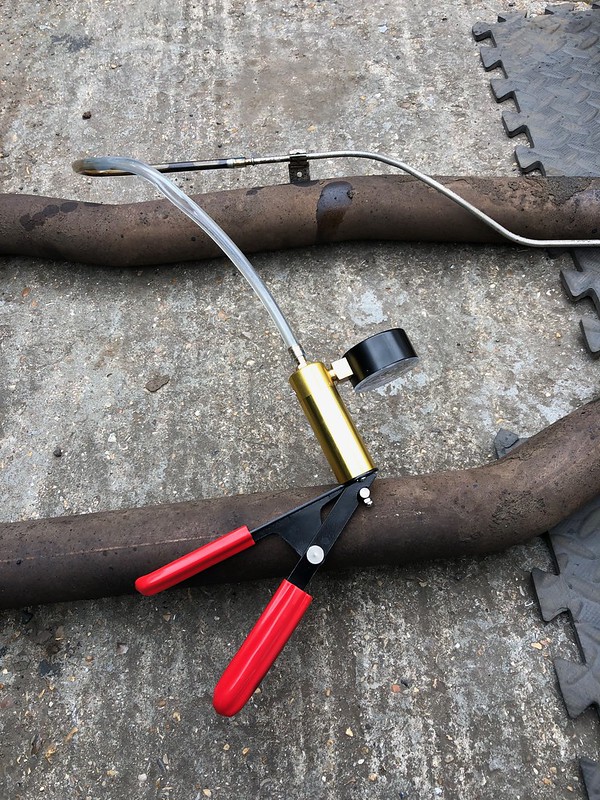
First, I tested the actuators, I removed the actuator arms from the valve arms and used a vacuum pump, all was well, both worked nicely.
Once clamp bolts were cut off, the tailpipes were free! This would give me a good look inside the valve area. The tips were left in a bucket of g101 after being blasted with korrosol to help remove the bulk of the carbon before the polishing wheel came out, annoyingly, I didn't take pics but they're looking like new now!! Will get some on the next detail.

Taking a look at the flap! Both were stuck in similar positions. Thankfully open.

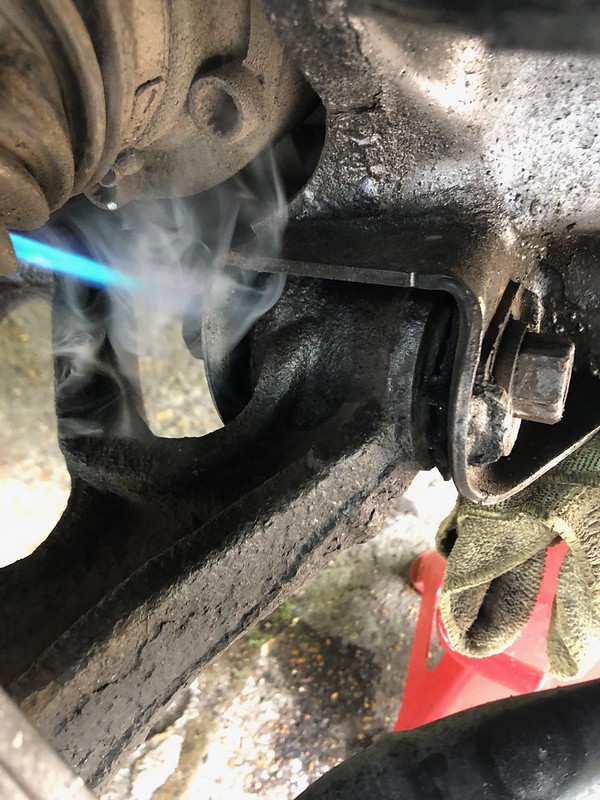
Now this was something I reallyyyyyyyyyyyyyyyy wanted to fix but I wasn't successful. I soaked them in PB Blaster, WD, heated with a blow torch, freeze sprayed, repeated this and without wanting to apply too much force with hammers and pry bars, the shaft wasn't budging, I think in the end, I opened them more but probably through bending the butterfly.
I admitted defeat on this one, I'm happy that they're open and it isn't so loud that you would want it quiet, so it's fine by me. If anyone has any tips on how to free these, let me know but I can't think what else I can do..
I was a bit pissed off at this point, so I didn't really take many pictures. I had painted the underside silver to tidy it up, refitted heat shields and started to refit. I regret not cleaning up the heatshield as I normally would have but I was annoyed at the flaps and getting a bit tired, you can't see it anyhow but looking back at the pictures, I wish I cleaned it :wack:

Stainless coach bolts / nuts for sleeves
Exhaust back up, had given the mounts a coating of paint.

And that's it for now, the underside is now fully protected and cleaned.
It got a good wash and hoover the next day as it was pretty caked in pollen.


Few jobs done last night, some fun, 1 not so fun.
Rained finally, got to see the protection on the paint working.

I'm investigating an issue I've got at the moment, I keep getting the 'Chassis system faulty' warning appear, it appears as soon as you hit 4mph. Resets once you turn the car off and back on but as soon as you hit 4, it's back and it seems to deactivate the PDCC..
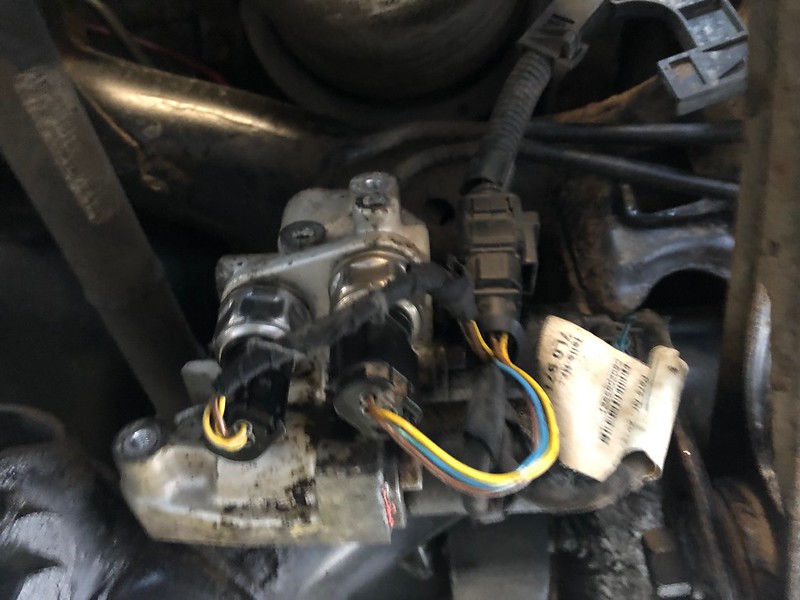
This is the rear axle PDCC valve body, Demort has helped massively on educating me and anyone interested in what this is about. It seems scary at first but since I have been looking in to my issue, this is just a body with 2 pressure sensors and 2 motors. I refuse to buy a complete unit for �700+ when I know that the issue is going to boil down to a service or replacement of the components fitted to the body, I plan on trying to figure it out and hopefully it will save people replacing the whole lot, myself too.
So, with cover removed, here it is.
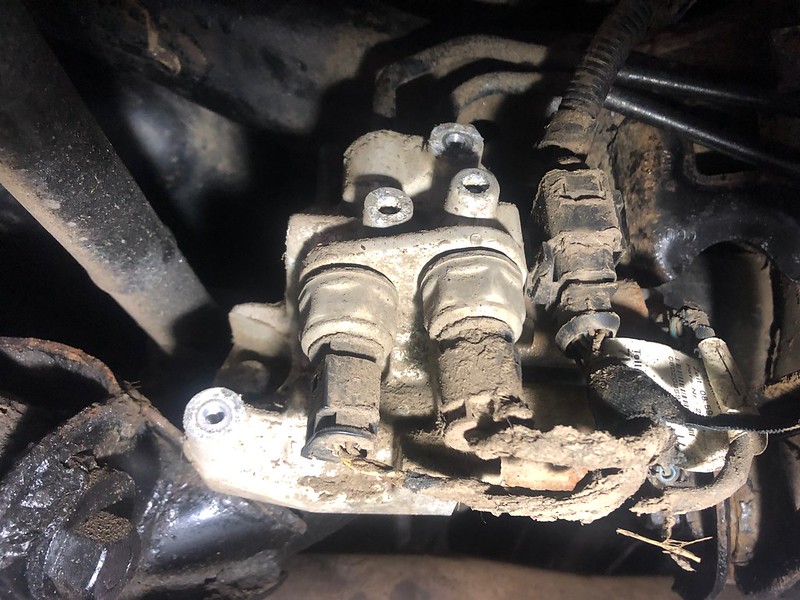
I wanted to check all plug connections and ideally, gain part numbers of components to find replacements.
After a dust down of the unit, I started pulling plugs and checking for dirt ingress/rust.
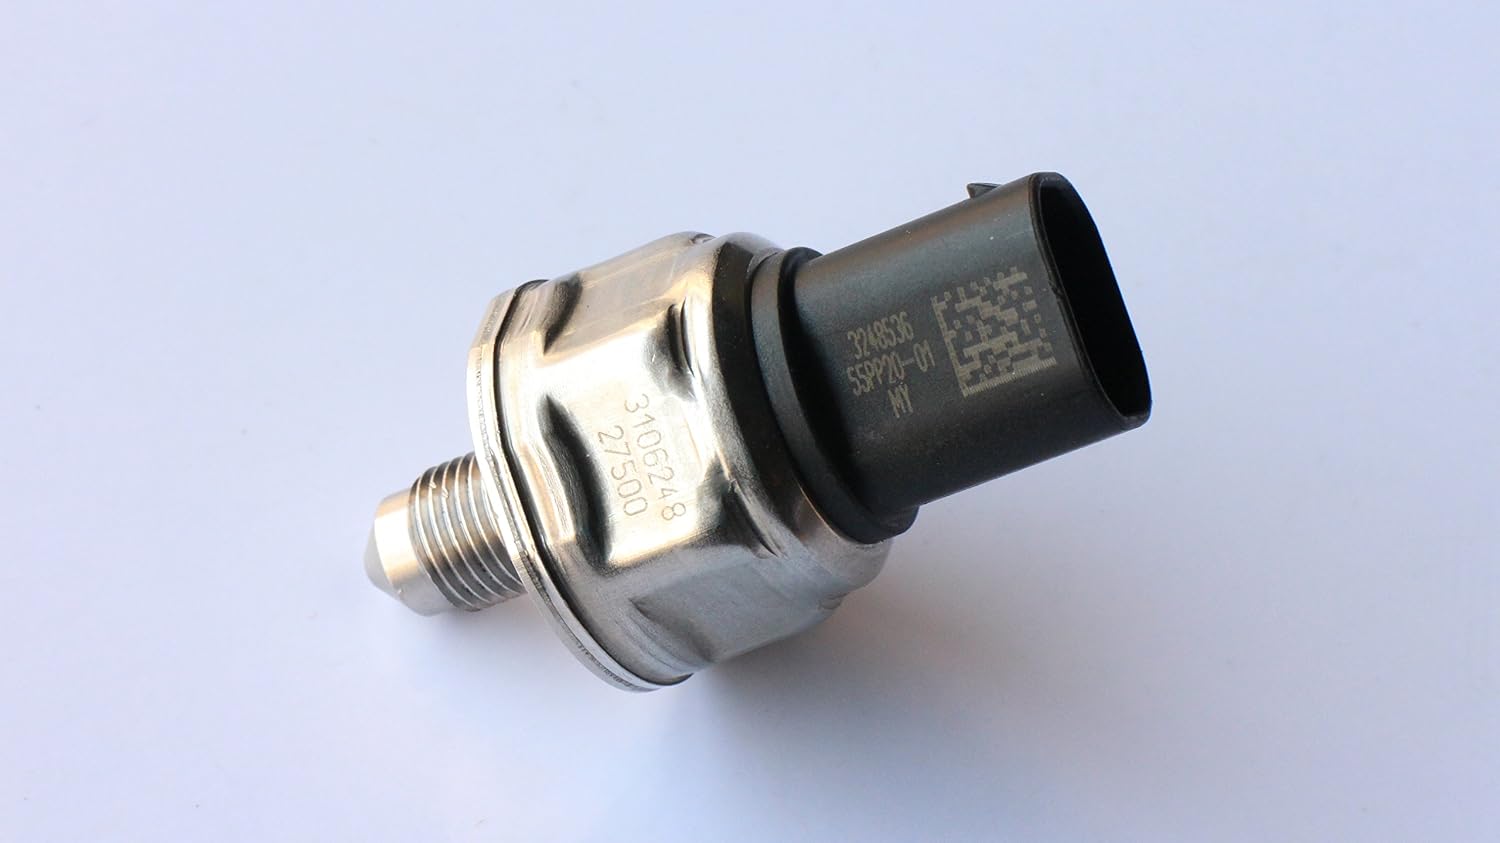
For reference, I found a part number for the pressure sensors and can source replacements for �22-30 each.

Bingo! I found rust within a plug, I got slightly excited at the sight, as this could be the cause of my issue..

After a clean with some tiny tools and IPA solvent, I buttoned it all back up.
Cover back on and replaced the original bolts with some stainless ones.
Tried it out and no change, warning was back. At this point, I'm going to get the code checked again and pay attention to the description before I start with new pressure senders.
TBC
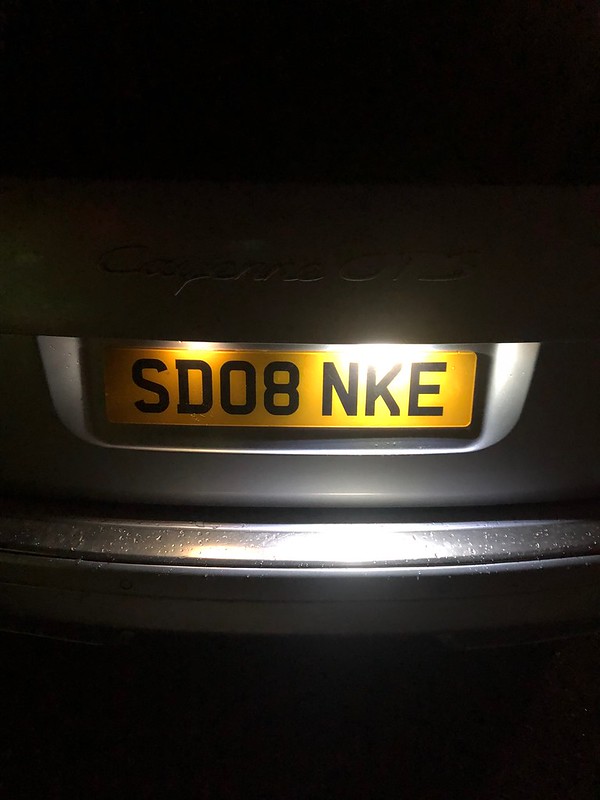
I replaced the rear number plate lights with some LED versions, they were too bright, so I applied some tint film to tone them down.
Left tinted, right BRIGHT!

I noticed that one of the SMD tail lights wasn't working, so I set about the fiddly job of replacing it.
Desoldered and removed

String of replacements
For ref;

All working!
That's all!
Once I get past the PDCC problem, I'll do something a bit more exciting.
Did a quick photoshop of the roof bars removed and different colours on the wheels. I think I'll be sticking with silver. Roof bars, not sure I'm fussed either way.

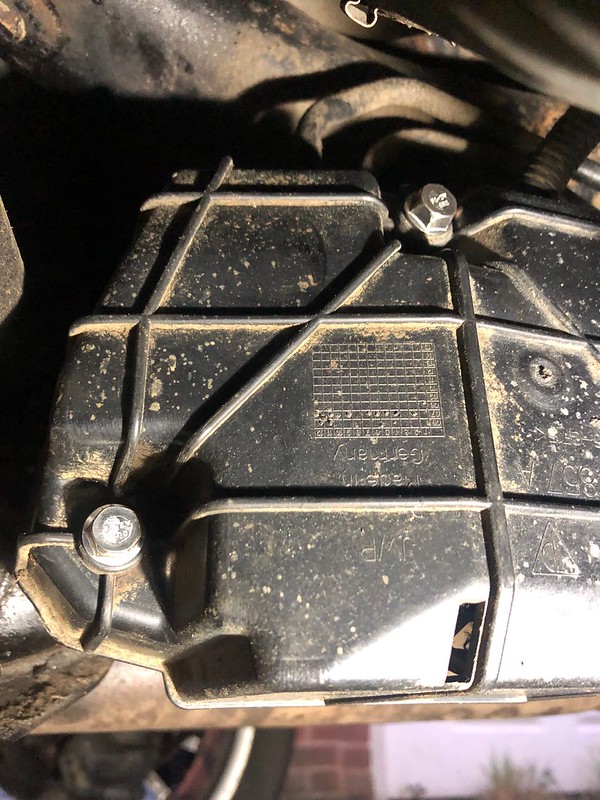
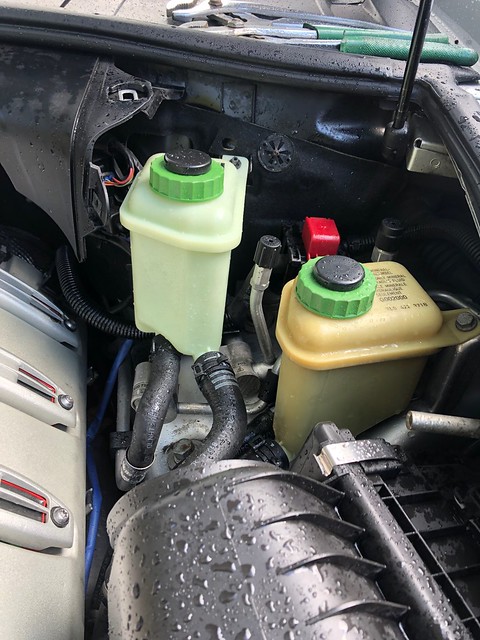
This just arrived, new PDCC fluid tank, I'll give that a swap at some point.

I realised the MOT runs out at the end of the month, as I've got a baby due at the same time, I thought it best to get the MOT out of the way now and get some other eyes to look it over.
Everything was fine! I did mention that there is a knock from the front end but no matter what we pulled on, levered with a huge pry bar and push against, we just couldn't detect what was at fault. Either way, I plan to change the wishbones / bushes regardless, they have covered 95k so past their best I'm sure.
Outside of the MOT, I was able to poke around with it up in the air, quite nice to be able to stand up under it rather than be on your back! All looks good now that it has been cleaned.

The only thing I spotted was a dubious bandage over a section of an exhaust flexi pipe, I need to investigate why and what is involved here. I assume there is a split/hole here. At first sight, it looks like the primary cat pipe will need to be removed so that someone can weld on a new flexi but getting that pipe off looks to be a nightmare as the nuts have rusted in typical porsche fashion. Hopefully it can be done in situ, let�s see. For the time being, I plan to heat wrap the flexi's, just to give some extra support in case they are getting weak.
So, the PDCC!!! I am itching to resolve the issue and I really need some better diagnosis but I'm impatient and had a new PDCC fluid tank to fit, so while I've got the bottle off, why not pull the rear valve block apart and take a look close at the components on it.
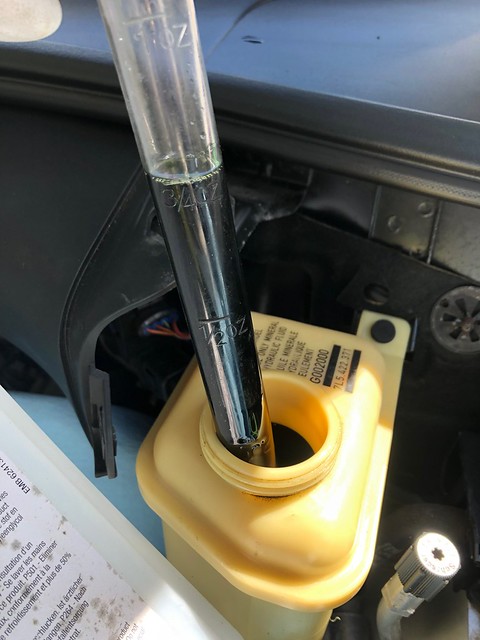
Fluid was pretty dark considering it was changed in May last year when a pressure line was replaced. The invoice for this job shows that the system was calibrated too.
New bottle as these have filters and should be done every 60k.
 [
[
So, off came the 2 pressure sensors and 2 valves. Not much to it in essence, I was slightly scared when removing these as if something snapped, I would be in trouble, thankfully, patience, WD and winding the parts out by loosening and re-tightening ensured everything came out smoothly.
Nothing scary was discovered, I cleaned everything up and refitted. Now I know it is all clean and I have now refilled with fresh CHF11s, it's a step in the right direction. I will get it on a computer again and go from there. All I can do on it now is replace the pressure sensors, fine, that will be an easy and quick swap so that I've had them off but if it's one of the valves, I'm not sure what I can do as they are not something I have seen before and certainly not going to be easy to trace as no part numbers could be seen. I really hope they haven't died.

I was tempted to put power to them while off the car but I didn't know how much so thought it best to find out. As it's all canbus, I was unsure.

So, with it all cleaned, back together and new fluid, I had hoped that the warning wouldn't return, unfortunately, it did. I think the system will need a computer bleed so I'll get this done after a diagnostic check from a proper system.
On a positive, the new fluid has resulted in a quieter pump, doesn't hum as much as it did.
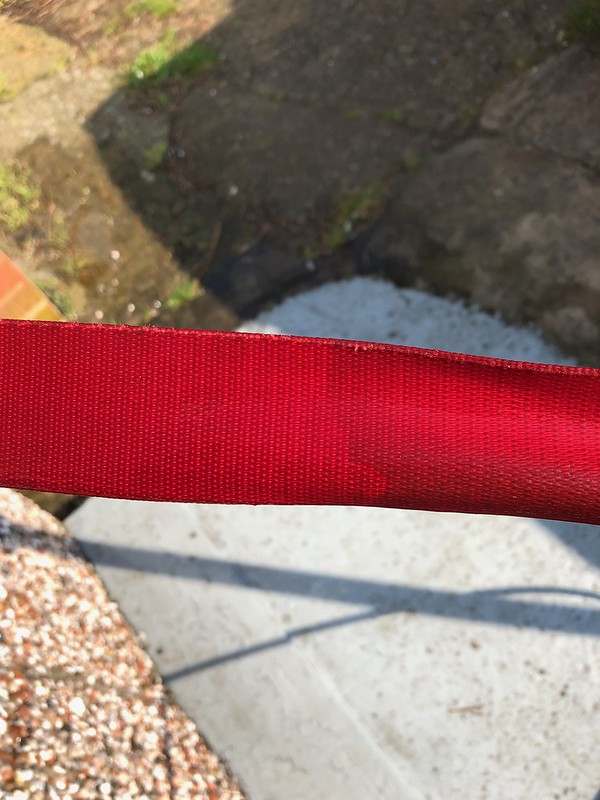
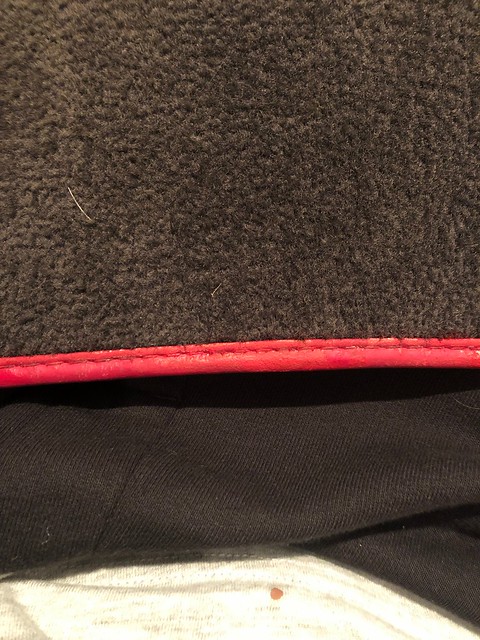
Small job, I wanted to restore the original mats, they were an expensive option and tie in nicely with the red belts, the mats themselves are in great shape but some of the red colouring on the leather binding was coming away, so I bought some leather dye and touched in the wear patches.


More beading


So next, wrap exhaust flexi's, find out if the dodgy one can be replaced in situ if needed, more diagnosis on the PDCC and I reallyyyyyyyyy want to book it in to have the rust removed but I want to sort the PDCC first!
Oh, tried out a Goonies DVD in the rear.

Odds and sods going on and more recently, having my patience tested!
Looking good from this angle!
new EL strip for the passenger side sill arrived, this was an easy enough to do job
Before

After

While poking around, I discovered the car has the expensive bearing support upgrade.
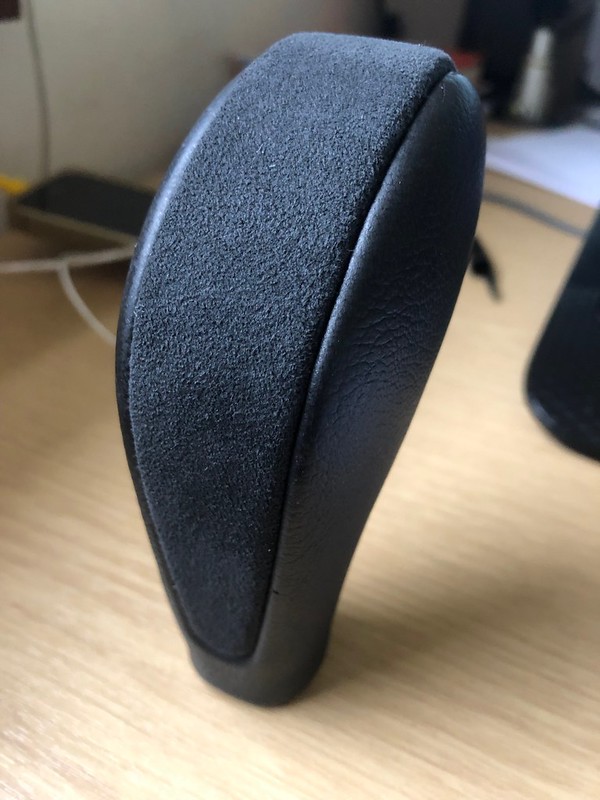
Gearknob handle was scratched, was going to paint this but then decided to use some spare alcantara to trim it, this was a bit trickier than I thought but after an hour, made a nice improvement.


Brake pads were very low and I had the wheels off to change the wishbones (or so i thought) so changed the pads


New pads and fitting kit

Now, the job I wanted to do was change the front lower wishbones but I just couldn't get one of the bolts out!! It undid and was turn, along with the bush but as it had seized itself within the bush sleeve, I couldn't bash it out. Not being able to get a good angle on it didn't help, I tried heat and all sorts. I'm going to attack it again this week but just cut the bloody thing off once my replacement bolts arrive.
I have since ordered new alignment bolts and upper wishbones..
Can't wait! :dont know: :x
What a nightmare, seems common after doing some google searching on how people removed it.
I'm awaiting new nuts/bolts to arrive at Porsche, once I have them, I will have a go at cutting the thing off!
New PDCC pressure sensors arrived, easily fitted those in 5 mins.

Not sure if they resolved anything as I'm getting the Chassis System Warning when I turn a corner, once my wishbones are sorted I'll get that code checked as that may not be PDCC related.
Always nice to start with something simple...

Got the bloody wishbones off.
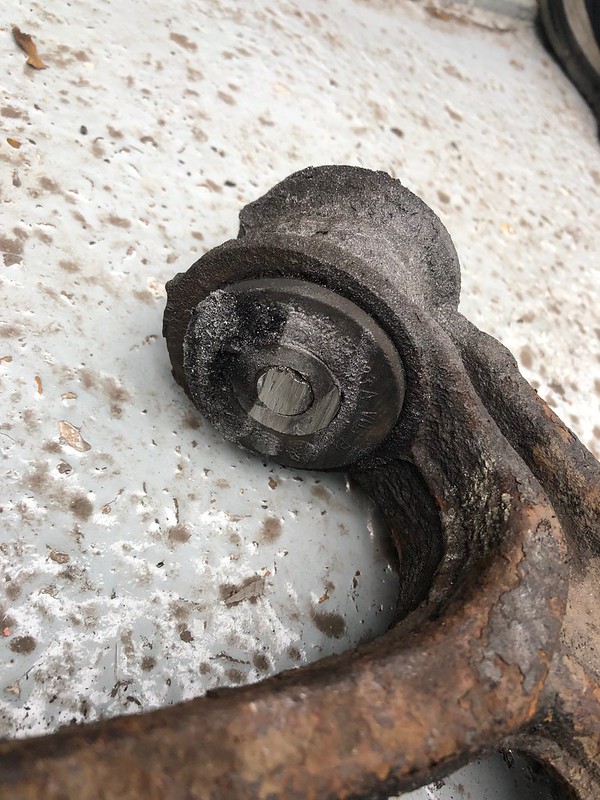
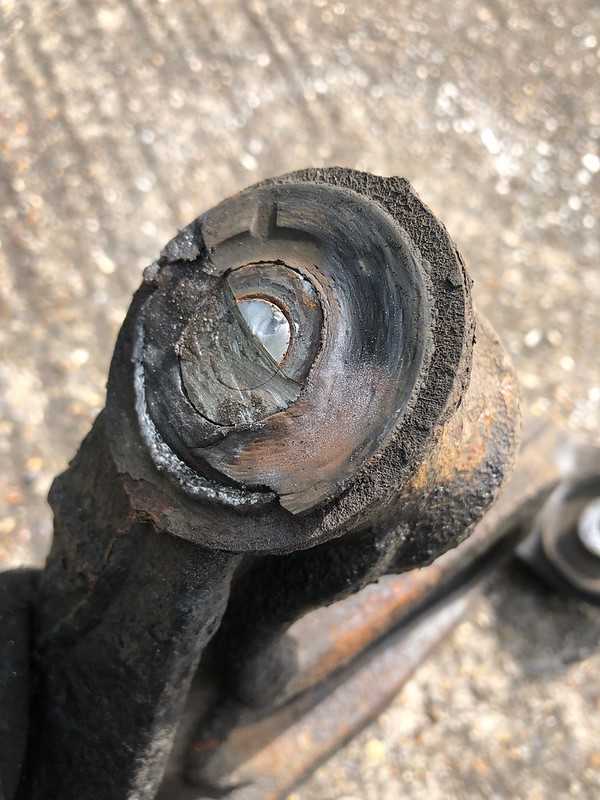
The ball joints were good, totally solid still, I was really surprised by that but the rear bushings were showing splits and felt soft so this was a worthwhile job.

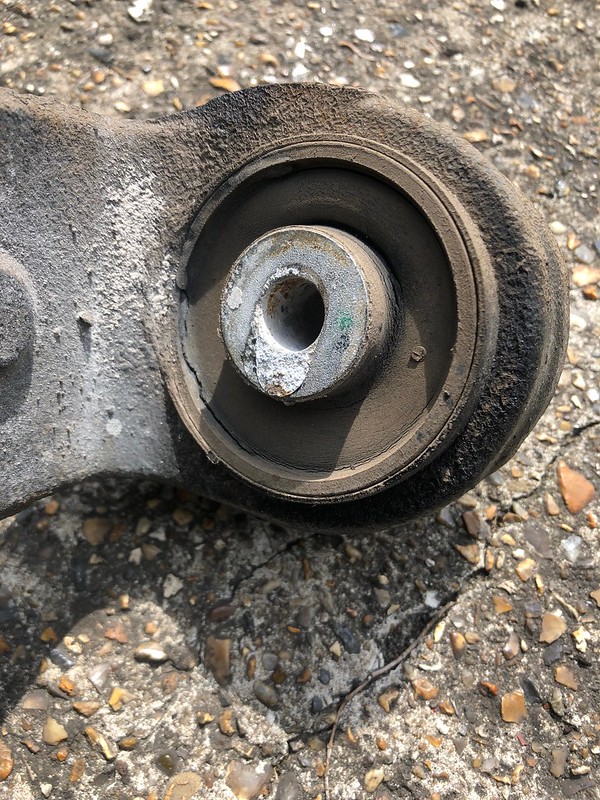
Really heavy, I regret not going for the Q7 aluminium arms, not that I'm going for weight saving here but I'm sure it would have added some benefit.

Ran out of time to do the uppers but I'm hoping to get those done this week along with top mounts which I only just discovered are available to buy for the air shocks.

All of the entry guards are scratches, so I set about cleaning those up as a little job on free moments of the bank holiday.
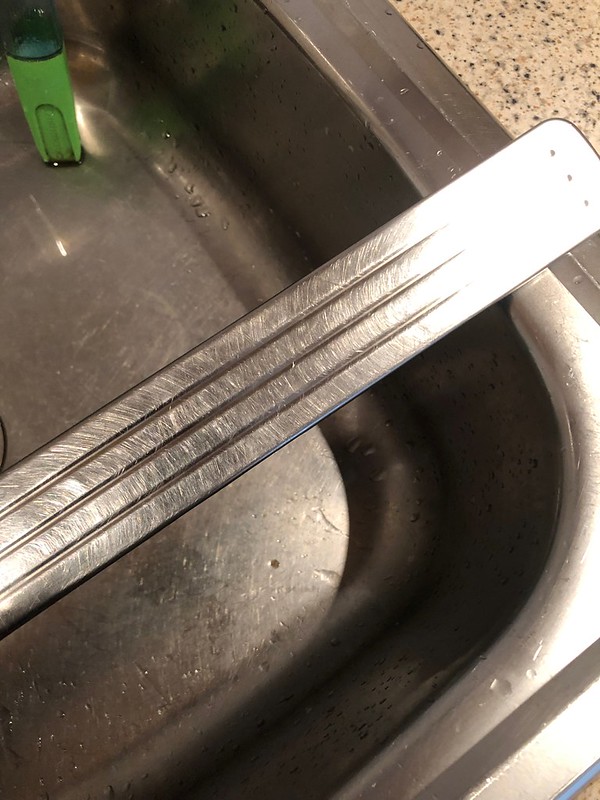
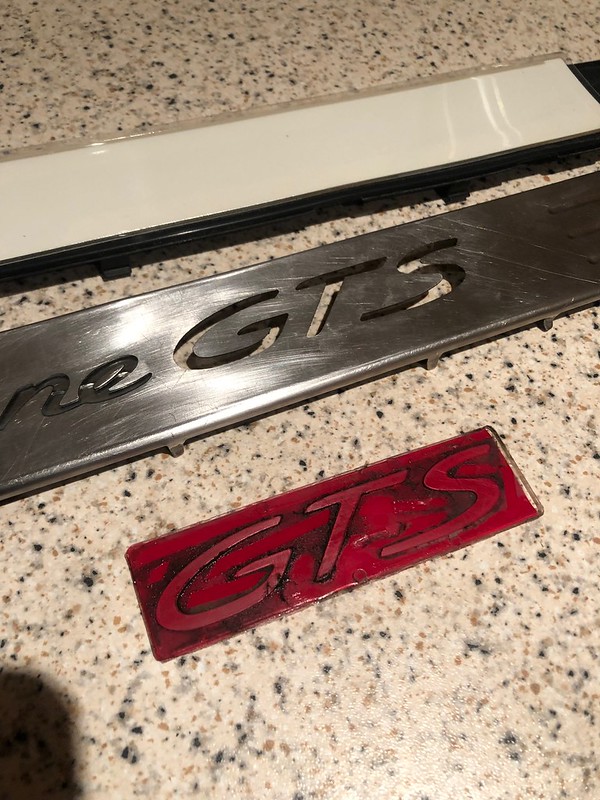
I didn't go for perfection as I didn't have the right bits with me but I did the best I could.

Front upper arms, top mounts and gearbox mount next! Will finish up with an alignment too, then I think that will be it for a little while as the baby is due anytime! :bye: :dont know:
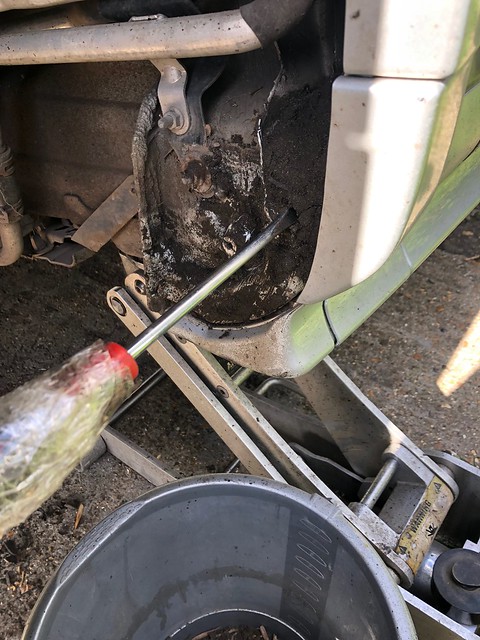
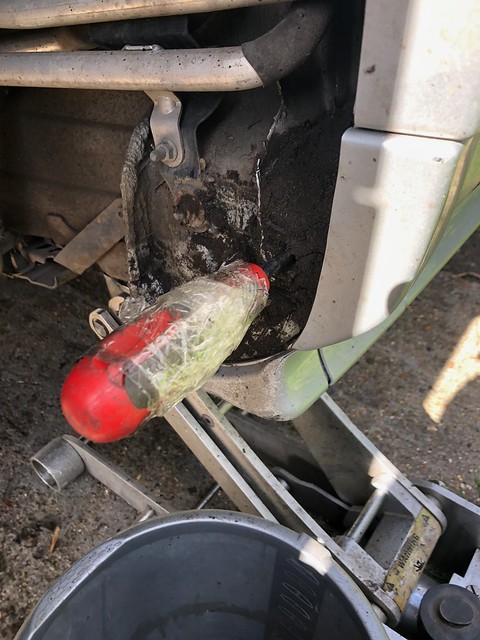
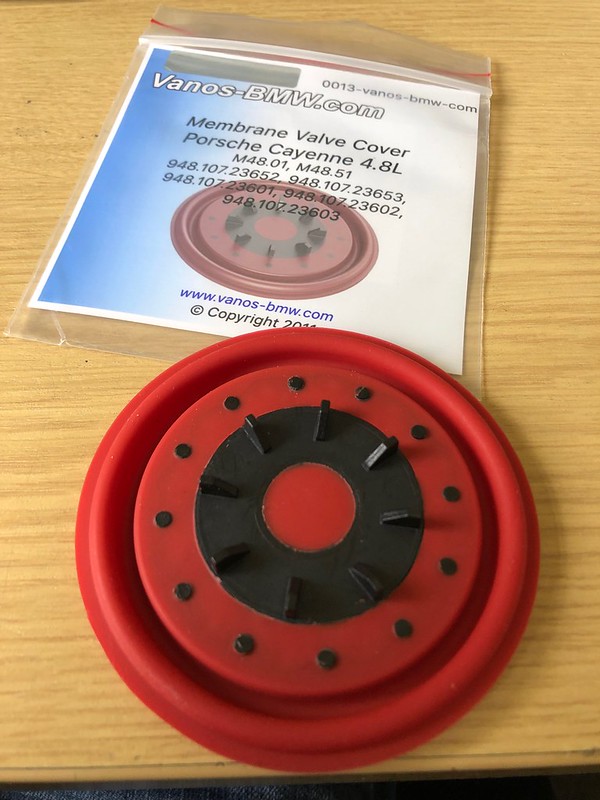
New AOS diaphragm turned up, no reason to change this other than why not for the sake of �25. My 997 benefited from a new AOS so I figured, why not on this.
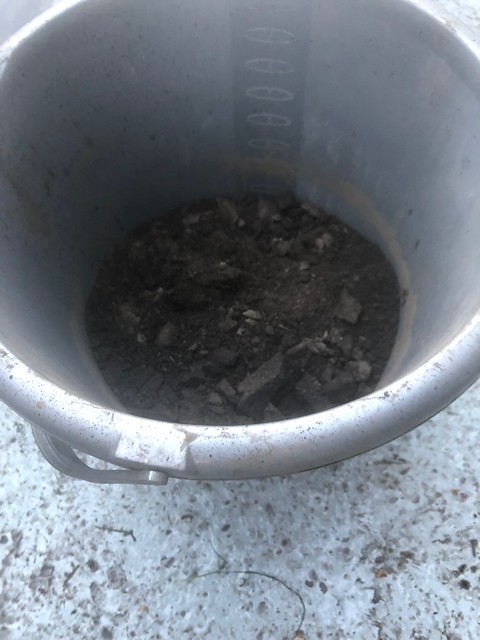
10 minute job, cap takes some careful levering, popped off to show oil build up from vapour. Cleaned this out and put new part in.
Not expecting 100 bhp but at least it's one extra thing to future proof it. Signs of a bad one is smoke on start up and hissing noise, I had neither but many people on the US forums get this around my mileage/age.
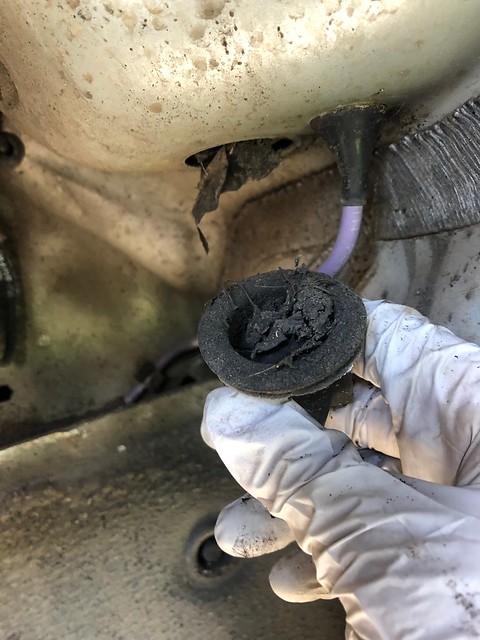
Original diaphragm was brittle as anything, in fact, I think it was stuck in position so probably wasn't doing it's job.
Overnight parts from Russia


Typing this with lots of aches and pains today, spent a solid day from 9am up until 10pm fitting the upper wishbones, new top mounts, doing some rust prevention finished off with a wash.
I lost an hour just doing this! I just couldn't get one of the wiper arms off and my bearing pulley was too big! Eventually got it free after lots of WD40 and pulling.
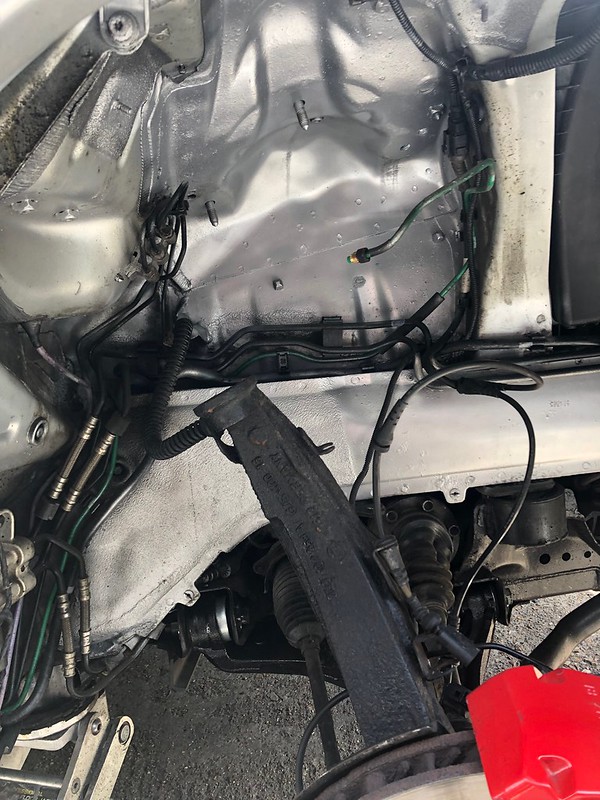
Removed the scuttle just to gain access to one of the turret mount bolts, also cleaned out leaves and crap.

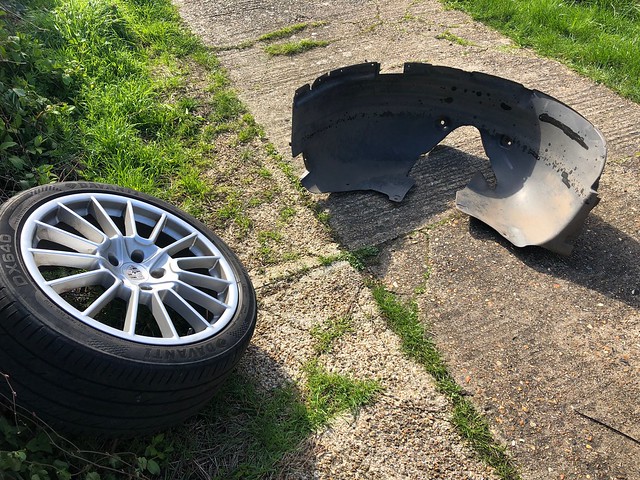
Arch liner removed

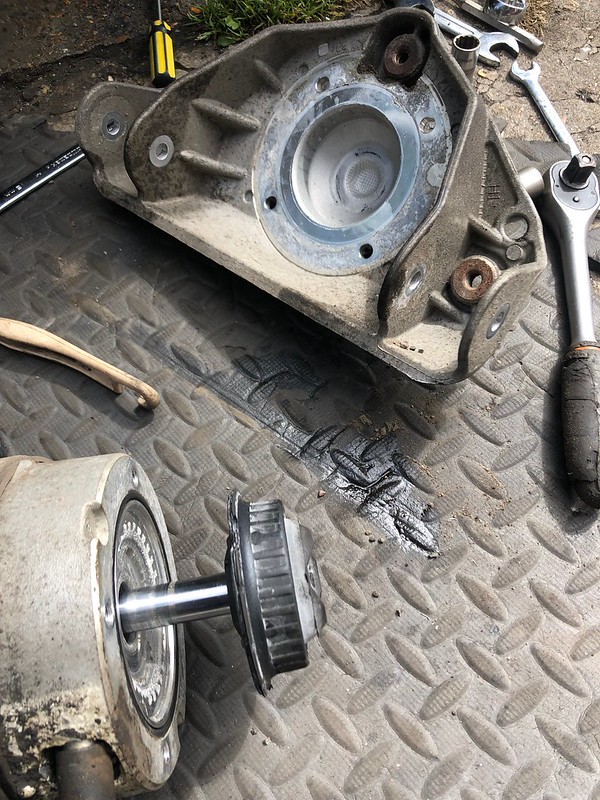
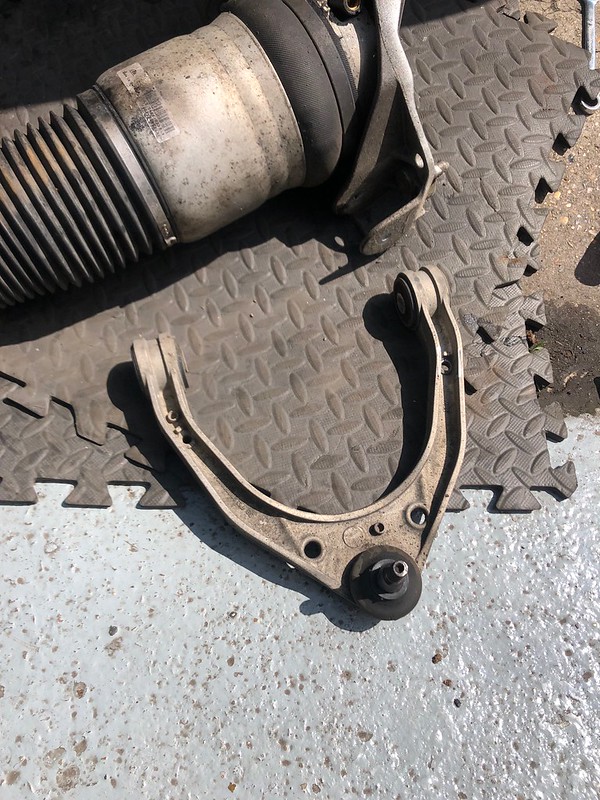
Shock out, I never thought I would be pulling a shock out of this car, the air system has always scared me as it's an unknown but now I've done this, it's fine!

Many people don't seem to know that there is a rubber mount in here, after seeing a guy on Rennlist showing his one torn in half, it was a no brainer to change while I had the shock out. I had a knock coming from somewhere so I would have hated to only do the wishbones and find the knocking is still present.
Upon inspection, the mount was fine, I couldn't tell it apart from the new one, the upper wishbone looked good too, balljoint was a little loose but I wouldn't have said it was at the end of its life. I was slightly worried at this point as I didn't find the destroyed bushing/joint I was hoping to see.. Drivers side anyway...
When I got to the passenger side, I found the fault, the balljoint was floppy and knocking!! What a sense of relief that was :worship: :bandit: :thumb:
Old and new

The passenger top mount was showing some signs of age too with a healthy crack, I wouldn't have said this was bad, probably just cosmetic at the moment, but I like to future proof while I'm working on an area.

Gave a quick clean up
New upper wishbone, these weigh nothing, I really really wish I did the ally lower arms!
Geearbox mount was next!
Original was squished

I removed the entire arm, 8 bolts and dead easy.

Smashed the original bushing out, this was very easy..
The hard bit was getting the new one in! The bushing was larger than the hole it had to go in, there was NO WAY it was going in. So after a good hour of sanding the edges of the bush and the bracket down, eventually, the new bushing was fitted after much lube, tapping and hammering!

I can tell it tested my patience as I didn't take any more pictures :roll:
Time to relax from working on this at every free moment now while I enjoy my son coming in to the world any day now. The next jobs will be alignment, wheel refurb and paintwork so nothing for me to get so involved with :thumb:
As for how the car is now, the knocking is no more and the drive is smoother, I was getting a light vibration at 33mph, commonly reported online and the driveshaft being the cause, as the bearing support and doughnut are new on my car, it couldn't be those, hence spotting the saggy mount. The vibration has gone. So I am very happy with my efforts
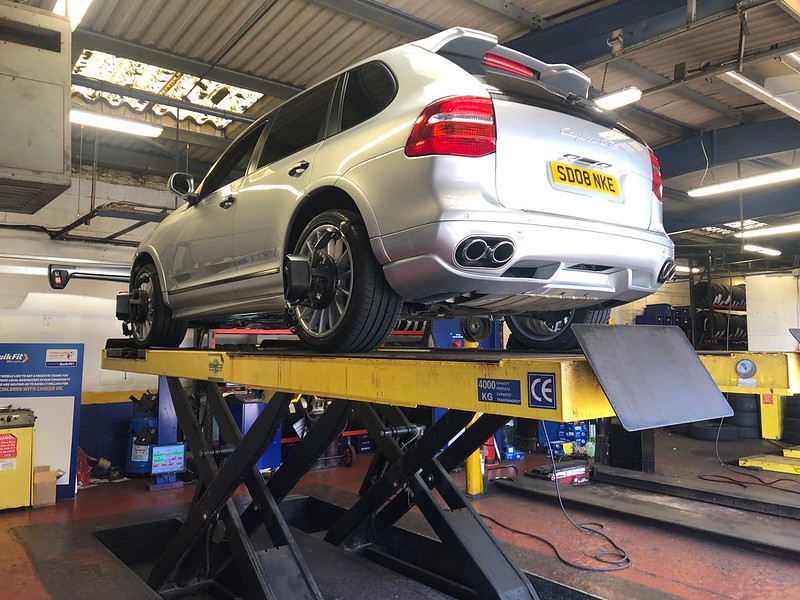
Got my alignment sorted, I thought I would give Kwik Fit a go, not somewhere I have ever taken a car before but since they had the highly regarded Hunter machines and they were local, I thought what was the worst that could happen..
Got there first thing Saturday morning and after a short wait, it was up and being adjusted, everything needed adjusting but it didn't take the guy long.
Once he said the adjustments were made, I compared them to the Porsche specs and everything was spot on!
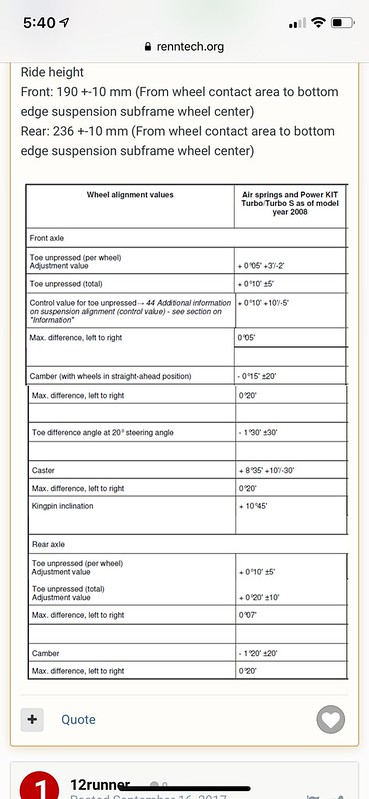
So �85 for 4 wheel alignment, nice guys and local, all good!

:bye:
Sooooooooooooooo, I'm now a dad, woohoo, after not doing anything to the cars for something like 5 or 6 weeks, I finally gave myself a few hours to solve an issue that has been spoiling the GTS experience and keeping me up at night!
I'm slightly hungover after a very late night session so hopefully this mass of words makes sense..
I had been getting a 'chassis system faulty' and 'chassis system warning' message on the dash for a little while, took a number of steps to try and resolve it, pretty blindly really as I was limited on the info I was getting from diagnostics. I had planned to visit Precision Porsche to see Iain and he has shared his wealth of knowledge and interest in the topic but I just had some things I wanted to try out before taking up his time.
I had already pulled off the pressure sensors and solenoids from the rear valve body, changed the reservoir and filled back up with fresh fluid..
Sadly the problem remained..
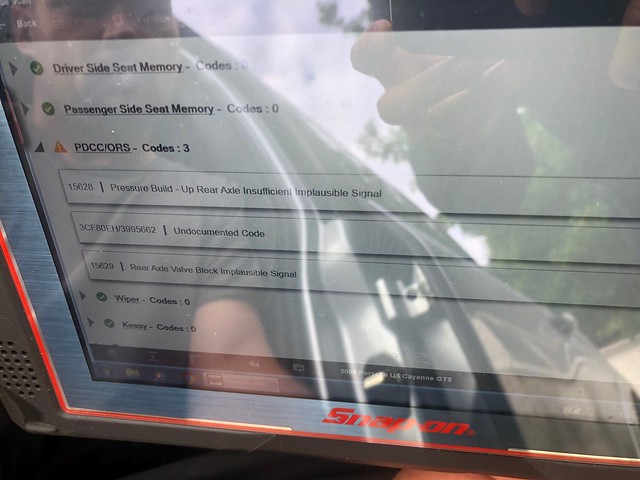
Pretty vague codes but they did point to the rear valve body, which in essence, is a simple thing, 2 solenoids and 2 pressure sensors, that's it!
So, during my paternity time off, spending some time researching the PDCC system, I found that BMW's have a similar system named Dynamic Drive, a quick google in to this, found a few threads but nothing of much interest until I discovered a guy who had stripped a valve body down, upon seeing the pictures, I noticed that the solenoids were similar, a bit more investigation found that the BMW valve bodies were pennies on ebay, so I bought one to pretty much dismantle and explore..�30 overnight part from Poland.. Compared to Porsche valve bodies starting at �350!
So, BMW unit pulled apart and investigated, this one is slightly more complex than the rear Porsche version, having 2 more solenoids and an extra sensor which may detect temperature...

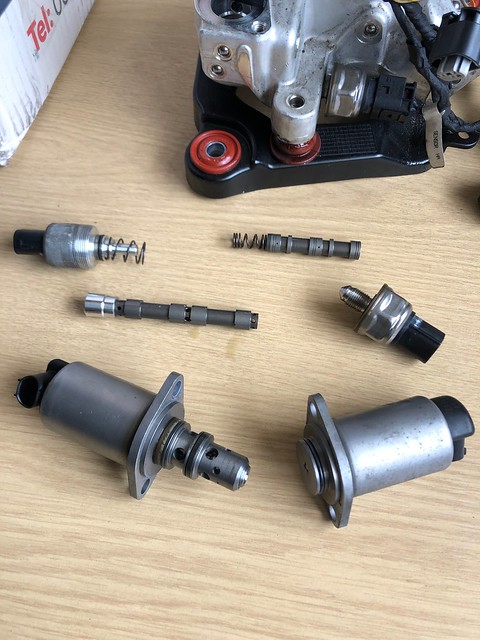
Solenoid opened up


Having all of these spares, gave me the chance to test what voltage powered the solenoids, I started with 5v and that was enough, so I could now use 5v to test my Porsche ones without fear of blowing them up.
On to the real exercise now, I sucked the CHF11s fluid out of the reservoir and pulled the solenoids off, 5v to each and annoyingly, they both worked, I was hoping to find one was dead. Poked around, pulled a small machined shaft thing out, that was clean and at this point, I thought FFS, what else can I do, so I set about refitting everything, I decided to fit the BMW solenoid in place of one of mine, it looked in better condition.

Fluid refilled, bled to some degree and time to test.
Holyyyyy fcku!! To my utter amazement, I didn't get the warning once I hit 4mph, I didn't get the warning after doing 5 miles! I bloody fixed it!!

I just parked the car up and felt content but slightly scared that as soon as I go out in it again, attack a corner, the warning will return.. I sent an excited message to Iain (Demort) letting him know the great news as he has been with me on this every step, we hoped to find a resolution to this error as it is something he is seeing more and more and no doubt, the older these systems get, the more this will occur.
Well, I have now done approx 40 miles, hard cornering, sport mode and the system is working as it should, I am no longer holding myself up when cornering, wow! I couldn't be happier. Big bill and lots of hassle avoided.
:thumb:
Hopefully this will help others, don't be scared of PDCC, it really is simple and if something goes wrong, it can be broken down to a small part being at fault which CAN be replaced.
So, that's THAT episode dealt with. Onto more fun stuff.
Last issue that I will address is a loose sounding knock from up front, louder in comfort mode but barely audible in sport mode, I have new upper and lower wishbones so I am wondering if it is the subframe mounts or ARB mount. Everything seems solid so I'll need to poke around on that, it is pretty minor but something I'll get around to.
So yesterday, I thought I'd fit some new matching rear tyres, the previous owner had some unknown brand tyres on the back which were cracking fast, I noticed some deforming too, I had planned to wait until I had some time to have the car off the road to have the wheels refurbed and then fit the tyres but with the car in use daily on baby duties, that's going to have to wait until we go on holiday or something, so new tyres fitted, the car is now making me very happy

I go to this local place called A&K tyres, they're a great bunch and take all the care in the world, I take all my cars here and so do many mates. They know to lock the suspension and correctly torque the wheels to the manufacturers spec, not just a random it'll do number.
A 2016 stamped tyre with just under 6mm in the middle, never buy cheapos!

Replacing these have totally erradicated some weird hoping feeling I was getting at 33mph too.
Thanks again Iain, you are truly a great asset to us all here and I REALLY need to come and buy you a pint or 10!
:grin: :grin: :grin: :grin: :grin: :worship: :worship: :worship: :worship:
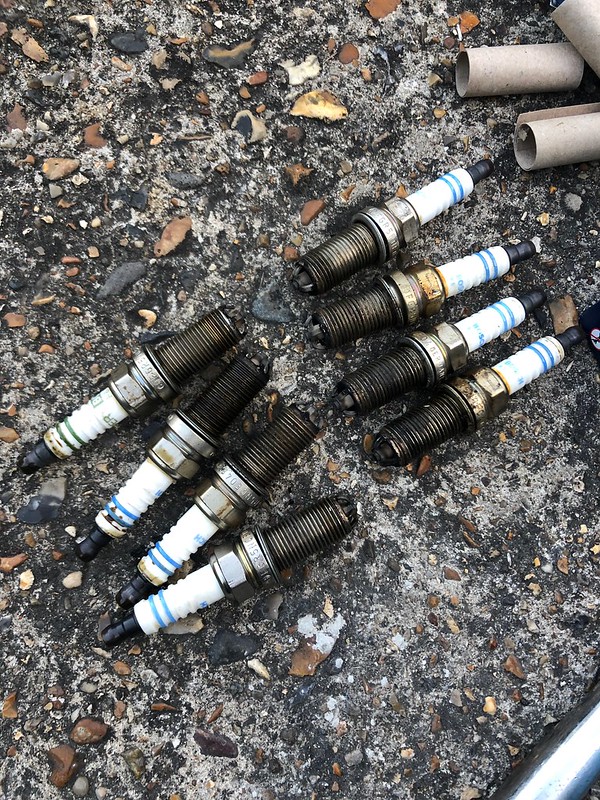
I recently set out to do an oil and filter change on the Cayenne and while at it, fit some new spark plugs as they were last changed around 30k mile ago, they're so cheap and easy, it's a no brainer to just do these with every service as I believe they do lose their efficiency with use.

Well, this was a job that wasn't as clear cut as just changing the plugs..
I bought Bosch FGR5NQE04, same as Porsche branded items, just �31 for the set of 8 instead of �75.
Someone had the same fitted already..
Old and new;

Old plugs, notice that 1 is different! (FFS!!)
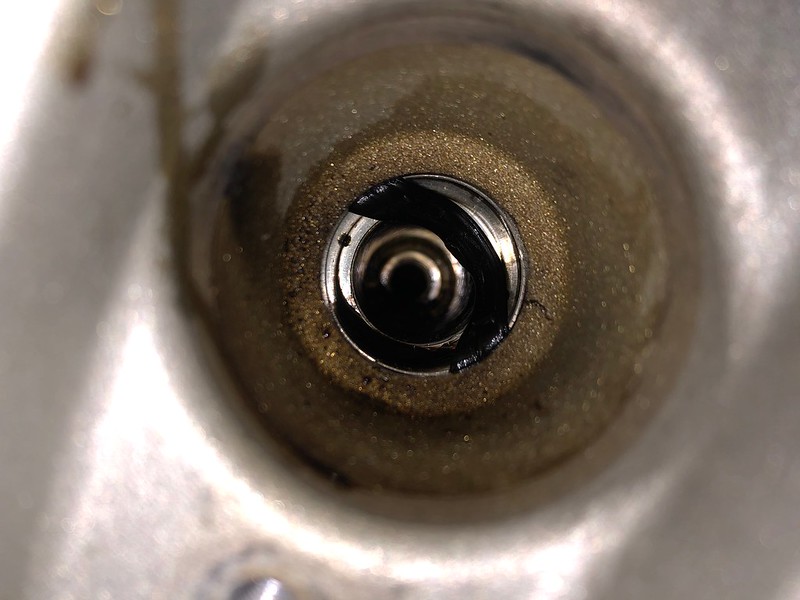
The problem I came across when pulling the last plug out was, when I pulled the coilpack out, it was soaked in oil! PANIC!!!
I put the socket to remove the plug and as I pushed that in, oil spurted out!!
I was about to lose my cool but once my brain kicked in, I thought the problem has to just be a bad seal on the valve cover, I pulled the plug and yup, that was covered but the tip was dry and matched the others so the engine is OK, phew!
A look down the tube and the problem was apparent, a seal was not doing its job as a moron had clearly fitted it. I believe an OPC to be behind this.
Great, another job and hours I don't have too much of right now to be spent sorting this out.
So, I put the new plugs in, buttoned it all back up and awaited my new parts to arrive. New valve cover seal, new plug tube seals and new valve cover bolts.
New bits arrived courtesy of Deroure.com

Strip down

Valve cover off!
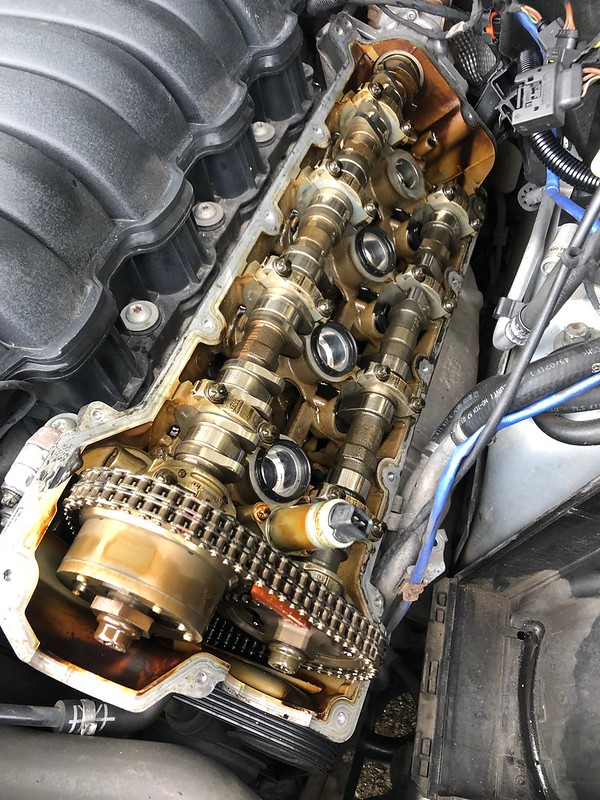
I was pretty happy to do this as I always like to get a look inside my engines, especially when the car has done so many miles (96k). Everything looked in good order, nothing out of the ordinary, chain was solid and tensioner pad looked in good order.
Are these the upgraded variocam bolts?

Not sure if this is a date but if so, it's newer than the car..

The offending seal!! Clearly had been fitted this way as it was trapped and not in the recess.

New valve cover bolts

Everything got a clean and then went back together!
Phew!
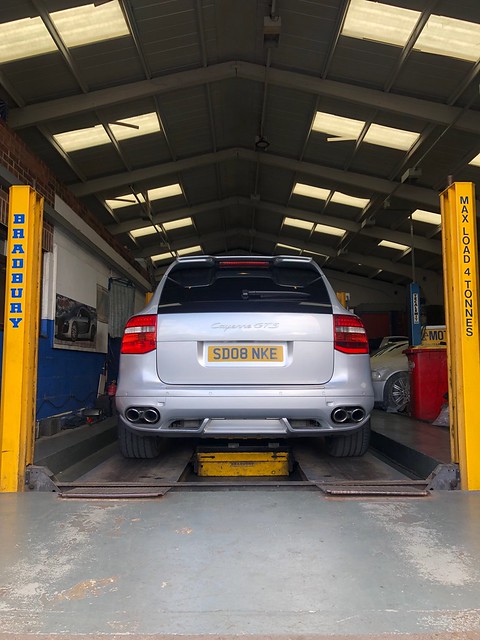
Oil change time, it is sooooooo good that I can just raise the car up to do this, no messing about with jacks and ramps!
Oil of choice, 5w/40 Mobil 1 Super 3000 X1. Meets specs and used it on the Boxster and found no issues.
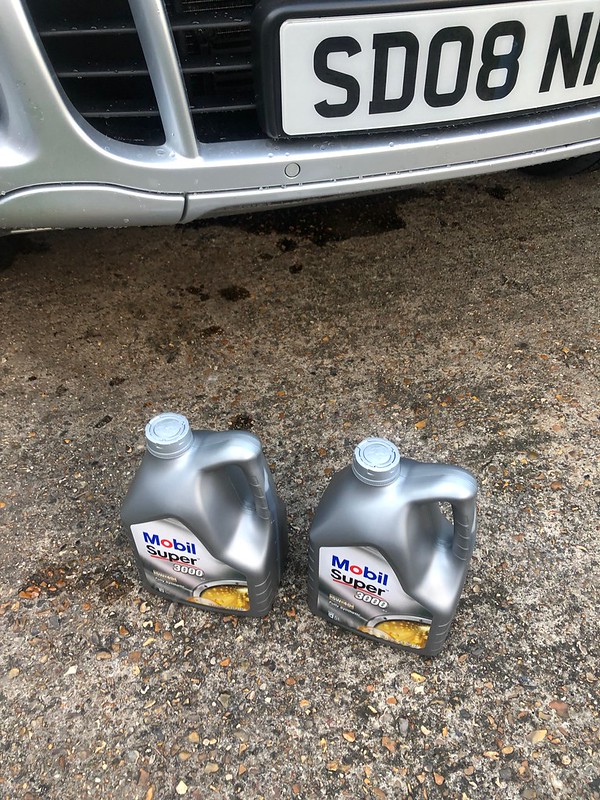
The oil in the car has been in there for approx 6500k miles, it came out black and really watery. I had been in touch with the specialist who did the last service and they informed me that they use 5w/40 Petronas.
Made a mess as always, I really need to upgrade my oil catcher.
Let this drain for 30 mins while getting the filter off and then accidentally finding the cause of a knock that has been driving me insane!!!
When going over bumps, I had a knock which sounded like a worn ball joint, but I had change them all, inspected everything and nothing else appears to be worn, I was getting to the point of setting out to change engine mounts and front shocks...
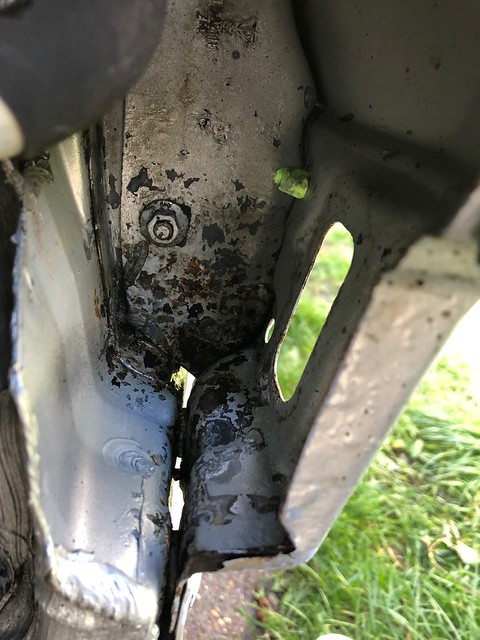
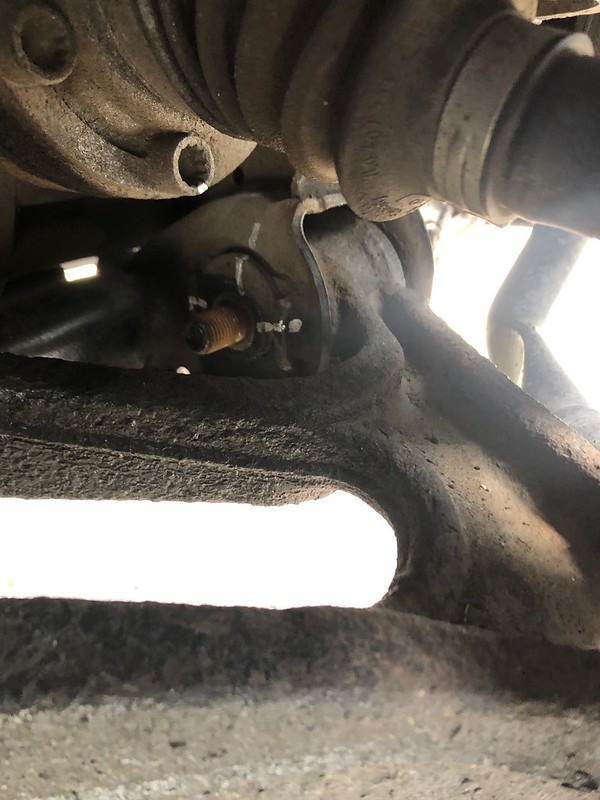
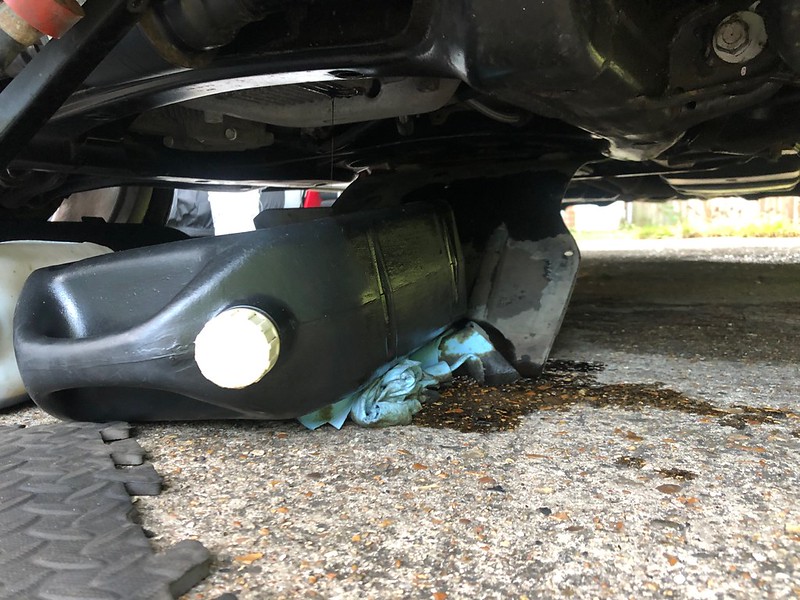
Well, while poking around, I saw this clamp and wondered how the hell someone did it up as the head was touching the subframe, a light touch and it moved! It was completely loose!! I thought that there was no way this little thing could be causing the knocking I was getting, it is a really heavy metal on metal knock, no way but maybe??! hopefully, fingers crossed, maybe it is this!

Where it should be

Well, I re-positioned and tightened the clamp, fitted the new oil filter and filled the engine with oil.
Fired it up, all sounding perfect, I let it run while I tidied my tools away. I then cautiously went out for a spin and to my amazement, the bumps which would always produce a knock, no longer did!!! I couldn't have felt happier!!
So, no more oil leak, fresh oil, plugs and now, no more knocking! This Cayenne is really feeling perfect now, really happy with it.
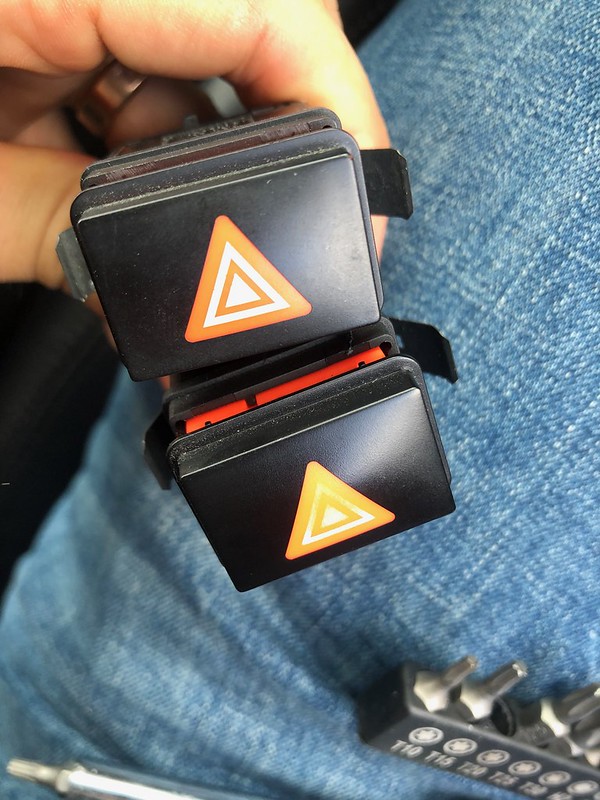
Swapped out the hazard switch, mine looked tired, so found a fresh one.
Cleaned the filters on the headlights, one was completely blocked, and I believe to be the reason the headlight was misting up

Small update, although it feels like it should be big with the amount of time invested here!
Didn't get pictures but during the wash, the underside, although I had pretty much waxoyled and dynax'd everything, got a good coat of Bilt Hamber Atom-Mac, this protects all metals from rust! You can spray it on brake discs before a wash to stop them rusting up during the wash stage, great stuff! So the under carriage got a good blast with this to get all those hard to reach areas and areas I didn�t coat! Great for suspension, ally components (stops corrosion) etc!
I had some scratches which I never quite spent enough time on, so I spent a day machine polishing this car again but with the aim of scratch removal, I used 3M green combo and Meguiars microfibre kit. I was shattered by the end of this, literally spending a day on it! I forget the size of the thing! I was only meant to target the scratches but I ended up going over the whole thing!
Used Fusso coat again to seal the job and protect the car as it has proven to be a long lasting wax which continues to bead beautifully!
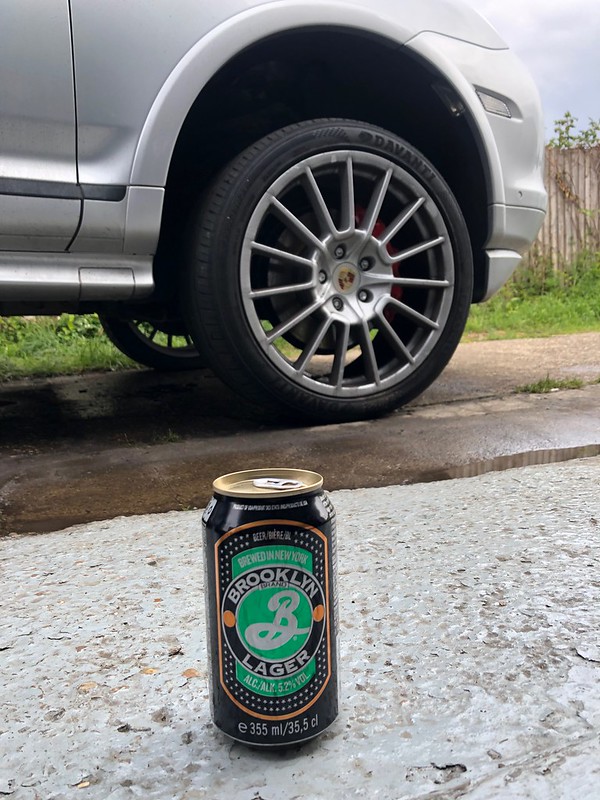
Luckily, had some Coronas to keep me going!

The next morning, snapped some pics! Not the best but it truly is gleaming!
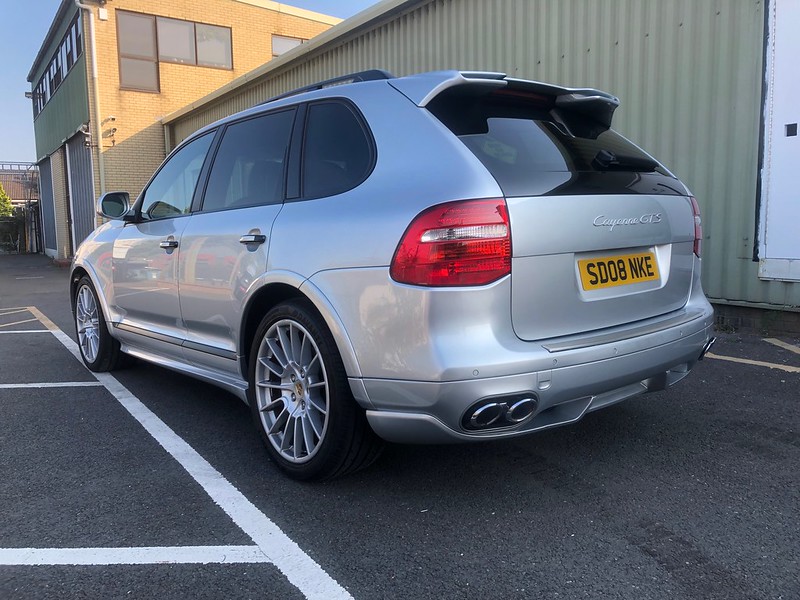

Next up, transfer box fluid change, Android headunit with 2 camera install and I am having some paintwork done
As I am a member and it looks like the forum needs a bit of waking up, I thought I would keep progress of my cars here. I have 4 Porsches as part of a small collection of cars, all of which I actively work on for fun, getting hands on is what I love to do, I still take the cars for their routine services to a specialist but for interim jobs, upgrades and replacement of consumable/worn parts, if a guy in a garage can do it then so can I, albeit, outside on a cold floor. It's nice to share the tasks I carry out, I enjoy following the progress of others who post their own accounts, sadly it seems to be something which is dying out and posting up progress on instagram just isn't the same. I like to keep a visual diary for my own references mainly but at the same time, hope this will help others to do jobs themselves or at least entertain you on these grey and wet days we have now.
At this point, I have owned the car for the best part of 8 months so forgive some time references..
With the news of my wife being pregnant (Now have a 4 month old boy), my first thought was obviously, woohoo, excuse for a new car! It didn�t take me long to decide on a Cayenne, she doesn�t like estate cars, a hatch would be too small and the boot on a saloon may prove challenging, we both fancied something high up, problem being was that most high up, non estate cars tend to be either diesels or unreliable which ruled out the 2nd inline choice of a BMW X5 4.8. A shame as I test drove one and I couldn't fault it, with it being much much much more modern inside compared to the 957 Cayenne and generally newer looking, after driving it, I couldn�t stop seeing them on the back of AA trucks, so I just kept returning to search for Cayennes. I would have loved a Macan but available car cash doesn�t stretch unless 1 of the collection goes. The Cayenne is pushing it on the size factor and I am going to have to see how the wife gets on with it while we still live in suburbia.
I had always liked the Cayenne and being in love with the Porsche brand, it made sense to add a 4th to the collection. Realising they do a GTS version which had alcantara, made a great noise and many other nice bits, it had to be one of those over the Turbo. I love naturally aspirated cars and the turbo was just a bit much for the duties required of it.
I had been looking for one since October/November 2018 and I just wasn�t finding much, they either pop up and disappear really quick or they have remained on sale for months and months for whatever reason. They also always seem to be black, as nice as it is, I really really didn�t want black as it a nightmare colour to maintain and on a car the size of a house, multiply that by 2!
To cut a long story short, I found my perfect one, albeit, more miles than I wanted but I did start to get a little desperate due to time running out, I wanted to get a car that I could get up to my standards before all of my free time is occupied with the baby.
The car I found was silver, great! Silver is my favourite colour on a car, it had the wheels I was desperate for, full history and all the options I wanted and more.
I contacted the owner and a deal was done. In the time I was awaiting a good opportunity to go and get the car, I managed to locate the previous owner and spoke to him, a lovely guy who told me about his time with the car, who the 1st owner was (Manager of a football club hence every option box being ticked) and the various bits of work which was carried out on the car in his time. This was brilliant for me, I love to know everything I can find out about a car I own and to get this kind of contact and info was priceless. I was sent old pictures, info on jobs done and original brochure.
This all gave me confidence in the car and as it was 300 miles away, it helped, I normally don�t like buying cars that take longer than an hour to get to as I have had my time wasted so many times with dishonest sellers, an exception was made here.
So here is the car based on some pics from the 2nd owner, I am now the 4th.
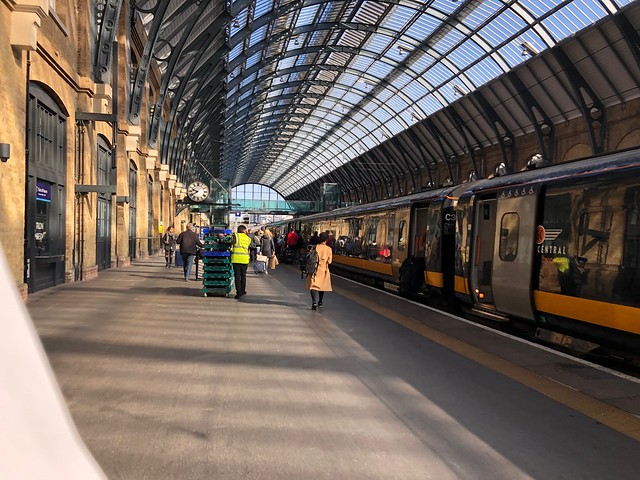
Collection day begun with an alarm at an obscene time on a Sunday and a train journey from South London to the North!
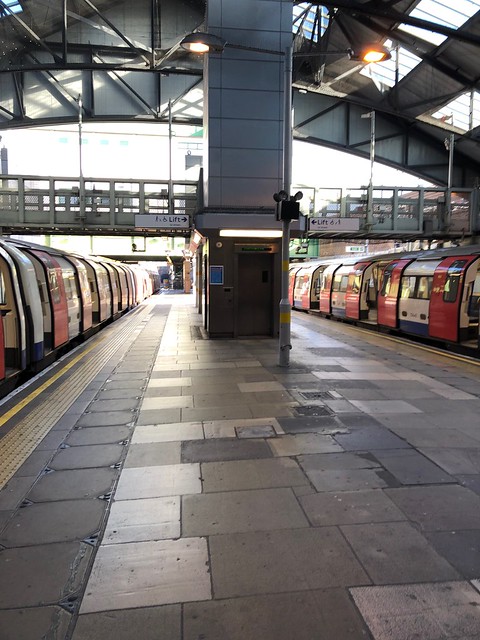
A ride to the tube to get to then get to Kings Cross�
Reading material (Can�t believe mags are �5 each now!)
Started getting dizzy up there..
Collected from the station, good look around the car and then to a pub to go through paperwork and details over a pint (I love Northerners!)
The car was generally as described, lots of paperwork, a great owner who was a copper and his wife used it mostly, it could be described as an honest used car, I love this as once I have finished with it, the results are much more noticeable. There was one thing which I wasn�t aware of and it did kind of put me off the car as I hate this kind of thing.. I was warned about the rear doors too! It is just the one door so it won�t be costly to repair and the price did reflect this in the end so not too bad, just an extra hassle to have sorted.
I will seal it up the best I can for now, make sure the wife is comfortable with the car and then book it in to be repaired. I will do some preventative stuff on the other side too! Assuming this rust is starting from the inside out? I was thinking to remove the door car and clean and seal with some dynax/waxoyl.
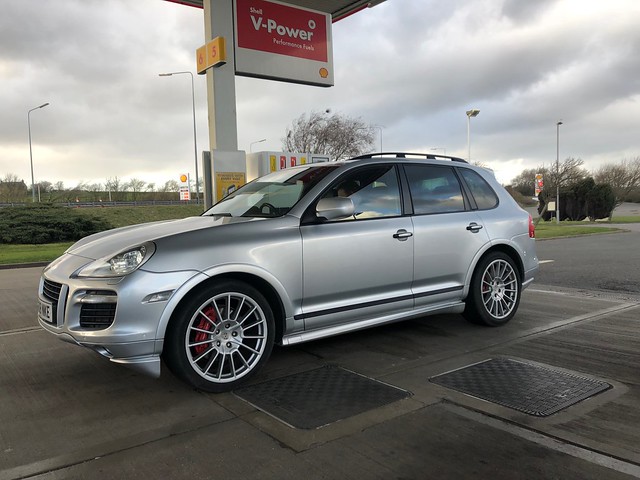
After a drink and waiting too long for the payment to go across, I was homeward bound! First fill of V power from near empty, �121!
I got home after 310 miles, 5 hours 5 minutes, 10:30pm.
Full first day of ownership, I woke up early once again and cracked on! First job was to fully inspect the car in detail and clean the underside up, I like doing this as I get a close look at bushings and the underpinnings.
This annoyed me everytime I looked in the rear view, one of the clips was bent
Oh wow, everything is so bloody big!!
Yuck!!!
Drains blocked!
Mud removed
Stone chipped
Painted
Front indicator was fogging up so wanted to take a closer look, what a ball ache that was! Think I need to replace with a new one.
Getting there
@Demort, I had you in mind here!
After everything was crisp, cleaned and dry. Everything got a good coat.
I repeated this a further 3 times and was absolutely shattered!!! I was flat out from 8am-ish through to 7PM.
All liner bolts painted
Rears
All wheel bolts painted and new caps
The last one before finishing for the night!!
I did have some distractions along the way, I noticed the rear light had some moisture so had a quick poke. Going to revisit that but cleaned it up a bit.
2 litres worth of mud, thats just what I caught! :floor:
That's all for now, MUCH more to come!
So, to finish up, no nasties found, just some surface rust which is kept at bay now. Could do with some new front brake pads in the coming months and I found that the exhaust valves are stuck open, I know most people have them permanently fixed open but I would like the feature to work, I disconnected the actuator arms but the flaps themselves are what is seized, I tried WD40 and a hammer but they're seized solid, so I plan to remove the exhaust tip and try and turn the flap itself from inside.
Looking better for brighter calipers and clean arches alone!
What's next, clean under trays (a bit brown) and poke under the belly of the car. Wetvac the carpets inside, I have a new pollen filter to fit, detail the engine bay and then polish the bodywork.
Only bits aside from front brake pads and front indicator lense I need are a pair of new tailgate spring things, it's a bit heavy and I think it needs a new belt tensioner, there is a whurring noise I can hear from inside and from the front of the engine, although it does seem louder in the car, its a whur sound which goes with the RPM of the engine, the belt could do with changing while I'm at that too. I haven't investigated this at all yet so it's an assumption, it definitely sounds belt/pulley bearing-ish! Hope so anyway..
Brilliant car, comfortable, has some poke, looks great and generally, really happy with it! I'll get some full on pics of everything as it has so many options!
Found a loose plug on front suspension leg, seems to be the acceleration sensor, push that back on properly and that should be the fix needed for the chassis system error, although that didn't reappear. I suspect I pulled the wire or plugs when painting/cleaning... Who knows..
Exhausted myself on the car this weekend, my main goal was to clear the underside, paint and protect everything and then detail the bodywork. I got it done after working flat out from 8:30am to 8pm for 2 days.
The underside just had a brown tinge to everything, just mud really, I was just going to do the bits you can see but in the end, I wanted to have a look at everything to check the condition of certain items, look for any leaks and just have a nose really.
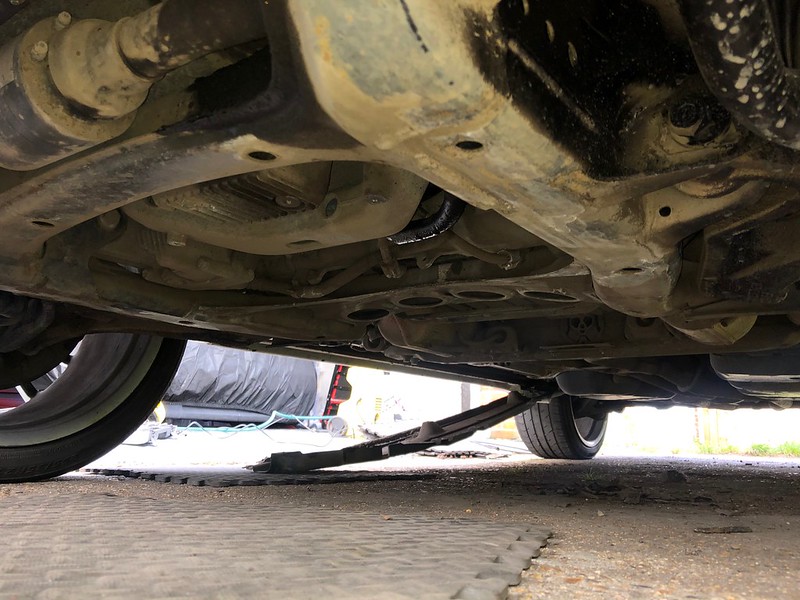
I started from the front, removed the undertrays and was surprised to not find any engine leaks, totally dry, the mud dust really helped here actually.
I did spot some broken rubber isolators so I've cabled tied the pipe which is normally held up by these for now until new rubbers arrive.
I suspect someone broke this when doing an oil filter change as the oil filter is blocked by this pipe.
I then spotted this fresh looking leak
Found that the banjo fitting was a bit slack, I could move the pipe left and right, got a 1/4 turn on that to tighten it, so that should solve that.
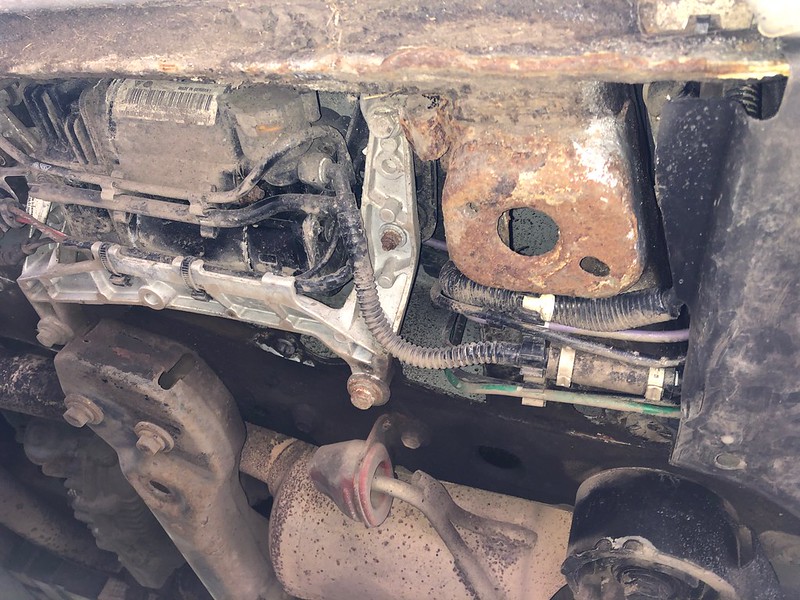
Air compressor and rusty looking jacking point
Suspect looking exhaust clamp, going to be removing the exhaust soon so will sort this out then, doesn't seem to blow when you hold you hand or spray water on it so I think it is sealed but I'll be changing the bolts to stainless ones as Porsche love to use chocolate bolts on the exhaust parts!
On the whole, pretty happy with the underside condition, muddy yes but for a 94k car, there were no engine oil leaks, nothing scary rust wise, all very good. I was scared initially as this is the highest mileage car I've ever owned but aside from dirt, it's in good shape!
I got a bit too into the clean up and got slack on the pictures but I did manage one good before, during and after.
Everything from the front to the rear of the car got blasted with G101, scrubbed with a brush, wire brush on the metal work, Bilt Hamber Hydrate 80 on any rusty bits, hammerite black gloss and Bilt Hamber Dynax on pipe joins, pipes and areas of the body that could do with protection.
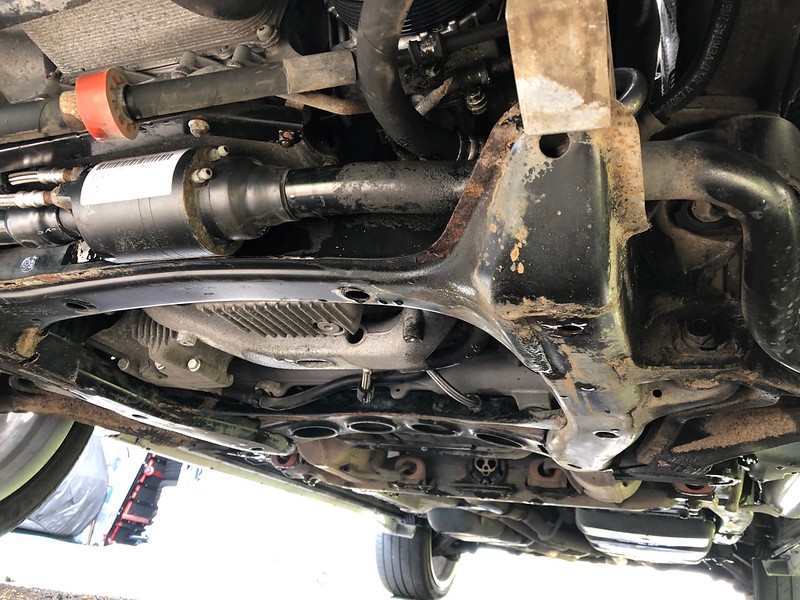
Front and rear subframes were scrubbed on the areas I could reach and painted with the above, I plan to remove the exhaust to give some better access and coat underside. I'll get some pics of all that as this area cleaned up nice, the rear diff etc were covered in mud but have come up like new now.
Few of these too
50/50 on the undertrays, cleaned both sides
Treated with Aerospace 303
On to the body, tar removed from in and out, paint needed a serious clay and machine polish.
Tar removed from inside rear doors, arch trim and lower half of car
I saw someone else mention that rust can occur from under the little black trim in the door shuts, the trim or grit gets rubbed through the paintwork. So I removed these and found some beginnings which got rust treated with Hydrate 80, painted and dynax'd.
No after shot grr but just imagine a line of wax.
Got side-tracked and found a seat belt to be twisted and the leather of the seat had become unclipped, so I clipped that back in to tighten the leather, when I removed the belt I figured that I could clean that and then refitted it correctly.
50/50
Someone didn't tuck away this bit of wiring, so that got tucked
This got rinsed, snowfoamed, rinsed, washed, snowfoamed, clayed, rinsed.
Wow this took ages, I forget the size of the thing.
After intensively claying, I'm left with marred paintwork, so machine polishing HAS to be done. Some of that is foam..
I just stopped taking pictures as I was completely knackered, going from decorating at home to flat out on this lump, I'm typing this with a body full of aches!
The results are great and I have definitely added some years to the life of this car now.
Tailpipes were completely black up close, got a load of that off, will go at these more when I remove the exhaust
Under bonnet cleaned and engine dusted
The paintwork, after being clayed, machine polished using Meguiars micro fibre mitt and finishing compound, removed a few scratches using a 3M green pad and compound then paintwork sealed with Soft99 Fusso Coat wax, this is a long lasting wax and with the baby coming and juggling the other cars, I'm not going to have the time to keep reapplying the usual glossier less durable products, I can just keep this topped up now and then.
More to follow of course.
The most uninteresting update..
Many lazy plate swaps it seems..
Took me bloody ages with a toffee wheel and white spirit
Hoovered leaves from the bonnet hinge area and under the brake M/C but was a bit tight and dark for good pics.
Taking this for a trip down to Sandbanks for an extended weekend getaway now
Stopped off when passing through New Forest.
New front brake pads and a Powerflex bush for the torque arm have turned up, still got a bit of meat on the pads so may delay putting them off for a bit but I'll fit the bush this week to see if it does anything, not expecting it too but it seems a few guys in the US change the torque arm due to worn bushes so I figured mine is probably worn too.
I'm actually looking to replace the front lower arms as that is loaded with 3 or 4 bushes and a ball joint, I'm sure changing them will offer some improvement. I'll give them all a proper inspection before hand however.
Just a lunchtime quickie,
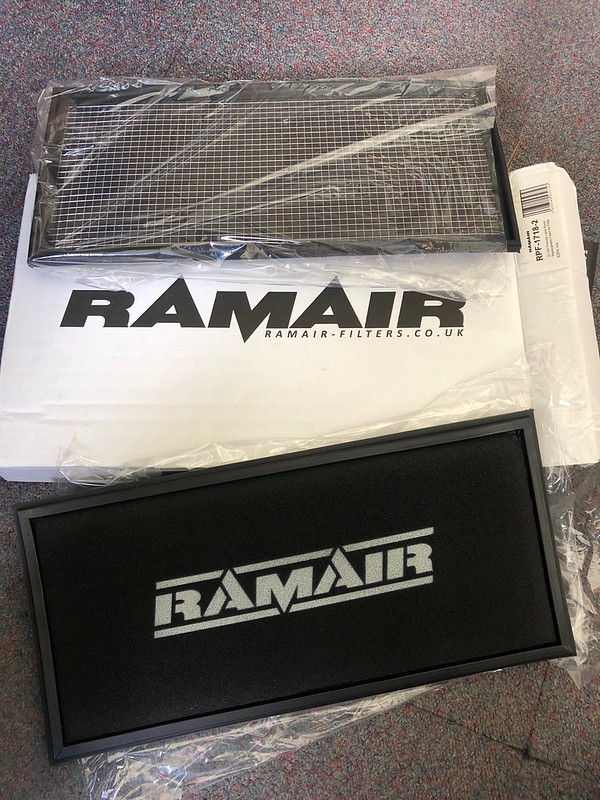
Ramair panel filters. I always like a panel filter upgrade on my cars, they all have an aftermarket panel. I can't say I notice a difference in performance but I have always done this for the sake of a better induction noise, on a V8, it had to be done. Cone filters would offer the best for noise but I prefer to stick with an air box, the improvement to induction is slight, but enough to warrant the effort.
Just fitted a pair to the GTS, biggest panels I've ever seen, sadly, I haven't driven it yet but I will update shortly.
Fitting was easy enough. 20 min job while talking to someone. Getting the air box lids back on is the most tricky bit but I learnt that from when I inspected the filters a few weeks back.
I had access to the torque arm, as able to twist it quite a bit with just my hand and little effort, that's getting changed later tonight! :thumb:
I think you'll be surprised on your run! Those VR6 engines are pretty good on a motorway run! I wanted a 3.2 or 3.6 just because I'm so familiar and comfortable with the engine itself, could rebuild one in my sleep. :grin: I bet you get have over a qtr left.
Did a few bits last night, cleaned and shaved the alcantara door pulls for the front doors as they were gummed up.
Fitted the Powerflex arm bush, passenger side light up sill plate, detailed the leather with some touch ups to wear and a condition.
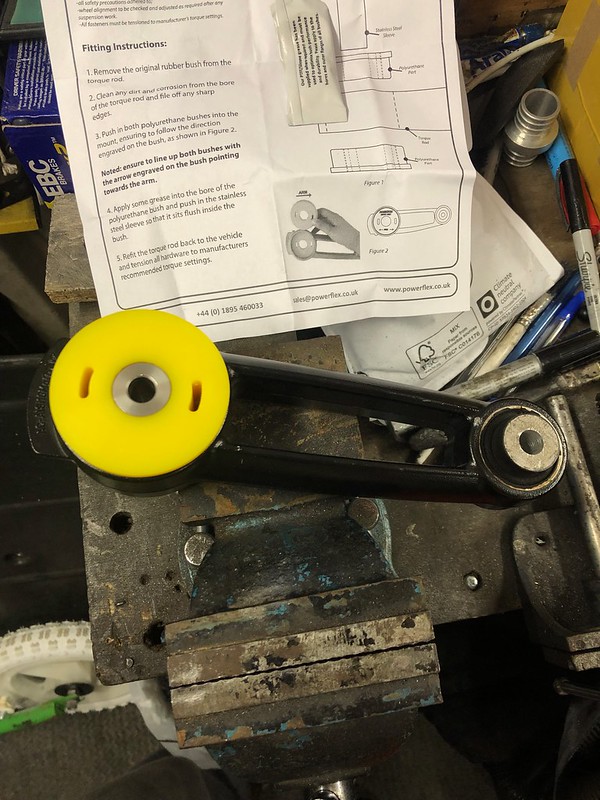
So, the arm bush, I was sceptical but after removing the arm, the bushing in the arm was soft, I could twist the centre, there was no wear to see but it was definitely soft.
Got it out!
In
I was sceptical of this but jesus, it definitely, without a doubt, has made a difference! The best way to describe what this has done is to say, it's like Sport mode is enabled, when it isn't!
From the moment I first pulled away, I could tell the difference, the car just pulled off, prior to the bush, I guess there was what felt like lag. Now, after driving it last night and again this morning, it's a night and day difference to the throttle. I am really really happy with this, the best thing I've done in a while. It took just over 1 hour to fit (would be far less if you had a press!), really really surprised me.
My thoughts on the air filters I had fitted earlier, definitely some extra induction noise lower down, windows down and you can hear the V8 more so. It seems like the car feels lighter, perhaps freer revving, could be a placebo but for the money, worth it.
That arm bushing though, very very happy with that, I am really surprised at the difference it has made, so much so, I didn't use sport mode last night or this morning, which I normally do to sharpen the throttle response.
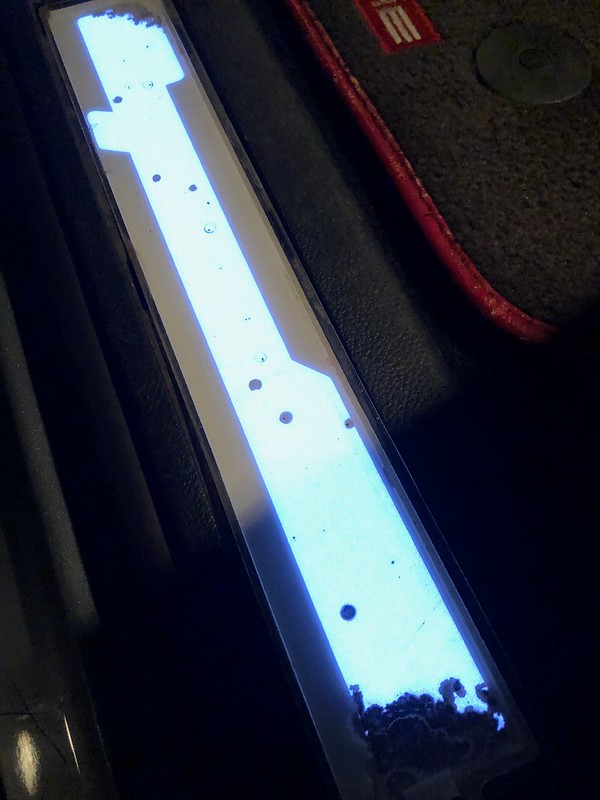
The passenger side illuminated sill had always bugged me, it looks like dirt had got inside, so I thought I'd get inside and have a look.
Sill apart
Ahh, not dirt, the EL part has started to break down..
I've managed to find something which I can replace this with, so fingers crossed it is the same size and works, to be continued!
Next jobs to be done on Saturday, removing the exhaust to free up exhaust flaps, clean the chassis above it and give the car a wash.
:bye:
Last of the dirty jobs on this for now, well, until I work out what bushes need doing, wishbones or drop links.
I wanted to drop the exhaust as I noticed some leaking from one of the clamps (turns out that was loose), the exhaust flaps were stuck and most important, change the typical Porsche chocolate exhaust bolts for stainless ones and most importantly, get better access to some areas of the floor in order to waxoyl and protect.
Firstly, was to remove these exhaust sleeves, one had clearer been replaced recently as the bolts weren't rusty and this was the one that was leaking, the bolts were loose, I assume some heat cycling has caused that..
This clamp, someone couldn't be arsed to replace both bolts, one came off nicely, the other required my dremel.
The job of removing the exhaust looked easy, nothing was in it's way, so in theory, should jut drop down once the mounts were undone. only 4 mounts support the rear section, no under trays or supports, so nice and easy.
Everything undone nicely, managed to get it down but the problem came when trying to pull the tailpipes from the bumper, due to the height of the car, I just couldn't get a good angle, had this been up on a ramp, I would have had no issue. So after much banging and kicking around, I had to give in and remove the rear bumper cover.
Thankfully, this took a matter of minutes, 15 perhaps and I was happy to do this as it gave me a chance to see behind the bumper.
Once this was off, the exhaust was ready to hit the ground.
Once down, I could pull a few bits off to give full access to the underside in order for lots of wire brushing, drill with a wire wheel, all in prep for a range of products, area dependent. Stone chip, thick gloopy waxoyl, Dynax, hammerite, some silver and some lacquer. I did this first as I needed some stages to dry before being able to coat again.
No surprises, just minor stuff which wouldn't be a threat if left.
Went over most of the joins as this is where the factory sealant tend to split and let water sit.
Below, you can see the middle portion of the car is quite fresh but the back portion, muddy, surface rust on the subframes etc, so this was the area I wanted to sort out with the exhaust out of the way.
Mixture of waxoyl and stone chip
While that was all drying, I spent a few hours on the exhaust flaps, cutting off the old clamp bolts, cleaning the tips up and putting back together with stainless stuff.
First, I tested the actuators, I removed the actuator arms from the valve arms and used a vacuum pump, all was well, both worked nicely.
Once clamp bolts were cut off, the tailpipes were free! This would give me a good look inside the valve area. The tips were left in a bucket of g101 after being blasted with korrosol to help remove the bulk of the carbon before the polishing wheel came out, annoyingly, I didn't take pics but they're looking like new now!! Will get some on the next detail.
Taking a look at the flap! Both were stuck in similar positions. Thankfully open.
Now this was something I reallyyyyyyyyyyyyyyyy wanted to fix but I wasn't successful. I soaked them in PB Blaster, WD, heated with a blow torch, freeze sprayed, repeated this and without wanting to apply too much force with hammers and pry bars, the shaft wasn't budging, I think in the end, I opened them more but probably through bending the butterfly.
I admitted defeat on this one, I'm happy that they're open and it isn't so loud that you would want it quiet, so it's fine by me. If anyone has any tips on how to free these, let me know but I can't think what else I can do..
I was a bit pissed off at this point, so I didn't really take many pictures. I had painted the underside silver to tidy it up, refitted heat shields and started to refit. I regret not cleaning up the heatshield as I normally would have but I was annoyed at the flaps and getting a bit tired, you can't see it anyhow but looking back at the pictures, I wish I cleaned it :wack:
Stainless coach bolts / nuts for sleeves
Exhaust back up, had given the mounts a coating of paint.
And that's it for now, the underside is now fully protected and cleaned.
It got a good wash and hoover the next day as it was pretty caked in pollen.
Few jobs done last night, some fun, 1 not so fun.
Rained finally, got to see the protection on the paint working.
I'm investigating an issue I've got at the moment, I keep getting the 'Chassis system faulty' warning appear, it appears as soon as you hit 4mph. Resets once you turn the car off and back on but as soon as you hit 4, it's back and it seems to deactivate the PDCC..
This is the rear axle PDCC valve body, Demort has helped massively on educating me and anyone interested in what this is about. It seems scary at first but since I have been looking in to my issue, this is just a body with 2 pressure sensors and 2 motors. I refuse to buy a complete unit for �700+ when I know that the issue is going to boil down to a service or replacement of the components fitted to the body, I plan on trying to figure it out and hopefully it will save people replacing the whole lot, myself too.
So, with cover removed, here it is.
I wanted to check all plug connections and ideally, gain part numbers of components to find replacements.
After a dust down of the unit, I started pulling plugs and checking for dirt ingress/rust.
For reference, I found a part number for the pressure sensors and can source replacements for �22-30 each.
Bingo! I found rust within a plug, I got slightly excited at the sight, as this could be the cause of my issue..
After a clean with some tiny tools and IPA solvent, I buttoned it all back up.
Cover back on and replaced the original bolts with some stainless ones.
Tried it out and no change, warning was back. At this point, I'm going to get the code checked again and pay attention to the description before I start with new pressure senders.
TBC
I replaced the rear number plate lights with some LED versions, they were too bright, so I applied some tint film to tone them down.
Left tinted, right BRIGHT!
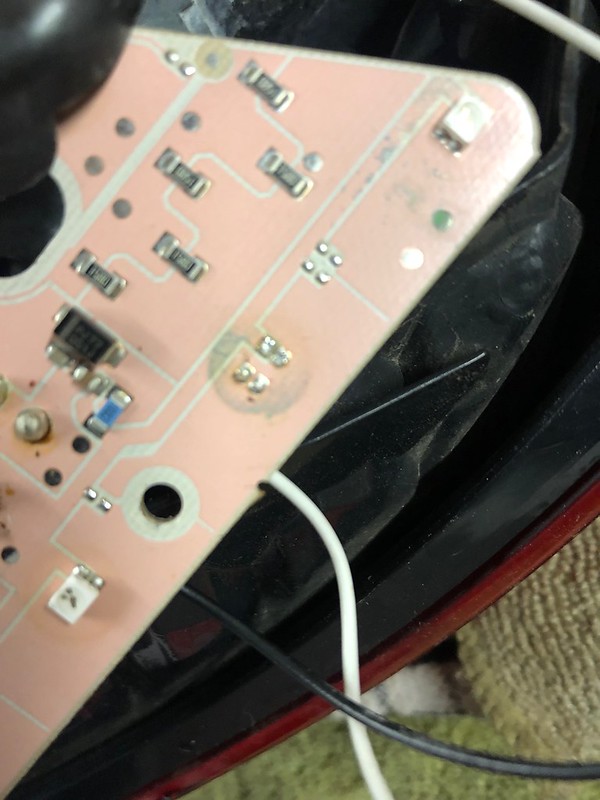
I noticed that one of the SMD tail lights wasn't working, so I set about the fiddly job of replacing it.
Desoldered and removed
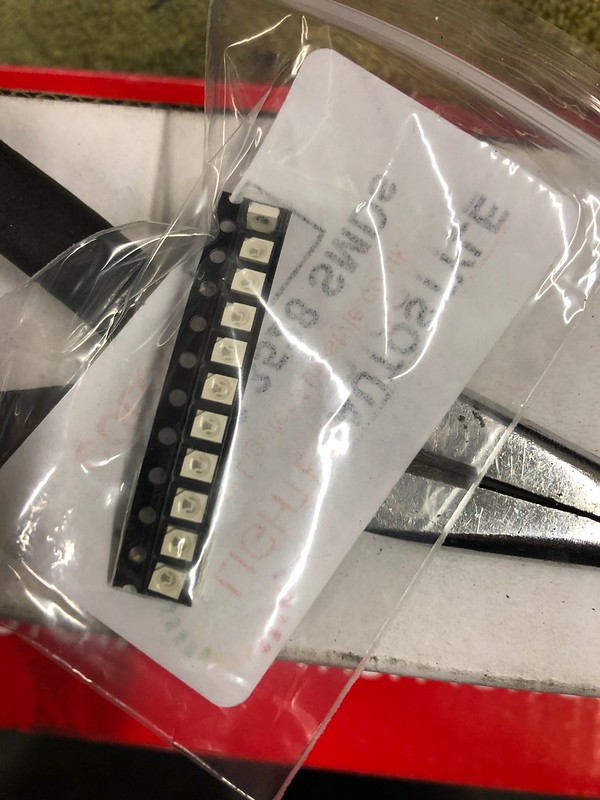
String of replacements
For ref;
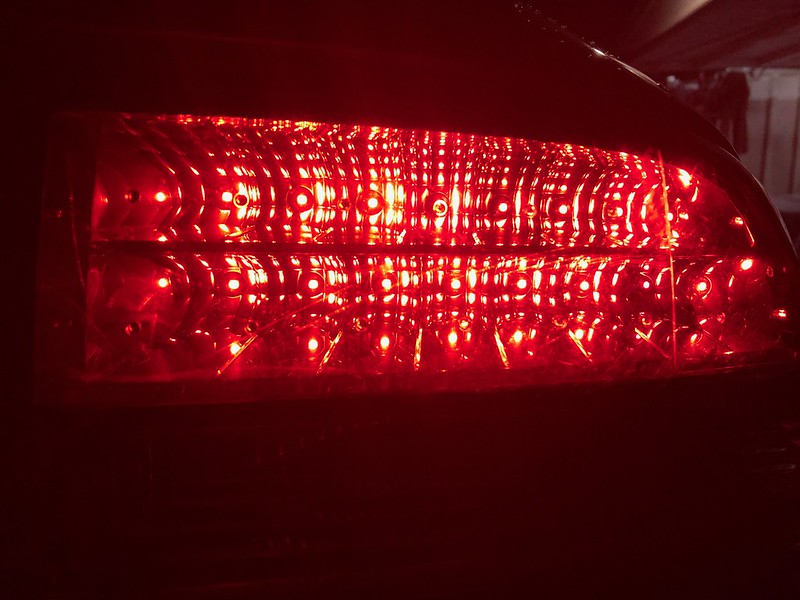
All working!
That's all!
Once I get past the PDCC problem, I'll do something a bit more exciting.
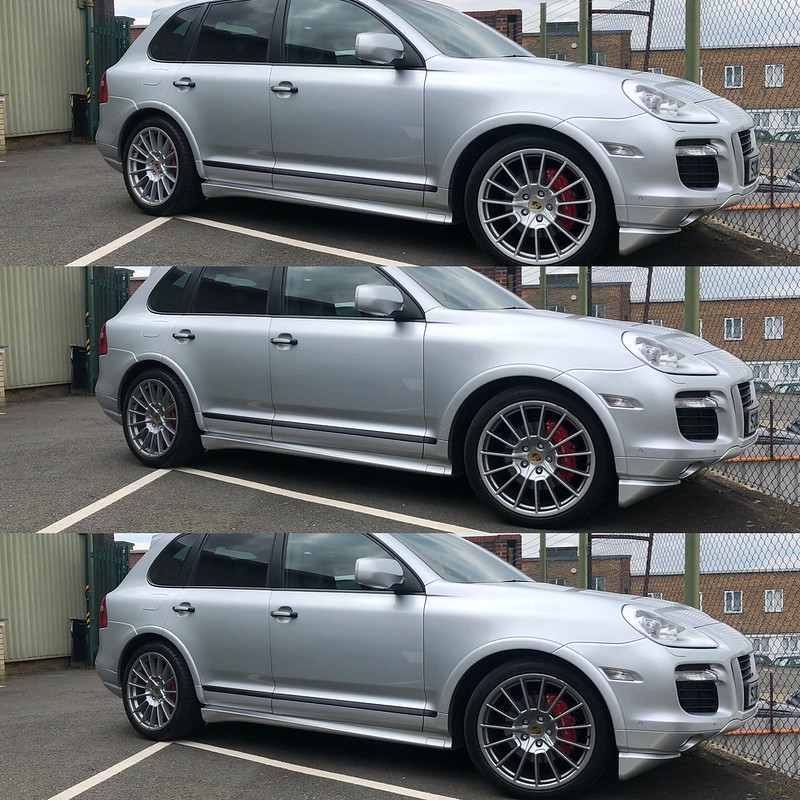
Did a quick photoshop of the roof bars removed and different colours on the wheels. I think I'll be sticking with silver. Roof bars, not sure I'm fussed either way.
This just arrived, new PDCC fluid tank, I'll give that a swap at some point.
I realised the MOT runs out at the end of the month, as I've got a baby due at the same time, I thought it best to get the MOT out of the way now and get some other eyes to look it over.
Everything was fine! I did mention that there is a knock from the front end but no matter what we pulled on, levered with a huge pry bar and push against, we just couldn't detect what was at fault. Either way, I plan to change the wishbones / bushes regardless, they have covered 95k so past their best I'm sure.
Outside of the MOT, I was able to poke around with it up in the air, quite nice to be able to stand up under it rather than be on your back! All looks good now that it has been cleaned.
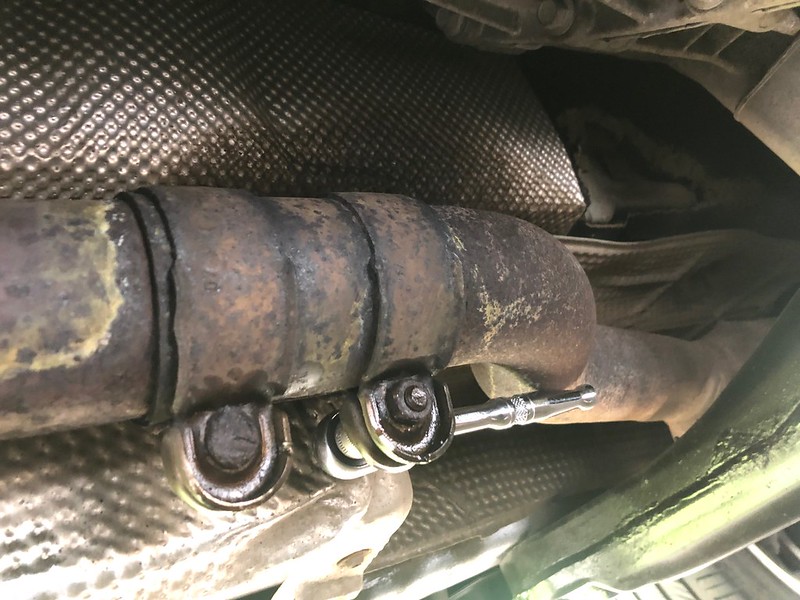
The only thing I spotted was a dubious bandage over a section of an exhaust flexi pipe, I need to investigate why and what is involved here. I assume there is a split/hole here. At first sight, it looks like the primary cat pipe will need to be removed so that someone can weld on a new flexi but getting that pipe off looks to be a nightmare as the nuts have rusted in typical porsche fashion. Hopefully it can be done in situ, let�s see. For the time being, I plan to heat wrap the flexi's, just to give some extra support in case they are getting weak.
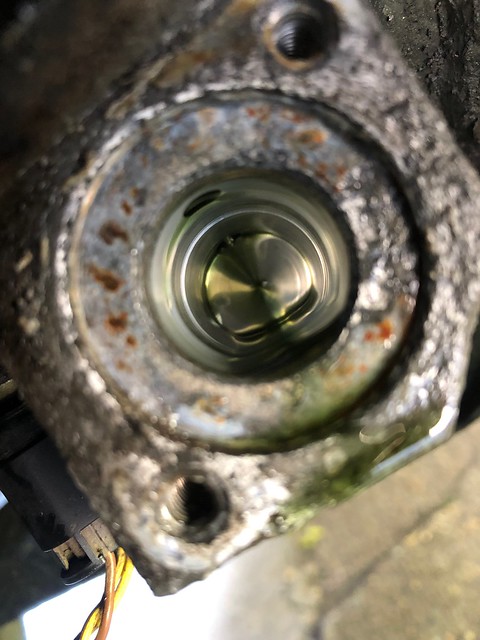
So, the PDCC!!! I am itching to resolve the issue and I really need some better diagnosis but I'm impatient and had a new PDCC fluid tank to fit, so while I've got the bottle off, why not pull the rear valve block apart and take a look close at the components on it.
Fluid was pretty dark considering it was changed in May last year when a pressure line was replaced. The invoice for this job shows that the system was calibrated too.
New bottle as these have filters and should be done every 60k.
[So, off came the 2 pressure sensors and 2 valves. Not much to it in essence, I was slightly scared when removing these as if something snapped, I would be in trouble, thankfully, patience, WD and winding the parts out by loosening and re-tightening ensured everything came out smoothly.
Nothing scary was discovered, I cleaned everything up and refitted. Now I know it is all clean and I have now refilled with fresh CHF11s, it's a step in the right direction. I will get it on a computer again and go from there. All I can do on it now is replace the pressure sensors, fine, that will be an easy and quick swap so that I've had them off but if it's one of the valves, I'm not sure what I can do as they are not something I have seen before and certainly not going to be easy to trace as no part numbers could be seen. I really hope they haven't died.
I was tempted to put power to them while off the car but I didn't know how much so thought it best to find out. As it's all canbus, I was unsure.
So, with it all cleaned, back together and new fluid, I had hoped that the warning wouldn't return, unfortunately, it did. I think the system will need a computer bleed so I'll get this done after a diagnostic check from a proper system.
On a positive, the new fluid has resulted in a quieter pump, doesn't hum as much as it did.
Small job, I wanted to restore the original mats, they were an expensive option and tie in nicely with the red belts, the mats themselves are in great shape but some of the red colouring on the leather binding was coming away, so I bought some leather dye and touched in the wear patches.
More beading
So next, wrap exhaust flexi's, find out if the dodgy one can be replaced in situ if needed, more diagnosis on the PDCC and I reallyyyyyyyyy want to book it in to have the rust removed but I want to sort the PDCC first!
Oh, tried out a Goonies DVD in the rear.
Odds and sods going on and more recently, having my patience tested!
Looking good from this angle!
new EL strip for the passenger side sill arrived, this was an easy enough to do job
Before
After
While poking around, I discovered the car has the expensive bearing support upgrade.
Gearknob handle was scratched, was going to paint this but then decided to use some spare alcantara to trim it, this was a bit trickier than I thought but after an hour, made a nice improvement.
Brake pads were very low and I had the wheels off to change the wishbones (or so i thought) so changed the pads
New pads and fitting kit
Now, the job I wanted to do was change the front lower wishbones but I just couldn't get one of the bolts out!! It undid and was turn, along with the bush but as it had seized itself within the bush sleeve, I couldn't bash it out. Not being able to get a good angle on it didn't help, I tried heat and all sorts. I'm going to attack it again this week but just cut the bloody thing off once my replacement bolts arrive.
I have since ordered new alignment bolts and upper wishbones..
Can't wait! :dont know: :x
What a nightmare, seems common after doing some google searching on how people removed it.
I'm awaiting new nuts/bolts to arrive at Porsche, once I have them, I will have a go at cutting the thing off!
New PDCC pressure sensors arrived, easily fitted those in 5 mins.
Not sure if they resolved anything as I'm getting the Chassis System Warning when I turn a corner, once my wishbones are sorted I'll get that code checked as that may not be PDCC related.
Always nice to start with something simple...
Got the bloody wishbones off.
The ball joints were good, totally solid still, I was really surprised by that but the rear bushings were showing splits and felt soft so this was a worthwhile job.
Really heavy, I regret not going for the Q7 aluminium arms, not that I'm going for weight saving here but I'm sure it would have added some benefit.
Ran out of time to do the uppers but I'm hoping to get those done this week along with top mounts which I only just discovered are available to buy for the air shocks.
All of the entry guards are scratches, so I set about cleaning those up as a little job on free moments of the bank holiday.
I didn't go for perfection as I didn't have the right bits with me but I did the best I could.
Front upper arms, top mounts and gearbox mount next! Will finish up with an alignment too, then I think that will be it for a little while as the baby is due anytime! :bye: :dont know:
New AOS diaphragm turned up, no reason to change this other than why not for the sake of �25. My 997 benefited from a new AOS so I figured, why not on this.
10 minute job, cap takes some careful levering, popped off to show oil build up from vapour. Cleaned this out and put new part in.
Not expecting 100 bhp but at least it's one extra thing to future proof it. Signs of a bad one is smoke on start up and hissing noise, I had neither but many people on the US forums get this around my mileage/age.
Original diaphragm was brittle as anything, in fact, I think it was stuck in position so probably wasn't doing it's job.
Overnight parts from Russia
Typing this with lots of aches and pains today, spent a solid day from 9am up until 10pm fitting the upper wishbones, new top mounts, doing some rust prevention finished off with a wash.
I lost an hour just doing this! I just couldn't get one of the wiper arms off and my bearing pulley was too big! Eventually got it free after lots of WD40 and pulling.
Removed the scuttle just to gain access to one of the turret mount bolts, also cleaned out leaves and crap.
Arch liner removed
Shock out, I never thought I would be pulling a shock out of this car, the air system has always scared me as it's an unknown but now I've done this, it's fine!
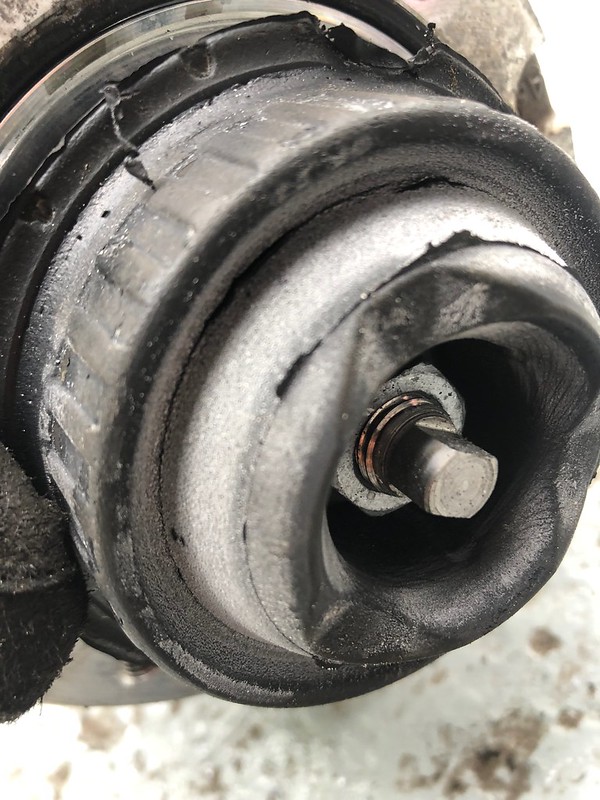
Many people don't seem to know that there is a rubber mount in here, after seeing a guy on Rennlist showing his one torn in half, it was a no brainer to change while I had the shock out. I had a knock coming from somewhere so I would have hated to only do the wishbones and find the knocking is still present.
Upon inspection, the mount was fine, I couldn't tell it apart from the new one, the upper wishbone looked good too, balljoint was a little loose but I wouldn't have said it was at the end of its life. I was slightly worried at this point as I didn't find the destroyed bushing/joint I was hoping to see.. Drivers side anyway...
When I got to the passenger side, I found the fault, the balljoint was floppy and knocking!! What a sense of relief that was :worship: :bandit: :thumb:
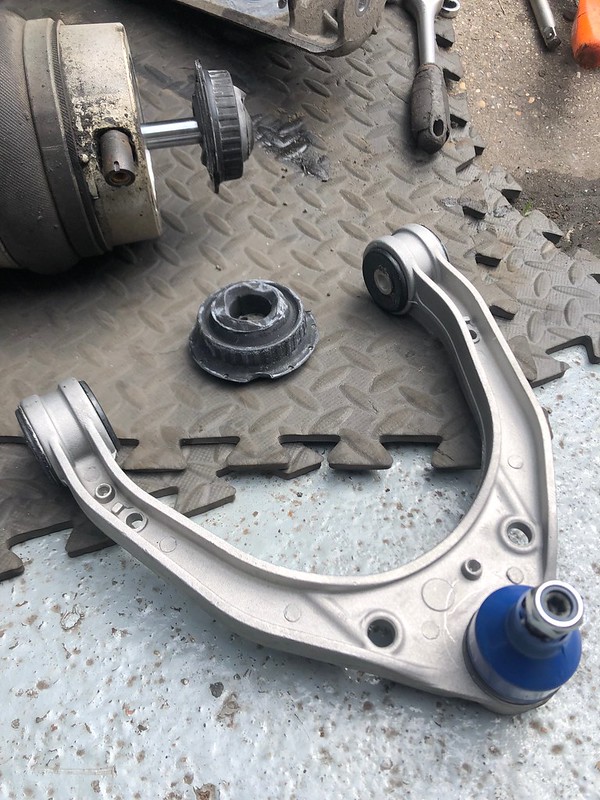
Old and new
The passenger top mount was showing some signs of age too with a healthy crack, I wouldn't have said this was bad, probably just cosmetic at the moment, but I like to future proof while I'm working on an area.
Gave a quick clean up
New upper wishbone, these weigh nothing, I really really wish I did the ally lower arms!
Geearbox mount was next!
Original was squished
I removed the entire arm, 8 bolts and dead easy.
Smashed the original bushing out, this was very easy..
The hard bit was getting the new one in! The bushing was larger than the hole it had to go in, there was NO WAY it was going in. So after a good hour of sanding the edges of the bush and the bracket down, eventually, the new bushing was fitted after much lube, tapping and hammering!
I can tell it tested my patience as I didn't take any more pictures :roll:
Time to relax from working on this at every free moment now while I enjoy my son coming in to the world any day now. The next jobs will be alignment, wheel refurb and paintwork so nothing for me to get so involved with :thumb:
As for how the car is now, the knocking is no more and the drive is smoother, I was getting a light vibration at 33mph, commonly reported online and the driveshaft being the cause, as the bearing support and doughnut are new on my car, it couldn't be those, hence spotting the saggy mount. The vibration has gone. So I am very happy with my efforts
Got my alignment sorted, I thought I would give Kwik Fit a go, not somewhere I have ever taken a car before but since they had the highly regarded Hunter machines and they were local, I thought what was the worst that could happen..
Got there first thing Saturday morning and after a short wait, it was up and being adjusted, everything needed adjusting but it didn't take the guy long.
Once he said the adjustments were made, I compared them to the Porsche specs and everything was spot on!
So �85 for 4 wheel alignment, nice guys and local, all good!
:bye:
Sooooooooooooooo, I'm now a dad, woohoo, after not doing anything to the cars for something like 5 or 6 weeks, I finally gave myself a few hours to solve an issue that has been spoiling the GTS experience and keeping me up at night!
I'm slightly hungover after a very late night session so hopefully this mass of words makes sense..
I had been getting a 'chassis system faulty' and 'chassis system warning' message on the dash for a little while, took a number of steps to try and resolve it, pretty blindly really as I was limited on the info I was getting from diagnostics. I had planned to visit Precision Porsche to see Iain and he has shared his wealth of knowledge and interest in the topic but I just had some things I wanted to try out before taking up his time.
I had already pulled off the pressure sensors and solenoids from the rear valve body, changed the reservoir and filled back up with fresh fluid..
Sadly the problem remained..
Pretty vague codes but they did point to the rear valve body, which in essence, is a simple thing, 2 solenoids and 2 pressure sensors, that's it!
So, during my paternity time off, spending some time researching the PDCC system, I found that BMW's have a similar system named Dynamic Drive, a quick google in to this, found a few threads but nothing of much interest until I discovered a guy who had stripped a valve body down, upon seeing the pictures, I noticed that the solenoids were similar, a bit more investigation found that the BMW valve bodies were pennies on ebay, so I bought one to pretty much dismantle and explore..�30 overnight part from Poland.. Compared to Porsche valve bodies starting at �350!
So, BMW unit pulled apart and investigated, this one is slightly more complex than the rear Porsche version, having 2 more solenoids and an extra sensor which may detect temperature...
Solenoid opened up
Having all of these spares, gave me the chance to test what voltage powered the solenoids, I started with 5v and that was enough, so I could now use 5v to test my Porsche ones without fear of blowing them up.
On to the real exercise now, I sucked the CHF11s fluid out of the reservoir and pulled the solenoids off, 5v to each and annoyingly, they both worked, I was hoping to find one was dead. Poked around, pulled a small machined shaft thing out, that was clean and at this point, I thought FFS, what else can I do, so I set about refitting everything, I decided to fit the BMW solenoid in place of one of mine, it looked in better condition.
Fluid refilled, bled to some degree and time to test.
Holyyyyy fcku!! To my utter amazement, I didn't get the warning once I hit 4mph, I didn't get the warning after doing 5 miles! I bloody fixed it!!
I just parked the car up and felt content but slightly scared that as soon as I go out in it again, attack a corner, the warning will return.. I sent an excited message to Iain (Demort) letting him know the great news as he has been with me on this every step, we hoped to find a resolution to this error as it is something he is seeing more and more and no doubt, the older these systems get, the more this will occur.
Well, I have now done approx 40 miles, hard cornering, sport mode and the system is working as it should, I am no longer holding myself up when cornering, wow! I couldn't be happier. Big bill and lots of hassle avoided.
:thumb:
Hopefully this will help others, don't be scared of PDCC, it really is simple and if something goes wrong, it can be broken down to a small part being at fault which CAN be replaced.
So, that's THAT episode dealt with. Onto more fun stuff.
Last issue that I will address is a loose sounding knock from up front, louder in comfort mode but barely audible in sport mode, I have new upper and lower wishbones so I am wondering if it is the subframe mounts or ARB mount. Everything seems solid so I'll need to poke around on that, it is pretty minor but something I'll get around to.
So yesterday, I thought I'd fit some new matching rear tyres, the previous owner had some unknown brand tyres on the back which were cracking fast, I noticed some deforming too, I had planned to wait until I had some time to have the car off the road to have the wheels refurbed and then fit the tyres but with the car in use daily on baby duties, that's going to have to wait until we go on holiday or something, so new tyres fitted, the car is now making me very happy
I go to this local place called A&K tyres, they're a great bunch and take all the care in the world, I take all my cars here and so do many mates. They know to lock the suspension and correctly torque the wheels to the manufacturers spec, not just a random it'll do number.
A 2016 stamped tyre with just under 6mm in the middle, never buy cheapos!
Replacing these have totally erradicated some weird hoping feeling I was getting at 33mph too.
Thanks again Iain, you are truly a great asset to us all here and I REALLY need to come and buy you a pint or 10!
:grin: :grin: :grin: :grin: :grin: :worship: :worship: :worship: :worship:
I recently set out to do an oil and filter change on the Cayenne and while at it, fit some new spark plugs as they were last changed around 30k mile ago, they're so cheap and easy, it's a no brainer to just do these with every service as I believe they do lose their efficiency with use.
Well, this was a job that wasn't as clear cut as just changing the plugs..
I bought Bosch FGR5NQE04, same as Porsche branded items, just �31 for the set of 8 instead of �75.
Someone had the same fitted already..
Old and new;
Old plugs, notice that 1 is different! (FFS!!)
The problem I came across when pulling the last plug out was, when I pulled the coilpack out, it was soaked in oil! PANIC!!!
I put the socket to remove the plug and as I pushed that in, oil spurted out!!
I was about to lose my cool but once my brain kicked in, I thought the problem has to just be a bad seal on the valve cover, I pulled the plug and yup, that was covered but the tip was dry and matched the others so the engine is OK, phew!
A look down the tube and the problem was apparent, a seal was not doing its job as a moron had clearly fitted it. I believe an OPC to be behind this.
Great, another job and hours I don't have too much of right now to be spent sorting this out.
So, I put the new plugs in, buttoned it all back up and awaited my new parts to arrive. New valve cover seal, new plug tube seals and new valve cover bolts.
New bits arrived courtesy of Deroure.com
Strip down
Valve cover off!
I was pretty happy to do this as I always like to get a look inside my engines, especially when the car has done so many miles (96k). Everything looked in good order, nothing out of the ordinary, chain was solid and tensioner pad looked in good order.
Are these the upgraded variocam bolts?
Not sure if this is a date but if so, it's newer than the car..
The offending seal!! Clearly had been fitted this way as it was trapped and not in the recess.
New valve cover bolts
Everything got a clean and then went back together!
Phew!
Oil change time, it is sooooooo good that I can just raise the car up to do this, no messing about with jacks and ramps!
Oil of choice, 5w/40 Mobil 1 Super 3000 X1. Meets specs and used it on the Boxster and found no issues.
The oil in the car has been in there for approx 6500k miles, it came out black and really watery. I had been in touch with the specialist who did the last service and they informed me that they use 5w/40 Petronas.
Made a mess as always, I really need to upgrade my oil catcher.
Let this drain for 30 mins while getting the filter off and then accidentally finding the cause of a knock that has been driving me insane!!!
When going over bumps, I had a knock which sounded like a worn ball joint, but I had change them all, inspected everything and nothing else appears to be worn, I was getting to the point of setting out to change engine mounts and front shocks...
Well, while poking around, I saw this clamp and wondered how the hell someone did it up as the head was touching the subframe, a light touch and it moved! It was completely loose!! I thought that there was no way this little thing could be causing the knocking I was getting, it is a really heavy metal on metal knock, no way but maybe??! hopefully, fingers crossed, maybe it is this!
Where it should be
Well, I re-positioned and tightened the clamp, fitted the new oil filter and filled the engine with oil.
Fired it up, all sounding perfect, I let it run while I tidied my tools away. I then cautiously went out for a spin and to my amazement, the bumps which would always produce a knock, no longer did!!! I couldn't have felt happier!!
So, no more oil leak, fresh oil, plugs and now, no more knocking! This Cayenne is really feeling perfect now, really happy with it.
Swapped out the hazard switch, mine looked tired, so found a fresh one.
Cleaned the filters on the headlights, one was completely blocked, and I believe to be the reason the headlight was misting up
Small update, although it feels like it should be big with the amount of time invested here!
Didn't get pictures but during the wash, the underside, although I had pretty much waxoyled and dynax'd everything, got a good coat of Bilt Hamber Atom-Mac, this protects all metals from rust! You can spray it on brake discs before a wash to stop them rusting up during the wash stage, great stuff! So the under carriage got a good blast with this to get all those hard to reach areas and areas I didn�t coat! Great for suspension, ally components (stops corrosion) etc!
I had some scratches which I never quite spent enough time on, so I spent a day machine polishing this car again but with the aim of scratch removal, I used 3M green combo and Meguiars microfibre kit. I was shattered by the end of this, literally spending a day on it! I forget the size of the thing! I was only meant to target the scratches but I ended up going over the whole thing!
Used Fusso coat again to seal the job and protect the car as it has proven to be a long lasting wax which continues to bead beautifully!
Luckily, had some Coronas to keep me going!
The next morning, snapped some pics! Not the best but it truly is gleaming!
Next up, transfer box fluid change, Android headunit with 2 camera install and I am having some paintwork done

The following 8 users liked this post by MarkGolf:
cayenne20007 (10-21-2020),
CRoger (05-18-2020),
deilenberger (01-22-2020),
GMKF (03-05-2020),
kadn33 (10-24-2019),
and 3 others liked this post.
10-23-2019, 01:50 PM
#3
Burning Brakes
Very impressive work. Thanks for posting, explaining, and all the pics. The only thing I don't understand is that you're in England and getting your beer from Brooklyn and Mexico. Makes no sense. Everything else more than makes up for that though. 
The following users liked this post:
320cap (04-17-2020)
10-23-2019, 01:53 PM
#4
Pro
Wow! Good grief you did a lot of work to that thing, but it really shows. Very nice GTS and you're seriously giving it the TLC it needs and then some. I'll be doing the transfer case and transmission fluid changes soon myself, definitely looking forward to more updates! Thanks for sharing everything. Congrats on the birth of your son as well, my friend.
10-23-2019, 02:11 PM
#5
Racer

Wait! You can get to the turn signal / Daytime Running light without taking the entire nose off?
When I redid my brakes, I painted them - the hat and the edge vanes - with clear high temperature paint. This keeps them from rusting. Especially the hats. They still look pretty good after 18 months
When I redid my brakes, I painted them - the hat and the edge vanes - with clear high temperature paint. This keeps them from rusting. Especially the hats. They still look pretty good after 18 months


Trending Topics
10-23-2019, 09:20 PM
#8
Rennlist Member
Been on your side of the pond, frequently on business trips.
What are they using on the road surfaces there that corrodes the undercarriage?
Anyone here thinking that an estate car is only for the rich and famous...its not. In the US its known as a station wagon.
What are they using on the road surfaces there that corrodes the undercarriage?
Anyone here thinking that an estate car is only for the rich and famous...its not. In the US its known as a station wagon.
 10-24-2019, 12:57 AM
#10
I'm guessing salt. That's what they use here in Finland. Same thing in Sweden and other nordic countries, possibly UK too. Ruins cars, makes them rust on the underside and sticks to paintwork like glue. I hate the stuff.
The following users liked this post:
Buffalo Bill (12-03-2020)
10-24-2019, 03:01 AM
#11
Wow, very impressed with your skill and great knowledge of what to tackle. Congrats.
Your GTS made me appreciate living and owning California cars.
I am pretty sure your thread have scared off huge amount of potential used Cayenne buyers:-)))
It am still totally affected LOL.
Where do I get the polyurethane insert for the engine damper?
Your GTS made me appreciate living and owning California cars.
I am pretty sure your thread have scared off huge amount of potential used Cayenne buyers:-)))
It am still totally affected LOL.
Where do I get the polyurethane insert for the engine damper?
10-24-2019, 05:49 AM
#12
Instructor
Thread Starter
Thank you!
HAHA, the local ales and lagers are for the evening, weak stuff during the day or I'd get no where.
Thanks, I love doing work, when I bought the car, I didn't see myself having to do quite so much but it was too late to quit once I got started and saw what it needed. I'll be doing my transfer change tomorrow so I will update, looks easy enough and the great thing is not having to jack the car up! Thank you!
Yup, I kinda found that out by chance on my first day of ownership, the nose 100% does not need to come of. Clear paint is a good idea, especially on new discs! I will remember that,
Thanks, shame to see you selling up now!!
Thanks, has been more than I wanted for the baby wagon but it just had to be done as I think I am a bit OCD when it comes to cleaning!
Ahhh it is the most frustrating thing! During the winter period, December through to February, the local authorities put salt on the main roads, it's a killer!! Fortunately, it's not so bad here in London but salt is salt. The real killer for my car was that it used to live up in Scotland (Aberdeen), it is much wetter throughout the year and also has salty sea air, the next owner then lived in the middle of no where on a farm or something in some highlands in the north of the UK, hence the mud etc, so the Cayenne hasn't had the driest of lives, sadly I only found out the depth of the corrosion after but I have tackled the main issues now. For me, it's a lesson learnt, don't buy a car from up North. The salt and the way our cars are eaten by the wet weather sucks, especially for me as I love to keep things looking as new as possible, I have some other cars which I don't dare drive when the roads have been salted or even if it is going to rain.
Whenever I go to warm climate countries and even California more recently, I couldn't believe the number of older cars and especially in California, air-cooled and older generation Porsche's (928's) that were clearly just being used as daily runners with minimal rust, what a dream!
Thanks, the red belts really made me want the car, they break up the interior and look pretty special
Yup!! Sameeee stuff. More than half of my cars go away for this period.
You don't know how lucky you are, rusted and seized bolts is just expected when working on most cars over 5years old, I was born in the wrong place haha.
I got mine from eBay, I think Powerflex are over in the US also so I'm sure you can easily get hold of one. If not, it looks like this seller would ship to you..
https://www.ebay.com/itm/Powerflex-T...YAAOSwMjtb9~eG
Wow! Good grief you did a lot of work to that thing, but it really shows. Very nice GTS and you're seriously giving it the TLC it needs and then some. I'll be doing the transfer case and transmission fluid changes soon myself, definitely looking forward to more updates! Thanks for sharing everything. Congrats on the birth of your son as well, my friend.
Wait! You can get to the turn signal / Daytime Running light without taking the entire nose off?
When I redid my brakes, I painted them - the hat and the edge vanes - with clear high temperature paint. This keeps them from rusting. Especially the hats. They still look pretty good after 18 months
When I redid my brakes, I painted them - the hat and the edge vanes - with clear high temperature paint. This keeps them from rusting. Especially the hats. They still look pretty good after 18 months
Thanks, has been more than I wanted for the baby wagon but it just had to be done as I think I am a bit OCD when it comes to cleaning!
Whenever I go to warm climate countries and even California more recently, I couldn't believe the number of older cars and especially in California, air-cooled and older generation Porsche's (928's) that were clearly just being used as daily runners with minimal rust, what a dream!
Wow, very impressed with your skill and great knowledge of what to tackle. Congrats.
Your GTS made me appreciate living and owning California cars.
I am pretty sure your thread have scared off huge amount of potential used Cayenne buyers:-)))
It am still totally affected LOL.
Where do I get the polyurethane insert for the engine damper?
Your GTS made me appreciate living and owning California cars.
I am pretty sure your thread have scared off huge amount of potential used Cayenne buyers:-)))
It am still totally affected LOL.
Where do I get the polyurethane insert for the engine damper?
I got mine from eBay, I think Powerflex are over in the US also so I'm sure you can easily get hold of one. If not, it looks like this seller would ship to you..
https://www.ebay.com/itm/Powerflex-T...YAAOSwMjtb9~eG
10-24-2019, 11:12 AM
#13
RL Community Team
Rennlist Member
Rennlist Member
Absolutely amazing work, thoroughness, and the willingness to dive into subsystems like the PDCC to figure out how they work.
That's a great looking GTS and I never really noticed how in silver it really highlights the flares of the front fenders.
Based on the amount of debris that was in your cowl vents, I would pull back the driver's side carpeting and foam pad to see if the wiring bundle there has been exposed to any water. If they've gotten wet, it's better to fix those splices before the corrosion spreads. Make sure to clean the sunroof vents too.
That powerflex torque arm bushing looks great too. I'll be using that to replace mine when it fails, but I'm only at 40,000 miles.
If you want a little more exhaust sound, delete the secondary cats with bypass pipes. Not much change inside the car unless heavy on the throttle but sounds a lot better with the windows open and from outside.
It pains me to see the rust you've had to deal with (I live in the southern US), but keep up the prevention methods and great work you're doing. It's amazing!


The following users liked this post:
CRoger (06-27-2020)
