When you click on links to various merchants on this site and make a purchase, this can result in this site earning a commission. Affiliate programs and affiliations include, but are not limited to, the eBay Partner Network.
I’ve been off-roading with my Cayenne for some time now and wanted to enhance the capabilities of my Cayenne even further. As many of you know the 1Y1 Advanced off road option was a pretty rare one for the 955 Cayennes. After doing a fair amount of research, I decided to find a differential and do the retrofit onto my cayenne.
1. The research
The Touareg, Q7 and the cayenne share many components including drive train components and electronic modules etc. The first thing I had to do was figure out the differential ratios and components that would be required.
I own a 2004 Cayenne Turbo so my final drive ratio is 3.7. after a long search and waiting I was able to locate a 2004 Touareg V8 with a 1Y1 option. Unfortunately, the final drive ratio for this Touareg was 4.56 so that meant that I had to replace both the Front and Rear Differentials. One added bonus was that since I am running larger All Terrain wheels, changing out the differentials geared my vehicle closer to OEM with a bias towards more torque.
As far as the parts needed, I needed to pull both the front and rear differential, the wiring that connected the rear electromechanical lock to the controller and so on, the control module and the axles.
Side note on the topic of axles, there are a few different kinds that I have come across. I believe the rear axles between the Cayenne models with and without the rear locker are different so I got the rear axles off the vehicle where I got my parts. This turned out to not be the case and the rear axles were identical. The front axles however are different between different models of the touareg and the V8 I pulled my front differential from happened to have a larger axle that used bigger bolts so I had to replace my front axles.
The wiring runs into the vehicle through a pass through a little behind the left rear passenger seat and joins the main harness. After joining the main harness the wires going to the electromechanical lock run back to the control module. The control module only has 1 connector on it. The rest of the pins run the entire length of the vehicle on the left side to the front. There is one exception and that is a grounding wire with a lug on it that runs back to a grounding point on the left back corner of the vehicle.
2. Installing the wiring and integration
I wanted the wiring runs to be identical to the OEM design so that is what I did. The wire runs followed the OEM routing with the exception of where they spliced in to their respective signal wires. Instead of adding a random fuse block, I traced the fuses required in the left fuse panel and added fuses in those locations once you mess around with Volkswagen connectors, depinning or adding fuse pins is actually not that terribly hard, just requires some hands on time. I wasn’t able to locate the specific splice points called out In the factory wiring diagrams so I spliced in where ever convenient.
If you are unable to find the wiring or don’t want to deal with it, there is someone in Germany named Sven (Instagram @cayenne_ontour) that makes wiring harnesses for retrofits.
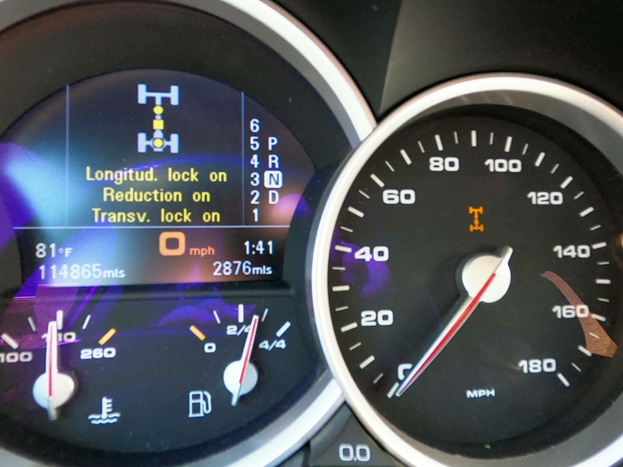
I honestly don’t recall what I did for the Control module integration. When I wired in the diagnostics pin, I was able to see the module on my PIWIS II. When the CAN high and Low were spliced in the system recognized the transaxle locker and was functional. Once the electronics are wired in if the differential motor connected you will get a PSM error so I would recommend unplugging the control module until the installation is complete.
3. The Differential installation
I would not recommend changing out the differentials on Jack stands. It may be possible but it is a bad idea! I was able to find a transmission shop that would let me commandeer one of their lift bays for a day and even then it was a painful job with certain aspects of it requiring 2 people. I don’t want to get too deep into the details but the factory service manual has everything you will need for these steps. Please see the following chapters
· 39 88 19 REMOVING AND INSTALLING FOUR-WHEEL FINAL DRIVE
· 39 01 19 REMOVING AND INSTALLING REAR FINAL DRIVE
You will need a good set of triple square bits including M10, M12 and M14 sizes.
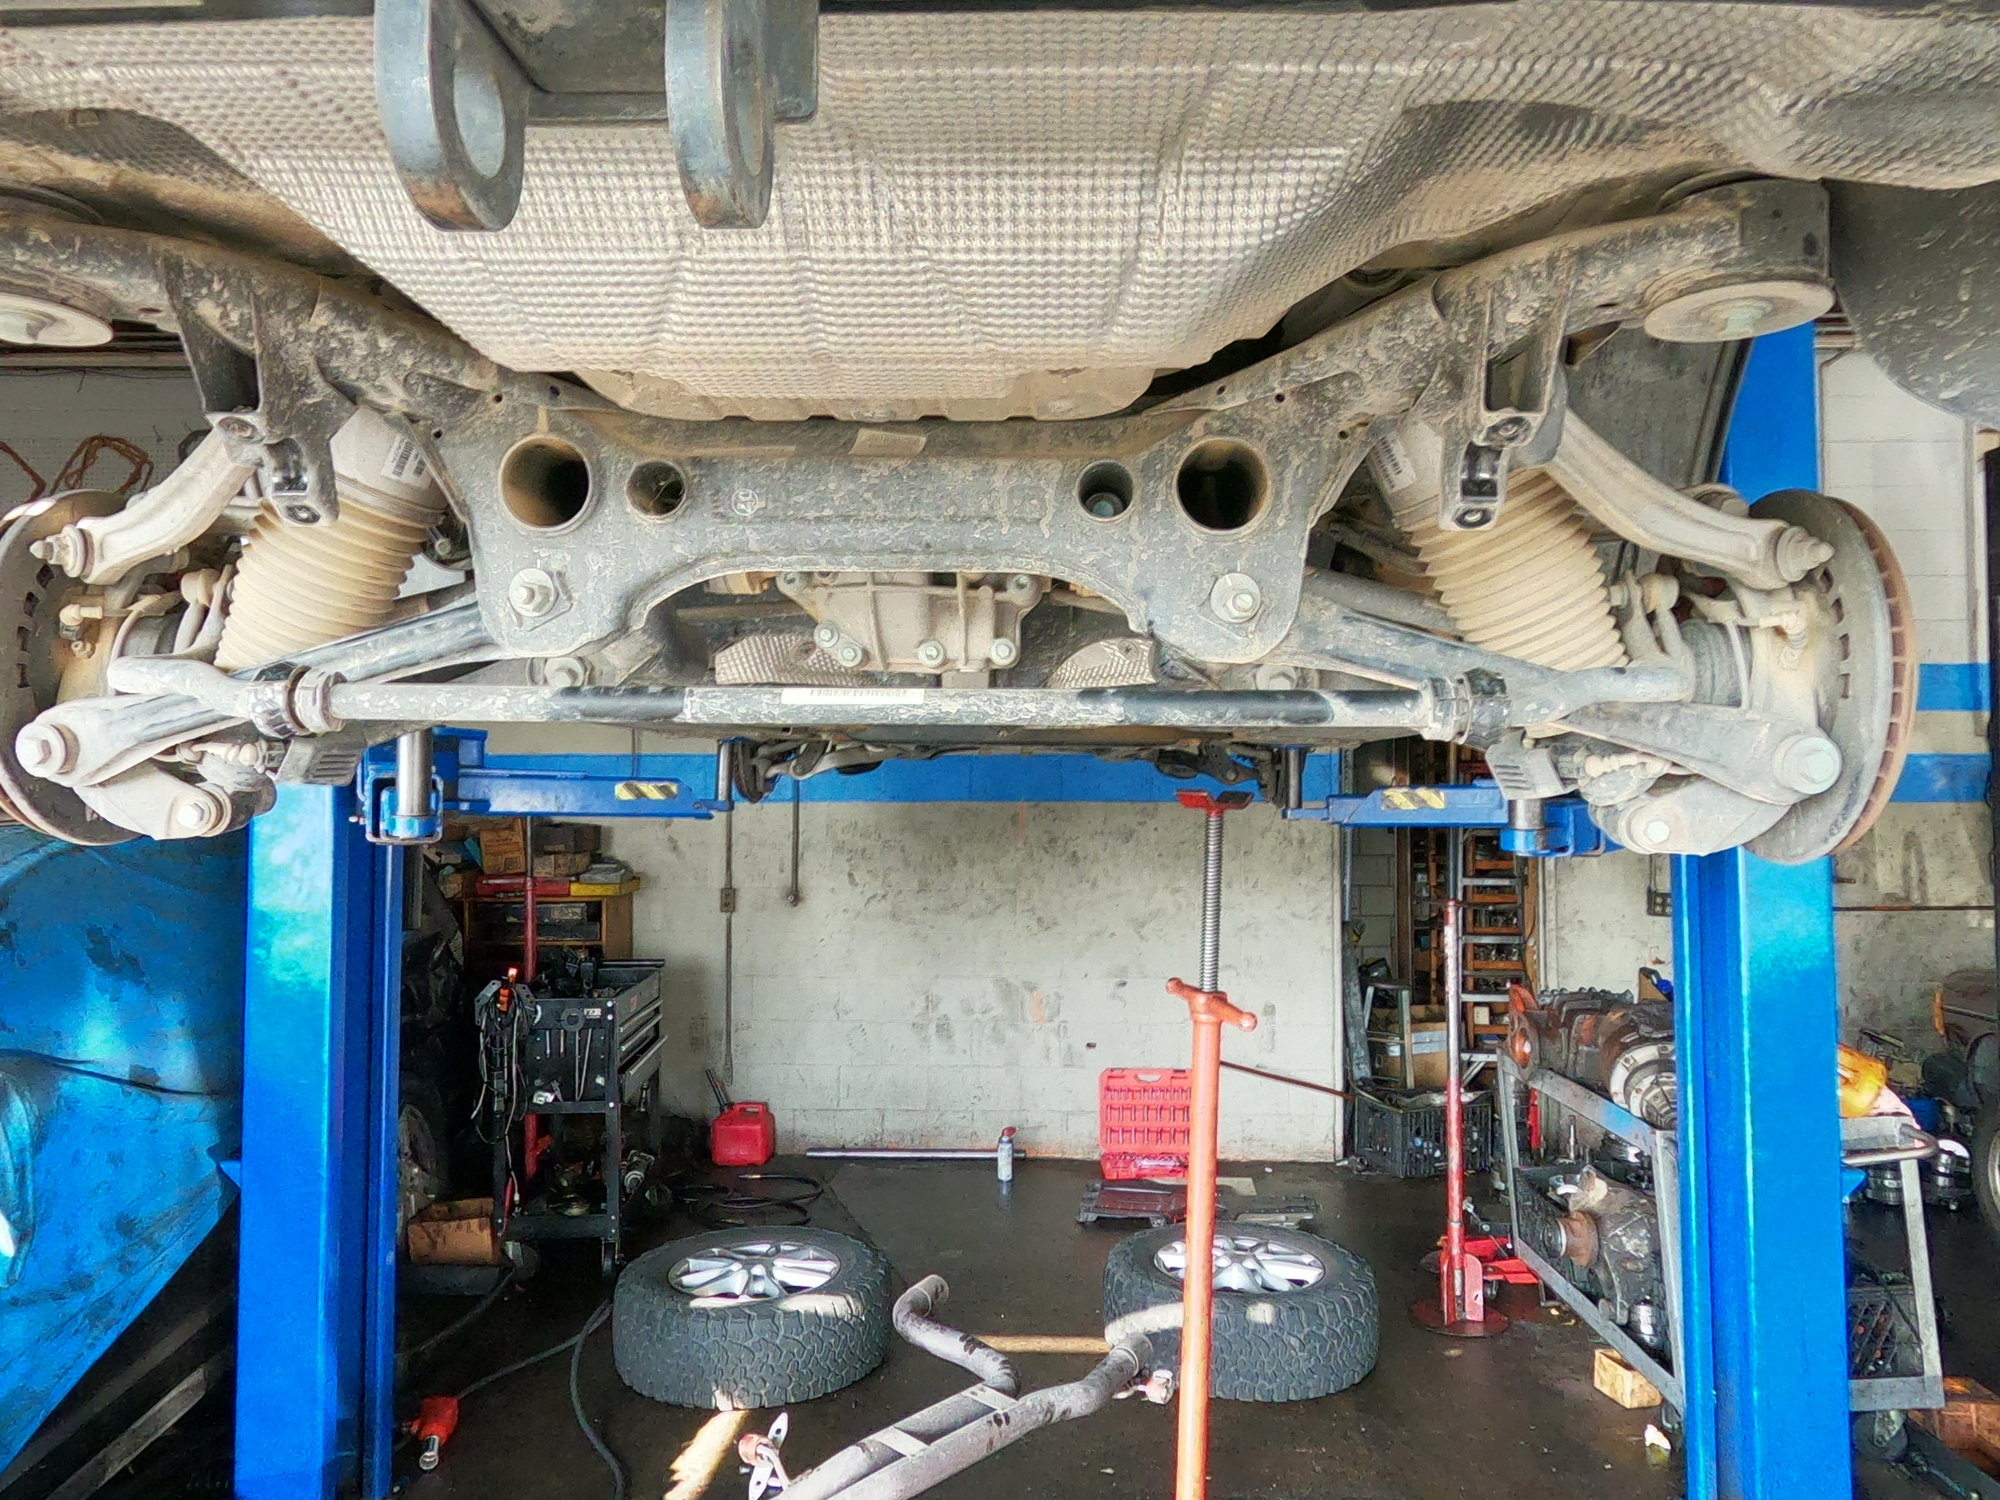
The rear differential required the removal of the exhaust and the cardon shaft. The previous owner of my vehicle gave me a replacement driveshaft so I replaced mine preemptively even though the existing one was in decent shape. You will also need to un mount the rear swap bars to get access to the mounting bolts for the rear differential.
For the front differential, there is a relatively involved process of uncoupling the steering shaft from the rack, undoing some clips and brackets and lowering the front subframe. If you need to replace the axles, you will also need to figure out a way to get them out.
Overall, the retrofit process required a good deal of research and sourcing of relatively hard to find parts. I also made some mistakes along the way that required me to buy other parts. I am currently the proud owner of 12 axles including a spare set I already had. Every step of the process it is easy to see the amount of thought and engineering that went into designing these machines and I look forward to exploring their capabilities further every day.
Very well done, indeed! This is a conversion many, including myself, have wanted to do for a long time. While it's been discussed for several years, to my knowledge, only one or two guys have completed the conversion. Thanks for posting this- it actually made my day.
I was just contemplating impact to torque the gear ratios would make on my 2009 CTTS.... whew! Going from a 3.27 to a 4.55 set of differentials would increase torque more than 20%! Someone can chime in here with a more specific number if they want. I had a 4.56 posi in my 69 Z28 back in the day and that car was a monster out of the hole. To me, the loss of top end speed is not a big deal here in the NW as there is very little opportunity to go over 90, if even that.
I was just contemplating impact to torque the gear ratios would make on my 2009 CTTS.... whew! Going from a 3.27 to a 4.55 set of differentials would increase torque more than 20%! Someone can chime in here with a more specific number if they want. I had a 4.56 posi in my 69 Z28 back in the day and that car was a monster out of the hole. To me, the loss of top end speed is not a big deal here in the NW as there is very little opportunity to go over 90, if even that.
It gets much worse
Then you fit taller tyres, maybe go from 29.5" to 33 or 35" and the loads on the driveline increases more, then put into low range 1st gear.

 10-17-2020, 06:07 PM