Notices
Cayenne 958 - 2011-2018 2nd Generation
Sponsored By:
Sponsored By:

Running Board Install **Installed with pics**

Thread Tools
 
Search this Thread
 
Old 04-19-2019, 08:40 PM
  #1  
Tim Wasmer
Race Car
Thread Starter
 
Tim Wasmer's Avatar
 
Join Date: Oct 2003
Location: Denver Colorado
Posts: 4,400
Received 44 Likes on 30 Posts
Default Running Board Install **Installed with pics**

Bought a set for 2011 Turbo but they came with no instructions. Anyone have a link to install instructions? Haven't found one yet.

Last edited by Tim Wasmer; 04-20-2019 at 10:04 PM.
Old 04-19-2019, 08:50 PM
  #2  
Tim Wasmer
Race Car
Thread Starter
 
Tim Wasmer's Avatar
 
Join Date: Oct 2003
Location: Denver Colorado
Posts: 4,400
Received 44 Likes on 30 Posts
Default

I think I found them. But I may be missing hardware Grrrrr
Old 04-19-2019, 09:53 PM
  #3  
garrett376
RL Community Team
Rennlist Member
 
garrett376's Avatar
 
Join Date: Oct 2003
Posts: 7,291
Received 572 Likes on 437 Posts
Default

Did you buy factory ones (which are two piece and offer impact protection), or aftermarket?
Old 04-19-2019, 10:03 PM
  #4  
Tim Wasmer
Race Car
Thread Starter
 
Tim Wasmer's Avatar
 
Join Date: Oct 2003
Location: Denver Colorado
Posts: 4,400
Received 44 Likes on 30 Posts
Default

They are aftermarket but supposedly identical the factory. And the video I found was for a 2016 so they're different. Here's a picture

Board
Old 04-19-2019, 10:14 PM
  #5  
garrett376
RL Community Team
Rennlist Member
 
garrett376's Avatar
 
Join Date: Oct 2003
Posts: 7,291
Received 572 Likes on 437 Posts
Default

You should be able to re-use all of your old hardware, as long as you don't break any of the fittings/plugs when pulling off all of the trim pieces since there's a lot to do to finally get to removing the old and installing the new part. You have to remove the F/R wheel well liners, then the plastic trim around the wheel wells (hopefully yours are not the extended version that is sticky-taped in place also), remove the front body piece in front of the front door, then the underbody sill panel, then the door trim strips, then the nuts, then screws... and then reverse!
Old 04-19-2019, 10:17 PM
  #6  
Tim Wasmer
Race Car
Thread Starter
 
Tim Wasmer's Avatar
 
Join Date: Oct 2003
Location: Denver Colorado
Posts: 4,400
Received 44 Likes on 30 Posts
Default

Holy heck! And I think it does have the extended wheel well arches. Do you use all existing covers as well by putting them back in place?
Old 04-19-2019, 10:24 PM
  #7  
garrett376
RL Community Team
Rennlist Member
 
garrett376's Avatar
 
Join Date: Oct 2003
Posts: 7,291
Received 572 Likes on 437 Posts
Default

Originally Posted by Tim Wasmer
Holy heck! And I think it does have the extended wheel well arches. Do you use all existing covers as well by putting them back in place?
I added the entire VR2 off-road protection onto my 2011 Turbo, so the sill and the underbody panel were different than my original parts. In your case you are replacing just the 1 black plastic sill panel below the door that wraps underneath, as you don't have the fancy "mounting bracket" which is the second piece which provides the underbody impact protection. So for you, the panel that's entirely under the car, gets put right back into place. Just be sure to remove your wheel well liners first so you can remove the hardware on the wheel arch pieces before trying to pull them. I seem to remember seeing that the extended arch pieces are screwed and stickied into place... good luck!
Old 04-20-2019, 10:22 AM
  #8  
Slickdvl
Pro
 
Slickdvl's Avatar
 
Join Date: Nov 2018
Location: FL
Posts: 659
Received 49 Likes on 47 Posts
Default

https://v.youku.com/v_show/id_XNzYxMzY5MzQw.html

when I bought mine off eBay - this is what they sent
Old 04-20-2019, 10:03 PM
  #9  
Tim Wasmer
Race Car
Thread Starter
 
Tim Wasmer's Avatar
 
Join Date: Oct 2003
Location: Denver Colorado
Posts: 4,400
Received 44 Likes on 30 Posts
Default

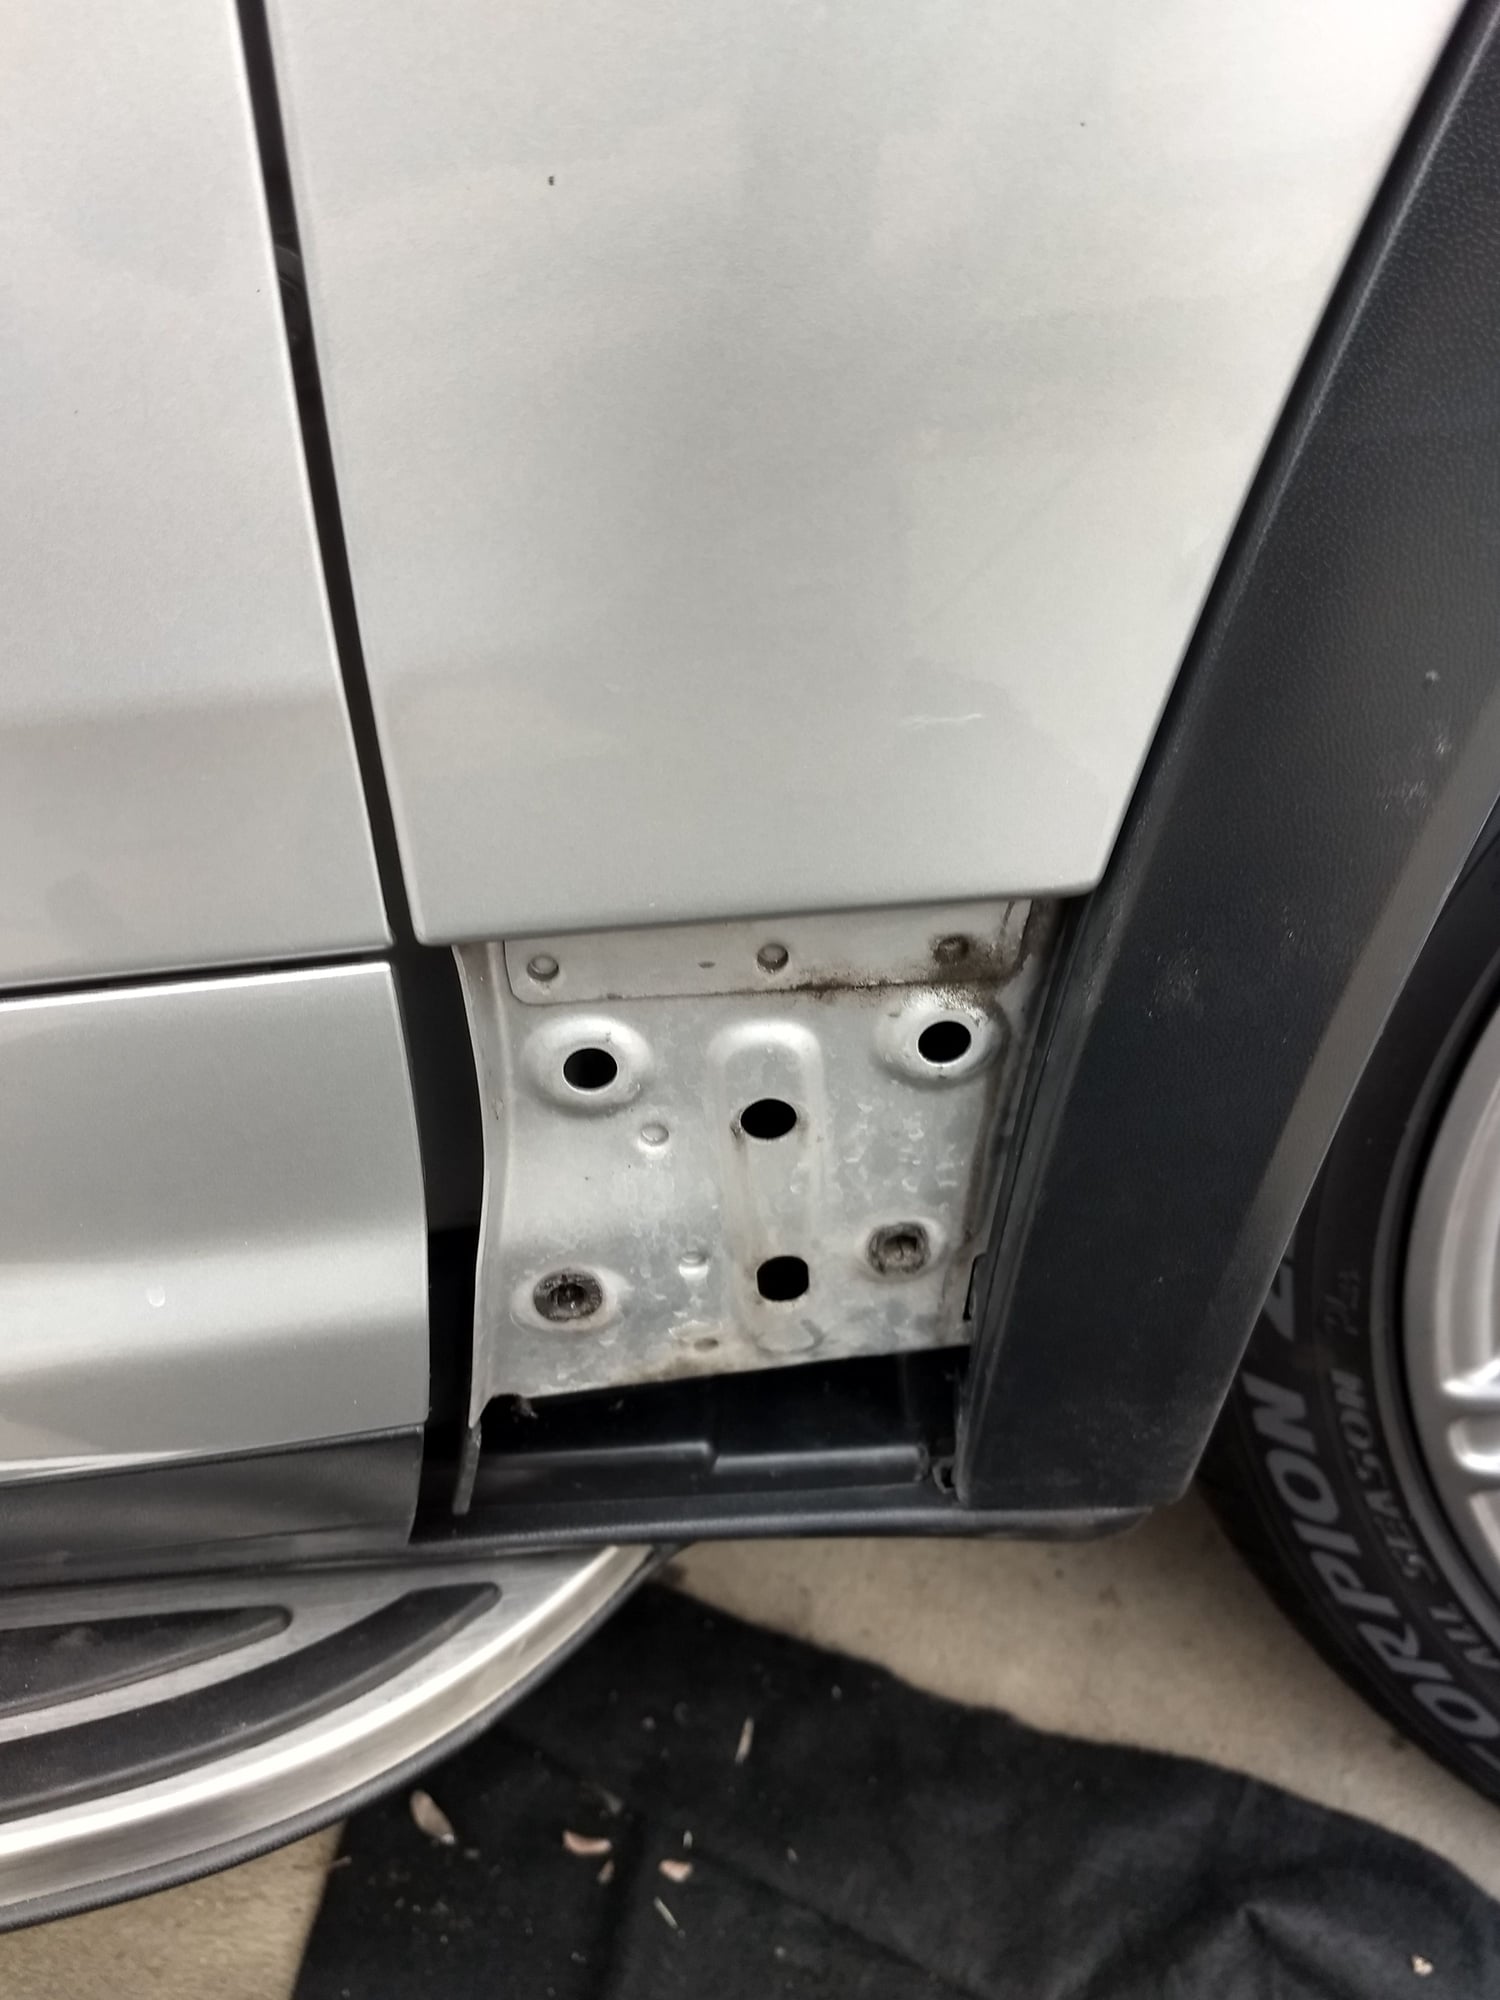
Ok got it done. ACTUALLY not ard once I figured it out. Did not need to remove the wheel wheel wells. The thing that thru me was the front panel right behind the front wheel (see picture). THAT is where the last bolt was hiding

2nd side went in in about 20-30min.

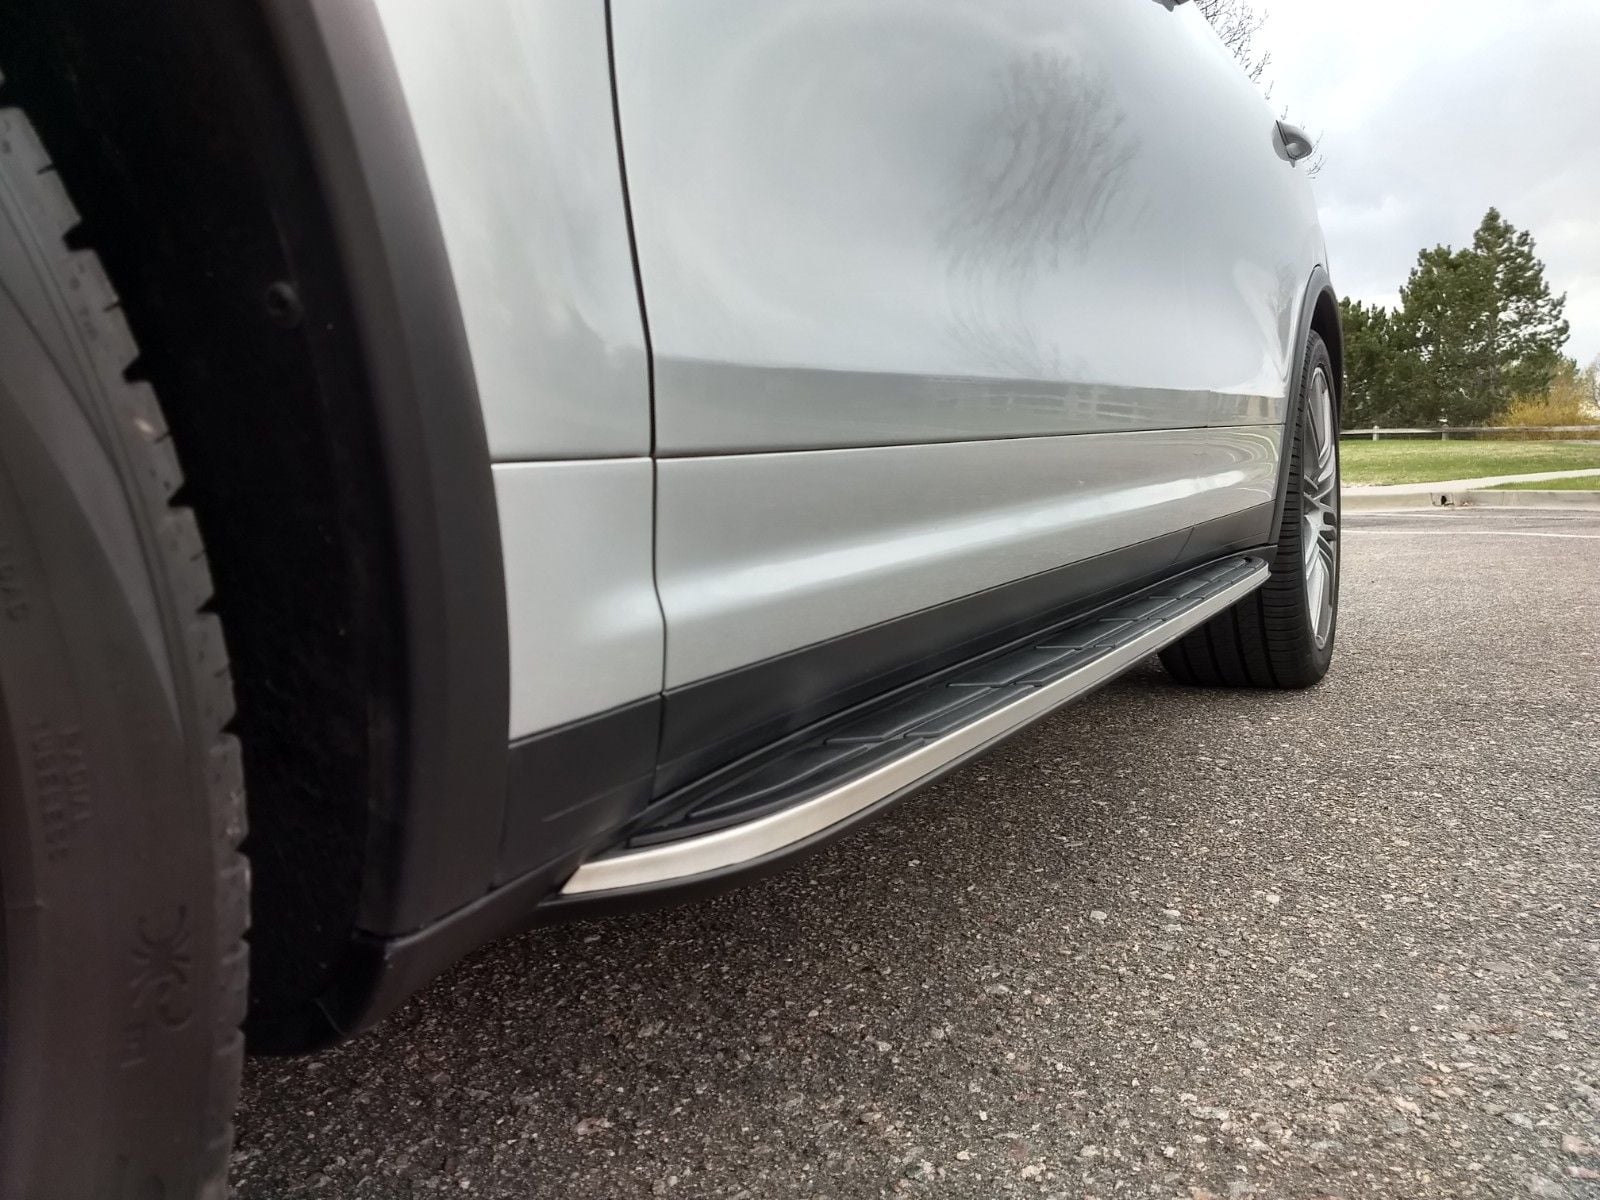
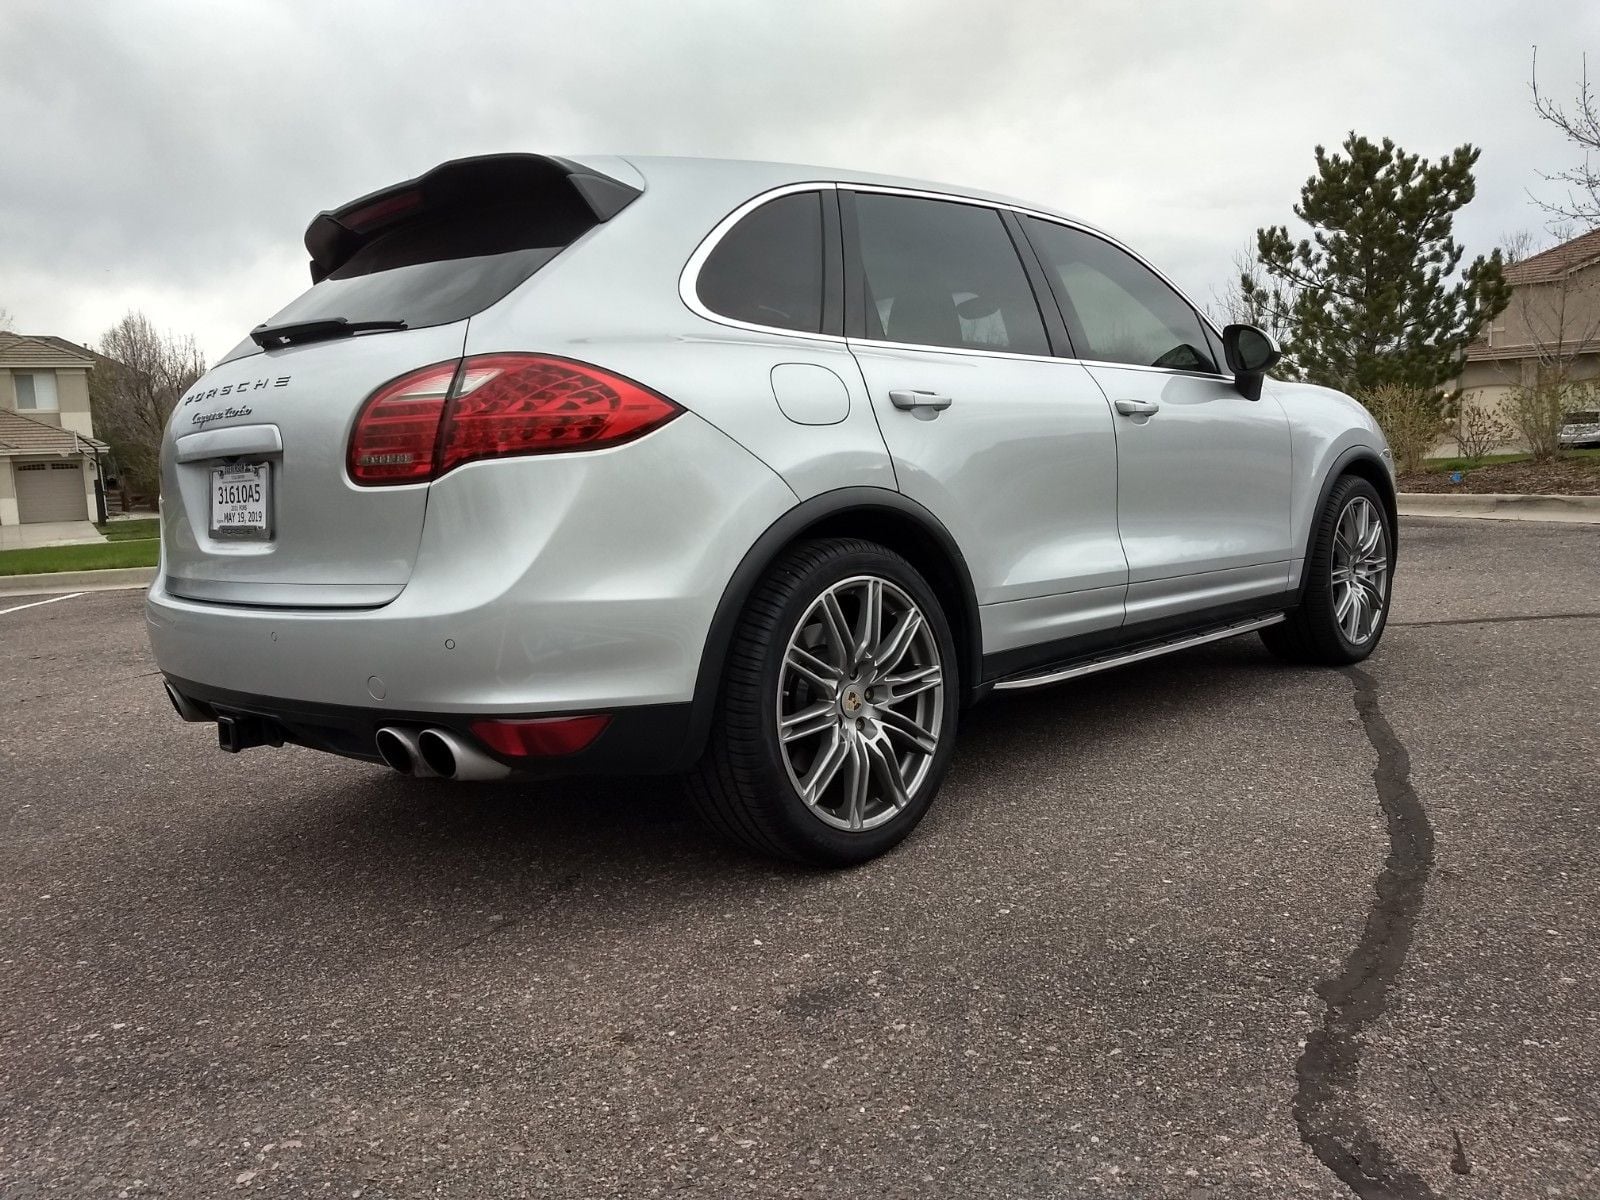
Here are some pictures. Subtle but really nice touch

PS: 199 off Ebay and perfect fit.


Old 04-21-2019, 01:40 AM
  #10  
garrett376
RL Community Team
Rennlist Member
 
garrett376's Avatar
 
Join Date: Oct 2003
Posts: 7,291
Received 572 Likes on 437 Posts
Default

Those look great. You Cayenne looks great, too. How did you unclip the metal C-clip on both ends of the sill cover, without removing the fender liners?
Old 04-21-2019, 01:49 AM
  #11  
Tim Wasmer
Race Car
Thread Starter
 
Tim Wasmer's Avatar
 
Join Date: Oct 2003
Location: Denver Colorado
Posts: 4,400
Received 44 Likes on 30 Posts
Default

Well if I understand right it it he one that holds the board and the arch together. When things broke free there they were. Now I will tell you I did NOT but them back. All was good with no movement. I removed them with a pick tool.

Honestly a retrofit like this takes a certain amount of what do you put back and what CAN you put back.
Old 04-21-2019, 09:38 AM
  #12  
mafpolo
Rennlist Member
 
mafpolo's Avatar
 
Join Date: Jan 2016
Posts: 1,232
Received 203 Likes on 163 Posts
Default

Great looking vehicle. I like the running boards. I love those wheels.
Old 04-21-2019, 01:04 PM
  #13  
RAudi Driver
Rennlist Member
 
RAudi Driver's Avatar
 
Join Date: Jan 2011
Location: West Coast
Posts: 8,867
Received 2,765 Likes on 1,653 Posts
Default

I hate running boards but that actually looks great and I'm sure they make for an easy entrance and exit from the vehicle.
Old 04-21-2019, 05:24 PM
  #14  
chsu74
Rennlist Member
 
chsu74's Avatar
 
Join Date: Oct 2006
Location: CT
Posts: 9,615
Received 311 Likes on 259 Posts
Default

The CD is not too high where running board is really needed. My GL on the other hand requires it.

My functional issue with CD running board is that gap between bottom of door and running board is narrow so winter ice can accumulate and block the door open and close action.
Attached Images  
Old 04-21-2019, 09:47 PM
  #15  
Tim Wasmer
Race Car
Thread Starter
 
Tim Wasmer's Avatar
 
Join Date: Oct 2003
Location: Denver Colorado
Posts: 4,400
Received 44 Likes on 30 Posts
Default

I am 6'2" and needed them so I can polish and wipe the top of the Piggy. And they ad a nice look.


Quick Reply: Running Board Install **Installed with pics**


All times are GMT -3. The time now is 02:07 PM.