When you click on links to various merchants on this site and make a purchase, this can result in this site earning a commission. Affiliate programs and affiliations include, but are not limited to, the eBay Partner Network.
Heated (also cooled) seats not working from time to time
Hello everyone,
I want to share with you a possible solution for heating and cooling seats issue.
So, when you press the heating or cooling button, it lights up for a second then shuts down.
There are two common issues (from What I read here and on another forums).
1. If both front seats have the same issue, then the issue is likely to be caused by the interior temperature sensor. That tiny plastic dot on the right side of steering wheel. I will attach photos below.
2. If only one seats has the issue - most likely the driver seat, then the problem is caused by the seat itself.
I want to share some usefull info for the second case.
My driver seat heating and cooling were working from time to time so I knew the issue was in the seat itself. On a decent scanner tool, I found an error for the seat temperature sensor. If you dont have a scanner tool, I would still recomend to follow the next tips. I will explain why this can be the most common fail point.
So, I removed the seat from the car and with a multimeter measured the resistance on the low heating element. Its a connector with 4 wires and it is on a diagonal. In the photo we suspected the connector itself, thats Why we put aligator taps on the wires.
As expected, the resistance was zero and if we moved the seat foam, it would show corect value.
So, at this step, it was clearly a issue with the termistor or wiring itself.
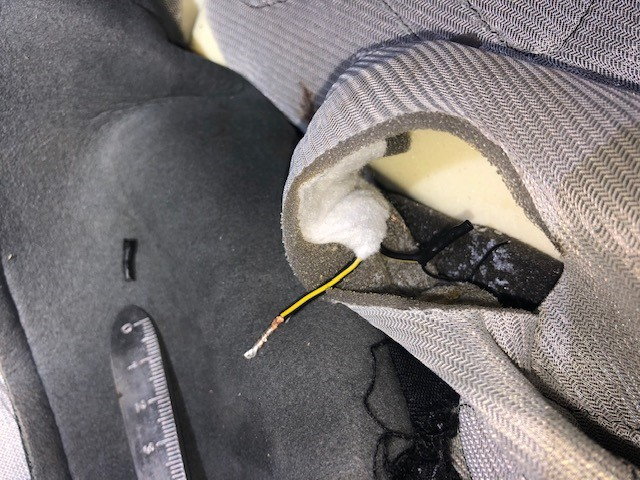
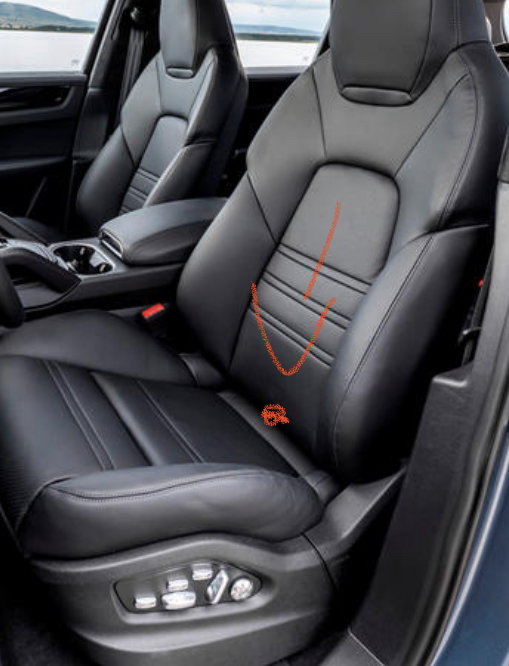
Now comes the Interesting part. We know the termistor is there but to idea where and No idea how much we have to search (and by search I mean cut the heating element from the foam - can be reglued later). Thankfully, the termistor near the rear end of the foam. Photo for better understanding:
I didn�t Take enough pictures on my car so I have to use another photos for References.
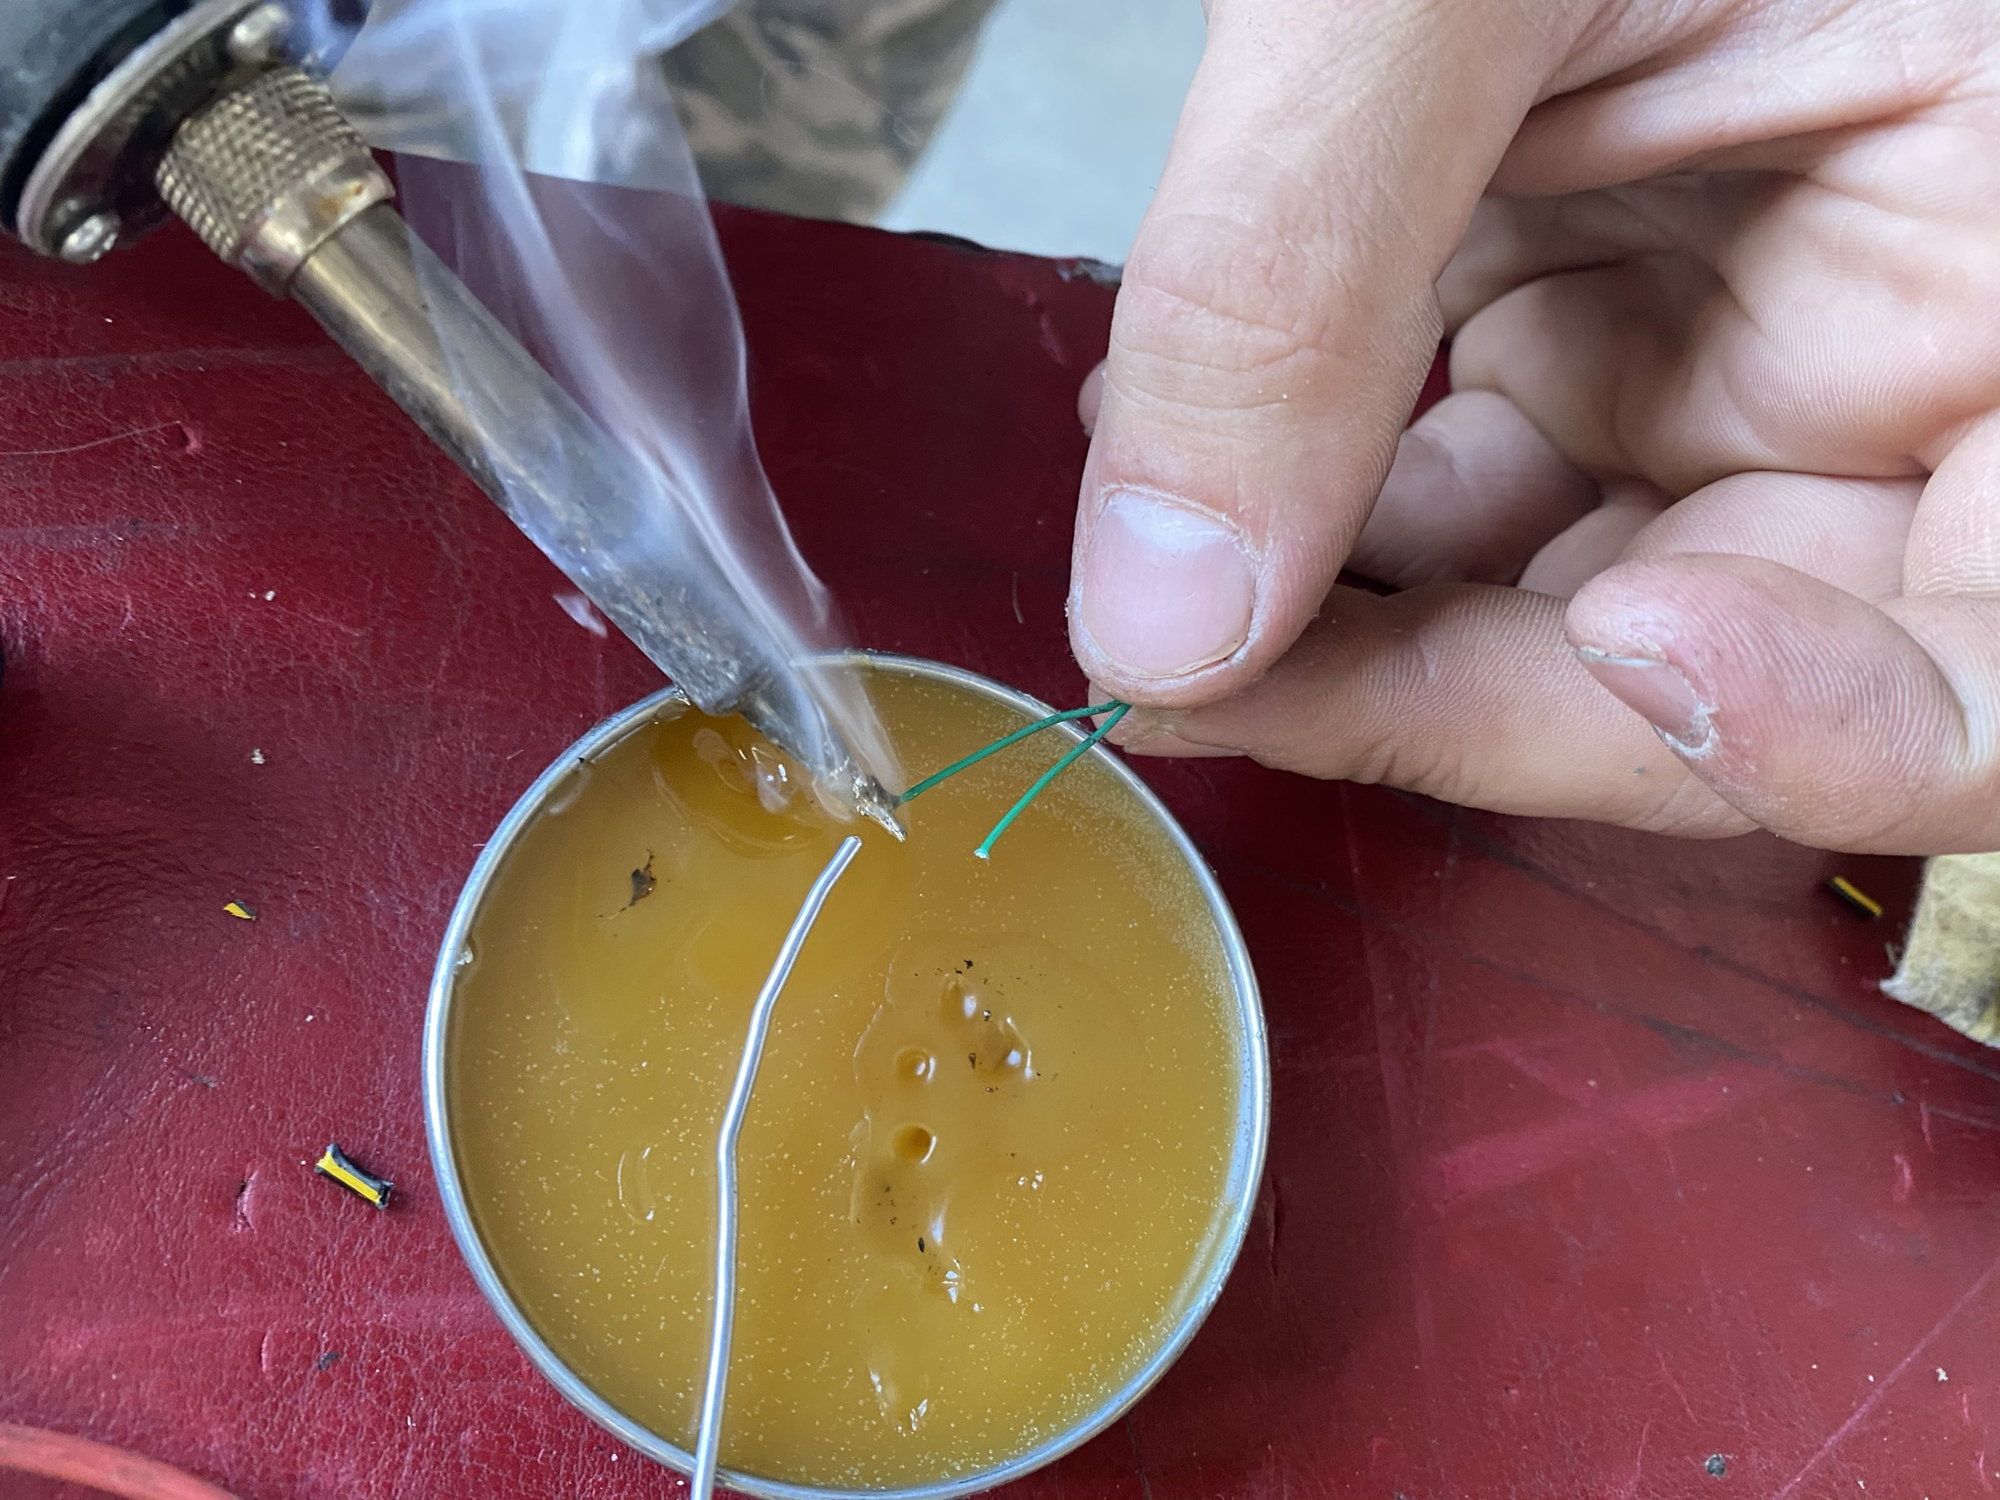
Now comes the common Fail point. As you can see - the green tiny wires are used for the termistor connection. One of those wires was cut or torn from the bigger one:
We re-solder the wires and put everything Back in place.
I hope this helps for diagnosting and repairing a faulty heated/cooled seats. This is not by Any means a DIY Because the upholstery can be a pain in the a*s to remove and put Back, you have to have soldering knwoledge also...
In my opinion, a local upholstery garage (I hope i dont mess with words) ) should be able to do this if you explain them those tips.
I want to share with you a possible solution for heating and cooling seats issue.
So, when you press the heating or cooling button, it lights up for a second then shuts down.
There are two common issues (from What I read here and on another forums).
1. If both front seats have the same issue, then the issue is likely to be caused by the interior temperature sensor. That tiny plastic dot on the right side of steering wheel. I will attach photos below.
2. If only one seats has the issue - most likely the driver seat, then the problem is caused by the seat itself.
I want to share some usefull info for the second case.
My driver seat heating and cooling were working from time to time so I knew the issue was in the seat itself. On a decent scanner tool, I found an error for the seat temperature sensor. If you dont have a scanner tool, I would still recomend to follow the next tips. I will explain why this can be the most common fail point.
So, I removed the seat from the car and with a multimeter measured the resistance on the low heating element. Its a connector with 4 wires and it is on a diagonal. In the photo we suspected the connector itself, thats Why we put aligator taps on the wires.
As expected, the resistance was zero and if we moved the seat foam, it would show corect value.
So, at this step, it was clearly a issue with the termistor or wiring itself.
Now comes the Interesting part. We know the termistor is there but to idea where and No idea how much we have to search (and by search I mean cut the heating element from the foam - can be reglued later). Thankfully, the termistor near the rear end of the foam. Photo for better understanding:
I didn�t Take enough pictures on my car so I have to use another photos for References.
Now comes the common Fail point. As you can see - the green tiny wires are used for the termistor connection. One of those wires was cut or torn from the bigger one:
We re-solder the wires and put everything Back in place.
I hope this helps for diagnosting and repairing a faulty heated/cooled seats. This is not by Any means a DIY Because the upholstery can be a pain in the a*s to remove and put Back, you have to have soldering knwoledge also...
In my opinion, a local upholstery garage (I hope i don't mess with words) ) should be able to do this if you explain them those tips.
Hi Buddy,
I have the same issue in my passenger side. Initially thought it was due to a flooded footwell i got about a month ago after the front drains managed to become blocked without warning. But from what ive tested so far its the actual seat, and exactly the same prob as my 996 had. So I've pulled the seat and have the two parts separated. Just about to take out the hog clips(oh joy) but wanted to compare my resistance readings to yours.. Do you have any record of the readings you had? reason i ask is because my issue is intermittent, so the element could be failing rather than failed.... .
My issue was also intermittent and thats Because the Bad wires made contact sometimes.
The resistance is infinte when it is not working Because there is No contact.
Yes, the termistor is in the lower side, where I marked the red point in the picture.
I�m sorry I didn�t Take more pictures. You have to identify the connector/wires and then you should be able to measure with a multimeter. Make sure you �massage� the red Spot when you measure it to make sure it is not in the �good� position.
magic. will have a look tonight. didn't want to take the wrong part of the seat apart. now i now its the base unit, not the back that'll save me some time
Mine had similar simptoms. Sometimes it worked for a Full trip, sometimes for 5 minutes, sometimes not at all, depending on the position of the wires when you sit in the chair.
ok so mine was exactly as expected. the thin wires soldered to the thermistor had broken. Mines a 2012 Cayenne and the sensor was at the rear of the seat base, didn't need to take all the leather off just removed the hog clips local to the wire, soldered it and heat shrink to add some strength. took some photos below... pretty simple job, seat comes out no hassle then you just removed the sides plastics. with the controls on. the seat had three plugs on the bottom. the sensor wires go on the inside of the seat (closest to the console) so in theory you could test the resistance without stripping to be sure. but from what I've read, if both heating and cooling stops its the sensor. also, under the leather is the heater element which is the sliver cloth you can see in the pics. The job took about three hours all in but I was taking my time and check what needed to be taken off. I didn't want to strip anything I didn't have to. id guess its done quicker by others. Also recently sorted my slow sunroof so will post a thread on that. My old C2 996 doesn't need as much love as the Cayenne, I only did snapped suspension springs, and faulty passenger door lock a few months ago on this beasty, the 996 just keeps on trucking with occasional oil and lots of fuel (though it did need an engine rebuild 4 years ago haha).

 10-23-2020, 05:49 AM


 so I have to use another photos for References.
 ) ) should be able to do this if you explain them those tips.